

Page 1
INSTRUCTIONS AND WARRANTY
MODEL NO.RHBM30G
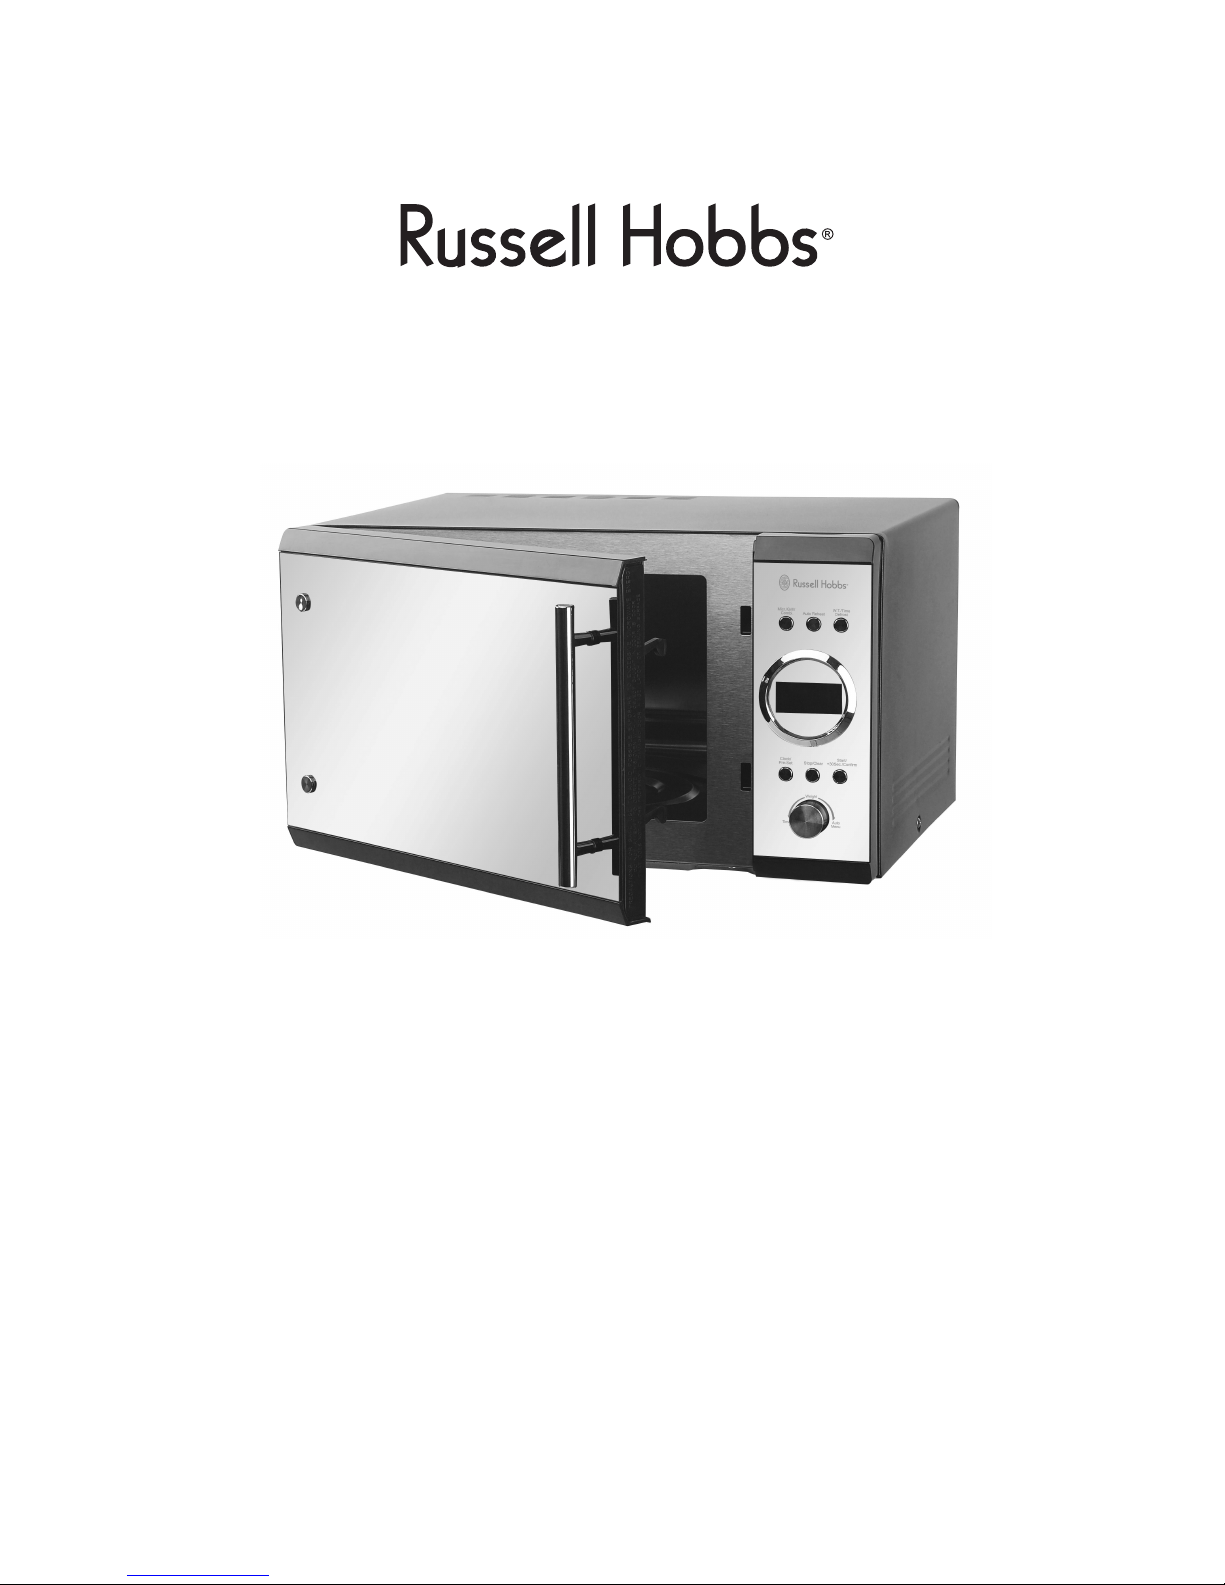
RUSSELL HOBBS 30 MICROWAVE OVENL
Page 2

Congratulations on purchasing the Russell Hobbs 30L Microwave Oven. Each unit
is manufactured to ensure safety and reliability. Before using this appliance for the
first time, please read the instruction manual carefully and keep it for future
reference.
FEATURES OF THE RUSSELL HOBBS 3 L MICROWAVE OVEN
• The enamel interior makes cleaning of your microwave oven quick and easy.
• With 5 microwave power settings, the microwave cooks, heats and defrosts to
perfection.
• The 8 automatic cooking menu’s are pre-programmed for cooking specific foods,
saving you time.
• The microwave oven has a 30L capacity, perfect for the smaller kitchen and
family.
• The rotary programme control is user friendly
• The weight programmable defrost setting ensures that food is defrosted
according to it’s weight, and protects the food from being accidentally cooked.
• The microwave oven has a built-in automatic reminder to inform the user that the
programme has been completed.
IMPORTANT SAFEGUARDS
When using any electrical appliance, basic safety precautions should always be
followed including the following:
1. Please read the instructions carefully before using any appliance.
2. Always ensure that the voltage on the rating label corresponds to the mains
voltage in your home.
3. Incorrect operation and improper use can damage the appliance and cause
injury to the user.
4. The appliance is intended for household use only. Commercial use invalids the
warranty and the supplier can not be held responsible for injury or damage
caused when using the appliance for any other purpose than that intended.
5. Avoid any contact with moving parts.
6. Close supervision is required when any appliance is used near or by children or
invalids.
7. Check the power cord and plug regularly for any damage. If the cord or the
plug is damaged, it must be replaced by the manufacturer or a qualified person
in order to avoid an electrical hazard.
8. Do not use the appliance if it has been dropped or damaged in any way. In
case of damage, take the unit in for examination and/or repair by an authorised
service agent
9. To reduce the risk of electric shock, do not immerse or expose the motor
assembly, plug or the power cord to water or any other liquid.
10. Never immerse the unit in water or any other liquid for cleaning purposes.
11. Remove the plug from the socket by gripping the plug. Do not pull on the cord
to disconnect the appliance from the mains. Always unplug the unit when not in
use, before cleaning or when adding or removing parts.
12. The use of accessory attachments that are not recommended or supplied by
the manufacturer may result in injuries, fire or electric shock.
0
2
Page 3

13. A short cord is provided to reduce the hazards resulting from becoming
entangled in or tripping over a longer cord.
14. Do not let the cord hang over the edge of a table or counter. Ensure that the
cord is not in a position where it can be pulled on inadvertently.
15. Do not allow the cord to touch hot surfaces and do not place on or near a hot
gas or electric burner or in a heated oven.
16. Do not use the appliance on a gas or electric cooking top or over or near an
open flame.
17. Use of an extension cord with this appliance is not recommended. However, if
it is necessary to use an extension lead, ensure that the lead is suited to the
power consumption of the appliance to avoid overheating of the extension cord,
appliance or plug point. Do not place the extension cord in a position where it
can be pulled on by children or animals or tripped over.
18. This appliance is not suitable for outdoor use. Do not use this appliance for
anything other than its intended use.
19. DO NOT carry the appliance by the power cord.
20. Do not leave this appliance unattended during use. Always unplug the unit
when not in use or before cleaning.
21. Always operate the appliance on a smooth, even, stable surface. Do not place
the unit on a hot surface.
22. The manufacturer does not accept responsibility for any damage or injury
caused by improper or incorrect use, or for repairs carried out by unauthorised
personnel.
23. In case of technical problems, switch off the machine and do not attempt to
repair it yourself. Return the appliance to an authorised service facility for
examination, adjustment or repair. Always insist on the use of original spare
parts. Failure to comply with the above mentioned pre-cautions and instructions,
could affect the safe operation of this machine.
24. Do not operate the microwave with the door open. Do not tamper with
safety interlocks. Do not place anything between the oven front and the door,
and do not allow this space to become soiled. If the door seals are damaged in
any way, do not use the microwave. Take the unit directly to your nearest
service agent.
25. Ensure the microwave is cleaned regularly and that all food deposits are
removed.
26. Do not place any metal objects in the microwave. These will damage the
microwave and will deem the warranty void.
27. Remove wire twist-ties and metal handles from any paper or plastic containers
before placing them in the microwave.
28. When using plastic, ceramic or glass containers in the microwave, ensure that
the containers are microwave safe. Some plastics are not microwave safe, and
will melt in the microwave. Glass or ceramic containers not suitable for
microwave use may crack.
29. Always beware when heating liquids in the microwave. Liquids may become
superheated and this results in eruptive boiling when the container is moved. It
is suggested that a wooden spoon or mixing stick be placed in the container to
prevent the eruptive boiling.
30. Always ensure that the glass tray is not restricted, and is placed on the
turntable ring assembly and turntable shaft correctly.
3
Page 4
31. Do not position the microwave above a conventional oven or other heat-
producing appliance. This will damage the unit and the warranty will be void.
32. Use of the microwave may cause television and radio interference. The further
the microwave is from these appliances, the less the interference will be.
TIPS FOR USING YOUR MICROWAVE
• Only use utensils suitable for use in microwaves. These would be plastic and
microwave safe wooden utensils. Do not place any metal utensils in the
microwave.
• Do not place whole eggs in the microwave. These will superheat, and could
explode.
• Do not heat liquids or food in sealed containers.
• Food cooks more evenly if it is stirred regularly during cooking.
• Large bones in meat may cause the meat to cook unevenly. To prevent this,
remove the bones before cooking.
• To prevent food from becoming soggy in the microwave, wrap them in paper
towels before cooking. This can be used to make potato chips crispy as well.
• Certain foods that have thick skins, such as potatoes and tomatoes, trap steam
underneath the skins during cooking. This can be prevented by piercing the skins
with a fork before cooking.
• Cover foods when cooking. This will prevent splattering and will help the food to
cook evenly.
• Use the shortest time possible to cook. Over-cooking may cause the food to
smoke and ignite.
• Place food and dishes in the centre of the microwave for the best cooking results.
Put the thicker parts of the food towards the outside edge of the cooking dish.
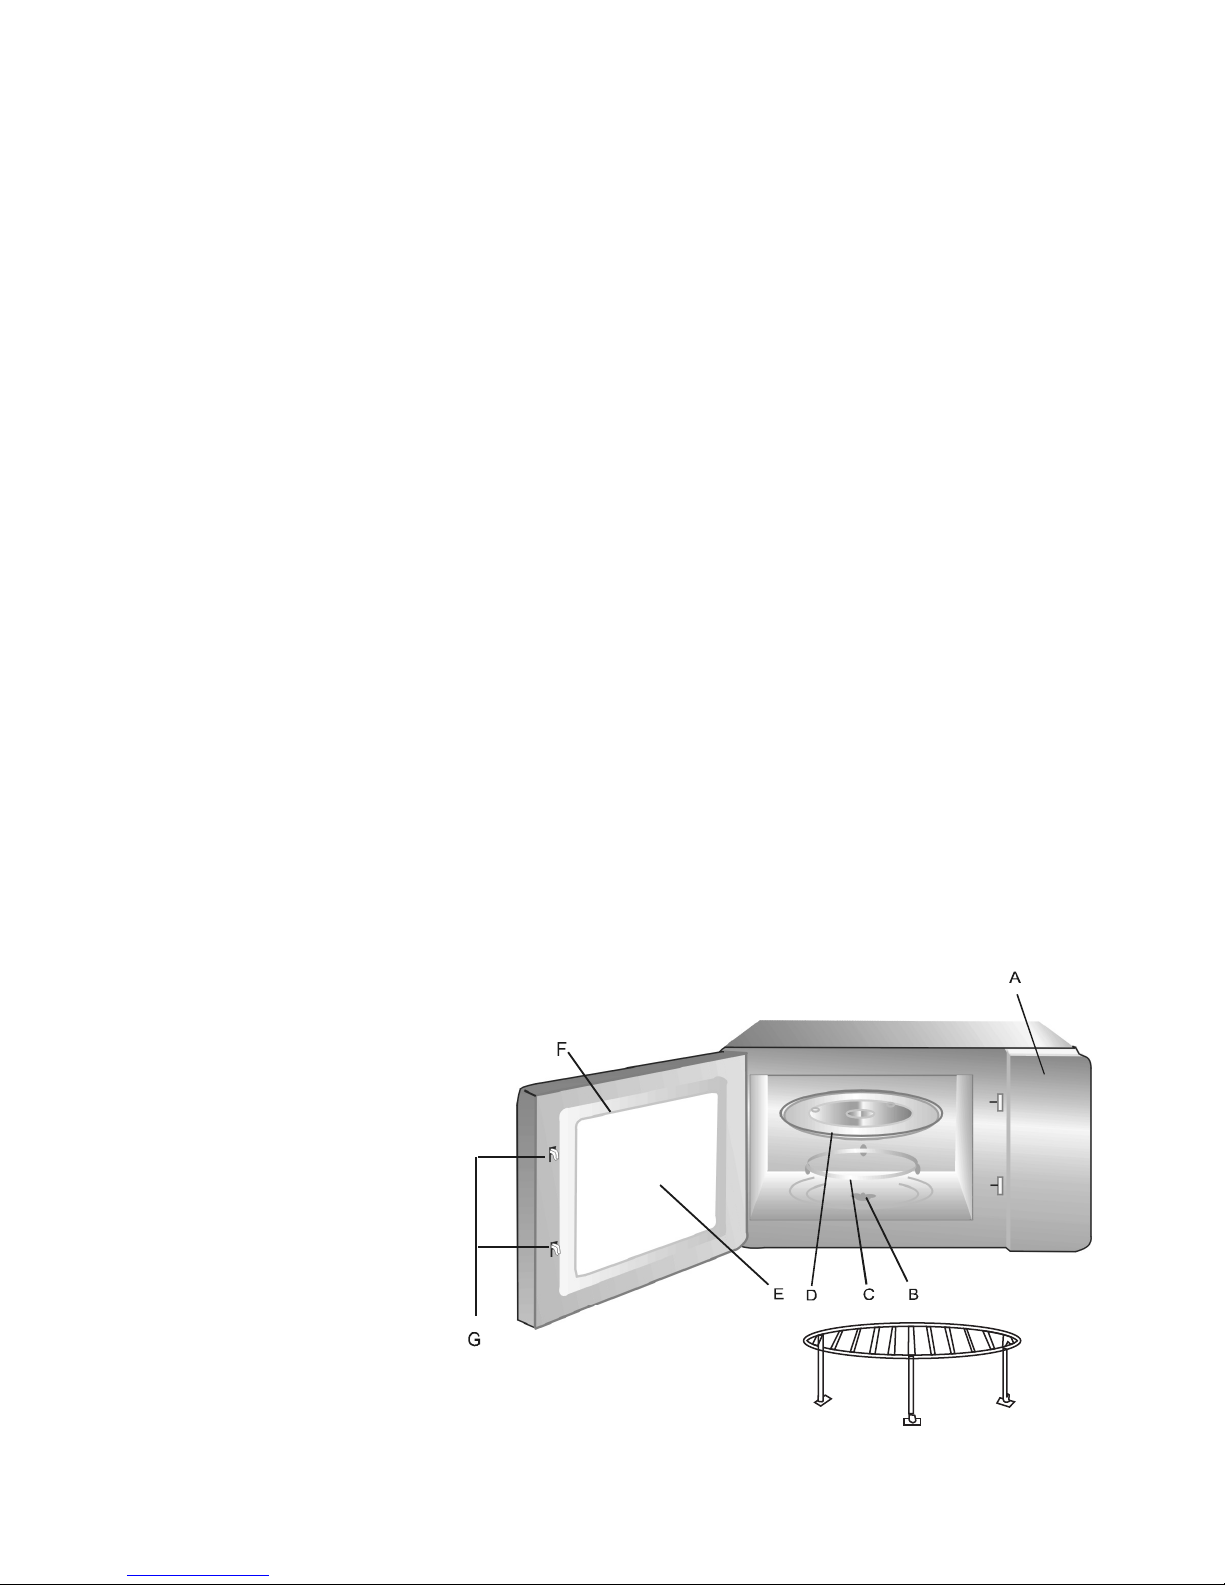
PARTS DIAGRAM
Your oven comes with the following accessories:
Glass tray
Turntable ring assembly
Instruction manual
A) Control panel
B) Turntable shaft
C) Turntable ring assembly
D) Glass tray
E) Observation window
F) Door assembly
G) Safety interlock system
The rear surface of appliance shall be placed against a wall.33.
Grill Rack ( Only for Grill series )
4
Page 5

COUNTERTOP POSITION
Remove all packaging material and accessories. Remove any protective film from
the surface of the microwave. NOTE: Do not remove the light brown Mica cover
attached to the microwave interior, as this protects the magnetron.
Place the microwave on a firm and stable surface. Ensure that there are two sides
open (one must be the door), and that there is at least 7.5cm clearance space
between the other two sides and the wall or cupboard. Ensure that there is at least
30cm clearance space above the microwave. Do not remove the legs from the
bottom of the microwave.
OPERATING INSTRUCTIONS
To set the clock:
• When the microwave is first plugged in, the digital display will show ‘0:00’, and
the buzzer will sound once. The clock will need to be set.
• Press the “CLOCK/PRE-SET” button once. The hour number will flash – turn the
rotary control to adjust the hour number, between 0 and 23.
• Press the “CLOCK/PRE-SET” button once more. The minute numbers will now
flash – turn the rotary control to adjust the minute numbers, between 0 and 59.
• Pres the “CLOCK/PRE-SET” button at last time to save the clock settings.
NOTE: The microwave will not function if the clock has not been set.
During the process of setting the clock, if you press “STOP/CLEAR” the
microwave will go back to the previous clock setting.
To cook in the microwave:
• Press the “Micr./Grill/Combi” button. The display will show ‘P100’. Turn the rotary
control to select the microwave power, or press the “Micr./Grill/Combi.” button up to
four times.
Microwave Power Chart:
Microwave Power 100% 80% 50% 30% 10%
Display P100 P80 P50 P30 P10
• Press “START/+30SEC./CONFIRM” to confirm the power setting.
• Turn the rotary control to select the cooking time, between 0:05 and 95:00.
• Press “START/+30SEC./CONFIRM” to start cooking.
Note: The time will increase as follows:
From 0 to 1 minute, the time will increase in 5 seconds increments
From 1 to 5 minutes, the time will increase in 10 seconds increments
From 5 to 10 minutes, the time will increase in 30 seconds increments
From 10 to 30 minutes, the time will increase in 1 minute increments
From 30 to 95 minutes, the time will increase in 5 minutes increments.
If the door is opened during cooking, the cooking will only continue if the
“START/+30SEC./CONFIRM” button is pressed once the door is closed.
The microwave will beep five times when cooking is finished.
5
The accessible surface
may be hot during
operation.
Page 6

microwave power, then press " " to start cooking.
" " can increase 30 seconds of cooking time.
In microwave, grill, combi. cooking or time defrost state, each press of
•
In waiting state, turn rotary control to set cooking time with 100%
•
START/+30SEC./CONFIRM
Press " " once, the screen display "P100".
Press " " to confirm, and the screen displays "C-1".
Turn rotar control to adjust the cooking time until the oven displays "10:00".
Press " " to start cooking .
Press " " once again or turn rotary control to choose combi. 1 mode.
Grill or Combi. Cooking;
Press "
" the LED will display"P100",and press " "for
to set cooking time from 0:05 to 95:00. Press
" "again to
start cooking.
Example: If you want to use 55% microwave power and 45% grill power(C-1) to
cook for
10 minutes, you can operate the oven as the following steps.
START/+30SEC./CONFIRM
START/+30SEC./CONFIRM
START/+30SEC./CONFIRM
START/+30SEC./CONFIRM
and turn rotary control
START/+30SEC./CONFIRM
dirsplay for each added press. Then press " "to confirm,
•
•
•
•
•
Grill
Power
100%
45%
64%
0%
55%
36%
Microwave
Power
Order
Display
"Micr./Grill/Combi." Pad instructions
Note:If half the grill time passes, the oven sounds twice, and this is normal.
In order to have a better effect of grilling food, you should turn the food over,
close the door, and then if no operation the oven will continue cooking.
G
C-1
C-2
each added press will increase 30 seconds cooking time up to 95 minutes.
Quick Start:
In waiting state, Press " " to start cooking with 100% power,
•
START/+30SEC./CONFIRM
6
y
Micr./Grill/Combi.
Micr./Grill/Combi.
6
7
8
times or turn the rotary control to choose the power you want, and "G","C-1" or "C-2" will
Micr./Grill/Combi.
Micr./Grill/Combi.
Page 7

To use Multi-stage cooking:
The microwave can be programmed to consecutively cook at different power
settings for different time periods. For example, you can programme the microwave
to cook at 80% power for 5 minutes, and then at 100% for 10 minutes. To do this:
• Press the “Micr./Grill/Combi.” button. The display will show ‘P100’. Turn the rotary
control to select 80% (P80) power.
• Press “START/+30SEC./CONFIRM” to confirm the power setting.
• Turn the rotary control to select the cooking time, between 0:05 and 95:00.
• Press the “Micr./Grill/Combi.” button.
• Press “START/+30SEC./CONFIRM” to confirm the power setting.
• Turn the rotary control to select the time setting.
• Press “START/+30SEC./CONFIRM” to confirm the time setting and to start
cooking.
If you are defrosting then cooking, always use the defrost setting first.
Press " " once, and the LED will display "200".
Press " " more times or turn rotary control to choose the weight of food,
and "400" or "600" g will be selected.
Press " " to start cooking.
Auto Reheat:
Auto Reheat
Auto Reheat
START/+30SEC./CONFIRM
•
•
•
To defrost by weight:
The microwave automatically works out the time required to defrost food based on
the weight.
• Press the “W.T/TIME DEFROST” button once. The display will read: ‘dEF1’.
• Turn the rotary control to select the food weight, between 100g and 2000g.
• Press the “START/+30SEC./CONFIRM” button to start defrosting.
To defrost by time:
• Press the “W.T/TIME DEFROST” button twice. The display will read: ‘dEF2’.
• Turn the rotary control to select the cooking time, from 5 seconds to 95 minutes.
• Press the “START/+30SEC./CONFIRM” button to start defrosting.
7
Page 8

The menu chart:
Auto Menu
The microwave has 8 pre-programmed menus. These can be used to cook specific
foods according to their weight as follows:
A-1 : PIZZA
A-2 : POTATO
A-3 : MEAT
A-4 : VEGETABLE
A-5 : FISH
A-6 : PASTA
A-7 : SOUP
A-8 :
To use this function:
• Turn the rotary control to select the menu number, from A-1 to A-8.
• Press “START/+30SEC./CONFIRM” to confirm the selected menu.
• Turn the rotary control to select the food weight.
• Press “START/+30SEC./CONFIRM” to start cooking.
PORRIDGE
8
Menu
Weight
Display
A-2
Potato
A-3
Meat
A-4
Vegetable
A-5
Fish
A-6
Pasta
A-7
Soup
A-8
Porridge
200 g
400 g
200 g
400 g
600 g
250 g
350 g
450 g
200 g
300 g
400 g
250 g
350g
450 g
50g(with 450 cold water)
100g(with 800 cold water)
200ml
400ml
550g
1100g
A-1
Pizza
200 g
400 g
200 g
400 g
600 g
250 g
350 g
450 g
200 g
300 g
400 g
250 g
350g
450 g
50g
100g
200ml
400ml
550g
1100g
Page 9

Pre-set function
The microwave can be programmed to start cooking at a pre-set time. To
programme the microwave to do this:
• Press the “Micr./Grill/Combi.” button. The display will show ‘P100’. Turn the rotary
control to select the microwave power, or press the “Micr./Grill/Combi.” button up
• Press “START/+30SEC./CONFIRM” to confirm the power setting.
• Turn the rotary control to select the cooking time, between 0:05 and 95:00.
• Press the “CLOCK/PRE-SET” button once. The hour number will flash – turn the
rotary control to adjust the hour number, between 0 and 23, to the hour you want
the microwave to start cooking.
• Press the “CLOCK/PRE-SET” button once more. The minute numbers will now
flash – turn the rotary control to adjust the minute numbers, between 0 and 59, to
the minute you want the microwave to start cooking.
• Press the “START/+30SEC./CONFIRM” button. The microwave will beep twice
when the preset time arrives, and will start cooking automatically.
Child protection lock:
It is possible to lock the microwave. This prevents children and people not
authorised to use your microwave from using it. Press and hold the “STOP/CLEAR”
button for 3 seconds. There will be a long beep, and the display will show an empty
square. The microwave is now locked and cannot be operated.
To unlock the microwave, press and hold the “STOP/CLEAR” button for 3 seconds.
There will be a long beep, and the display will return to the normal clock display.
The microwave can now be operated.
CLEANING AND MAINTENANCE
• This appliance is for household use only and is not user-serviceable.
• Do not open or change any parts by yourself. Please refer to a qualified electrical
service department or return to the supplier if servicing is necessary.
• Always remember to unplug the unit from the electrical outlet when not in use and
before cleaning.
• It is much easier to clean the accessories directly after they have been used.
Wash them in warm, soapy water, rinse and dry well.
• The body of the microwave should be cleaned with a damp cloth. Do not let water
enter the microwave.
• Do not use bleach or other abrasive substance or solvents to clean your
appliance as it can be damaging to the finish.
• Do not immerse the microwave in water or any other liquid, or hold it under a
running tap to clean.
• To remove stubborn spots/marks, wipe the surfaces with a cloth slightly
dampened in soapy water or mild non-abrasive cleaner. Rinse and dry a clean,
dry, soft cloth.
9
to four times.
Page 10

SERVICING THE APPLIANCE
There are no user serviceable parts in this appliance. If the unit is not operating
correctly, please check the following:
• You have followed the instructions correctly
• That the unit has been wired correctly and that the wall socket is switched on.
• That the mains power supply is ON.
• That the plug is firmly in the mains socket.
If the appliance still does not work after checking the above
:
- Consult the retailer for possible repair or replacement. If the retailer fails to resolve
the problem and you need to return the appliance, make sure that:
• The unit is packed carefully back into its original packaging.
• Proof of purchase is attached.
• A reason is provided for why it is being returned.
If the supply cord is damaged, it must be replaced by the manufacturer or an
authorised service agent, in order to avoid any hazard. If service becomes
necessary within the warranty period, the appliance should be returned to an
service centre. Servicing outside the
warranty period is still available, but will, however, be chargeable.
CHANGING THE PLUG
Should the need arise to change the fitted plug, follow the instructions below.
This unit is designed to operate on 230V current only. Connecting to other
power sources may damage the applia nce. Connect a three-pin plug as
follows:
The wires in this mains lead are coloured in accordance with the following code:
Green/Yellow = Earth
Blue = Neutral
Brown = Live
approved Tedelex Trading (Pty) Ltd
10
Page 11

PLEASE AFFIX YOUR PROOF OF PURCHASE/RECEIPT HERE
IN THE EVENT OF A CLAIM UNDER WARRANTY THIS RECEIPT MUST BE
PRODUCED.
W A R R A N T Y
Tedelex Trading (Pty) Limited (“the Supplier”) warrants to the original
purchaser of this product (“the Customer”) that this product will be free of defects in
material and workmanship which under normal, personal, family or household
purpose manifest themselves within a period of 365 days from the date of purchase
or in respect of commercial or professional purposes, manifest themselves within a
period of 90 days from the date of purchase. Any claim in terms of the warranty
must be supported by a proof of purchase. If such proof is not available, then
notwithstanding anything to the contrary herein, the Supplier’s normal charge for
service and/or spares will be payable by the Customer upon collection of the
repaired product. If a claim is made in terms of the aforesaid warranty within the
first 7 days from the date of purchase, the faulty product will be exchanged
(provided that the product is in its original packaging with all accessories). Failing
return of the product within 7 days, the Supplier’s liability shall be limited on return
to the Supplier of the product or parts thereof, to the replacement or repair (in the
sole discretion of the Supplier, or its duly authorised service dealer) of the product
to eliminate any defect in workmanship or materials found to be due exclusively to
any acts or omissions on the parts of the Suppliers, of which defects the Supplier
shall have been notified in writing by the Customer within the aforesaid warranty
period. The warranty provided herein and the obligations of the Supplier as
aforesaid are in lieu of, and the Customer waives, all other warranties, guarantees,
conditions or liabilities, express or implied, arising by law or otherwise, including
without limitation, any obligation of the Supplier in respect of any injury, loss or
damage (direct, indirect or consequential) arising out of the use of, or inability to use,
this product and whether or not occasioned by the Supplier’s negligence (gross or
otherwise) or any act or omission on its part. The warranty does not include and
will not be construed to cover products damaged as a result of disaster, misuse,
abuse or any non-authorised modification of the product. The warranty does not
include replacement of light bulbs, heater bars, paper bags or any glass, plastic
bowl or jug or other expendables. During the warranty period the product should be
taken to a service centre of the Supplier or one of its duly authorised service agents.
The Supplier neither assumes nor authorises any other person to assume for it, any
additional liability in connection with the sale or servicing of its products.
11
Page 12

TEDELEX TRADING (PTY) LTD
(011) 490-9000
29 HERONMERE ROAD
P O BOX 39186
BOOYSENS, JOHANNESBURG, 2016
(021) 535-0600
(031) 792-6000
www.russellhobbs.co.za
JOHANNESBURG TEL NO.
:
CAPE TOWN
DURBAN
TEL NO.
:
TEL NO.
:
12
 Loading...