

Page 1
20160AU_IB_FA_030614
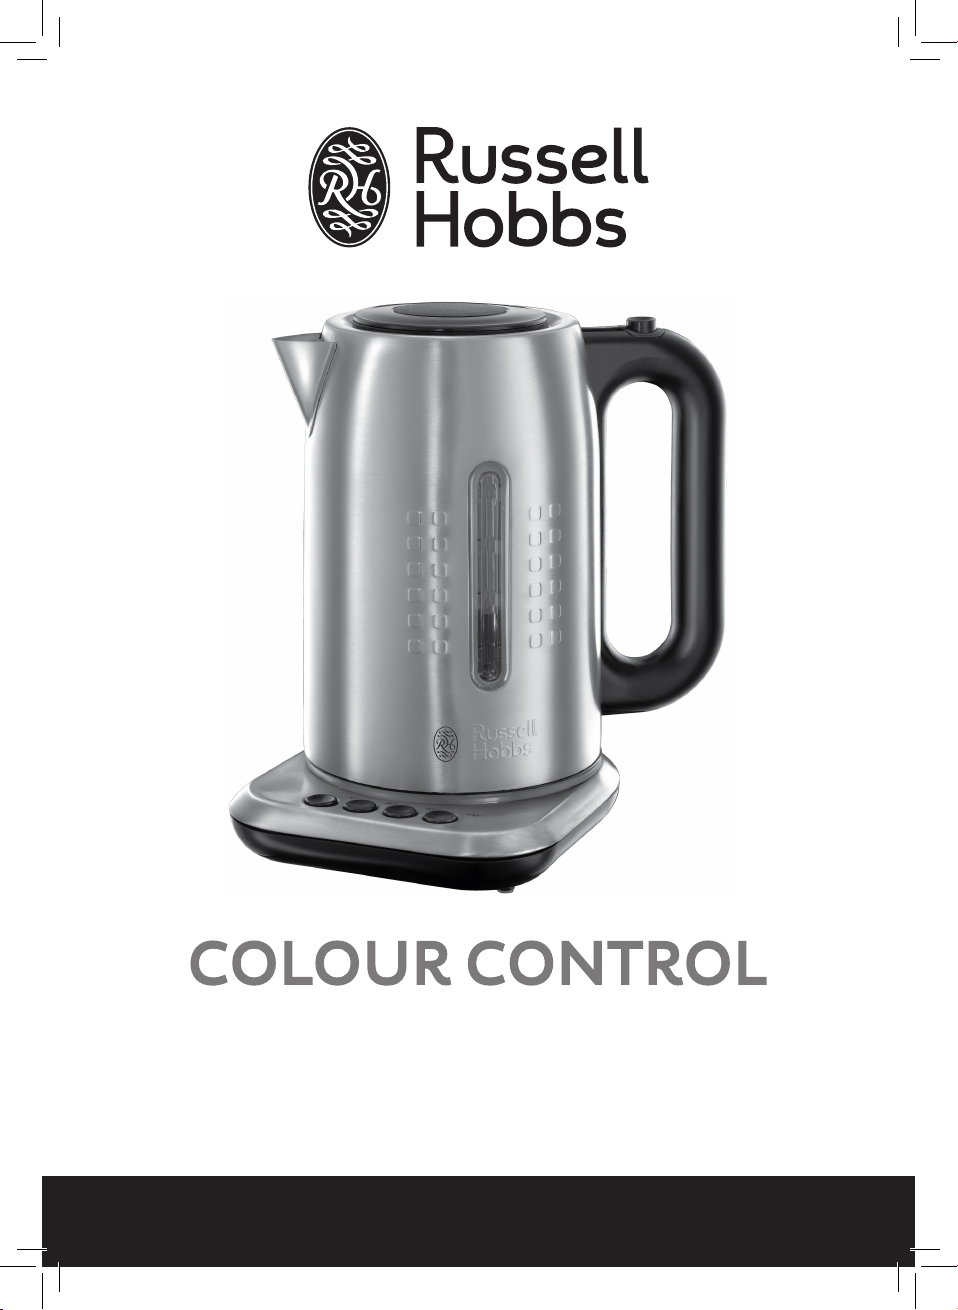
KETTLE
2 YEAR WARRANTY
20160AU
INSTRUCTIONS & WARRANTY
Page 2

Spectrum Brands Australia Pty Ltd
Warranty Conditions
4. The Goods must be used in accordance with the manufacturer’s instructions. This Warranty
does not apply should the defect in or failure of the Goods be attributable
to misuse, abuse, accident or non-observance of manufacturer’s instructions on the part of
the user. As far as the law permits, the manufacturer does not accept liability for any direct or
consequential loss, damage or other expense caused by or arising out of any failure to use
the Goods in accordance with the manufacturer’s instructions.
5. Exhaustible components (such as batteries, lters and brushes) of the Goods are included
under this Warranty only where there is a defect in workmanship or materials used.
6. The warranty granted under clause 3 is limited to repair or replacement only.
7. Any parts of the Goods replaced during repairs or any product replaced remain the property
of the manufacturer. In the event of the Goods being replaced during the Warranty Period,
the warranty on the replacement Goods will expire on the same
date as for the Warranty Period on the original Goods which are replaced.
8. In order to claim under the warranty granted under clause 3 you must:
(a) Retain this warranty with your receipt/proof of purchase; and
(b) Return the Goods to us at the relevant address or to the Supplier by prepaid freight
9. This warranty is immediately void if:
(a) Any serial number or appliance plate is removed or defaced;
(b) The Goods have been serviced or otherwise repaired by a person not authorised to do so
10. The Goods are designed for domestic use only. A limited 90-day Warranty applies to any
industrial or commercial use of the Goods. The Goods must be connected to the electrical
voltage requirements as specied in the ratings label located on the Goods.
11. This warranty does not cover the cost of claiming under the warranty or transport
of the Goods to and from the Supplier or us.
12. This warranty is only valid and enforceable in Australia against Spectrum Brands Australia Pty
Ltd and in New Zealand against Spectrum Brands New Zealand Ltd.
Contact us or the Supplier for further details.
Register your product online
If you live in Australia please visit: www.spectrumbrands.com.au/warranty
If you live in New Zealand Please visit: www.spectrumbrands.co.nz/warranty
Registration of your warranty is not compulsory, it gives us a record of your purchase
AND entitles you to receive these benets: Product information; Hints and tips; Recipes and
news; Information on special price oers and promotions.
Any questions? Please contact Customer Service for advice.
Locked Bag 3004 Braeside
Victoria 3195 Australia
Customer Service in Australia
Toll Free: 1800 623 118
Email: info@spectrumbrands.com.au
Website: www.spectrumbrands.com.au
Spectrum Brands New Zealand Ltd
PO Box 9817 Newmarket
Auckland 1149 New Zealand
Customer Service in New Zealand
Toll Free: 0800 736 776
Email: service@spectrumbrands.co.nz
Website: www.spectrumbrands.co.nz
Spectrum Brands Australia Pty Ltd and Spectrum Brands New Zealand Ltd
W
0911
In this warranty:
Australian Consumer Law means the Australian consumer law set out in Schedule 2 to the Competition
and Consumer Act 2010;
CGA means the New Zealand Consumer Guarantees Act 1993;
Goods means the product or equipment which was accompanied by this warranty and purchased in
Australia or New Zealand, as the case may be;
Manufacturer, We or us means:
1. for Goods purchased in Australia, Spectrum Brands Australia Pty Ltd ABN, 78 007 070 573;
or
2. for Goods purchased in New Zealand, Spectrum Brands New Zealand Ltd, as the case may be,
contact details as set out at the end of this warranty;
Supplier means the authorised distributor or retailer of the Goods that sold you the Goods in Australia or
in New Zealand; and
You means you, the original end-user purchaser of the Goods.
1. Our goods come with guarantees that cannot be excluded under the Australian Consumer Law, or
the CGA. You are entitled to a replacement or refund for a major failure and compensation for any
other reasonably foreseeable loss or damage. You are also entitled
to have the goods repaired or replaced if the goods fail to be of acceptable quality and the failure
does not amount to a major failure.
2. The benets provided by this Warranty are in addition to all other rights and remedies in respect of
the Goods which the consumer has under either the Australian Consumer Law
or the CGA. The original purchaser of the Goods is provided with the following Warranty subject to
the Warranty Conditions:
3. We warrant the Goods for all parts defective in workmanship or materials from the date
of purchase (Warranty Period), for the period of:(a) Two (2) years for Russell Hobbs products (see product packaging for details)
(b) Two (2) years with ve (5) year motor warranty for Russell Hobbs products (see product
packaging for details)
(c) Limited Lifetime, Ten (10) years for Russell Hobbs cookware.
(d) One (1) year for George Foreman.
If the Goods prove defective within the Warranty Period by reason of improper workmanship
or material, we may, at our own discretion, repair or replace the Goods without charge.
Warranty Against Defects
2
Page 3

Warranty Conditions
4. The Goods must be used in accordance with the manufacturer’s instructions. This Warranty
does not apply should the defect in or failure of the Goods be attributable
to misuse, abuse, accident or non-observance of manufacturer’s instructions on the part of
the user. As far as the law permits, the manufacturer does not accept liability for any direct or
consequential loss, damage or other expense caused by or arising out of any failure to use
the Goods in accordance with the manufacturer’s instructions.
5. Exhaustible components (such as batteries, lters and brushes) of the Goods are included
under this Warranty only where there is a defect in workmanship or materials used.
6. The warranty granted under clause 3 is limited to repair or replacement only.
7. Any parts of the Goods replaced during repairs or any product replaced remain the property
of the manufacturer. In the event of the Goods being replaced during the Warranty Period,
the warranty on the replacement Goods will expire on the same
date as for the Warranty Period on the original Goods which are replaced.
8. In order to claim under the warranty granted under clause 3 you must:
(a) Retain this warranty with your receipt/proof of purchase; and
(b) Return the Goods to us at the relevant address or to the Supplier by prepaid freight
within the Warranty Period accompanied with (i) the legible and unmodied original
proof of purchase, which clearly indicates the name and address of the Supplier, the date
and place of purchase, the product name or other product serial number and (ii) this
warranty.
9. This warranty is immediately void if:
(a) Any serial number or appliance plate is removed or defaced;
(b) The Goods have been serviced or otherwise repaired by a person not authorised to do so
by us or where non approved replaced parts are used.
10. The Goods are designed for domestic use only. A limited 90-day Warranty applies to any
industrial or commercial use of the Goods. The Goods must be connected to the electrical
voltage requirements as specied in the ratings label located on the Goods.
11. This warranty does not cover the cost of claiming under the warranty or transport
of the Goods to and from the Supplier or us.
12. This warranty is only valid and enforceable in Australia against Spectrum Brands Australia Pty
Ltd and in New Zealand against Spectrum Brands New Zealand Ltd.
Contact us or the Supplier for further details.
Register your product online
If you live in Australia please visit: www.spectrumbrands.com.au/warranty
If you live in New Zealand Please visit: www.spectrumbrands.co.nz/warranty
Registration of your warranty is not compulsory, it gives us a record of your purchase
AND entitles you to receive these benets: Product information; Hints and tips; Recipes and
news; Information on special price oers and promotions.
Any questions? Please contact Customer Service for advice.
3
Page 4
Congratulations on the purchase of your new Russell Hobbs appliance. Each unit is
manufactured to ensure safety and reliability. Before using the appliance for the first time,
please read this instruction booklet carefully and keep it for future reference. Pass it on if
you pass on the appliance.
When using this appliance, basic safety precautions should always be followed.
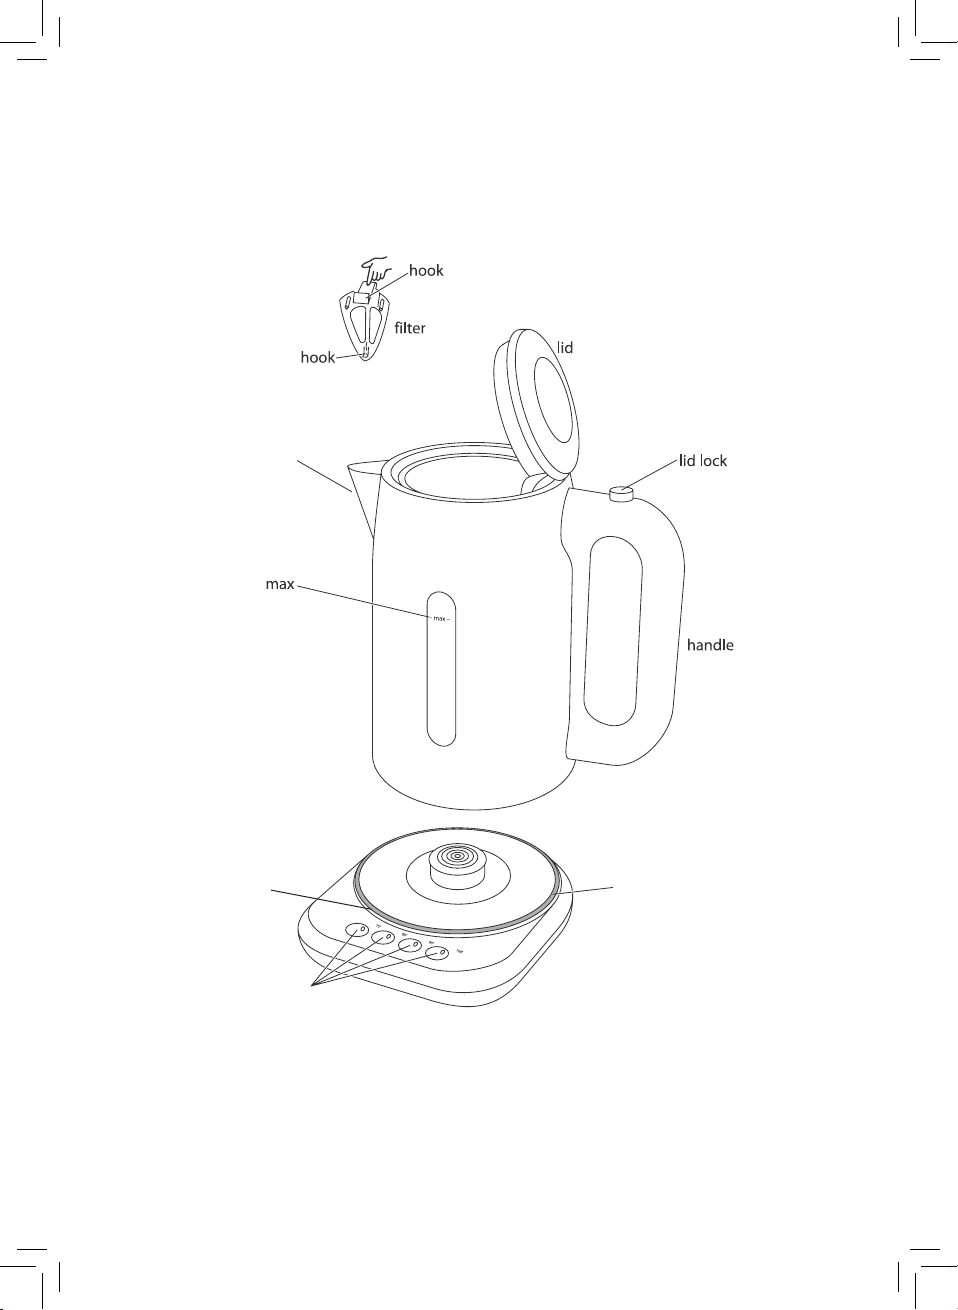
spout
light ringbase
temperature
control buttons
BEFORE FIRST USE
Fill the kettle with water to the ‘max’ level, boil, discard the water, and then rinse. Do this three
times, to remove any dust, residues, etc., from the kettle. (For instructions on operating the
kettle see ‘Switching On’)
• Ensure the lter is in place; otherwise the kettle may not switch off and may spit water
from the spout.
4
Page 5

POSITIONING
• Place the base on a stable, level surface.
• Route the cord so it does not overhang, and cannot be caught or tripped over.
• Wind excess cord beneath the base.
FILLING
Caution: If the kettle has just boiled it will be full of steam. Keep hands clear as steam
will escape from the kettle when opening the lid.
• Remove the kettle from the base.
• Press the lid lock button to open the lid.
• Fill the kettle above the ‘min’ line.
• Do not ll above the ‘max’ line. If overlled, the kettle may spit boiling water.
• Close the lid, and press down to lock it.
• Check the lid is fully closed or the kettle may not switch off when it boils.
VARIABLE TEMPERATURE AND THE LIGHT RING
The Colour Control Kettle has been designed with four pre-programmed temperature settings,
ideally suited to different types of beverages. These are represented in a unique way with the
Colour Control light ring that illuminates and changes colour according to water temperature:
NOTE: The light ring will change colour both as the water heats and then cools.
Temperature setting Colour
70°C Blue
80°C Green
90°C Purple
100°C Red
NOTE: See ‘Optimum Temperatures for Teas and Coffees’ for recommended brewing
temperatures and times for different beverages.
SWITCHING ON
CAUTION: Keep clear, as steam will escape from the spout when boiling.
• Plug the power cord into the wall power outlet and switch it on. The temperature control
buttons will ash.
• Place the kettle on the base – take care not to spill any water.
• Select the desired temperature by pressing the appropriate temperature control button.
The light on the button will illuminate.
• As the kettle boils, the light ring will ash and change colour according to the temperature
5
Page 6

of the water. Once the set temperature is reached the light ring will glow steadily in the
colour corresponding to that temperature. The light in the temperature control button will
also go out.
• To switch off manually, press the temperature control button again (the light in the
temperature control button will go out). Alternatively, lifting the kettle from the base will
cause it to switch off automatically.
• If a lower temperature is required, leave the kettle on the base to cool. As the water cools,
the light ring will change colour according to the decreasing temperature.
CAUTION: If a lower temperature is desired, always place the kettle on the base and wait
for the water to cool. Do not attempt to pour the hot water out and refill with cold water
while the kettle is still hot as it may spit.
SWITCHING OFF / SLEEP MODE
• After 5 minutes of inactivity, the kettle will switch into sleep mode.
• Press any button to wake the kettle. All buttons will ash and the light ring will illuminate to
indicate the current temperature of the water.
• If reheating is required, press the desired temperature control button.
GENERAL
• Remove the kettle from the base before pouring.
• To avoid the risk of splashing, pour slowly and do not over-tilt the kettle.
• Do not tilt the kettle backwards as water may seep into the control area.
• If this happens, empty any remaining water and allow the kettle to dry before further use –
place it in a warm, dry location for at least 12 hours.
• When you lift the kettle, you may see a little moisture on the base. This is the steam used
to switch the kettle off automatically, which then condenses and escapes via vents under
the kettle. This is normal.
• Always switch off and disconnect the appliance from the wall power outlet when not in use.
USING WITH INSUFFICIENT WATER
• Using the kettle with insufcient water can shorten the life of the element.
• If the kettle is accidently switched on when it does not contain sufcient water, a boil-dry
cut-out will switch the kettle off.
• Sit the kettle on a stable heat resistant surface until it has fully cooled down.
• Do not ll the kettle with water until it is cold, or it may spit.
CARE AND MAINTENANCE
• Check that the kettle is switched off by lifting the kettle from the base and replacing it.
• Switch the power off and remove the plug from the wall power outlet.
6
Page 7

• Allow the kettle to cool down fully.
• Wipe over the outside of the kettle and base with a damp cloth. A mild dishwashing
detergent may be used if required.
• Keep all connectors and sockets dry.
• Do not immerse the kettle or base in liquid.
• Do not use alkaline cleaning agents or harsh abrasives when cleaning this appliance.
• Clean the inside of the kettle using the instructions in the “DE-SCALE REGULARLY” section.
THE SUPPRESSOR
• The Suppressor is designed to reduce the noise made by the boiling water.
• If you allow scale to build up it will not be able to work properly and the kettle will become noisier.
DE-SCALE REGULARLY – EVEN IN SOFT WATER AREAS
Water contains minerals that will form deposits on the inside of your kettle, commonly referred
to as scaling. Scaling discolours the internal surfaces and can affect the performance.
To maintain the performance of your kettle, it should be de-scaled every three months or so.
De-scale more frequently if you live in a hard water area.
• Add 2 to 3 teaspoons of citric acid to the empty kettle.
• Fill the kettle with fresh cold water to the max level mark on the water gauge.
• Switch the ON/OFF switch to ON and allow the kettle to boil.
• Once the water has boiled allow the kettle to cool.
• Once the kettle has cooled, discard the water into the sink.
NOTE: If using a commercial de-scaler, follow the instructions listed on the de-scaler.
RINSE AFTER DE-SCALING
• Fill the kettle with fresh cold water to the max level mark on the water gauge.
• Discard the water into the sink.
• Repeat the rinsing process 3 times, discarding the water in the kettle each time.
NOTE: Products returned under warranty with faults due to scale may be subject to a
repair charge.
WATER FILTER
Scale particles suspended in the water may give it a cloudy or greasy appearance. The lter will
prevent these particles going into your drink. Remove and clean the lter as required.
CLEANING THE FILTER
• Check your hands are free from soap, hand cream, or anything which may leave a taint.
• Switch the power off and remove the plug from the wall power outlet.
7
Page 8

• Allow the kettle to cool down fully.
• Press the lid lock button to open the lid.
• Press the top of the lter down, to release the hooks from the top of the spout.
NOTE: Take care not to press on the mesh part of the filter – you may damage it.
• Lift the lter out of the kettle
• Rinse the lter under a running tap whilst brushing with a soft brush.
• Rinse the kettle in case scale particles have fallen inside.
• Lower the lter into the kettle, and engage the bottom hook in the bottom of the spout.
• Push the top of the lter towards the spout, to force the top hooks under the top of the
spout.
• Rell the kettle and close the lid.
Caution: Do not use the kettle without the filter in place – it may spit boiling water.
OPTIMUM TEMPERATURES FOR TEAS AND COFFEES
The temperature of the water used in the preparation of different types of tea and coffee is
important for extracting optimal avour. The following can be used as a guideline.
Beverage
Water temperature
°C
Brewing time
(min)
TEA
Black Tea 100 5 – 7
Whole Leaf Black Tea
Chai Tea
Broken Leaf Black Tea
Genmaicha
100
100
5 – 7
100
90 2 – 3
4
5
(Japanese Green Tea)
Chinese Oolong Tea 80 – 90 3 – 4
Herbal Teas 80 3 – 4
Green Tea 70 – 90 2 – 5
Flavoured Green Tea 70 – 80 3 – 4
Sencha (Japanese Green Tea) 70 1 – 2
Yellow Tea 70 – 80 2 – 4
White Tea 70 – 80
7 – 20
COFFEE
Instant Coee 90
Coee
90
(piston/plunger coee pot)
8
Page 9

IMPORTANT SAFEGUARDS
When using electrical appliances, basic safety precautions should always be followed,
including:
1. To protect against electrical hazards do not immerse the power cord, plug, base, or kettle in water or any other
liquid.
2. Do not use in the bathroom or near any source of water. Do not use outdoors.
3. Always use the appliances handles as some parts may be hot.
4. This appliance is not intended for use by persons (including children) with reduced physical, sensory or mental
capabilities, or lack of experience and knowledge, unless they have been given supervision or instruction concerning
use of the appliance by a person responsible for their safety.
5. Always turn off and unplug from the power outlet before cleaning the appliance.
6. Always switch off and disconnect the appliance from the wall power outlet when not in use.
7. To disconnect, turn off the wall power outlet, then grasp and pull the plug from the wall outlet. Never pull by the cord.
8. Do not operate this appliance with a damaged cord/plug or after the appliance has malfunctioned, or been dropped
or damaged in any manner. Contact Customer Service for replacement, examination, repair or adjustment.
9. There are no user serviceable parts. If power cord is damaged, it must be replaced by the manufacturer or similarly
qualified person in order to avoid a hazard.
10. Do not use on an inclined plane or unstable surface.
11. Do not move the kettle while it is switched on.
12. Ensure the lid is properly closed or the kettle may not switch off once boiled.
13. Do not open the lid while the water is heating or boiling.
14. Always take care when pouring. Pour slowly, do not over-tilt the kettle.
15. The scalding hazard remains long after the water has boiled. Keep the kettle, base, and the power cord away from
the edge of tables or countertops and out of reach of children or infirm persons.
16. Only use the kettle with the base provided and vice versa.
17. Wind excess cord beneath the base.
18. Do not place on or near any heat sources.
19. Do not use this appliance for other than its intended purpose of heating water.
20. Do not switch on the kettle unless the water is at or above the minimum level.
21. Do not fill past ‘max’, otherwise water may be ejected from the spout while boiling.
22. Do not use without filter fitted.
23. Do not leave the product unattended when in use or where it may be touched by children or infirm persons.
24. Do not use alkaline cleaning agents or harsh abrasives when cleaning this appliance. Follow the instructions in the
‘Care and Maintenance’ section when cleaning this appliance.
25. This appliance is not a toy. Children should be supervised to ensure they do not play with the appliance.
26. This appliance is not intended to be operated by means of an external timer or separate remote control system.
27. De-scale the kettle regularly to ensure proper operation.
28. For added safety, electrical appliances should be connected to a power outlet that is protected by a residual current
device (RCD), also often referred to as a ‘Safety Switch’. Your switchboard may already incorporate an RCD. If unsure,
call an electrician for verification and fitting if necessary.
SAVE THESE INSTRUCTIONS. THIS APPLIANCE IS FOR HOUSEHOLD USE ONLY.
9
Page 10

NOTES
10
Page 11

NOTES
11
Page 12

www.russellhobbs.com.au
www.russellhobbs.co.nz
RUSSELL HOBBS and logo are Trade Marks of Spectrum Brands, Inc., or one of its subsidiaries.
Manufactured in China to Spectrum Brands specifications. ©2014 Spectrum Brands, Inc.
12
 Loading...