

Page 1
Smart home wifi camera operating guide V1.5
Version explanation:
20170818:V1.5 Simplify & normalize operating process.
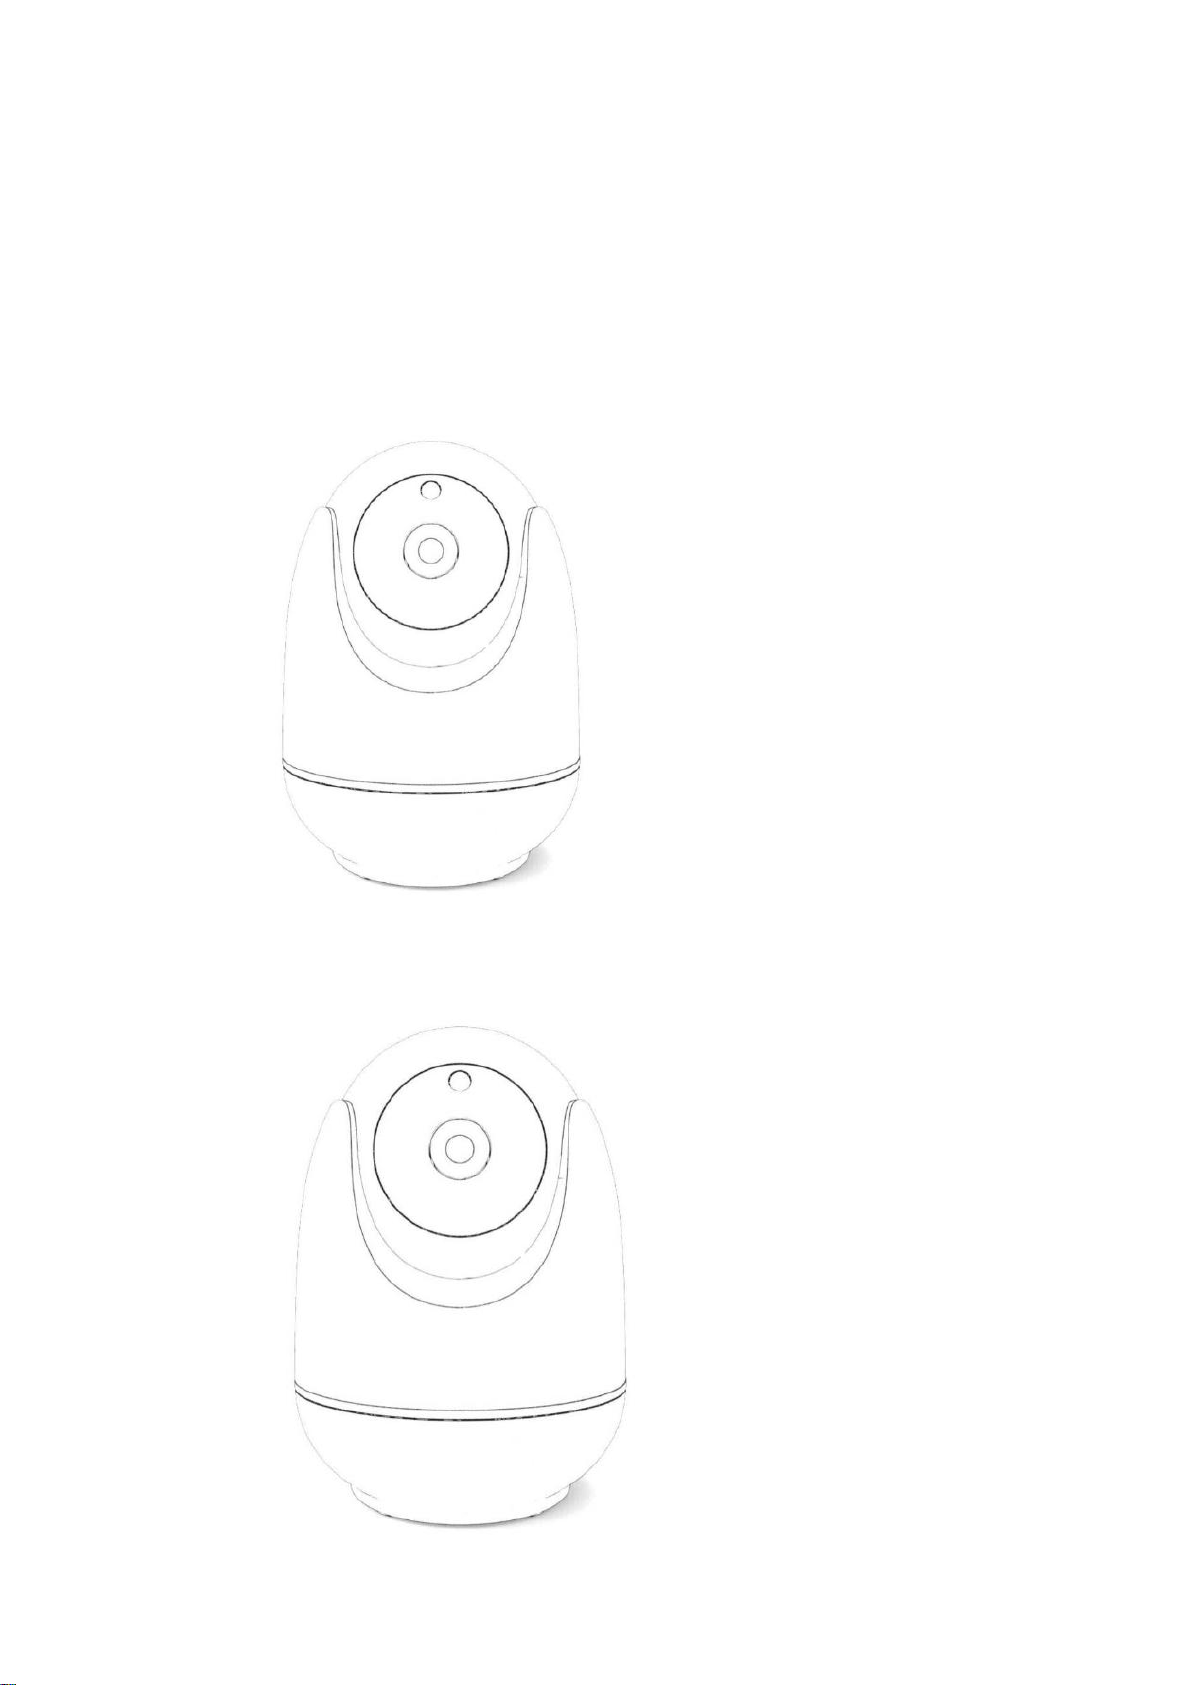
I. Learn about your camera
1. Ethernet port 2.TF card port 3.power port
Page 2

indicator light
always on
twinkle
Off
network light
connected properly
connecting
no connection
alarm light
alarming
-
no alarm
recording light
with TF card
recording
no TF card
deploying alarm light
deployed alarm
deploying alarm
no deploying alarm
1:network light; 2:alarm light; 3:video light; 4:deploying alarm light; 5:
infrared receipt
You can check whether camera works properly or not by watching below indicator light:
II. Download & install Yoosee APP for phone
Go to Apple APP Store or Android Google Play and search for Yoosee or you can go to
www.yoosee.co to download & install Yoosee then finish registration according to the
instructions and log in.
III. Add camera
1. Register & log in
App can be registered via phone numbers and e-mail addresses as well as via WeChat.
Note: phone numbers registration is only limited in China currently and also do use true e-mail
addresses better for finding forgotten password back in the future.
Page 3
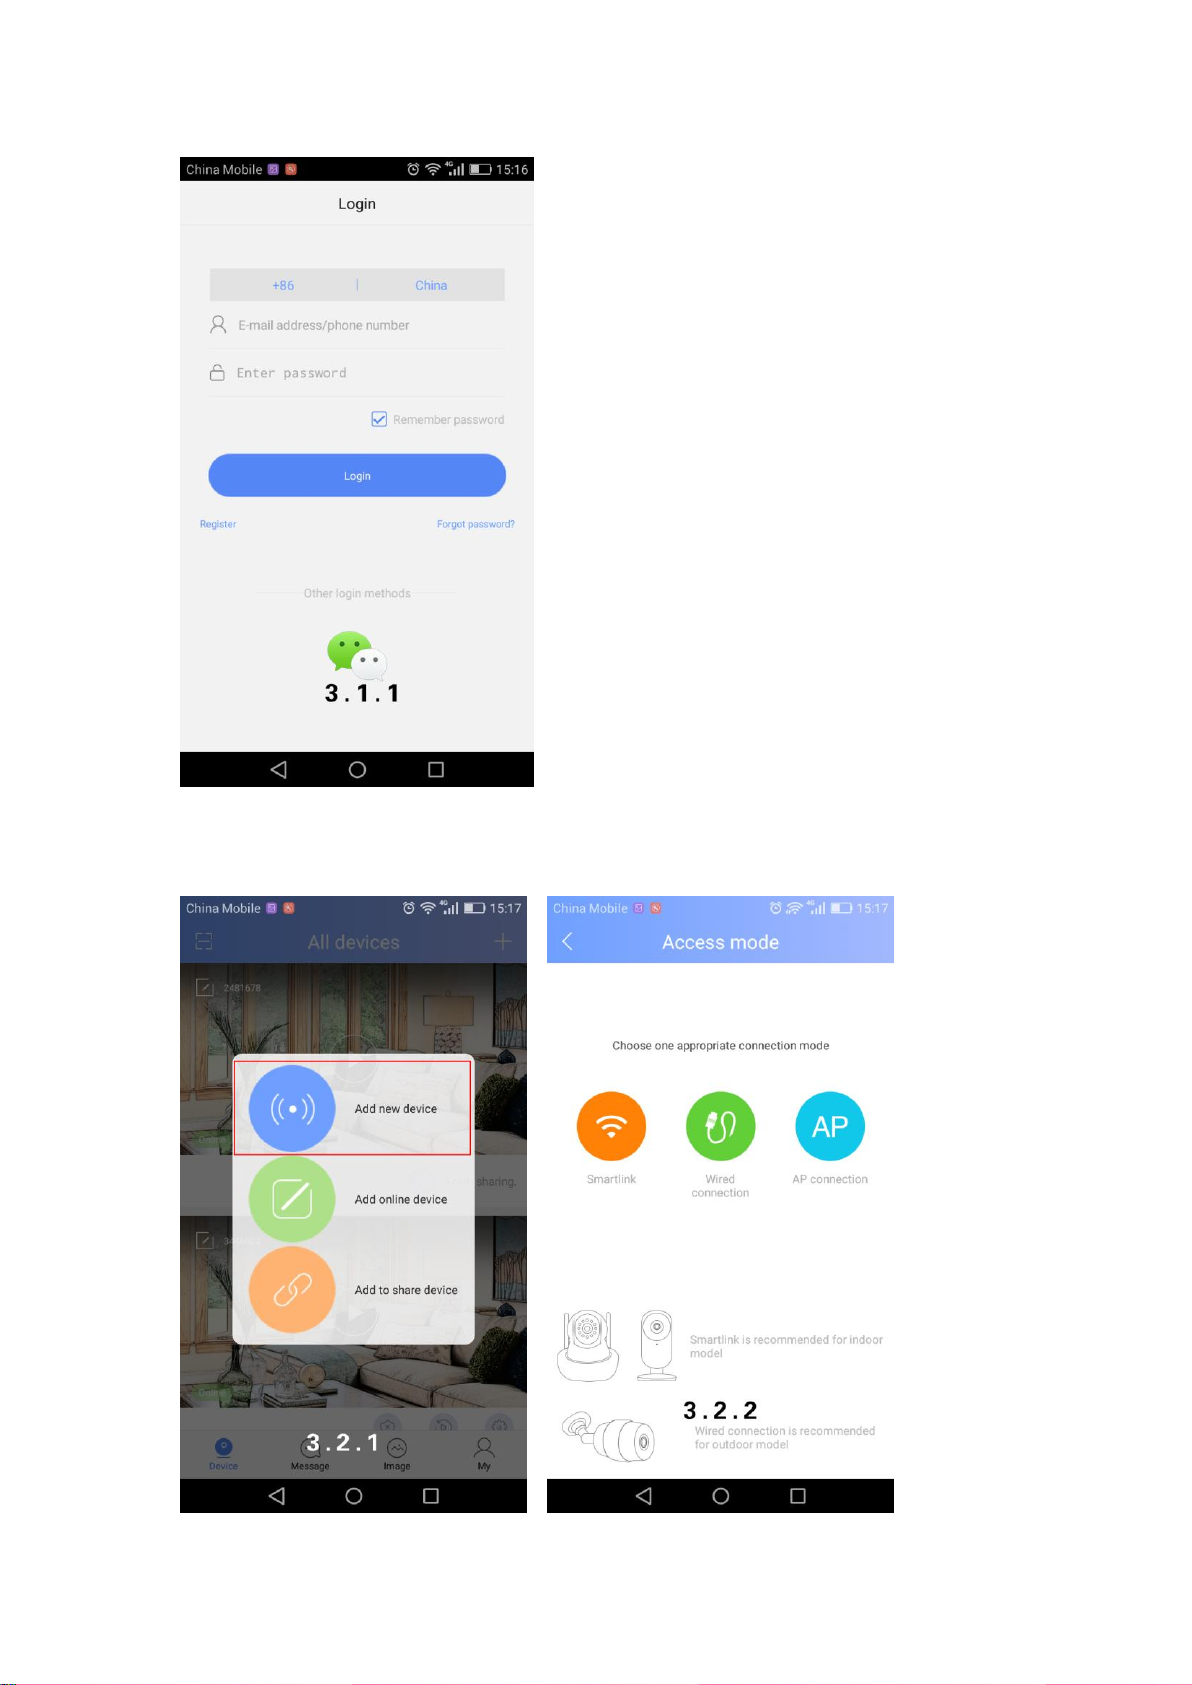
2. Process of adding new devices
Page 4
Device needs to be back to initialized status by pressing the “reset” button for 5 seconds when
adding new devices.
Two ways for adding device: one is via Wi-Fi, the other is via wire. Wi-Fi adding can be divided
into smart link and AP connection.
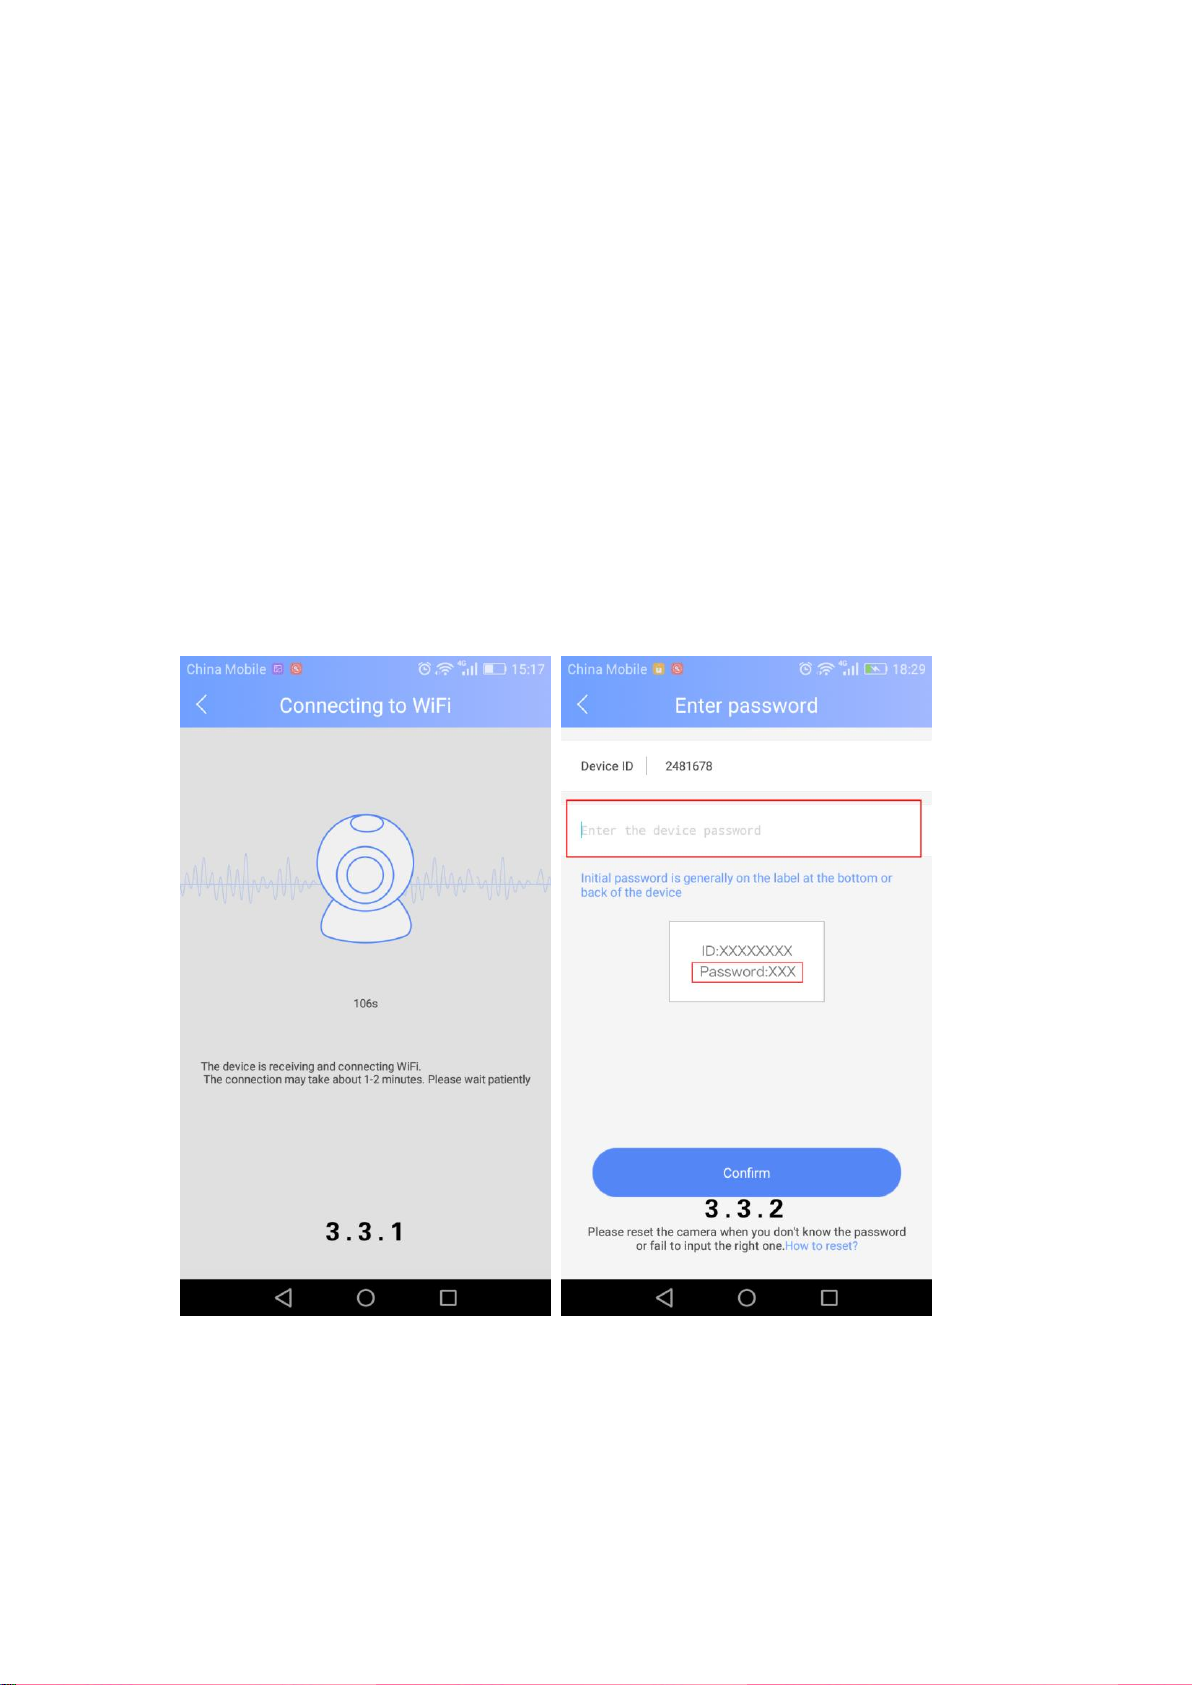
Smart link
Select smart link→follow the instructions→input default password (see pic 3.3.2) after
camera connecting with Wi-Fi →save.
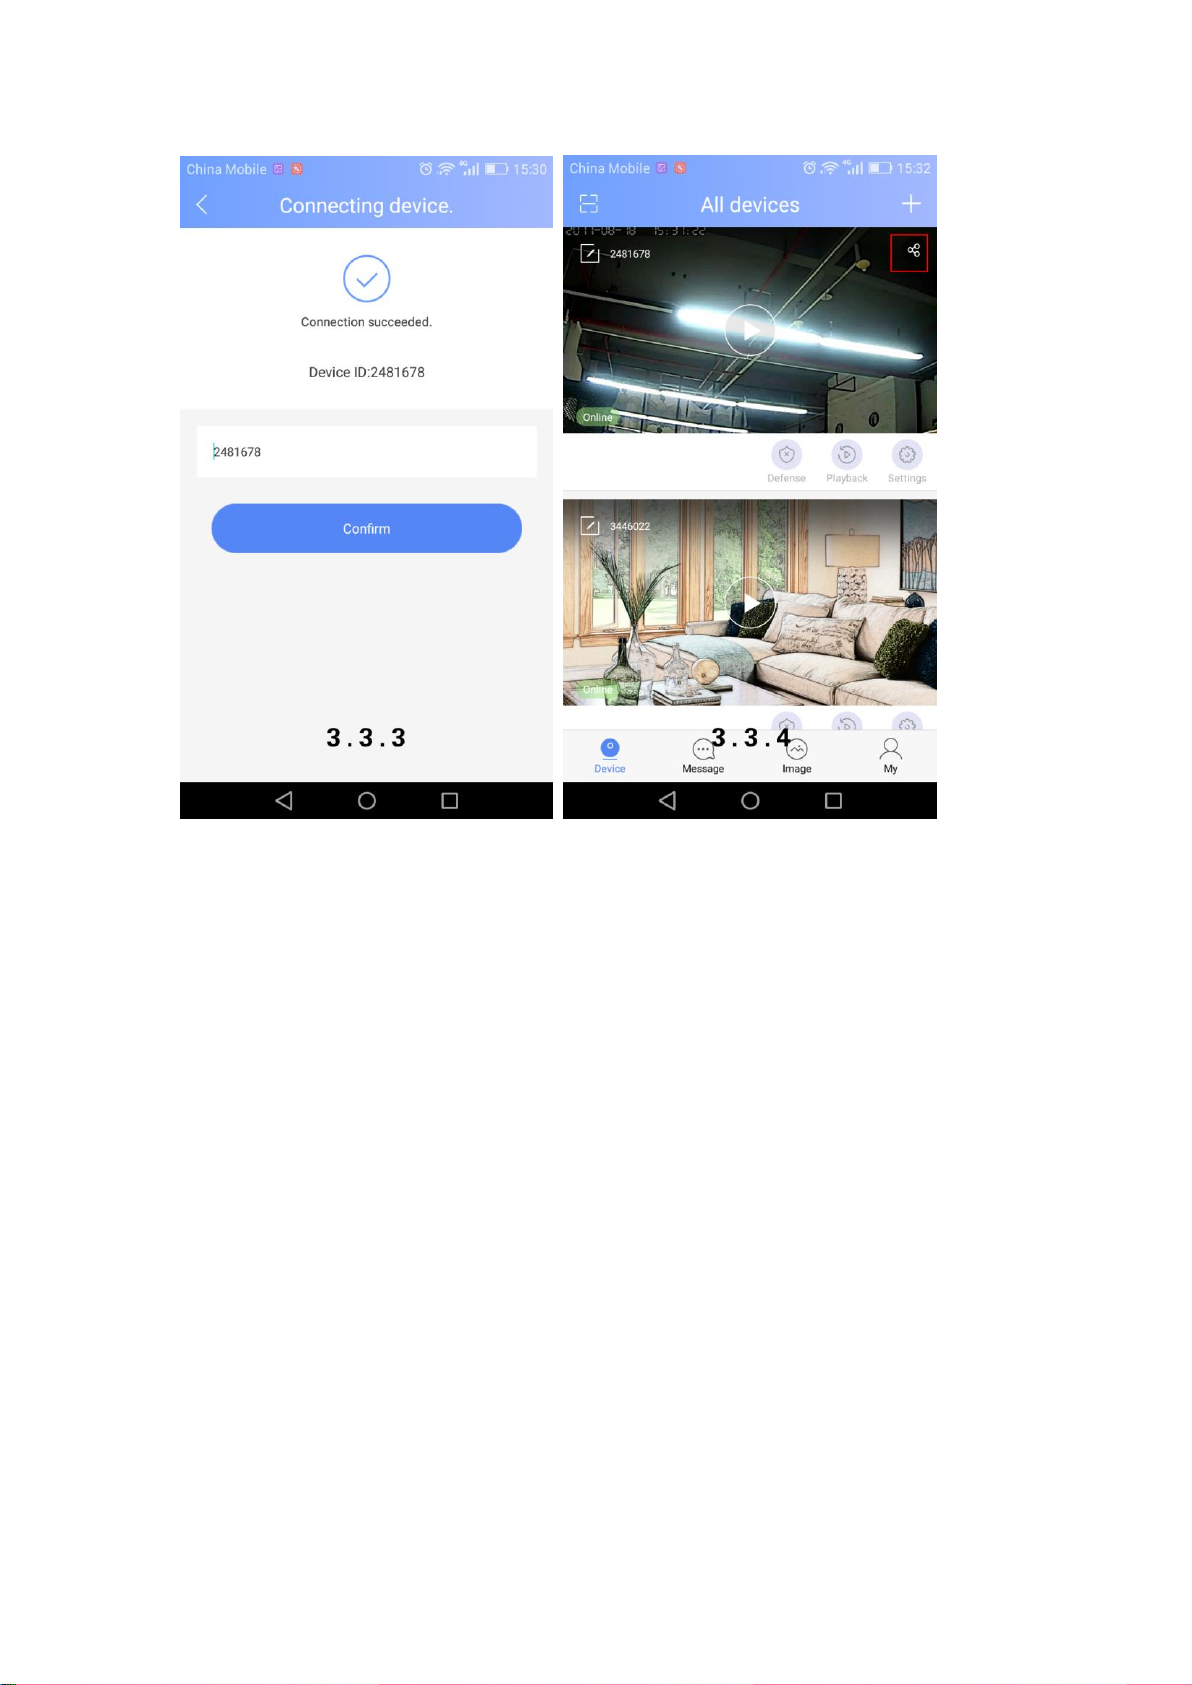
If this is your first time to add this camera, you are the owner of it after adding. You can click
on the “share “button on the right upper corner (see pic 3.3.4) and share to your friends.
Page 5
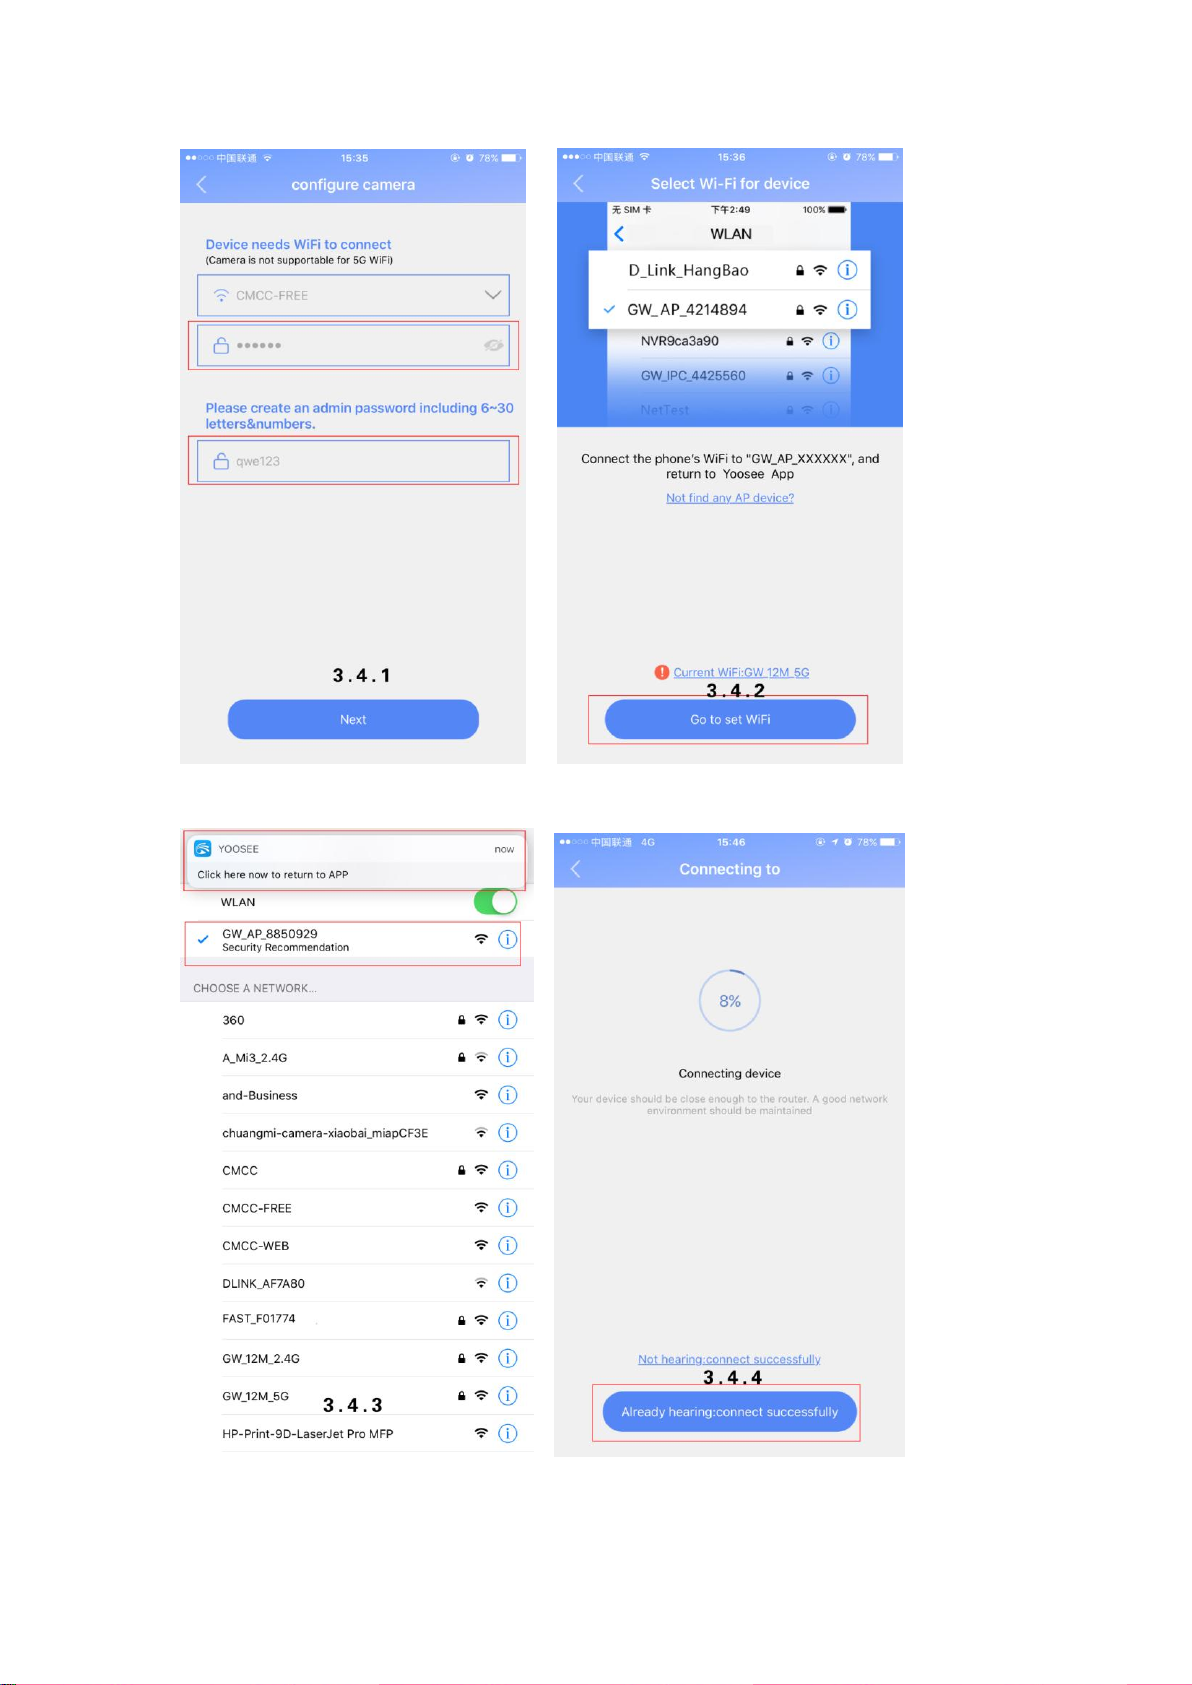
AP connection:
Select AP connection→input the Wi-Fi password asked by device and create visiting
password→click “next step”→enter into interface of “select Wi-Fi for device” and click on
“go to set Wi-Fi” →jump to phone’s Wi-Fi listing interface, select your wanted device
GW-AP-XXX and click on the reminder of “click here now to return to APP”(see pic 3.4.3) →
done
Page 6
Page 7

Wired adding
Select wired connection→select wanted device in new device listings→create device
name(please input default password manually if device got one) →save
Notes: If reminder shows up (see pic 3.5.1) when adding new devices, please ask device
owner to unbind & delete device in “settings”.
IV. Sharing to friends
1. Click on “sharing” button and enter into sharing interface (see pic.4.1.2) then share camera
to friends, please see below picture.
Page 8

2. Please ask your friends to install, register and login the latest Yoosee version.
3. How does your friends add sharing camera?
1) If friends nearby.
Ask your friends to open APP→click on “scan” →scan the QR code→jump to the
interface of adding sharing device(see pic 4.2.3) →done.
Page 9

Page 10

2) If friends not nearby.
You can share the link to friends by social networking tools (only WeChat is supported),
details are as follows:
Click on the link on WeChat→click the button on right upper corner (see pic 4.3.2) →
open it via browser→enter into the interface of being invited→jump to the interface of
adding sharing device(see pic 4.3.3) →done
Page 11

Or you can copy the sharing link and send it to your friends→copy the link manually→
open APP→click on “add to share device”→enter into the interface of adding sharing
device, details are as follows:
Page 12

Page 13

4. Sharing Management
The interface of “sharing management “will appear when clicking “sharing “button if this
device has been shared to other people, you can delete the shared friends or share it again
to other friends.
Page 14

②④③
⑤
①
⑥
V. Introduction of function buttons
① Scan
② Weak password icon: Suggest to revise password when this icon is on.
③ Defense succeeded & disarming succeeded : Deploy must be switch on when using alarm
notification and alarm recording.
④ Video playback
⑤ Setting: “Red spots “will be appeared on “settings ”&”firmware update” when there is new
firmware version needed to be updated.
⑥ Sharing
Page 15

①②③④⑤
⑥
⑦
①Remote recording: Record videos and save it to phone.
②Intercom system: Press the button and you can talk remotely.
③Remote capturing: Capture video screenshot and save it to phone.
④Volume
⑤Video Definition
⑥Direction indicator pointer: You can control the rotation by sliding left and right.
⑦Monitoring area: You can slide it up and down (left&right) to control the rotation in
the monitoring area.
Page 16

VI. Settings
Device information: Firmware version. We need to know firmware information when
something happens to firmware.
Time settings: Set device’s time and time zone.
Picture and sound:set device video format、volume、video quality、motion detection
sensitivity、reverse image、indicator light and so on.
Security settings:RTSP password setting; set or change device administer password and
visitor password. No password will be shown for devices by sharing way.
Defense settings (this function needs device support):Set regular plan of deploying & revoking
alarm
Network settings:Shift between wired & Wi-Fi connection or shift to other Wi-Fi.
Alarm settings:receive alarm prompt、delete alarm pushing account、bound alarm pushing
e-mail、buzzer、motion detection and sensitivity.
Record settings:Set record mode---record manually, record alarm, record timer.
Note: motion detection or sensor should be switched on as well as defense succeeded when
Page 17

using alarm notification and alarm recording.
Add sensor (this function needs device support):It’s available to add ordinary sensor (door
magnetic, PIR), remoter, special sensor (smoke detector, special gas detector).
Adding methods :click”+” in add sensor interface→confirm→trigger sensor→add successfully.
Using case: switch on “receive alarm prompt” in alarm settings after add sensor successfully. And
at the same time deploying alarm should be done. Once door magnetic is triggered after
deploying alarm successfully, device will send alarm notifications to phone APP.
Firmware update:Update & optimize device firmware.
Change to standalone mode (this function needs device support):It applies to the users
without using router. You can get through via AP hot WiFi under this mode.
Users without router can access through device’s hotspot, details are as follows:
Let device back to the initialized status→connect device’s hotspot: GW-AP-XXX→back to APP
interface of “configuring camera” and click “skip, shift to AP mode” →confirm→find the device
Page 18

Page 19

VII. FAQ
① Q: Notice wrong password when checking real time videos.
A: Device visiting password probably has been changed by other people but you can enter
correct remote visiting password in the popup. If you forgot the password, you can press the
“reset” button for a long time and restart.
② Q: It shows device is offline in device listing.
A: Please check whether camera is connected with network properly and network indicator
light is always on or not.
Please check whether the router’s network is fine or not.
③ Q: What shall we do if phone APP can’t get any notifications?
A: Check whether alarm items & alarm notifications in alarm settings are switched on and
make sure you have deployed alarm successfully. Also whether android backgrounder have been
prohibited or not by SafeMgr.
④ Q: What shall we do if motion detection gives misinformation?
A: Update device firmware (above 14.0.07.76) and APP (above 00.46.00.13) so that you can
adjust motion detection sensitivity in APP settings or revise configuration files md_ level = 3(1~6,
the smaller, the more sensitive)
⑤ Q: Recorded videos files can’t be searched out on playback.
A: Please check whether SD card is damaged or not.
Please check the search time of recorded files and system time of camera.
⑥ Q: Camera can’t connect with Wi-Fi.
A: Confirm the input password is correct.
Page 20

Camera is not supported for 5G Wi-Fi, please connect with 2.4G Wi-Fi.
Some items restricted on Wi-Fi access such as AP isolation, Wi-Fi Zone and etc. should be
closed.
⑦ Q: AP devices can’t be found on Phone Wi-Fi list.
A: Firmware is not supported for this function.
The distance is too far from phone to device.
VIII. Acquire more information
This fast guidance will guide you to use your network camera in a very fast way. If you want to
acquire more information, please download detailed user guidance or ask technical support from
manufacturer.
FCC Statement:
This device complies with part 15 of the FCC rules. Operation is subject to the following two condi
tions: (1) this device may not cause harmful interference, and (2) this device must accept any inte
rference received, including interference that may cause undesired operation.
Changes or modifications not expressly approved by the party responsible for compliance could
void the user’s authority to operate the equipment.
NOTE: This equipment has been tested and found to comply with the limits for a Class B digital de
vice, pursuant to part 15 of the FCC Rules. These limits are designed to provide reasonable protec
tion against harmful interference in a residential installation. This equipment generates uses and
can radiate radio frequency energy and, if not installed and used in accordance with the instructi
ons, may cause harmful interference to radio communications. However, there is no guarantee th
at interference will not occur in a particular installation. If this equipment does cause harmful int
erference to radio or television reception, which can be determined by turning the equipment off
and on, the user is encouraged to try to correct the interference by one or more of the following
measures:
‐ Reorient or relocate the receiving antenna.
‐ Reorient or relocate the receiving antenna.
‐ Reorient or relocate the receiving antenna.
‐Consult the dealer or an experienced radio/TV technician for help important announcement
Page 21

Important Note:
Radiation Exposure Statement
This equipment complies with FCC radiation exposure limits set forth for an uncontrolled
environment. This equipment should be installed and operated with minimum distance 20cm
between the radiator and your body.
 Loading...