

Page 1

Programming kit - RTX4002 Repeater
1. Auto registration
1. Ensure that the repeater is switched off.
Disconnect the power plug.
2. Set the base station in registration mode.
On most base stations, holding down the “Registration or Page” key for several seconds starts the procedure. Consult
your base station user guide for more information.
3. Switch on the Repeater
Connect the power plug.
4. The LED on the Repeater flashes.
After a short while the LED stays on permanently indicating that registration is complete and the unit is ready for
operation.
2. Manual registration
1. Set the repeater in registration mode
Insert the repeaters power plug for 1-5 seconds in the socket and then remove it. Insert it once more and leave it there.
The LED on the repeater flashes slowly after the start. You now have five minutes to carry out the registration. If the
procedure is not carried out within this period you must start over again.
2. Set the base station in registration mode
On most base stations, holding down the “Registration or Page” key for several seconds starts the procedure. Consult
your base station user guide for more information.
3. The LED on the front of the repeater flashes
If the LED flashes very quickly without interruptions go to step 5. If the LED flashes very quickly with brief
interruptions go to step 4.
4. Registration of the handset
If the base code has been changed, it must be set to “0000”. You must repeat the registration procedure even if the
mobile unit used was already registered at the base station, (consult your base station user guide for more
information). Now the LED flashes very quickly without interruptions.
5. Assign a repeater number
You must now assign a repeater number to the repeater (selection: 2-7, for up to 6 repeaters). Please note that each
number only can be assigned once, when using more than one repeater. These numbers are independent of the mobile
unit extension numbers.
Hook off by pressing the -key (the LED stops flashing). Press a number between 2 and 7. When the repeater has
accepted the chosen number, the LED will flash a corresponding number of times. Accept the registration by pressing
the *-key and then the -key (hook on). The repeater is now automatically restarted. The LED goes off for 2 seconds,
flashes for a brief moment and the remains continuously illuminated. The registration of the repeater is completed.
You can now disconnect the power and move the repeater to the selected location (disconnecting the power will not
delete the registration.)
3. Reset the repeater
1. Switch off the repeater.
Disconnect the power plug.
2. Switch on the repeater for 1 to 5 seconds and switch off again.
3. Switch on the repeater for 25 to 35 seconds on switch off again.
Now the repeater is ready for a new registration.
Note: Reset the repeater will also delete the registrations in the repeater.
Page 2

4. Install Repeaters in series
1. Register one repeater to your base station as described above
2. Install “Setup_wrs4002cfg” on your laptop.
3. Apply 120 V or 230Vac to the power supply and connect the serial bus to the Com port to the registered repeater.
Note that power must be switch on before connecting the serial bus to the Com port. Fig.1
Fig.1 Fig.2
4. Unit is ready for communicate with the laptop. Fig.2
5. Start the program Wrs4002cfg. An empty scheme of the program Rtx4002 Repeater config program will appear. Fig.3
Fig.3
Fig. 1a
6. In the COM port drop down box select the COM port where the single wire bus is connected. Fig.4
Fig.4
7. Click on the “Load” button in the “REPEATER” window. Fig.5
Note: The kit either comes with a cable for serial
connection or a cable for USB connection.
Fig.1a: Shows the USB connection cable
Fig.1: Shows the serial connection cable, inside the
dashed red circle.
If delivered with the USB cable, it replaces the serial
cable highlighted by the red dashed circle. The USB cable
is also shown as a COM port in Windows.
Page 3
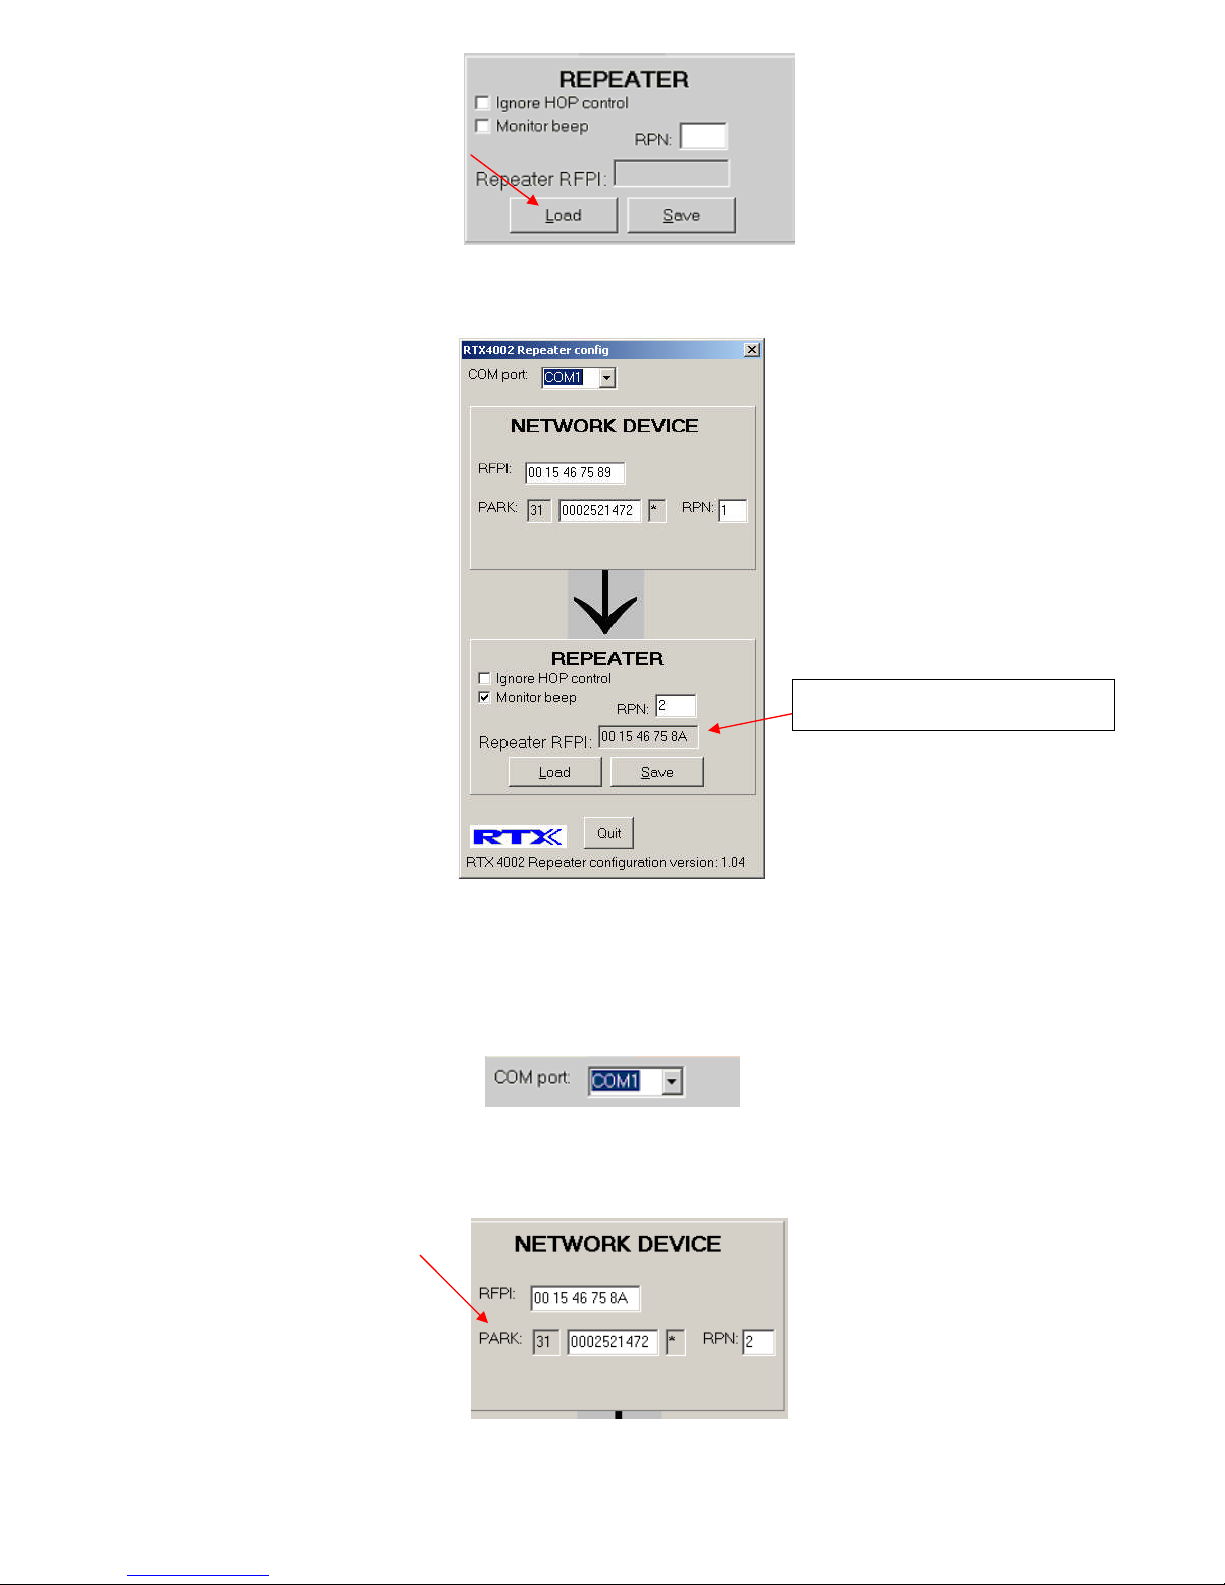
Fig.5
8. The Base station RFPI and the repeater RFPI is shown in the RTX4002 repeater config program. Remember the
Repeater RFPI, the repeater RFPI is going to bee used step11. Fig.6
Fig.6
9. Disconnect the first repeater and connect the second repeater to the laptop. Start the RTX40042 Repeater config
program.
10. In the COM port drop down box select the COM port where the single wire bus is connected. Fig. 7.
Fig.7
11. Enter RFPI off the first repeater in the “NETWORK DEVICE” window. Note the value in PARK and RPN, will
automatic update when you click on another box. Fig.8
Fig.8
12. Mark the “Ignore HOP control” check box. Fig.9
The first repeater RFPI
Page 4
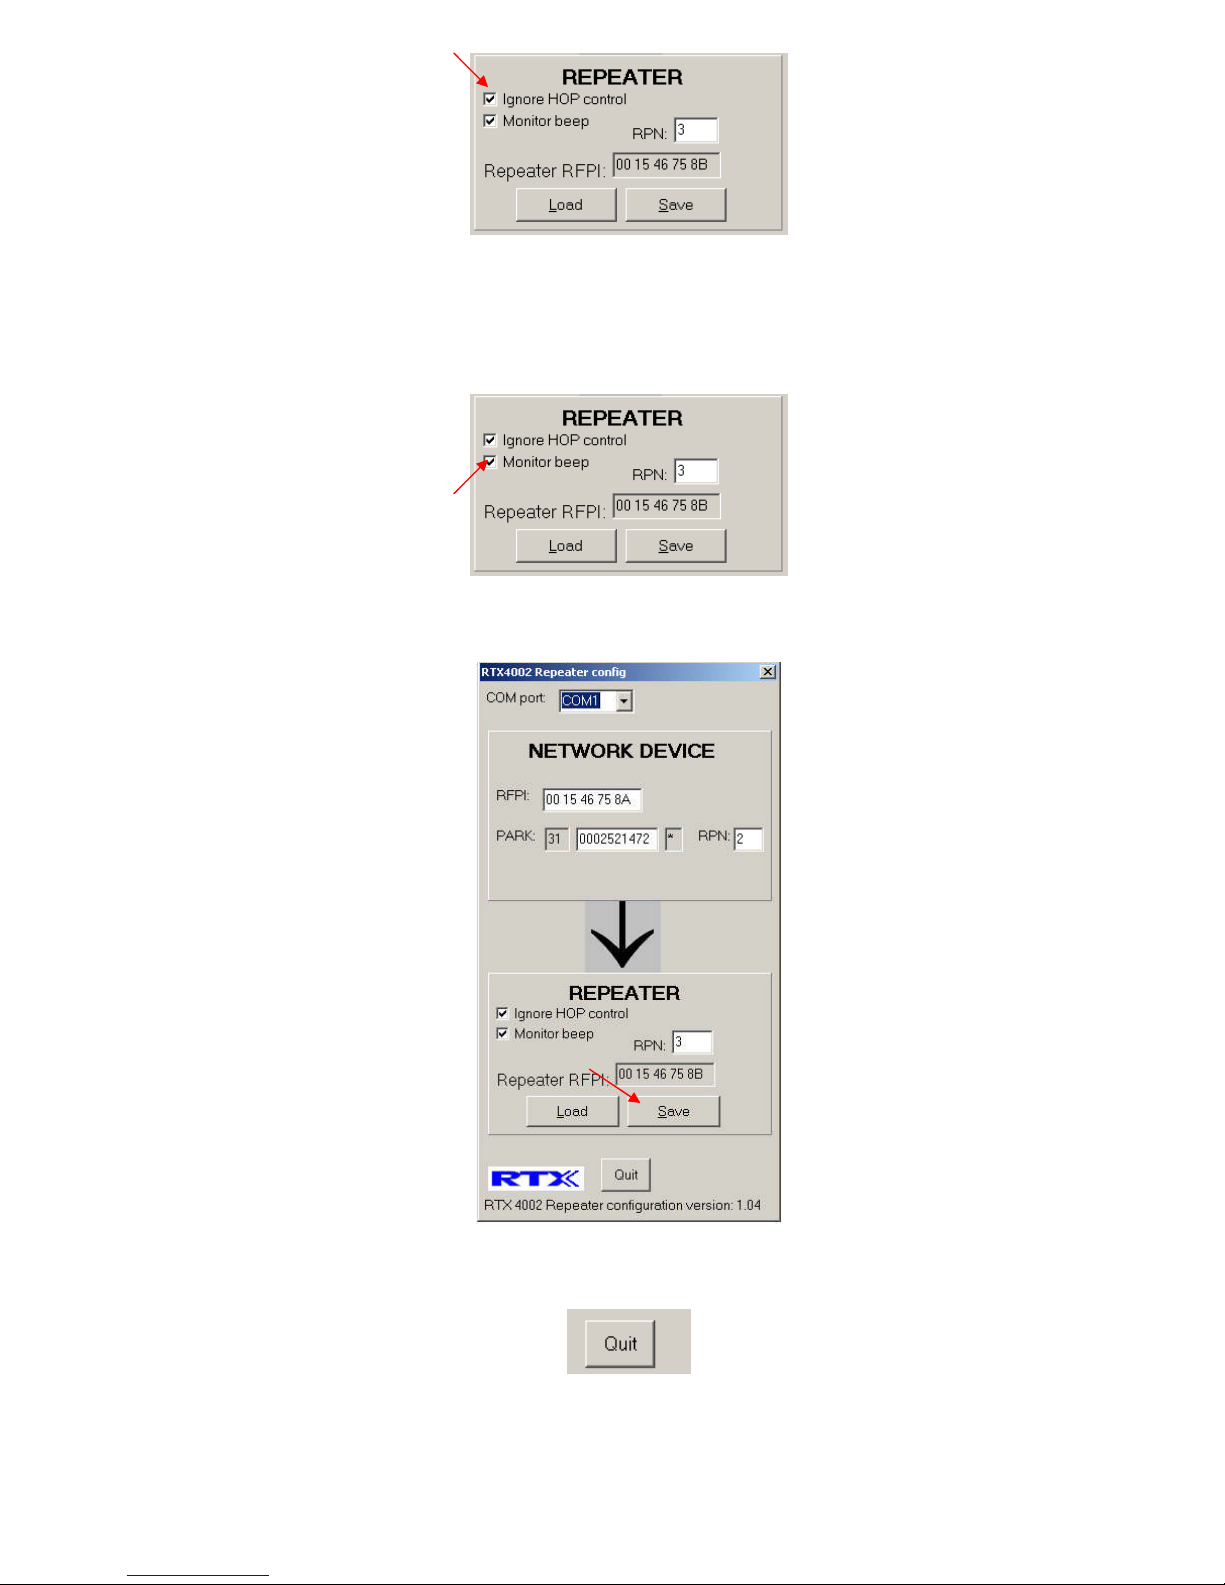
Fig.9
13. Monitor beep check box configures whether a beep will be played once every 3 seconds in the earpiece of a handset
operating on the repeater. If this feature is enabled, it will not be possible to transmit or receive fax or modem. When
connecting several repeaters in serial a beep from each repeater will be audible. Fig.10
Fig.10
14. Press the “Save” button in the “REPEATER” window to save the changes. Fig.11
Fig.11
15. Quit the RTX4002 Repeater config program by pressing the “Quit” button. Fig.12
Fig.12
16. Now you have to register the second repeater to your base station, as the first repeater was registered. After the
registration of the second repeater is completed, you can disconnect the power and move the repeaters to the selected
location (disconnecting the power will not delete the registration)
 Loading...