

Page 1
OPERATING INSTRUCTIONS
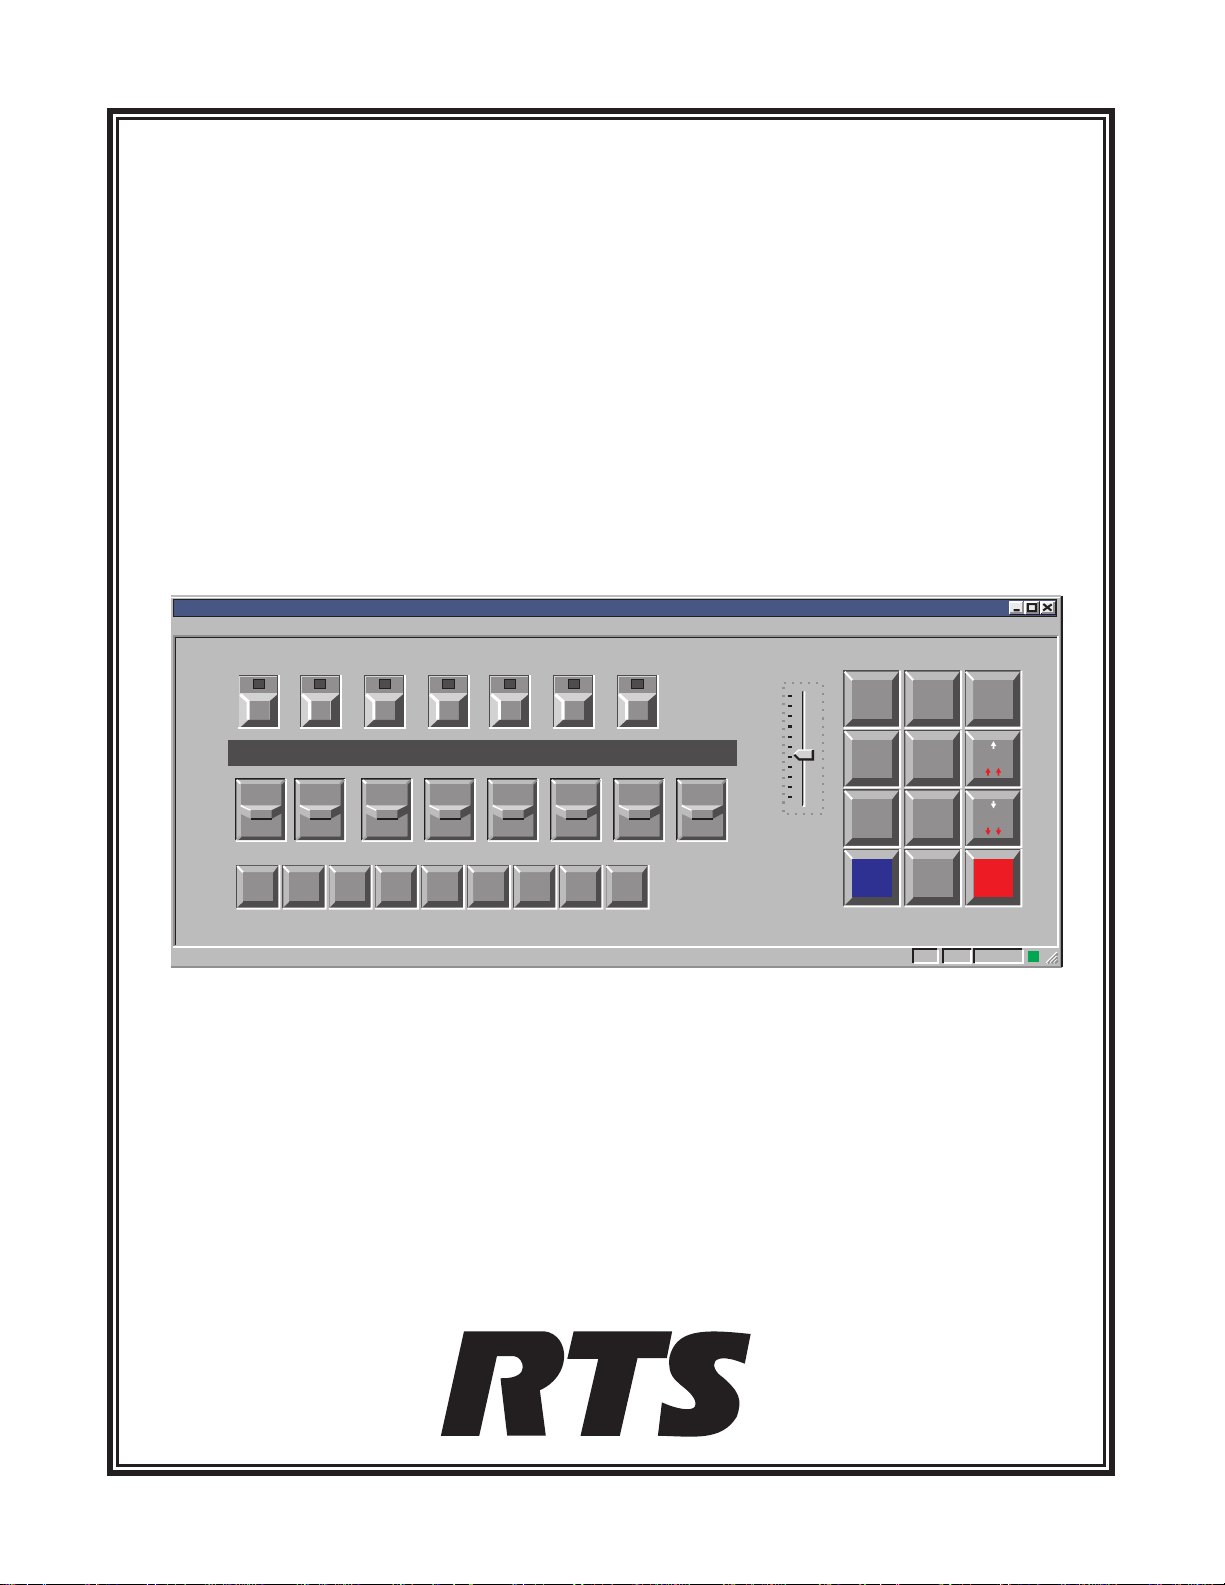
Keypanel
File Display Scroll Function Help
WKP-8/NT
Windows Keypanel
Talk
Off
(Talk)
Ready
IS01 RY01
PG1
PG2 PG3 PG4
N021 LAB MRKP SL01 MRNT
INPUT
LEVEL
PHONE
P-P IFB PL
----
Clear
Off
Call-Answer
Incoming Messages
Programming
Volume
NUM
1
SLIST
PHONE
4
RELAY
COPYCW
7
EXCOPY
CLR
PL2AUTO
IFB ISO
PREFIX
5
TYPE
E-PNL
8
DISPLAY
MULT
0
FUNC
M--1 N011
3
6
9
PGM
NORMAL
9350-7548-010 Rev A, 3/97
™
Page 2

PROPRIETARY NOTICE
CUSTOMER SUPPORT
The RTS product information and design disclosed herein were
originated by and are the property of Telex Communications,
Inc. Telex reserves all patent, proprietary design,
manufacturing, reproduction, use and sales rights thereto, and
to any article disclosed therein, except to the extent rights are
expressly granted to others.
COPYRIGHT NOTICE
Copyright 1997 by Telex Communications, Inc. All rights
reserved. Reproduction in whole or in part without prior written
permission from Telex is prohibited.
UNPACKING AND INSPECTION
Immediately upon receipt of the equipment, inspect the
shipping container and the contents carefully for any
discrepancies or damage. Should there be any, notify the freight
company and the dealer at once.
WARRANTY INFORMATION
RTS products are warranted by Telex Communications, Inc. to
be free from defects in materials and workmanship for a period
of three years from the date of sale.
The sole obligation of Telex during the warranty period is to
provide, without charge, parts and labor necessary to remedy
covered defects appearing in products returned prepaid to
Telex. This warranty does not cover any defect, malfunction or
failure caused beyond the control of Telex, including
unreasonable or negligent operation, abuse, accident, failure to
follow instructions in the Service Manual or the User Manual,
defective or improper associated equipment, attempts at
modification and repair not authorized by Telex, and shipping
damage. Products with their serial numbers removed or effaced
are not covered by this warranty.
Technical questions should be directed to:
Customer Service Department
RTS/Telex,
2550 Hollywood Way, Suite 207
Burbank, CA 91505 U.S.A.
Telephone: (818) 566-6700
Fax: (818) 843-7953
RETURN SHIPPING INSTRUCTIONS
PROCEDURE FOR RETURNS
If a repair is necessary, contact the dealer where this unit was
purchased.
If repair through the dealer is not possible, obtain a RETURN
AUTHORIZATION from:
Customer Service Department
Telex Communications, Inc.
Telephone: (800) 828-6107
Fax: (800) 323-0498
DO NOT RETURN ANY EQUIPMENT DIRECTLY TO
THE FACTORY WITHOUT FIRST OBTAINING A
RETURN AUTHORIZATION.
Be prepared to provide the company name, address, phone
number, a person to contact regarding the repair, the type and
quantity of equipment, a description of the problem and the
serial number(s).
SHIPPING TO MANUFACTURER FOR REPAIR OR
ADJUSTMENT
To obtain warranty service, follow the procedures entitled
"Procedure For Returns" and "Shipping to Manufacturer for
Repair or Adjustment".
This warranty is the sole and exclusive express warranty given
with respect to RTS products. It is the responsibility of the user
to determine before purchase that this product is suitable for the
user's intended purpose.
ANY AND ALL IMPLIED WARRANTIES, INCLUDING
THE IMPLIED WARRANTY OF MERCHANTABILITY
ARE LIMITED TO THE DURATION OF THIS
EXPRESS LIMITED WARRANTY.
NEITHER TELEX NOR THE DEALER WHO SELLS
RTS PRODUCTS IS LIABLE FOR INCIDENTAL OR
CONSEQUENTIAL DAMAGES OF ANY KIND.
2 Windows NT Keypanel
All shipments of RTS products should be made via United
Parcel Service or the best available shipper, prepaid. The
equipment should be shipped in the original packing carton; if
that is not available, use any suitable container that is rigid and
of adequate size. If a substitute container is used, the equipment
should be wrapped in paper and surrounded with at least four
inches of excelsior or similar shock-absorbing material. All
shipments must be sent to the following address and must
include the Return Authorization.
Factory Service Department
Telex Communications, Incorporated
West 1st Street
Blue Earth, MN 56013 U.S.A.
Upon completion of any repair the equipment will be returned
via United Parcel Service or specified shipper collect.
Page 3

Table of Contents
1 Starting the Keypanel...................................................5
2 Keypanel Features ....................................................5
2.1 Menu Bar ......................................................5
2.1.1 File Menu ···················································5
2.1.2 Display Menu ·················································5
2.1.3 Scroll Menu··················································5
2.1.4 Function Menu ················································6
2.1.5 Help Menu ··················································6
2.2 Listen Keys .....................................................6
2.3 Display Window...................................................6
2.4 Talk Keys ......................................................6
2.5 Page Keys (PG1 TO PG4)..............................................6
2.6 Function Keys ....................................................6
2.6.1 Input Level Function Key ··········································6
2.6.2 Phone Function Key ·············································6
2.6.3 Point-To-Point Function Key (P-P)······································6
2.6.4 IFB Function Key···············································6
2.6.5 Party Line Function Key (PL) ········································6
2.7 Incoming Messages Window and Key .......................................7
2.8 Volume Control ...................................................7
2.9 Programming Keypad ................................................7
2.10 Status Bar......................................................7
3 BASIC KEYPANEL OPERATION ...........................................7
3.1 Startup Indications..................................................7
3.2 Volume Adjustment .................................................8
3.3 Talk Key Operation .................................................8
3.4 Listen Key Operation ................................................8
Windows NT Keypanel 3
Page 4

3.5 Other Display Window Indications .........................................9
3.6 Answering Calls in the Incoming Messages Window................................9
3.7 Incoming Calls when the Keypanel is Minimizede .................................9
4 ADVANCED OPERATIONS..............................................10
4.1 Using a Telephone with the Keypanel .......................................10
4.1.1 Manual Dialing ···············································10
4.1.2 Hanging Up ·················································11
4.1.3 Talk Mute During a Phone Conversation ··································11
4.1.4 Last Number Redial ·············································11
4.1.5 Storing An Autodial Number ········································12
4.1.6 Dialing An Autodial Number ········································13
4.2 Assigning Setup Pages ...............................................14
4.3 Displaying Information About the Keypanel ...................................14
4.3.1 Displaying Information using Display Request Sequences ·························14
4.3.2 Displaying Information using Alpha Scrolling ·······························15
4.4 Assigning Keys...................................................16
4.4.1 Assigning Keys using Alpha Scrolling ···································17
4.4.2 Assigning Keys Using Copy ········································19
4.4.3 Assigning Keys Using Numeric Entry ···································20
4.4.4 Assigning Keys using the P-P, IFB, and PL Function Keys ·······················29
4.4.5 Assigning a Stacked Talk Key ·······································30
4.4.6 Clearing a Key Assignment ·········································30
4.5 Adjusting an Input Level ..............................................30
4.6 Talking to a Destination That Does Not Have a Talk Key Assigned .......................31
5 Glossary .........................................................32
4 Windows NT Keypanel
Page 5
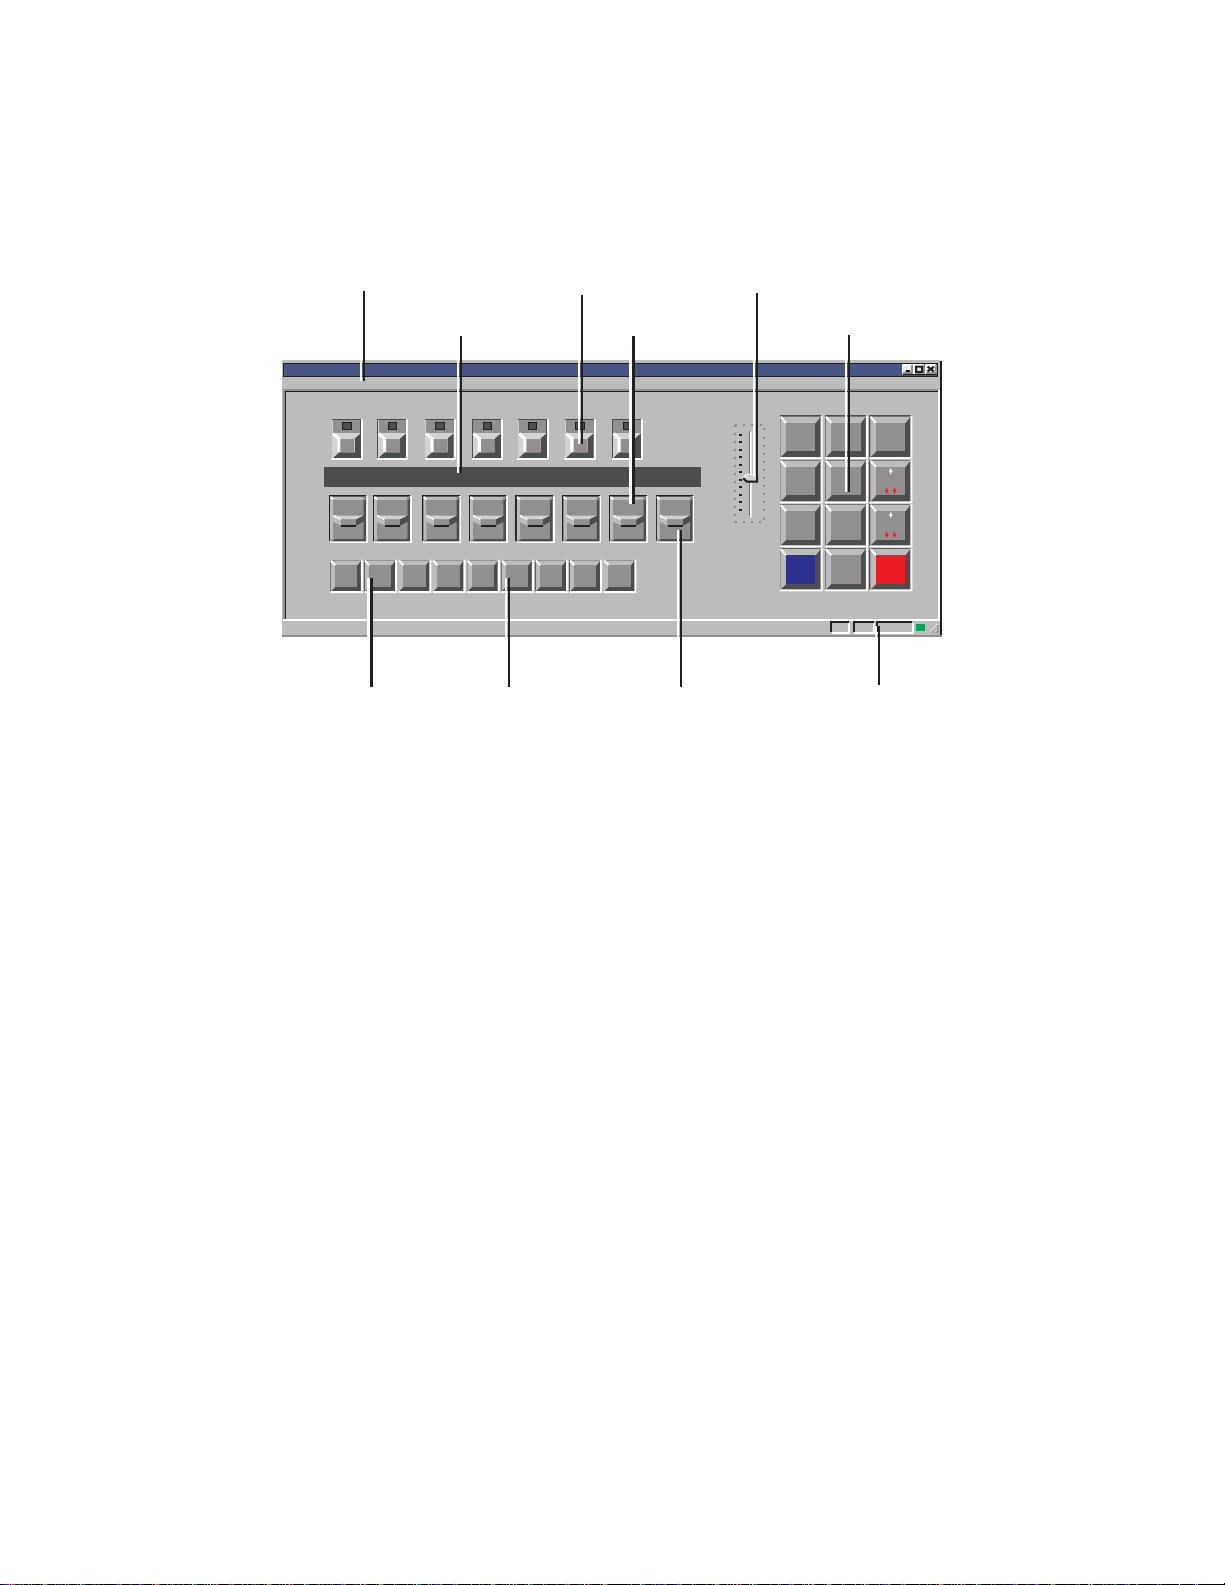
1 Starting the Keypanel
Click the Start button and point to programs. Then point to the Telex Keypanel folder and click on the Key Panel program.
Intercom
Menu Bar
Keypanel
File Display Scroll Function Help
IS01 RY01
Talk
Off
(Talk)
PG1
PG2 PG3 PG4
Listen Keys
DisplayWindow Talk Keys
N021 LAB MRKP SL01 MRNT
INPUT
LEVEL
PHONE
P-P IFB PL
Volume Control
----
Clear
Off
Call-Answer
Incoming Messages
Programming
Volume
Programming
Keypad
NUM
PL2AUTO
1
SLIST
IFB ISO
PHONE
PREFIX
4
5
RELAY
TYPE
COPYCW
E-PNL
7
8
EXCOPY
DISPLAY
MULT
0
CLR
FUNC
3
6
9
PGM
Ready
Function KeysPage Keys Incoming Messages
M--1 N011
NORMAL
Status Bar
Window and Key
Figure 1. Reference View
2
Keypanel Features
2.1 Menu Bar
The menu bar contains pull-down menu selections for most of the commonly used programming features. The menu
selections are basically shortcuts that save you from having to remember programming keypad sequence.
2.1.1 File Menu
This menu contains only the Exit command, which closes the keypanel. Note, there is no Save command because any
changes that you make to keypanel settings are automatically uploaded and saved at the intercom matrix. Also, there is
no Open command because the keypanel's configuration file is automatically downloaded from the matrix and opened
whenever the keypanel connects to the intercom system.
2.1.2 Display Menu
The Display menu lets you display information about the keypanel. For further information about items contained on
the Display menu see “Displaying Information About the Keypanel”, page 14.
2.1.3 Scroll Menu
This menu contains shortcuts for assigning keys using alpha scrolling. See “Assigning Keys using Alpha Scrolling”,
page 17.
Windows NT Keypanel 5
Page 6

2.1.4 Function Menu
You use this menu to adjust volume levels, activate phone keys, copy assignments and change setup pages.
2.1.5 Help Menu
You use this menu to access the help file and version information.
2.2 Listen Keys
Each listen key is normally assigned to the same destination as the talk key directly beneath it. Listen keys can be
assigned either for manual activation or for several types of automatic activation using special functions.
2.3 Display Window
The display window contains a 4-character, alpha-numeric display for each talk key. When a destination is assigned to
a talk key, the name of that destination appears in the display window above that key. The display window may also be
used to display other information about keys.
2.4 Talk Keys
The talk keys are used to talk to the destinations indicated in the display window. Talk keys can be activated in either
momentary (push-to-talk) mode or latching (hands-free) mode.
2.5 Page Keys (PG1 TO PG4)
Each page key selects one of four setup pages. Each setup page contains a complete set of talk and listen key
assignments, and by changing setup pages you can completely reconfigure the keypanel.
2.6 Function Keys
2.6.1 Input Level Function Key
The Input Level key works only with ADAM CS and ADAM Intercom Systems. You use this key to adjust the listen
level for individual destinations.
2.6.2 Phone Function Key
The Phone key works with an optional TIF-951 Telephone Interface. You use it to make telephone calls from the
keypanel. (Activating this key is the same as selecting “Phone” on the Function menu at the top of the keypanel.)
2.6.3 Point-To-Point Function Key (P-P)
You use the P-P key as a shortcut to assign an individual intercom port of the local intercom system to a talk and/or
listen key.
2.6.4 IFB Function Key
You use the IFB key as a shortcut to assign an IFB in the local intercom system to a talk key.
2.6.5 Party Line Function Key (PL)
You use the PL key as a shortcut to assign a party line in the local intercom system to a talk and/or listen key.
6 Windows NT Keypanel
Page 7

2.7 Incoming Messages Window and Key
The Incoming Messages window displays a caller's name when no talk key is assigned to that caller.1You use the
Incoming Messages key to respond to the caller. The Incoming Messages key may also be used, along with the
programming keypad, to talk to a destination that does not have a talk key assigned.
2.8 Volume Control
The Volume control adjusts the master listening level.
2.9 Programming Keypad
You use the programming keypad to assign keys and to display information about the keypanel.
2.10 Status Bar
The status bar provides a quick view of keypanel information. The left end of the status bar displays information when
using the pull-down menus. The right end of the status bar displays the keypanel's setup page number, the panel ID and
the connection status indicator. If the connection status indicator is green the data link to the intercom system is
operating, if it is red, no data has been detected.
3 BASIC KEYPANEL OPERATION
3.1 Startup Indications
When the keypanel is started, the alpha-numeric displays will momentarily show asterisks and the connection status
indicator on the status bar will be red.
**** **** **** **** **** **** **** ****
After a few moments, the normal talk key assignments should display and the connection status indicator will turn
green.
VID1 VID2 AUD1 AUD2 MNT1TEL2TEL1
•
For any talk key that is not assigned, the display above it will show dashes.
•
If the keypanel cannot establish communications with the intercom system, all displays will continue to show
asterisks and the connection status indicator will remain red. If this happens, check the connections to the
intercom system and make sure the intercom system is operating.
----
1 This is the default operation. ADAM and ADAM CS intercoms can also be set to display the names
of all callers in the Incoming Messages window. This occurs when DIP switch 2 on each master
controller card in the ADAM or ADAM CS frame is set to the “on” position.
Windows NT Keypanel 7
Page 8

3.2 Volume Adjustment
To adjust the listening level, click and drag the Volume control up or down.
Volume
ADAM CS and ADAM intercom systems also let you adjust the level of individual intercom ports. See “Adjusting
☞
an Input Level”, page 30.
3.3 Talk Key Operation
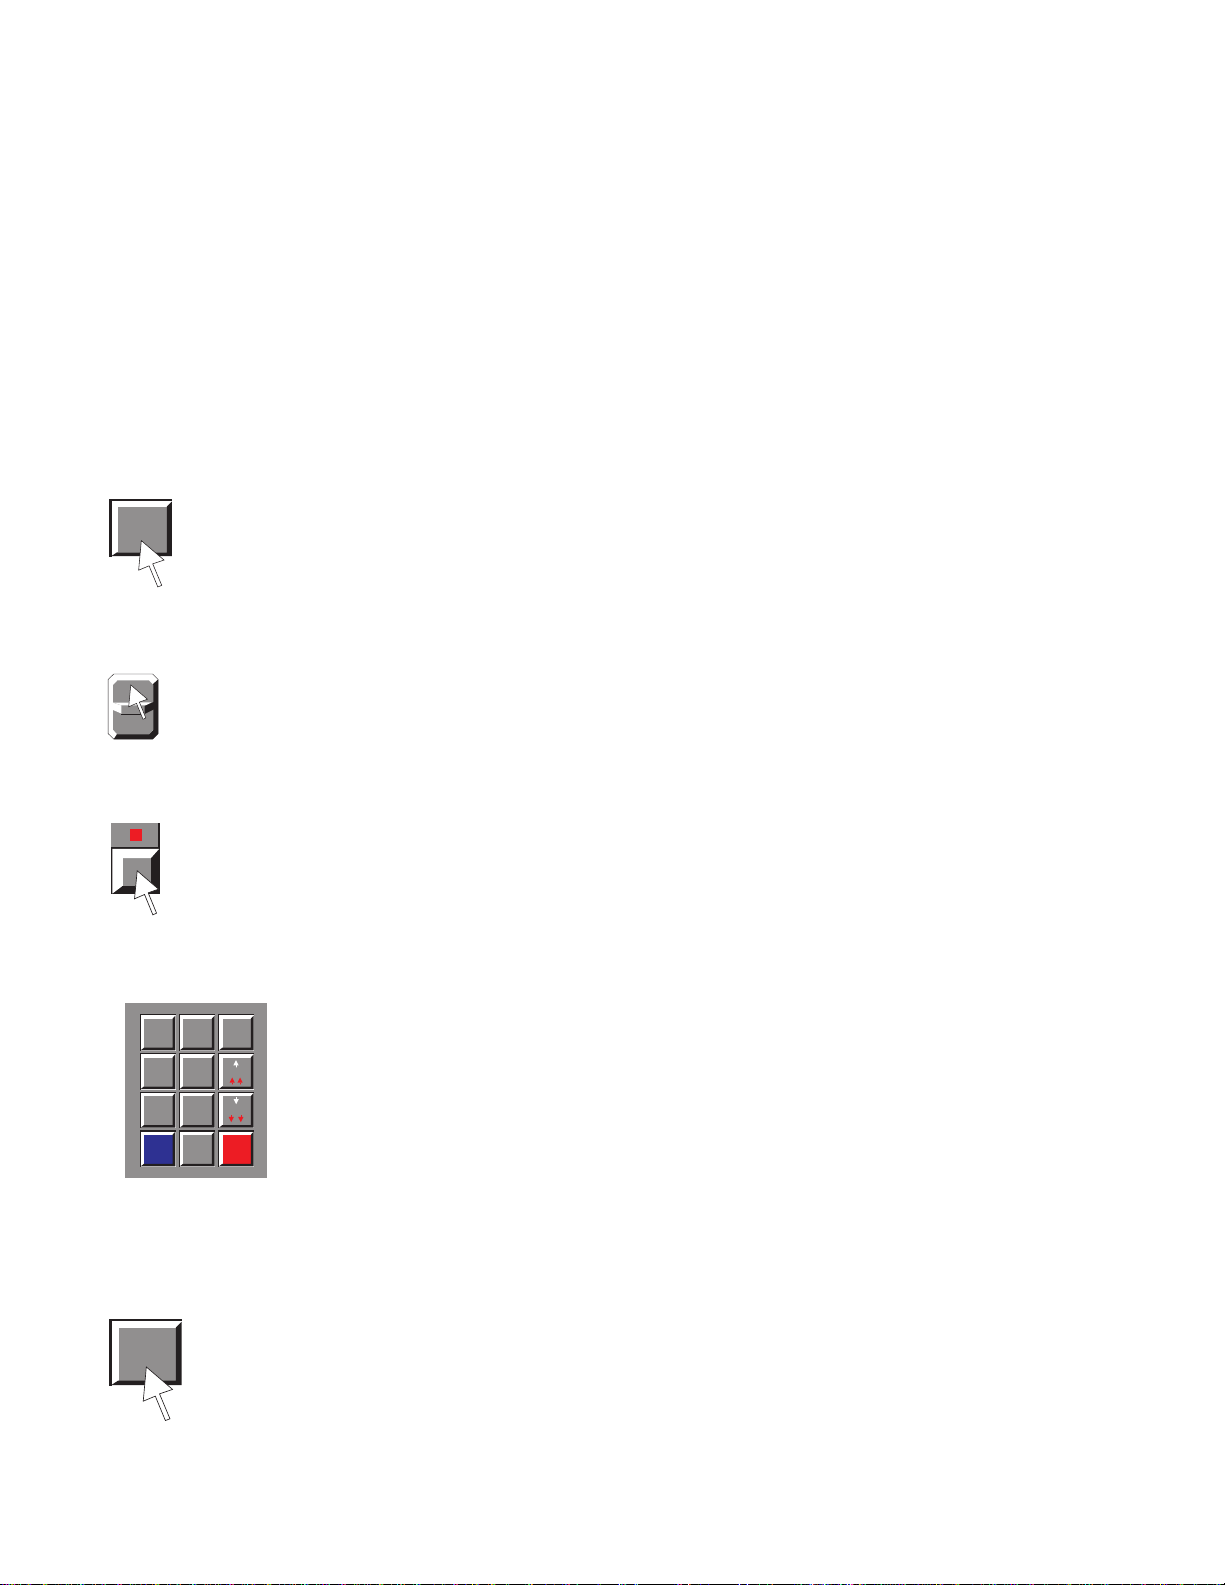
To talk to a destination, activate its talk key in either of two ways:
For momentary talk, click and hold the bottom of the talk key while talking. When you release the key it will return to
the off position.
Momentary Talk
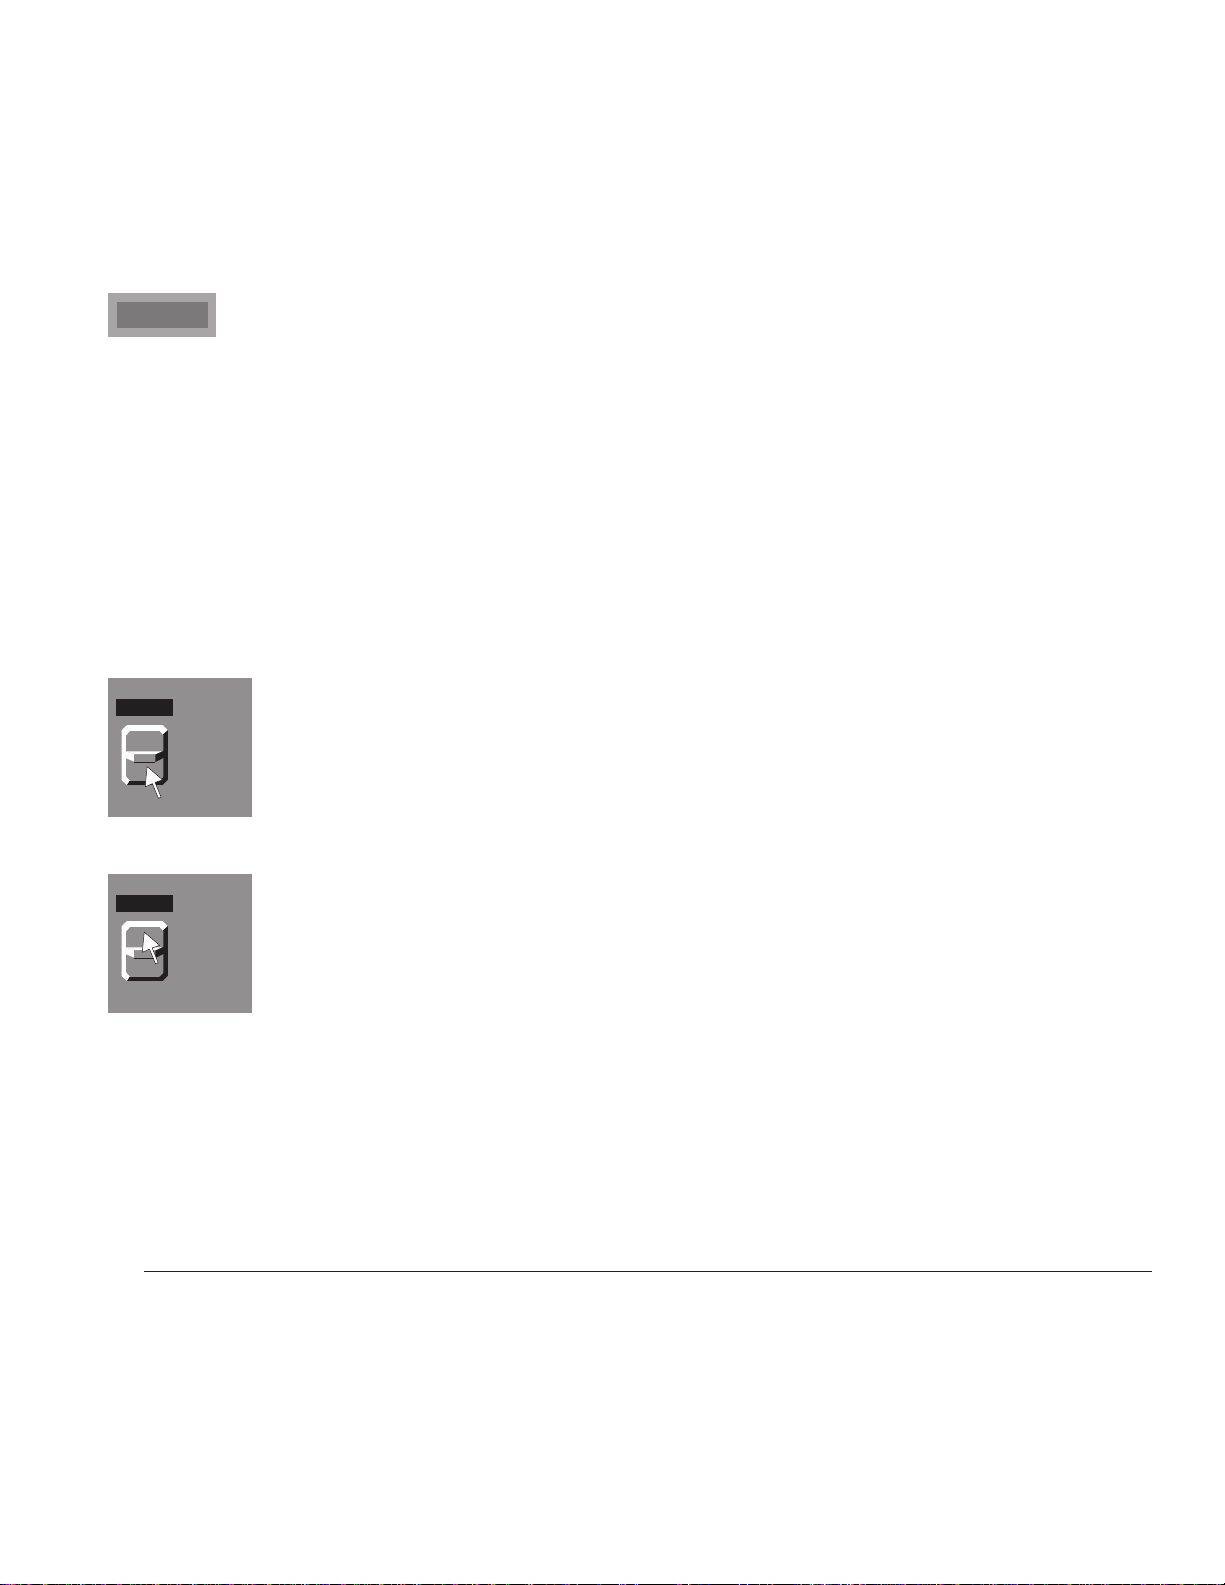
To latch a talk key in the on position for an extended conversation, click on the top of the key.To unlatch the talk key
and turn it off, click on the bottom of the key.
Latch On
The display above a talk key will be lit yellow when the key is off and red when it is on.
☞
Unlatch
Talk keys can also be turned on and off using the F1 through F8 keys on
☞
the computer keyboard.
3.4 Listen Key Operation
You may not be able to hear a destination that you are talking to. In this case, click on the listen key directly above the talk
key. If you still can't hear the destination, it may not have been assigned for listening. See “Assigning Keys”, page 16.
Listen keys can also be turned on and off using the Shift-F1 through
☞
Shift-F8 keys on the computer keyboard.
The red indicator in a listen key is only intended to provide a visual confirmation that you have manually turned
☞
the key on or off. This does not mean that the listen path has been activated. For example, if the listen key has not
been assigned, nothing will happen when you turn it on. Also, the indicator does not provide an indication when
listen has been automatically activated using one of the special functions.
8 Windows NT Keypanel
Page 9
If you find that you're always manually turning a listen key on when you want to talk to a certain destination, you
☞
might want to assign auto listen to that listen key. (See “Special Function Key Assignment”, page 26.)
3.5 Other Display Window Indications
When a talk key is activated, the display above it may alternate between the normal key
•
assignment name and a double asterisk. This indicates that you cannot currently talk to that
--
**
destination. There are two occasions when this happens. The first is when the key is assigned to
an IFB and another keypanel with a higher IFB priority is currently using the IFB. The second
is when the talk key is assigned to a person, party line, etc. of a remote intercom system, and
there are currently no trunking lines available to route the call.
If the display above a talk key begins to flash, this indicates that the destination assigned to that
•
key is calling you. Activate the talk key to talk back. After about 15 seconds, the display will
stop flashing.
If a display above a talk key flashes continuously and does not stop after about 15 seconds, this
•
is an in-use indication. Some other keypanel is currently talking to the indicated destination.
3.6 Answering Calls in the Incoming Messages Window
1DIR
Clear
Off
Call Answer
Incoming Messages
Clear
Off
Call Answer
Incoming Messages
If a destination calls you, and there is no key assigned to that destination, the caller's name will
appear in the Incoming Messages window.
Incoming Messages key.
If the Incoming Messages display begins to flash while a caller's name is displayed, this means
that there is another caller waiting. To clear the first caller's name, click on the top of the
Incoming Messages key.
Then click and hold the bottom of the key again to talk to the next caller. If you do not clear a
name from the Incoming Messages window, it will automatically clear after about 90 seconds.
Up to four callers can be waiting in the Incoming Messages window. Whenever there is more than
one unanswered call the Incoming Messages window will continue to flash.
2
To talk to the caller, click and hold the bottom of the
3.7 Incoming Calls when the Keypanel is Minimizede
If the keypanel is minimized while there is an incoming call, an icon will pop up and flash in the lower-right corner of
the screen. Position the mouse cursor over the icon to identify the caller. Click and hold the icon to talk back. If there is
a second incoming call you will be able to hear the caller’s voice. To talk to the second caller, clear the first call by
right-clicking on the icon.
2 This is the default operation. ADAM and ADAM CS intercoms can also be set to display the names
of all callers in the Incoming Messages window. This occurs when DIP switch 2 on each master
controller card in the ADAM or ADAM CS frame is set to the “on” position.
Windows NT Keypanel 9
Page 10
4 ADVANCED OPERATIONS
4.1 Using a Telephone with the Keypanel
In order to use this feature, your intercom system must be equipped with a TIF-951 Telephone Interface (from here
☞
on referred to as the TIF). Also, your keypanel must have a talk and listen key pair assigned to communicate with
the TIF. See “Assigning Keys”, page 16.
If the display is flashing continously for a talk key that is assigned to the TIF, this indicates that the phone line is
☞
in-use.
4.1.1 Manual Dialing
1. Click the PHONE key to activate dialing mode. (or, select “Phone” on the Function menu.)
PHONE
2. Click the top of the talk key that is assigned to the TIF. This will latch the key in the on position, and the key's
display should turn blank.
If the listen key is set for manual activation, you can either turn it on now to hear the dialing tones as you dial, or
☞
wait until after you dial.
3. Dial the telephone number using the programming keypad or the computer's numeric keypad. As you dial, the
digits should appear in the display above the talk key. If the listen key is turned on, you will also hear dialing tones.
NUM
PL
2
IFB
PREFIX
5
TYPE
E-PNL
8
DISPLAY
MULT
0
FUNC
AUTO
3
ISO
6
9
PGMCLR
1
SLIST
PHONE
4
RELAY
COPYCW
7
EXCOPY
The PGM key is the same as the # key on a telephone. To enter an asterisk (*) click the CLR key twice. (A single
☞
CLR is used with the redial and autodial features, described below.)
4. After dialing the telephone number, click the PHONE key again to exit dialing mode.
PHONE
5. When the destination answers you should be able to carry on a conversation like any other intercom conversation.
10 Windows NT Keypanel
Page 11
4.1.2 Hanging Up
1. Turn off the talk key by clicking on the bottom of the key.
2. Click the PHONE key.
PHONE
3. Again click the bottom of the talk key. The phone line is now disconnected.
4.1.3 Talk Mute During a Phone Conversation
You may turn the talk key off during a phone conversation without hanging up the phone line. This will mute output to
the phone line. Reactivate the talk key to resume your conversation.
4.1.4 Last Number Redial
The last phone number dialed is stored at the TIF. If several people have access to the TIF, redial may not produce
☞
the results that you expect!
1. Click the PHONE key to activate dialing mode.
PHONE
2. Click the top of the talk key assigned to the TIF. (Also activate the listen key now if desired.)
3. Click CLR-0-0 on the programming keypad. The last phone number will redial.
MULT
0
FUNC
MULT
0
FUNC
4. After the number has dialed, click the PHONE key to end dialing mode.
PHONE
Windows NT Keypanel 11
Page 12
5. Proceed with your phone conversation. Hang up when finished using the key sequence:
PHONE
4.1.5 Storing An Autodial Number
The TIF-951 can store up to 32 autodial numbers. Each number can contain up to 30 digits. The numbers are not
retained if there is a loss of power to the TIF, so if this feature is used it's a good idea to power the TIF from an
uninterruptable power source. Store an autodial number as follows:
1. Click the PHONE key to activate dialing mode.
PHONE
2. Click the top of the talk key assigned to the TIF to latch the key on.
3. Dial the telephone number that you want to store using the programming keypad or the computer's numeric
keypad. (The Num Lock key should be on to use the computer’s keypad.)
NUM
PL
2
IFB
PREFIX
5
TYPE
E-PNL
8
DISPLAY
MULT
0
FUNC
AUTO
3
ISO
6
9
PGMCLR
1
SLIST
PHONE
4
RELAY
COPYCW
7
EXCOPY
To insert a pause anywhere in the dialing sequence, enter CLR-CLR-9-9.
99
A pause may be required, for example, if you need to enter a digit to get an outside line and your phone system
requires a pause before continuing to dial. If you are using credit card dialing, several pauses may also be required
between the phone number and your personal access code.
4. After dialing the telephone number, click CLR-PGM, then enter the two-digit number that you will use as the
autodial number
Example: store to autodial number 1.
MULT
PGM
0
FUNC
12 Windows NT Keypanel
NUM
1
SLIST
Page 13

5. After storing the autodial number, hang up by entering the sequence:
PHONE
4.1.6 Dialing An Autodial Number
1. Click the PHONE key to activate dialing mode.
PHONE
2. Click the top of the talk key assigned to the TIF to latch it in the on position.
3. Enter the autodial number by clicking CLR followed by the autodial number.
Example: dial autodial number 1.
MULT
0
FUNC
NUM
1
SLIST
4. When finished dialing, click the PHONE key again to exit dialing mode.
PHONE
5. Hang up at the end of the conversation by entering the sequence:
PHONE
Windows NT Keypanel 13
Page 14

4.2 Assigning Setup Pages
PG1 PG2 PG3 PG4
The easiest way to assign a setup page is by clicking on the desired page key at the bottom of the keypanel. Then click
any talk or listen key to make the assignment. The names of the keys that have been setup on that page will appear in
the display window. If no keys have been assigned on a particular page, the displays will show dashes (----). If you
have created different key assignments on each setup page, you can quickly reconfigure the keypanel by changing the
setup page.
You can also change the page using the "Assign Page" command on the Function menu.
☞
4.3 Displaying Information About the Keypanel
Normally, only talk key assignments appear in the display window. Other types of key assignments, such as listen key
assignments and level 2 talk key assignments, are not displayed. There are three ways to display additional key
assignment information as well as other information about the keypanel:
Using display request key sequences.
•
Using alpha-scrolling.
•
• Using the Display menu at the top of the keypanel. Note, the Display menu basically provides shortcuts for the
other two methods. Use of this menu is not discussed separately.
4.3.1 Displaying Information using Display Request Sequences
All keypad display requests start by clicking FUNC-DISPLAY:
MULT
0
FUNC
Click the CLR key at any time to start over.
4.3.1.1 Keypanel Identification
MULT
0
FUNC
This sequence displays the intercom port number your keypanel is connected to. The number is displayed briefly in the
Incoming Messages window. (This is the same as "Panel ID" on the Display menu at the top of the keypanel.)
E-PNL
8
DISPLAY
E-PNL
8
DISPLAY
NUM
1
SLIST
14 Windows NT Keypanel
Page 15

4.3.1.2 Level 2 Talk Key Assignments for Stacked Talk Keys
MULT
0
FUNC
This sequence displays all level 2 talk key assignments for a few moments. LEV2" displays in the Incoming Messages
window. (This is the same as “Level 2" on the Display menu at the top of the keypanel.)
4.3.1.3 Listen Key Assignments
MULT
0
FUNC
This sequence briefly displays all listen key assignments. “LSTN” displays in the Incoming Messages window. (This is
the same as “Listen” on the Display menu at the top of the keypanel.)
4.3.1.4 Keypanel Setup Page Number
MULT
0
FUNC
When you enter this sequence, the Incoming Messages window displays the setup page number that is currently
assigned to the keypanel. M1, M2 etc. indicates Main keypanel, setup page 1; Main keypanel, setup page 2 etc. (This is
the same as “Page Use” on the Display menu at the top of the keypanel.)
E-PNL
8
DISPLAY
E-PNL
8
DISPLAY
E-PNL
8
DISPLAY
PL
2
IFB
AUTO
3
ISO
E-PNL
8
DISPLAY
4.3.2 Displaying Information using Alpha Scrolling
The display requests that were described in the previous section can also be accessed using alpha scrolling. Alpha
scrolling also offers several additional features. Use this feature as follows:
1. Click FUNC-DISPLAY. Then click and hold either arrow key to scroll up or down in the list of display request
names. The names will appear in the Incoming Messages window as you scroll. (See the descriptions on the
following page.)
MULT
0
FUNC
2. When the desired display request name is selected, click the PGM key to view the requested information.
E-PNL
8
DISPLAY
6
9
PGM
3. Click the CLR key at any time to exit.
Windows NT Keypanel 15
Page 16

DISPLAY REQUEST
NAME
ID (Panel ID)
DESCRIPTION
Briefly displays the intercom port number that the keypanel is connected to. (Same as the FUNCDISPLAY-1 display request sequence. Also the same as "Panel ID" on the Display menu at the top of
the keypanel.)
LEV2 (Level 2)
LSTN (Listen)
NAME (Names)
TYPE (Function Types)
MTX (Matrices)
EPNL (Page Use)
GAIN (Key Gain)
MVOL (Master
Volume)
Briefly displays the level 2 talk key assignments. (Same as FUNC-DISPLAY-2 display request
sequence. Also the same as "Level 2" on the Display menu at the top of the keypanel.)
Briefly displays listen key assignments. (Same as FUNC-DISPLAY-3 display request sequence. Also
the same as "Listen" on the Display menu at the top of the keypanel.)
Gets a list of names of all intercom ports which are currently in communication with this keypanel,
and displays that list in the Incoming Messages window. If there are no ports, N/A will briefly
display. Click the arrow keys to scroll up or down the list. Click the Incoming Messages key to talk to
the currently displayed intercom port. (This is the same as "Names" on the Display menu at the top of
the keypanel.)
Briefly displays the type of communication (point-to-point, party line etc.) for all level 1 talk keys.
(This is the same as "Function Types" on the Display menu at the top of the keypanel.)
Briefly displays the intercom matrix names for all level 1 talk key assignments. If there is only one
intercom system, the word “LOCL” displays to indicate “local matrix”. (This is the same as
"Matrices" on the Display menu at the top of the keypanel.)
Briefly displays the number of the setup page currently being used. (This is the same as the FUNCDISPLAY-8 display request sequence. It is also the same as “Page Use” on the Display menu.)
This feature works only with ADAM CS or ADAM intercom systems. It is used to adjust listen gain
for a point-to-point or party line listen key. After selecting GAIN, click a listen key. After a few
seconds, the gain level for that key will display. Use the arrow keys (6 and 9 keys) to change the gain
level. (This is the same as using the Input Level key or selecting “Key Gain” on the Function menu.)
This feature works only with ADAM CS and ADAM intercom systems. It is used to adjust the master
volume. After selecting MVOL, wait a few seconds for the master volume level to display, then click
the arrow keys (6 and 9 keys) to change the level. (This is the same as “Master Volume” on the
Function menu.)
V”X” (Version)
Where X is the keypanel’s version number. (This is the same as "Version" on the Display menu at the
top of the keypanel.)
Click CLR at any time to return to the normal Incoming Messages window display.
4.4 Assigning Keys
There are several ways to assign talk and listen keys:
•
Key Assignment using Alpha Scrolling: Using this method, you scroll through lists of names in the Incoming
Messages and pick the alpha-numeric name of the destination that you wish to assign to a key. Then you copy
that name to a key. Alpha scrolling is the recommended method of key assignment for most users because it lets
you find a destination by a name rather than a number. If descriptive names have been assigned alpha scrolling
is easiest to use.
16 Windows NT Keypanel
Page 17

Key Assignment using Copy: This method is used along with alpha scrolling, but it can also be used to copy an
•
assignment from one key to another or to copy any destination currently displayed in the Incoming Messages
window to a key.
Key Assignment using Keypad Numeric Entry: Using this method, you enter the numeric ID of the
•
destination that you wish to assign to a key. Numeric entry can be a short-cut method for assigning intercom
keys. However, it is not generally recommended for casual users because it requires a detailed knowledge of the
intercom system ID numbers.
Key Assignment using the Function Keys: Three of the more common types of key assignments (point-to-
•
point, IFB, and party line) can be accessed using the P-P, IFB, and PL function keys along the bottom of the
keypanel. These keys are basically shortcuts for numeric entry described above, but like numeric entry, they are
not recommended for casual users.
4.4.1 Assigning Keys using Alpha Scrolling
Alpha scrolling lets you scroll through lists of intercom systems and destinations within intercom systems. Once the
desired destination is displayed you can copy it to a key. There are four scrolling modes: intercom, type, prefix and
single-step.
4.4.1.1 Intercom Scrolling
If a destination is located in a remote intercom system, click FUNC to enter intercom scroll mode. (Or select “Icom”
from the Scroll menu). Then use the up and down arrow keys to display the name of the desired intercom system in the
Incoming Messages window.
Intercom
Scroll
MULT
0
FUNC
While the desired intercom system name is displayed, activate type scrolling mode, below.
4.4.1.2 Type Scrolling
To display a list of the available key assignment types for any intercom system, Click FUNC-TYPE, then use the arrow
keys to scroll up or down the list of key assignment types.
MULT
0
FUNC
The following abbreviations are used for key assignment types. (These items are also available on the Scroll menu at
the top of the keypanel):
P-P Point-to-Point
RLY Relay
SPCL Special List
PL Party Line
IFB IFB
ISO Camera ISO
PREFIX
5
TYPE
Up
6
Down
9
6
9
Windows NT Keypanel 17
Page 18

Once the desired key assignment type is displayed, click the PGM key to retrieve a list of destinations. WAIT may
display briefly while the list is being retrieved. Clicking PGM at this point also puts the keypanel in single-step
scrolling mode, below.
PGM
Reminder: In addition to selecting key assignment types using type scrolling as described above, you can also
☞
select types from the Scroll menu at the top of the keypanel.
4.4.1.3 Single-Step Scrolling
When a list of destinations is displayed in the Incoming Messages window, use the up and down arrow keys to scroll
through the list.
6
When you locate the destination that you want to assign, copy the Incoming Messages window to a key. (See “Copying
from the Incoming Messages Window to a Key”, page 19.)
If you click the up or down arrow key without first selecting an intercom system or a key assignment type, the
☞
keypanel will automatically enter single-step scrolling mode using the point-to-point list for your intercom system.
If you do not see an expected name in a scroll list, or N/A appears when you select a list, restrictions may have
☞
been imposed in the system configuration software to prevent key assignment.
If the list of available key assignments is very long when using single-step scrolling, you may wish to use prefix
☞
scrolling, below, to speed up the process.
4.4.1.4 Prefix Scrolling
When you are using single-step scrolling with a long list of destinations, it may take a long time to scroll to the desired
name (this is particularly true of point-to-point lists). To speed up the process, enter prefix scrolling mode from singlestep scrolling mode by clicking the PREFIX key.
PREFIX
9
5
TYPE
Once in prefix mode, use the up and down arrow keys to scroll through a list in alpha-numeric order. Only the first
occurrence of each two-character prefix is displayed. For example, if your intercom system had users 1CAM, 2CAM,
3CAM, 1DIR and 2DIR, prefix scrolling would display 1CAM followed by 1DIR and would skip 2CAM and 3CAM.
Once you locate a desired two-character prefix using prefix scroll, switch back to single-step scrolling by clicking the
PGM key. Then use the up and down arrows to scroll to the desired destination name.
When the desired destination is displayed in the Incoming Messages window, you can copy it to a key. See “Copying
the Incoming Messages Window to a Key”, below.
18 Windows NT Keypanel
Page 19

4.4.2 Assigning Keys Using Copy
There are two ways to copy key assignments:
Copy a name from the Incoming Messages window to a key.
•
Copy one key's assignment to another key.
•
4.4.2.1 Copying the Incoming Messages Window to a Key
The key that you are copying to should be off before using this procedure.
☞
1. While a destination name is displayed in the Incoming Messages window, click the COPY CW key. (Or, select
“Copy CW” from the Function menu at the top of the keypanel.)
COPYCW
7
EX COPY
2. Click the key that you want to copy to. You can click either a talk or listen key. If you want to assign both, click
the COPY CW key again between assignments.
If a name cannot be copied from the Incoming Messages window to a key, restrictions may have been imposed
☞
using the intercom system configuration software.
4.4.2.2 Copying a Key's Assignment to Another Key
Special functions and level 2 assignments do not copy.
☞
The keys that you are copying from and to should be off before using this procedure.
☞
1. Click FUNC-EX COPY. (Or, select “Copy Key”from the Function menu at the top of the keypanel.)
MULT
0
FUNC
COPYCW
7
EX COPY
Windows NT Keypanel 19
Page 20

2. Click the talk or listen key that you want to copy from.
3. Click the talk or listen key that you want to copy to.
4. Repeat all steps for each additional key assignment.
If a key will not accept an assignment, restrictions may have been imposed using the intercom system
☞
configuration software.
4.4.3 Assigning Keys Using Numeric Entry
4.4.3.1 General Procedure
The key that you are assigning should be off before using this procedure.
☞
The available types of key assignments are labeled on the programming keys in either white or red letters:
NUM Port NUMbers (point-to-point key assignment)
SLIST Special lists
PL Party lines
IFB IFB's
AUTO Auto functions (also called special functions)
ISO Camera ISO's
RELAY Relays
If a key assignment type is labeled in white letters, you can begin a key assignment by simply clicking that key. For
example, to assign a port NUMber to a key click the NUM key.
NUM
1
SLIST
If a key assignment type is labeled in red letters, click the FUNC key first, then click the desired red-lettered key. For
example, to assign a special list to a key, click FUNC then SLIST.
MULT
0
FUNC
NUM
1
SLIST
20 Windows NT Keypanel
Page 21

Once you have selected the key assignment type, the procedure to assign a destination to a key is basically the same for
all key assignments:
1. If your keypanel is used in a trunked intercom system, enter the identification number for the intercom system
where the destination is located (7 for example). If trunking is not used, skip this step.
COPYCW
7
EX COPY
Intercom system numbers are the numbers that appear in the “Icm” column in CStrunk when you select “Names”
☞
or “Setup” from the Intercoms menu.
2. Enter the identification number for the destination that you wish to assign to a key.
If the destination is located in a remote intercom system, you must always enter 3 digits for a port number or 2
digits for any other key assignment type. Add leading zeros if necessary. For example, to assign a key to talk to
port number 1 in a remote intercom system, click 0-0-1.
MULT
0
FUNC
If the destination is located in your intercom system, you do not have to enter leading zeros.
3. Click the PGM key.
MULT
0
FUNC
NUM
1
SLIST
PGM
4. Click the talk or listen key that you want to assign the destination to. (The key should be in the off position before
you click it.)
5. If you make a mistake when entering a key sequence, click the clear key, then start over.
When using numeric entry, each step must be completed within 4-5 seconds. Otherwise, the sequence will
☞
automatically clear.
If a key will not accept an assignment, restrictions may have been imposed using the intercom system
☞
configuration software.
Windows NT Keypanel 21
Page 22

4.4.3.2 Point-To-Point Key Assignment Using Keypad Numeric Entry
The key that you are assigning should be off before starting this procedure.
☞
1. Point-to-point key assignments start by clicking the NUM key (since you are assigning a port NUMber to a key).
NUM
1
SLIST
2. If the destination is located in another intercom system, enter the intercom system number (7 in the example).
Otherwise, skip to step 3.
COPYCW
7
EX COPY
Intercom system numbers are the numbers that appear in the “Icm” column in CStrunk when you select “Names”
☞
or “Setup” from the Intercoms menu.
3. Enter the port identification number of the destination that you want to assign (37 for example:)
MULT
0
FUNC
A leading zero is entered in this example because the intercom port is located in a remote intercom system, which
☞
requires that 3 digits be entered. If it was port 37 in the local intercom system, you would only need to enter 37.
4. Click the PGM key.
AUTO
3
ISO
COPYCW
7
EX COPY
PGM
5. Click a talk or listen key.
N037
•
If a talk key is clicked, the port's name (not ID number) will appear in the alpha-numeric display above that key.
(In this example, the default name N037" is shown, but it could be any name of up to 4-characters assigned
using the intercom system configuration software.)
•
If a listen key is clicked, the port's name will appear briefly in the display below that key. Then the talk key
assignment will reappear. (If there is no talk key assignment, dashes will reappear.) To re-check listen key
assignments at any time, use the listen key display request sequence FUNC-DISPLAY-3.
22 Windows NT Keypanel
Page 23

If a key will not accept an assignment, restrictions may have been imposed using the intercom system
☞
configuration software.
4.4.3.3 Special List Key Assignment Using Keypad Numeric Entry
The key that you are assigning should be off before starting this procedure.
☞
1. Special list is a red-labeled function, so click the FUNC key first, then SLIST.
MULT
0
FUNC
2. If the special list is located in another intercom system, enter the intercom system number (7 in this example).
Otherwise, skip this step.
COPYCW
NUM
1
SLIST
7
EX COPY
Intercom system numbers are the numbers that appear in the “Icm” column in CStrunk when you select “Names”
☞
or “Setup” from the Intercoms menu.
3. Enter the special list identification number (4 in this example).
MULT
0
FUNC
If the special list is in a remote intercom system, you must always enter 2 digits by adding a leading zero if
☞
required. If the special list is in the local intercom system, you do not have to enter a leading zero.
PHONE
4
RELAY
4. Click the PGM key.
PGM
5. Click a talk or listen key.
SL04
•
If a talk key is clicked, the name of the special list (not the ID number) will appear in the alpha-numeric display
above that key. (The default name for special list number 4 is shown in this example.)
Windows NT Keypanel 23
Page 24

If a listen key is clicked, the name of the special list will appear briefly in the display, then the talk key
•
assignment will reappear. To recheck listen key assignments at any time, use the listen key display request
sequence FUNC-DISPLAY-3.
If a key will not accept an assignment, restrictions may have been imposed using the intercom system
☞
configuration software.
4.4.3.4 Party Line Key Assignment Using Keypad Numeric Entry
The key that you are assigning should be off before proceeding.
☞
1. Click the PL key.
PL
2
IFB
2. If the party line is located in a remote intercom system, enter the intercom system number (7 in the example).
Otherwise, skip to step 3.
COPYCW
7
EX COPY
Intercom system numbers are the numbers that appear in the “Icm” column in CStrunk when you select “Names”
☞
or “Setup” from the Intercoms menu.
3. Enter the party line number (4 in this example).
MULT
0
FUNC
If the party line is in a remote intercom system, you must always enter 2 digits by adding a leading zero if required.
☞
If the party line number is in the local intercom system, you do not have to enter a leading zero.
4. Click the PGM key.
PHONE
4
RELAY
PGM
5. Click a talk or listen key.
PL04
•
If a talk key is clicked, the name of the party line (not the ID number) will appear in the alpha-numeric display
above that key. The default name for party line number 4 is shown in this example.
24 Windows NT Keypanel
Page 25

If a listen key is clicked, the name of the party line will appear briefly in the display, then the talk key
•
assignment will reappear. To recheck listen key assignments at any time, use the listen key display request
sequence FUNC-DISPLAY-3.
If a key will not accept an assignment, restrictions may have been imposed using the intercom system
☞
configuration software.
If desired, you can program the listen key with the auto-listen special function so that it is automatically activated
☞
when the talk key is activated. See “Special Function Key Assignment using Keypad Numeric Entry”, page 26, for
further information.
4.4.3.5 IFB Key Assignment Using Keypad Numeric Entry
The key that you are assigning should be off before proceeding.
☞
1. Since IFB is a red-labeled function, begin by clicking the FUNC key, then the IFB key.
MULT
0
FUNC
2. If the IFB is located in a remote intercom system, enter the intercom system number (5 in this example).
Otherwise, skip to step 3.
PREFIX
PL
2
IFB
5
TYPE
Intercom system numbers are the numbers that appear in the “Icm” column in CStrunk when you select “Names”
☞
or “Setup” from the Intercoms menu.
3. Enter the IFB number (2 in this example).
MULT
0
FUNC
If the IFB is in a remote intercom system, you must enter 2 digits by adding a leading zero if required. If the IFB is
☞
in the local intercom system, you do not have to enter a leading zero.
PL
2
IFB
4. Click the PGM key.
PGM
Windows NT Keypanel 25
Page 26

5. Click a talk key.
IF02
The name of the IFB (not the ID number) will appear in the alpha-numeric display above that key. The default name for
IFB number 2 is shown in this example.
If a key will not accept an assignment, restrictions may have been imposed using the intercom system
☞
configuration software.
4.4.3.6 Special Function Key Assignment using Keypad Numeric Entry
The key that you are assigning should be off before proceeding.
☞
1. Click the AUTO key.
AUTO
3
ISO
2. Select one of the following special functions:
NUM
1
SLIST
PL
2
IFB
AUTO
3
ISO
PHONE
4
RELAY
PREFIX
5
TYPE
Auto Listen (AL)
Auto Follow (AF)
Auto Mute (AM)
Auto Reciprocal (AR)
All Call (AC)
26 Windows NT Keypanel
Page 27

3. After selecting a special function, click the PGM key.
PGM
4. Click a listen key for all features except All Call, or...
...click a talk key for All Call.
If a listen key is clicked to assign one of the auto functions, the name will briefly appear in the display below the key. If
a talk key is clicked for All Call, AC will appear in the alpha-numeric display above the key.
If a key will not accept an assignment, restrictions may have been imposed using the intercom system
☞
configuration software.
4.4.3.7 Camera ISO Key Assignment Using Keypad Numeric Entry
The key that you are assigning should be off before proceeding.
☞
1. Since ISO is a red-labeled function, begin by clicking the FUNC key, then click the ISO key.
MULT
0
FUNC
2. If the ISO is located in a remote intercom system, enter the intercom system number (5 in this example).
Otherwise, skip to step 3.
PREFIX
AUTO
3
ISO
5
TYPE
Intercom system numbers are the numbers that appear in the “Icm” column in CStrunk when you select “Names”
☞
or “Setup” from the Intercoms menu.
3. Enter the ISO number (2 in this example).
MULT
0
FUNC
PL
2
IFB
If the ISO is in a remote intercom system, you must enter 2 digits by adding a leading zero if required. If the ISO is
☞
in the local intercom system, you do not have to enter a leading zero.
Windows NT Keypanel 27
Page 28

4. Click the PGM key.
PGM
5. Click a talk or listen key.
IS02
If a talk key is clicked, the name of the ISO (not the ID number) will appear in the alpha-numeric display above that
key. The default name for ISO number 2 is shown in this example.
If a listen key is clicked, the name of the ISO will appear briefly in the display, then the talk key assignment will reappear.
To recheck listen key assignments at any time, use the listen key display request sequence FUNC-DISPLAY-3.
If a key will not accept an assignment, restrictions may have been imposed using the intercom system
☞
configuration software.
If desired, you can program the listen key with the auto-listen special function so that it automatically activates
☞
when the talk key is activated. See “Special Function Key Assignment using Keypad Numeric Entry”, page 26, for
further information.
4.4.3.8 Relay Key Assignment Using Keypad Numeric Entry
The key that you are assigning should be off before proceeding.
☞
1. Since relay is a red-labeled function, begin by clicking the FUNC key, then the RELAY key.
MULT
0
FUNC
2. If the relay is located in a remote intercom system, enter the intercom system number (5 in this example).
Otherwise, skip to step 3.
PREFIX
PHONE
4
RELAY
5
TYPE
Intercom system numbers are the numbers that appear in the “Icm” column in CStrunk when you select “Names”
☞
or “Setup” from the Intercoms menu.
3. Enter the relay number (2 in this example).
MULT
0
FUNC
PL
2
IFB
28 Windows NT Keypanel
Page 29

If the relay is in a remote intercom system, you must enter 2 digits by adding a leading zero if required. If the relay
☞
is in the local intercom system, you do not have to enter a leading zero.
4. Click the PGM key.
PGM
5. Click a talk or listen key.
RL02
If a talk key is clicked, the name of the relay (not the ID number) will appear in the alpha-numeric display above that
key. The default name for relay number 2 is shown in this example.
If a listen key is clicked, the name of the relay will appear briefly in the display, then the talk key assignment will
reappear. To recheck listen key assignments at any time, use the listen key display request sequence FUNC-DISPLAY-3.
4.4.4 Assigning Keys using the P-P, IFB, and PL Function Keys
These function keys provide instant access to the point-to-point, IFB, and party line key assignment lists for the local
intercom system. They cannot be used with remote intercom systems. You can use these function keys to assign keys,
or to talk to destinations that do not have keys assigned.
1. Click the desired function key:
P-P Gets the point-to-point list for the local intercom system.
IFB Gets the list of IFB’s for the local intercom system.
PL Gets the list of party lines for the local intercom system.
2. The list of available assignments will appear in the Incoming Messages window. Use single-step scrolling and
prefix scrolling to scroll through the list of names and locate the desired destination.
3. To talk to the destination, click and hold the bottom of the Incoming Messages key. Release the key when finished.
4. To assign the destination to a talk or listen key, first make sure that key is off, then click the COPY CW key. Then
click the talk or listen key. If you want to assign both a talk and a listen key, click the COPY CW key again before
each assignment.
If a key will not accept an assignment, restrictions may have been imposed using the intercom system
☞
configuration software.
Windows NT Keypanel 29
Page 30

4.4.5 Assigning a Stacked Talk Key
1. Assign talk level 1 using any of the standard key assignment methods previously described.
2. Assign talk level 2 using keypad numeric entry. Make the assignment like any key assignment, except enter 00
before the key sequence.
Example: Assign port number 35 as the level 1 key assignment. Assign relay 5 as the level 2 assignment:
Using keypad numeric entry, the key sequence for the level 1 assignment would be:
NUM
1
SLIST
The key sequence for the level 2 assignment would be:
MULT
0
FUNC
The level 2 key assignment will display briefly after the talk key is clicked. Then, the level 1 talk assignment will
reappear in the display.
4.4.6 Clearing a Key Assignment
There are two ways to clear a key assignment:
1. Copy the key assignment of an unused key to the key that you want to clear. See “Copying a Key's Assignment to
Another Key”, page 19.
2. Clear the Incoming Messages window (click the Incoming Messages key up). Then, copy the Incoming Messages
window to the key that you want to clear. See “Copying from the Incoming Messages Window to a Key”, page 19.
If you cannot clear a key, restrictions may have been imposed using the intercom system configuration software.
☞
AUTO
3
ISO
MULT
0
FUNC
PREFIX
5
TYPE
MULT
0
FUNC
PGM
PHONE
4
RELAY
PREFIX
5
TYPE
PGM
4.5 Adjusting an Input Level
This feature works only for ADAM CS and ADAM Intercom Systems. You use it to adjust the level of individual listen
keys. To adjust an input level:
1. Click the Input Level key. (Or, select “Key Gain” from the Function menu.)
INPUT
LEVEL
2. Click the listen key that you want to adjust.
30 Windows NT Keypanel
Page 31

The key's listen level will display in the Incoming Messages window.
+6DB
Clear
Off
Call Answer
Incoming Messages
3. Click the down or up arrow keys on the programming keypad to change the level. The range of adjustment is +6
dB to -99 dB. You will hear the change as you make the adjustment.
6
Volume
Up
9
Volume
Down
4. After setting the level as desired, click the Input Level key again to exit.
INPUT
LEVEL
4.6 Talking to a Destination That Does Not Have a Talk Key Assigned
Occasionally, you may need to talk to a destination that does not have a key assigned on your keypanel. You can create
a temporary talk key using the Incoming Messages key. Use alpha scrolling as previously described. When the desired
name is displayed in the Incoming Messages window, click and hold the bottom of the Incoming Messages key to talk.
Note that this procedure generally only works when talking to other keypanels. It is not recommended for use with belt
packs or party lines when you need to carry on a conversation, since you won't be able to hear them. If you need to
have a conversation with a destination that does not have talk-back capability, you must assign a talk/listen key pair.
Windows NT Keypanel 31
Page 32

5 Glossary
ADAMedit
ADAMedit is the windows-based software utility used to configure the intercom system.
Alphas and Alpha Scrolling
Alphas are the names that appear in the alpha-numeric displays when keys are assigned to talk to destinations in the
intercom system. Alpha names are assigned using CSedit or ADAMedit.
Alpha scrolling is way of assigning keys by scrolling through scroll lists of destination names and selecting names to
assign to keys. Alpha scrolling can also be used to display information about the keypanel.
Camera Isolate (ISO)
Camera isolate is a feature that is typically used in a broadcasting environment. It is used with camera intercoms that
have been assigned to party lines. ISO provides a means for a keypanel operator to isolate a particular camera from the
party line and then carry on a private conversation with that camera operator. ISO's are built in to the intercom system
and have default names IS01, IS02 etc. These names can be changed using CSedit or ADAMedit. CSedit or ADAMedit
is also used to define the intercom port that will be isolated. Once an ISO is setup, it may be assigned to a key by the
keypanel user (unless access has been restricted by CSedit or ADAMedit).
CSedit
CSedit is the DOS-based software utility used to configure the intercom system.
Destination
A destination is any of the following items which can be assigned to talk and listen keys:
Ports
Special Lists
Party lines
IFB's
Camera ISO's
Relays
Identification Numbers
In trunked intercom systems, each intercom system has a two-digit ID number. This number appears in the Icom
column in CStrunk when Names or Setup is selected from the Intercoms menu.
Within each intercom system, each destination has a unique identification number of up to 3 digits. These identification
numbers appear in the various editing screens of CSedit or ADAMedit. You can find out the identification number for
your keypanel by entering display request key sequence 0-8-1 on the programming keypad.
There are also ID numbers associated with each intercom port, party line, etc. within an intercom system.
32 Windows NT Keypanel
Page 33

Identification numbers are generally only used at keypanels when assigning keys using numeric entry. Since most
intercom system users do not normally have access to the ID numbers, alpha scrolling is generally recommended when
assigning keys.
Interrupt Foldback (IFB)
IFB is a special use of an intercom output port. Normally, the port hears a program source connected to some intercom
input port. When a keypanel calls the IFB output, the program is automatically interrupted, and the caller can then talk
to the person at the IFB output without the program sound being heard. IFB's are built in to the intercom system and
have default names IF01, IF02 etc. These names can be changed using CSedit or ADAMedit. CSedit or ADAMedit is
also used to define the program input and output ports for an IFB. Once an IFB is setup, it may be assigned to keypanel
keys using CSedit or ADAMedit, and an IFB priority can also be assigned to individual keypanels to control IFB use.
Keypanels with a higher IFB priority will override keypanels with a lower. IFB’s can also be assigned to keys by
keypanel users, unless access has been restricted by CSedit or ADAMedit.
Local vs Remote Intercom System
The local intercom system is always the one that your keypanel is connected to. If your intercom system is part of a
larger trunking intercom system, there may be one or more remote intercom systems as well.
Matrix
Matrix refers to the central switching frame which routes calls throughout the intercom system.
The term matrix may also be used interchangeably with intercom system.
Numeric Entry
Numeric entry is a method of assigning keys by entering destination ID numbers using the programming keypad.
Party Line (PL)
A party line is a group of intercom ports which can always talk and/or listen to each other. Party lines are built in to the
intercom system, and have default names PL01, PL02 etc. These names can be changed using CSedit or ADAMedit.
CSedit or ADAMedit is also used to assign the desired intercom ports to a party line. Once a party line has been
configured in CSedit or ADAMedit, it can be assigned to a key by the keypanel user (unless it has been restricted using
CSedit or ADAMedit).
Point-to-Point Communication
Point-to-point refers to communication between two individual intercom ports.
You use point-to-point key assignment when you want to assign a key to talk/listen to a specific keypanel, belt pack
etc.
Ports and Port Numbers
The ports are the individual channels that intercom stations, program sources etc. are connected to. Communication
between individual ports is called point-to-point communication.
Relays
Relays are optional in most intercom systems. If an intercom system includes relays, they may be assigned to talk or
listen keys by the keypanel operator (unless restrictions have been imposed using CSedit or ADAMedit ). Relays may
Windows NT Keypanel 33
Page 34

be used from a keypanel to control lighting, for example, or to key a transmitter and talk to a mobile user. Relays have
default names RY01, RY02 etc. These names can be changed using CSedit or ADAMedit.
See also: Stacked Talk Keys
Restricting Access
CSedit or ADAMedit can restrict access to specific destinations in the intercom system. When a destination is
restricted, it's alpha name won't appear when using alpha scrolling at a keypanel. And, when using numeric entry or the
copy functions to make a key assignment, the assignment will be ignored.
CSedit or ADAMedit can also restrict access to specific keys on a keypanel. Any attempts to reassign these keys will
be ignored.
Setup Pages
A setup page is a complete set of talk and listen key assignments for the keypanel. The keypanel has four setup pages to
choose from.
Special Functions
There are five special functions that can be assigned to keys. One of them, All Call, is for talk keys only. The other four
special functions are for listen keys only. Each special function has a default two-character name*:
AC All Call
AF Auto Follow
AL Auto Listen
AM Auto Mute
AR Auto Reciprocal
* The default names can be changed in CSedit or ADAMedit.
All Call Special Function (AC)
This special function key assignment can only be assigned to talk keys. When a talk key is programmed for All Call,
clicking that key will activate it and all talk keys to the left of it (up to, but not including another All Call key).
Auto Follow Special Function (AF)
Auto Follow (for listen keys only): This special function causes a listen key's assignment to always be the same as the
talk key directly below it. Auto follow is a convenient assignment because you only have to assign a listen key once.
Then, whenever you change the talk key assignment, the listen key automatically follows to the new assignment.
When you assign auto-follow to a listen key, you may still have to manually activate the key to hear certain types of
destinations. There are other types of auto-following listen key assignments that take care of key activation for you.
Auto Listen Special Function (AL)
Auto Listen (for listen keys only): This special function key assignment works like auto follow, except that listen is
automatically engaged when the talk key is activated. Auto listen is sometimes a good listen key assignment for use
with party lines or other non-keypanel devices such as belt packs. This is because these devices do not have the talk-
34 Windows NT Keypanel
Page 35

back capability that keypanels have. If you find that you're always activating the listen key when you want to talk to a
particular destination, you might want to assign auto-listen to that listen key.
Auto Mute Special Function (AM)
Auto Mute (for listen keys only): This special function key assignment works like auto follow, except that listen is
automatically muted when the talk key is activated. Auto mute is useful for talking to devices which echo your voice
back to you. If you find that you need to activate the listen key when conversing with a destination, but you hear an
echo whenever you activate the talk key and talk back, consider assigning auto mute to the listen key.
Auto Reciprocal (for listen keys only): This special function key assignment works like auto follow, but it forces the
keypanel to continuously listen to whatever is assigned to the talk key beneath it. Auto reciprocal is useful when you
wish to continuously monitor a source such as a party line.
Special List (SL, SPCL, or SLIST)
A special list is a group of intercom ports that a keypanel operator can talk or listen to by activating a single key.
Special lists are typically used for paging or monitoring selected groups of people. Special lists are built in to the
intercom system, and have default names SL01, SL02 etc. These names can be changed using CSedit or ADAMedit.
CSedit or ADAMedit is also used to assign the desired intercom ports to the special list. Once a special list has been
configured in CSedit or ADAMedit, it can be assigned to a key by the keypanel user (unless it has been restricted using
CSedit or ADAMedit).
Stacked Talk Keys
A stacked talk key activates two types of communication at once. For example, a stacked talk key could simultaneously
activate audio output to a transmitter and key the transmitter using a relay. The audio output is called the level l
assignment and the relay is called the level 2 assignment.
TIF-951 Telephone Interface
The TIF-951 is a device that lets you connect two phone lines to two intercom ports. The TIF has dial in and dial out
capability. Persons calling into the intercom system can access specific intercom stations by entering ID numbers using
the phone's keypad. Other features include: password protection for incoming calls; auto-answer capability; redial, and
32 programmable autodial numbers.
Trunking
Trunking is a method of interconnecting several intercom systems to create communication channels between them. If
your intercom system is trunked, there will be an additional scroll list of intercom system names (labeled MTX) when
you make key assignments.
CStrunk is the software utility used to configure the trunking lines between the intercom systems and to assign names
to the intercom systems.
Windows NT Keypanel 35
Page 36

36 Windows NT Keypanel
Page 37

Index
F
A
Asterisk
Entering an asterisk when dialing 10
IFB or trunk busy 9
No connection to intercom 7
Autodial
Dialing An Autodial Number 13
Storing an autodial number 12
C
Connection Status Indicator
Not connected to intercom 7
Customer Support 2
D
Dialing
asterisk key (*) 10
Last Number Redial 11
pound key (#) 10
Storing An Autodial Number 12
Display indications
continuous talk display flash 9
incoming call flash 9
Incoming Messages display flash 9
phone line in-use 10
talk on/off 8
Display Menu
Described 5
Function Types 16
Level 2 15
Listen 15
Matrices 16
Names 16
Page Use 15
Panel ID 14
Shortcut for display request and alpha-scroll 14
Display Request Sequences 14
Display Window 6
E
Exit 5
File Menu 5
Flash indications
double asterisk 9
Incoming call 9
in-use continuous flash 9
Function Keys
Assigning Keys with 29
Described 6
Function menu
Assign Page 14
Copy CW 19
Copy Key 19
Described 6
Key Gain 30
Master volume 16
H
Hanging Up 11
Help Menu 6
I
IFB
double asterisk flash for busy indication 9
IFB definition 33
IFB Function Key, described 6
IFB Function Key, operation 20
IFB Key Assignment Using Keypad Numeric Entry
25
type scrolling 17
Incoming Messages Window and Key
Answering calls 9
Described 7
flashing indication 9
Input Level Function Key 6
K
Key Gain 16
Keypanel Features 5
Keypanel Identification
Display request sequence 14
panel ID on status bar 7
Windows NT Keypanel 37
Page 38

L
Latching talk 8
Listen key indicator 8
Listen Keys
Described 6
Operation 8
Special Function Key Assignments 26
M
Manual Dialing 10
Menu Bar 5
Minimized
Incoming call when the keypanel is minimized 9
Momentary talk 8
Mute During a Phone Conversation 11
O
Open 5
P
Page Keys
Described 6
Party Line Function Key (PL) 6
PG1 TO PG4 6
Phone 10
Dialing An Autodial Number 13
Function key, described 6
Hanging Up 11
Last Number Redial 11
Manual Dialing 10
On Function menu 6
Storing An Autodial Number 12
Talk Mute 11
Point-To-Point Function Key (P-P) 6
P-P
Function key operation 29
Key, described 6
Type scrolling 17
Programming Keypad
Described 7
Manual dialing 10
Reference View 5
Return Authorization 2
Return Instructions 2
S
Save 5
Scroll Menu 5
Setup Pages
Assigning 14
Special Functions
Activation not indicated 8
Starting the Keypanel 5
Startup Indications 7
Status Bar 7
T
Talk Keys
Described 6
Operation 8
TIF-951 Telephone Interface
Required for telephone use of the keypanel 10
Trunking
double asterisk flash for busy indication 9
V
Version 16
Volume Control
Adjustment 8
Described 7
W
Warranty Information 2
R
Redial 11
38 Windows NT Keypanel
 Loading...