

RTS KrimpVark User Manual


RT S Help Line
Dear client should you experience any
difficulties or problems on your RTS Product
(s) please feel free to contact our office at
086100 2525
Weekdays between 08H00 and 17H00
We will gladly assist you with your purchased
RTS Product (s)
This radio have been programed
with the following factory defaults:
Channel 1-8 with CTCSS 94.8 Hz
Channel 9-16 with CTCSS 131.8Hz

CONTENTS
Introduction………………………………………1
Unpacking and check devices……………………2
Accessory List……………………………………2
Main Features……………………………………3
Technical information……………………………4
Identification………………………………………6
Preparation for Using……………………………7
PC Software Programming Setting………………12
Operation Guide…………………………………13
Maintenance………………………………………17
Troubleshooting…………………………………19
Appendix: CTCSS QT and DCS DQT Chart ……22

Introduction
Thanks for purchasing RTS Krimpvark radio.
Please read this manual carefully to learn its
functions and ope rat i o ns bef ore usi ng .
With mini compact size, stable performance,
and easy-to-use feature, transceiver Krimpvark is
developed for wide using. It offers you a normal
communication when you are in the rur al area, fo rest
zone, pasturing area or sea area. The fine appearance
of Krimpvark m eet s your nee ds of pe rs onal ity
.
- 1 -

Unpacking and check the devices
Please take the radio out carefully from the
package, and check again before disposing of the
packing to make sure that all the following items are
contained in the packaging. If any of them are
missing or damaged du ri n g t ransportation, pl ease
contact with the vendor for service.
Accessories list
Description Unit Quantity
Antenna pc 1
Belt clip pc 1
Lithium
battery pack
pc 1
Charger pc 1
Wrist string pc 1
Warranty card pc 1
QC passed
card
pc 1
User Manual book 1
- 2 -

Main Feature
1、400--470MHz full frequency
2、Chinese and English channel report
3、High and low power optional
4、wide and narrow band optional
5、CTCSS/50 and DCS/83 squelch system to
avoid the disturbance from other radio station.
6 、 VOX function ,free your hands , easy
operation
7、BCL(busy channel lock)function to know
the busy state
8、SCAN function, scan all the channels
9、Built-in FM-radio to know the latest new at
anytime.
10、power-save function to make the standby
time longer.
All the above functions are edited by PC
programming software. And the transceiver has the
following functions itself:
- 3 -

1. Emergency alarm function gives you more
peace.
2. Rime elimination function will eliminate
the noise when stop talking.
Technical Information
GENERAL
Frequency range
400MHz-470MHz
Number of channel 16
Channel spacing 12.5kHz / 25kHz
Modulation method FM
Operating temperature range -10℃ --- +
55℃
Voltage 3.7V---4.2V
Standby Current about 10mA(Save Power
State)
Size 95(H) × 53(W) × 30(D)mm
Weight about 135g
- 4 -

TRANSMITTER
Frequency stabilization ≤5ppm
Output power ≤3.5W
Emission current ≤1.3A
Maximum frequency deviation ±5kHz
Audio distortion <10%
Adjacent channel power <70dB
Residual radiation <-60dB
RECEIVER
Reference sensitivity <-122dBm
(12dB SINAD)
Sensitivity lock <-126dBm
Audio Power ≥500mW
Receiving current ≤300mA
Audio distortion <10%
Adjacent channel selection ≥60dB
Intermodulation rejection ≥60dB
- 5 -

Identification
- 6 -

1. Pendent hole 2.Belt Clip Stator
3. Indicated Light 4. Antenna
5 .Volume Knob 6. Channel Knob;
7. Belt Clip; 8. PTT
9. Earphone Jack
10. FM Radio/Monitor/Reception+
11. Speaker 12. Call/Reception-
13. MIC 14. Charging Contact Plate
15. USB Char ging Jack 16. Antenna Terminal
- 7 -
Preparation before Using
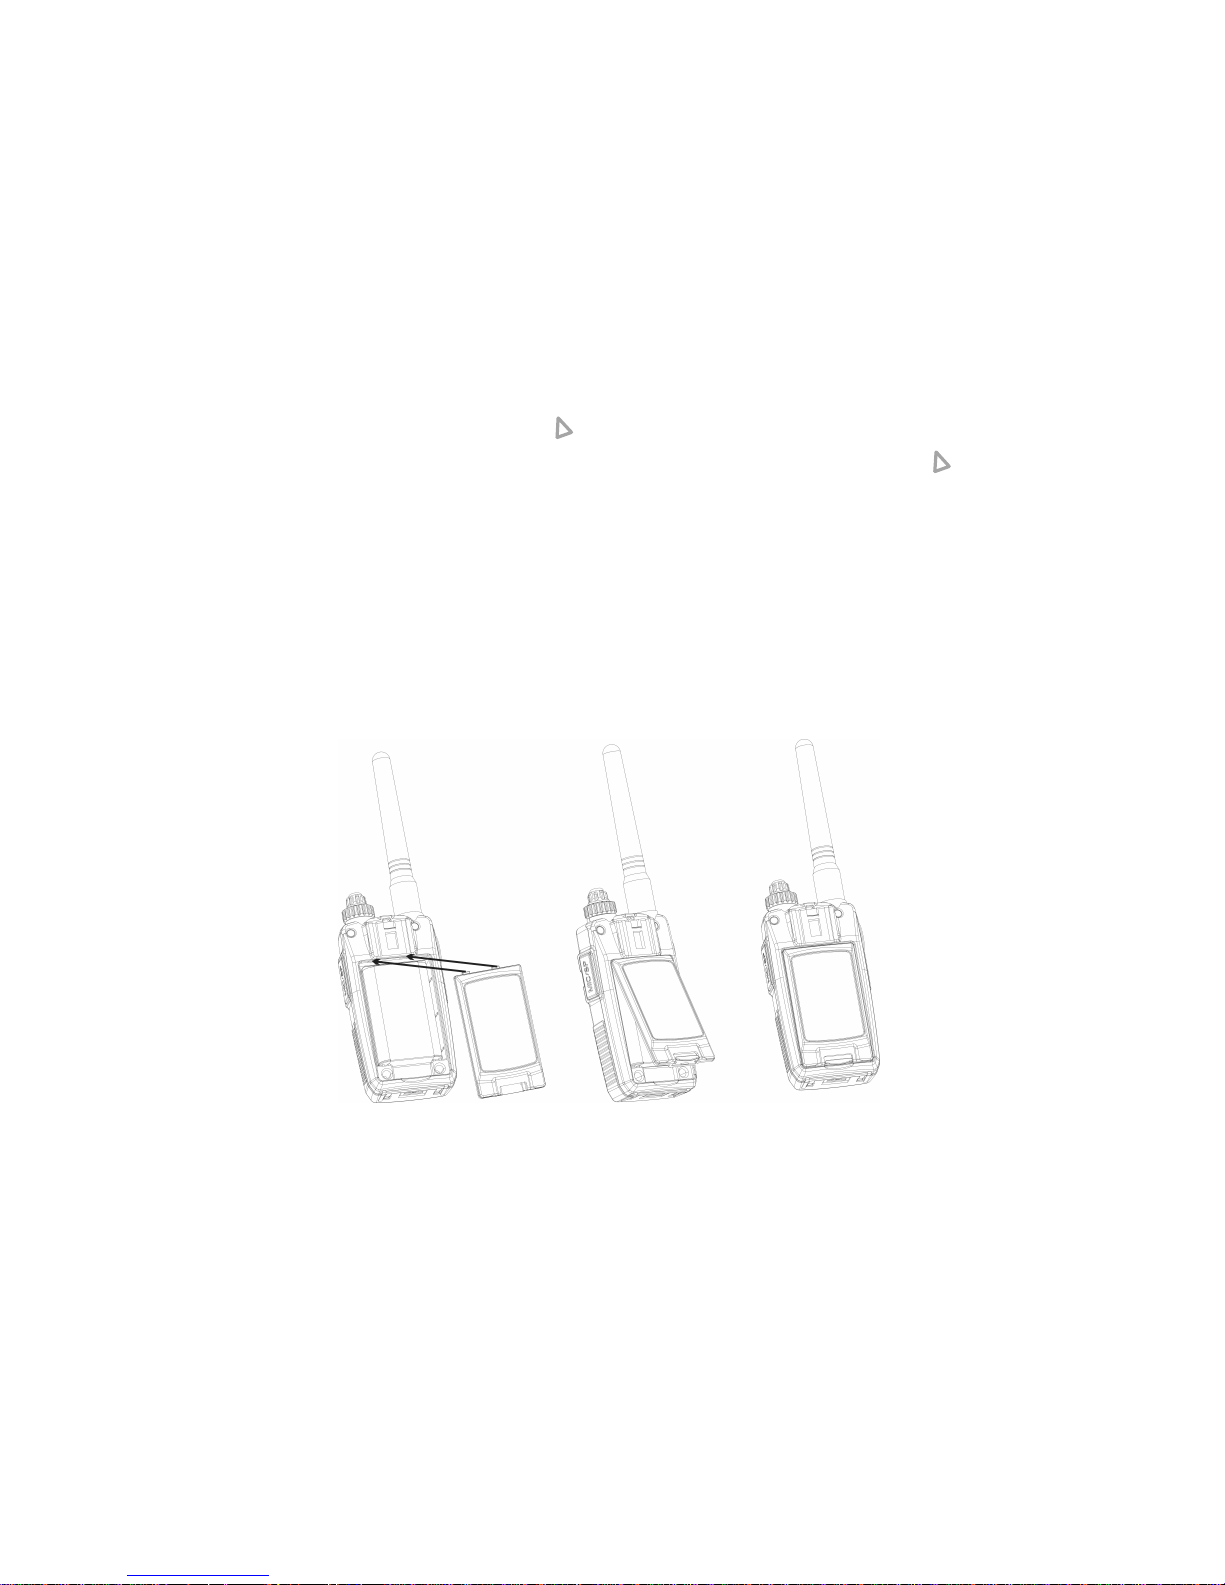
Install Lithium battery pack
Install the battery rear case properly as
following pictures show
Picture1 picture2
Install battery rear case
Install the battery rear case properly as
following pictures show
Picture1 picture2 picture3
Fix the belt clip
fix the belt clip properly as the following
pictures show:
- 8 -
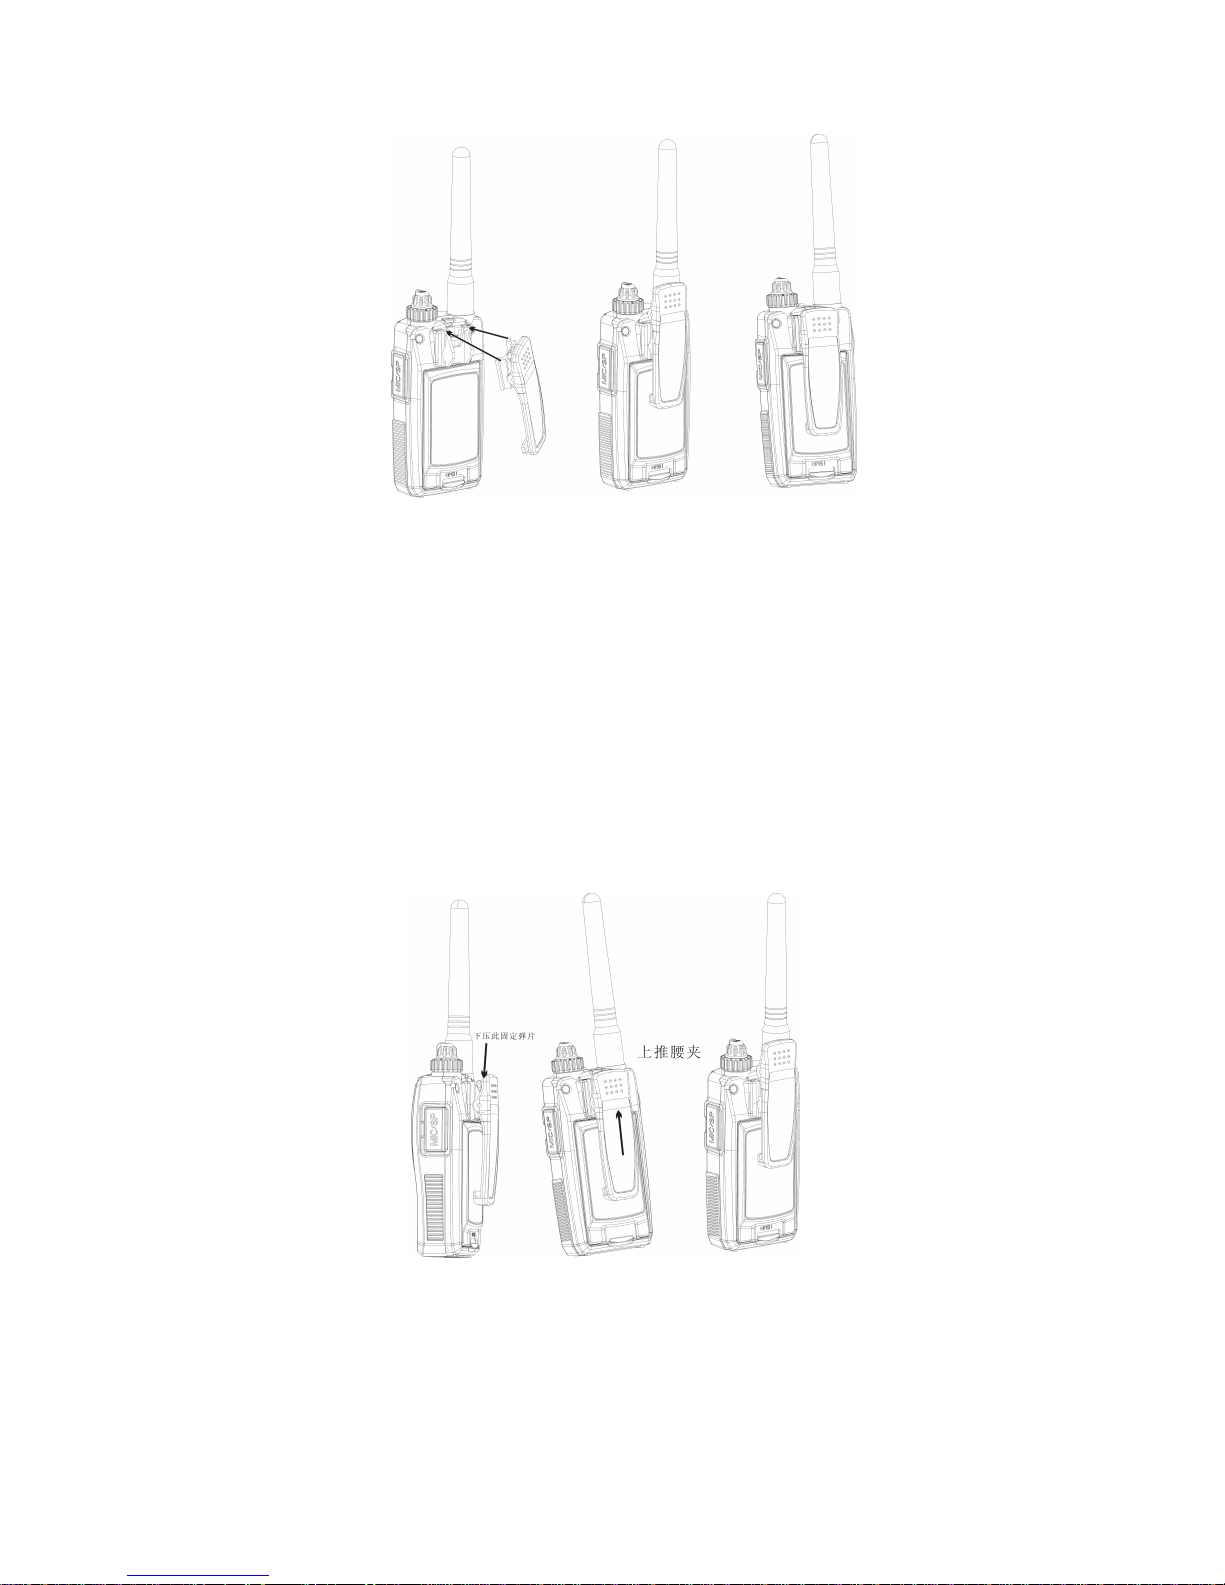
Picture1 picture2 picture3
Take off the Belt Clip
Press the belt clip stator (as arrow shows) as
following picture 1 shows, push up the belt clip as
the arrow of picture 2 shows, then take off the belt
clip as picture 3 shows.
Picture1 picture2 picture3
- 9 -
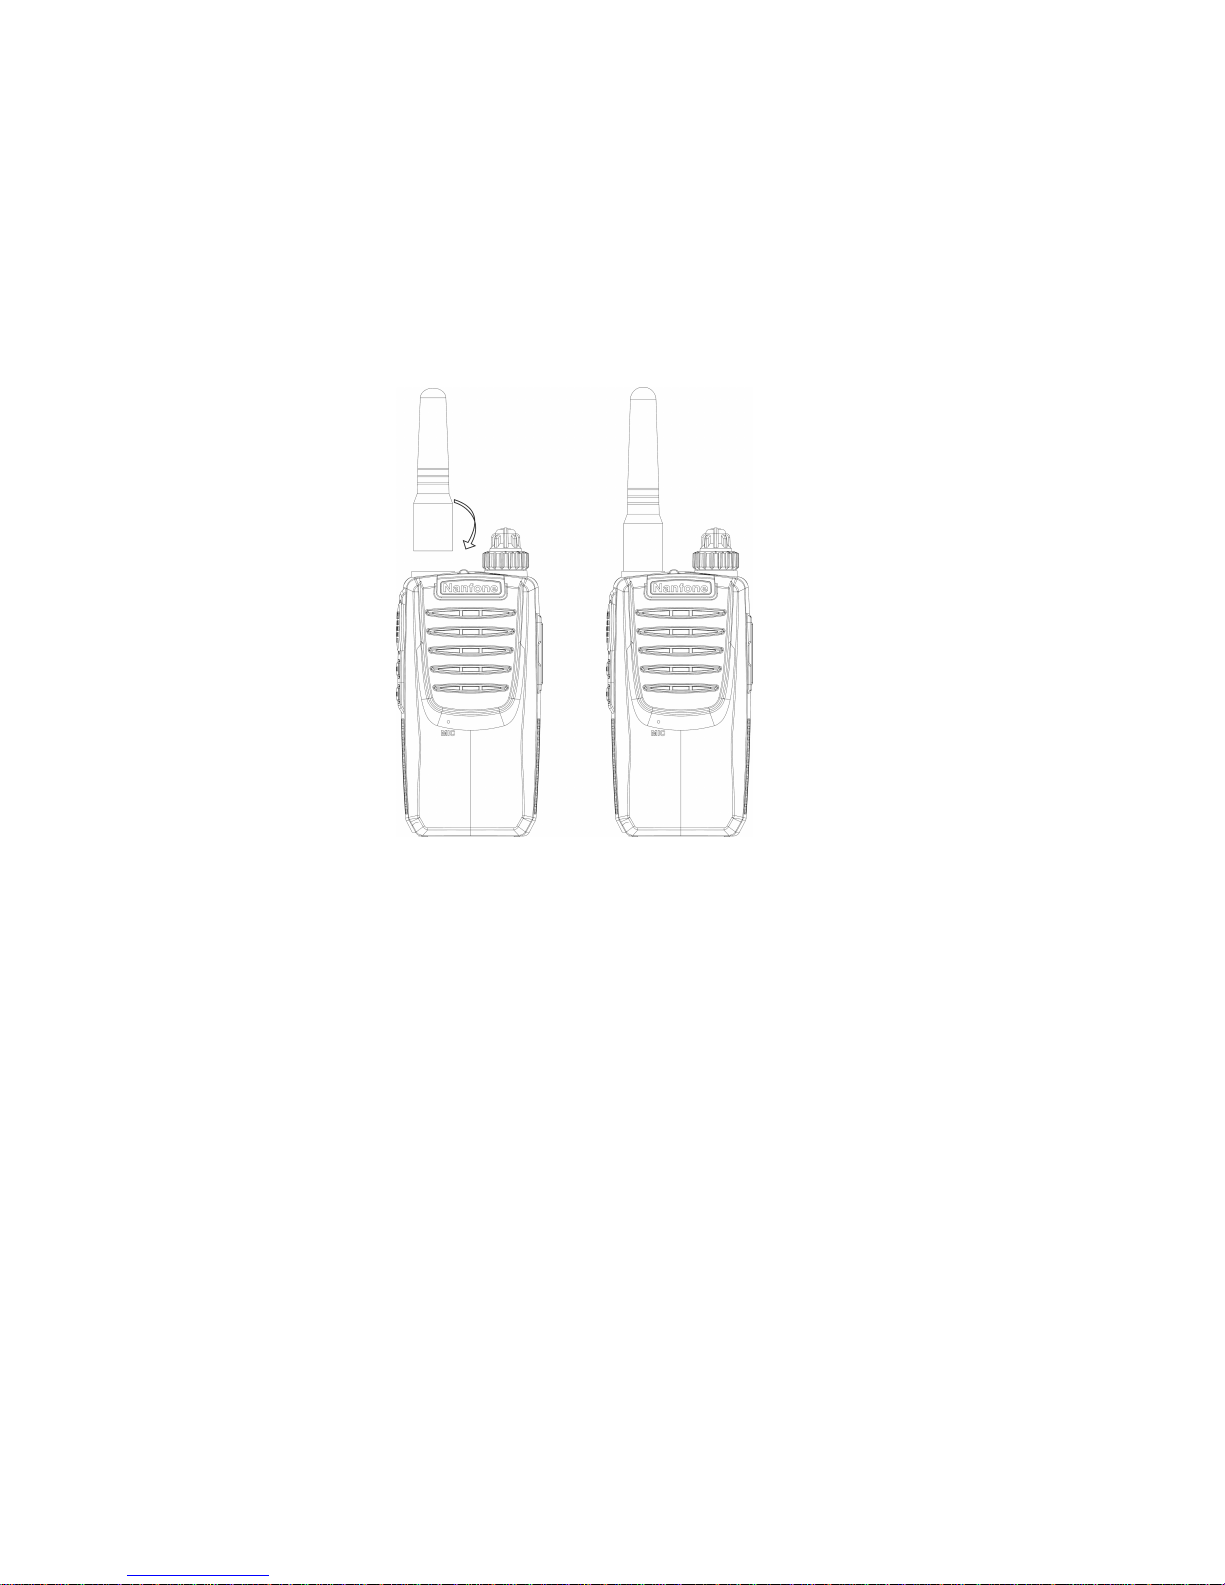
Install the Antenna
Rotate the antenna clockwise into the antenna
terminal as the arrow of picture 1 shows, and then
tighten the antenna as picture 2 shows.
Picture1 picture2
Charging the Lithium Battery Pack
The battery pack is without completely charging
when finished, and please charge it before using.
When used for the first time after purchased or
stored over two months, the capacity of battery pack
is less than normal. However, it will return normal
after charged and discharged for three or five times.
- 10 -
 Loading...