

Page 1
LoopDVP-HD User Manual
P
ro
DAP
RSF Europe
USER MANUAL
L
oop
DVP
- H D
Page 2
LoopDVP-HD User Manual
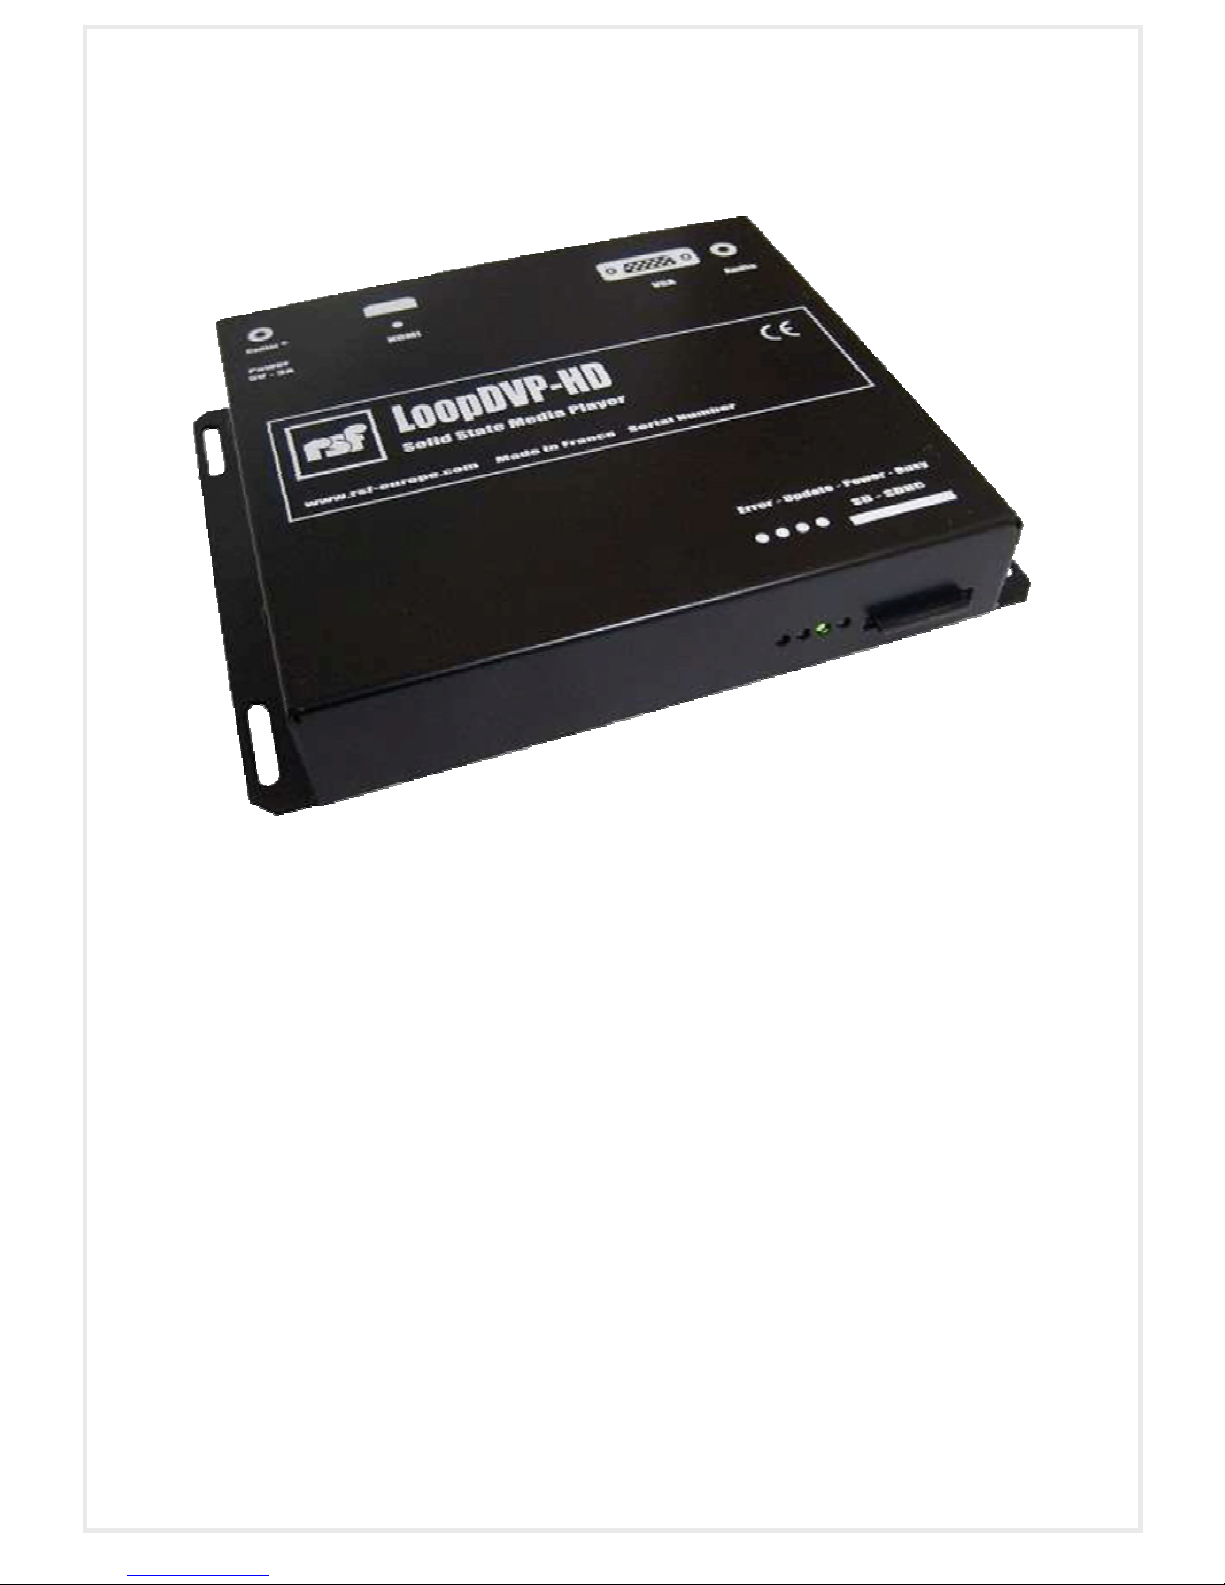
A solid state HD video player with SD
memory card, made for simple standalone
applications where no control is needed. It
has HDMI, component, and VGA outputs. It
is capable of playback at full HD 1080p
resolution @ 50 and 60Hz.
RSF LoopDVP-HD
Page 3
LoopDVP-HD User Manual
1. Simple mode Page 4
2. Playlist mode Page 5
3. Manual configuration Page 6
4. Accepted file types Page 9
5. Recommended encoding parameters Page 9
6. Technical Specifications Page 10
Table of contents
Page 4
LoopDVP-HD User Manual
Chapter 1
Simple mode
Using the LoopDVP-HD in simple mode, is, as the title suggests, rather simple. Simply load the media
file(s) onto the SD card and it/they will be played in a loop in alphanumerical order.
When the player is turned on it will attempt to auto-configure the resolution on the VGA output. If there
is no device connected on the VGA port it will try on the HDMI port. If no device is detected also on the
HDMI port or communication between the screen / projector and LoopDVP-HD was unsuccessful, it
will revert to default mode: 1024 x 768 x 75p
NB: in most cases the screen or projector must be already turned on when the LoopDVP-HD is
switched on for the auto-configuration to work.
The following defaults are used:
- Audio output simultaneously on analogue output, and HDMI AC3
- Volume 100%
- Stretch videos to cover entire screen - aspect ratio is NOT maintained
- Centre static images with no scaling (edges may be cropped)
- 3 second interval between static image files
- Switch static image with no transition effects
If any of these settings need to be different then playlist mode should be used (see next chapter)
Page 5
LoopDVP-HD User Manual
Chapter 2
Playlist mode
A playlist / configuration file can be created using a basic text editor, such as Windows Notepad. The
file should be saved as autoplay.BSP (NB ensure the text editor doesn’t automatically add the
extension .TXT)
If there are no configuration settings in the playlist file the LoopDVP-HD will use the following default
settings:
When the player is turned on it will attempt to auto-configure the resolution on the VGA output. If there
is no device connected on the VGA port it will try on the HDMI port. If no device is detected also on the
HDMI port or communication between the screen / projector and LoopDVP-HD was unsuccessful, it
will revert to default mode: 1024 x 768 x 75p
NB: in most cases the screen or projector must be already turned on when the LoopDVP-HD is
switched on for the auto-configuration to work.
The following defaults are used:
- Audio output simultaneously on analogue output, and HDMI AC3
- Volume 100%
- Stretch videos to cover entire screen - aspect ratio is NOT maintained
- Centre static images with no scaling (edges may be cropped)
- 3 second interval between static image files
- Switch static image with no transition effects
If these default settings are acceptable then a playlist may simply contain the names of the files to be
played and their order, for example:
Introvideo.mpg
Show1.ts
Show_two.ts
The end slide.BMP
Outromusic.mp3
10min black video.mpg
In this example the files would be played in a continuous loop. Media files may contain spaces, and
combinations of numbers and letters. Any combination of static images, audio files, video files with
audio, and video files with no audio can be used.
Page 6
LoopDVP-HD User Manual
Chapter 3
Manual configuration of LoopDVP-HD
The following command lines can be used in the file autoplay.BSP in each case * denotes the default
value.
Rem
Remark - all further commands and characters on the text line will be ignored by the LoopDVP-HD
Audiooutput #
Where # is one of the following values:
0 - Analogue audio output
2 - HDMI audio output stereo PCM
3 - HDMI audio output raw AC3
4* - HDMI audio output raw AC3 plus analogue stereo
Volume #
Where # defines the volume as any integer value between 0 and 100* inclusive.
Videomode #
Where # defines the resolution of the video. Available resolutions are:
VGA
1024x768x75p
1280x768x75p (only available with firmware v 3.2.53 and later)
1280x800x75p (only available with firmware v 3.2.53 and later)
1360x768x60p
Component
720x576x50p
720x480x60p
1280x720x60p
1280x720x50p
1280x720x59.94p
1920x1080x50i
1920x1080x59.94i
1920x1080x60i
HDMI
1024x768x75p
1360x768x60p
720x576x50p
720x480x60p
1280x720x60p
1280x720x50p
1280x720x59.94p
1920x1080x50i
1920x1080x59.94i
1920x1080x60i
1920x1080x50p
1920x1080x29.97p (recommended)
1920x1080x60p
Page 7

LoopDVP-HD User Manual
Viewmode #
Where # is the value of one of the following options, used to define playback mode for video files.
0* - Fill the screen. Aspect ratio may change.
1 - Centre the image and add black border (Letterbox mode) Aspect ratio is maintained
2 - Centre the image and fill screen. Aspect ratio is maintained
Imagemode #
Where # is the value of one of the following options, used to define display mode for static image files.
0* - Centre the image without scaling (image may be cropped if image resolution is greater than
output resolution)
1 - Scale image to fill the screen as much as possible while maintaining aspect ratio.
2 - Scale image to fill entire screen. Aspect ratio is maintained, image may be cropped.
3 - Scale image to fill entire screen. Aspect ratio may be changed.
Slideinterval #
Time between different image files where # is an integer number of seconds. (NB may be inserted
multiple times in a playlist to change interval times for different images)
Transition #
Define the transition between static images where # is the value relating to one of the following options:
0* - No transition
1-4 - Wipe from top, bottom, left, right.
6-9 - Start in top left (6), top right (7), bottom left (8), bottom right (9), corner, and grow to
full screen
10-11 - Multiple stripes, wipe left to right (10), top to bottom (11)
12 - Vertical stripes, wipe alternatively top to bottom and bottom to top
13 - Horizontal stripes, wipe alternatively left to right and right to left
14 - Fade to black and then to new image
15 - Fade between images
16-19 - Slide in from top (16), bottom (17), left (18), right (19)
Pause #
Pause the playback between playlist items for # seconds (# must be an integer). The image on-screen is
retained.
PauseMS #
Pause the playback between playlist items for # milliseconds (# must be an integer). The image onscreen is retained.
PowerSaveModeOn
Turn off the synchronisation signals for the VGA and component outputs. For many screen models this
will provoke standby mode to reduce power consumption
PowerSaveModeOff
Leave synchronisation signals for VGA and component outputs active.
Page 8

LoopDVP-HD User Manual
Stop
Stop playback at the end of the playlist (NB once this command has been used the only way to restart
playback is to disconnect and reconnect the power supply to the LoopDVP-HD)
Page 9
LoopDVP-HD User Manual
Chapter 4
Accepted files types
The following files can be read by the LoopDVP-HD:
Static Images: BMP 8, 24, or 32-bit (recommended)
PNG
JPG
Video:
Containers: MPG
VOB
TS
Codecs: MPEG-1
MPEG-2
MPEG-4 (H264, AVC)
Audio: MP3
Chapter 5
Recommended encoding parameters
MPEG-2 Transport Stream – HD :
Codec: MPEG-2 video
Profile & level : MP@HL
Resolution : 720p : 1280 x 720,
1080i : 1920 x 1080,
1080p (Full HD) : 1920 x 1080
Aspect ratio (pixel): 1 :1,
Aspect ratio (image): 4:3, 16:9
Frame rate : 25 fps (or 29,97 / 30 fps depending on source)
GOP structure: Standard
GOP type: Closed
Bitrate: Up to 30 Mbit/s CBR / VBR (SD card-dependent). As a general rule 20 to 25 Mbit/s
gives the best results.
Audio format : MPEG-1 Audio Layer III
Sampling rate: 48000 Hz.
Channel configuration : Mono or Stereo.
Audio bitrate: Up to 224 kb/s. (160 Kb/s recommended)
Extension : m2t (to be changed to .ts after encoding)
Page 10
LoopDVP-HD User Manual
Chapter 9
Technical Specification
Connectors
Video outputs .................. HDMI, DVI (with adapter), VGA, Component (with adapter)
Audio outputs ................... Stereo line out
Flash card Slot ................. 1 slot on front panel
Storage ............................ SD and SDHC (class 4 or 6)
Indicators
Power indicator ................ 1 Led
Reading indicator ............. 1 Led
Update indicator............... 1 Led
Error indicator .................. 1 Led
Power supply .......................... 5v DC
Maximal consumption............ 3A
Enclosure................................ stand alone enclosure
Dimensions (enclosure)......... 150mm W, 160mm D, 30mm H
Weight .....................................
Environment
Temperature .................... 0°C (32°F) to 50°C (122°F)
Humidity ........................... 0-90%
Warranty ................................. 3 years
 Loading...