

Page 1
R-101 Shock Band Replacement Instructions
Due to environmental conditions and natural properties, all elastic bands eventually require
replacement. Replacing the bands on the shock mount provided with the R-101 is an easy
process using the bands and o-rings provided in this replacement kit. Before beginning,
please check to make sure that you received all of the required and extra components:
• 3 shock bands (includes 1 extra)
• 10 small neoprene o-rings (includes 2 extra)
• 6 large neoprene o-rings (includes 2 extra)
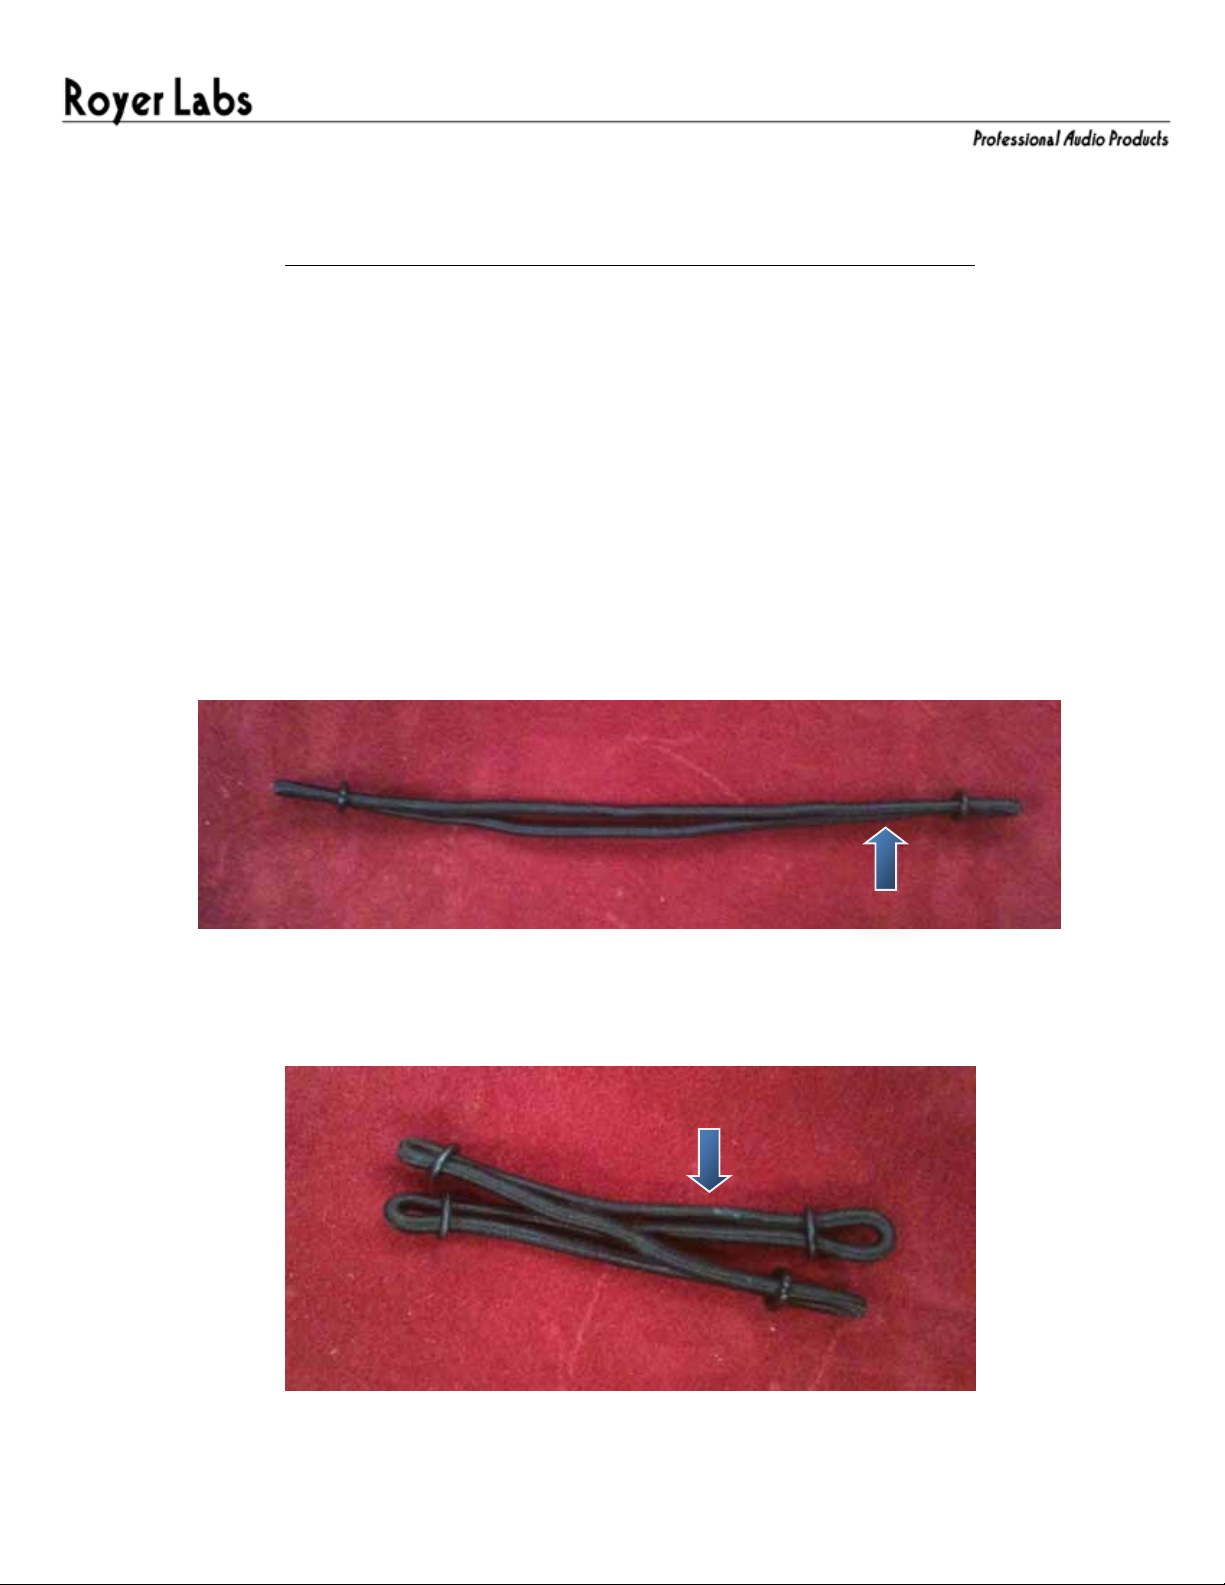
1. Pull 1st shock band straight and roll small o-rings onto band about !” from ends. Adjust
location of loops on the band such that the adhesive seam of the band is !” to the inside
of the o-ring location.
Seam
2. Fold band in half and roll 2 more small o-rings onto band about !” from ends.
Seam
Page 2
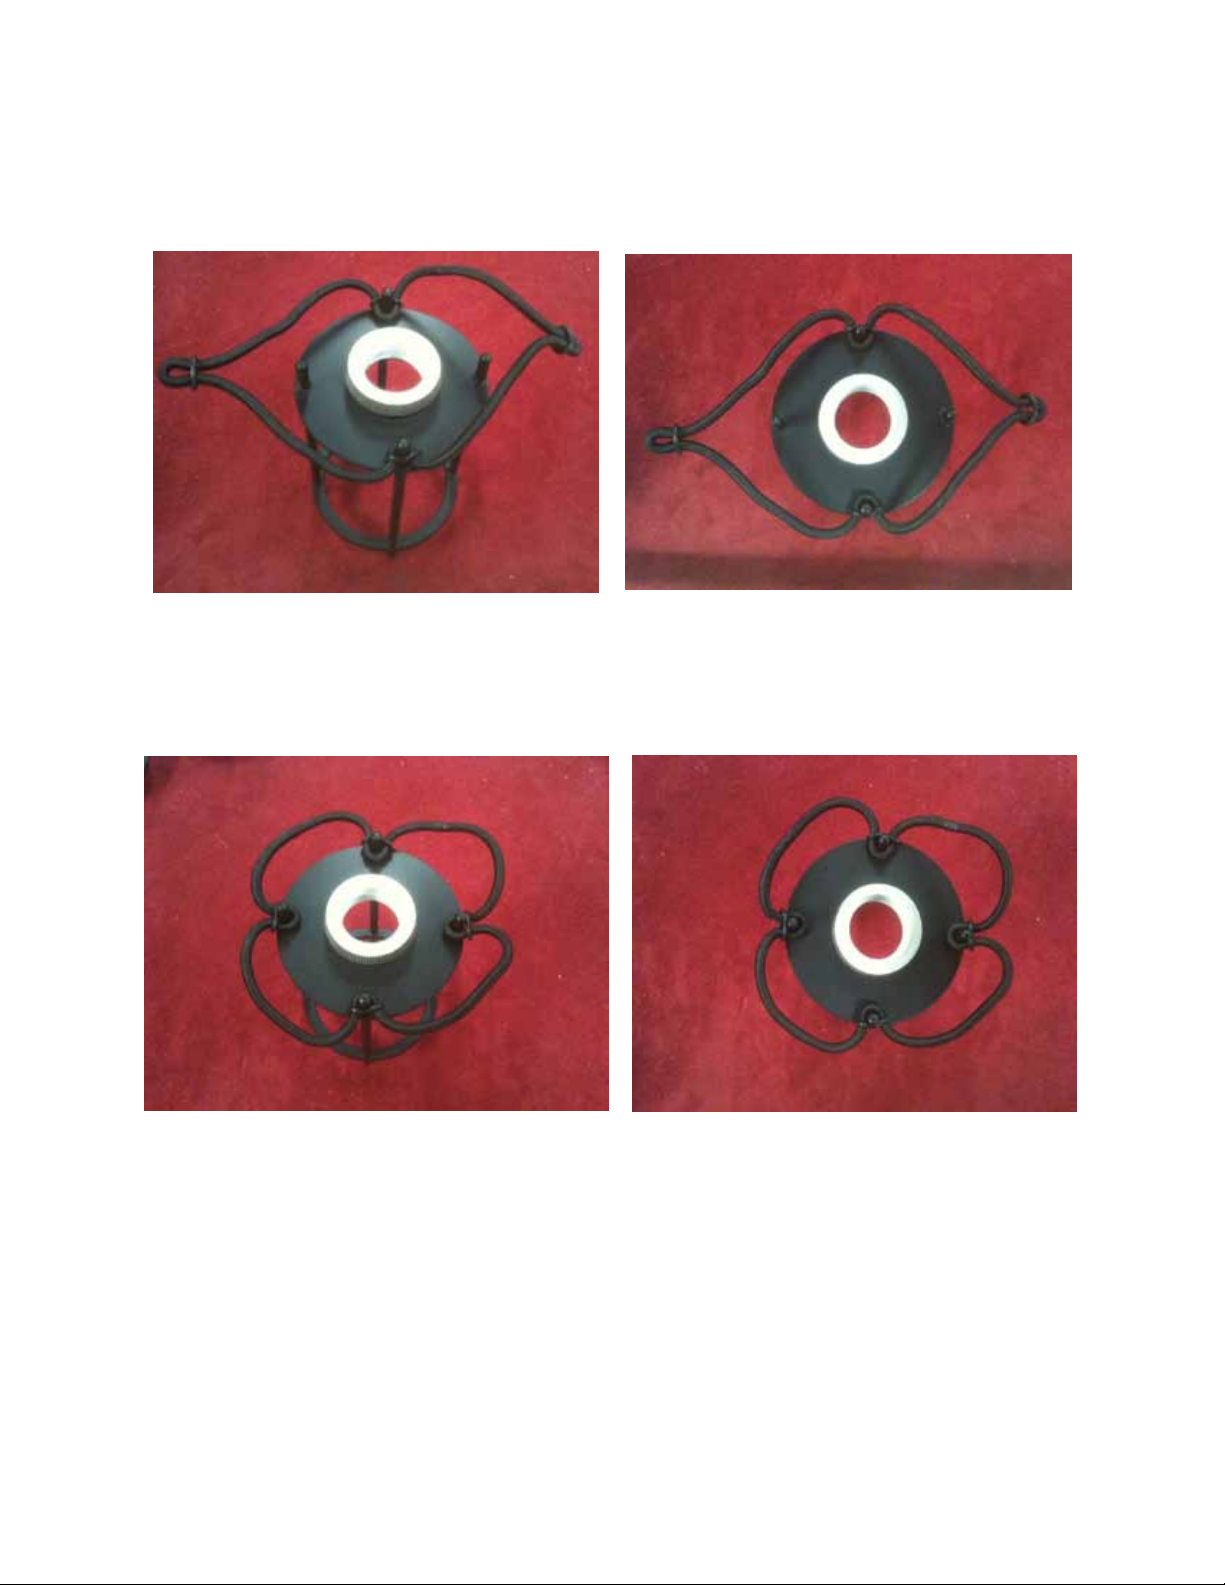
3. Turn shock carriage upside down and attach 1st band by sliding opposing loops onto
opposite posts of carriage.
4. Slide 2 remaining loops onto 2 remaining posts.
Page 3

5. Turn carriage upright and repeat process with 2nd band and small o-rings.
6. Turn carriage upside down and align outer shock ring over top of carriage. Maneuver
shock ring and 1st band to hook band segments with all 4 posts of outer shock ring.
Page 4

7. While holding down outer shock ring, reach through triangles created by stretched 1st
band and hook 2nd band with finger.
8. Pull hooked 2nd band through triangle and hook over shock ring post. Repeat with all 3
other sections of 2nd band. Adjust shock so that shock ring is parallel to table surface and
tension is evenly distributed among band sections.
Page 5

9. Hook large o-ring around one side of shock ring post and pull over other side of post to
lock bands in place.
Page 6

10. Adjust small o-rings such that they sit to the inside of the top and bottom of the inner
shock carriage.
That’s it! Your shock is ready for use.
Should you have any questions, please contact Royer Labs at (818) 847-012 1 or email
repair@royerlabs.com.
 Loading...