

Page 1

OWNER’S MANUAL
Operating and Servicing Instructions
Español - página E1
www.hoover.com
IMPORTANT: READ CAREFULLY BEFORE ASSEMBLY AND USE.
Quest ions or concer ns? For assist ance, please ca ll Customer Service at
1-80 0-944 -9200 Mon- Fri 8am-7pm EST before ret urning this product to t he store.
THIS PRODUCT IS INTENDED FOR COMMERCIAL USE ONLY.
©2011 Techtronic Floor Care Technol ogy Limited. A ll rights res erved. #961069011 R0 • ID 102713 R0
Page 2
Thank you for choosing a HOOVER® product.
Please enter the complete model and serial number in
the spaces provided.
Model:
Serial Number:
Hint: Attach your sales receipt to this owner’s manual.
Verification of date of purchase may be required for
warranty service of your HOOVER® product.
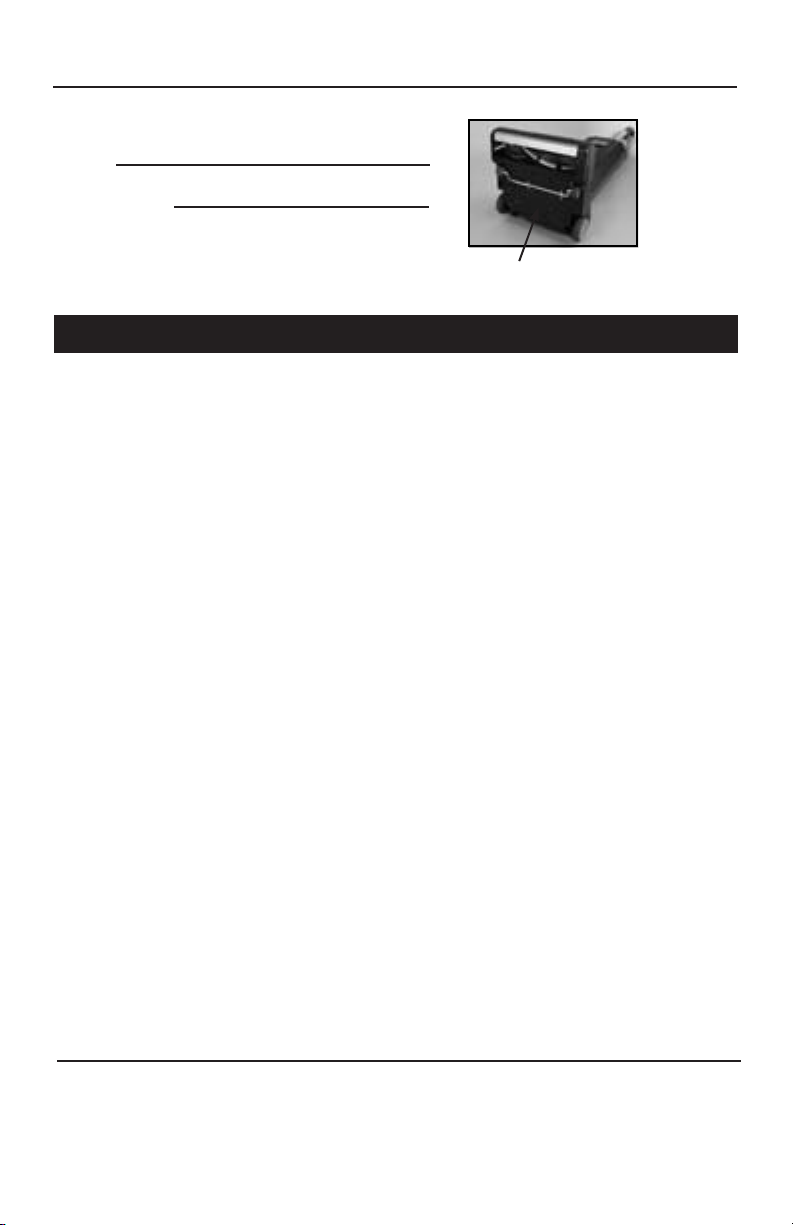
SERIAL NUMBER
(Label located on bottom of vacuum)
CONTENTS
Important Safeguards .................................................................................................3
Cleaner Assembly ......................................................................................................6
Carton Contents ..................................................................................................6
Attach Main Body to Nozzle ................................................................................6
Attach Handle ......................................................................................................7
Attach Hose .........................................................................................................7
Position Tools ......................................................................................................7
Power Cord Assembly ......................................................................................... 7
How To Use ................................................................................................................ 8
Vacuum Description ............................................................................................ 8
LED Diagnostic Panel .........................................................................................8
On-Off Switch ...................................................................................................... 9
Transporting Cleaner ...........................................................................................9
Carry Handle .......................................................................................................9
Handle Positions .................................................................................................9
Carpet Height Adjustment ...................................................................................9
Height Settings .................................................................................................... 9
Cord Storage ....................................................................................................... 10
Cleaning Lightweight Flexible Rugs ....................................................................10
Tools ........................................................................................................................... 10
Maintenance ............................................................................................................... 11
Filter Bag ............................................................................................................. 11
Filters ..................................................................................................................12
Agitator Brushroll .................................................................................................13
Resetting LED Indicator Light ............................................................................. 14
Clearing Blockages .............................................................................................15
Lubrication ...........................................................................................................15
Troubleshooting Guide ...............................................................................................16
Service .......................................................................................................................17
If you need assistance:
Visit our website at hoover.com. Follow the authorized dealer locator link to find the Hoover®
authorized dealer nearest you or call 1-800-944-9200 for an automated referral of Hoover® authorized dealer locations (U.S. only) or to speak with a customer service representative; Mon- Fri
8am- 7pm EST. Please do not return this product to the store.
2
Page 3

IMPORTANT SAFETY INSTRUCTIONS
SAVE THESE INSTRUCTIONS
When using an electrical appliance, basic precautions should always be
followed, including the following:
READ ALL INSTRUCTIONS BEFORE USING THIS APPLIANCE.
WARNING: TO REDUCE THE RISK OF FIRE,
ELECTRIC SHOCK OR INJURY:
• Fully assemble before operating.
• Operate vacuum only at voltage specified on data label on bottom of cleaner.
• Do not leave appliance when plugged in. Unplug from outlet when not in use and
before cleaning or servicing.
• Do not use outdoors or on wet surfaces.
• Do not allow to be used as a toy. Not intended for use by children age 12 and under.
Close supervision is necessary when used near children. To avoid injury or damage,
keep children away from product, and do not allow children to place fingers or other
objects into any openings.
• Use only as described in this manual. Use only manufacturer’s recommended
attachments and products.
• Do not use with damaged cord or plug. If appliance is not working as it should, has
been dropped, damaged, left outdoors, or dropped into water, take it to a service
center prior to continuing use.
• Do not pull or carry by cord, use cord as a handle, close a door on cord, or pull cord
around sharp edges or corners. Do not place product on cord. Do not run appliance
over cord. Keep cord away from heated surfaces.
• Do not unplug by pulling on cord. To unplug, grasp the plug, not the cord.
• Do not handle plug or appliance with wet hands.
• Do not put any object into openings. Do not use with any opening blocked; keep free
of dust, lint, hair, and anything that may reduce air flow.
• Keep hair, loose clothing, fingers, and all parts of body away from openings and
moving parts. Brushroll continues to rotate when in the upright position.
• Turn off all controls before unplugging.
• Use extra care when cleaning on stairs. To avoid personal injury or damage, and to
prevent the cleaner from falling, always place cleaner at bottom of stairs on floor.
Do not place cleaner on stairs or furniture, as it may result in injury or damage.
• Do not use to pick up flammable or combustible liquids, such as gasoline, or fine
wood sandings, or use in areas where they may be present.
• Connect to a properly grounded outlet only. See Grounding Instructions.
• Do not pick up anything that is burning or smoking, such as cigarettes, matches, or
hot ashes.
• Do not use without Dust bag and Filters in place.
• WARNING: This product contains chemicals known to the State of California to
cause cancer, birth defects or reproductive harm.
3
Page 4

• Make sure your extension cord is in good condition and is the correct size for your
appliance. Table (A) shows the correct size to use depending on cord length and
nameplate ampere rating. If in doubt, use the next heavier gauge. The smaller the
gauge number, the heavier the cord. An undersized extension cord will cause a drop
in line voltage resulting in loss of power and overheating.
• Use only three-wire outdoor SJ or SJT-type cords that have three-prong grounding
plugs and grounding receptacles that accept the appliance’s plug.
• To reduce the risk or personal injury due to a loose connection between the appliance’s plug and the extension cord, firmly and fully attach the appliance plug to
the extension cord. Periodically check the connection while operating to ensure it
is fully attached. Do not use an extension cord that provides a loose connection. A
loose connection may result in overheating, fire and increase the risk of burning.
• Maintain Appliance With Care- Inspect extension cords periodically and replace if
damaged.
CAUTION: TO REDUCE THE RISK OF DAMAGE:
• Avoid picking up hard, sharp objects with this product, as they may cause damage.
• Store in a dry place. Do not expose machine to freezing temperatures.
• Brushroll continues to turn while product is turned on and handle is in upright
position. To avoid damage to carpet, rugs, furniture and flooring, avoid tipping cleaner
or setting it on furniture, fringed area rugs, or carpeted stairs during tool use.
• Do not use sharp objects to clean out hose as they can cause damage.
GROUNDING INSTRUCTIONS
This appliance must be grounded.
1
B
B
A
A
C
C
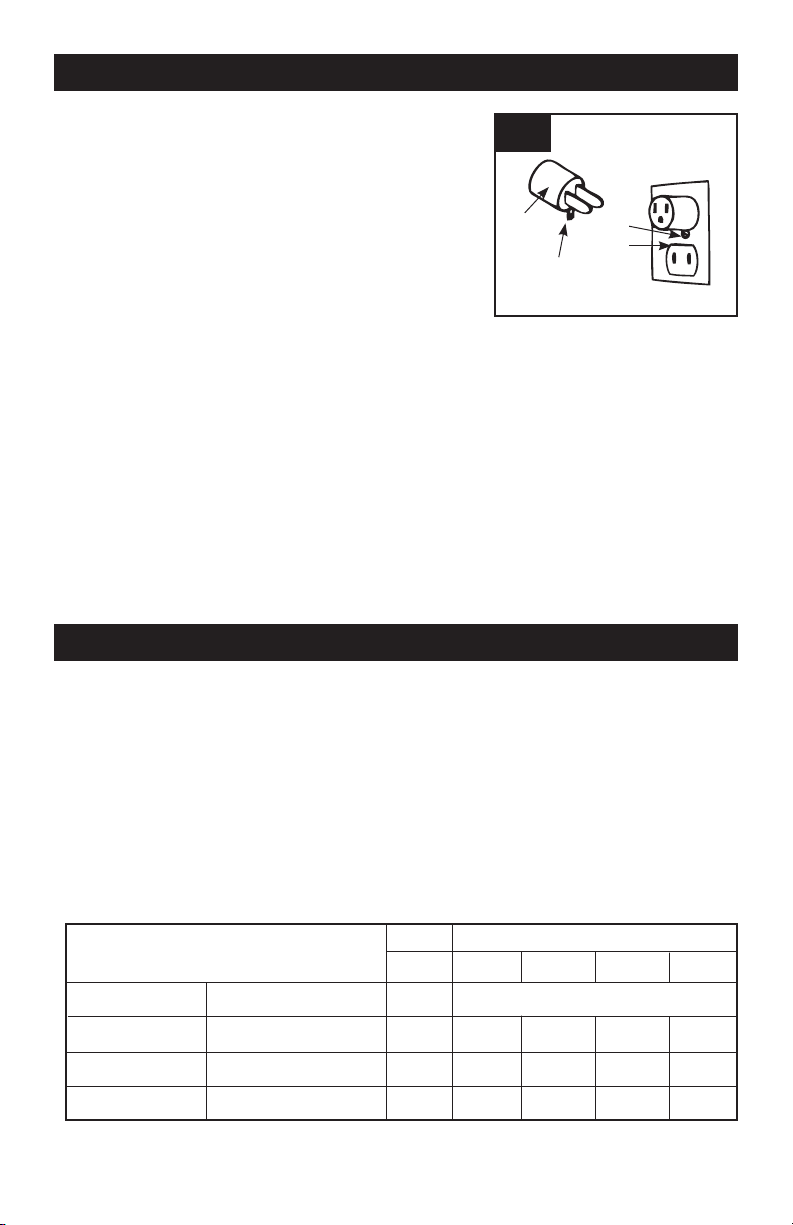
If it should malfunction or breakdown, grounding
provides a path of least resistance for electrical current to reduce the risk of electric shock.
This appliance is equipped with a cord having an
equipment-grounding conductor (C) and grounding plug (A).
The plug must be plugged into an appropriate
outlet (B) that is properly installed and grounded in
accordance with all local codes and ordinances.
4
Page 5
GROUNDING INSTRUCTIONS (CONT’D)
DANGER ‑ Improper connection of the equipment-
grounding conductor can result in the risk of electric
shock. Check with a qualified electrician or service
person if you are in doubt as to whether the outlet is
properly grounded. Do not modify the plug provided
with the appliance - if it will not fit the outlet, have a
proper outlet installed by a qualified electrician.
This appliance is for use on a nominal 120 volt cir-
cuit and has a grounding plug that looks like the plug
in sketch (1)- see page 4
A temporary adapter (D) may be used to connect this plug to a 2-pole receptacle (E) if
a properly grounded outlet is not available.
The temporary adapter should be used only until a properly grounded outlet (B) can be
installed by a qualified electrician.
The green colored rigid ear, lug, or the like (F) extending from the adapter must be
connected to a permanent ground (G) such as a properly grounded outlet box cover.
Whenever the adapter is used, it must be held in place by a metal screw.
Note: In Canada, the use of a temporary adapter is not permitted by the Canadian
Electrical Code.
2
D
D
F
F
G
G
E
E
EXTENSION CORD GUIDELINE
• Do not use appliance with damaged cords or plugs. When servicing, refer to a
qualified electrician or service person only. Use only identical replacement parts.
• Make sure your extension cord is in good condition and is the correct size for your
appliance. Table (A) shows the correct size to use depending on cord length and
nameplate ampere rating. If in doubt, use the next heavier gauge. The smaller the
gauge number, the heavier the cord. An undersized extension cord will cause a
drop in line voltage resulting in loss of power and overheating.
• TABLE A •
MINIMUM GAUGE EXTENSION CORDS
Unit's Ampere Rating
more than
0
6
10 12
Volts
120 V
not more than
6
10
5
Total Length of cord in feet
25
18 16 14
16 16 14 12
50 100 150
AWG
14161618
12
Page 6
1. CLEANER ASSEMBLY
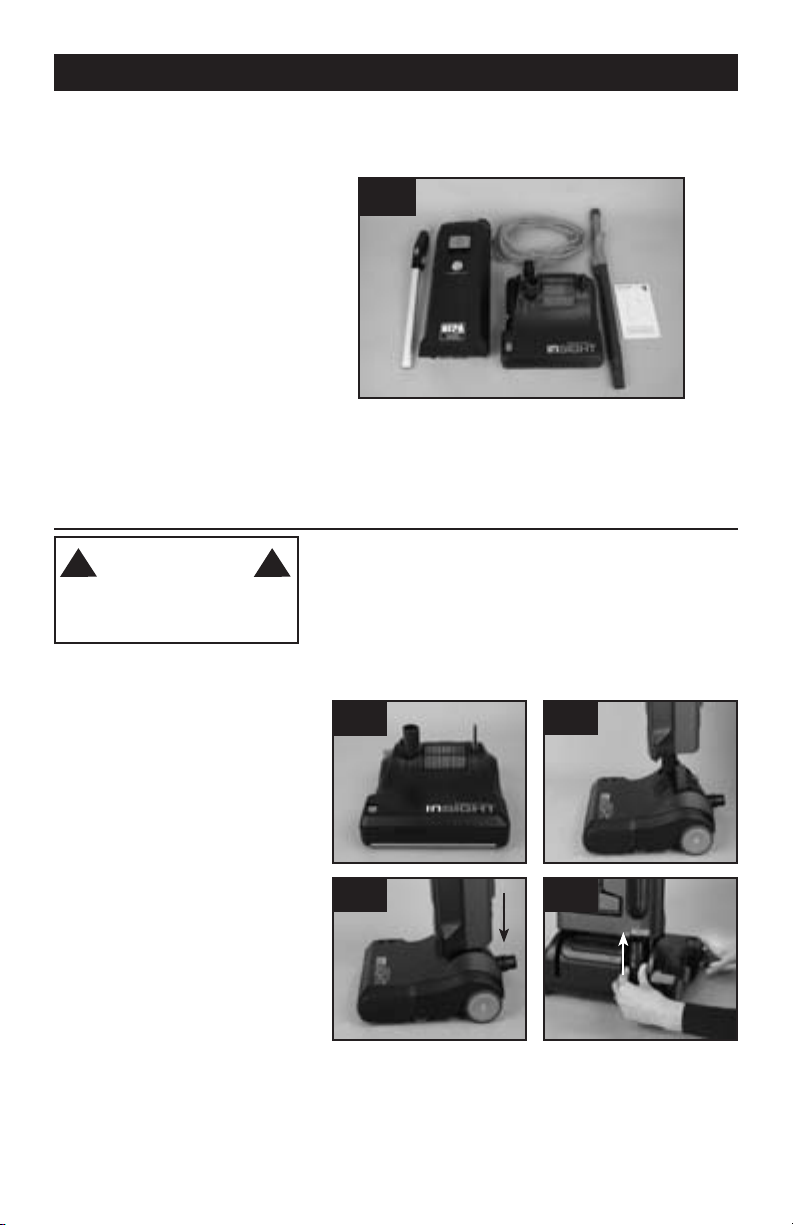
CARTON CONTENTS
A. Handle Assembly
B. Nozzle Assembly
C. Wand with Handle Grip and Hose
D. Cleaner Body
E. Extension Cord
F. Instruction manual
Remove all parts from carton and identify
each item shown.
Make sure all parts are located before
disposing of packing materials.
! !
WARNING
To reduce the risk of electric shock,
unplug before cleaning or ser vicing.
1.1
E
A
D
B
C
F
ATTACH MAIN BODY TO NOZZLE
1.2 Place the nozzle on a flat surface with
the neck (A) and the support lever (B) in the
upright locked position.
1.3 Hold the bag housing vertically and
place over neck and support lever.
1.4 Push firmly down until the bag housing
locks in place
1.5 Push the end of the nozzle hose (C) into
the opening on the bottom of the bag housing (D) until it clicks into place.
1.2
1.4
A
B
1.3
1.5
D
C
6
Page 7

1. CLEANER ASSEMBLY (CONT’D)
ATTACH HANDLE
1.6 Lift the handle lock button up and
place the handle assembly down into the
opening on top of the bag housing as far
as it will go.
1.7 When the handle assembly has been
pushed down as far as it can go, press the
handle lock back down. As a precaution,
pull up on handle to confirm it has been
locked properly.
ATTACH HOSE
1.8 Hold wand with handle grip and hose at
a slight angle as you slide bottom end of
wand into channel on back of bag housing.
1.9 As you are lowering the wand down into
the channel, align the indicator graphic on
the handle grip with the indicator graphic
on the channel in the bag housing.
1.10 Push the opposite end of the hose (A)
into the opening in the top of the cleaner
body (B) until it clicks into place.
1.6
1.7
1.8 1.9
1.10
A
B
POSITION TOOLS
1.11 Make sure the crevice tool (A) and
upholstery tool (B) are in their designated
places on the back of the machine.
POWER CORD ASSEMBLY
1.12 This cleaner is equipped with a Quick-Change power cord (A).
To connect the extension cord to the Quick-Change power cord,
plug the socket end of extension cord into the 3-prong end of the
Quick-Change cord.
When completed, plug extension cord into properly grounded outlet
to operate. If extension cord is damaged during use, simply replace
with new extension cord (see Extension Cord Guideline on page 5).
7
1.11
A
B
1.12
A
A
Page 8

VACUUM DESCRIPTION
1. Handle grip
2. ON/OFF switch
3. Handle
4. Hose release button on
bag housing
5. LED diagnostic panel
6. Bag door release latch
7. Bag housing
8. Bag door cover
9. Nozzle
10. Brushroll Quick-Release button
11. Upper cord hook
12. Extension cord
13. Hose
14. Wand handle grip
15. Handle lock
16. Wand
17. Quick-change cord
18. Carrying handle/lower cord hook
19. Crevice tool
20. Upholstery nozzle
21. Bag housing release button
22. Nozzle hose release button
23. Nozzle hose
24. Handle release pedal
25. Carpet height adjustment knob
2. HOW TO USE
2.1
2
5
6
8
9
10
1
3
4
7
12
17
21
18
19
23
11
13
15
20
24
14
16
22
25
LED DIAGNOSTIC PANEL
2.2 The LED diagnostic panel, located on top of the bag
housing, features three performance indicators which
inform the user that either the bag, filter or brush roll
need maintenance/checked.
When maintenance is required, a red light will turn on
above the particular icon that needs serviced.
2.2
BRUSHROLL CHECK:
When the red indicator light above the brushroll check icon illuminates and is blinking, the brushroll is jammed and
needs maintenance.
When the red indicator light above the brushroll check icon illuminates and stays solid, the brushroll bristles are
worn and the brushroll needs replaced. See maintenance section on how to ser vice the brushroll (page 13).
FILTER FULL:
When the red indicator light above the filter full icon illuminates, the secondary filter needs to be replaced. See
maintenance section on how to replace the filter (page 12).
BAG FULL:
When the red indicator light above the bag full/clog icon illuminates, the bag needs to be checked. See maintenance section on how to service the bag (page 11-12).
MOTOR ERROR:
If all three indicator lights illuminate and stay solid, there is a motor error. Contact your local authorized Hoover
service representative.
SYSTEM ERROR:
If all three indicator lights illuminate and are flashing, there is a system error. Contact your local authorized Hoover
service representative.
8
Page 9

ON-OFF SWITCH
TRANSPORTING CLEANER
2.3
2.3 Plug cord into electrical outlet. LED lights will
flash on and then off.
To turn cleaner ON, push
ON/OFF switch to “ | “
position.
To turn cleaner OFF, push
ON/OFF switch to “O ”
position.
CARRY HANDLE
2.5
2.5 The cleaner can
also be moved by
using the carry handle
(A).
A
2.6
CARPET HEIGHT ADJUSTMENT
FOR MODELS WITH MANUAL HEIGHT ADJUSTMENT
2.7
A
2.7 The cleaning of
carpet and rugs takes
place at the nozzle.
When it is necessary to
rais e and lowe r the
nozzle for various carpet
pile heights, turn the
nozzle control knob (A)
to the desired setting.
2.4 To move your cleaner
2.4
from room to room, put
handle in upright
position, tilt cleaner back
on rear wheels and push
forward.
HANDLE POSITIONS
A
2.8
B
C
2.8 For ease in turning knob, the handle
should be in the upright position (A).
The nozzle will not move into the adjusted
position until the cleaner handle is lowered
A
to the operating position (B).
B
2.6 The handle of your
cle aner has three
positions; (A) upright for
storage and when using
cleaning tools; (B)
operating position fo r
general operation on
carpet and floors; (C)
low for reaching under
low furniture. Step on
handle release lever to
lower handle into each
position (B & C).
! !
CAUTION
Not to be used for grooming a pet!
2.9
2.9 For maximum cleaning performance, the following carpet height settings are recommended:
• Lowest setting (1): for bare floors and low pile, level loop, kitchen-type or commercial grade carpet.
• Medium setting (2): For medium pile types of carpet.
• Higher settings (3-4): For very deep pile carpet where easier pushing effort is desired, while maintaining good
cleaning performance.
Note: If the cleaner is difficult to push, turn the control knob to the next higher setting.
9
Page 10

CARPET HEIGHT ADJUSTMENT (CONT’D)
FOR MODELS WITH AUTOMATIC HEIGHT ADJUSTMENT
2.10
2.10 The brushroll automatically adjusts for any carpet
or hard surface. The DUAL wheel stabilizing system,
located on the underside of the nozzle, adjusts the
brushroll up and down in order to reach the optimal
setting for the desired floor/carpet type.
CORD STORAGE
2.11
A
B
2.11 Wrap cord around
cord hooks (A & B) for
convenient storage.
Attach the plug end to
cord.
3. TOOLS
Tools allow for cleaning surfaces above the floor and for
reaching hard to clean areas.
The vacuum is ready for tool use when handle is in
upright position.
CLEANING LIGHTWEIGHT
FLEXIBLE RUGS
2.12
IMPORTANT
Brushroll continues to turn while product is turned on
and handle is in upright position. To avoid damage to
carpet, rugs, furniture and flooring, avoid tipping
cleaner or setting it on furniture, fringed area rugs, or
carpeted stairs during tool use.
2.12 Stand on one end of
rug and move cleaner
toward other end or edge.
Before reaching edge,
push down on handle.
This will lift up the nozzle
(front of cleaner) as shown
and will prevent rug from
clinging to cleaner.
Continue to lift up nozzle
so that when you have
reached the edge, it is
completely off the rug.
Move cleaner back to start
again, lower nozzle, and
use only forward strokes.
SELECT PROPER TOOL
3.1
A
B
3 .1
A. Upholstery nozzle may be used for upholstered
furn itur e, drap erie s, matt ress es, clo thin g,
automobile interiors, and carpeted stairs.
B. Crevice tool may be used in tight spaces,
corners and along edges in such places as dresser
drawers, upholstered furniture, stairs and
baseboards.
10
Page 11

3. TOOLS (CONT’D)
ATTACH WAND AND TOOLS
3.2
To use tools without the wand: Pull the ho se out o f the
wand while the wand is still docked in the channel on the
back of th e machine. Attach tools directly to the end of the
hose.
3.2 Remove wand from compartment on cleaner body.
Attach desired tool by pushing it firmly onto the end of
the wand.
Twist wand or tool slightly to
tighten or loosen the connection.
HOW TO CLEAN TOOLS
3.3
water. Cleaning tools may be washed in warm
water with a detergent. Rinse and air dry completely before using.
3.3 To clean the hose, wipe with a
damp cloth. Do not submerge in
water
4. MAINTENANCE
Familiarize yourself with these maintenance tasks as proper use and care of your vacuum will ensure continued clean-
ing effectiveness.
Any other servicing should be done by an authorized service representative.
! !
An Internal Thermal Protector has been designed into your cleaner to protect it from overheating. When the
thermal protector activates the cleaner will stop running.
If this happens proceed as follows:
1. Turn cleaner OFF and unplug it from the electrical outlet.
2. Check fullness of filter bag; change if needed.
3. Inspect and remove blockage along the dirt path. This blockage may occur at the: nozzle, nozzle inlet,
wand, nozzle hose, hose, inspection door, filter bag inlet, secondary filter, and final filter.
4. When cleaner is unplugged and motor cools for 30 minutes, the thermal protector will deactivate
and cleaning may continue.
If the thermal protector continues to activate after following the above steps, your cleaner needs servicing.
NOTICE
FILTER BAG: When to Replace
! !
Very fine materials, such as face powder or
cornstarch, may seal the filter bag and may cause it
to burst even though it is partially full of dirt. When the
cleaner is used to remove material of this nature,
change filter bag often.
When the red indicator light for the bag full/clog light
illuminates, the following should be checked:
• If the filter bag is full; change the filter bag.
• If very fine materials have been picked up clogging the
bag pores; change the filter bag.
• If there is a blockage at the bag opening; remove the
blockage.
CAUTION
IMPORTANT
All new carpet has loose fibers which can fill the bag
quickly while vacuuming. This type of debris does
not activate the “Bag Full/Clog” indicator.
What to Buy: Filter Bag
Use only genuine Hoover® bags with your vacuum.
When purchasing a new bag, ask for Hoover
Allergen Filtration Type SB disposable
filter bags.
11
®
Page 12

FILTER BAG: How to replace
4.1 To change filter bag, lift up bag door release
latch and pull out. Remove door.
4.2 Grasp plastic bag collar (A) and pull collar from
bag support frame (B). Do not pull on paper flap
seal. Paper flap will seal the bag opening automatically when removed from the support frame, preventing dust from being released into the air. Discard
used filter bag.
IMPORTANT
Do not clean out old filter bag and reuse. Discard
used filter bag.
4.3 Hold new filter bag as shown. Slide plastic
bag collar into the bag support frame until the
bag is securely in place. Tuck in filter bag.
4.4 Reposition bag door by aligning tabs on bottom
of door into openings on cleaner body (C). (Make
sure the bag door release latch is lifted up, otherwise, the bag collar will not engage and door will
not close.)
Close bag door and snap securely shut. Press down
on bag door release latch to lock into place.
! !
To reduce the risk of personal injury, unplug before
cleaning or servicing.
Do not use vacuum without filter bag in place.
4.1
4.3
Note: Bag door will not
latch without bag properly
installed.
WARNING
4.2
A
4.4
B
B
C
SECONDARY FILTER: When to Replace
4.5 When the red indicator light for the filter full illuminates or the unit
is not cleaning well, the secondary filter (A) located inside the bag compartment is clogged with dirt or dust; change the secondary filter.
SECONDARY FILTER: How to Replace
! !
To reduce the risk of personal injury, unplug before
cleaning or servicing.
Do not use vacuum without either the secondary or
final filter in place.
WARNING
Secondary Filter
The secondary filter is located inside the bag compartment and protects the motor from dirt particles.
4.6 To change the secondary filter first remove the
bag door then slide the filter out by grasping and pulling from the bottom (as shown).
4.7 Insert the new filter by lifting the metal safety lever
(A) and sliding the new filter in until it is securely in
place. Be sure to grab filter by plastic frame and finger
loop located on bottom of filter. Reattach bag door.
4.6 4.7
NOTE: Bag door cannot be closed unless filter is
in place.
4.8 WHEN FILTER HAS BEEN REPLACED,
RESET THE “FILTER FULL” INDICATOR ON THE
LED DIAGNOSTIC PANEL (SEE PAGE 14).
What to Buy
Use only genuine Hoover Secondary Filters with your
vacuum. When purchasing a new Secondary Filter,
®
Hoover Part No. 440001913
ask for
12
4.5
A
A
Page 13

FINAL FILTER: When to Replace
4.9 The final filter (A) located on top of the nozzle should be changed when
clogged with dirt or dust. Inspect regularly or when changing the secondary filter.
4.9
A
FINAL FILTER: How to Replace
! !
To reduce the risk of personal injury, unplug before
cleaning or ser vicing. Do not use vacuum without
either the secondary or final filter in place.
4.10 To remove this filter when it becomes dirty,
first release the handle all the way to the floor by
stepping on the handle release lever (B) twice.
4.11 To remove final filter, pull tab (C) for ward.
Remove filter cover and filter. Insert a new filter
and replace the filter cover.
WARNING
What to Buy
Use only genuine Hoover Final Filters with your
vacuum. When purchasing a new Final Filter, ask for ®
Hoover Part No.440001914.
4.10
B
C
4.11
BRUSHROLL: When to Clean or Replace
When the red indicator light above the brushroll check icon illuminates and is blinking, the brushroll is jammed and
needs checked and cleaned.
When the red indicator light above the brushroll check icon illuminates and stays on, the brushroll bristles are worn
and the brushroll needs replaced.
It is also advised to check occasionally for excess hair or fiber wrapped around the brushroll.
BRUSHROLL: How to Clean or Replace
! !
To reduce the risk of personal injury from moving
parts, unplug vacuum before ser vicing.
4.12 To remove the brushroll, tilt nozzle on its side with
brushroll side plate up. Push the brushroll release button (A) forward and remove the side plate (B).
4.13 Twist brushroll forward and lift brushroll out. If
cleaning, remove any debris and/or hair from the
brushroll. If replacing, discard old brushroll and install
a new one.
4.14 To reinstall the brushroll, slide the brushroll back
into the brush housing and twist it backwards until it
locks in place.
4.15 Press the side plate (C) back onto the nozzle,
until it locks into place.
4.16 If you’ve replaced the brushroll with a
new one, reset the brushroll check indicator
on the LED Diagnostic Panel (see page 14).
WARNING
4.12
A
4.13
4.14
4.12
B
4.13
4.15
C
What to Buy
Use only genuine Hoover Brushroll with your
vacuum. When purchasing a new Brushroll, ask for
Hoover Part No. 440001916.
13
Page 14

RESETTING LED INDICATOR LIGHT
4.17
4.17 When it is time to change the Brushroll or change the Secondary Filter, the indicator light above those
particular icons will illuminate and stay on (solid). Once the Brushroll or Secondary Filter has been
replaced, the indicator light will need to be manually reset. The indicator light A LWAY S needs to be reset
whenever the brushroll or secondar y filter have been replaced.
To reset the indicator light , first turn the unit off, while making sure it is still plugged in. Take a paper clip or
pen tip and gently push the tip into the opening next to the . The “Brushroll Check” inidicator light will
begin to blink, signifying that you have activated the “reset” mode.
Upon activating the “reset” mode, the indicator light above the “Brushroll Check” icon will begin to blink first
(default), indicating that you have selected to reset the “Brushroll Check” indicator. Pushing the tip into
the opening next to the again will make the “Filter Full” light blink, indicating that you’ve selected the
“Filter Full” indicator to reset. Pressing the will toggle between the filter and the brushroll.
Once you’ve selected the correct indicator that you need to reset, push the paper clip or pen tip into the
opening next to the and hold it there until the indicator light turns off.
14
Page 15

CLEARING BLOCKAGES
! !
WARNING
To reduce the risk of personal injury, unplug before cleaning or servicing.
Low suction or pick up may be due to a blockage in
the system. Refer to the following steps to check
for blockages, continuing with each step until
the blockage is found:
4.18 Check fullness of filter bag
a. Change if needed.
4.19 Check airflow path
a. Plug cleaner in and turn ON. Check for
suction at end of hose (A).
b. If there is suction, continue to step 4.20.
c. If there is no suction, check for blockage
in hose and wand as follows:
i) Disconnect wand from hose by pressing
the wand release button (B) and pulling
wand from hose. Clear any blockages in
wand.
ii) Remove hose by pressing hose release
button on cleaner body (C) and pulling hose
out. Clear any blockages from hose or hose
duct.
iii) Reattach hose and wand by reversing steps
above.
4.20 Check under nozzle.
a. Turn cleaner OFF and unplug.
b. Release the handle all the way to the floor
by stepping on the handle release lever twice.
c. Turn cleaner on its side.
d. Remove brushroll by following steps on page13.
e. Inspect nozzle (D) and nozzle inlet (E) and
remove any blockages.
f. Replace brushroll by following steps on page 13.
4.21 Check nozzle hose located on back of cleaner
a. Slide the nozzle hose release button (F) to
disconnect the hose and clear any blockages.
b. Proceed to 4.22
4.22 Check Inspection door
a. Open the inspection door on the bottom of
cleaner.
b. Twist nozzle hose to unlock hose inside
inspection door.
c. Remove hose and clear any blockages.
d. Reattach hose inside nozzle and twist to lock
into place. Close inspection door.
e. Reattach nozzle hose on back of cleaner body.
Note: Inspection door will not close unless hose is properly locked in position.
4.18
4.19
A
4.19
4.20
4.21
F
4.22
4.19
B
C
4.20
E
D
4.22
LUBRICATION
The motor is equipped with bearings that contain sufficient lubrication for the life of the motor. The addition of lubricant
could cause damage. Therefore, do not add lubricant to motor bearings.
15
Page 16

5. TROUBLESHOOTING
If a minor problem occurs, it usually can be solved quite easily when the cause is found by using the
checklist below. Any other servicing should be done by an authorized service representative.
! !
To reduce risk of personal injury - unplug vacuum before ser vicing.
PROBLEM POSSIBLE REASON POSSIBLE SOLUTION
Cleaner won’t run
Cleaner/ tools
won’t pick up or
low suction
Cleaner hard to
push
Dust escaping
from vacuum
Brushroll Indicator
light is on (solid)
Brushroll indicator
light is flashing
Filter indicator
light is on (solid)
Bag full indicator
light is on (solid)
1. Not firml y plugged in. 1. Plug unit in fir mly.
2. No voltage in wall receptacle. 2. Chec k fuse or br eaker in home or buil ding.
3. Blown fuse or trippe d breaker. 3. Replace fuse or reset breaker in home or
4
. Thermal protector activated . 4. Unplug and allow cleaner to cool for 30
5
. Brushro ll jammed. 5. Clear/remove debris from brushroll- page 13.
6. Needs ser vice. 6. Contact your local authorized Hoover service
1. Incorrect carpet height setting. 1. Move carpet height adjustme nt knob to lower
2. Filter bag full a nd/or clog ged. 2. Change filter bag- page 11-12 .
3. Secondar y or final filte r clogged. 3. Replace secondary or final filter- page 12-13.
4. Blockage in air flow passage. 4. Clear blockage - page 15.
5. Agitator brushroll worn. 5. Repl ace brushroll- page 13.
6. Brushroll not turning. 6. Contact your local Authorized Hoover service
7. Need s servic e. 7. Contact your local authorized Hoover service
1. Incorrect carpet height setting. 1. Move carpet height adjustment knob to higher
1. Filter bag full. 1. Change filter bag - page 11-12.
2. Filter bag not installed correctly. 2. Review filter bag removal and replacement-
3. Hose not installed correctly. 3. Review hose installation - Page 7.
4. Filter dama ged or miss ing. 4. Replace Filter- page 12-13.
5. Needs ser vice. 5. Contact your local authorized Hoover service
1. Brushroll needs replaced. 1. Replace Brushroll- page 13.
1. Brushr oll may be ja mmed. 1. Clean brushroll- page 13.
1. Seconda ry filter needs replaced. 1. Replace secondary filter- page 12.
1. Filter bag full. 1. Change filter bag- page 11-12.
WARNING
building.
minutes (this will reset the thermal protector).
representative.
setting- page 9.
representative.
representative.
setting- page 9.
page 11-12.
representative.
16
Page 17

5. TROUBLESHOOTING
PROBLEM POSSIBLE REASON POSSIBLE SOLUTION
All three LED lights
are on (solid)
All three LED
lights are flashing
1. There is a motor error 1. Contact your local authorized Hoover service
representative.
1. There is a system error 1. Contact your local authorized Hoover service
representative.
6. SERVICE
To obtain approved Hoover® service and genuine Hoover® parts, locate the nearest Authorized Hoover® Warranty Service
Dealer (Depot) by:
• Checking the Yellow Pages under “Vacuum Cleaners” or “Household”.
• Visit our website at hoover.com (U.S. Customers) or hoover.ca (Canadian customers).
Follow the service center link to find the service outlet nearest you.
• For an automated referral of authorized service outlet locations call 1-800-944-9200.
Do not send your vacuum to Hoover®, Inc., Company in Glenwillow for service. This will only result in delay.
If you need further assistance:
To speak with a customer service representative call 1-800-944-9200; Mon-Fri 8am-7pm EST.
In Canada, contact Hoover® Canada, Toronto: 755 Progress Ave., Scarborough, ON M1H 2W7 OR Hoover® Canada,
Edmonton: 18129-111 Ave., Edmonton, AB T5W 2P2, Phone: 1-800-944-9200, Mon-Fri 8am-7pm EST.
Always identify your vacuum by the complete model number when requesting information or ordering parts. (The model
number appears on the bottom of the vacuum.)
PLEASE DO NOT RETURN THIS PRODUCT TO THE STORE.
17
 Loading...