

Royal RG1000, RG2000, RG3000, RG5000VS, RGPRO Owner's Manual
...
WOOD PELLET GRILL
OWNER’S MANUAL
DESIGNED FOR RESIDENTIAL OUTDOOR USE ONLY. USE FOOD GRADE WOOD PELLETS.
MODELS: RG1000 RG2000 RG3000 (Side Hopper Construction)
RG1000
RG3000
RG2000
CAUTION DO NOT USE OR STORE NEAR COMBUSTIBLE MATERIALS
INCLUDING GASOLINE, THINNER, OIL, PAINTS OR FLAMABLE LIQUIDS
www.royallgrills.com 325 South Park Street Reedsburg, WI 53959 Phone 608-768-8508

Thank you for selecting ROYALL for your wood pellet grill purchase.
Your grill is proudly made in America and is designed to provide years
of grilling enjoyment.
SPECIAL FEATURES
- EXTRA LARGE GRILLING SURFACE
- ROOMY SMOKE CHAMBER PROFILE
- UNIQUE SMOKE BAFFLE PLATE FOR ENHANCED CIRCULATION
- SOLID WELD CONSTRUCTION FOR STRENGTH AND DRUABILITY
- RG2000 & RG3000 BOTTOM AND SIDE SHELF
- RG2000 & RG3000 QUICK CHANGE PELLET HOPPER
- RG2000 & RG3000 DIGITAL CONTROL
- RG2000 & RG3000 ADDITIONAL RACK SYSTEM UPGRADEABLE
Your new grill has been shipped with some assembly required. Follow
the simple instructions and you’ll be ready to start grilling in minutes.
TOOLS REQUIRED:
- (2) 7/16 wrenches & (1) 3/8 wrench or nut driver
- 1/4 wrench or nut driver
- #2 Phillips screw driver
- hammer
STEP#1: Carefully remove packaging material and free unit from
shipping skid. (use cardboard or cloth under the grill base
during assembly to prevent scratches)
STEP#2: Check the packaging for the following items
- (2) Long Legs
- (2) Short legs
- (1) Hopper Cover Plate
- (1) Hardware Bag (with 2 caster wheels & 2 straight)
- (1) Set of Grill Grates
- (1) Drip Pan
- (1) Fire pot Heat Deflector
- (1) Drip Pail
- (1) Combustion fan
- (1) Axle rod
- (2) Handles with hardware (RG2000 & RG3000)
- (1) Chimney assembly (RG2000 & RG3000)
- (1) Side shelf assembly
- (1) Bottom shelf
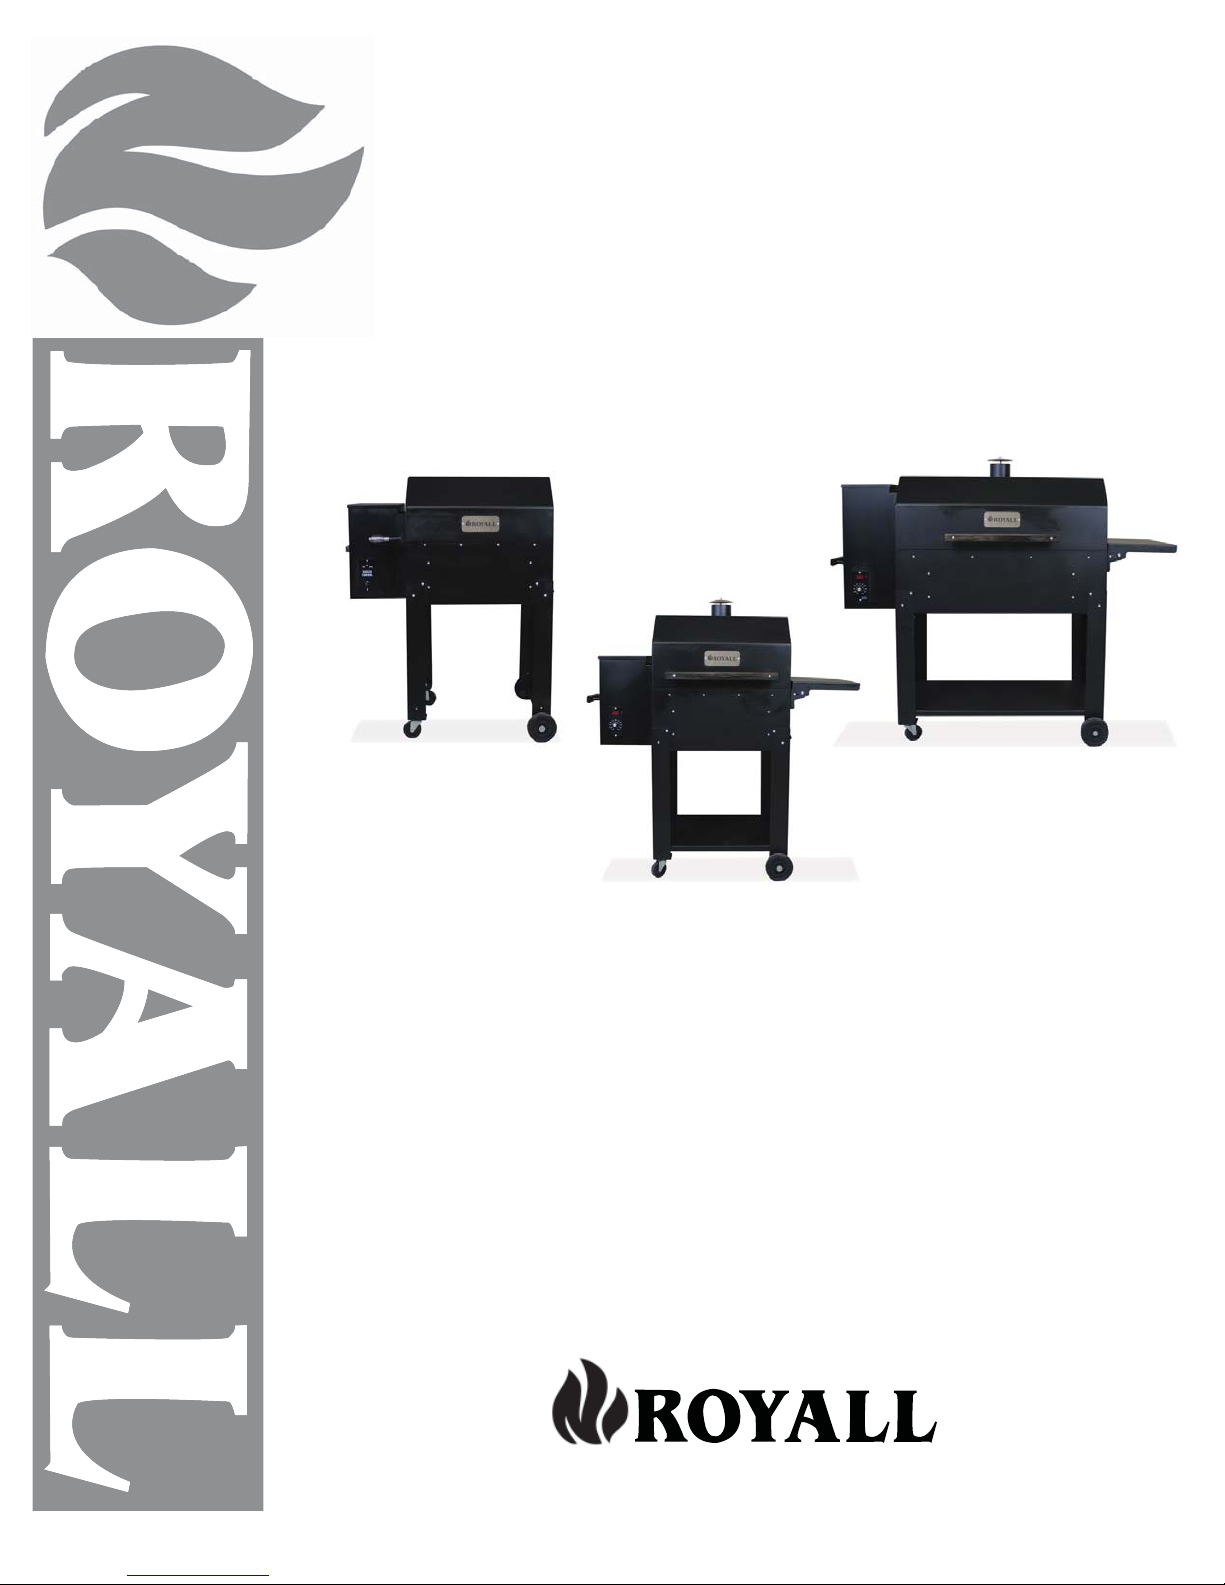
Locate fan motor
assembly with bracket
over auger opening
STEP#3: Lay Grill base on its back . Unwrap COMBUSTION FAN ASSEMBLY &
MOUNTING BRACKET. Locate mounting holes of bracket over (4)
holes in bottom of auger box and secure to base with (4)
3/8 hex ½” long screws NOTE: check blade after installation
to ensure that it spins without rubbing when mounted.
STEP#4: Plug combustion fan into
receptacle with orange
and white wire coming
from the control board
wire harness.
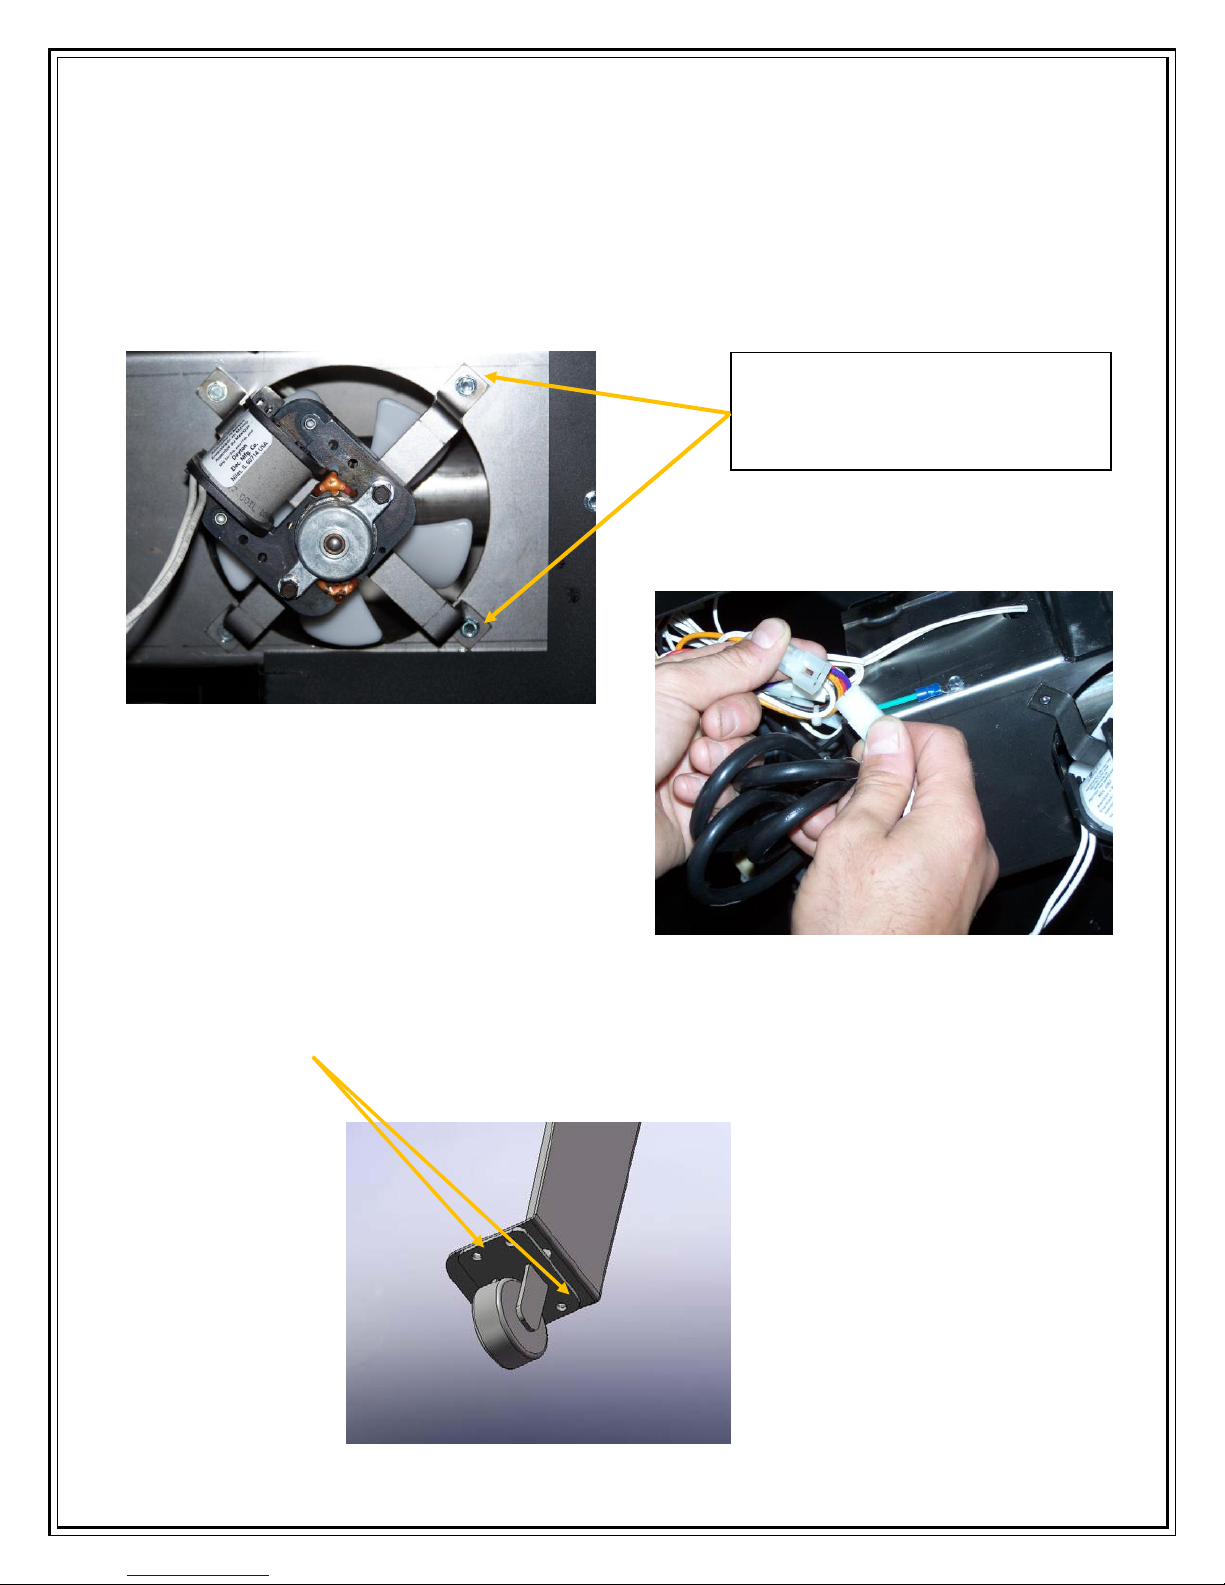
STEP#5: Attach swivel caster wheels to both short legs using
(2) 1/4-20 screws and flange nuts for each swivel wheel.
STEP#6: “LOOSELY” attach the 2 short
legs to Hopper end of grill
base corners using (4) 1/4-20 x
5/8 Phillips head bolts and (4)
flange nuts per leg. Repeat for
the 2 long legs to the other
end of the grill base . NOTE:
leave legs loose until bottom
pan has been installed.
STEP#7: Using (4) 1/4-20 x 5/8
Phillips head bolts and
(4) flange nuts, position
bottom shelf between
the legs. Now final
tighten leg bolts to
cabnet from step above
STEP#8: Secure a cap nut on ONE end of the 3/8 rod with a
hammer.
SLIDE over the rod:
(1)3/8 washer - (1) 5” wheel,
(1) 3/8 washer and slide rod
through both legs.
Slide on (1) 3/8 washer, (1) 5”
wheel, (1) 3/8 washer and(1)
cap nut.
NOTE: Support the rod ends
and final secure the cap nut
by tapping with a hammer.

STEP#9: Assemble the handles to the grill lid and pull handle to
hopper using hardware attached to the handle.
(RG2000 & RG3000)
STEP#10: Move grill into up right position. Attach side shelf assembly
brackets to end of grill using (4) 1/4-20 x 5/8 Phillips head
bolts and (4) flange nuts
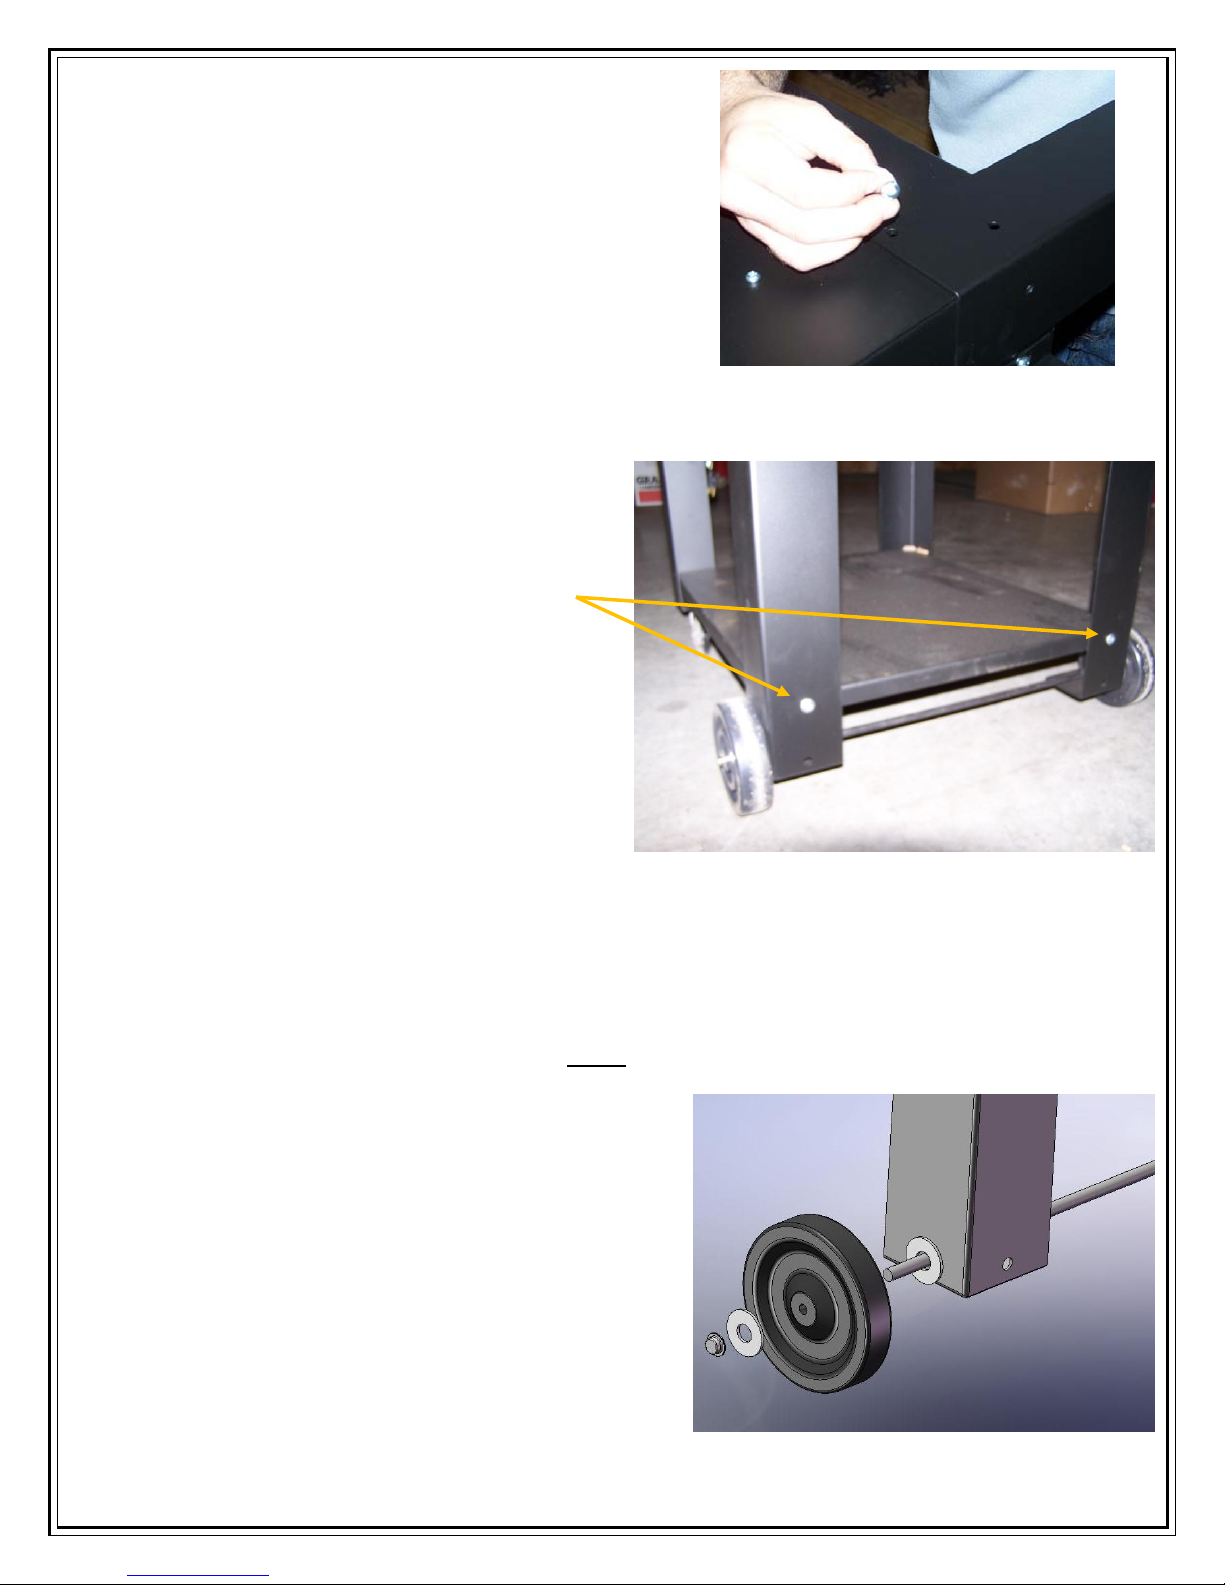
STEP#11: Attach chimney to roof by sliding up through from inside
the grill and securing (2) 3/8 phillips head screws & loc nuts.
STEP#12: Attach Rain cap to Chimney by placing
CAUTION: Locate your new grill such that all surfaces are at least 18”
from any combustible material. Also consider winds and proximity to
windows so that exhaust is not directly entering your home.
cap over rod and succuring cap with
acorn nut.
STEP#13: Attach smoke baffle plate inside, below chimney using (3)
3/8 phillips head screws & loc nuts
GETTING READY FOR THE FIRST TIME FIRING OF YOUR GRILL
STEP# 14: Move the grill and remaining components to your cooking
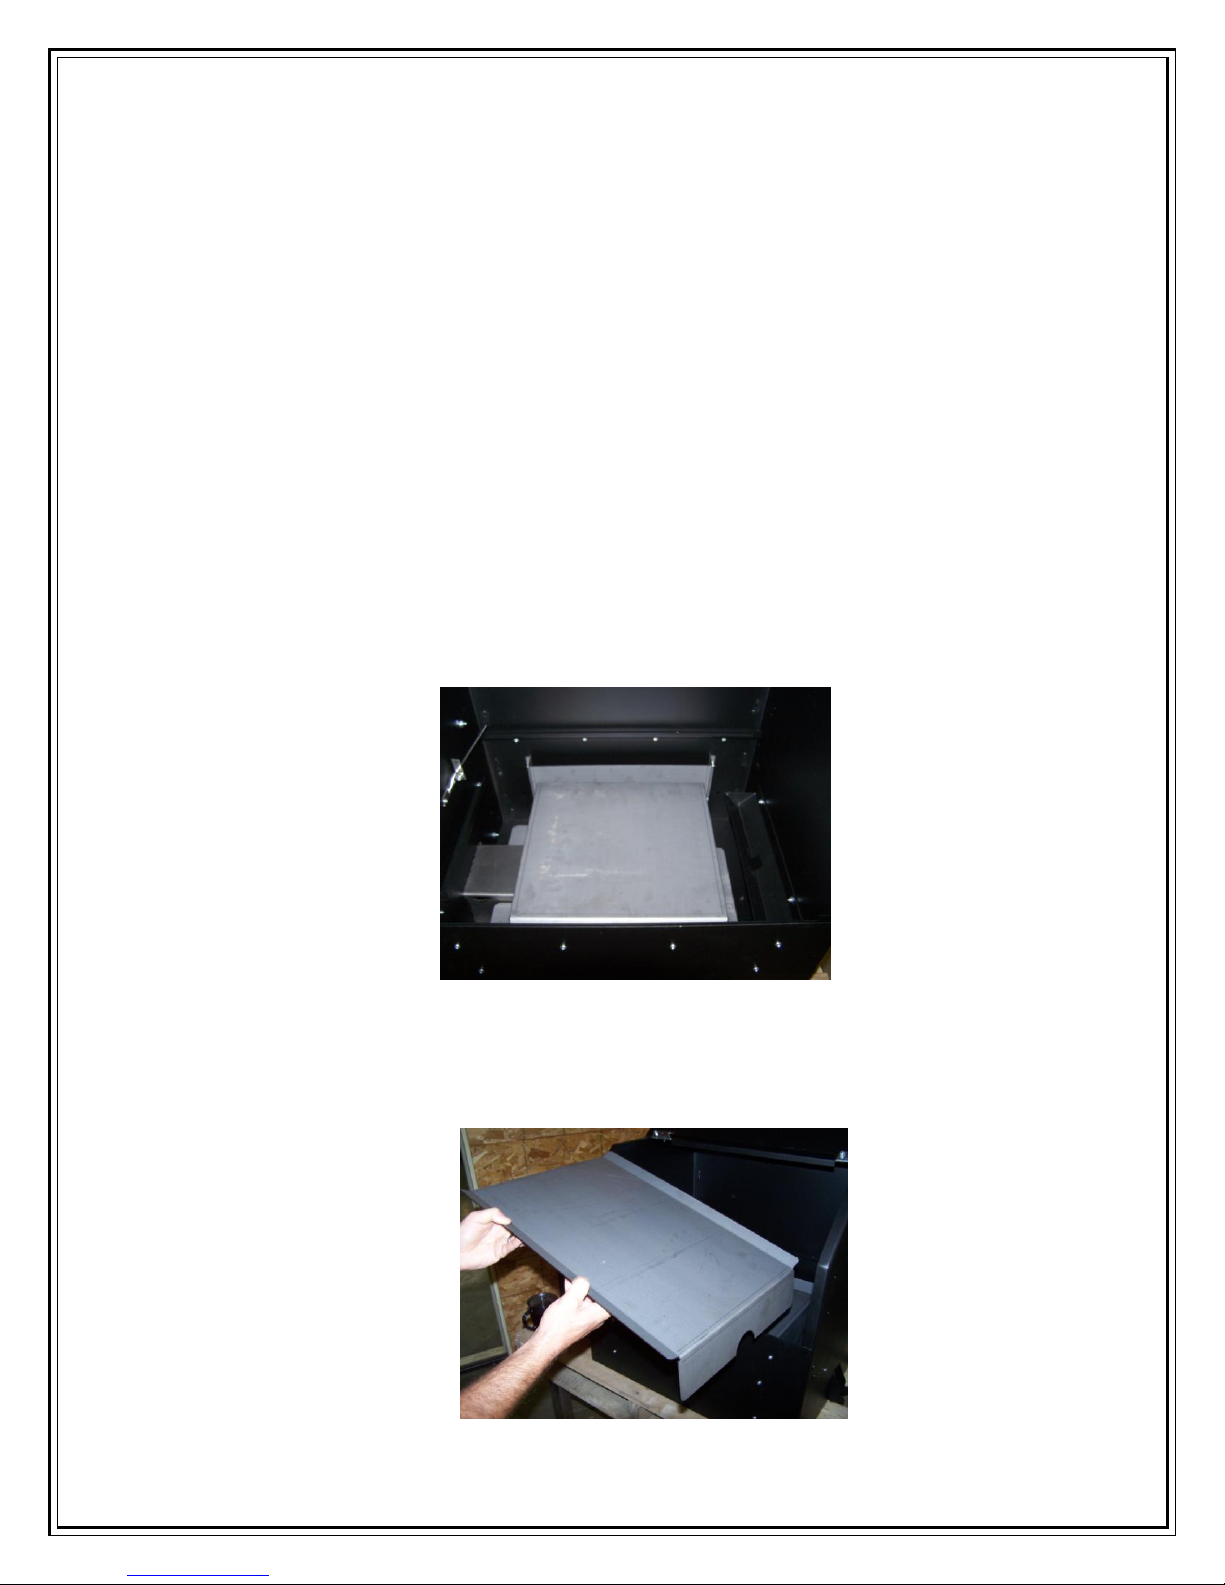
location. Remove the grates, drip pan and heat shield.
Note: A 110 volt grounded electrical outlet will be needed
within 6 feet of the grill.
STEP#15: Place the control switch in the off position and plug in the
unit. Visually check the Pellet hopper to see that no
foreign objects are present (like packing material).
STEP#16: Turn the control switch to the HIGH position. Visually check
to see that the auger is turning. (it revolves once/min)
STEP#17: Look under the bottom of the unit to see that the fan is
circulating
STEP#18: AFTER 2-3 minutes of power the hot rod in the fire pot should
be emitting a little heat and may have a faint glow to it.
STEP#19: Charge the pellet auger. Add food grade wood pellets to
the hopper and watch the fire pot until pellets appear.
(takes approx. 5 – 7 minutes)
STEP#20: Once a couple of pellets have reached the fire pot…Turn
the control switch to the off position. Then place the heat
shield over the fire pot so that it is centerend over the fire pot.
STEP#21: Install the DRIP PAN with one end sloping towards the catch
drain. NOTE: for easy clean up, place a layer of aluminum foil over
the drip pan.
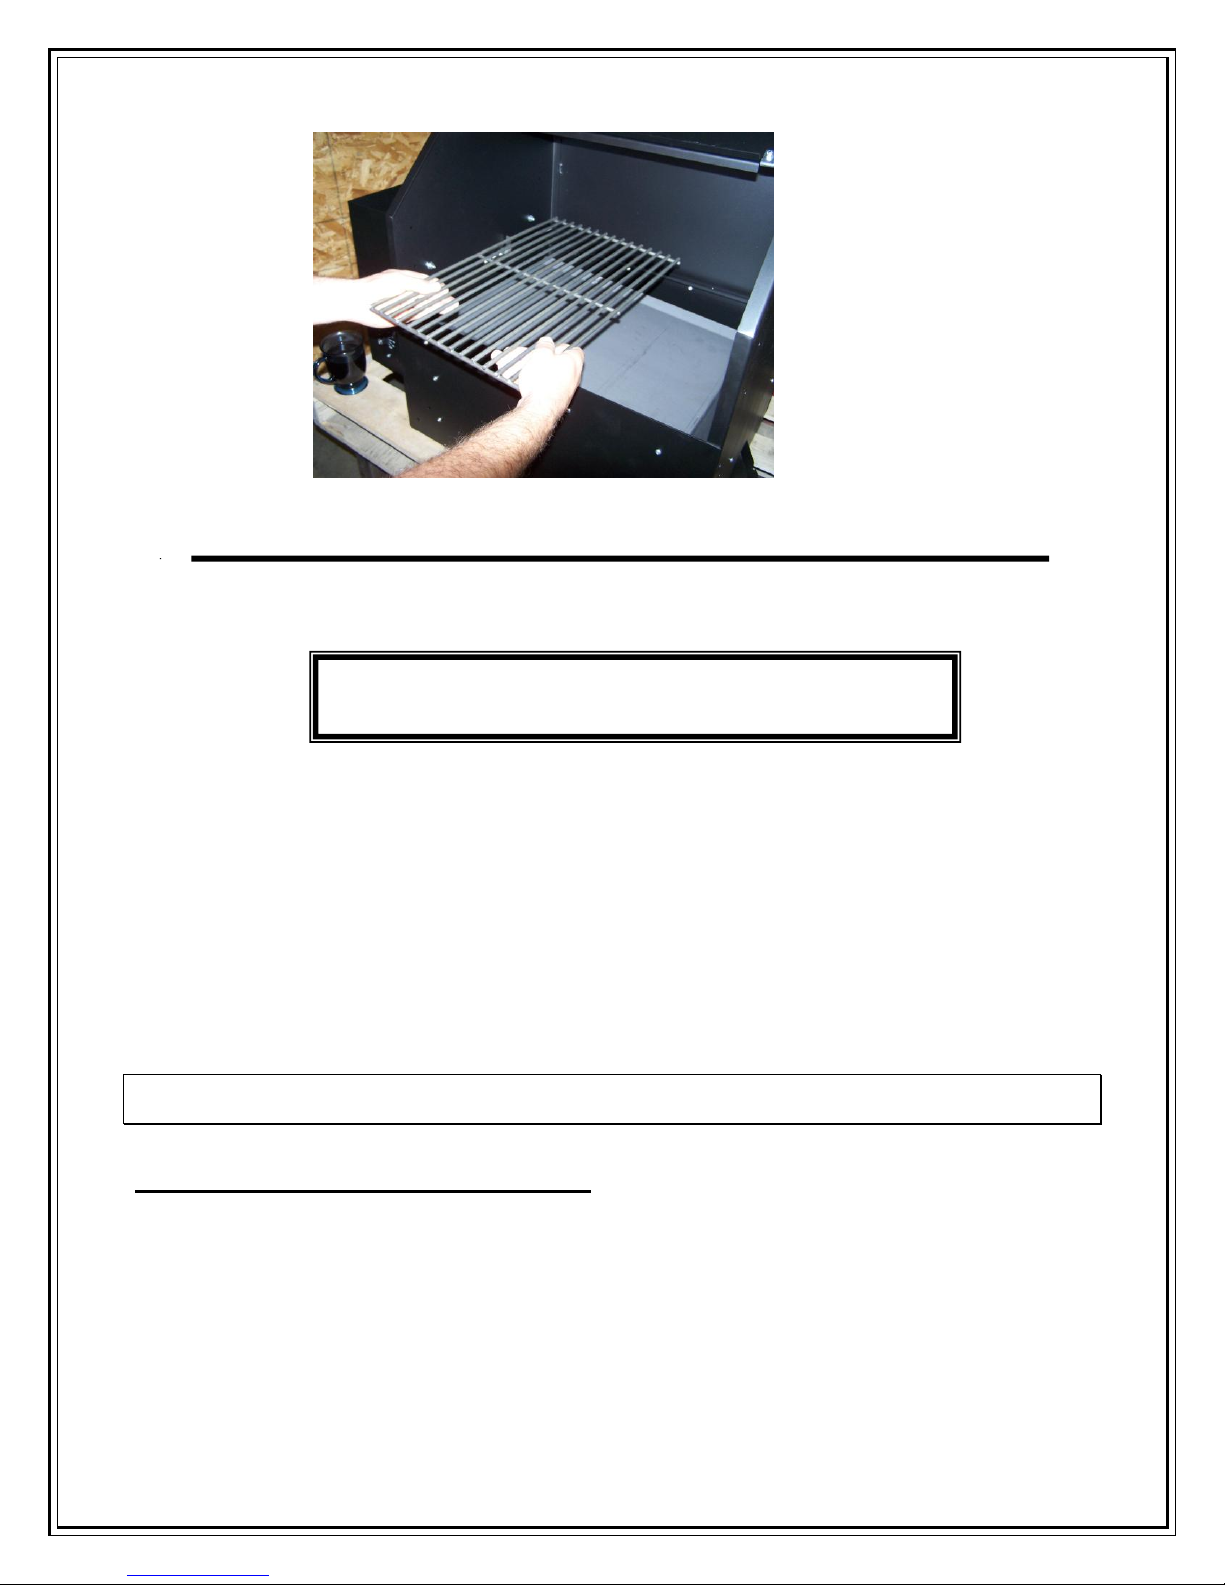
STEP#22: Place the GRILL GRATES onto the grill supports.
FIRST USE: WE RECOMMEND RUNNING THE GRILL
FOR 20 MINUTES ON HIGH TO SEASON THE GRILL
YOU ARE READY TO START GRILLING
SET THE CONROL SWITCH TO HIGH TO START YOUR GRILL. THE HOT ROD
WILL HEAT FOR ABOUT 3-4 MINUTES AND SHUT OFF. NORMALLY THIS IS
ENOUGH TIME TO IGNITE THE PELLTS. AFTER 10-12 MINUTES OF BURNING
, YOU CAN SET THE CONTROL TO YOU DISIRED TEMPERATURE.
IF IT DIDN’T START, TURN IT OFF AND ON AGAIN TO REPEAT THE START
CYCLE.
OPERATING DO’S and DON’TS
EACH TIME YOU START YOUR GRILL:
CHECK PELLET HOPPER TO ENSURE PELLETS ARE DRY AND READY TO
USE. (Wet pellets can swell and damage the auger or shear the pin)
Apply a new foil to the spatter plate for easy clean up.
Check for and remove any excessive drippings or build up to avoid
flare ups and grease fires.
 Loading...