

Royal STICK VAC PLUS, PROTEGE 7400 SERIES Owner's Manual
#I-320096-001
Rev.
4/94
Please read these
instructions carefully
before using your
Stick Vac.
Let us help you
put your vacuum
together or answer
any questions, call
1-800-321
-1
134.
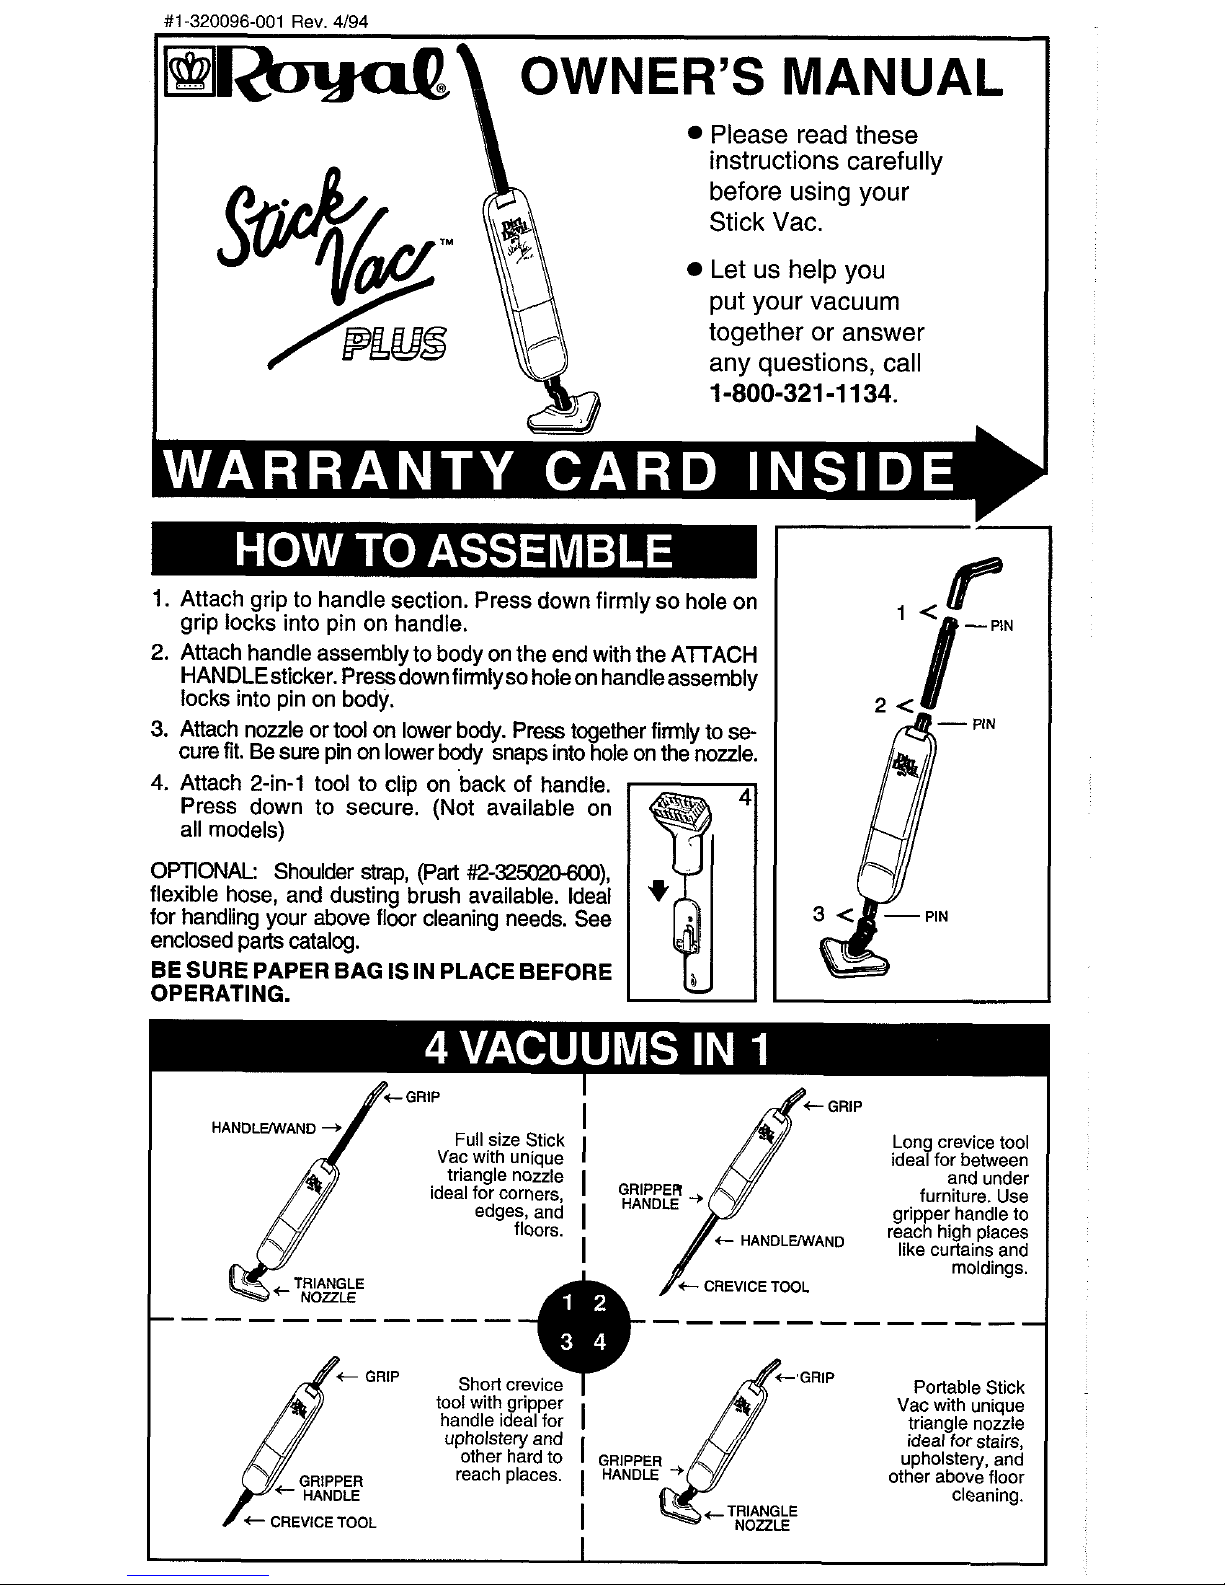
1.
Attach grip to handle section. Press down firmly so hole on
grip locks into pin on handle.
2. Attach handle assembly to body on the end with the AlTACH
HANDLEsticker. Pressdownfirmlyso holeon handleassembly
locks into pin on body.
3.
Attach nozzle or tool on lower body. Press together firmly to
se-
cure fit. Be sure pin on lower body snaps into hole on the nozzle.
4.
Attach 2-in-1 tool to clip on back of handle.
Press down to secure. (Not available on
all models)
OFTONAL: Shoulder
strap,
(Part
#2-325020-600),
flexible hose, and dusting brush available. Ideal
for handling your above floor cleaning needs. See
enclosed parts catalog.
BE SURE
PAPER
BAG
IS
IN
PLACE
BEFORE
OPERATING.
Long crevice tool
ideal for between
and under
furniture. Use
gripper handle to
reach high places
like curtains and
moldings.
Portable Stick
Vac with unique
triangle nozzle
ideal for stairs,
upholstery, and
other above floor
cleaning.
This information has been compiled by the Vacuum Cleaner Manufacturer's Association
working with government and private sources, concerned with product safety. These basic
guidelines are for your protection and convenience.
THlS VACUUM IS INTENDED FOR HOUSEHOLD USE ONLY.
IMPORTANT SAFETY INSTRUCTIONS
When using an electrical appliance, basic precautions should always be followed, including
the following:
READ ALL INSTRUCTIONS BEFORE USING THlS APPLIANCE
WARNING: TO REDUCE THE RISK OF
FIRE, ELECTRIC SHOCK OR INJURY:
Do not leave appliance when plugged in.
Unplug from outlet when not in use and
before servicing.
Do not use outdoors or on wet surfaces.
Do not allow to be used as a toy. Close
attention is necessary when used by or
near children.
Use only as described in this manual.
Use only manufacturer's recommended
attachments.
Do not use with damaged cord or plug. If
appliance is not working as it should, has
been dropped, damaged, left outdoors, or
dropped into water, return it to a service
center.
Do not pull or carry by cord, use cord as
a handle, close a door on cord, or pull cord
around sharp edges or corners. Do not run
appliance over cord. Keep away from
heated surfaces.
Do not unplug by pulling on cord. To unplug,
grasp the plug, not the cord.
Do not handle plug or appliance with wet
hands.
Do not put any object intoopenings. Do not
use with any opening blocked; keep free of
dust, lint, hair, and anything that may reduce
air flow.
Keep hair, loose clothing, fingers, and all
partsof body awayfrom openingsand moving
parts.
Do not pick up anything that is burning or
smoking, such as cigarettes, matches, or hot
ashes.
Do not use without dust bag andlor filters in
place.
Turn off all controls before unplugging.
Use extra care when cleaning on stairs.
Do not use to pick up flammable or
combustible liquids such as gasoline or use
in areas where they may be present.
Approved by thevacuum Cleaners Manufacturer's Association ExecutiveCommittee, April
29,1987.
SAVE THESE INSTRUCTIONS
WARNING
I
Electrical shock could occur if used outdoors or on wet surfaces.
NOTE: REGISTER YOUR CLEANER TO VALIDATE WARRANTY
WARNING:
To reduce the risk of electric shock, this appliance has a polarized plug (one blade is wider
than the other). This plug will fit in a polarized outlet only one way. If the plug does not fit fully
on the outlet, reverse the plug. If it still does not fit, contact a qualified electrician to install the
proper outlet. Do not change the plug in any way.
IMPORTANT: OPERATE CLEANER AT VOLTAGE
SPECIFIED ON DATA PLATE.
1.
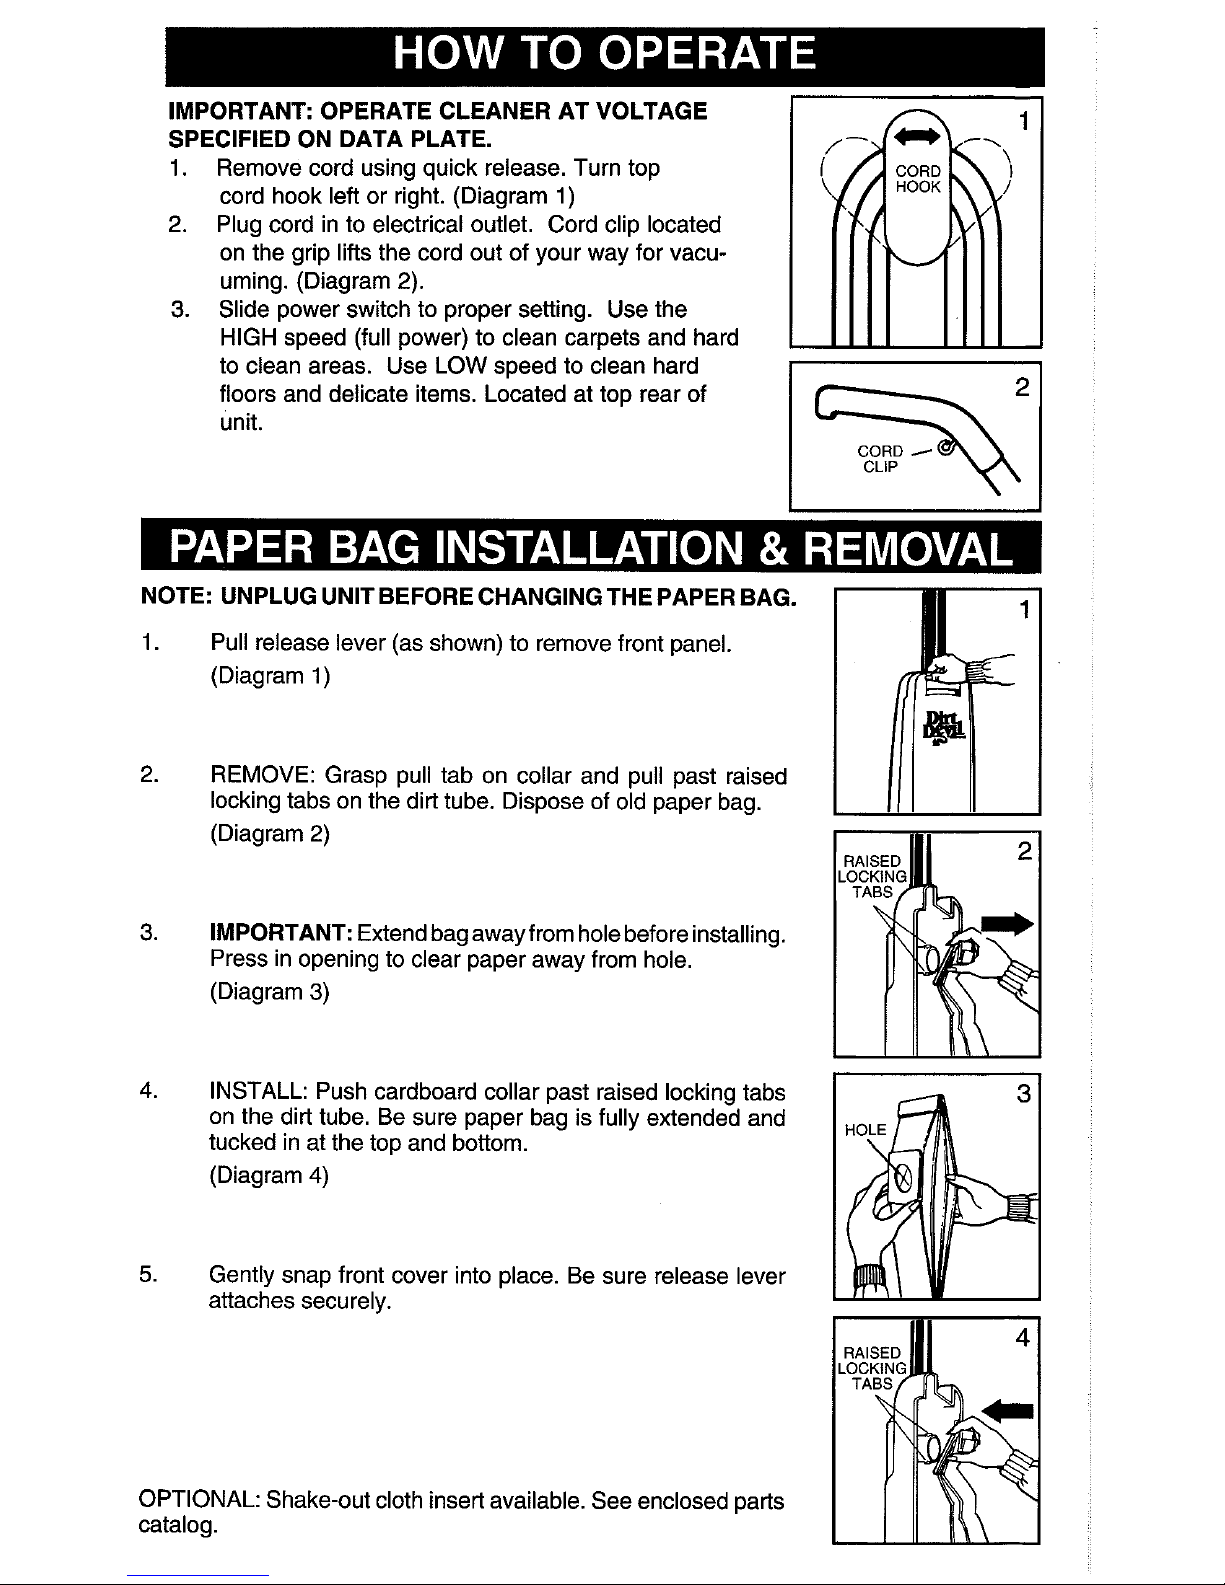
Remove cord using quick release. Turn top
cord hook left or right. (Diagram 1)
2. Plug cord in to electrical outlet. Cord clip located
on the grip lifts the cord out of your way for vacuuming. (Diagram 2).
3. Slide power switch to proper setting. Use the
HIGH speed (full power) to clean carpets and hard
to clean areas. Use LOW speed to clean hard
floors and delicate items. Located at top rear of
unit.
NOTE: UNPLUG UNIT BEFORE CHANGING THE PAPER BAG.
Pull release lever (as shown) to remove front panel.
(Diagram 1)
REMOVE: Grasp pull tab on collar and pull past raised
locking tabs on the dirt tube. Dispose of old paper bag.
(Diagram 2)
IMPORTANT:
Extend bag away from hole before installing.
Press in opening to clear paper away from hole.
(Diagram 3)
INSTALL: Push cardboard collar past raised locking tabs
on the dirt tube. Be sure paper bag is fully extended and
tucked in at the top and bottom.
(Diagram 4)
Gently snap front cover into place. Be sure release lever
attaches securely.
OPTIONAL: Shake-out cloth insert available. See enclosed parts
catalog.
 Loading...