

Page 1

220DX Operation Manual
Page 2

Royal ECR
220DX Operation Manual
Introduction
Thank you for choosing the Royal-220DX electronic cash register.
Its functions are flexible and can preset a quality receipt for your clients, and
get detailed reports for your accounts. Works well in retail and hospitality.
We have included a PC software to help you get program ECR.
This operation manual comes in two sections:
1. How to program the register.
2. How to use the register.
User should read carefully to ensure optimum performance.
Note:
The register has max. 3 digits decimal; user can choose the decimal point
position in the system flag.
All examples in this operation manual use 2 digits decimal point.
Page 3

Royal ECR
220DX Operation Manual
WARNING!
In order to ensure years of trouble-free operation, the following points
should be noted when handling the cash register.
1. Do not place the cash register where it will be subjected to direct
sunlight, high humidity, near water or other liquids, or high
temperature.
2. Make sure the voltage matches the power supplied in the area.
3. Do not insert or drop metal, flammable or other foreign objects into
the machine through the ventilation slits, as this may cause fire or
electric shock.
4. Never operate the cash register while your hands are wet.
5. When removing dirt stains, use only isopropyl alcohol. Never use
benzene, thinner, or any other volatile agent which may cause
damage to the plastic material.
6. Do not remove the cover, repair or modify the machine by yourself.
Please contact your dealer for help.
7. When the control key is in LOCK mode, the display is OFF and
keyboard is disabled however the ECR’s power is still ON. Make sure
the AC adapter cord is disconnected before opening the upper shell
or replacing any hardware equipment within the cash register to avoid
damages to the ECR.
The socket-outlet shall be installed near the equipment and shall
be easily accessible.
===Notes===================================================
1. The contents of this manual are subject to change without notice.
2. Our company cannot be held responsible if other products, which are not
approved by Our company, are used for options or expendable supplies
Page 4

Royal ECR
220DX Operation Manual
I
CONTENTS
1 MAIN FEATURES ........................................................................................... 1
1.1 Hardware & Software Features ................................................................... 1
2 BEFORE USING .............................................................................................. 2
2.1 Model Selection ......................................................................................... 2
2.2 Key Layout ................................................................................................ 3
2.3 Keys Function ............................................................................................ 3
2.4 Display ....................................................................................................... 6
3 CLEAR MEMORY OPERATION................................................................... 7
3.1 Initial Clear ................................................................................................ 7
3.2 Clear the Reports Data................................................................................ 8
3.3 Clear the PLU stock ................................................................................... 9
4 MEMORY ALLOCATION .............................................................................10
5 WORKING TYPE CHOOSE .......................................................................... 11
5.1 Changing to Restaurant Mode ...................................................................11
5.2 Changing to Retail Mode .......................................................................... 12
6 THE SPECIAL INPUTTING ..........................................................................13
6.1 Regarding Decimal Point Inputting........................................................... 13
6.2 Descriptors Inputting ................................................................................ 13
7 PROGRAMMING ...........................................................................................16
7.1 Time and Date Preset ................................................................................ 16
7.2 Department Preset .................................................................................... 16
7.3 PLU Preset Parameter............................................................................... 19
7.4 System Option Preset ............................................................................... 21
7.5 TAX/VAT Rate Preset ............................................................................... 27
7.6 Welcome Message Preset ......................................................................... 29
7.7 Trailer Message Preset .............................................................................. 29
7.8 Clerk Programming .................................................................................. 29
7.9 Check/Charge Key Programming ............................................................. 30
7.10 - % Preset ................................................................................................. 30
7.11 Refund(-)Preset ................................................................................... 30
7.12 Printout the System Information Operation ............................................... 31
7.13 Miscellanous features in Prog Mode ......................................................... 31
8 RETAIL MODE ...............................................................................................32
8.1 Clerk Assign ............................................................................................. 32
8.2 Time Display ............................................................................................ 32
Page 5

Royal ECR
220DX Operation Manual
II
8.3 Entering Starting Cash Amount (RA/PO).................................................. 33
8.4 Department Sale Entries ........................................................................... 33
8.5 PLU Operation ......................................................................................... 34
8.6 Finalizing a Transaction............................................................................ 37
8.7 Split price operation ................................................................................. 38
8.8 Return Merchandise (RM) Operation........................................................ 39
8.9 Refund Operation ..................................................................................... 40
8.10 Percentage (- %) OPERATION................................................................. 42
8.11 VOID Operation ....................................................................................... 43
8.12 Single Item Department or PLU Entry ...................................................... 45
8.13 Tax Operation ........................................................................................... 45
8.14 Reprint the Last Receipt ........................................................................... 48
8.15 No Sale Operations................................................................................... 48
8.16 Calculator Function .................................................................................. 49
8.17 Receipt ON/OFF ...................................................................................... 50
8.18 Post sale change calculation ..................................................................... 50
9 RESTAURANT MODE ...................................................................................51
9.1 Major Features ......................................................................................... 51
9.2 Table Preset .............................................................................................. 51
9.3 REG Mode Operation ............................................................................... 52
9.4 Active Table Report .................................................................................. 53
9.5 Table Report ............................................................................................. 53
10 TRAINING MODE ......................................................................................55
11 COMMUNICATIONS .................................................................................56
11.1 Serial Port Overview ................................................................................ 56
11.2 Communications with PC ......................................................................... 57
11.3 External Connecting Scanner .................................................................... 57
11.4 External Terminal Printer.......................................................................... 57
12 ELECTRONIC JOURNAL .........................................................................59
13 REPORTING AND BALANCING ..............................................................60
13.1 Taking Read and Reset Reports ................................................................ 60
13.2 Report Sample Format (VAT Version) ....................................................... 62
14 OTHER FUNCTIONS .................................................................................68
14.1 Power Failure ........................................................................................... 68
15 ERROR CODE CORRESPONDING LIST TABLE ..................................69
Page 6
1
1 MAIN FEATURES
1.1 Hardware & Software Features
Standard Hardware
Customer display screen 8 digits large size numeric yellow/blue LED
Operator display screen
9 digits large size numeric yellow/blue LED
Printer
58mm wide 1 station thermal printer
Control lock 5- position control lock(P/R/X/Z/L)
Keyboard 36 keys with rubber
RS-232 Ports
1xDB-9 (male),1xRJ11
PS2 Port 1xPS2
Optional Hardware
External printer
Barcode scanner
Cash drawer
External PS/2 scanner
Software Features
No. of PLU(Max)
Up to 500 Price Look Ups (PLUs)
No. of Dept(Max)
Standard max. 16 departments
No. of Clerk(Max)
Up to 10 clerks with name and password
No. of Table(Max)
40
Tax function 4 tax rates with Value–Added Tax (VAT)
4 tax rates with Add-on Tax
Payment TOTAL and check/charge tender functions
Electronic journal Electronic journal capability with 60000 lines
Logo 10 built-in logos & 1 user-defined
Line of welcome message 6
Line of trailer message 6
Training mode Supports training mode for new clerks
Other functions Void, Error Correct, Return Merchandise, Void all
transaction functions etc
Page 7

2
2 BEFORE USING
2.1 Model Selection
There are 5 modes: Program mode, Registration mode, X report mode, Z report mode and
Lock mode.
Each mode has a specific function:
LOCK
The machine is locked without responding to the key input.
To exit this mode, just change the mode.
REGISTRATION (Reg)
Used to perform all sales transactions, paid out,
and received-on-account functions.
X
This type of report will not affect any sales data in the report memory. It can be
issued at any time.
Z
This type of report will clear all the resettable totals and counters in the report
memory after the report is issued. However, it should be issued only once at the
end of the day usually after closing the store.
PROGRAM (Prog)
All the programming is done in this mode.
Page 8

3
2.2 Key Layout
The following is the standard keyboard layout, which was initially set at the factory
.
dept
shift
clerk
feed void
7 8 9
4/12
8/16 -%
#/NS
RA Ref/-
4 5
6
3/11
7/15
tax
shift
check
PO. PLU
1 2
3
2/10
6/14
sub
total
charge
C
qty/
time
0 00
1/9 5/13
amt tend
TOTAL
2.3 Keys Function
This chapter will introduce all the keys which the register provided; it includes the
keys that have already been installed on the standard keyboard layout and the
optional keys.
1) [0-9] keys
T
hese keys are used to enter amounts, quantity, percentage, etc. The leading
zeros entered prior to a 1 to 9 are ignored.
2) [00] key
This key is used to enter “00” as numeric key.
If user opens the system flag: [00] is used as [.] key, The key is used for decimal
multiplication, when setting or entering fractional percentage discounts, or when
programming fractional tax rates. Do not use the decimal key when making
amount entries into DEPT or PLUs or tendering.
3) [feed](Paper Feed) key
Simply used for feeding paper. This key is operable in all except LOCK mode. If
user needs to feed paper continuously, depress this key and without release.
Standard Keyboard Layout
Page 9

4
4) [#/NS](No Sale) key
The key is used to open the cash drawer without recording a sale or as a
reference number during a sale.
5) [C] (CLEAR) key
This key has two basic functions. One is to correct any numeric keys entry error
or incorrect command entry; another is to correct a machine error condition that
has caused the error tone to sound.
6) [qty/time] key
This key has two functions, straight multiplication and time displaying. When this
key is pressed in “Reg” mode and the machine is free, the time is displayed.
7) [- %] key
Use the key to register discount or surcharge.
Depending on programming, they can be added to an item or a subttl amount.
The rate can be preset or manually entered.
8) [ref/-]key
During the sale:
This key is used when an amount of money is subtracted from a sale. It is used
to give back to a customer for reason other than an item being returned from a
sale.
It can either work with a department(item)or off the total of the sale.
Out of the sale:
This key is used when an item sold by the store is returned for some reason and
the amount of the sale is given back to the customer.
9) [void] key
This key has two functions:
Press this key directly can cancel the registration of the last-registered item
which includes function key operation, such as %, (-), RM, etc.
This key can be used directly after the item has been entered incorrectly, or to
remove an item entered earlier in the sale.
Note: 00+ [VOID] can cancel the whole transaction.
10) [PLU](Price Look Up) key
PLU is the selling item coded with number. A PLU is usually associated with a
preset price. This key retrieves the preset price from the PLU table in the register
memory and records item. PLU price can also be opened, that is OPEN PLU.
Page 10

5
11) [PO](Paid Out) key
This key is used when some amount of money is taken out from the register for
reason other than a sale transaction.
12) [RA](Received On Account) key
This key is used when some amount of money is received on account.
13) [RCPT/OFF](Receipt ON/OFF)key
When this key is pressed once, the register will stop issuing receipts. When this
key is pressed again, the register issues receipts. The mark “●” in the rightmost
digit on the display indicates the register is in the receipt off mode.
14) [check] key
Press to totalize a transaction paid by check.
15) [sub total](subttl) key
This key displays and prints the total of the sale including any tax calculation.
16) [amt tend/TOTAL](TOTAL) key
Press to totalize a transaction paid by cash. Also, if the cash amount tendered is
over the amount purchased, enter the amount of the tender, and then press the
TOTAL key. The drawer will open and the cash change will be computed.
17) [DEPTx] keys
The machine has 8 direct departments. Each department supports 2 layers that
can be extended via [dept shift] key to support 16 departments. Normally they are
used to manage all PLU.
18) [dept shift] key
This key is a conversion key. Press it in order to obtain the extended number of
department.
19) [tax shift] key
When this key is depressed before a department or PLU, the tax shift key
reverses the tax shift of the Department/PLU. i.e. a department with no tax status
could be preset with Tax1, Tax2, Tax3 or All.
20) [charge] key
Calculates the sale total including tax, finalizes the sale, and opens the cash
drawer.
Page 11

6
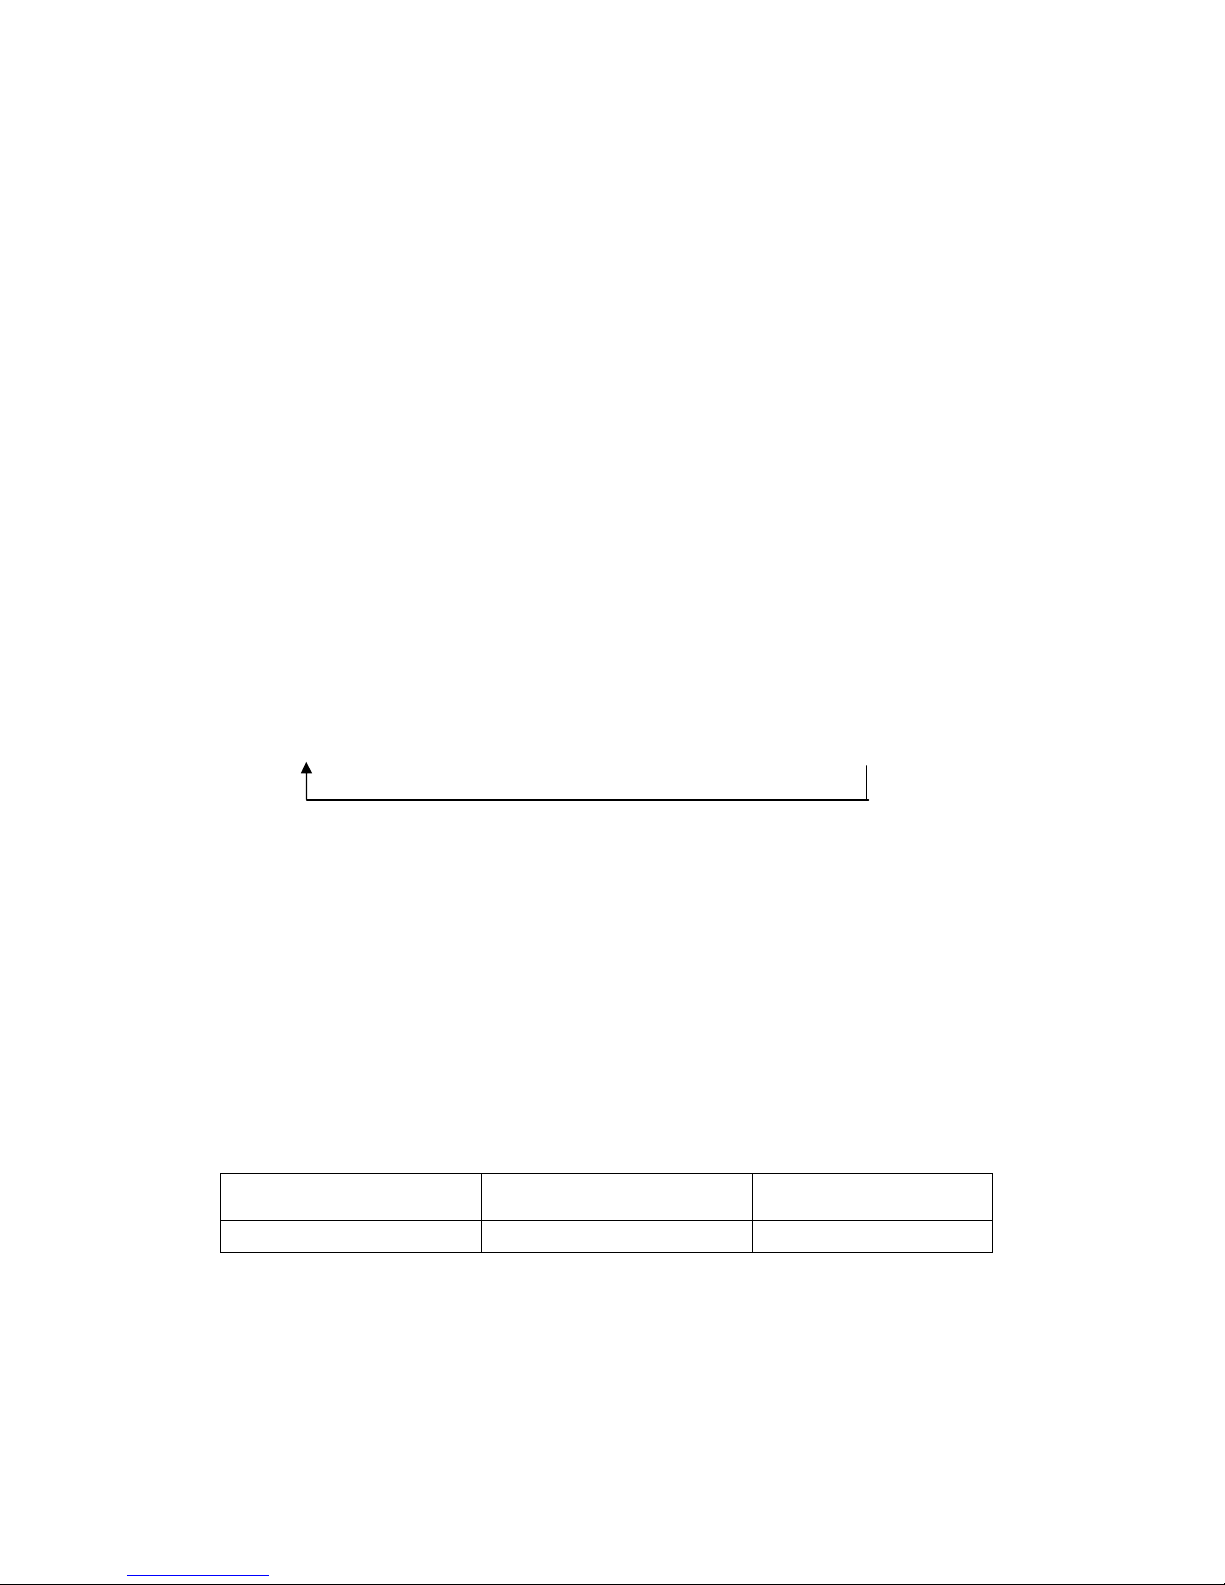
2.4 Display
The Operator’s Display (front display) is located at the top of the register just above
the keyboard. The rear display is a 9 digits display that allows your operator to monitor the
transaction and view the sale total. The display has two types of display portions —
numeric display and message descriptors (status lamps).
Numeric Display:
DEPT /PLU (2 digits): Display the code that represents each DEPT key. It stays lit
when repeating the same department entry.
RPT (1 digit): Display the repeat count of the same count. The count is indicated from
the second entry on, and only the last digit will be displayed even if the
count exceeds nine.
AMOUNT: 8 digits for total display, and 7 digits for entries. When the subttl is
8-digits, the RPT digit is also used for amount display.
The Point Message:
DP 1: Illuminates when the dept shift key depressed one time.
TAX SF1 (TAX SHIFT 1): Indicates the TAX SHIFT 1 key is pressed.
TAX SF2 (TAX SHIFT 2): Indicates the TAX SHIFT 2 key is pressed.
TAX SF3 (TAX SHIFT 3): Indicates the TAX SHIFT 3 key is pressed.
TAX SF4 (TAX SHIFT4): Indicates the TAX SHIFT 4 key is pressed.
Decimal Position: The register has max.3 digits decimal.
RCPT OFF:Indicates that the register is in “Receipt Off” mode.
Decimal
Position
DP SF
TAX
SF1
TAX
SF2
RCPT
OFF
TAX
SF3
TAX
SF4
Dept/PLU RPT
Amount
Page 12

7
3 CLEAR MEMORY OPERATION
3.1 Initial Clear
To Perform an All Clear:
The first way:
1. Switch the control lock to the Prog mode.
2. Enter the number “951” on the numeric keypad.
3. Press the [qty/time] key located on the default keyboard layout.
4. The message “InIt SUrE” will display momentarily.
5. Press the [subttl] key to confirm the initialization. (Other function keys to discard)
6. The message “InIt…” will be displayed.
7. When the initial clear is completed, it will print one receipt and the message
“0.00” will be displayed.
The second way:
1. Switch the control lock to Prog mode.
2. Turn the Power OFF.
3. Press and hold [1] [3] [7] [9] keys.
4. While continuing to hold the [1] [3] [7] [9] keys, turn the power ON.
5. The message “InIt SUrE” will display and then releasing these keys.
6. Press the [subttl]to confirm the initialization.(Other function keys to dircard)
7. The message “InIt…” will be displayed.
When the initial clear is completed, it will print one receipt and the message “0.00”
will be displayed.
The receipt format: (Retail Mode)
* * * * * * * ** * * ** * * ** * * ** * * ** *
Work mode RETAIL
Department Num 16
Clerk Num 10
PLU Num 500
All clear is completed!
* * * * * * * ** * * ** * * ** * * ** * * ** *
Note:
The operation will clear all data and make the register return to a factory default state.
Perform this operation only as necessary.
Page 13
8
3.2 Clear the Reports Data
Operator can clear the reports data with the following shortcut mode, no need taking the
Z reports.
Procedure:
1. Switch the control lock to Z mode
2. (A) [TOTAL] (SUrE) …
a. press [subttl]to confirm
b. Press other key to discard
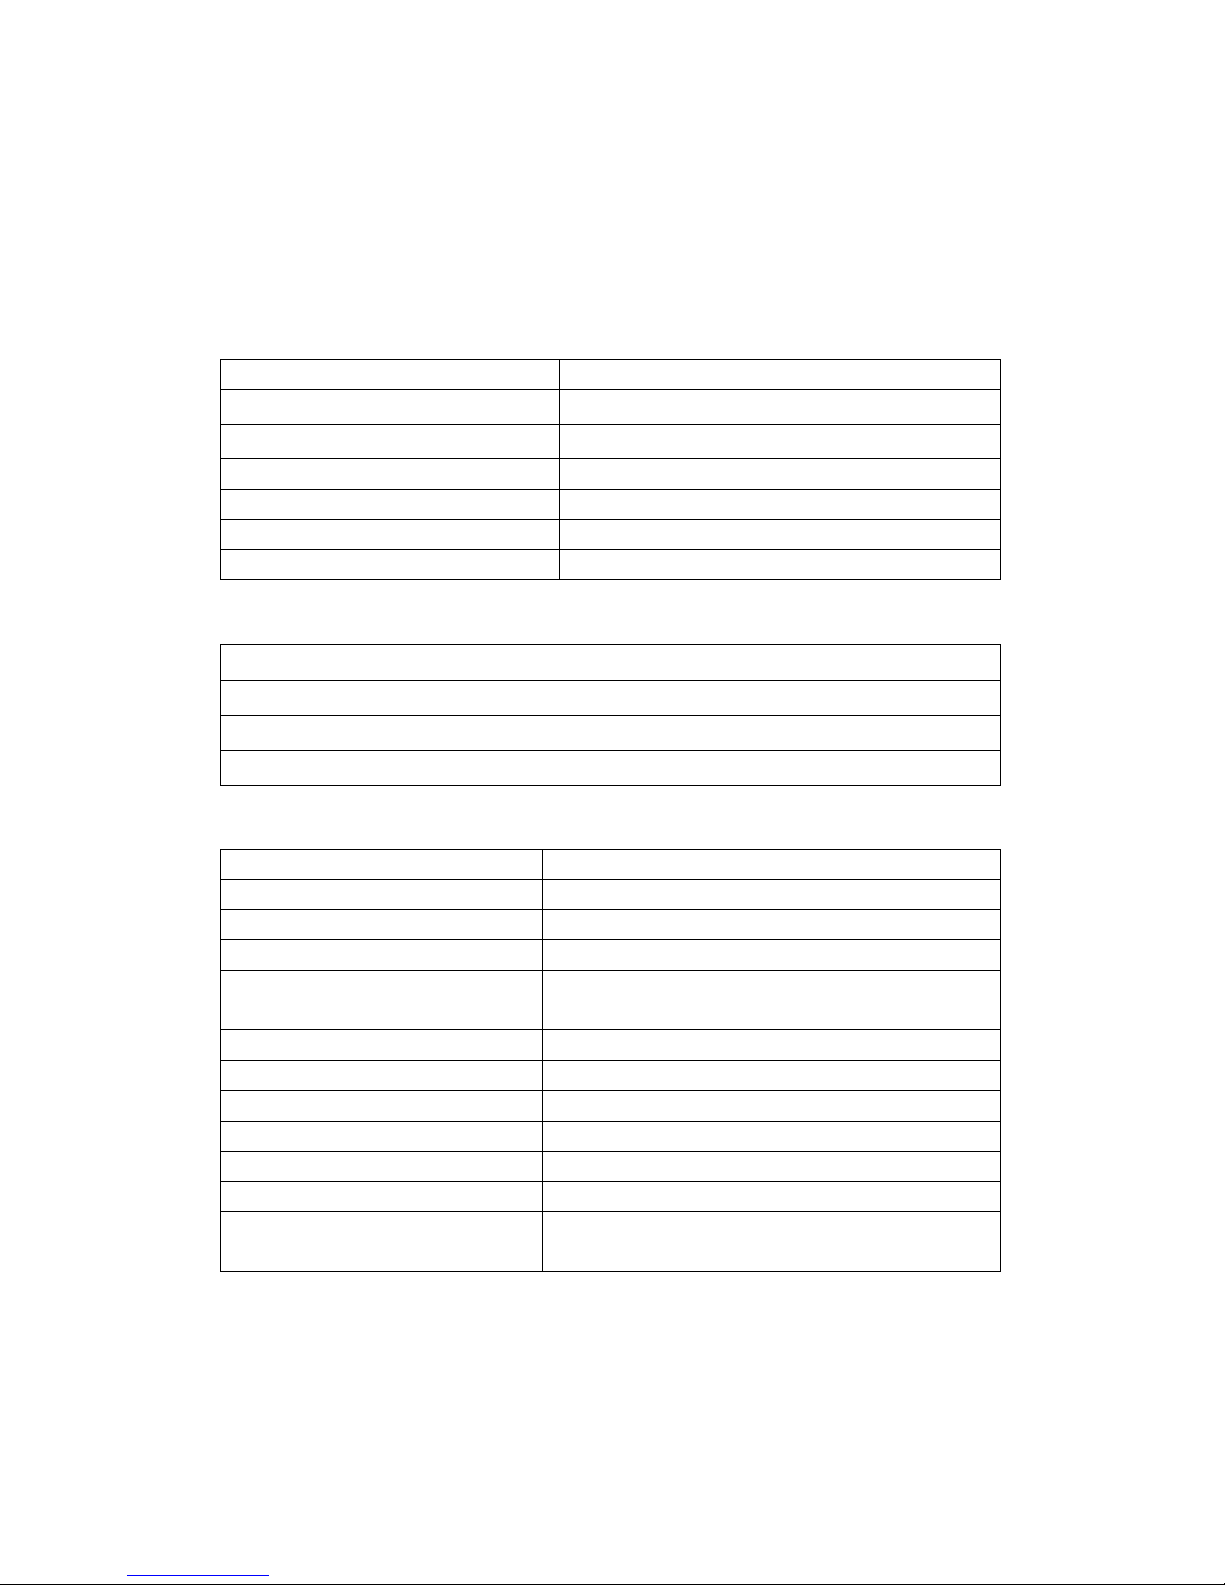
A: Represents the different operations order, as shown below table
A value Comments Note
26064550 Clear the whole reports data
The NRGT is cleared too.
26064551 Clear the Daily and PTD sales report
26064552 Clear the Daily PLU report
26064553 Clear the Daily and PTD clerk report
26064554 Clear the hourly report
26064555 Clear the table report It is active in restaurant
mode only.
26064557 Clear the NRGT(Non-Resettable Grand Total)
①
Note: ①
It will print one receipt, which only including the NRGT has been cleared ※
without grand total amount.
※ The second way:
Operation:
Z mode (2003) [TOTAL] (SUrE)…
Press [subttl] key to confirm, it will print one receipt that including the NRGT
amount. Press other function keys will be discarded.
* * * * * * * ** * * ** * * ** * * ** * * ** *
NRGT 00000033822.75
The NRGT has been cleared!
* * * * * * * ** * * ** * * ** * * ** * * ** *
01-01-2011 Monday Time13:02
Page 14

9
3.3
Clear the PLU stock
Condition:
The PLU stock function is active.
Switch the work mode to the Z mode
(1) Clear designated PLU’s stock
(0)[qty/time](PLU barcode)[PLU] by keyboard
(0)[qty/time]Scan PLU barcode by Scanner
(2) clear all PLU’s stock
(0)[qty/time][PLU]
Then the “SUrE” message will be displayed, to confirm, press [subttl] key, and otherwise
press other function key.
Page 15
10
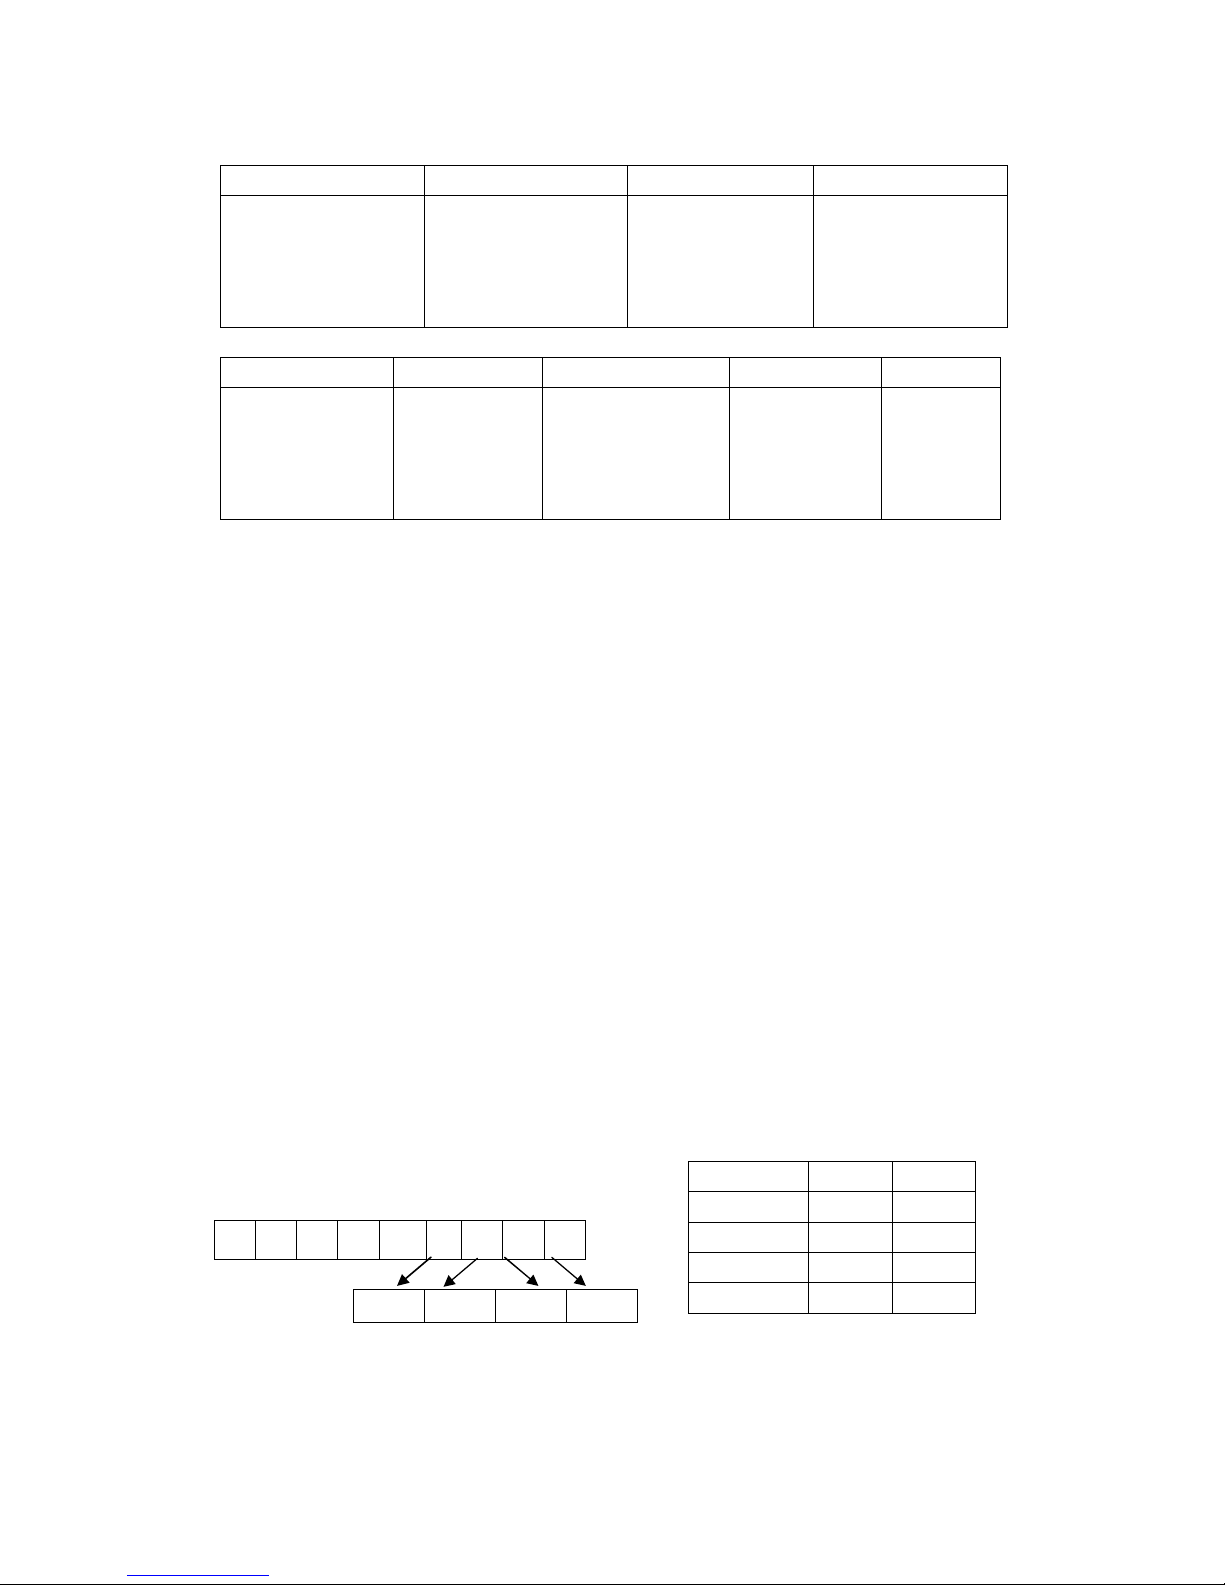
4 MEMORY ALLOCATION
Using this function, user can redefine the amount of department no. clerk no. table no.etc.
After this operation, the ECR will do the all clear operation automatically, so it is better to
print whole report before do it.
Procedure:
Switch the control lock to the Prog mode.
(501) [qty/time] (Redefine parameters)[subttl][check]
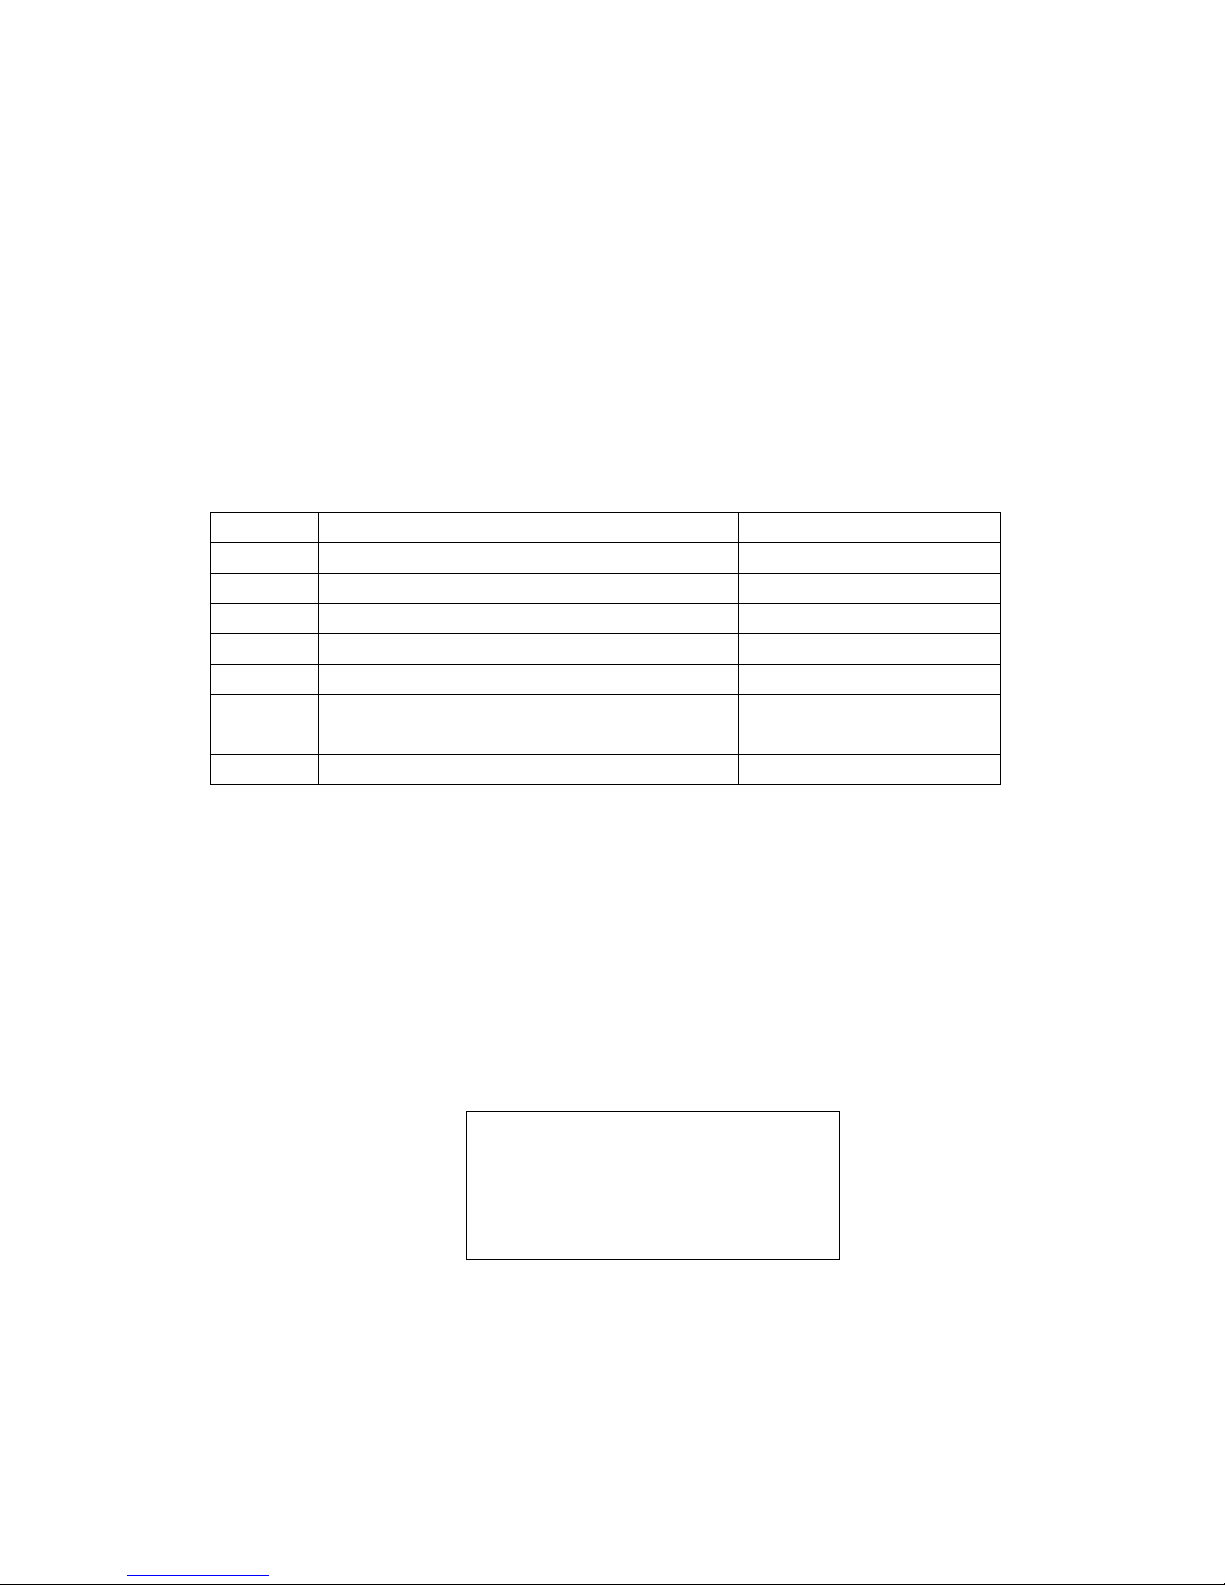
The parameters to redefine in Retail Mode and Restaurant Mode are as follows:
Retail Mode
Restaurant Mode
Parameters Default Set Max. No. Parameters Default Set Max.No.
Department 16
16
①
Department 16
16 ①
Clerk 10 10 Clerk 10 10
PLU 500
***
②
Table 40 40
PLU 357
***
②
Note:
①
Department
There are 8 standard keys on the keyboard and can be extended via [dept
shift] key to support 16 departments.
②
PLU ***
The total number of PLUs available values are allocated automatically, after
the previous items are decision. So it cannot enter manually.
Comments for steps:
1. Starting at the department’s field, enter the quantity of each memory variable. Press
[subttl] key, after each entry, and will move to the next variable.
2. If you press [TOTAL] key, at any parameter you will abort memory allocation
processes without making changes.
3. Continue filling each variable until complete. If you wish to implement the new
allocation you have entered, press [check] key.
4. The message “ALLOC SUrE” will be displayed.
5. Press [subttl]key to confirm.(Other function keys to discard)
6. The display will monitor the memory clear processes. When complete, it will print one
receipt, which shows the detail information.
Repeat to program next
Page 16

11
5 WORKING TYPE CHOOSE
The machine has two working type, Retail Mode and Restaurant Mode.
After all clear, the Retail Mode is default.
Note:
After do the ECR work type change, the following will do automatically:
a. Clear all the report data, both daily and period to date
b. Initialize the department programming parameter to default
c. Initialize the PLU programming parameter to default
d. Initialize the table programming parameter to default
5.1 Changing to Restaurant Mode
The procedure for changing the register to Restaurant Mode:
Operation:
1. Switch the control lock to the Prog mode.
2. Enter “202” by numeric keypad, then press [qty/time] key.
3. The message “SUrE” will be displayed.
4. Press the [subttl] key to confirm. (Other function keys to discard)
5. Then user will do the memory allocation.
The following are the default quantity of the below items: (See "Memory
Allocation” for the detailed information)
a. Department Number
b. Clerk Number
c. Table Number
d. PLU Number (The total number of PLUs available values are allocated
automatically, so it cannot enter by manually.)
At the quantity field, after each entry, press [subttl] key and the next item will
appear, if user wants to keep the default value, directly press the [subttl] key to
skip.
6. After the set is completed, press [check] key to allocate the memory.
7. The message “ALLOC SUrE” is displayed.
8. Press [subttl]key to confirm (Other function keys to discard)
9. When completed, the register will print one receipt, which represents the quantity
for each item.
The receipt format:
Page 17

12
* * * * * * * ** * * ** * * ** * * ** * * ** *
Work mode RESTAURANT
Department Num 16
Clerk Num 10
Table Num 40
PLU Num 357
Allocation is completed!
* * * * * * * ** * * ** * * ** * * ** * * ** *
5.2 Changing to Retail Mode
ECR automatically starts in Retail Mode after the initial clear procedure.
Procedure:
1. Switch the control lock to Prog Mode.
2. Enter “201” by numeric keypad, press [qty/time] key.
3. The message “SUrE” will be displayed.
4. Press [subttl] key to confirm. (Other function keys to discard)
5. User will do the memory allocation.
The following are the default quantity of the below items: (see “Memory
Allocation” for the detailed information)
a. Department Number
b. Clerk Number
c. PLU Number
(The total number of PLUs available values are allocated
automatically, after the previous items are decision. So it cannot
enter manually
.)
6. After the set is completed, press [check] key to allocate the memory.
7. The message “ALLOC SUrE...” is displayed.
8. Press [subttl]key to confirm (Other function keys to discard)
9. When completed, the register will print one receipt, which represents the quantity
for each item.
The receipt format:
* * * * * * * ** * * ** * * ** * * ** * * ** *
Work mode RETAIL
Department Num 16
Clerk Num 10
PLU Num 500
Allocation is completed!
* * * * * * * ** * * ** * * ** * * ** * * ** *
Page 18

13
6 THE SPECIAL INPUTTING
6.1 Regarding Decimal Point Inputting
The Decimal Point Position is set in the System Flag Option. The system default value
is two digits decimal point.
When the Decimal Point is decided,at the transaction inputting the amount cannot be
entered with decimal.
E.g. user inputs the number “1234”, if the decimal has 2 digits, the register will deal with
it as “12.34”.
The point key can be used in the following operations:
1. The multiplication operation at Reg mode or Training mode.
2. The rate of -%, manual entries at Reg mode or Training mode.
3. The stock manually entries of PLU is programmed.
6.2 Descriptors Inputting
Descriptors are programmable for Departments, PLUs, Clerks and the Welcome
/Trailer Messages.
Note: Only the descriptors of welcome message/bottom message can be blank,
others cannot.
There are two methods available to program descriptors, by character keyboard
method or by character code method.
6.2.1 Using Character Code
Steps:
1. At a descriptor field, refer to the Characters Code Chart below and type the code.
2. Each character code will be displayed as it is entered.
3. Press [subttl] key when the descriptor is completed.
Example:
To program the descriptor "APPLE", type:
(51)
(92) (92) (52) (91)
A P P L E
Note:
The detailed usage of [C] key, [00]key, [subttl]key, and [TOTAL] key in Character
Code entering method, See the latter by
Character Keyboard
section.
Page 19
14
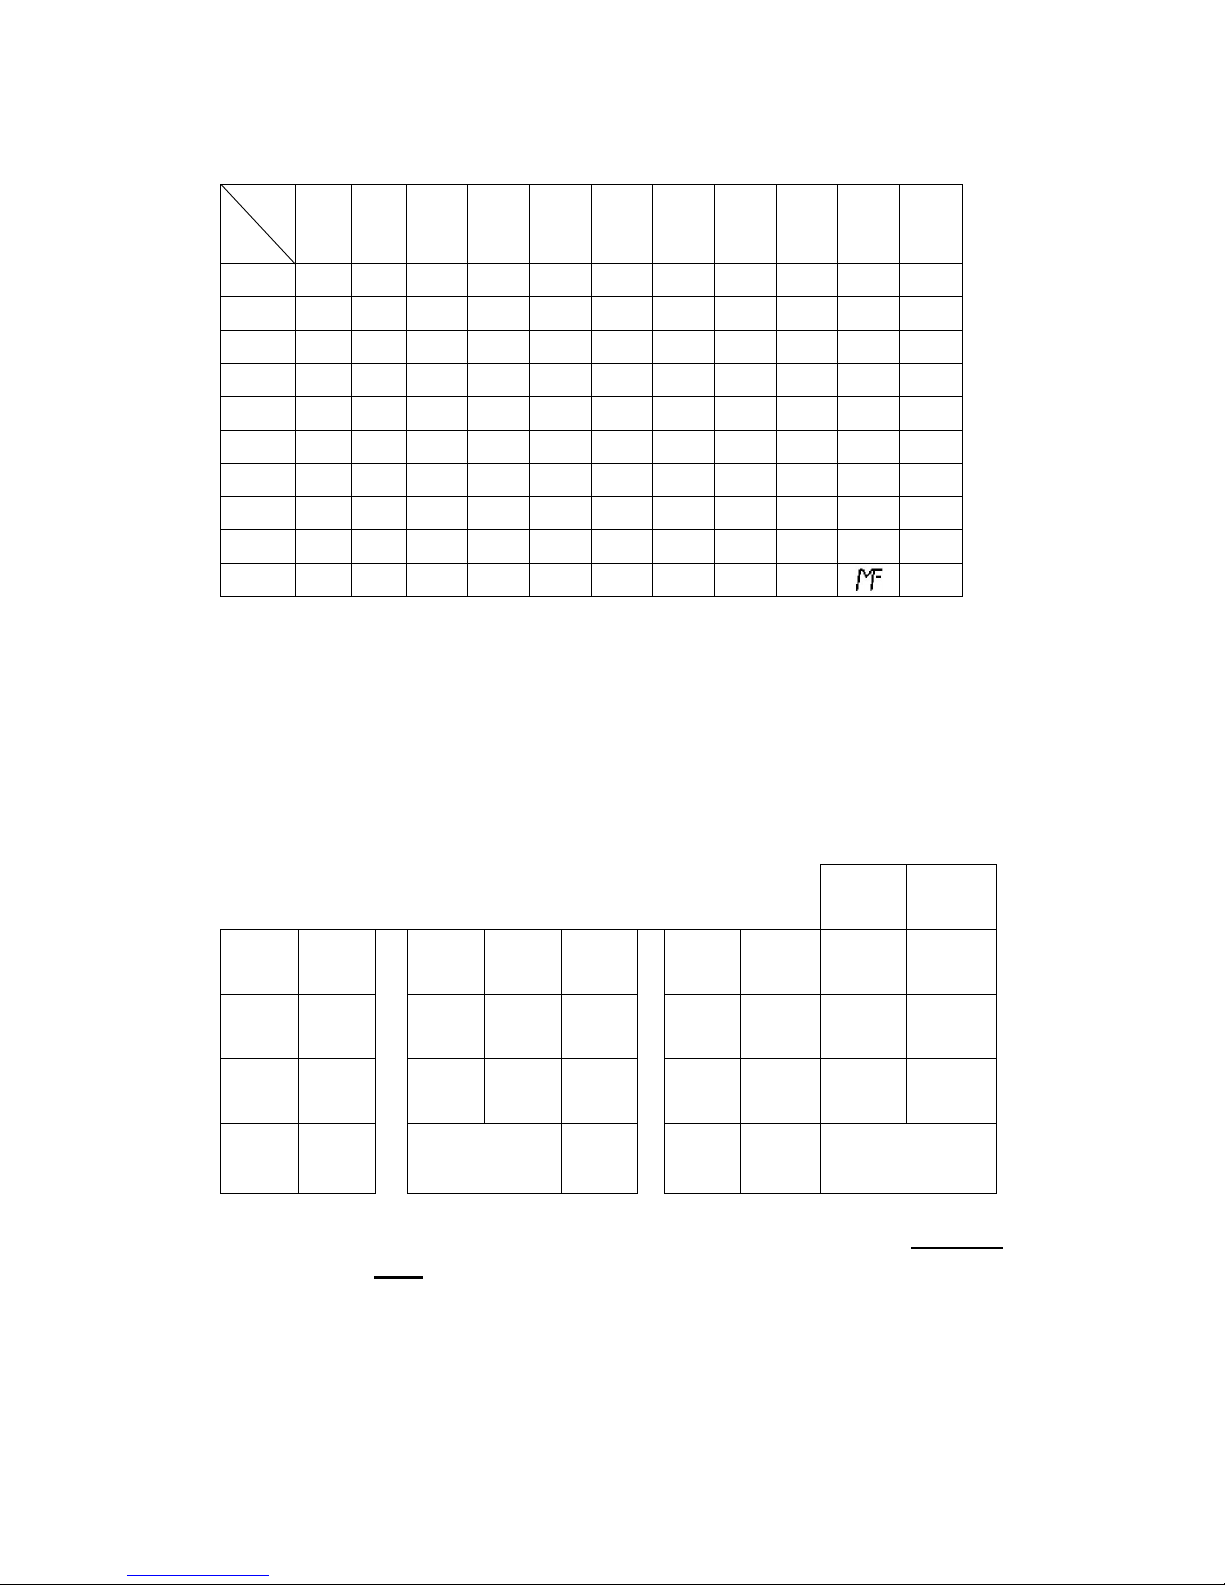
Characters Code Chart
0 1 2 3 4 5 6 7 8 9 00
0 0 1 2 3 4 5 6 7 8 9 SP
1 - + # . SP A B C D E F
2 G H I J K L M N O P Q
3 R S T U V W X Y Z a b
4 c d e f g h i j k l m
5 n o p q r s t u v w X
6 y z Ä Ö Ü ξ Ň ª
£ $
¥
7 ( ) / % ! ” & * · Ⅱ :
8 ’
,
< = > ? → Ⅲ Θ ↑ ;
9 ← @ ^ ↓ Å Æ \ β
€
Note:
1. The default is Character Keyboard inputting. Press [
CODE]
key once change to
character code inputting mode.
6.2.2 Using Character Keyboard
The characters layouts on the key layout are as follows:
ABC DEF
FONT CAP
7 8 9
GHI J
K L
M N
4 5 6
O
P
Q R
STU V
1 2 3
W
X
sub total
SPACE
CLEAR CODE
0 00
Y Z TOTAL
[CLEAR] key:
Backspace key, clear the last input character, also used in Character
Code entering method.
[CAP] key:
Pressing this key shift the character through the uppercase letter,
lowercase letter and return to the uppercase letter in sequences.
Alphabet (A (a)-Z (z)) keys:
Used input to characters.
1st
2nd
Page 20

15
[Sub Total] key:
Accept the programmed characters.
[TOTAL] key:
Exit the character programming.
[FONT] key:
During entering the descriptors, press different times in this key can
specifies that the current line you input to a double size character, or be
able to combine Double & Single size characters. Also used in
Character Code
entering method. Welcome Message and Trailer
Message support four formats. Only support normal and double width.
One time
Changing the character to double width
Two times
Changing the character to normal format.
[Code] key:
During entering the descriptors, press different times in [Code] key can
chose characters code inputting or ordinary characters inputting.
Page 21
16
7 PROGRAMMING
Note:
1. All programming functions are completed in Prog mode.
2. (..)indicates the data are entered by numeric keys.
[..] indicates it is a function key.
3. During the Programming, if there is no change to the current parameters, you can
press
[subttl]
key to skip.
4.
More program use circulation procedure, so quitting has two methods:
[TOTAL]/[check]
[TOTAL]:
Quitting and only printing the current preset parameter.
[check]:
Quitting and printing all preset parameter press
[C] Key
to interrupt the
printing
.
7.1 Time and Date Preset
Procedure:
[qty/time](TIME INPUT)[subttl](DATE INPUT)[subttl][TOTAL]
Here: Time Format: HHMM (4digits)
Date Format: (6digits) the set/print order is Month- Day -Year. If you want to change the
order into Month-Day-Year or Year-Month-Day Select appropriate status of
Bit A in Terminal Status 1 in 7.4. System Option Preset section.
The three different date formats are as follows: DD-MM-YY/YY-MM-DD/MM-DD-YY
7.2 Department Preset
These are department keys through which sales item are registered. At program mode,
simply depress on DEPTx key, and then preset the attribute, price and descriptor. If [dept
shift] key is necessary, please first depress the [dept shift] key then depress the
corresponding department key. The an example is as follows:
Operate sequence Actual key Example
[dept shift][DEPT 1~8] [DEPT9~16]=[DEPT1~8]+ 8 [DEPT10]=[dept shift][DEPT 2]
Then program the department as follow:
[DEPTx](FLAG)[subttl](TAX NO.) [subttl](PRICE)[ subttl](Descriptor)
[sub total] Skip to next department preset.
Note:
At this time, you can continue preset next department, or press [TOTAL] key for quit. After
preset department parameter you can press [check] Key for printing them.
Repeat if needed
Page 22
17
★
FLAG: ABCD (Retail mode)
A B C D
Department mode ①
0:Normal
1:Single
Department status
②
0:Normal(default)
1:Negative
2:Gallonage
HDLO
(High digit Lock
Limited 0-7) Max.
99999.99
Department Group
1~9
★
FLAG: ABCDE (Restaurant mode)
A B C D E
Send to KP or not
0:Not send
1:Send
Department
mode ①
0:Normal
1:Single
Department status
②
0:Normal(default)
1:Negative
2:Gallonage
HDLO
(High digit Lock
Limited 0-7)
Max. 99999.99
Department
Group
1~9
Note: ① Department mode :
Normal: When a sale item amount is entered, the sale is not finalized until a
payment key (such as [TOTAL]) is operated. Other items can be
entered with one sale receipt sequence.
Single:
Single item department automatically total as a cash sale
immediately after registration. (I.e. when no other items have been
entered within one receipt sequence). If a PLU is linked with this
department, the PLU will inherit single status.
② Department status:
Normal:
Standard Mode
enters the price using the normal decimal place
setting.
Negative:
Using
Negative Mode
allows you to closely track the number of
discounts given or the number of times the discounts were given.
Gallonage:
Gallo
nage
Mode allows entering a price with 3 decimal places,
representing the cost per gallon, pound, kilogram, yard, meter, or
other unit of measurement. For example, $2.899 per gallon. The
quantity, representing the unit of measurement, can also be
entered in up to 3 decimal places. This lets you enter 10.931
gallons of gasoline at $2.899 a gallon.
Negative Mode allows you to set the price to a negative number.
This is useful when you need to assign preset discounts or
coupons.
★
TAX NO:(TAX mode)
★
VAT NO:(VAT mode)
Display:
T X X X X
TAX1 TAX2 TAX3 TAX4
TAX NO. NO YES
TAX1 0 1
TAX2 0 1
TAX3 0 1
TAX4 0 1
Page 23
18
★
VAT NO:(VAT mode)
★
(Price): The price display is as follows:
P 0.00
Price(1-9999999)
Price flag
★
(Descriptor):The description display is as follows:
d 12
The length of current description, Max 12 characters.
Descriptor Flag
See 6.2. Descriptors Inputting section for the detail information
Example:
Department06 attributes are as follows:
Flag Price Descriptor
1071 5.50 cake (code: 04 93 84 24)
Prog mode [DEPT6](1071)[subttl](1111) [subttl](550)[subttl](04 93
84 24)[subttl][TOTAL]
Receipt format:
– – – – –Department attribute –– – – – –
cake Price: 5.50
Type: Single Mode: normal
DEPT group:#1 HDLO:99999.99
TAX:TAX1&TAX2&TAX3&TAX4
01-01-2011 Saturday
11:36
Display:
T X
VAT1 VAT2 VAT3 VAT4
Display VAT NO.
0 NO
1 VAT1
2 VAT2
3 VAT3
4 VAT4
Page 24

19
7.3 PLU Preset Parameter
7.3.1 PLU Attribute Preset
(Bar code input)[PLU][subttl](Linked Dept No.) [subttl] (Price)[subttl]
(Descriptor)[subttl] (STC SEL AB
) [
subttl](Input Stock)[subttl]
scan PLU(preset
next PLU)
Note:
At this time, you can continue preset next PLU, or press [TOTAL] key for quit. After
preset all the PLUs parameter you can press [check] Key for printing them.
(Bar Code Input) [PLU]:
This step only used for entering the barcode manually. If input by scanner, scans the
barcode directly.
When ECR at the idle
status in the “Prog” mode, user wants to program a PLU record,
if the PLU barcode already existing in ECR system, just using the scanner scans the
barcode, then can go to this PLU.
(
STC SEL AB
) [
subttl](Input Stock)[subttl]:
There is no this parameter in the default preset, but via the Bit A of terminal
status3 in the System Option Preset user can set PLU Stock options. Here we set
it to “1”.
If user did not set it, then has no this step operation. And if not set the FLAG A is 0
(this PLU stock function is inactive), also can’t input PLU stock.
(Bar Code): We can input by keyboard or by scanner.
(Linked DEPT No.): (1-16)
If a PLU linked with one department, the PLU will inherit the department’s attribute. Such as the
TAX/VAT Rate, Status.
(Price): Max. 6 digits. (1-999999)
(Descriptor): Max. 12 characters. See 6.2. Descriptors Inputting section for the
detail info.
STC SEL AB:
A:The stock function of this PLU is actives or not.
0: stock function is inactive
1: stock function is active
B:PLU stock
0: The new-preset amounts of PLU stock will overlay the original stock
1: The original amount of PLU stock will plus new-preset amount
2: The original amount of PLU stock will subtract the new –preset amount
Page 25

20
(Stock): Max 99999.999
Example:
Bar code Linked DEPT Price Descriptor
6921669003002
2 2.40 pear (code: 25 24 93 45)
“Prog” mode(6921669003002) [subttl](2) [subttl] (240)[subttl]
(25 24 93 45)[subttl](11
) [
subttl] (100)[subttl][TOTAL]
Receipt format:
Note:
The above example, if reprogramming the pear’s attribute has any variety,only use the
bar code scanner to scan the bar code directly modify it when ECR is at the idle status in
the “Prog” mode.
7.3.2 Delete PLU
Condition: The sales total of the PLU need delete must be empty
After the PLU is deleted, the attribute and barcode of the PLU will restore to default. if the
PLU has stock then it will be automatically clear
Note:
If the PLU preset bar code, user can use the bar code scanner to scan the barcode
directly or enter it by keyboard.
– – – – – – – PLU attribute – – – – – –
#6921669003002 pear
Link: DEPT02 Price: 2.40
Stock: 1: active 1: addition
Stock Qty:100
01-01-2007 Monday
11:36
“Prog” mode(PLU barcode) [PLU][VOID](Next PLU)[TOTAL]
Repeat if needed
Page 26

21
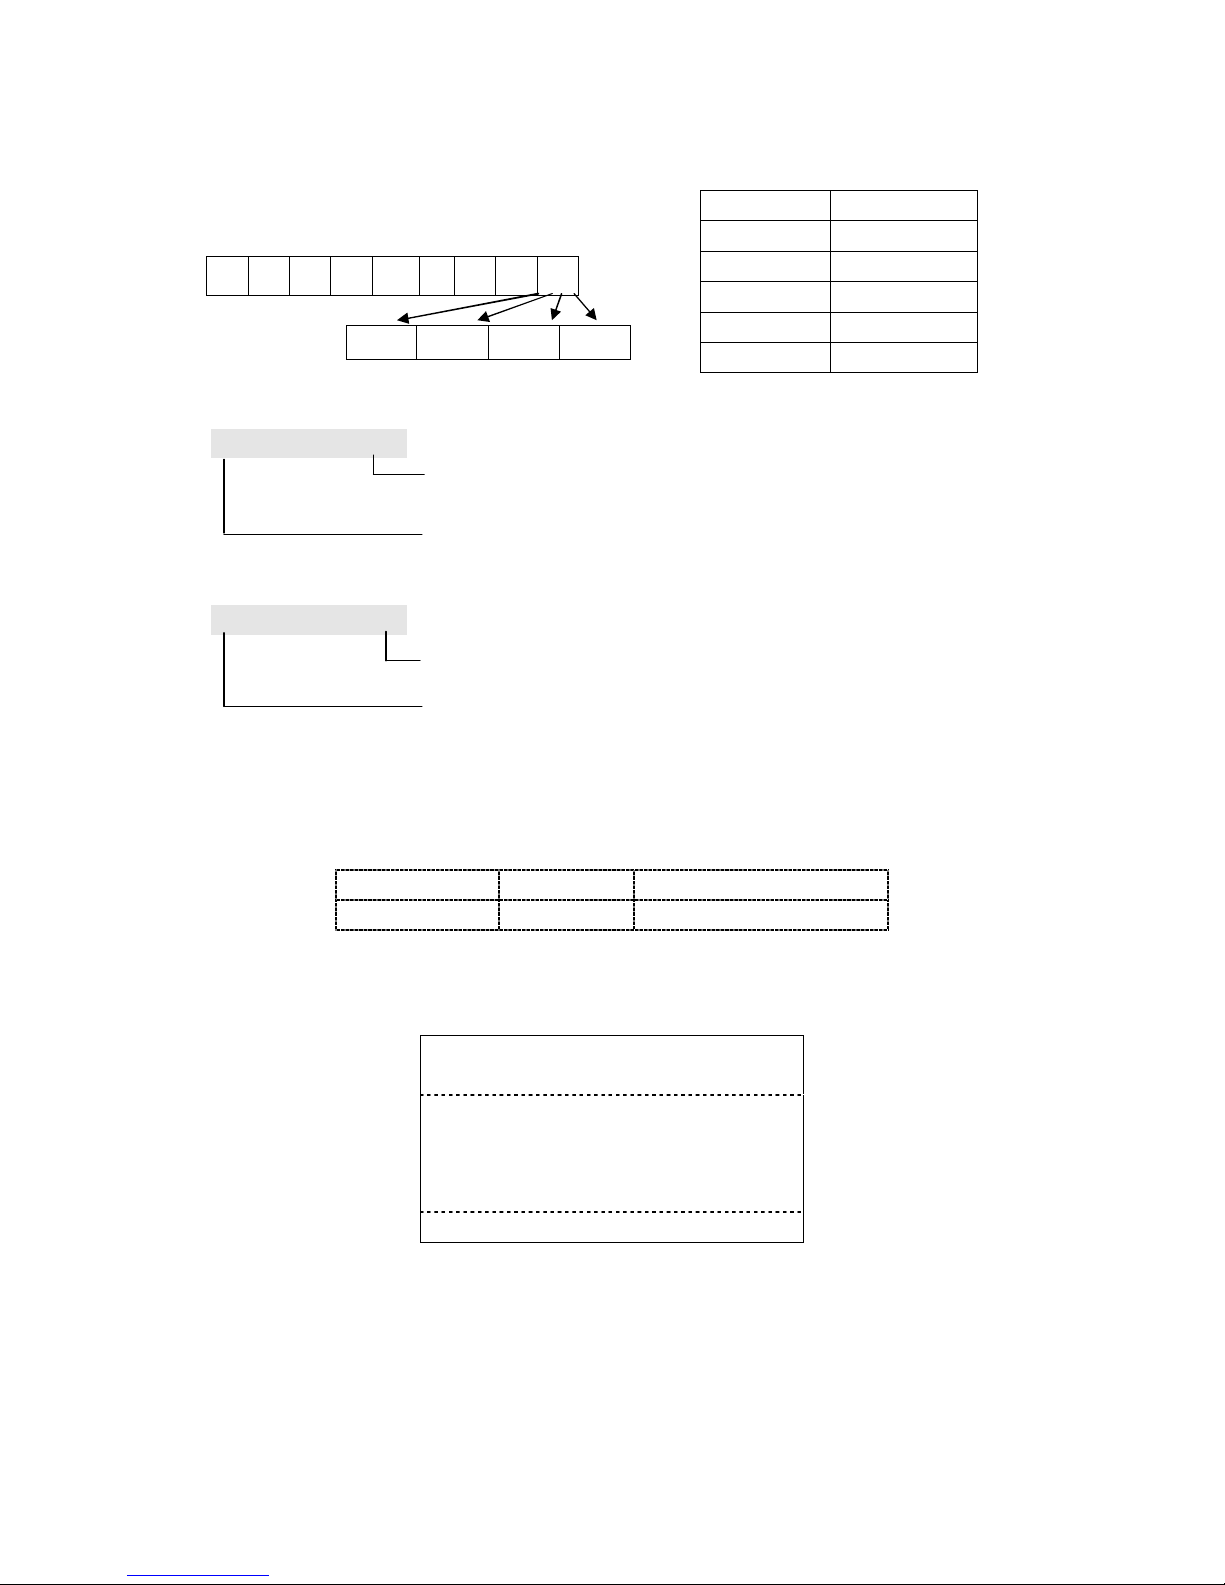
7.3.3 PLU Group Programming
[0] [PLU] (PLU barcode)[Sub total][TOTAL]/[check]
There are total 10 groups and each group can include max. 50 PLUs.
Using group you
can
manage all PLUs and can take each group report to run your business.
When you first preset the group, the display format is as follow:
0 1 0 0 0 0
The PLU barcode*
The Group No. (1-10)
* It indicates the current group is blank. (The default value is none PLUs for each group)
The following are about the group operations:
1. Displaying the next PLU barcode of the current group, when up to the last one, will skip
to next group.
-----[subttl]
2. Deleting the current PLU of the current group -----[VOID]
3. Deleting the designated PLU
-----(PLU barcode)[VOID]
If the PLU does not exist, it will have no error tip.
4. Adding designated PLU for the current group.
-----(PLU barcode)[subttl]
If the PLU has already existed, it will be designated
and display it.
5. Printing the current group -----[check]
6. Switch to other group
-----(group NO.)[PLU]
After preset the PLU parameter of current group you can press [check]Key for printing
them.If PLU amount is large, you can press [C]key to terminate the printing.
7.4 System Option Preset
This operation is provided for your selections of the register’s basic functions according to
the market and your requirements.
(A)[qty/time](FLAG SET)[SUBTLL] [TOTAL]/[check]
Next Option Flag
Repeat if needed
Page 27

22
A:TERMINAL STATUS CODE-- 1 =
Terminal Status 1
2 =
Terminal Status 2
3 =
Terminal Status 3
4 =
Terminal Status 4
5 =
Terminal Status 5
6 =
Terminal Status 6
7 =
Terminal Status 7
8 =
Machine Number Preset.
9 =
Receipt Consecutive Number Preset
10=
High Amount Lock-out Preset (HALO)
11=
Total in Drawer Limit
12=
Graphic logo Selection
13=
Clerk/receipt ON/OFF key Selection
(1) Terminal Status 1
The display format is as follows:
F 0 1 - A B C D E
A:
Date format
0 = Month-Day-Year
(MM-DD-YY) Default
1 = Day-Month-Year (DD-MM-YY)
2 =
Year-Month-Day (YY-MM-DD)
B:
Decimal Point Position
DISPLAY PRINTING
0 0 12345678
1 .0 1234567.8
2
.00 123456.78 Default
3 .000 12345.678
Change condition:
1. The sales total memory must be blank
2. When the register has registration data, must make sure all Reports are
reset and the grand total is blank.
C:
Rounding for multiplication sales.
0 = Round Off (5/4)
Default
1 = Round Up
2 = Discarding
D:
When EJ is full, clear all EJ information automatic or by manual.
0 = Clear the EJ by manual
Default
1 = Auto clear the EJ
Note: When EJ is full, choose clear the EJ by manual, ECR will not store the
new transaction to electronic journal if haven’t done clear operation.
Page 28

23
E: 0 = the electronic journal function is not activated
1 = the electronic journal function is activated Default
(2) Terminal Status 2
F 0 2 - A B C D E
A:
0 = not allow direct tender
1 = allow direct tender
Default
B:
0 = normal payment
Default
1 = the inputted amount must be bigger or equal to the total
amount.
C:
Support the zero transaction.
0
= Not allowed
Default
1 = allowed
D:
Reprint the receipt after tender directly or not.
0
= Not reprint
Default
1 = Reprint
E:
the logo print position
0 =The logo image is printed at the end of the receipt.
1
= The logo image is
printed
above the
“Welcome message”
Default
(3) Terminal Status 3
F 0 3 - A B C D E
A:
0
= T
he Stock Function is not allowed
Default
1 = T
he Stock Function is allowed
B:
0 = The receipt is not printed.
1 = The receipt is printed.
Default
C:
0 = Clerk function is not activated.
Default
1 = Clerk function is activated.
Change “1” to “0” condition:
The sales total memory must be blank, if not, take Z
-
clerk report (daily and
PTD) first.
Note:
When the clerk function is inactivate, all clerk operation will be invalid.
D:
0 = subttl not printing when depress the subttl key.
Default
1 =
subttl
printing when depress the
subttl
key.
Page 29

24
E:
0 = The #/No Sale message is not printed when perform No Sale
operation.
1
= The #/No Sale message is printed when
pe
rform
No Sale
operation.
Default
(4) Terminal Status 4
F 04 - A B C D E
A:
0 = VAT Version.
1 = Tax Version.
Default
Change condition:
1. When the register has just initialized.
2. When the register ha
s registration data, must make sur
e all
reports are reset and the grand total is blank.
B:
Tax Rounding
0 = Round Off (5/4)
Default
1 = Round Up
2 = Discarding
C:
0 = Not Keep the Tax Shift status when press the tax shift key.
Default
1 = Keep the Tax Shift status
when press the
tax shift
key.
D:
Print the PLU barcode on PLU report.
0
=No
Default
1 = Yes
E:
Character format for the KP printer.
1
= Normal
Default
2 = Double Height
3 = Double Width
4 = Double
Width
&
Height
(5) Terminal Status 5
F 05 - A B C D E
A: 0 = Zero Not skip in X (Z) Report.
1 = Zero skip in X (Z) Report.
Default
B:
0
= Receipt Consecutive Number is not reset after Daily Z
Report.
Default
1= Receipt Consecutive Number is reset after Daily Z Report.
C:
0 = The key dept shift is not allowed.
1 = The key dept shift is allowed.
Default
D:
Print font control in X/Z mode
0 = X/Z mode print normal font
Default
1 = X/Z mode print compress font
Page 30

25
E:
Print font control in P mode
0 = normal font
Default
1 = compress font
(6) Terminal Status 6
F 0 6- A B C D E
A:
0 = Don’t print date on receipt.
1 = Print date on receipt.
Default
B:
0 = Don’t print time on receipt.
1 = Print time on receipt.
Default
C:
0 = Don’t print receipt consecutive number on receipt.
1 = Print receipt consecutive number on receipt.
Default
D:
0 = Don’t print machine number on receipt.
1 = Print machine number on receipt.
Default
E:
0 = Don’t print tax amount information on receipt.
1 = Print tax amount information on receipt.
Default
(7) Terminal Status 7
F 0 7 - A B C D E
A:
Printer Type
1 = KP_TM_88_ III
Default
2 = KP_TM_U210
3 = KP_IDP3110
B:
Auto-Cutter for the Kitchen Printer
0 = Not auto-cutter
1 = Auto-cutter
Default
C:
Print table bill
0 = Not print
Default
1 = Print
D:
[00] key function
0 = [.] (decimal) key
1
= double zero
Default
E:
Print NRGT in Z report
0
=Not print
Default
1=Print
Page 31

26
(8) Machine Number Preset.
F 08 - X X X X
XXXX:
indicates the number input by user. Total 4 digits. Initial Set is “0001”
(9) Receipt Consecutive Number Preset.
F 09 - X X X X X X
XXXXXX:
indicates the number input by user. Total 6 digits. Initial Set is “000001”
(10) High Amount Lock-out Preset
The High Amount Lock-Out limits of the transaction. When the amount entered is over
the HALO amount, an error will occur.
H - X X X X X X X X
XXXXXXXX:
subttl
HALO preset. Maximum 8 digits (0
– 99999999).
Initial Set is
“999999.99”
E.g. Set 100 as limit, enter 10000. The display will be 100.00.
(11) Total in Drawer Limit
D - X X X X X X X X
XXXXXXXX:
Total in Drawer Limit preset. Maximum 8 digits
(0 –
99999999).
Initial Set is
“999999.99”
E.g. Set 100 as limit, enter 10000. The display will be 100.00.
(12) Graphic logo Selection
CURRENT LOGO NO.
X X
X X: graphic logo selection (0
-
10). For value = 0, graphic
-
logo is not activat
ed.
Initial Set
is “4”
Note: 1- 10 for the graphic logo in ROM. 11 for user-defined logo in SRAM, which can be
download by the PC software. If user does all clear operation, it must be downloaded
again.
The feature of each logo is as follows:
Pi
cture 1
Picture 2
Picture 3
Picture 4
Picture 5 Picture 6 Picture 7 Picture 8
Picture 9
Picture 10
Page 32

27
P
mode
(901)
[
qty/time
]
Printing all the Logos
(13) Clerk key function
F 1 3 - A
A :
0 = RCPT/OFF key
1 = [clerk] key
Default
7.5 TAX/VAT Rate Preset
Each either TAX or VAT method depending on the Bit A for Terminal Status 4
programming.
Four TAX rates can be programmed. Each can be percent rate, or tax table.
Four VAT rates can be programmed. Each can be percent rate.
Change condition:
1. The sales total memory must be blank.
2. When the register has registration data, must make sure all reports are reset and the
grand total is blank.
7.5.1 TAX Rate Preset
Select the TAX TYPE:
(X) [Tax shift] (TAX TYPE) [Sub Total] setting the tax by the tax type
X: 1~4 TAX INDEX
TAX TYPE: 0: FIXED TAX
1: TAX TABLE
1. FIXED TAX SETTING
(TAX RATE) [Sub Total] (TAX LIMIT)[Sub Total] (
DESCRIPTOR
)[Sub
Total][TOTAL]/ [check]
2. TAX TABLE
A TAX table consists of a series of graduated tax amounts which correspond to dollar
values. A repeating pattern among the breakpoints must be established to determine the
two segments. Usually the first several breakpoints are irregular. The second segment
consists of the breakpoints that make up one complete repetitive pattern. A maximum of
63 breakpoints can be entered. Below is a simple tax table, showing the irregular and
regular breakpoints.
Page 33

28
Tax Amount
Breakpoints
Hi Lim
Difference
0.00
0.00 0.01-0.10 0.10
0.01 0.11-0.25 0.15
0.02 0.26-0.46 0.21
0.03 0.47-0.67 0.21
0.04 0.68-0.88 0.21
0.05 0.89-1.10 0.22
0.06 1.11-1.25 0.15
0.07 1.26-1.46 0.21
0.08 1.47-1.67 0.21
0.09 1.68-1.88 0.21
0.10 1.89-2.10 0.22
0.11 2.11-2.25 0.15
0.12 2.26-2.46 0.21
0.13 2.47-2.67 0.21
The Irregular Breakpoints are 0.10 and 0.25, and the first repeating patterns of Regular
Breakpoints are 0.46, 0.67, 0.88, 1.10, and 0.25.
(Irregular breakpoints) [Sub Total][TAX AMOUNT][Sub Total][#NS]
(Regular breakpoints) [Sub Total][TAX AMOUNT] [Sub Total][#NS]
[DESC] [Sub Total][TOTAL]
Note:
After preset the entire TAX Rate preset you can press [check] Key for printing them.
Press the [VOID] key will reset the tax.
7.5.2 VAT Rate Preset
VAT tax Rate Preset:
(x) [RA] (TAX RATE)[Sub Total] (
DESCRIPTOR
)[Sub Total][TOTAL]/ [check]
X: 1~4 VAT INDEX
Note:
After you program the tax, you also have to individually specify which departments are to
be taxed, please refer to 7.2. Department Preset section.
Repeat if needed
Repeat if needed
Irregular Part
Regular Part
Page 34

29
7.6 Welcome Message Preset
The Welcome Message can only be set with maximum 6 lines. Each line has maximum
characters as follows:
Normal 32 characters
Double Width 16 characters
Double Height 32 characters
Double width and height. 16 characters
(A) [qty/time] (TEXT INPUT) [subttl]
[TOTAL]/[
check
]
[TOTAL]
Without changing and
quit presetting
A : Line Code 21-26 (1st line to 6th line)
See 6.2. Descriptors inputting section for the detail information
7.7 Trailer Message Preset
(A)[qty/time](TEXT INPUT)[subttl][TOTAL]/[check]
A : Line Code 31-36 (1st line to 6th line)
For detail operation please refer to Welcome Message Preset※
7.8 Clerk Programming
(A)[ qty/time] (PASS CODE)[subttl] (DESCRIPTOR) [subttl] [TOTAL]/[check]
A: Clerk Code, a maximum of 10 clerks can be preset.
41-50 (Clerk 1 to Clerk 10)
Pass Code: 4 digits
Descriptor: Max .12 characters. 6.2. Descriptors Inputting section for the detail
information
Note: 1.The pass code can’t be zero.
2.It doesn’t allow two same passcode.
3.Preset Clerk must be sure that the clerk function is activated.
Repeat if needed
Skip next line
Repeat if needed
Page 35

30
7.9 Check/Charge Key Programming
[check]/[charge](DESCRIPTOR)[subttl][TOTAL]
Descriptor: Max.12 Characters. See 6.2. Descriptors Inputting section for the detail
info.
7.10 - % Preset
[ - %] (AB)[subttl] (RATE)[subttl] (DESCRIPTOR)[subttl] [TOTAL]/[check]
AB: status
A: Status 1
Code No.
After subttl After Item + / -
0 YES YES +
1 YES YES 2 YES NO +
3 YES NO 4 NO YES +
5 NO YES 6 NO NO +
7 NO NO -
Percent Rate: 0.000% - 99.999%
Desc.: Descriptor, Max. 12 characters. See 6.2. Descriptors Inputting section
for the detail information
Note:
When change +/-, the corresponding reports data must be empty.
7.11 Refund(-)Preset
[ref/-](STATUS)[subttl](PRICE)[subttl](DESCRIPTOR)[subttl][TOTAL]
The status is as follows:
Code No. After subttl After Item
0 N Y
1 Y N
2 Y Y
Code No.
Rate Rounding
0 Rounding off
1 Rounding Up
2 Discarding
Repeat if needed
(Max.12 characters)
(6 digits)
B: Status 2
Page 36

31
7.12 Printout the System Information Operation
Users can printout the system information by follow operation:
(10000) [qty/time]
The receipt result should be as follow:
7.13
Miscellanous features in Prog Mode
1. Printing Error Code Corresponding List Table
Procedure:
Prog mode (301) [qty/time]
2. Printing all Graphic-Logo Images
Procedure:
Prog mode (901) [qty/time]
3. Preset the Feed Lines for after Receipt Printing
Procedure:
Prog mode (902) [qty/time] (X) [subttl]
X: feed lines (0-20), 2 is default
System Information
ITEM TOTAL USED
- - - - - - - - - - - - - - - - - - - - - - - - - - - - - - PLU (RETAIL) 500 0
EJ 60000 0
DEPT 16 0
CLERK 10 0
- - - - - - - - - - - - - - - - - - - - - - - - - - - - - - -
01-01-2011 Saturday 12:11
Page 37

32
8 RETAIL MODE
8.1 Clerk Assign
8.1.1 Sign On/Off a Clerk
After initial clear procedure, Clerk Function is not activated. User can set the bit C of
Terminal Status 3 to "1", the clerk function will be active.
Sign Off Operation: “Reg” mode (0) [TOTAL]
Sign on Operation: “Reg” mode (Clerk Pass Code) [subttl]
Once a clerk is signed on, the same clerk will remain the clerk signed on until the
clerk signed off.
8.1.2 Disable Clerk Function
If set the bit C of Terminal Status 3 to "0" (Clerk Function is not activated.), that
means all operations which concerned the clerk would be invalid. Refer to Terminal
Status 3 in 7.4. System Option Flag preset section
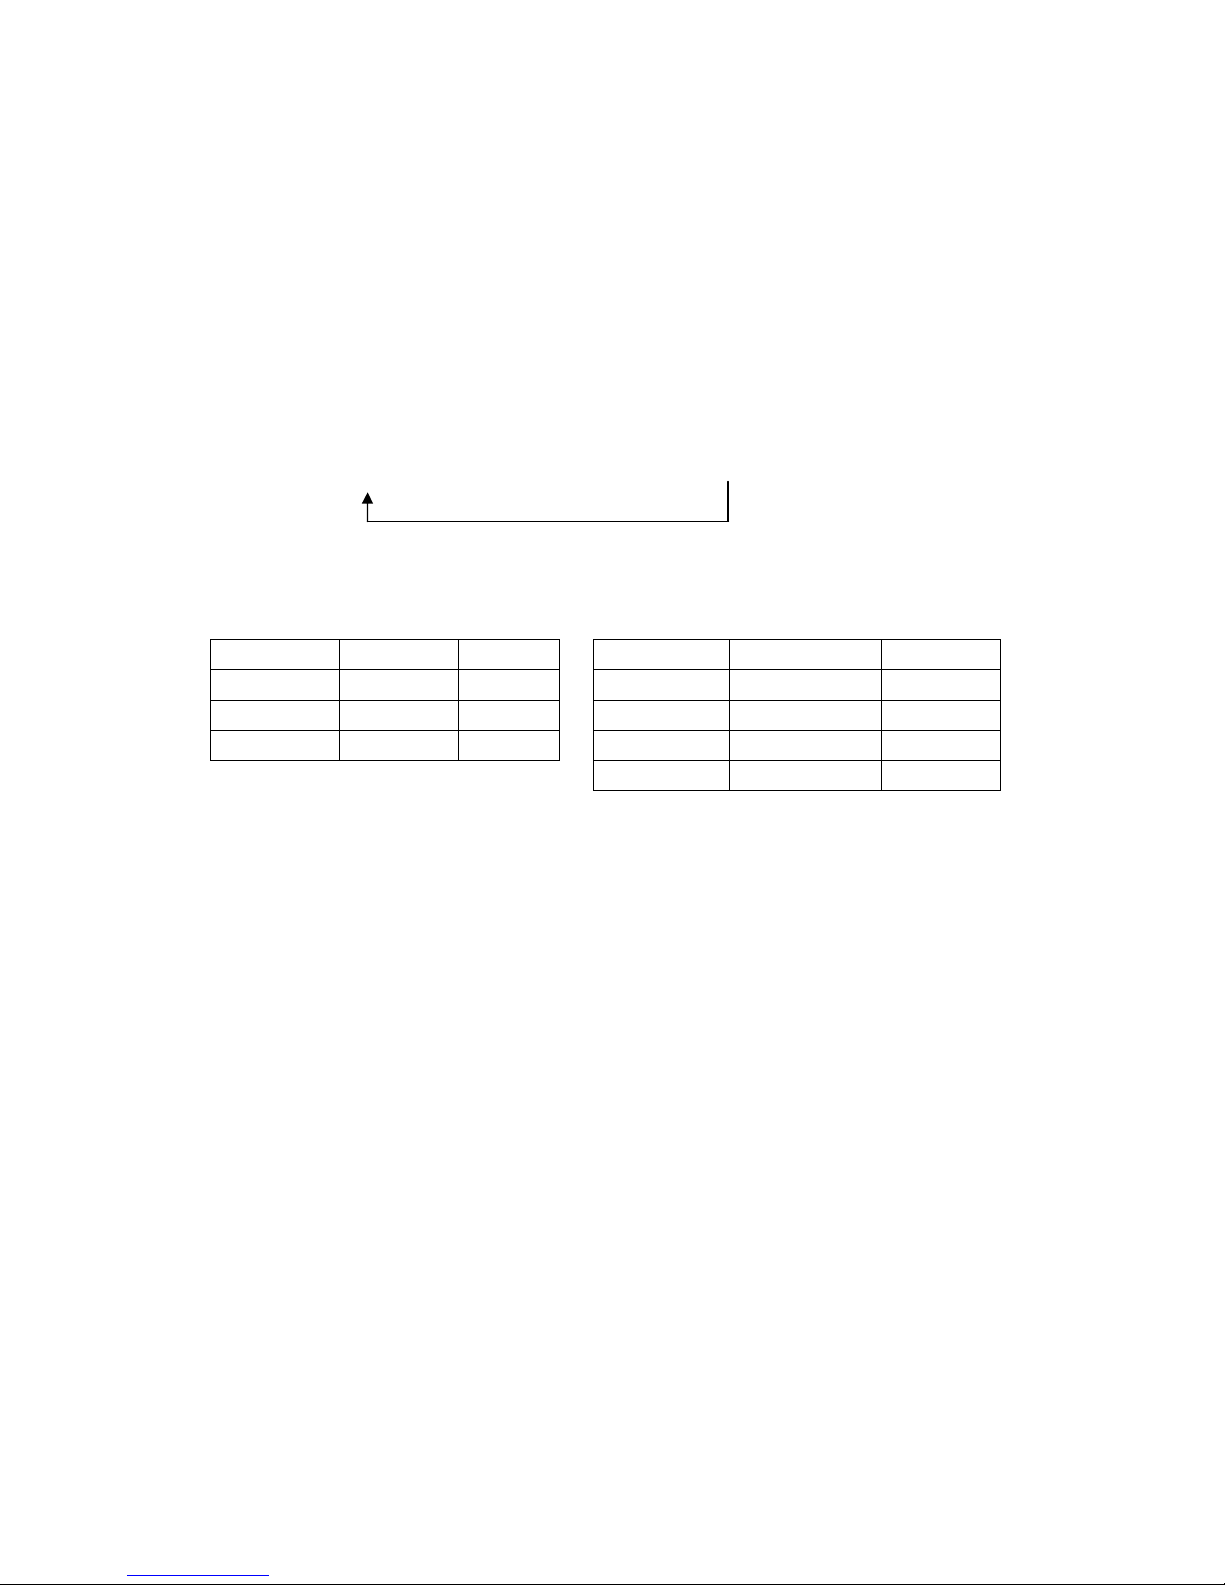
8.2 Time Display
When outside a transaction, user can press the [qty/time] key to display the current
Time, press the [qty/time] again to display the current Date.
Press[qty/time]key Display time
Press[
qty/time
]key
Display date
Press[
qty/time
]key
Display time
Press[C]key Clear
Time Display Format:
(Example: 3:30 p.m.)
Page 38

33
8.3 Entering Starting Cash Amount (RA/PO)
If you want to prepare the starting cash amount in drawer when the day begins, enter
the amount of the cash, and use RA function. To withdraw cash, use PO function.
The amount can be check, charge and misc function other than cash.
RA (received on account) entry
Procedure:
Reg mode (Amount) [RA] [TOTAL]/ [charge]/ [check]
PO (paid out) entry
Procedure:
Reg mode (Amount) [PO] [TOTAL]/ [charge]/ [check]
Amount: Max. 99999.99
8.4
Department Sale Entries
8.4.1 Normal Operation
Open-price department
(Price entries) [DEPTx]
Preset-price department
[DEPTx]
The following table is the detailed method with [dept shift] key.
DEPT1~DEPT8
[DEPT1~8]
Preset Price
(Price)
[DEPT1~
8] Manual price entry
DEPT 9~ DEPT 16
[dept shift
] [DEPT1~8]
Preset Price
[dept shift
]
(Price)
[DEP
T1~8]
Manual price entry
Note:
Above examples are used for the department keys in standard key layout.
8.4.2 Repeat Operation
You can use this function when you sell two or more of the same items by pressing the
same key.
Open-price department
(price entries) [DEPTx][DEPTx]…
Preset-price department
[DEPTx] [DEPTx]…
Page 39

34
Example:
(100) [DEPT1] Manual price entry. Item Name Price Qty Total
[DEPT1] Repeat DEPT1 = = = = = = = = = = = = = = = = = = = = =
[DEPT2] Preset Price2.00. DEPT01 1.00 1 1.00
[DEPT2] Repeat DEPT2 DEPT01 1.00 1 1.00
[dept shift] ※ DEPT02 2.00 1 2.00
(700) [DEPT1] Dept 09 price 7.00. DEPT02 2.00 1 2.00
[DEPT1] Repeat dept09 DEPT09 7.00 1 7.00
[subttl] DEPT09 2.00 1 7.00
(2500) [TOTAL]
S
UB
20.00
C
ash
25.00
C
hange
5.00
Total Qty
6
01-01-2011 #000072 12:30
0001
#000001
※ Note:
Above example is used for the department keys in standard key layout.
Other department please notices the [dept shift] key.
8.4.3 Multiplication Operation
You can use this function when you sell two or more of the same items.
Operation:
(Qty) [qty/time] (PRICE)
Example:
(2) [qty/time] Quantity Item Name
Price Qty Total
(100) [DEPT1] Manual price entry = = = = = = = = = = = = = = = = = = = = =
(3) [qty/time] Quantity DEPT01 1.00 2 2.00
[DEPT2] Preset price 2.00 DEPT02 2.00 3 6.00
(7) [qty/time] Quantity for Dept09 DEPT09 7.00 7 49.00
[dept shift] ※
S
UB
57.00
(700) [DEPT1] Manual price for dept09
C
ash
60.00
[subttl]
C
hange
3.00
(6000) [TOTAL] Total Qty
12
01-01-2011
#000073 12:30
0001
#000002
Other department please notice the ※ [dept shift] key
8.5 PLU Operation
During PLU transaction, the display shows PLU linked department No. and the PLU price.
There are four ways to enter a PLU.
【DEPT】
When item is preset
Page 40

35
1. Bar Coded PLUs which are PLUs programmed to be registered by a scanner.
2. Input PLU barcode then press [PLU] key.
8.5.1 Preset PLU Entry
Bar Code PLUs: Using the scanner to scan the PLU directly or enter the barcode
and then press [PLU] key
(6) [PLU] Preset price 6.00 Item Name Price Qty Total
[subttl]
= = = = = = = = = = = = = = = = = = = = =
(1000)
[TOTAL]
PLU0006 6.00 1 6.00
S
UB
6.00
C
ash
10.00
C
hange
4.00
Total Qty
1
01-01-2011 #00074 12:30
0001
#000003
8.5.2 PLU Repeat Operation
The last registered PLU can be repeated. Simply depress [PLU] key for the number
times required immediately after a PLU entry.
If repeated registered barcode PLU using scanner, only can scan it more times
directly.
Operation: (PLU barcode) [PLU] [PLU] …
Example:
In this example PLU 6 price is 6.00.
(6) [PLU] Preset price 6.00 Item Name Price Qty Total
[PLU]
Repeat PLU6 = = = = = = = = = = = = = = = = = = = = =
[subttl]
PLU0006 6.00
1 6.00
(1500)
[TOTAL]
PLU0006 6.00
1 6.00
S
UB
12.00
C
ash
15.00
C
hange
3.00
Total Qty
2
01-01-2011 #00075 12:30
0001
#000005
8.5.3 PLU Self-Learning Operation
Self-Learning PLU functions with two conditions:
New PLU: If PLU does not exist, the ECR will memorize all the info you inputted
automatically.
Page 41

36
Operation:
(Enter or scan the bar code) (Error: new PLU) [C] (Enter the price) [subttl]
Discard the PLU sale:
(Enter or scan the bar code)(Error: new PLU)[C][C]
Zero price: If there is the PLU but no price.
Operation:
(Enter or scan the bar code)(Error: no price)[C](Enter the price) [SUBTLL]
Discard the PLU sale:
(Enter or scan the bar code)(Error: no price)[C][C]
Note: It will memorize the new PLU barcode and the price you have inputted automatically in
the transaction and you can register it directly next time.
8.5.4 PLU price inquiry
It can inquire a PLU price in or out of a transaction.
(0) [PLU](Enter or scan the bar code)[PLU][C]
Note: If this operation is in a transaction, you can continue to register the other items as normal
after pressing the clear key.
8.5.5 PLU Multiplication Operation
Bar Code PLUs:
※ By scanner:
Preset PLU:
Enter the quantity of items [qty/time] Scan the PLU bar code
※ By keyboard:
Preset PLU:
Enter the quantity of items [qty/time] (input barcode) [PLU]
Example:
* In this example PLU 6 price is 6.00.
(2.5) [
qty/time
]
Quantity
Item Name
Price Qty Total
(6) [PLU]
PLU 6 price 6.00
= = = = = = = = = = = = = = = = = = = = =
[subttl]
PLU0006
6.00 2.5 15.00
(2000)
[TOTAL]
S
UB
15.00
C
ash
20.00
C
hange
5.00
Total Qty
2.5
01-01-2011
#000079
12:30
0001
#000006
Page 42

37
8.6 Finalizing a Transaction
Press the [subttl] key during a transaction when you want to know the sale subttl
including tax. Then the sale total will appear in the display.
Up to four different ways may be used to close a transaction.
8.6.1 Direct Closing
Press the [TOTAL] directly
Registrations – [TOTAL]
Example:
(150)
[DEPT03]
Manual price entry
Item Name
Price Qty Total
(350)
[DEPT04]
Manual price entry
= = = = = = = = = = = = = = = = = = = = =
[subttl]
DEPT03
1.50 1 1.50
[TOTAL]
Directly tender
DEPT04
3.50 1 3.50
S
UB
5.00
C
ash
5.00
Total Qty
2
01-01-2011 #000080
12:30
0001
#000007
8.6.2 Cash Tendering
Enter the amount tendered by the customer and press the key [TOTAL] if it is cash
tender. When the tendered amount is greater than the sale amount, the register will
show the change due amount.
Example:
(150)
[DEPT03]
Manual price entry
Item Name
Price Qty Total
(350)
[DEPT04]
Manual price entry
= = = = = = = = = = = = = = = = = = = = =
[subttl]
DEPT03
1.50 1 1.50
(1000)
[TOTAL]
Tender amount is 10.00
DEPT04
3.50 1 3.50
S
UB
5.00
C
ash
10.00
C
hange
5.00
Total Qty
2
01-01-2011
#000081
12:30
0001
#000008
Page 43

38
8.6.3 Charge Tendering
After [subttl], press the [charge] key directly. It will finalize transaction.
Example:
(150)
[DEPT03]
Manual price entry
Item Name
Price Qty
Total
(350)
[DEPT04]
Manual price entry
= = = = = = = = = = = = = = = = = = = = =
[subttl]
DEPT03
1.50 1 1.50
[charge]
Tender by charge 1
DEPT04
3.50 1 3.50
S
UB
5.00
CHARGE1
5.00
Total Qty
2
01-01-2011
#000082
12:30
0001
#000010
8.6.4 Check Tendering
After [subttl], press the [check] key directly. It will finalize transaction.
Example:
(150)
[DEPT03]
Manual price entry
Item Name
Price Qty Total
(350)
[DEPT04]
Manual price entry
= = = = = = = = = =
= = = = = = = = = = =
[subttl]
DEPT03
1.50 1 1.50
(2)
[check]
Tender by check 1
DEPT04
3.50 1 3.50
S
UB
5.00
CHECK1
5.00
Total Qty
2
01-01-2011
#000083
12:30
0001
#000011
8.7
Split price operation
It’s possible to execute one” Split price” (for Sample in order to register the Split
package merchandise。
Procedure:
(Split Qty)[Qty/time] (Total Qty)[Qty/time](PRICE)
(Split Qty)[Qty/time] (Total Qty)[Qty/time] (PLU barcode) [PLU]
When item is preset
[DEPT]
Page 44

39
Example:
(2) [
qty/time
]
purchased quantity
Item Name
Price Qty Total
(5)
[qty/time]
Second quantity
= = = = = = = = = = = = = = = = = = = = =
(10.00)
[DEPT2]
Whole package Price
DEPT01
10.00
2/5 4.00
(2)
PLU01
10.00
3/10 3.00
(3)
[qty/time]
purchased quantity
S
UB
7.00
(10)
[qty/time]
Second quantity
Cash
10.00
(1)
[PLU]
Change
3.00
[subttl]
Total QTY
5
(10.00)
[TOTAL]
01-01-2011
#000085
12:30
0001
#000013
8.8 Return Merchandise (RM) Operation
Press [ref/-] key can return merchandise (R.M.) by some reason outside a sale. If users
do R.M. operation, this transaction only supports R.M.
Procedure: [ref/-] (PLU barcode) [PLU]…
Scan a PLU barcode…
[DEPT x] …
(Price) [DEPT x] …
Example: DEPT1 price is 1.00, PLU01 price is 10.00
[ref/-] Item Name Price Qty Total
[DEPT1] Return DEPT1 = = = = = = = = = = = = = = = = = = = = =
DEPT01 1.00
1
(1000) [DEPT2] Return DPET2 * R. M. *
-1.00
DEPT02 10.00
1
(1) [PLU] Return DPET2 * R. M. *
-10.00
[TOTAL] PLU001 10.00
1
* R. M. *
-10.00
S
UB
-21.00
C
ash
-21.00
Total Qty
-3
01-01-2011 #000124 12:30
0001
#000090
Page 45

40
The RM operation can also be used to the multiplication operation
Procedure: [ref/-] (Qty) [qty/time] (PLU barcode) [PLU]…
(Qty) [qty/time] Scan a PLU barcode…
(Qty) [qty/time] [DEPT x] …
(Qty) [qty/time](Price) [DEPT x] …
Example: DEPT1 price is 1.00, PLU01 price is 10.00
[ref/-] Item Name Price Qty Total
(2) [qty/time] Quantity = = = = = = = = = = = = = = = = = = = = =
(500) [DEPT1] Manual price entry DEPT01 5.00
2
* R. M. *
-10.00
(3) [qty/time] Quantity PLU001 10.00
3
(1) [PLU] PLU100 price10.00 * R. M. *
-30.00
[subttl]
S
UB
-40.00
[TOTAL]
C
ash
-40.00
Total Qty
-5
01-01-2011 #000125 12:30
0001
#000091
8.9 Refund Operation
1. Item Refund Operation
Operation:
Item entry (XXXXXX) [ref/-]
* If you have already preset price for the [ref/-] key, you can just press it.
You also can do multiplication with the [ref/-] key the same as the department.
Operation:
Item entry (qty)[qty/time] (XXXXXX) [ref/-]
Qty: quantity
Price (6 digits)
*
Price (6 digits)
Page 46

41
Example:
[ref/-] key has already preset price 1.00
[DEPT2] Preset price2.00 Item Name Price Qty
Total
[ref/-] Used preset price 1.00 = = = = = = = = = = = = = = = = = = = = =
(400) [DEPT4] DEPT02 2.00
1
2.00
(200) [ref/-] Manual entry Refund 1.00
(600) [DEPT6] * Item *
1
-1.00
(2) [qty/time] DEPT04 4.00
1
4.00
(200) [ref/-] Manual entry Refund 2.00
[dept shift] * Item *
1
-2.00
(800) [DEPT2] DEPT06 6.00
1
6.00
(6) [qty/time] Refund 2.00
[ref/-] Used preset price 1.00 * Item *
2
-4.00
[
TOTAL
]
DEPT10 8.00
1
8.00
Refund 1.00
* Item * 1.00
6
-6.00
S
UB
7.00
C
ash
7.00
Total Qty
4
01-01-2011 #000085
12:30
0001
#000015
※ Note: Must ensure the refund amount is less than the item amount.
2. subttl Refund Operation
Operation:
[subttl] [XXXXXX] [
ref/-
]
* If you have already preset price for the [
ref/-
] key, you can just press it.
You also can do multiplication with the [
ref/-
] key the same as the department.
Operation:
[subttl](qty)[qty/time] [XXXXXX] [
ref/-
]
Qty: quantity
Note:
Both of methods must ensure the refund amount is less than the subtotal amount.
Price (6 digits)
*
Price (6 digits)
Page 47

42
Example:
(200) [DEPT2] Item Name Price Qty
Total
(400) [DEPT4] = = = = = = = = = = = = = = = = = = = = =
(600) [DEPT6] DEPT02 2.00
1
2.00
[subttl] DEPT04 4.00
1
4.00
(200)
[ref/-] Manual entry DEPT06 6.00
1
6.00
[TOTAL]
S
UB
12.00
Refund 2.00
* SubT *
1
-2.00
S
UB
10.00
C
ash
10.00
Total Qty
3
01-01-2011 #000086
12:30
0001
#000016
8.10 Percentage (- %) OPERATION
According to the % key’s programmed status, it will act as a premium key or a
discount key.
And it can be programmed for item entries or for the subttl.
1. % for item entries
Operation:
(Item entry) [XX .XXX] [- %]
Example:
-% preset –5%, after item and subttl is allowed.
(500) [DEPT1] Manual price entry Item Name Price Qty
Total
[- %] Used preset rate -5% = = = = = = = = = = = = = = = = = = = = =
[DEPT2] Preset price 2.00 DEPT01 5.00
1
5.00
(10) [- %] Manually enter -10%. 1%
-5.000%
[subttl] * Item *
-0.25
[
TOTAL
]
DEPT02 2.00
1
2.00
1%
-10.000%
* Item *
-0.20
S
UB
6.55
C
ash
6.55
Total Qty
2
01-01-2011 #000087 12:30
0001
#000017
2. % for subttl
Operation:
[subttl] (XX .XXX) [- %]
Percentage rate
Percentage rate
Page 48

43
Example:
(500) [DEPT1] Manual price entry Item Name Price Qty Total
(600) [DEPT2] = = = = = = = = = = = = = = = = = = = = =
[subttl] DEPT01 5.00
1
5.00
(10)
[-%] Manually enter 10%. DEPT02 6.00
1
6.000
[subttl] SUB
11.00
[TOTAL] 1%
10.000%
* SubT *
1.10
S
UB
12.10
C
ash
12.10
Total Qty
2
01-01-2011 #000088 12:30
0001
#000018
8.11 VOID Operation
8.11.1 Direct Void Operation
After entering one item, press [VOID] key directly, then you can cancel this item. It
can correct the Department, PLU, %, RM, Designate Void Operation, and REFUND etc.
Example:
(450) [DEPT1] Manual price entry Item Name Price Qty Total
[VOID] = = = = = = = = = = = = = = = = = = = = =
(100)
[DEPT1] EC price 4.50 DEPT01 4.50
1 4.50
[DEPT2] Preset price 2.00 * E.C. * -4.50
(300) [DEPT3] DEPT01 1.00
1 1.00
(10) [Disc %] DEPT02 2.00
1 2.00
[VOID] EC % Disc operation DEPT03 3.00
1 3.00
(500) [DEPT5] 1%
-10.000%
(100) [REF] * Item * -0.30
[VOID] EC refund operation * E.C. *
0.30
[TOTAL] DEPT05 5.00
1 5.00
Refund 1.00
* Item *
1 -1.00
* E.C *
1.00
SUB 11.00
C
ASH 11.00
Total Qty 4
01-01-2011 #000089 12:3
0
0001 #000
021
Page 49

44
8.11.2 Void Previously Items Operation
VOID department
(Price)
[VOID][DEPTx] Void DEPT manual price entries
(0) [VOID][DEPTx] Void preset DEPT
VOID PLU
By scanner
(0) [VOID] scans barcode
Example:
(500) [DEPT1] Manual price entry Item Name Price Qty Total
[DEPT2] Preset price 2.00 = = = = = = = = = = = = = = = = = = = = =
(100) [PLU] Normal PLU100 DEPT01 5.00 1 5.00
(500) [VOID] Void DEPT1 DEPT02 2.00 1 2.00
[DEPT1] PLU0100 100.00 1 100.00
(1) [VOID] Void DEPT2 DEPT01 * VOID * -5.00
[DEPT2] DEPT02 * VOID * -2.00
(100) [VOID] Void PLU100 PLU0100 * VOID * -100.00
[PLU]
S
UB
0.00
[TOTAL]
C
ash
0.00
Total Qty
3
01-01-2004 #000091 12.30
0001
#000020
8.11.3 Transaction Void Operation
It will void the whole transaction before tendering. The operation is:
(registrations)[subttl](00) [VOID]
Example:
Item Name Price Qty Total
= = = = = = = = = = = = = = = = = = = = =
(104) [DEPT1] Manual price entry DEPT01 1.04 1 1.04
(108) [DEPT2] DEPT02 1.08 1 1.08
(118) [DEPT3] DEPT03 1.18 1 1.18
(136) [DEPT4] DEPT04 1.36 1 1.36
[subttl]
S
UB
4.66
*** Transaction VOID ***
(00) [VOID]
Note:
1. Though the transaction is voided, the consecutive register number is still added.
2. When using kitchen printer at Restaurant Mode, user does transaction void operation,
it is also cancel in KP side.
Page 50

45
8.12 Single Item Department or PLU Entry
Single item operation finalizes a transaction without tendering key entry.
The transaction is not finalized until you press a normal department or PLU key
before single item department or PLU entry.
Example: DEPT5 is a single item.
(500) [DEPT5] Manual price entry Item Name Price Qty Total
= = = = = = = = = = = = = = = = = = = = =
DEPT05 5.00 1 5.00
S
UB
5.00
C
ash
5.00
Total Qty
1
01-01-2011 #000088 12:30
0001
#000023
8.13 Tax Operation
In normal transaction taxes are automatically collected according to the department’s
programmed taxable status. Please refer to 7.2.Department Preset section
Add-on tax rate --
Tax amount is charged using straight percentage rate from the price
In regard to the VAT rate preset, refer to 7.5 TAX/VAT Rate Preset section
You can know the current TAX NO. by the Operator display screen. Please refer to 2.4
Display descriptions.
1. Normal Operation
In the following example DEPT1is programmed for TAX1, DEPT2 is programmed for
TAX2. Tax1 rate is 5.000%, Tax2 rate is 10.000%
(105) [DEPT1] Tax1 rate Item Name Price Qty
Total
(110) [DEPT2] Tax2 rate = = = = = = = = = = = = = = = = = = = = =
[subttl] DEPT01 1.05 1 1.05
[TOTAL] DEPT02 1.10 1 1.10
SUB
2.31
SUB
2.05
Tax1
0.05
Tax2
0.11
Total tax amount 0.16
C
ash
2.31
Total Qty
2
01-01-2011 #000090
12:30
0001
#000026
Page 51

46
2. Tax Shift –For Tax Version
This operation is only used for TAX version.
The tax status is changed by TAX SHIFT key.
Exempting item tax from a taxable item using tax shift key
Before a taxable item entry, to exempt tax, press 0+ [tax shift] will be exempt item tax
from a taxable item.
For example, DEPT1 is linked Tax1, and you do not wish to collect tax for this
department, then immediately press [0] [TAX SHIFT] key before registering the
department.
1. Press [0] [TAX SHIFT] key.
Item Name Price Qty Total
2. Enter an amount, do not use the decimal = = = = = = = = = = = = = = = = = = = = =
3. Press[DEPT1]key, the item will be non-taxable
DEPT01 1.05
1 1.05
4. Press [TOTAL] key to finalize.
S
UB
1.05
C
ash
1.05
Total Qty
1
01-01-2011 #000091 12:30
0001
#000027
Adding Tax to a Non-taxable Item
Before a non-taxable item entry, to charge tax1, press [1] [tax shift]; to charge tax2,
press [2] [tax shift]; to charge tax3,press [3] [tax shift]; to charge tax4,press [4]
[tax shift]; to charge multiple taxes, press each of the appropriate tax shift keys.
For example, PLU47 is a non-taxable item, and you wish to collect tax1 for this PLU,
just press [1] [TAXSHIFT] key before registering the PLU.
Tax1 rate is 5.000%.
1. Press [1] [TAX SHIFT] key.
Item Name Price Qty Total
2. Enter the PLU No. 47 = = = = = = = = = = = = = = = = = = = = =
3. Press[PLU]key, the item will be taxable
PLU0047 1.00
1 1.00
4. Press [TOTAL] key to finalize.
S
UB
1.05
SUB
1.00
Tax1
0.05
Total tax amount 0.05
C
ash
1.05
Total Qty
1
01-01-2011 #000092
12:30
0001
#000028
Page 52

47
Changing item tax status from a taxable item using tax shift key
If one item has already been programmed with tax2, before registering the item:
a. To press [1] [tax shift] key, this item will be taxable with tax1.
b. To press [3] [tax shift] key, this item will be taxable with tax3.
c. To press taxshift1 and taxshift3, this item will be item with tax1 and tax3.
For example, DEPT1 is linked Tax1, you wish to change the tax status which
including Tax1 and Tax2. Tax1 rate is 5.000%, Tax2 rate is 10.000%.
[1] [TAX SHIFT]
Item Name Price Qty Total
[2] [TAX SHIFT] = = = = = = = = = = = = = = = = = = = = =
(1000) [DEPT1] Tax1 rate & tax2 rate DEPT01 10.00 1 10.00
[subttl]
S
UB
11.50
[TOTAL] SUB
10.00
Tax1
0.50
Tax2
1.00
Total tax amount 1.50
C
ash
11.50
Total Qty
1
01-01-211 #000093
12:30
0001
#000029
Keeping the tax shift key’s status
In the above examples the tax shift key only affect the current item, if the TAX SHIFT
status is kept, it will automatically affect all items enters without pressing the TAX
SHIFT key again.
Condition: Set the Bit C to “1 “in Terminal Status 4 in System Option Preset.
If you want to cancel the Tax Shift status, only depress the corresponding Tax Shift
key. But pressing the Tax Shift key again, it will remain again, unless you also set the
Bit C to “0” in Terminal Status 4 in System Option Preset.
For example, DEPT 1 is linked Tax1, DEPT2 is Linked Tax2 and DEPT3 is
Non-Taxable Tax1 rate is 5.000%, Tax2 rate is 10.000%.
[1] [TAX SHIFT]
Item Name Price Qty Total
(100) [DEPT1] Tax1 = = = = = = = = = = = = = = = = = = = = =
(100) [DEPT2] Tax1 DEPT01 1.00 1 1.00
(100) [DEPT3] Tax1 DEPT02 1.00 1 1.00
[subttl] Dept03 1.00 1 1.00
[TOTAL]
S
UB
3.30
SUB
3.00
Tax1
0.15
Total tax amount 0.15
C
ash
3.15
Total Qty
3
01-01-2011 #000094 12:30
0001
#0030
Page 53

48
Note:
Please note the TAX SHIFT‘s status, is used when necessary.
3. Exempting total tax for the transaction.
Before payment, press [subttl] key, then press [0][tax shift](display [SURE]for
the exempt tax operation)[sub total],after this operation, it will only do the payment.
For example, DEPT 1 is linked Tax1, DEPT2 is Linked Tax2.Tax1 rate is 10.000%,
Tax2 rate is 20.000%.
(105) [DEPT1] Tax1 Item Name Price Qty
Total
(110) [DEPT2] Tax2 = = = = = = = = = = = = = = = = = = = = =
[subttl] DEPT01 1.05 1 1.05
[0] DEPT02 1.10
1 1.10
[TAX SHIFT] Non-taxable
NON TAX
[subttl]
S
UB
2.15
[TOTAL]
C
ash
2.15
Total Qty
2
01-01-2011 #000114 12:30
0001
#000032
8.14 Reprint the Last Receipt
8.14.1 Reprint the last receipt
When outside a transaction, you can press(0) [subttl] key any time to reprint the last
transaction’s receipt, or press [TOTAL] key directly.
This operation is regardless of Receipt ON/OFF function.
8.14.2 Preset the Reprint Counter
Procedure:
Prog Mode (109) [qty/time] (X) [subttl]
X: counters 1~10, 1 is default
8.15 No Sale Operations
1. OPEN DRAWER
The #/NS key will open the cash drawer when you have not already started a
transaction.
1. Press the [#NS] key
2. The drawer will open and a receipt is printed.
Page 54

49
2. Non- Add Number
When any code number is to be recorded for future reference, such as a check no,
customer no, etc. A Non-add Number Print function is used.
Operation:
[#NS]
Example:
1
2
3
4
5
6
7
8
[#NS]
Note: ※
1. A Non-add Number can be entered at the starting of a sale or any time
during a sale if it is not finalized.
2. The entered number will not affect any sales data; it is simply a print for
reference.
The preceding number cannot be ‘0’.
8.16 Calculator Function
The register offers a calculator function. You can use it any time at the registration
without affecting the sales.
Procedure: “Reg” mode [1] [subttl]
Quit the Calculator Function:
Press the [subttl] key located on the default keyboard layout.
The keys of calculator are located as follows, and the positions are fixed.
CL CE
Feed
7 8 9
+
BS -/+
4 5 6
-
1 2 3
* ST
0
.
/
﹦
Note:
It is only a simple calculator, supports addition, subtraction, multiplication and
division.
CL: Clear the all status and data
CE: Clear the input data
BS: Delete the last one digit of the current display data, as the backspace function
-/+: Change the plus or minus symbol of the current display data
ST: Exit this mode
Code Number Max.9 digits (0-9)
(Decimal Point is not allowed)
Page 55

50
8.17 Receipt ON/OFF
There are 2 ways for this operation
1. The first way
Use the [RCPT /OFF] key, it can act on any mode; user also can press it at any
moment except during the transaction and programming the descriptors.
Set the Bit A to “0” in Terminal Status 13 in System Option Preset, then the
clerk key function will change to [RCPT /OFF] key
2. The second way
Set the Bit B to “0” in Terminal Status 3 in System Option Preset, then the
receipt will stop printing.
The far right digit will be lit when the receipt is on OFF status.
8.18 Post sale change calculation
After finalizing a transaction paid by cash, the change due is shown on the display. If
you need to review the change amount: (Enter cash amount) [TOTAL]
The display will review the cash change.
Note:
It must be out of a transaction and the amount of the tender entered cannot less than
the amount purchased.
This operation can also be used for closing a table temporarily in the Restaurant
Mode.
Page 56

51
9 RESTAURANT MODE
The operation of changing to the Restaurant Mode, see 5.Working Type Choice
section.
9.1 Major Features
The special RESTAURANT mode provides:
Maximum 40 open tables
70 simultaneously open items for an open table.
9.2 Table Preset
Note:
The function is only for Restaurant Mode.
Condition:
1. Switch the control lock to Prog mode.
Operation:
(Table No.) [DEPT 8/16/tab](Table Name)[subttl/Tab][subttl] [TOTAL]
Table No.: The physical number (1-40).
Table Name: Max. 12 characters. See 6.2. Descriptors Inputting section for the detail info.
[DEPT 8/16/tab]: [DEPT8/16] used as [Table] key only in Restaurant Mode.
Example:
The table 013 name is coffee.
“Prog” mode(13)[DEPT 8/16/tab](711534342424) [subttl][TOTAL]
Receipt format:
- - - - - - - Table description - - -
Coffee
P013
01-01-2011
Saturday
12:30
Repeat if needed
Table Name
Table No.
Page 57

52
9.3 REG Mode Operation
Most transaction operations are the same as the Retail Mode; the following only
explains the special operation for the Restaurant Mode.
9.3.1 Open a Table and Suspend the Table
Opening a table is a procedure by which we keep an open account for a customer –
table until the customers asks to pay for the account.
Each table belongs to one and only one clerk. When a clerk opens a table, all servings
to that table are counted for his record.
Operation:
(Table No.) [DEPT 8/16/tab](Clerk Secret Code) [subttl]
(Registrations)Press [DEPT 8/16] to suspend table or do Payment
Clerk: If clerk function is not activated, here this step will be omitted. Refer to the
Bit C of Terminal Status 3.
Note:
Before entering the clerk code, you can press [TOTAL] key to discard opening this
table.
9.3.2 Re-activate a Suspended Table
Operation:
(Table No.) [DEPT 8/16/tab](Clerk Secret Code) [DEPT
8/16/tab](Registrations) Press [DEPT 8/16/tab] to suspend table or do Payment
Note:
The clerk code must be the clerk code that originally opened the table.
9.3.3 Finally Close a Table
Because a table belongs to the clerk that originally opened it, to finally close a table
the clerk’s code and the table must be active at the time. Else, you must do the following
operation:
(Table No.) [DEPT 8/16/tab]( Clerk Secret Code) [ subttl](tendering)
9.3.4 Final Check out Bills
When after a payment, it will print the table’s checkout bills, which included the detailed
order items.
Users can choice whether printing the checkout bills:
Operation:
Set the Terminal Status 7’s C = 1, printing the checkout bills
Set the Terminal Status 7’s C = 0, no printing the checkout bills.
Page 58

53
9.4
Active Table Report
9.4.1 All Active Table
X mode(22) [TOTAL]
Example:
X mode
---- Active table sales report ----
(22)
[TOTAL]
Item Name Cnt/Qty
Amount Cnt: count Qty:
quantity
= = = = = = = = = = = = = = = = =
Table 001 6
36.00
Table1 Item
quantity
and
Table 006
3
6.00 amount
Table 007 5
3.00
Table 008 9
17.60
Table 009 3
199.00
Table 012
3
3.00
Total
29
264.60 All active table total
01-01-2011
Saturday 15:25
quantity and amount
9.4.2 Active Table Individual Report
X mode (Enter table No.) [DEPT 8/16/tab]
Press [TOTAL] key to quit.
9.5 Table Report
9.5.1 Individual Table Report
Key in table number and press the key [DEPT 8/16/tab].
Operation:
X mode (Table No.) [DEPT 8/16][TOTAL]
Page 59

54
Example:
View table 66 sale amount
X mode
---- Table individual report ----
(66)
[DEPT 8/16] Item Name Cnt/Qty
Amount Cnt: count Qty:
quantity
[TOTAL]
= = = = = = = = = = = = = = = = = = = = =
Coffee 4
158.31 Table66 sale count
Total count 4
and amount
exclude the
Total amount
158.31 activated status
01-01-2011
Saturday 15:25
9.5.2 All Table Sales Report
The report will print after the final closed table.
Operation:
X/Z mode [DEPT 8/16/tab] OR(21)[TOTAL]
Note
:
If there is no active table, taking the Z mode report will reset the report data. If there are
active table, the Z mode report cannot be taken.
Example:
X mode
---- <X> Table sales report ----
[OPENTABLE] Item Name Cnt/Qty
Amount Cnt: count Qty: quantity
= = = = = = = = = = = = = = = = = = = = =
Table 011 1
25.44 Table11 sales count and amount
Coffee 4
158.31 exclude the active status
Table 099 6
29.80
Total 11
213.55
01-01-2011
Saturday 15:25
Page 60

55
10 TRAINING MODE
The register provides a training mode for new clerks. After entering the training mode, a
clerk can operate the same transaction entries as those in the REG mode.
1. To change from Normal Operation mode to the Training mode
Condition:
There are no active tables open.
Operation:
1. Turn the Control Lock to the Reg position.
2. Enter the number “000987” by numeric keypad.
3. Press [subttl] key.
Then a trainee can operate all transaction entries described in the REG mode.
All issued receipt will have a training message.
Receipt format:
****************In Train mode******************
Welcome you!
Call again!
* Training *
Item Name Price Qty Total
= = = = = = = = = = = = = = = = = = = = = =
PLU0300 30.30 1 30.30
PLU0600 60.60 1 60.60
PLU0900 90.90 1 90.90
SUB 181.80
C
ASH 181.80
Total Qty 3
01-01-2011 #000186 11:36
0001 #000055
Note:
The data in the training mode is not affected any actual sales data in business and the
report total area. But the consecutive number will be still incremented.
2. To quit the Training mode
There are two methods:
The first way:
1. Enter the number “000789” by number keypad.
2. Press [subttl] key.
3. The register will change from Training mode to Normal mode
The Second way:
Changing the control lock to other positions.
Note:
When the register changes to normal mode, transaction entries thereafter will be stored
in the memory.
Page 61

56
11 COMMUNICATIONS
11.1 Serial Port Overview
Two RS-232 serial ports are supported. PORT1 (
DB9
male) and PORT2 (
RJ-11
).
Before using an external device, user must choose a port and preset the proper
attribute for it. The preset process as follows:
The serial port1 setting:
Procedure:
Prog mode (130) [qty/time] (input the external device code) [Sub Total]
(Baud Rate code) [Sub Total]
The below table list all devices that the ECR can be supported.
Device Code Device Name
0 None
1 PC
2 POS keyboard
3 Kitchen printer
4 Receipt printer
5 Scanner
Baud Rate Code:
The serial port2 setting:
Procedure:
Prog mode (133 ) [qty/time] (input the external device code) [Sub Total]
(Baud Rate code) [Sub Total]
The below table list all devices that the ECR can be supported.
Device Code
Device Name
0 None
1 PC
5 Scanner
0 — 9600
1 — 19200
2 — 38400
3 — 57600
4— 4800
0 — 9600
1 — 19200
2 — 38400
3 — 57600
4 — 4800
Baud Rate Code:
Baud Rate Code:
Page 62

57
11.2 Communications with PC
Note:
When ECR communications with PC, The ECR PORT1‘s Baud Rate and PC COM’s
Baud Rate which used for connecting the ECR must preset the same value. 57600 is
our suggestion.
ECR
1. Uses the standard serial cables connect to the ECR’s PORT and then connect the
other end of the cable to your PC’s COM1 or COM2 port.
2. Power on, and turn the control lock to Prog mode.
3. Through (130/133) [qty/time] order to select the ECR’s PORT you are using and
preset its proper baud rate.
PC
1. Run the PC software that provided with ECR.
2. Configure the PC’s COM port and preset the baud rate the same as ECR.
3. You are ready to program the ECR using the software and your PC.
11.3 External Connecting Scanner
Note:
The scanner does not need external power supply.
Serial Scanner
1). Connects the cable of scanner to the ECR’s PORT.
2). Through
(133)
[qty/time]
to set ECR’s PORT you are using and preset its
proper baud rate.
PS2 Scanner
Just insert the PS2 Scanner to the PS2 port on the ECR.
11.4 External Terminal Printer
11.4.1 Types of Printer
There are three types of printer for two purposes:
Receipt printer (RP) for printing a customer receipt.
Kitchen printer (KP) for printing customer’s orders for the kitchen.
Note:
The printout of KP and RP are different:
Receipt Printer:
The printout contents are same as the ECR’s inside printer, only
difference is the receipt printer does not print the graphic Logo and
when press the ECR’s FEED key it does not advance the paper of the
receipt printer.
Page 63

58
The RP can printout items conditions:
1. Select the fit PORT and corresponding baud rate.
2. Select the type of printer as receipt printer.
3. Select the printer model that user is using.
4. Only at the sales mode.
Kitchen Printer:
Only prints the quantity of the transactions items.
Only at restaurant mode and at opening table situation, the sale
items can printout in the Kitchen Printer.
The other conditions of the KP can printout items:
1. Select the fit PORT and corresponding baud rate.
2. Select the type of printer as kitchen printer.
3. Select the printer model that user is using.
4. Preset the department flag “send to kitchen printer” is active.
5. Working at Restaurant Mode.
11.4.2 Preset the Feed Line for the Kitchen Printer
This data used to feed more lines before the next receipt printing in the kitchen printer.
Procedure:
Prog mode (139) [qty/time] (XX) [subttl]
XX: 0~20
8 is default
Page 64

59
12 ELECTRONIC JOURNAL
The Electronic Journal means Sales Journal. Content has 60000 lines. There will give an
alarm to user to do clear journal operation if up to 57000 lines. User can select clear
journal operation by manual or automatic. Details see the bit D of the terminal status 1.
And you can send all electronic journal information to PC by register link software.
Note: If user does all clear procedure, the electronic journal contents cannot be cleared, only using
the specified method can clear them.
Print Sales Journal
Mode Method Sequence
X
Print the sales journal (41) [TOTAL]
X
Read By Date
(42) [TOTAL](StartDate)[subttl](End Date) [subttl]
[subttl]
X
Read By serial No.
(43) [TOTAL]( Start Serial No.) [subttl](End Serial No.)
[subttl]
Z
Clear the sales journal (40) [TOTAL](Sure) [subttl]/[TOTAL]
Comments:
Start Date:
6 digits must input and the date format is determined by the system flag.
(DDMMYY, MMDDYY or YYMMDD)
End Date:
The end date and the format is same as start date, if omitted, it will be up to the
current date.
Start Serial No.:
1-999999
End Serial No.:
If user omits inputting, it will be till up the current record.
Page 65

60
13 REPORTING AND BALANCING
13.1 Taking Read and Reset Reports
1. The Concepts of Various Types of Reports
◆ Daily Read Report:
It can be issued at any time and any number of times during the day. It reads the
sale recorded always from the Reset Report was issued last time to the moment.
Taking this type of report will not affect any sales data in the memory.
◆ Daily Reset Report:
The contents and format are the same as the Daily Read Report, but taking this
type of report will clear all the resettable totals and counters in the memory after the
report is issued, so it should be issued at the end of the day.
◆ Periodical Read Report:
It can be issued at any time and any number of times during a certain period
defined by user. Taking this type of report will not affect any sales data in the memory.
◆ Periodical Reset Report:
The contents and format are the same as the Periodical Read Report, Taking
this type of report will clear all the resettable totals and counters in the memory after
the report is issued.
Several different types of reports available:
X reports - Read only, takes a Daily Report or a Periodic Report
Z reports – Reset, takes a Daily Report or a Periodic Report
Page 66

61
2. Taking Reports Operation
TYPE OF
REPORT
MODE Daily Report Periodical Report
Sales Report X Z (1)[TOTAL] (11)[TOTAL]
All Department
Report
X (2)[TOTAL] (12)[TOTAL]
Department Group
Report
X
(3)[TOTAL][ Input Group
No.][subttl]
(13)[TOTAL][Input Group
No.][subttl]
Clerk Report X Z (4) [TOTAL] (14) [TOTAL]
PLU Report X Z [PLU] or (5) [TOTAL]
Hourly Report X Z (7)[TOTAL]
Table Report X (21)[TOTAL]
Active Table Report X (22)[TOTAL]
PLU Group Report X
(6)[TOTAL][ Input Group
No.][subttl]
Top 50 PLUs
amount
X (31) [TOTAL]
Top 50 PLUs
quantity
X (32) [TOTAL]
Individual
Department Report
X [DEPTx][DEPTx]…[TOTAL]
Individual PLU
Report
X (PLU barcode)[PLU]…[TOTAL]
PLU Stock Report
X
(101)
[
TOTAL
]
PLU Stock Report
(By PLU group)
801 [TOTAL] PLU group no. [subttl]
PLU Stock Report
(By DEPT)
802 [TOTAL] DEPT no. [subttl]
Note:
1. For “top 50 PLUs” that means only printout the PLUs which has sales data record.
2. When taking All PLU Report, PLU Group Report and Range PLU Report you can press
[C] key to terminate the printing.
Page 67

62
13.2 Report Sample Format (TAX Version)
Sales Read or Reset Report (Daily or Periodical)
----
<Z> Daily Report
-----
Z number 0003
Item Name Cnt/Qty Amount
→
Cnt: count Qty: quantity
= = = = = = = = = = = = = = = =
DEPT01 98
772.11
→
Dept.1 sales: item quantity and amount
DEPT02 24
183.61
→
Dept.2 sales: item quantity and amount
DEPT03 38
839.58
→
Dept 3 sales: item quantity and amount
DEPT04 10
29.52
→
Dept 4 sales: item quantity and amount
DEPT05 12
70.00
→
Dept 5 sales: item quantity and amount
DEPT16 3
72.00
→
Dept.16 sales: item quantity and amount
------------------------------------------------
Total 208
2098.98
→
Sum of departments: quantity and amount
1% -5.000%
→
1% rate 15.000%
Percent Item 4
-0.55
→
1% after Item percentage count and amount
Percent Subttl 1
-0.70
→
1% after Item percentage count and amount
Refund Item 2
-32.00
→
Refund after item quantity and amount
Refund Subttl 1
-50.00
→
Refund after subttl quantity and amount
TAX1
Taxalbe amt
772.11
→
Sales total with TAX1
Amt
29.68
→
TAX1 Total amount
TAX2
Taxable amt
183.61
→
Sales total with TAX2
Amt
13.58
→
TAX2 Total amount
TAX4
Taxable amt
118.30
→
Sales total with TAX4
Amt
33.81
→
TAX4 Total amount
Total TAX amount 212.97
Net sale number 36
Net sale amount
2070.57
Net Amt exclude tax 1891.41
→
Net sale without tax
------------------------------------------------
R.M. 6 -16.06
→
Return merchandise item quantity and
amount
E.C. 14 229.00
→
Error Correct item count and amount
VOID 7
16.16
→
VOID item count and amount
Page 68

63
TransVOID 1
9.66
→
Transaction all VOID item count and amount
No sale count 4
-----------------------------------------------****** Received on account*******
Cash 2 205.50
→
Cash amount for RA
Check1 1 550.00
→
Check1 count and amount for RA
Charge1 1
50.00
→
Charge1 count and amount for RA
------------------------------------------------
*********** Paid Out ***********
Cash 1 -650.00
→
Cash amount for RPO
Check1 1 -423.00
→
Check1 count and amount for PO
Charge1 1 -50.00
→
Charge1 count and amount for PO
********************************
Cash Sale 22 1464.37
→
Cash tendering count and amount
---------------------------------------------------
CHECK1 4 349.14
→
Check 1 tendering count and amount
------------------------------------------------
Total 4 349.14
→
Check tendering total count and amount
------------------------------------------------
CHARGE1 1
40.06
→
Charge 1 tendering count and amount
------------------------------------------------
Total 1
40.06
→
Charge tendering total count and amount
------------------------------------------------
Cash total in drawer 1019.87
NRGT 00000001781.48
→
Non-resettable grand total (13 digits)
01-01-2011 Saturday 16:01
All Department Report (Daily or Periodical)
-
<X>Daily Department Report-
Item Name Cnt/Qty
Amount
→
Cnt: count Qty: quantity
= = = = = = = = = = = = = =
DEPT01 98
772.11
→
Dept.1 sales: item quantity and amount
DEPT02 24
183.61
→
Dept.2 sales: item quantity and amount
DEPT03 38
839.58
→
Dept 3 sales: item quantity and amount
DEPT04 10
29.52
→
Dept 4 sales: item quantity and amount
DEPT05 12
70.00
→
Dept 5 sales: item quantity and amount
DEPT16 3
72.00
→
Dept.16 sales: item quantity and amount
--------------------------------------------
Total 208
2123.12
→
Sum of departments: quantity and amount
01-01-2011 Saturday 16:01
Page 69

64
Department Group Report (Daily or Periodical)
Example: group1
-
<X>Daily Dept group Report
--
** GROUP 1 **
GROUP Number
Item Name Cnt/Qty
Amount
→
Cnt: count Qty: quantity
= = = = = = = = = = = = = = =
DEPT01 98
772.11
→
Dept.1 sales: item quantity and amount
DEPT02 24
183.61
→
Dept.2 sales: item quantity and amount
DEPT03 38
839.58
→
Dept 3 sales: item quantity and amount
DEPT04 10
29.52
→
Dept 4 sales: item quantity and amount
DEPT05 12
70.00
→
Dept 5 sales: item quantity and amount
------------------------------------------------
Total 182
1894.82
→
Sum of group1: quantity and amount
01-01-2011 Saturday 16:01
All PLU Read or Reset Report (Daily or Periodical)
-----
<Z>Daily PLU Report
---
Item Name Cnt/Qty
Amount
→
Cnt: count Qty: quantity
= = = = = = = = = = = = = = =
PLU#0001 1000000000001
PLU0001 15
15.60
→
PLU1 sales: item quantity and amount
PLU#2 1000000000002
PLU0002 24
48.96
→
PLU2 sales: item quantity and amount
PLU#3 1000000000003
PLU0003 4
12.16
→
PLU3 sales: item quantity and amount
PLU#4 1000000000004
PLU0004 3
12.12
→
PLU4 sales: item quantity and amount
PLU#5 1000000000005
PLU0005 4
70.67
→
PLU5 sales: item quantity and amount
PLU#300 100000000300
PLU0300 4
18.12
→
PLU300 sales: item quantity and amount
------------------------------------------------
Total 78 433.45
→
Sum of PLU sale quantity and amount
01-01-2011 Saturday 16:01
Page 70

65
PLU Group Report (Daily or Periodical)
Example
Group 01:
-
<X>Daily PLU group Report-
** GROUP01 **
Item Name Cnt/Qty
Amount
→
Cnt: count Qty: quantity
= = = = = = = = = = = = = = =
PLU#0001 1000000000001
PLU0001 15
15.60
→
PLU1 sales: item quantity and amount
PLU#0002 1000000000002
PLU0002 24
48.96
→
PLU2 sales: item quantity and amount
PLU#0003 1000000000003
PLU0003 4
12.16
→
PLU3 sales: item quantity and amount
PLU#0004 1000000000004
PLU0004 3
12.12
→
PLU4 sales: item quantity and amount
PLU#0005 1000000000005
PLU0005 4
70.67
→
PLU5 sales: item quantity and amount
PLU#0050 1000000000050
PLU0050 5
53.74
→
PLU50 sales: item quantity and amount
-----------------------------------------------
Total 55 213.25
→
Sum of group1 sale quantity and amount
01-01-2011 Saturday 16:01
Clerk Report (Daily or Periodical)
----
<Z>Daily Clerk Report --
Item Name Cnt/Qty Amount
→
Cnt: count Qty: quantity
= = = = = = = = = = = = = = =
Clerk 01 10
300.53
→
Clerk1 sales count and amount
Clerk 02 26
57.00
→
Clerk 2 sales count and amount
Clerk 03 15
536.57
→
Clerk 3 sales count and amount
Clerk 15 5
99.99
→
Clerk 15 sales: item count and amount
-----------------------------------------------
Total 58 2070.57
→
Sum of Clerk sales quantity and amount
01-01-2011 Saturday 16:01
Page 71

66
Hourly Report
----
<Z> Hourly sales Report
----
08 09 3
7.55
→
Time zone (08-09), Hourly sales count 3,
hourly sales total 7.55
0910 10
22.00
1617 21
814.66
1718 18
526.57
-----------------------------------------------Total count 58
Total amount 2070.57
01-01-2011 Saturday 16:05
→
Current time
PLU Stock Report
-----
<X> PLU stock report
---
PLU0001
100
→
PLU0001 remain stock
PLU0002
50
PLU0046
242
PLU0876
10
PLU0910
12
PLU1001
2
------------------------------------------------
01-01-2007
Monday 16:10
→
Current time
PLU Stock Report (By PLU Group)
-----
<X> PLU stock report
---
(
By PLU group
)
** GROUP01**
PLU0001
100
→
PLU0001 remain stock
PLU0002
50
PLU0046
242
PLU0876
10
PLU1001
2
------------------------------------------------
01-01-2007
Monday 16:20
→
Current time
Page 72

67
PLU Stock Report (By DEPT)
----
<X> PLU stock report
----
(
By DEPT
)
** DEPT01**
PLU0001
100
→
PLU0001 remain stock
PLU0002
50
PLU0046
242
PLU0876
10
PLU1001
2
------------------------------------------------
01-01-2007
Monday 16:20
→
Current time
Page 73

68
14 OTHER FUNCTIONS
14.1 Power Failure
If a power failure occurs during a transaction, all sales data stored in the memory are
automatically protected. When power on, it will print a line message “Power down,
continue…” at the time, user only can continue the sale or finalize without doing other
operation, otherwise the buzzer will alarm.
The receipt format:
Item Name
Price Qty Total
= = = = = = = = = = = = = = = = = = = = = =
Department01
5.00 1 5.00
Department02
1.10 1 1.10
* *
* * * * * * * * * * * * * * *
*
Power down, continue…
* *
* * * * * * * * *
* * * * * *
*
Note:
The message “Power down, continue…” is only printed during a transaction or during a
program or exists the active tables when the Power Failure.
Page 74

69
15 ERROR CODE CORRESPONDING
LIST TABLE
Error
Code
Error Description
E001 -------
The input digit is too big or too small
E002 ------- The input digits format illegal
E003 ------- Press the illegal key
E004 ------- The input digits length is too long
E005 ------- Not allow pressed Decimal Point key in this case
E006 ------- The Decimal Point key has pressed already
E007 ------- The dept shift key is not allowed by the system flag
E008 ------- This key code nonexistent or UN-programmable
E009 ------- This PLU group is full
E010 -------
Only the Welcome& Bottom messages description s
upport the
Decimal Point key input.
E011 -------
The description input all is blank (Except Welcome& Bottom
messages description)
E012 -------
The corresponding reports data is not empty
E013 ------- The payment is not end
E014 ------- The sale no end
E015 ------- No new sale
E016 ------- Zero payment is not allowed
E017 ------- Zero transaction is not allowed
E018 ------- The VOID operation input digit is too big
E019 -------
Item Refund operation, the input digit is larger than the transaction
price
E020 ------- The transaction is full (Must do the tender)
E021 ------- Transaction amount reaches maximum
E022 -------
The transaction’s quantity is reach to the max
E023 -------
Refund or Percent operation, the corresponding flag not allow this
operation
E024 ------- (HALO) Transaction amount too big
E025 ------- Nonexistent department
E026 ------- The multiplication operations max quantity is 9999.999
E027 ------- The Percent operations rate can’t be 0
E028 ------- This operation is not allowed in Z mode
E029 ------- Doing the individual report
Page 75

70
E031 ------- The programming operation no end
E032 ------- Nonexistent the hard control lock
E033 -------
Doing partial electronic journal, the end condition input is smaller
than the start condition input
E034 ------- Did not found the item with the condition in partial electronic journal
E035 ------- Max 16 operable departments
E036 ------- The e-journal is blank
E037 ------- The PLU report is empty
E038 ------- The integrated receipt printing not end
E039 -------
Not initialize the FCE rate
E040 ------- The Journal is not active
E041 ------- The EJ is near to full
E042 ------- The EJ is full
E043 ------- The cash total in drawer is over
E044 ------- The exchange data is too big
E045 ------- FCE data over
E046 ------- Not allow SHIFT in VAT mode
E051 ------- The input of long number is only for barcode input
E052 ------- Nonexistent PLU bar code in index table
E053 ------- Nonexistent bar code format
E054 ------- The bar code has existed
E055 ------- The PLU is full
E056 ------- Hasn’t set the price of PLU
E061 -------
After download the PLU index table, did not download the PLU
attribute
E062 ------- The serial port is working in other mode
E063 ------- Can’t set the port work in this mode
E067 ------- Don’t exist the HOLD items
E068 ------- Exist the HOLD items
E071 ------- The pressed key is not the calculator key
E073 ------- The inputted amount is less than total payment amount
E101 -------
Clerk function is not allowed by the system flag
E103 ------- Already existing the same clerk password
E104 -------
Clerk password is not correct
E105 ------- Clerk is not the same as the previous open table
E106 ------- The table not activity
E107 ------- The object table is the same as the source table
Page 76

71
E108 ------- The sum of the two tables buffer length is too big
E109 ------- Nonexistent opened table
E110 -------
This logical number is exist in other table
E111 ------- Logical number can not be zero
E112 ------- The logical number not exist
E115 ------- Not in Restaurant Mode
E116 ------- The kitchen printer is no active
E117 ------- Existing active table
E119 ------- Don’t support print table barcode function
E201 ------- Nonexistent mode
E221 ------- No port used to PC communication
E222 ------- Kitchen printer is time out
E996 ------- The electronic journal’s data is wrong
E997 ------- The Flash is damaged
E998 ------- Not existing the flash memory for store the electronic journal
E999 ------- The SRAM’s data is wrong
User can also print it:
Procedure:
Prog mode (301) [qty/time]
Page 77

Date: Jan. 2013
Ver.: 001
 Loading...