

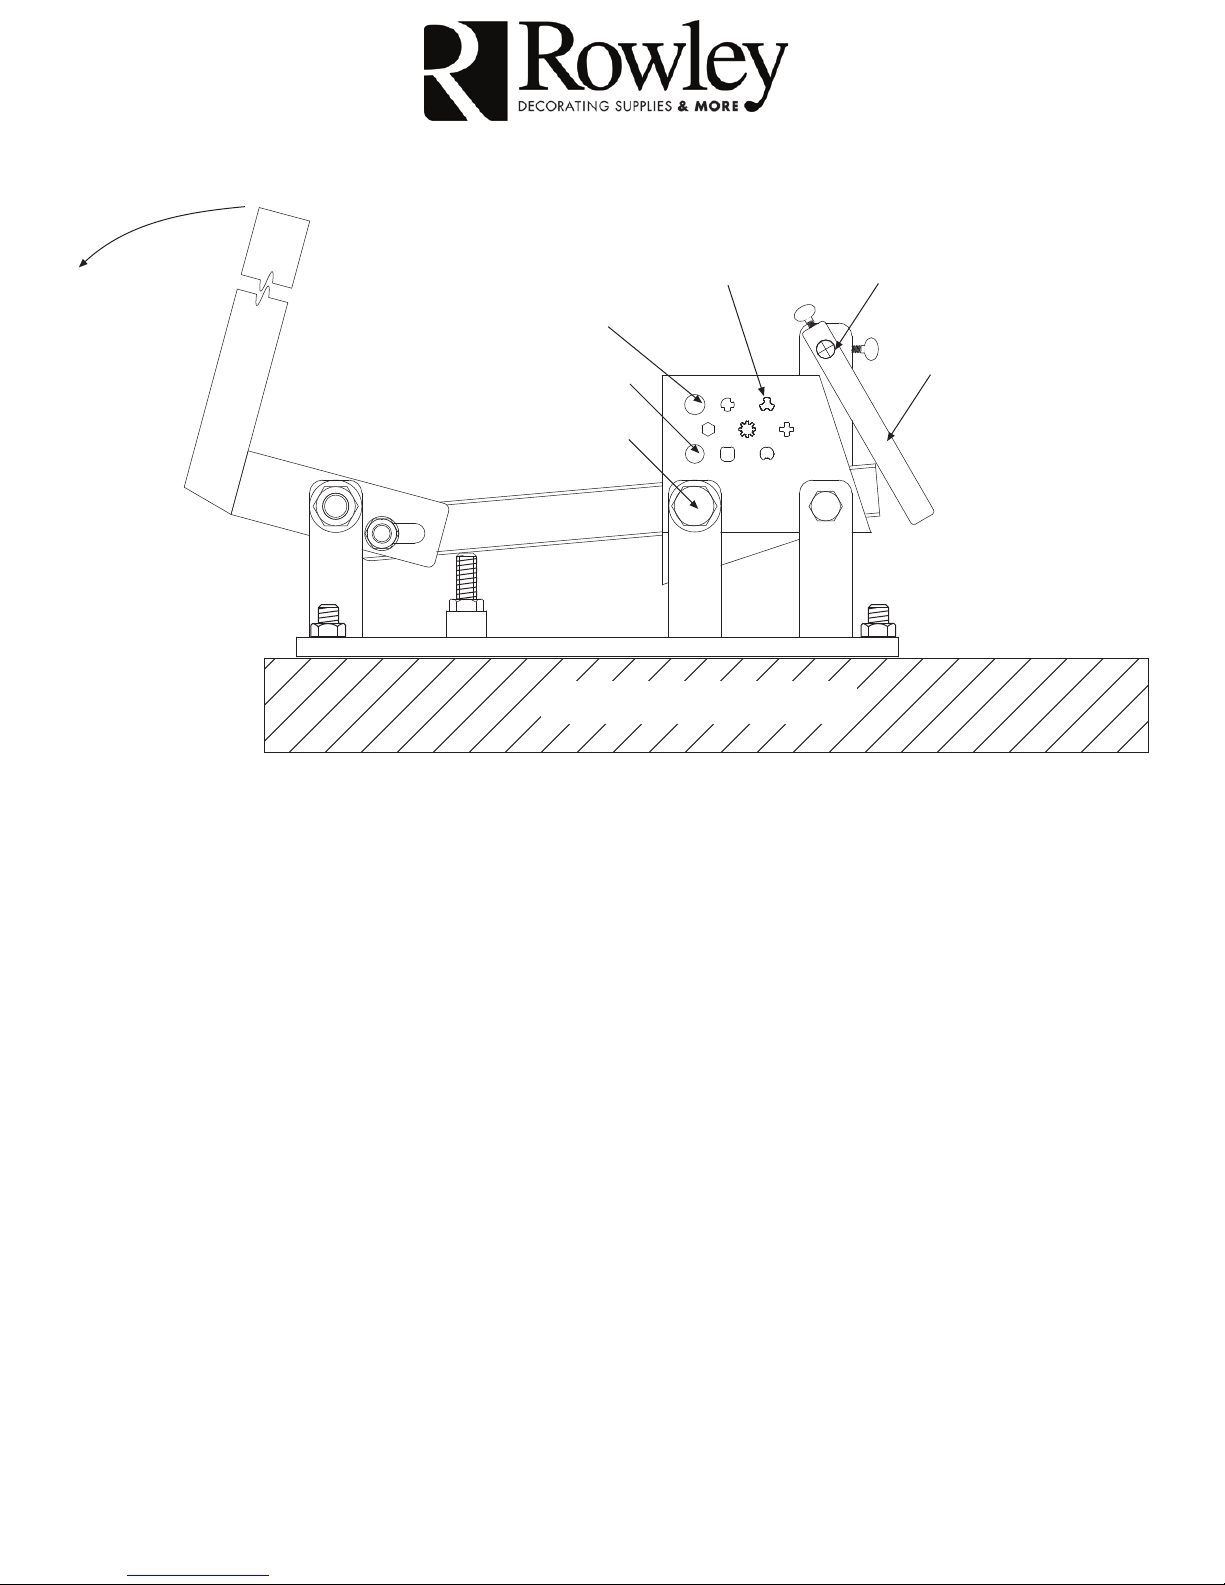
Pull
the handle
to cut the
rod
Instructions for use of Rod Cutter (Stk# RC20)
Numerous Vertical
& Horizontal Blind
Tilt Rod Holes
For fiberglass and
aluminum only
Only use this hole for
3
/8” steel rodding.
Pivot Bolt
Guide Rod
Guide
I-28.5
19” long piece of 2” x 6” lumber
This rod cutter can cut several different shape rods. See drawing above. When you are cutting
different rod shapes, use the appropriate hole. Use the upper circular hole (marked with a sticker
or “F” next to the hole) for 3/8” fiberglass and aluminum rods only. For steel rod, only use the 3/8”
hole next to the pivot bolt. Feed the rod into the hole from either side of the cutter. One side of
the cutter has a 1/2” thick blade and the other blade is 5/8” thick. Using a fair amount of strength,
pull the handle down to cut the rod.
The small guide rod and guide stop are provided for occasions when you need to make numerous
cuts of small length. For longer cuts, you can use a longer length of 3/8” rod as the guide rod.
Rod Cutter can be mounted in several ways:
•To a 19” long piece of 2” x 6” lumber as shown above. Remember to countersink the heads of
the mounting bolts so floors are not scratched by the heads. This is the most versatile & portable
method of mounting your rod cutter.
•To a work table.
•To the floor of a vehicle. If you choose to mount the rod cutter to the vehicle, consult your auto
dealer first in regard to underbody rust protection.
***WARNING***: Do not try to cut steel rod in the hole marked with an “F” or a sticker “For
fiberglass and aluminum only” for cutting steel. Damage to the cutter or injury to the operator
may result. Always wear safety goggles when using tools.
Updated on 2/20/08

ROD CUTTER (RC20) ASSEMBLY INSTRUCTIONS
Bolt
Washer
I-28.5
Handle
Fig 2
Fig 1
Hole in
Connecting Shaft
Slot in
Handle
Washer
Nut
Connecting
Rod
Fig 3 Top View
Bolt
Washer
Remove the nut and only one plastic washer from the bolt.
Line up the hole in the connecting shaft with the handle slot (see fig 1).
Insert the bolt and other washer from one side of the handle slot, through the hole in the
connecting shaft and out other side of the handle slot.
Push the bolt all the way in and add washer & nut to other end of bolt (see fig. 2 & 3).
Do not over tighten the nut. The nut should be tightened to make very light contact with
the handle. If it is over tightened, the Shaft cutter may not function properly.
The Shaft cutter is now ready to use.
Do not try to cut steel rod in the hole marked with an “F” or a sticker “For fiberglass and
aluminum only” for cutting steel. Damage to the cutter or injury to the operator may result.
Always wear safety goggles when using tools.
Washer
Nut
*** Warning ***
***WARNING***
Updated on 2/20/08
 Loading...