

CD040093/50-04 - VU6040
NOT CD030093 vu6040 22/12/04 12:29 Page 1
1
3 4
CLICK
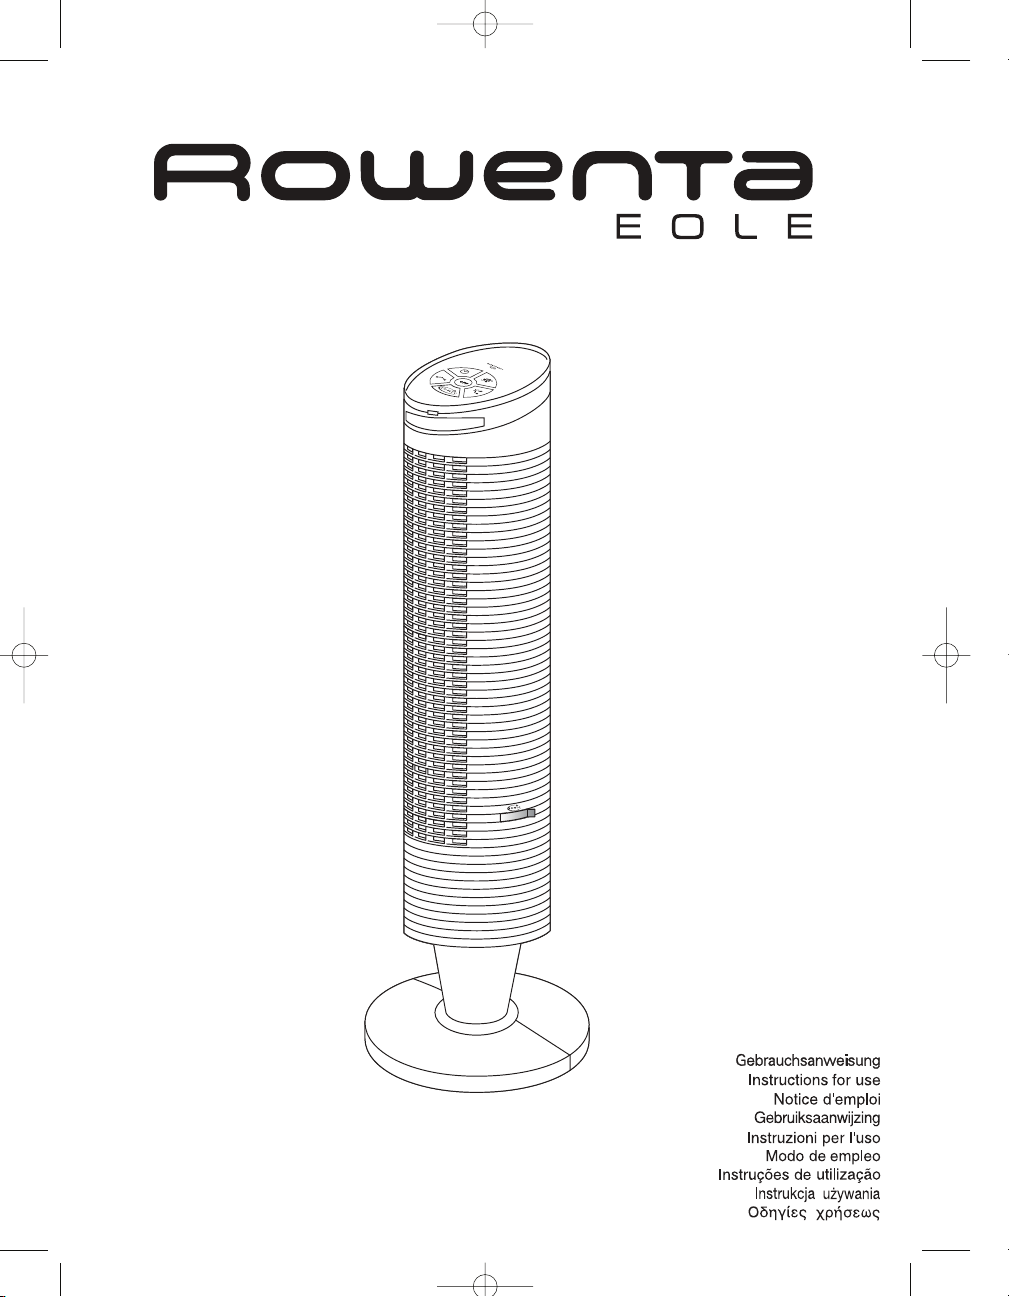
D
C
E
F
A
B
G
2
NOT CD030093 vu6040 22/12/04 12:29 Page 2
5
6 7
8 9
NOT CD030093 vu6040 22/12/04 12:29 Page 3
10
11
NOT CD030093 vu6040 22/12/04 12:29 Page 4

Bitte aufmerksam durchlesen und aufbewahren.
HINWEISE
Bitte lesen Sie die vorliegende Anleitung unbedingt aufmerksam durch, und beachten Sie die folgenden Empfehlungen :
• Dieses Gerät entspricht den europäischen Richtlinien 73/23/CEE und 89/336/CEE.
• Überprüfen Sie vor jeder Benutzung das Gerät, den Stecker und das Kabel auf einwandfreien
Zustand.
• Den Stecker weder am Gerät noch am Netzkabel aus der Wandsteckdose ziehen.
• Stecken Sie niemals Gegenstände (z.B.: Nadeln...) in das Gerät hinein.
• Während des Betriebs ist das Gerät außerhalb der Reichweite von Kleinkindern, Tieren und
Personen mit bestimmten Behinderungen zu halten.
• Benutzen Sie das Gerät nicht in staubigen Räumen oder in Räumen mit Brandgefahr.
• Dieses Gerät ist ausschließlich Haushaltszwecken vorbehalten. Es darf nicht für industrielle
Verwendungen benutzt werden.
• Bei Beschädigungen durch unsachgemäße Verwendung erlischt der Garantieanspruch.
• Ist das Stromkabel beschädigt, muß es aus Sicherheitsgründen vom Hersteller, in dessen
Kundendienstwerkstaff oder von einer Person mit entsprechender Qualifikation durch ein Neues
ersetzt werden.
SEHR WICHTIG
• Zwischen dem Gerät und anderen Gegenständen (Vorhänge, Wände, Sprühdosen ...)
einen Abstand von 50 cm lassen.
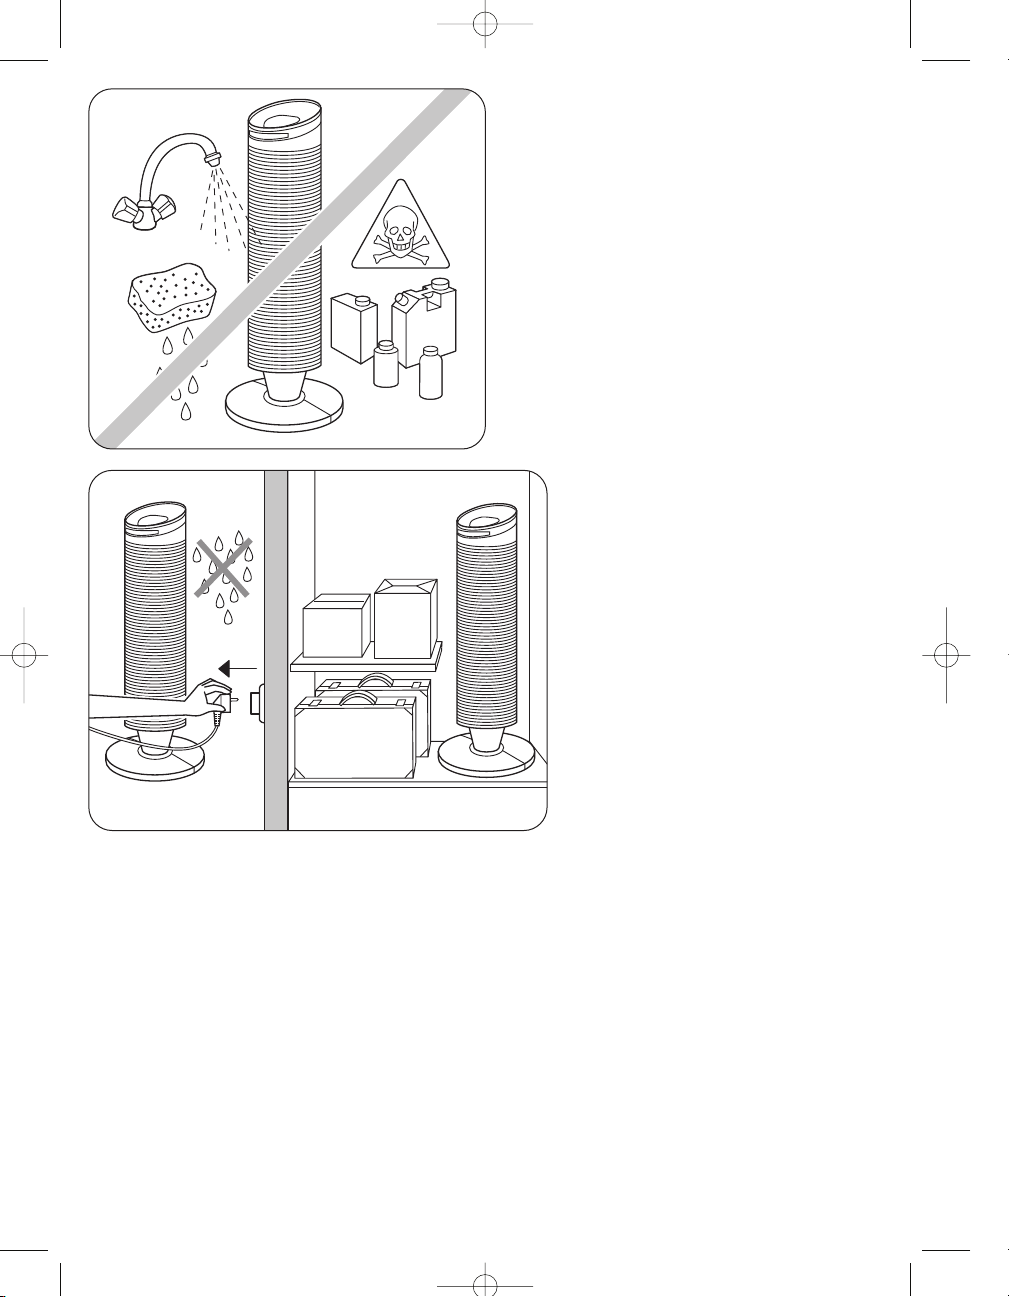
• ES DARF NIEMALS WASSER IN DAS GERÄT EINDRINGEN.
• Das Gerät nicht mit feuchten Händen anfassen.
• Versichern Sie sich vor der Inbetriebnahme des Ionisator-Reinigungssystems, dass das Gerät
ans Stromnetz angeschlossen ist.
• Bitte stellen Sie vor der Betriebsnahme sicher :
- Der Zusammembau des Gerätes ergibt sich aus der entsprechenden Anleitung.
- Das Gerät ist auf einer beständigen und festen Oberfläche plaziert.
- Das Gerät ist in einer normalen Betriebsposition (Senkrecht auf seinen Füßen).
SPANNUNG
• Überprüfen Sie vor der ersten Benutzung, ob die Netzspannung mit der auf dem Gerät angegebenen Spannung übereinstimmt.
• Ihr Heizkörper muss an eine Steckdose mit Erdung angeschlossen werden. Es entspricht der
Klasse II (doppelte elektrische Isolation ).
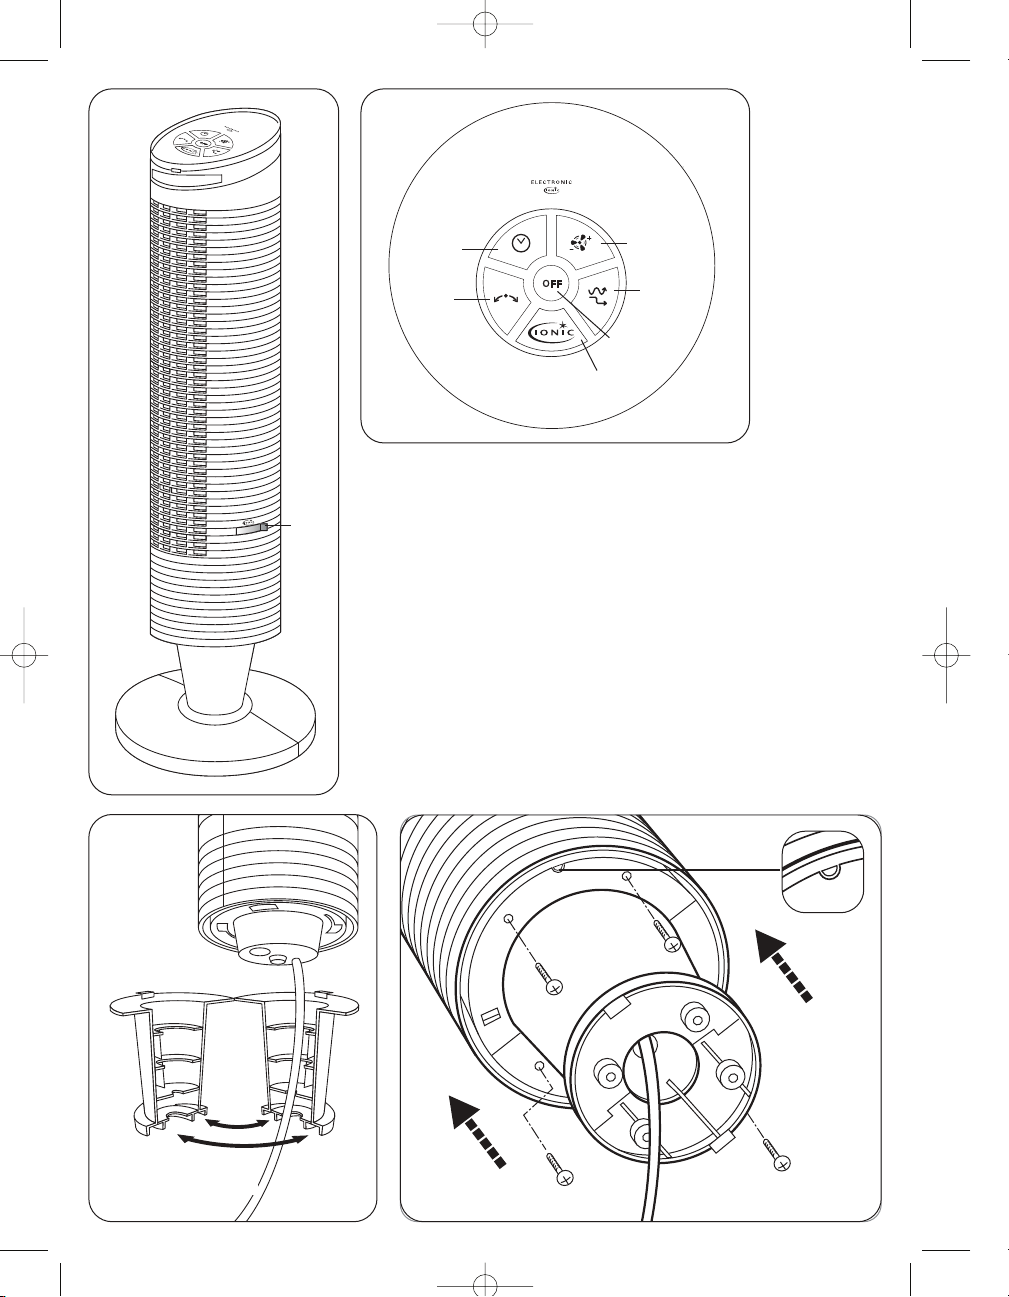
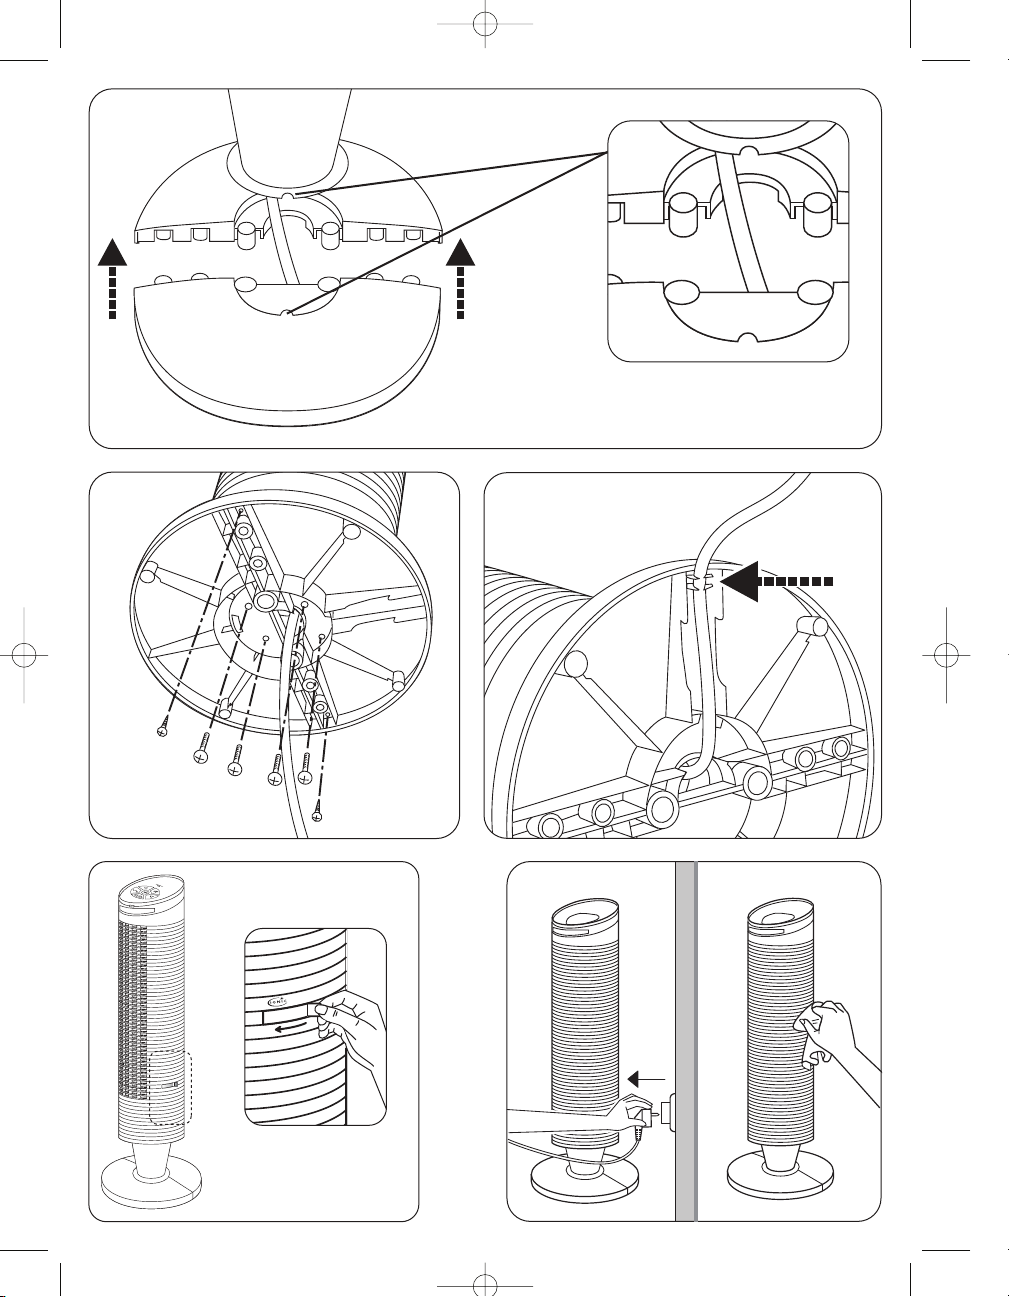
MONTAGE
• Ihr Gerät wird in Einzelteile zerlegt geliefert. Aus Sicherheitsgründen ist unbedingt darauf zu
achten, das Gerät richtig zusammenzubauen.
Fig. 3, 4, 5, 6, 7.
„IONIC" SYSTEM
Die von dem Gerät abgegebenen negativen Ionen stellen das Gleichgewicht der Raumluft wieder
her und sorgen dafür, dass man sich so wohl fühlt wie im Gebirge und am Meer, wo die negativen Ionen natürlicher weise in großer Zahl vorhanden sind.
Die Funktionsweise ist nachstehend beschrieben.
D
NOT CD030093 vu6040 22/12/04 12:29 Page 5

D
1 Stunde 2 Stunden 4 Stunden 8 Stunden
S T O P
• Taste C, Einstellung des REDUCTION- oder des VARIATION-Modus:
Wählen Sie die gewünschte Anfangsgeschwindigkeit (siehe obenstehendes Schema) und stellen
Sie anschließend den REDUCTION- oder den VARIATION-Modus ein (wie unten beschrieben):
- Drücken Sie einmal die Taste C, der „VARIATION"-Modus schaltet sich ein und die grüne Anzeige
„VARIATION" leuchtet auf.
VARIATION : REDUCTION
:
Geschwindigkeit ändert sich im 90 Sekunden- Geschwindigkeit ändert sich im 90 Sekunden
Rhythmus nach dem Zufallsprinzip Rhythmus nach dem Zufallsprinzip +
Geschwindigkeit verlangsamt sich alle 30 Minuten
Voreinstellung der Geschwindigkeit
Voreinstellung der Geschwindigkeit
Voreinstellung der Geschwindigkeit
Voreinstellung der Geschwindigkeit
Voreinstellung der Geschwindigkeit
Voreinstellung der Geschwindigkeit
GEBRAUCHSANLEITUNG
Die unten beschriebenen Tasten A, B, C und F sind erst nach Inbetriebnahme des Geräts
betriebsbereit und können gleichzeitig eingesetzt werden.
• Taste A, Einstellung des Schwingmechanismus:
- Drücken Sie einmal die Taste A, der Ventilator beginnt horizontal zu schwingen.
- Drücken Sie ein weiteres Mal die Taste A, der Schwingmechanismus schaltet sich ab.
• Taste B, Zeitschaltuhr zum automatischen Abschalten des Geräts:
Sie können zwischen 4 Betriebszeiten wählen: 1, 2, 4 oder 8 Stunden.
- Drücken Sie einmal die Taste B, die Zeitschaltung 1 Stunde schaltet sich ein und die Anzeige 1h
leuchtet auf.
- Drücken Sie ein zweites Mal die Taste B, die Zeitschaltung 2 Stunden schaltet sich ein und die
Anzeige 2h leuchtet auf.
- Drücken Sie ein drittes Mal die Taste B, die Zeitschaltung 4 Stunden schaltet sich ein und die
Anzeige 4h leuchtet auf.
- Drücken Sie ein viertes Mal die Taste B, die Zeitschaltung 8 Stunden schaltet sich ein und die
Anzeige 8h leuchtet auf.
- Ein weiterer Druck auf die Taste B schaltet die „TIMER” Funktion ab.
NOT CD030093 vu6040 22/12/04 12:29 Page 6
- Drücken Sie ein zweites Mal die Taste C, der „REDUCTION"-Modus schaltet sich ein und die
rote Anzeige „REDUCTION" leuchtet auf.
- Ein weiterer Druck auf die Taste C schaltet das Gerät ab.
WICHTIG:
Bei Nichtbenutzung des Geräts sollte dieses ausgesteckt werden.
PFLEGE
• Vor der Durchführung von Pflegearbeiten ist unbedingt der Netzstecker herauszuziehen.
• Sie können das Gerät mit einem feuchten Tuch reinigen.
• Ihr Gerät ist mit einem Ionisator-Reinigungssystem ausgestattet (Abb. 1-G).
Zur Sicherstellung eines optimalen Ionenausstoßes muss der Ionisator regelmäßig gereinigt werden (je nach Betriebshäufigkeit 1 bis 2 zwei Mal pro Monat).
(Siehe Abb. 8).
• Wichtig : Niemals Schleifmittel benutzen, da diese die Oberflächen Ihres Gerät beschädigen
könnten.
UNTERBRINGUNG
• Wenn Sie das Gerät nicht benutzen, muß es in einem vor Feuchtigkeit geschützten Raum aufbewahrt werden.
BEI STÖRUNGEN
• Nehmen Sie das Gerät niemals selbst auseinander. Ein falsch repariertes Gerät kann für den Benutzer
eine große Gefahr darstellen.
• Wenn das Gerät nicht mehr funktionsfähig oder in irgendeiner Hinsicht beschädigt ist, kontaktieren Sie
eine unserer Servicestellen.
DENKEN SIE AN DEN SCHUTZ DER UMWELT !
Ihr Gerät enthält wertvolle Rohstoffe, die wieder verwertet werden können.
Geben Sie Ihr Gerät deshalb bitte bei einer Sammelstelle Ihrer Stadt oder Gemeinde ab.
D
Taste F, Inbetriebnahme des Ionisators:
- Drücken Sie einmal die Taste F, der Ionisator schaltet sich ein und die blaue Anzeige leuchtet auf.
- Ein weiterer Druck auf die Taste F schaltet den Ionisator ab.
• Taste D, Ein/Aus-Taste und Einstellung der Geschwindigkeit:
- Drücken Sie einmal die Taste D, das Gerät läuft auf Stufe 1 an und die entsprechende Anzeige
leuchtet auf .
- Drücken Sie ein zweites Mal die Taste D, das Gerät schaltet auf Stufe 2 und die entsprechende
Anzeige leuchtet auf .
- Drücken Sie ein drittes Mal die Taste D, das Gerät schaltet auf Stufe 3 und die entsprechende
Anzeige leuchtet auf .
- Bei einem weiteren Druck auf die Taste D schaltet das Gerät wieder auf Stufe 1 und die entsprechende Anzeige leuchtet auf .
• Taste E, sofortiges Ausschalten des Geräts:
- Drücken Sie die Taste E, das Gerät schaltet sich vollständig ab.
R e d u c t i o nV a r i a t i o n
S T O P
NOT CD030093 vu6040 22/12/04 12:29 Page 7

Please read carefully and keep in a safe place.
WARNINGS
It is essential that you read these instructions carefully and comply with the following recommendations.
• This appliance complies with European directives 73/23/EEC and 89/336/EEC.
• Before using, always check the condition of the appliance, the power socket and the power
cord.
• Do not pull on the power cord or the appliance, even to unplug it from the wall socket.
• Never insert objects into the appliance (e.g. needles...).
• When in use, this appliance must be kept out of the reach of young children, animals and certain handicapped people.
• Do not use your appliance in a dusty room or a room where there is a risk of fire.
• This appliance is intended for domestic use only. It must therefore not be used in industrial
applications.
• This product has been designed for domestic use only. Any commercial use, inappropriate use
or failure to comply with the instructions, the manufacturer accepts no responsibility and the
guarantee will not apply.
• If the power cord is damaged, it must be replaced by the manufacturer, its after-sales service or
a person with similar qualifications to avoid any danger.
VERY IMPORTANT
• Keep the appliance 50 cm away from any objects (curtains, walls, aerosols, etc.)
• NEVER ALLOW WATER TO PENETRATE THE APPLIANCE.
• Do not touch the appliance with wet hands.
• Before using the ioniser cleaning system, please ensure that you have unplugged the appliance.
• Before operating, please ensure that :
- The appliance is assembled according to the manufacturers instructions.
- The appliance is placed on a stable and firm surface
VOLTAGE
• Before using the appliance for the first time, ensure that your mains voltage corresponds to the
voltage indicated on the appliance.
• Your appliance can be used with a power plug without an earth connection. It is a class II
appliance (double insulation ).
ASSEMBLING
• Your appliance is supplied unassembled. For your safety, it is essential to assemble it correctly.
Fig. 3, 4, 5, 6, 7.
"IONIC" SYSTEM
The negative ions that are effectively released by your appliance rebalance the air in the room so
as to create the feeling of well-being that one feels in the mountains or at the seaside where
negative ions are naturally found in very large numbers. See Operation below.
GB
NOT CD030093 vu6040 22/12/04 12:29 Page 8
GB
OPERATION
The " A" "B" "C" and "F" buttons described below are only operational once the appliance
has been turned on and can be used simultaneously.
• "A" button, oscillation control:
- Press the "A" button once, the fan oscillates horizontally.
- To stop the oscillation function, press the "A" button again.
• "B" button, set automatic appliance shutdown:
You have 4 choices, 1-, 2-, 4- or 8-hour operating time.
- Press the "B" button once; the 1-hour timer is activated and the 1h indicator comes on.
- Press the "B" button a second time; the 2-hour timer is activated and the 2h indicator comes on.
- Press the "B" button a third time; the 4-hour timer is activated and the 4h indicator comes on.
- Press the "B" button a fourth time; the 8-hour timer is activated and the 8h indicator comes on.
- To stop the "TIMER" function, press the "B" button again.
• "C" button, select REDUCTION mode or VARIATION mode:
1 h o u r 2 h o u r s 4 h o u r s 8 h o u r s
S T O P
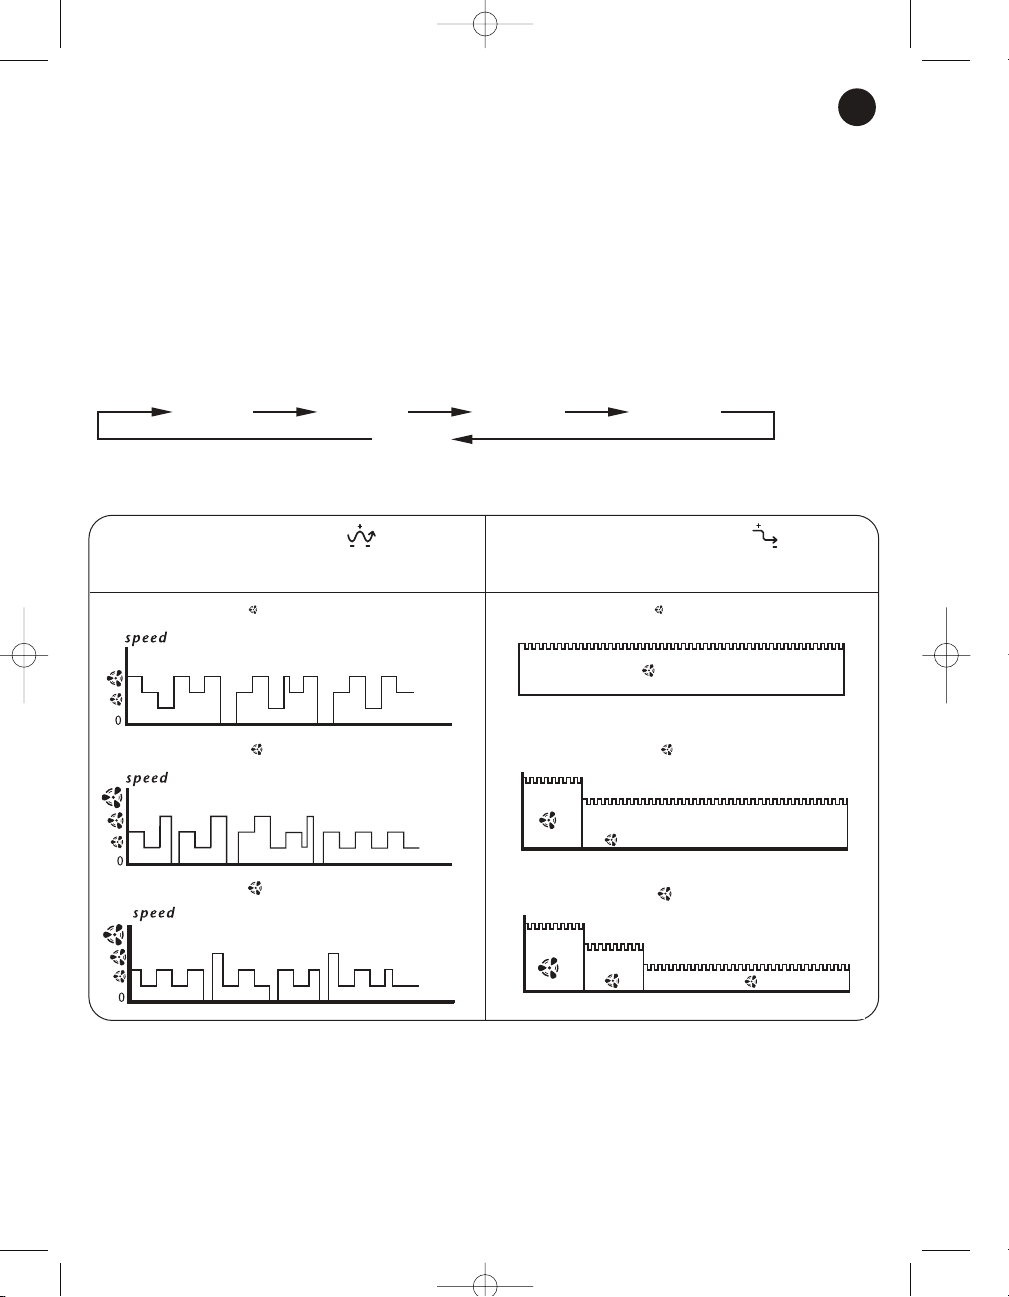
VARIATION : REDUCTION :
Random speed cycles (90-second cycles) + Random speed cycles (90-second cycles) +
Speed steps down every 30 minutes
Pre-select speed
Pre-select speed
Pre-select speed
VA RIA TI ON sp eed
0
Pre-select speed
Pre-select speed
va ria ti on
sp eed
va ria ti on
sp eed
0
30 min .
Pre-select speed
va ria ti on
sp eed
va ria ti on sp eed
va ria ti on
sp eed
0 30 min . 60 min .
NOT CD030093 vu6040 22/12/04 12:29 Page 9
IMPORTANT:
It is recommended that you unplug your appliance whenever it is not in use.
CLEANING
• Your appliance must be unplugged before proceeding with any cleaning work.
• You can clean it with a slightly damp cloth.
• Your appliance is equipped with an ioniser cleaning system (Fig. 1-G). To ensure optimum ion
emission efficiency, regular cleaning is necessary (once or twice a month depending on frequency of use) (See Fig. 8).
• IMPORTANT: Never use abrasive products which might damage the appearance of your appliance.
STORAGE
• When you are not using your appliance, store it in a dry place.
IN THE EVENT OF PROBLEMS
• Never dismantle your appliance yourself, this will negate any guarantee. A poorly repaired appliance
may be dangerous for the user.
• If the appliance ceases to operate or is damaged in any way, contact one of our authorised
service centres.
ENVIRONMENT PROTECTION FIRST !
Your appliance contains valuable materials which can be recovered or recycled. Leave it
at a collection point
If you have any problems or queries please call our Customer Relations Team for expert help and advice:
HELPLINE:
0845 602 1454 - UK
(01) 4751947 - Ireland
Or consult our web site: www.rowenta.co.uk (if this is a Rowenta product).
GB
• “F” Button, to select the ioniser:
- Press the F button once, the ioniser is activated and the blue indicator comes on.
- Press the F button again to stop the ioniser.
• "D" button:
- Press the "D" button once; the appliance starts up at speed 1 and indicator comes on.
- Press the "D" button a second time; the appliance changes to speed 2 and indicator comes on.
- Press the "D" button a third time, the appliance changes to speed 3 and indicator comes on.
- If you press the "D" button again, the appliance changes back to speed 1 and indicator comes on.
• "E" button, immediate appliance shutdown:
- Press the "E" button to completely shut down the appliance.
R e d u c t i o n
S T O P
V a r i a t i o n
Pre-select the start-up speed according to your needs (see table above), then select
REDUCTION mode or VARIATION mode (using method described below):
- Press the "C" button once, "VARIATION" mode is activated and the green "VARIATION"
indicator comes on.
- Press the C button a second time, "REDUCTION" mode is activated and the red "REDUCTION"
indicator comes on
- Press the C button a third time to stop this function.
NOT CD030093 vu6040 22/12/04 12:29 Page 10
 Loading...