

Page 1

PRIME
QUICK START GUIDE
CL-6000/6001
Page 2
WARNING
• Never rely solely on ROVI products when driving. Always practice safe driving
habits and follow all driving laws and standards. ROVI products are not a
replacement for safe driving habits.
• Always survey your surrounding before driving and operating ROVI products.
ROVI products are not replacements for manually checking your surroundings
• Never drive while only looking into the built-in monitors of ROVI products. The
images and objects viewed from the screen will be different from the actual
distance to your vehicle.
• Do not operate or change settings on any ROVI products while driving or while
the vehicle is in motion. Always practice safe, hands-free, and
unobstructed driving.
• Mounting and installation locations are for recommendations only. The
placement recommendations may not apply to every type of vehicle. Please
ensure that installation and mounting location you choose will not obstruct
visibility, any safety features of the vehicle, or violate government
safety standards.
BEFORE USING ROVI...
Page 3
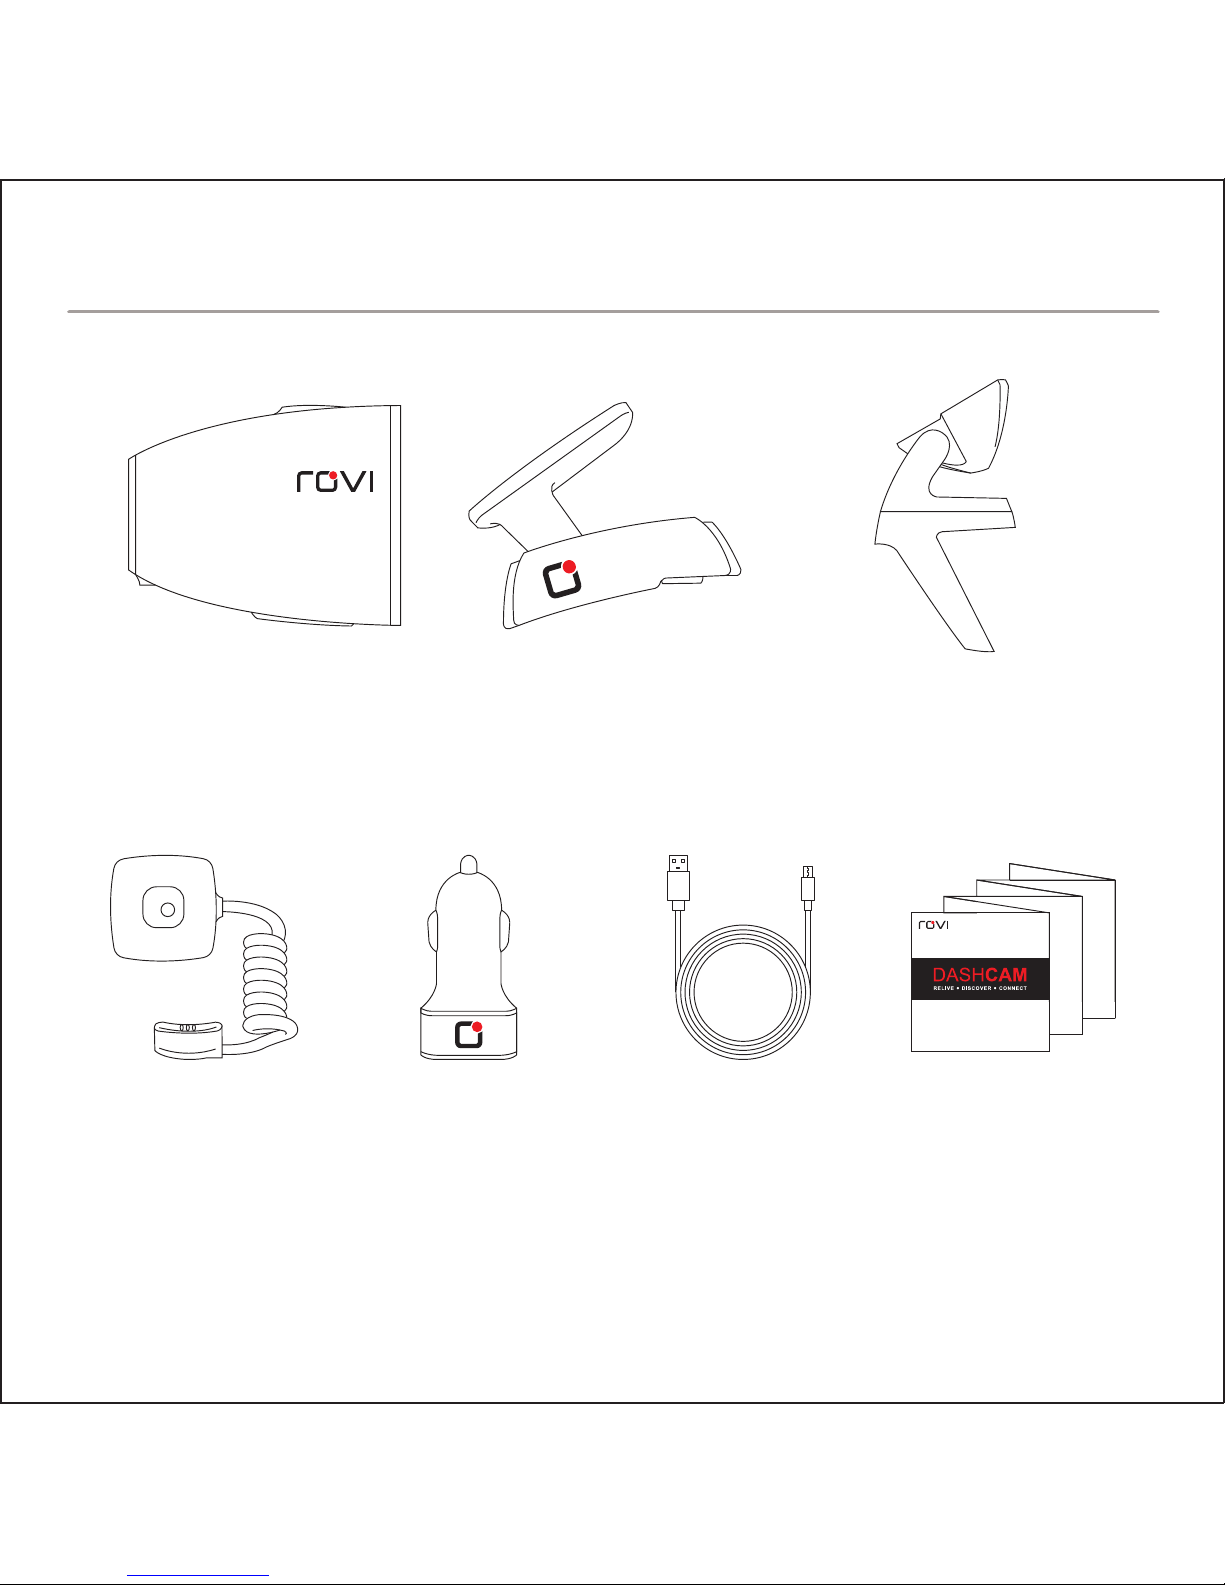
ROVI Dashcam
Compact
Magnetic Mount
(Included with
CL-6000)
Magnetic Mount
(Included with
CL-6001)
GPS Module
(Included with
CL-6001)
USB Car Charger
USB Charge
and Sync Cable Quick Start Guide
Accessories sold separately. Available on RoviCams.com
optional
mount
IN THE BOX
Page 4
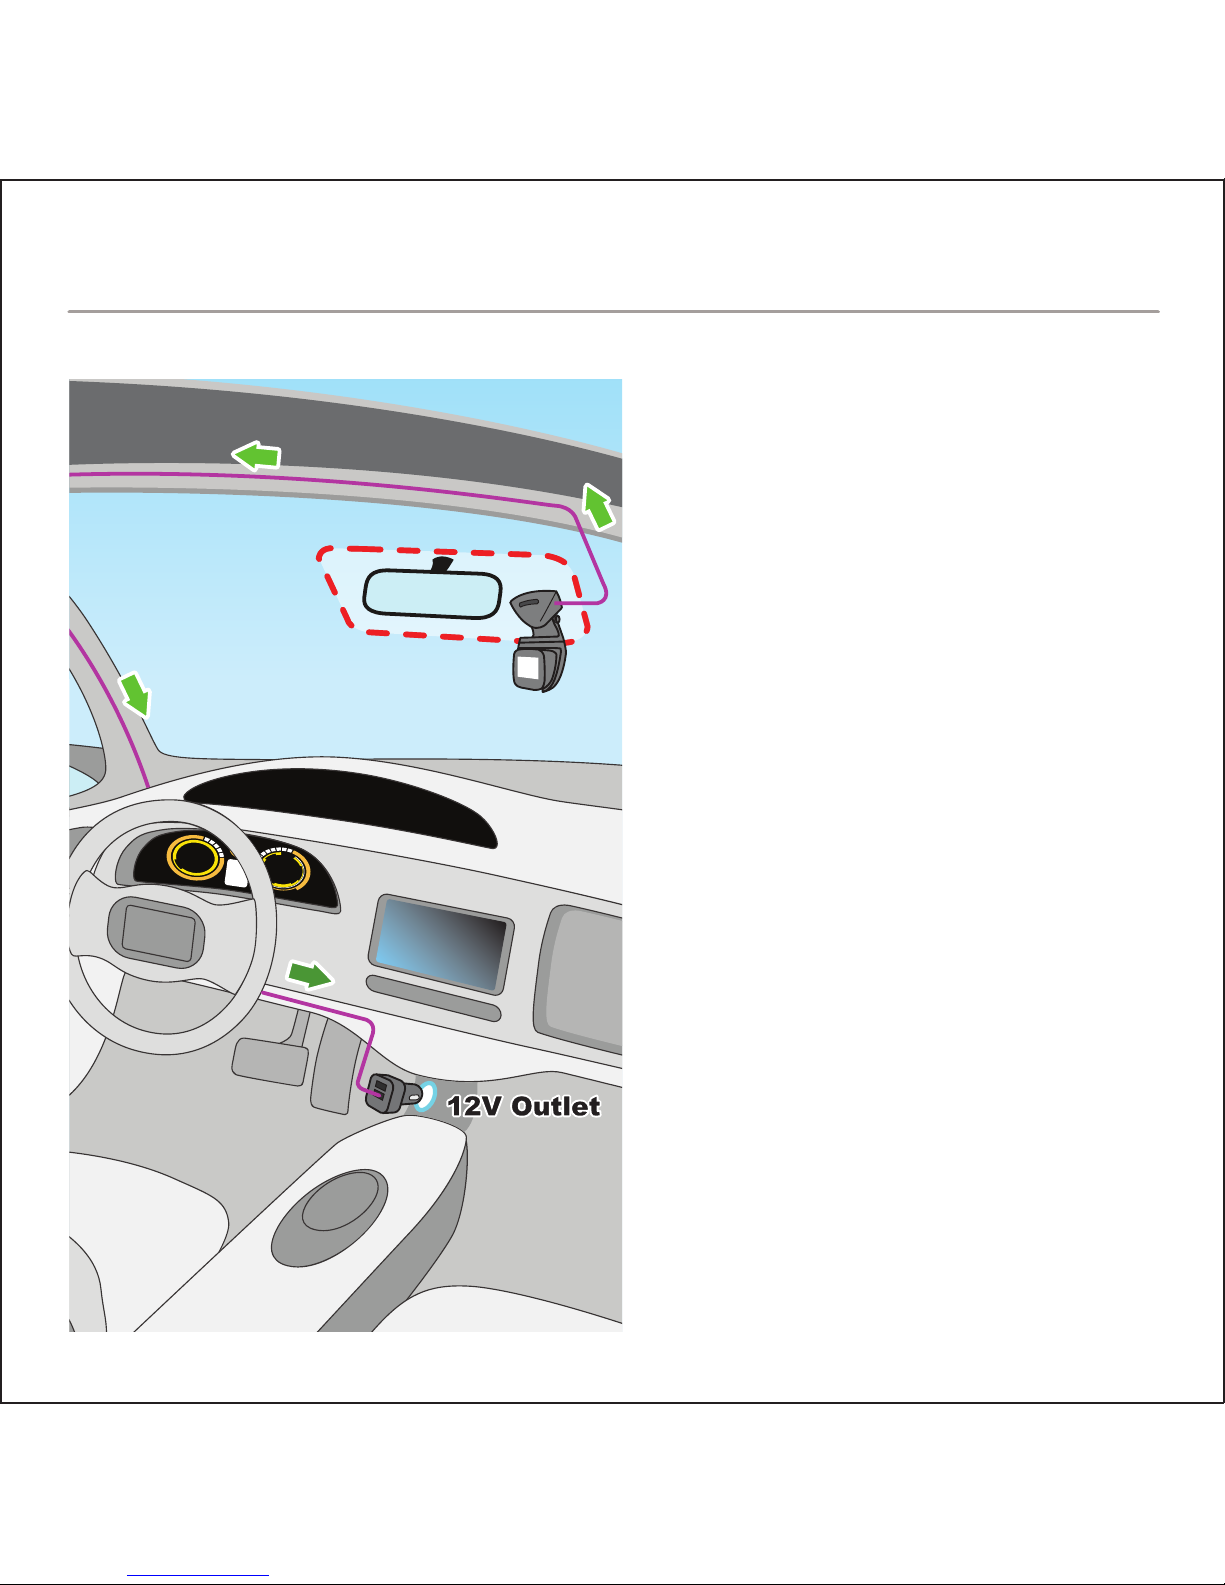
1. Insert the MicroSD card in the
ROVI dashcam. Push card
until it locks into place.
2. Determine mounting location
(See diagram for optimal
placement)
3. Connect USB power cable to
the magnetic mount and plug
the USB car charger to the
12V socket.
4. Route cable around windshield
so it is not obstructing visibility.
5. Attach the ROVI dash camera
to the mount.
6. Adjust the angle of the mount
for optimal viewing.
INSTALLATION
Page 5
A
B
C
D
1
2
3
4
5
6
7
8
9
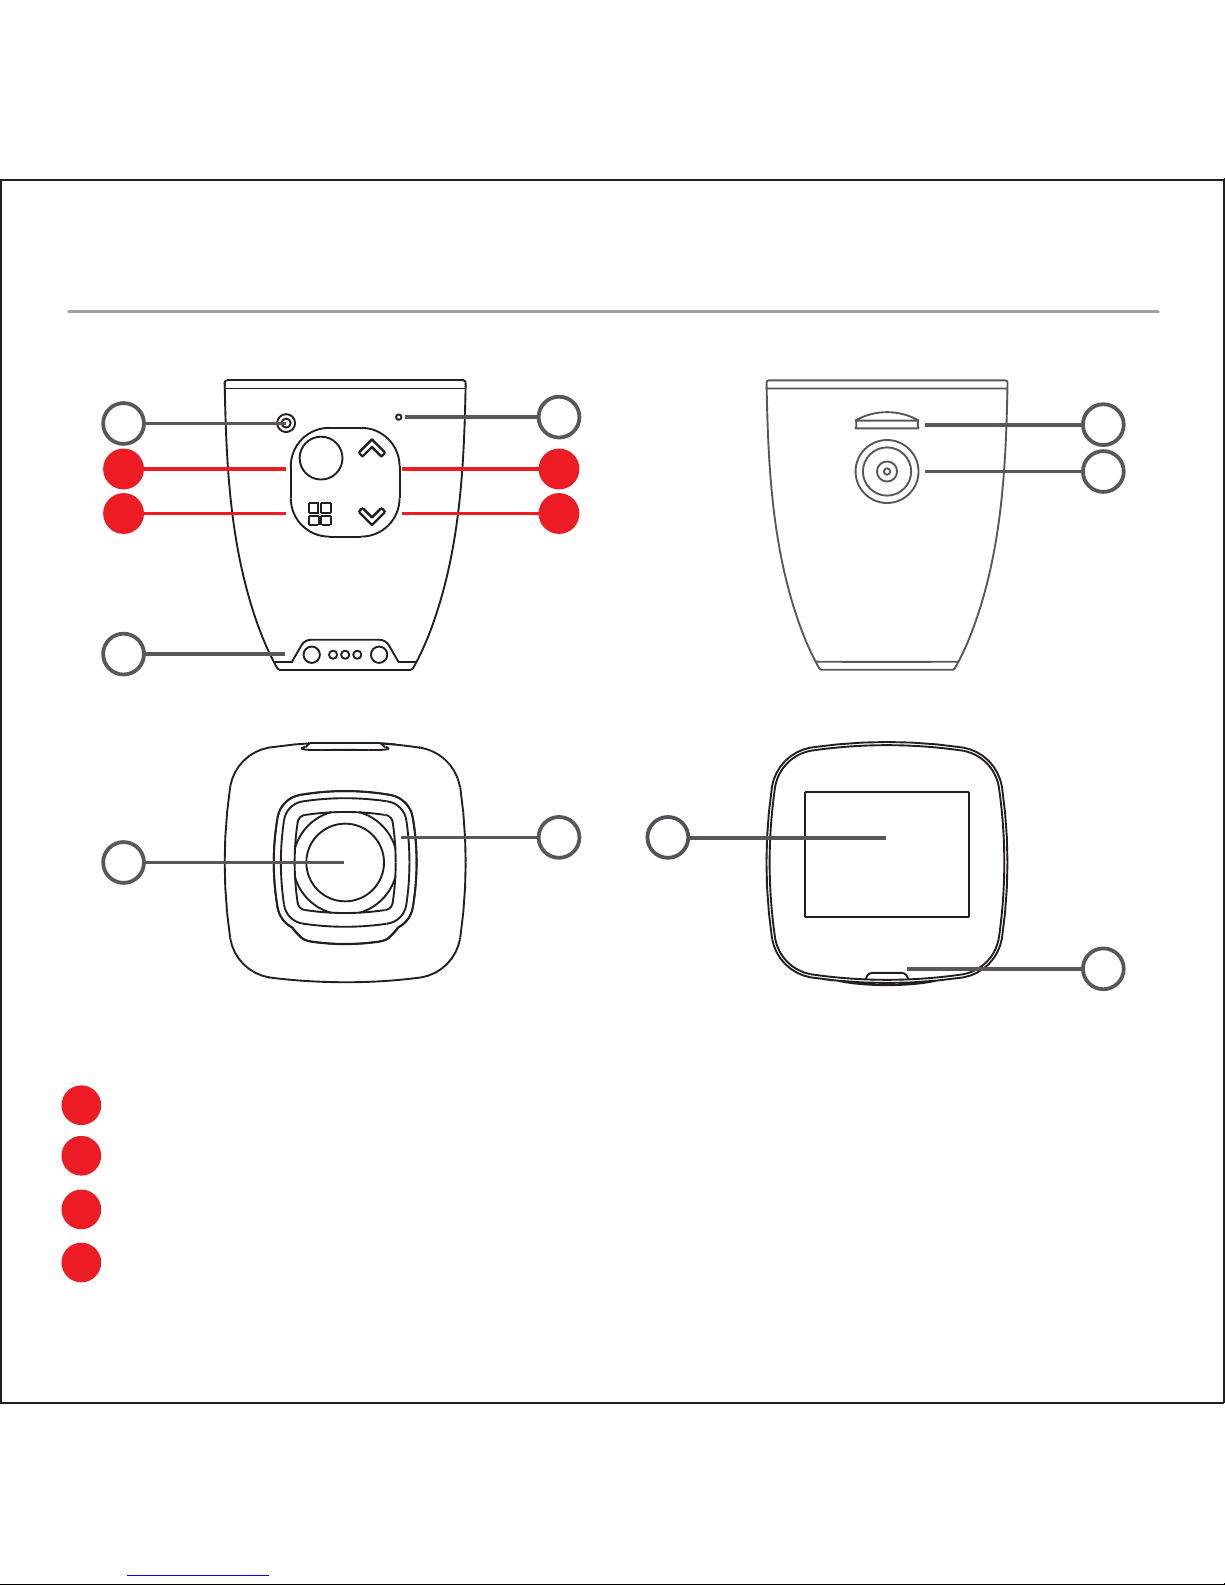
A Power / OK
B Menu / Mode
C Up
D Down
1. Reset Button
2. Microphone
3. GPS Connector
4. MicroSD Card Slot
5. Magnetic Connector
6. Wide Angle Lens
7. Tempered Glass
8. 1.5” Screen
9. Status Light
BUTTON LAYOUT
Page 6
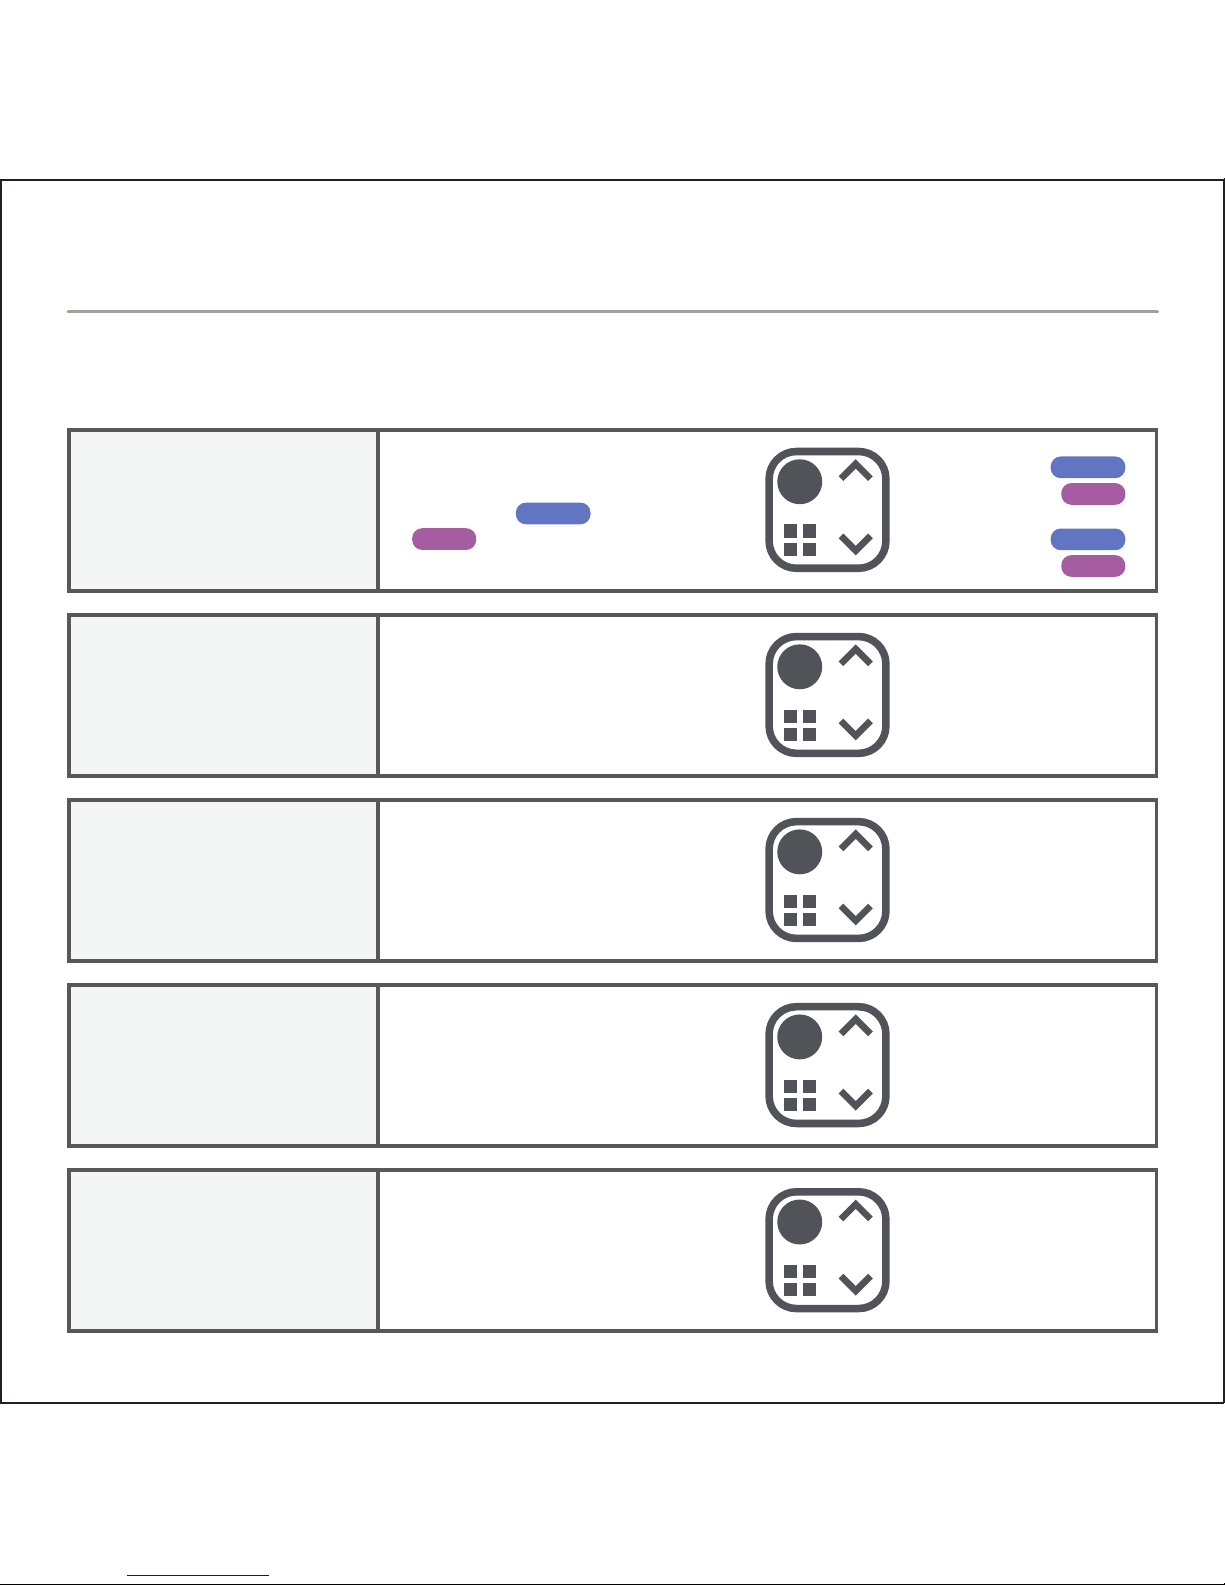
Setup Menu
Mode Switch Between
Dashcam / Photo / Playback
Start / Stop Recording
Zoom Out
Wi-Fi Mode
Zoom In
Flip Screen
Protect Current Recording
Start / Stop Recording
Zoom Out
Zoom In
Options
Play / Pause
Next File
Previous File
Setup Menu
Take Photo
Zoom Out
Zoom In
Toggle Between Menus Down
Up
MENU
HOLD
PRESS
HOLD
PRESS
HOLD
PRESS
MODE
NOT RECORDING
RECORDING
FUNCTIONS
PLAYBACK
PHOTO
Select
BUTTON FEATURES
Page 7
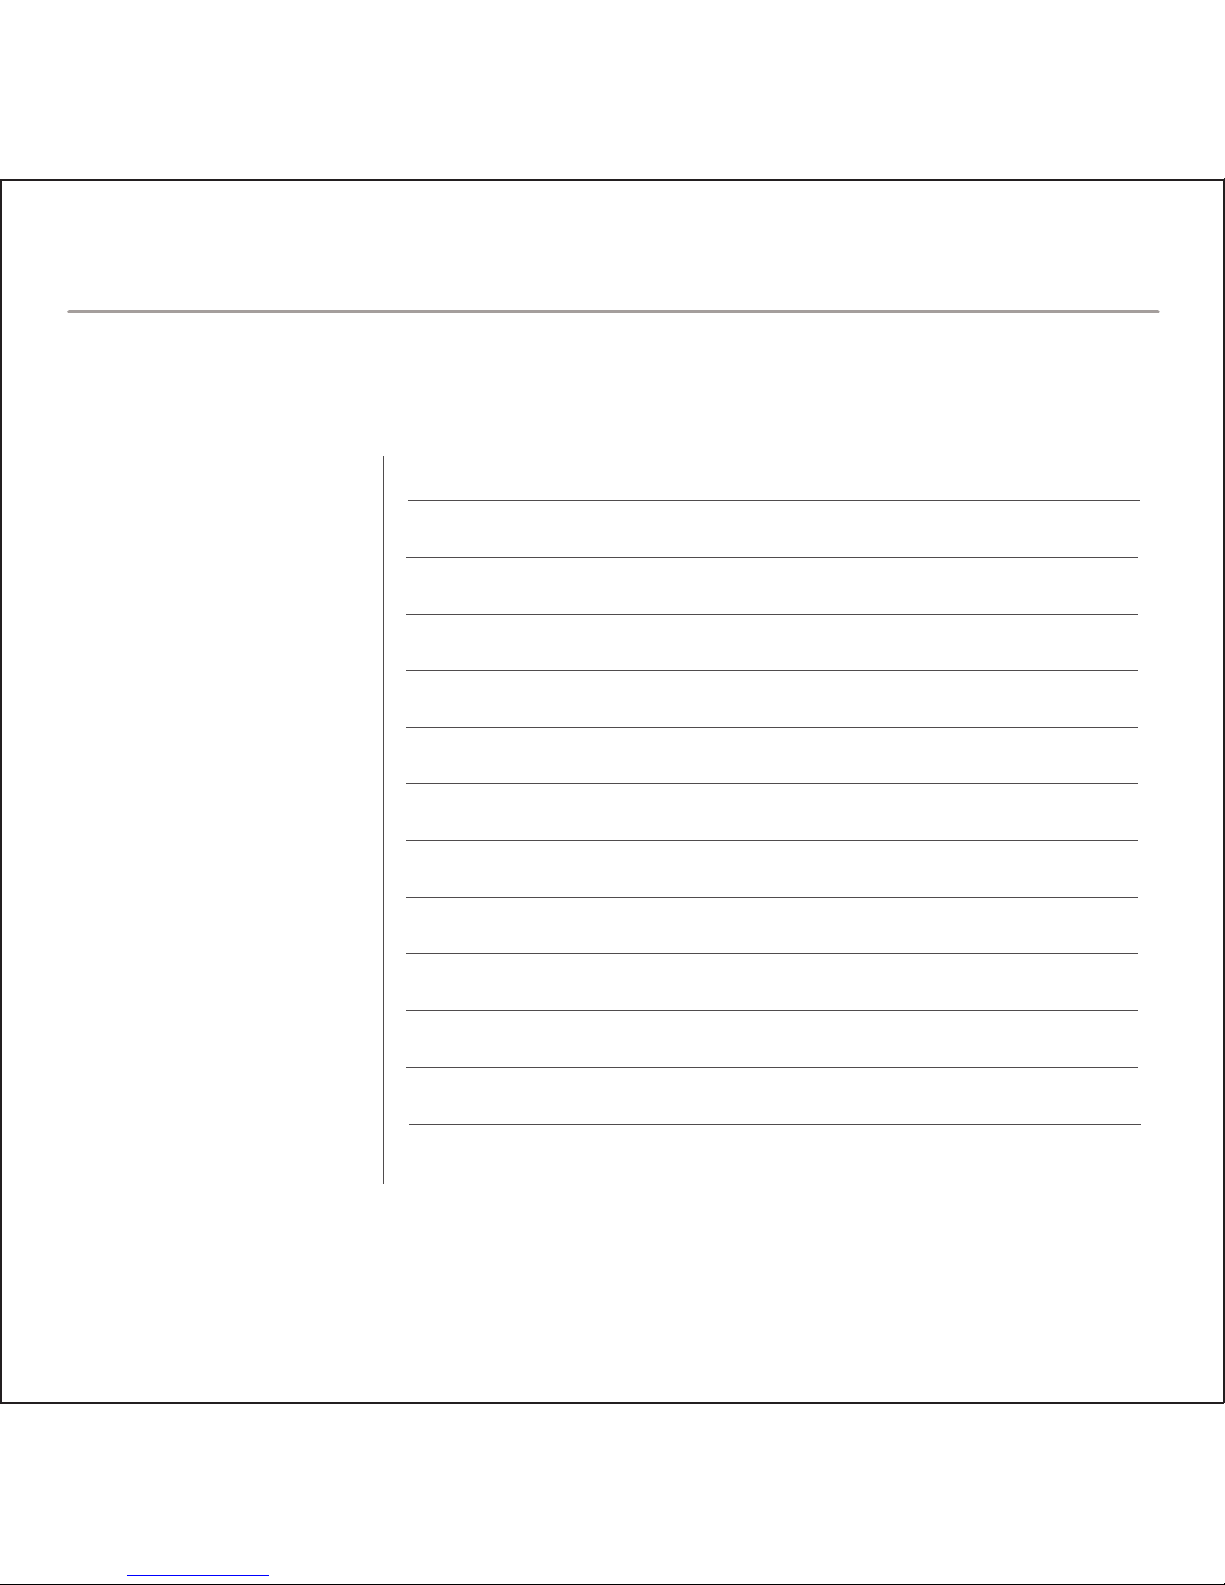
Chipsets
Sensor
Lens
Spectacles
LCD
Resolution/FPS
Battery
Loudspeaker
Storage
Image Technology
Security Application
Mount Features
Working Temperature
NT96658
SONY IMX322
F/2.0 150° Diagonal Viewing Angle 6 layer glass + IR
Optical coating tempered glass
1.5" 480 x 240 resolution
1080p / 30fps ,720p / 60fps
Built-in polymer Li-ion battery
8Ω 0.5W
MAX: 64GB micro SD
H.264 / .MOV / 4X digital zoom / Wide Dynamic Range (WDR)
G-sensor / Motion detection / LDWS / Parking monitor
Quick removal / Magnetic power connector / Adjustable angle
- 20°C ~ 70°C
SPECIFICATIONS
Page 8
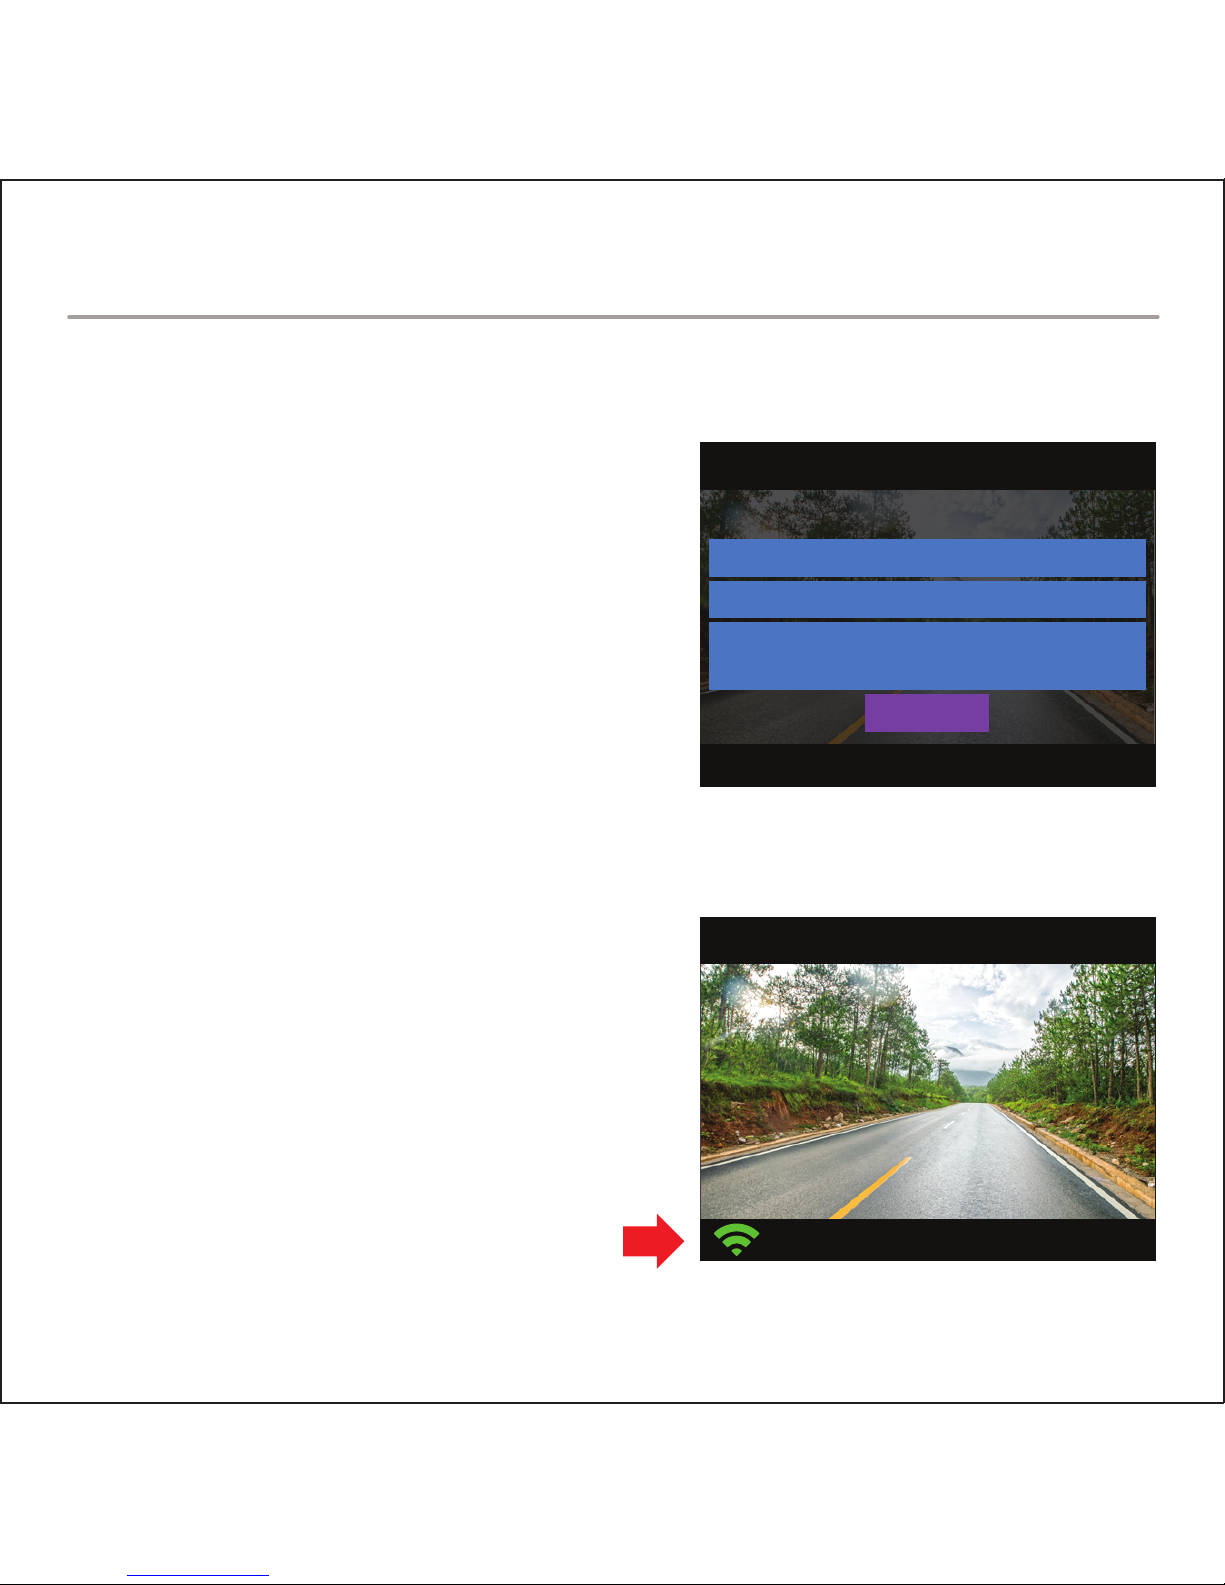
1. Download ROVI app from the App
Store (iOS) or Google Play (Android).
2. On the ROVI dashcam, turn on Wi-Fi
Mode by going into the settings menu
or holding the down arrow while
not recording.
3. On your mobile device, go to Wi-Fi
Settings and select the dashcam
SSID and enter the default password
(12345678) displayed on the
dashcam screen. (fig.1)
4. Once connected, the dashcam
screen will show a Wi-Fi icon at the
bottom left corner. (fig.2)
5. Open the ROVI app.
fig.1
fig.2
AP_MODE
Cancel
SSID: A1WG_XXXXXXXXXXXX
PWD: 12345678
please use
phone WiFi to connect
WI-FI APP SETUP
Page 9
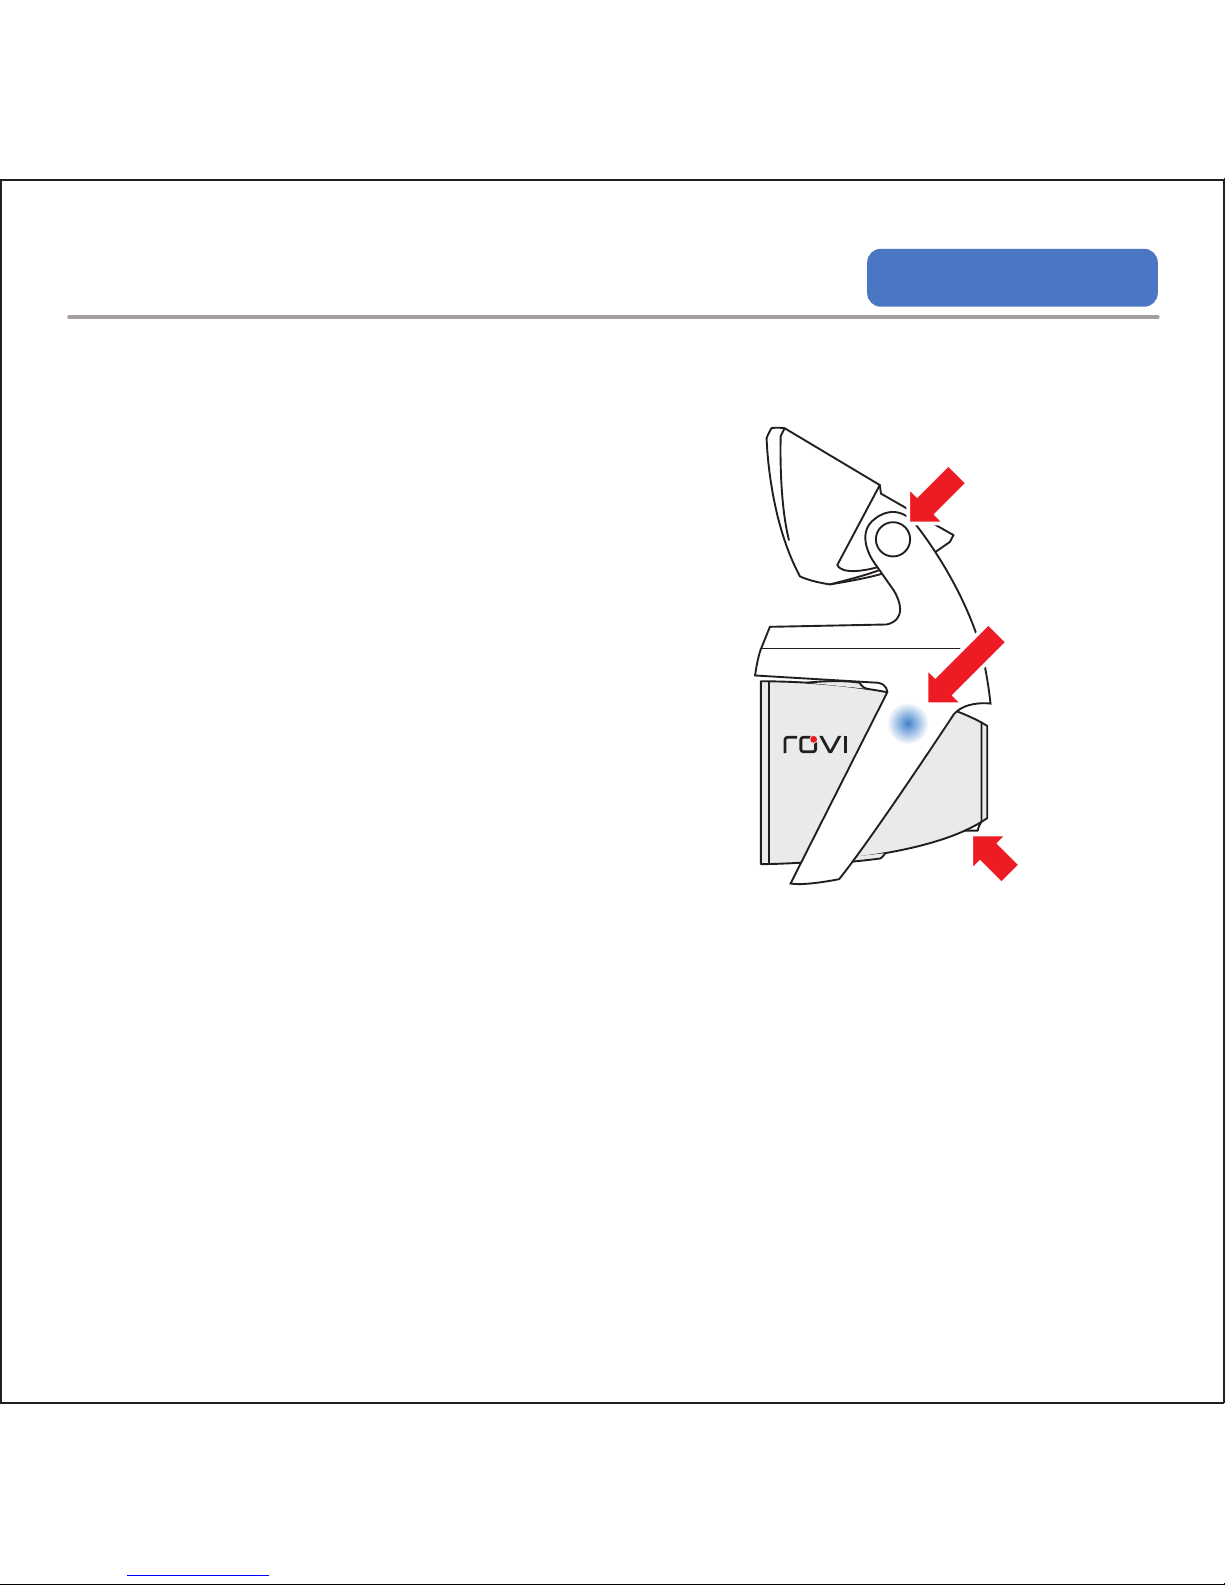
GPS MODULE INSTALLATION
1. Connect the GPS Module magnetic
connector to the ROVI dashcam. (fig.3)
2. Attach GPS Module unit to the right side of
the magnetic mount. (fig.4)
3. The ROVI dashcam will automatically
recognize the GPS Module and
automatically searches for the GPS signal.
4. Recorded videos will automatically be
embedded with GPS coordinates.
TO ACCESS GPS INFORMATION
1. Download and install Windows desktop Driving Recorder Player
from RoviCams.com.
2. Download dashcam video with GPS information via the desktop app.
3. Play the recorded video.
4. The application will play the video and show location information.
GPS MODULE
HERE
MAGNETIC
CONNECTOR
HERE
ANGLE LOCK
RELEASE BUTTON
fig.3
fig.4
GPS SETUP
STANDARD ON CL-6001
OPTIONAL ON CL-6000
Page 10
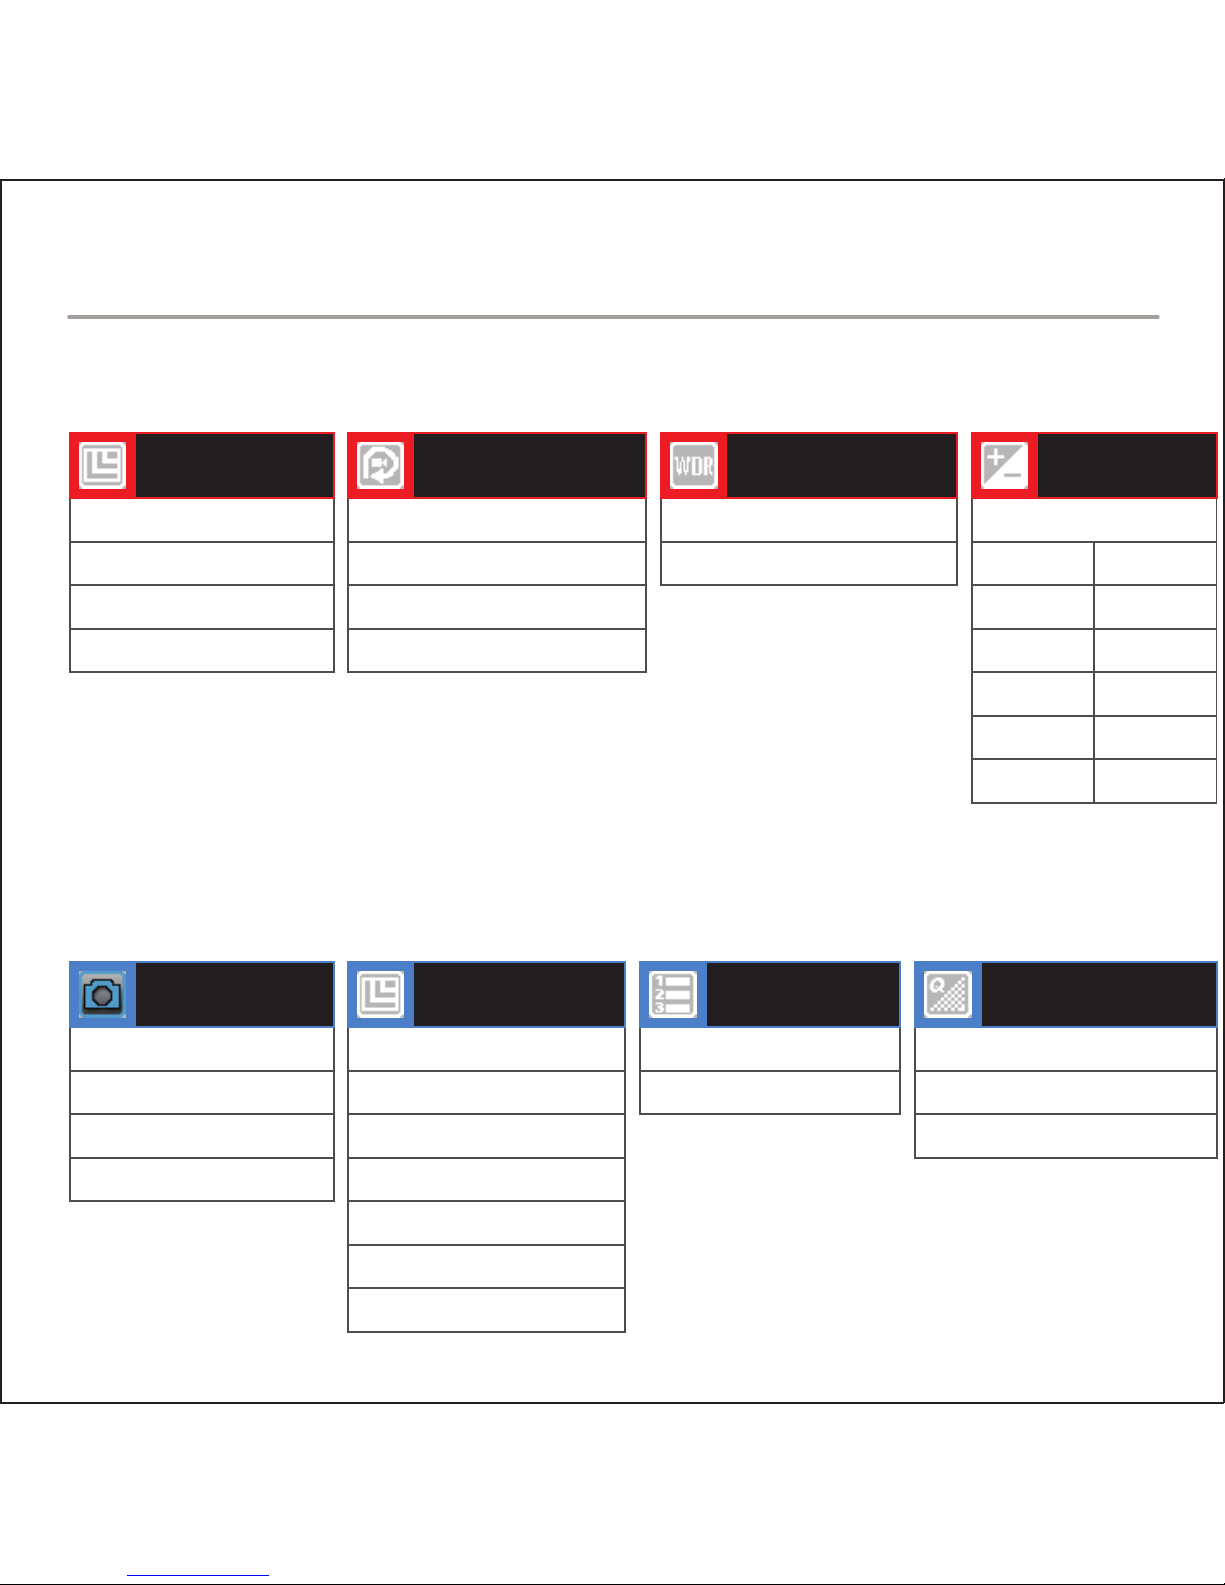
VIDEO RECORDING SETTINGS
PHOTO SETTINGS
1080 FHD 1920x1080
720p 1280x720
WVGA 848x480
VGA 640x460
VIDEO
RESOLUTION
OFF
3 Minutes
5 Minutes
10 Minutes
LOOP RECORDING
OFF
ON
WIDE
DYNAMIC RANGE
+ 0.0
EXPOSURE
Single
2 Second Timer
5 Second Timer
10 Second Timer
CAPTURE
MODE
12M 4032x3024
10M 3648x2736
8M 3264x2448
5M 2592x1944
3M 2048x1536
2M 1920x1080
1.3M 1280x960
PHOTO
RESOLUTION
OFF
ON
SEQUENCE
Superior
Normal
Economy
IMAGE QUALITY
+2.0
+5/3
+4/3
+1.0
+2/3
+1/3
-1/3
-2/3
-1.0
-4/3
-5/3
-2.0
MENU LIST
Page 11
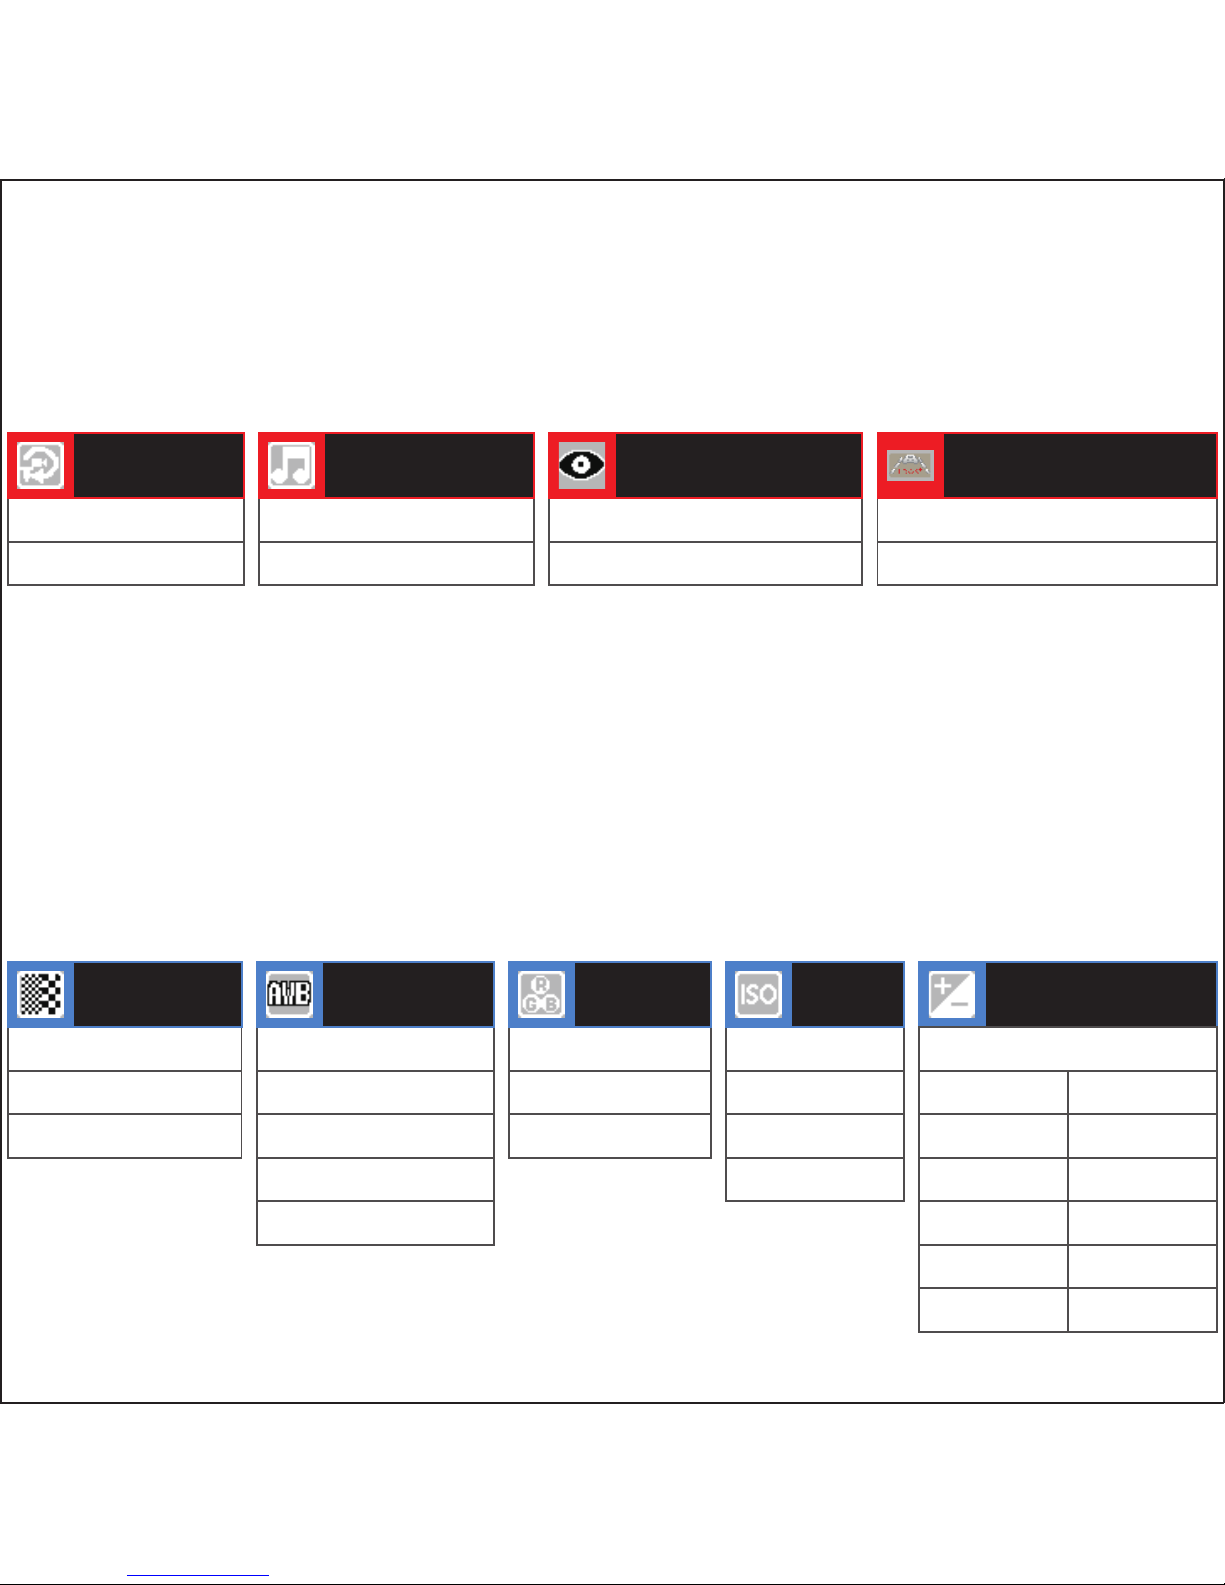
OFF
ON
MOTION
DETECTION
OFF
ON
RECORD AUDIO
OFF
ON
PARKING MONITOR
OFF
ON
LANE DEPARTURE
WARNING SYSTEM
Strong
Normal
Soft
SHARPNESS
Auto
Daylight
Cloudy
Tungsten
Fluorescent
WHITE
BALANCE
Color
Black & White
Sepia
COLOR
Auto
100
200
400
ISO EXPOSURE
+ 0.0
+2.0
+5/3
+4/3
+1.0
+2/3
+1/3
-1/3
-2/3
-1.0
-4/3
-5/3
-2.0
Page 12
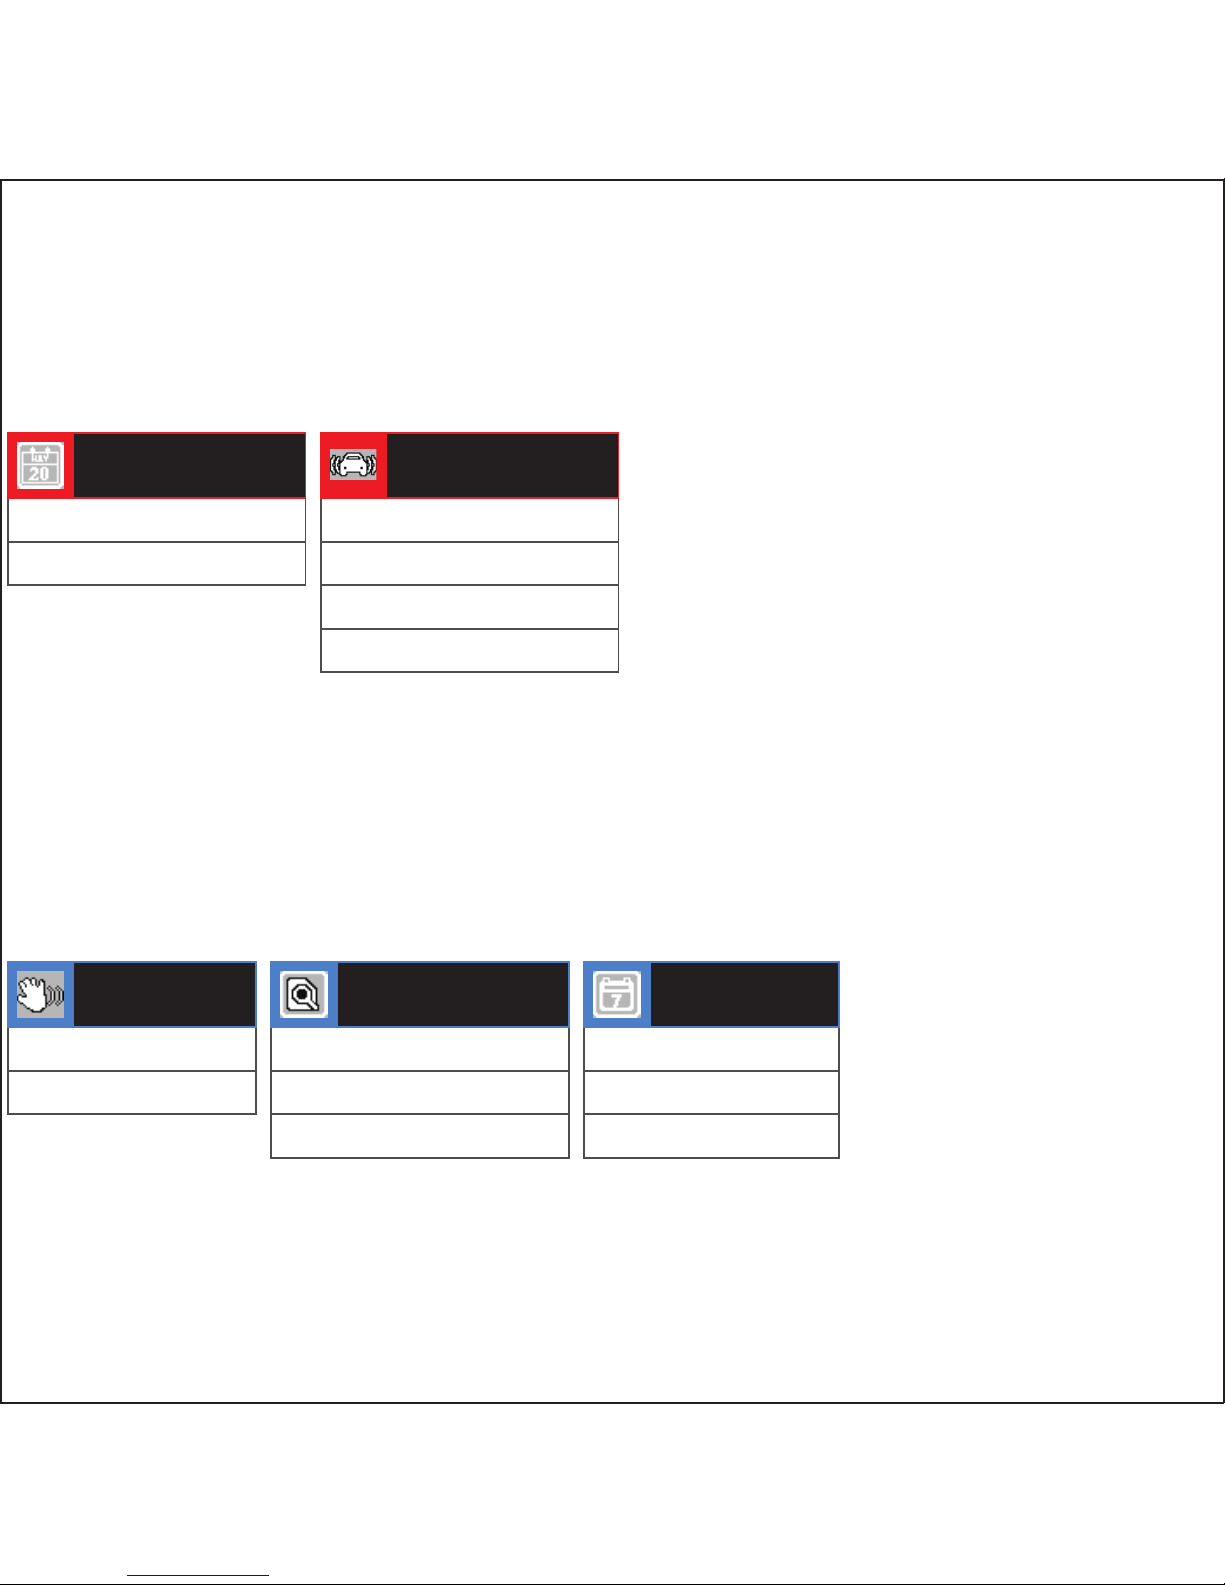
OFF
ON
DATE STAMP
OFF
High
Middle
Low
G-SENSOR
SENSITIVITY
OFF
ON
ANTI-SHAKE
OFF
2 Seconds
5 Seconds
QUICK PREVIEW
OFF
Date
Date / Time
DATE STAMP
Page 13
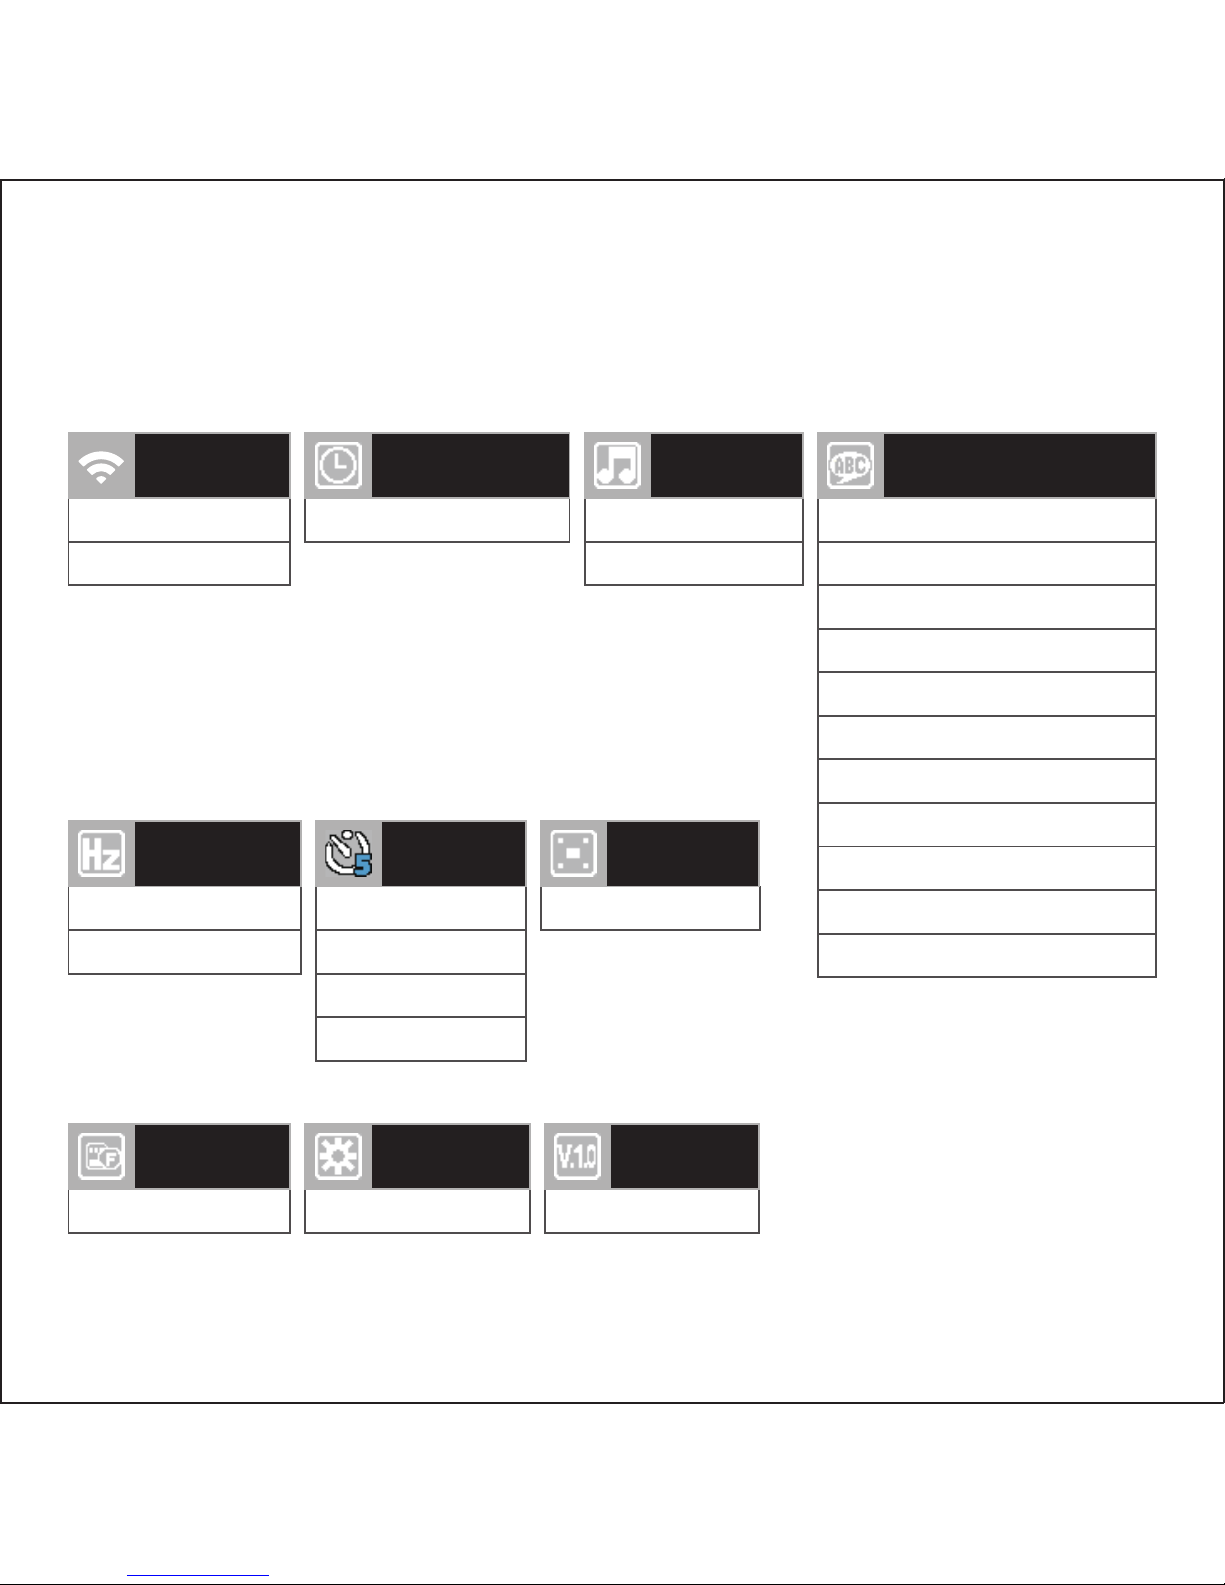
SYSTEM SETTINGS
OFF
ON
WI-FI
Manual Input
DATE / TIME
OFF
ON
BEEP
English
Français (French)
Español (Spanish)
Português (Portuguese)
Deutsch (German)
Italiano (Italian)
简体中文 (Simplified Chinese)
繁體中文 (Traditional Chinese)
pусский (Russian)
日本語 (Japanese)
ไทย (Thai)
LANGUAGES
50 Hz
60 Hz
FREQUENCY
OFF
1 Minute
3 Minutes
5 Minutes
SCREEN
SAVER
Manual Input
LICENSE
PLATE
Format SD Card
FORMAT
Restore Defaults
DEFAULT
SETTINGS
Firmware Version
VERSION
Page 14

rovicams.com
THANK YOU FOR CHOOSING ROVI.
ENHANCE YOUR DRIVING EXPERIENCE.
FOR IMMEDIATE HELP AND SUPPORT,
AS WELL AS HOW-TO VIDEOS, PLEASE VISIT
 Loading...