

Rotel X5 Owner's Manual
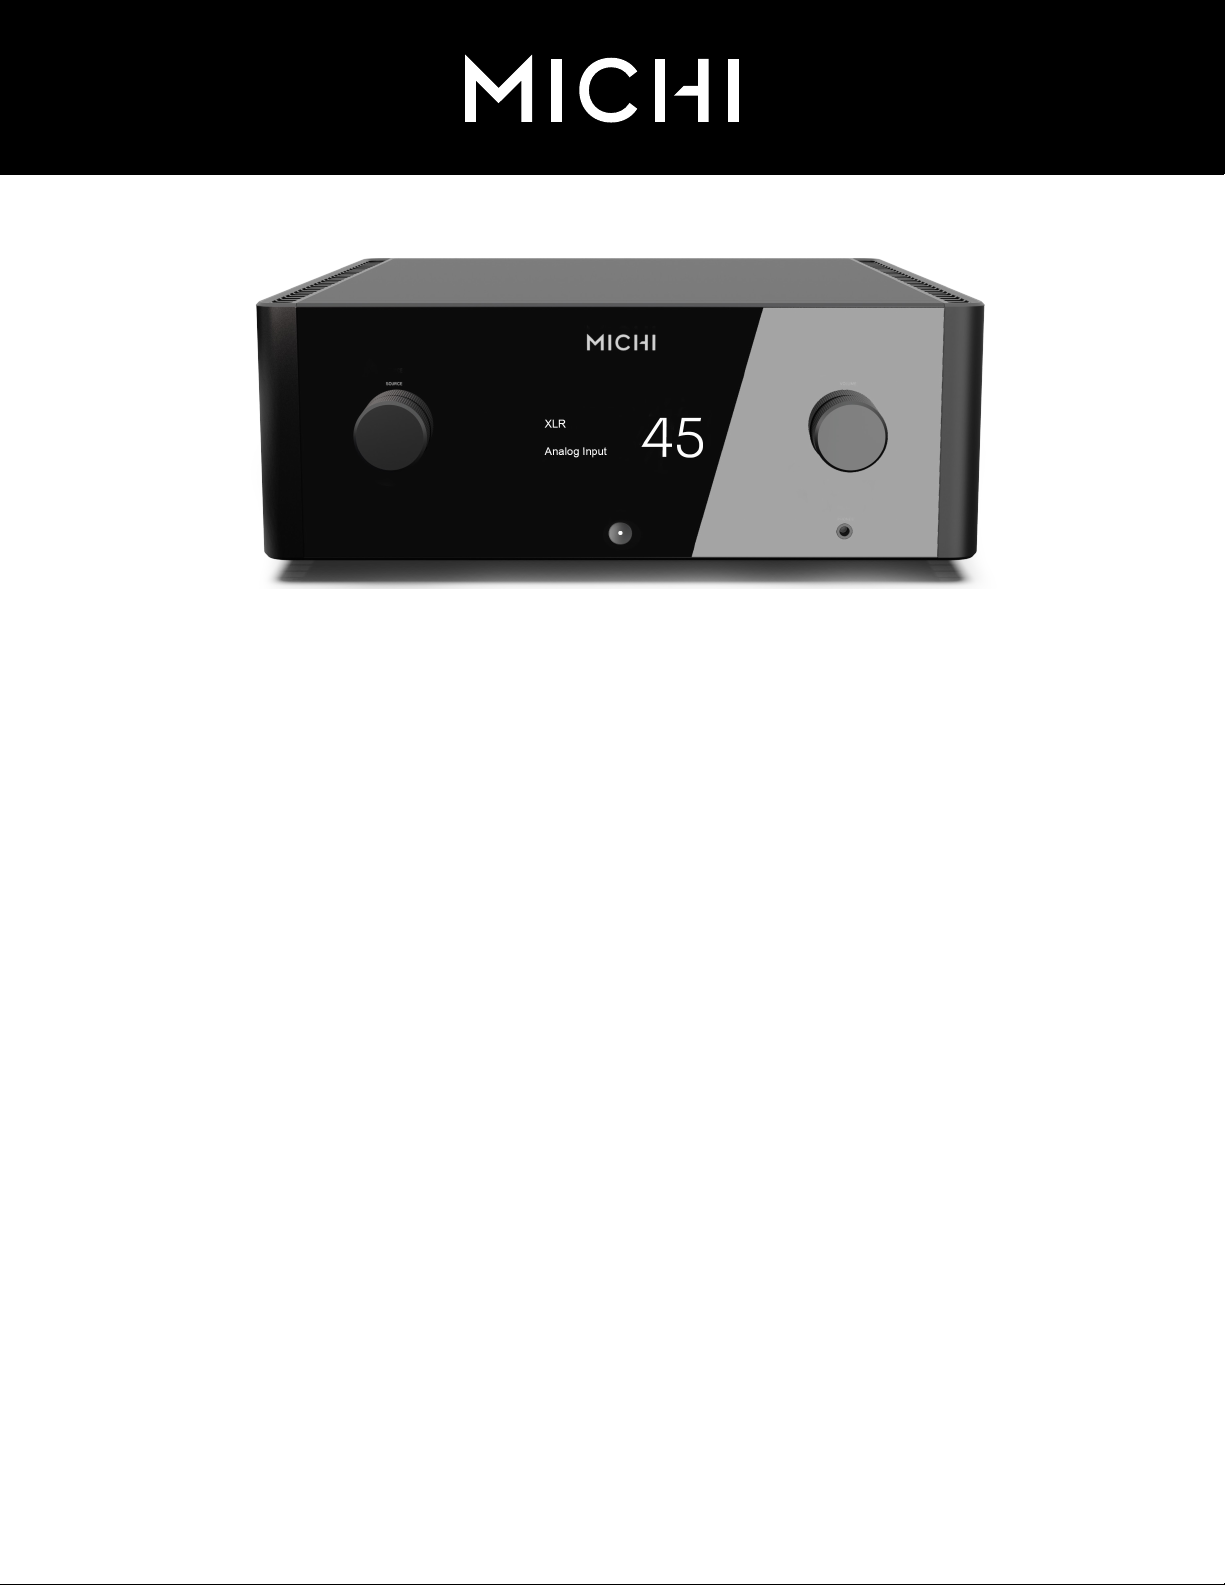
Michi X5
Stereo Integrated Amplifier
Amplificateur Stéréo Intégré
Stereo-Vollverstärker
Amplificador Integrado Estereofónico
Geïntegreerde stereoversterker
Amplificatore integrato stereo
Integrerad stereoförstärkare
Интегрированный стерео усилитель
Owner’s Manual
Manuel de l’utilisateur
Bedienungsanleitung
Manual de Instrucciones
Gebruikershandleiding
Manuale di istruzioni
Instruktionsbok
Инструкция пользователя
2
50
cm
20
50
cm
50
cm
50
cm
20 in
20 in
20 in
Important Safety Instructions
Michi X5 Stereo Integrated Amplifier
Notice
The RS232 connection should be handled by
authorized persons only.
WARNING: There are no user serviceable parts
inside. Refer all servicing to qualified service
personnel.
WARNING: To reduce the risk of fire or electric
shock, do not expose the unit to moisture or water.
Do not expose the unit to dripping or splashing.
Do not place objects filled with liquids, such as
vases, on the unit. Do not allow foreign objects
to get into the enclosure. If the unit is exposed
to moisture, or a foreign object gets into the
enclosure, immediately disconnect the power
cord from the wall. Take the unit to a qualified
service person for inspection and necessary
repairs.
Read these instructions.
Keep these instructions.
Heed all warnings.
Follow all instructions.
Do not use this apparatus near water.
Clean only with dry cloth.
Do not block any ventilation openings. Install in
accordance with the manufacturer’s instructions.
Do not install near any heat sources such as
radiators, heat registers, stoves, or other
apparatus (including amplifiers) that produce
heat.
Do not defeat the safety purpose of the polarized
or grounding-type plug. A polarized plug has two
blades with one wider than the other. A grounding
type plug has two blades and a third grounding
prong. The wide blade or the third prong are
provided for your safety. If the provided plug does
not fit into your outlet, consult an electrician for
replacement of the obsolete outlet.
Protect the power cord from being walked on
or pinched particularly at plugs, convenience
receptacles, and the point where they exit from
the apparatus.
Only use attachments/accessories specified by
the manufacturer.
Use only with the cart, stand, tripod, bracket, or
table specified by the manufacturer, or sold with
the apparatus. When a cart is used, use caution
when moving the cart/apparatus combination
to avoid injury from tip-over.
Unplug this apparatus during lightning storms or
when unused for long periods of time.
Refer all servicing to qualified service personnel.
Servicing is required when the apparatus has
been damaged in any way, such as power supply
cord or plug is damaged, liquid has been spilled
or objects have fallen into the apparatus, the
apparatus has been exposed to rain or moisture,
does not operate normally, or has been dropped.
The apparatus should be used in non tropical
climate.
The ventilation should not be impeded by covering
the ventilation openings with items, such as
newspapers, table-cloths, curtains, etc.
No naked flame sources, such as lighted candles,
should be placed on the apparatus.
Touching uninsulated terminals or wiring may
result in an unpleasant sensation.
You must allow a minimum 50 cm or 20 inches of
unobstructed clearance around the unit.
WARNING:
The rear panel power cord connector
is the mains power disconnect device. The
device must be located in an open area that
allows access to the cord connector.
The unit must be connected to a power supply
only of the type and voltage specified on the
rear panel. (USA: 120 V/60Hz, EC: 230V/50Hz)
Connect the component to the power outlet only
with the supplied power supply cable or an exact
equivalent. Do not modify the supplied cable. Do
not use extension cords.
The mains plug is the disconnect of the unit. In
order to completely disconnect the unit from the
supply mains, remove the main plug from the unit
and the AC power outlet. This is the only way to
completely remove mains power from the unit.
Use Class 2 wiring for speaker connections to
ensure proper installation and minimize the
risk of electrical shock.
The batteries in the remote control should not
be exposed to excessive temperature such as
sunshine, fire or other heat sources. Batteries
should be recycled or disposed as per state and
local guidelines.
This device complies with Part 15 of the FCC
Rules. Operation is subject to the following
to conditions: (1) This device may not cause
harmful interference, and (2) this device must
accept any interference received, including
interference that may cause undesired
operation.
WARNING: The master power switch is
located on the rear panel. The unit must allow
unobstructed access to the main power switch.
Michi products are designed
to comply with international
directives on the Restriction of
Hazardous Substances (RoHS)
in electrical and electronic
equipment and the disposal of
Waste Electrical and Electronic
Equipment (WEEE). The crossed
wheelie bin symbol indicates
compliance and that the products
must be appropriately recycled
or processed in accordance with
these directives.
This symbol means that this unit
is double insulated. An earth
connection is not required.
Place the unit on a on a fixed, level
surface strong enough to support
its weight. Do not place it on a
moveable cart that could tip over.
Pin Assignments
Balanced Audio (3 pole XLR):
Pin 1: Ground / Screen
Pin 2: In phase / +ve / Hot
2
1
3
Pin 3: Out of phase / -ve / Cold
3
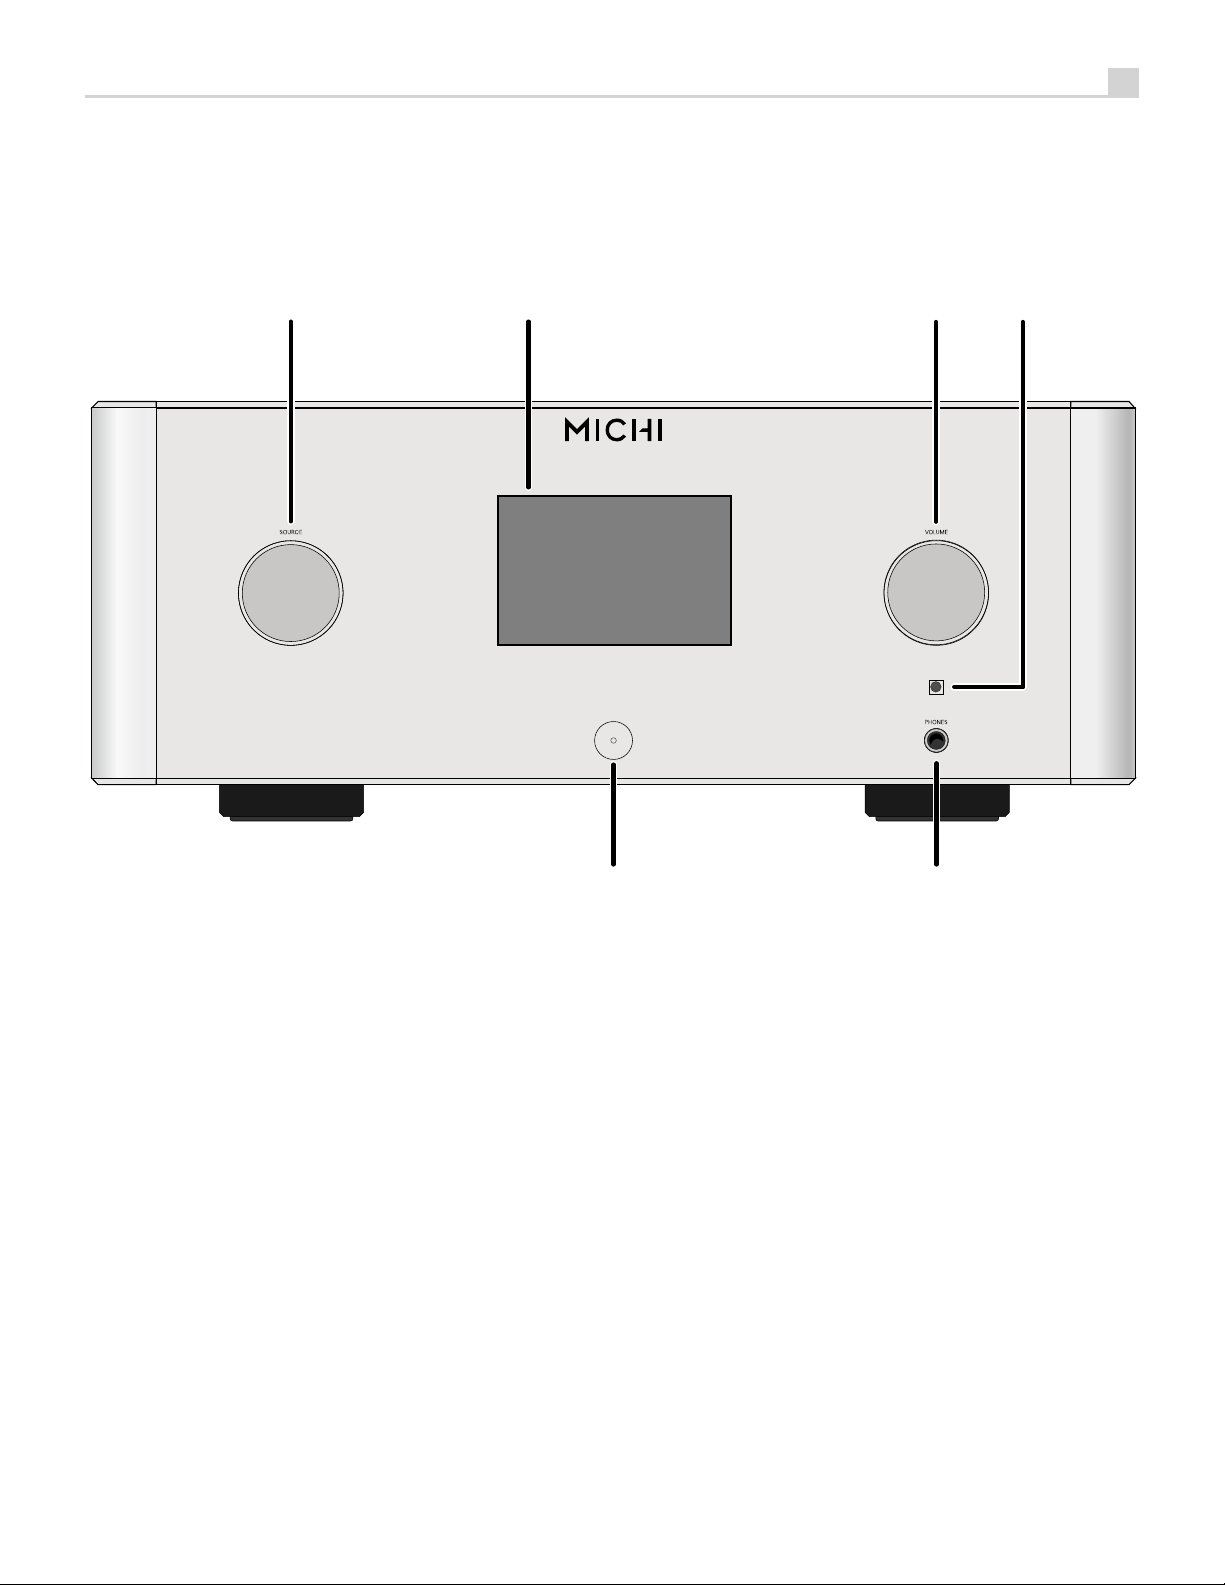
Figure 1_1: Controls and Connections
Commandes et Branchements
Bedienelemente und -Anschlüsse
Controles y Conexiones
1
2
Bedieningselementen en aansluitingen
Controlli e connessioni
Kontroller och anslutningar
Органы управления и разъемы
3
4
5
: Source Knob
1
Selects the input signal source.
: Display
2
: Volume Knob
3
Adjust the volume output level.
: Remote Sensor
4
Receives IR commands from the remote control.
: Power Button
5
Activate the unit or put it into standby mode.
: Headphone Output
6
Connect headphones for private listening.
6

4
1
2
3
6
5
4
Michi X5 Stereo Integrated Amplifier
Figure 1_2: Controls and Connections
Commandes et Branchements
Bedienelemente und -Anschlüsse
Controles y Conexiones
Bedieningselementen en aansluitingen
Controlli e connessioni
Kontroller och anslutningar
Органы управления и разъемы
0987q -=
w
er
: Phono Input
7
Connect to a turntable.
: CD Input
8
: Tuner Input
9
: Aux Inputs
0
Analog “line level” inputs.
: Mono Sub Output
-
Connect to a subwoofer.
: Preamplifier Output
=
Connect to the integrated amplifier or power
amplifier.
: Balanced Input
q
: Bluetooth Antenna
w
Use for wireless streaming via Bluetooth.
tyuiop [ ] \
: Ground Connector
e
Connect with a “ground” wire from the turntable.
: Digital Input
r
Connect to coaxial or optical PCM outputs of your
source component.
: Speaker Connectors
t
: Network Port
y
: PC-USB Input
u
: EXT REM Input Jack
i
Receive command codes from industry-standard
infrared receivers via hard-wired connections.
: 12V Trigger Output
o
Send a 12V trigger signal when powered on.
: USB Power Port
p
Use for software update and powering USB devices.
: RS232
[
Use for integration with automation systems.
: AC Power Inlet
]
: Master Power Switch
\
5
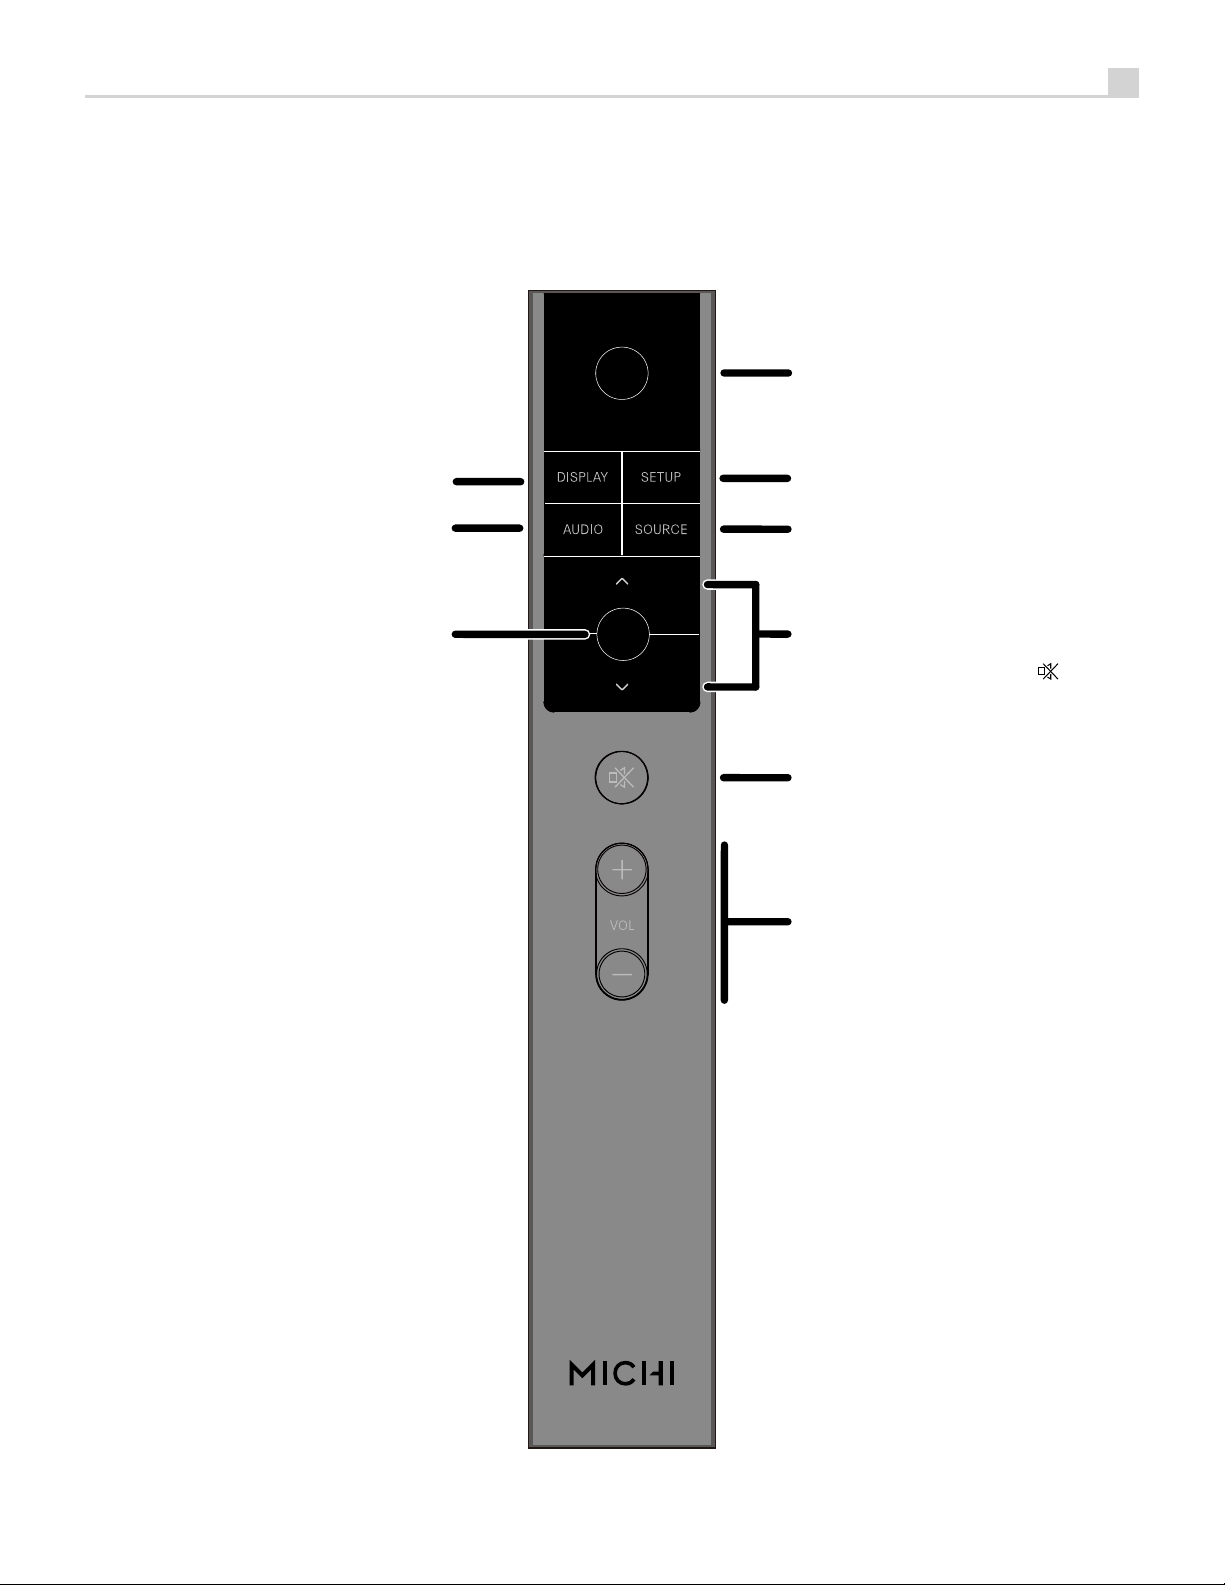
Figure 2 : RR-RH6 Remote Control
Télécommande infrarouge RR-RH6
Fernbedienung RR-RH6
Mando a Distancia RR-RH6
: DISPLAY Button
G
Dims the front display.
G
H
: AUDIO Button
H
Temporary adjustments to the
Balance, Bass and Treble settings.
: Enter Button
K
Confirm the selected and desired
settings.
K
Afstandsbediening RR-RH6
Telecomando RR-RH6
RR-RH6 fjärrkontroll
Пульт ДУ RR-RH6
A
B
C
D
: Power Button
A
Activate or deactivate the unit.
: SETUP
B
Activates the OSD setup screen
on the front display.
: SOURCE
C
Selects the input signal source.
: Navigation Buttons
D
Access the various menus and
operate the Amplifier settings.
: Mute Button
E
Mute the audio.
E
F
: Volume Buttons
F
Adjust the volume output level.
6
Michi X5 Stereo Integrated Amplifier
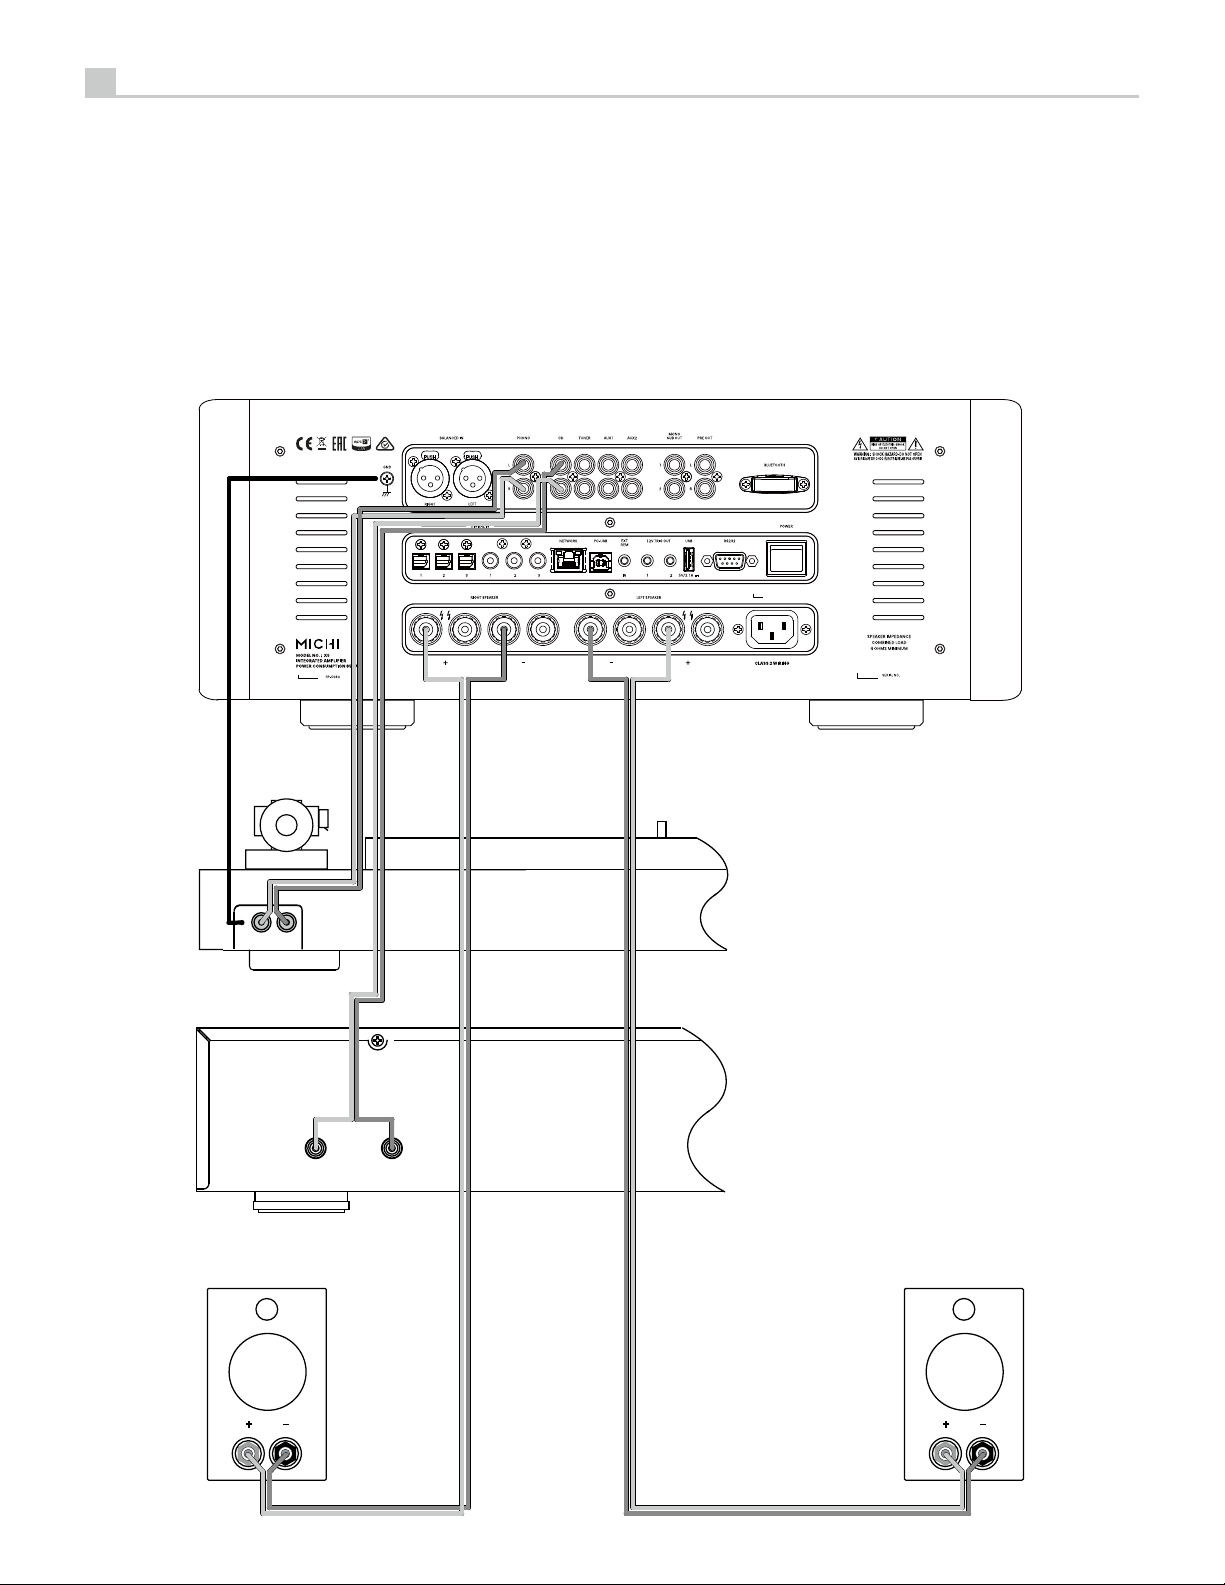
Figure 3: Analog Input and Speaker Output Connections
Branchements des entrées analogiques et sorties enceintes acoustiques
Anschlussdiagramm (analoge Eingangsanschlüsse, Ausgangsanschlüsse für die
Lautsprecher)
Conexiones de Entrada Analógicas y de Salida a las Cajas Acústicas
Analoge ingangen en luidsprekeruitgangen
Collegamenti ingressi analogici ed uscite diffusori
Anslutningar för högtalare och analoga ingångar
Подсоединение источников сигнала на аналоговые входы и акустических систем
Michi X5
GND R L
PH0NO
ROTEL CD Player
ANALOG OUT
RIGHT LEFT
SPEAKERSPEAKER
 Loading...