

Page 1
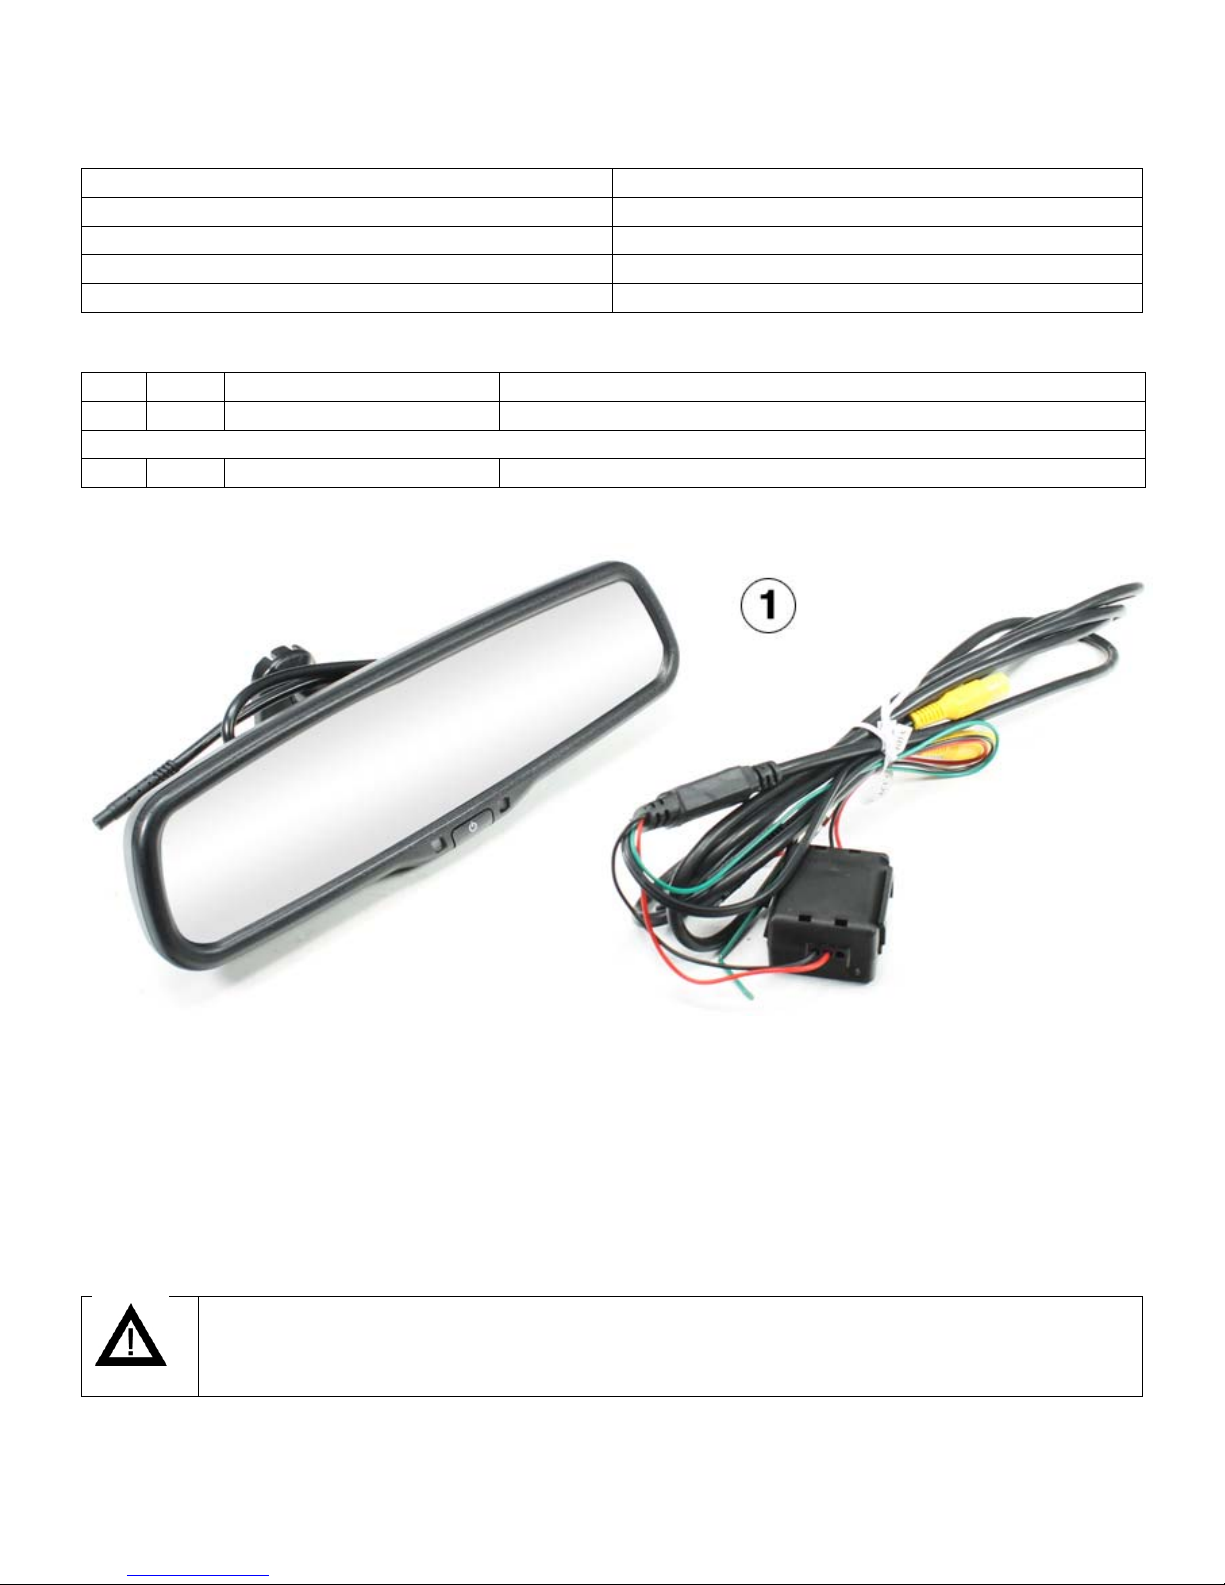
REARSIGHT MIRROR/MONITOR
e
b
250-8208/300-3000-002 Installation Instructions
Parts Identification Page 1
Vehicle Preparation Page 1
System Layout Page 2
Installation Page 2
Testing/Reassembly/Troubleshooting Page 3
Parts Identification
Item Qty. Part Number Description
1A 1 250-8208 4.3” LCD Mirror/Monitor with Extensions Harness
OR
1B 1 300- 3000- 002 3.5” LCD Mirror/Monitor with Extensions Harness
Before beginning your installation, familiarize yourself with the installation instructions and the RearSight
camera system components.
To ensure your safety, (A) apply the emergency brake and (B) read t his entire manual befor e beg inni ng.
CAUTION: It is advisable to disconnect the negative battery cable for 3 minutes befor
installation, to avoid unintended air bag deployment. Note and record any anti- theft radio codes prior to
disconnecting.
Form #5404, Rev. A, 01-24-13
Rostra Precision Controls, Inc. - 2519 Dana Dr. - Laurinburg, NC 28352 - 800-782-3379 - rostra.com
Vehicle Preparation
eginning
Page 1
Page 2
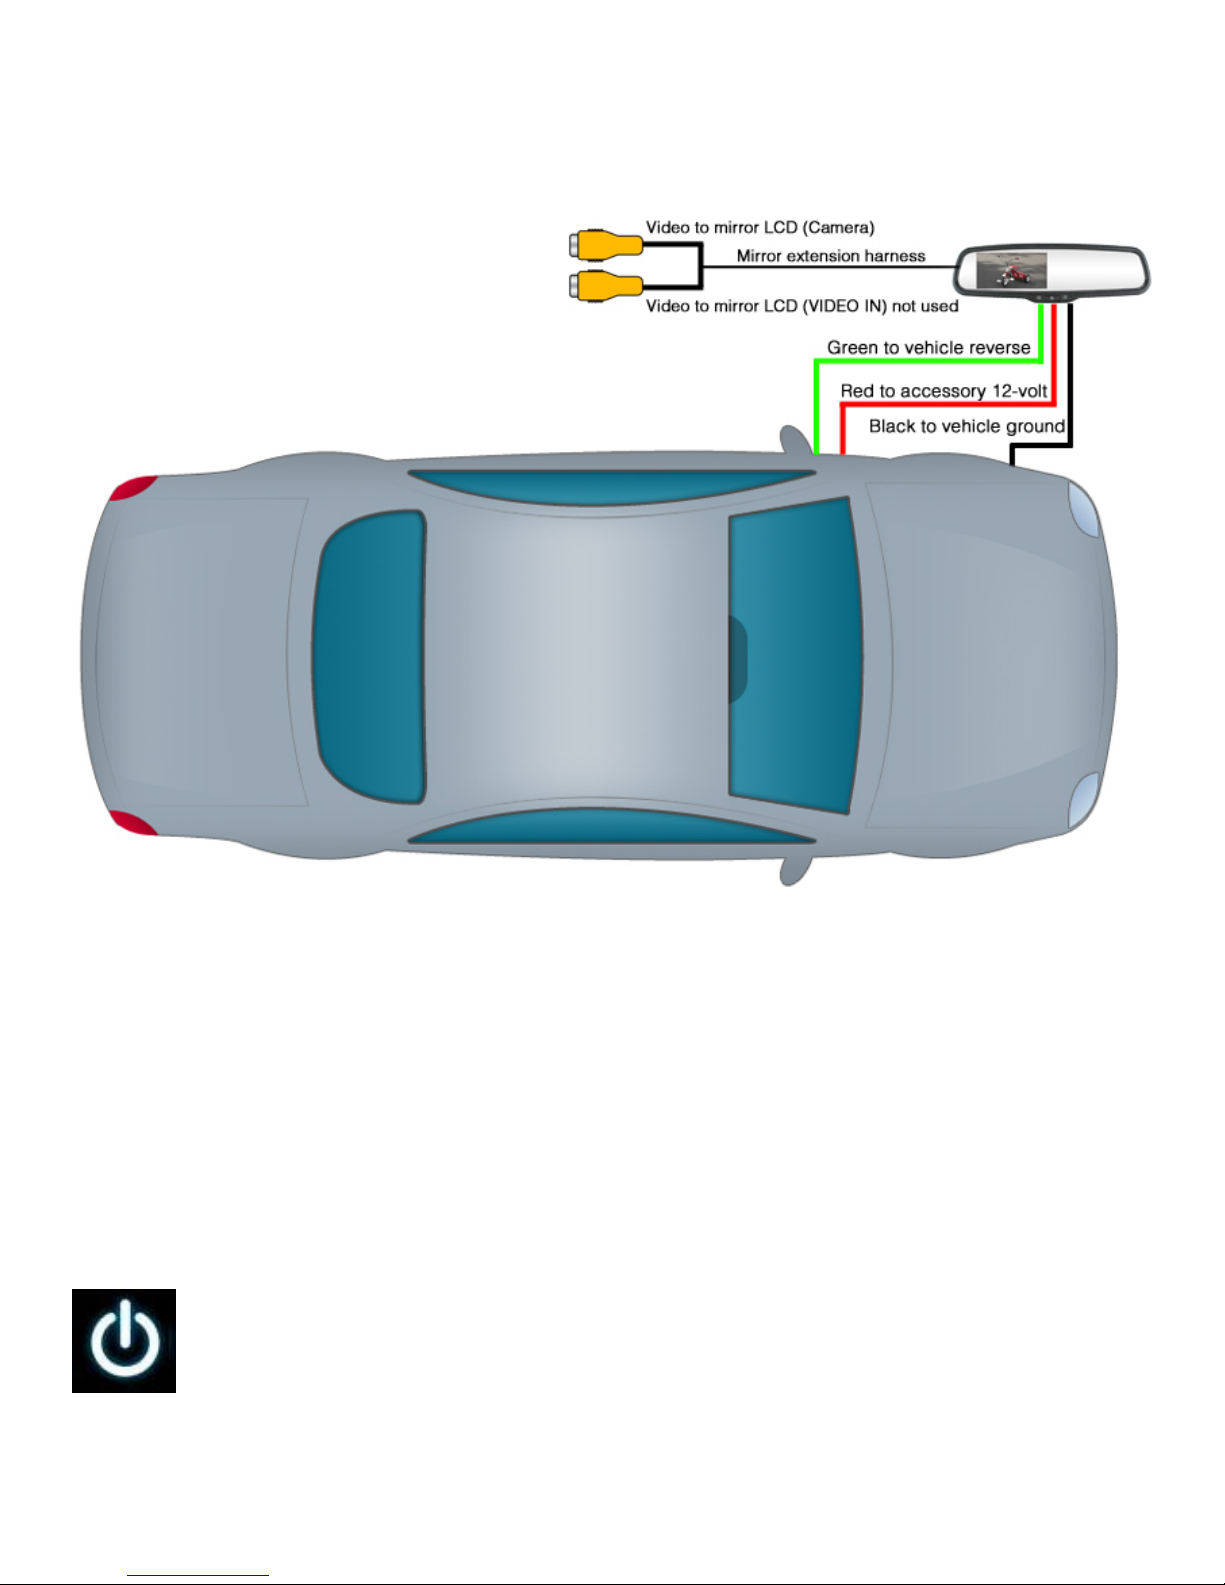
System Layout
Installation
1. Remove the existing mirror from the windshield and replace with RearSight mirror
tightening the mirr or’ s stem to the windshield with a P hillips s c rewdriver. (Some vehic les
requir e a mirror remo va l too l).
2. Connect the mirror’s Red Wire to a fused Ignition 12-volt power circuit, Black Wire to a
vehicle ground point, and Green Wire to the reverse power circuit at the fuse panel or the
rear lamp.
3. Connect the video feed from your camera (not included) to the yellow female RCA camera-
in plug.
Adjusting LCD Screen Brightness
While the L C D s creen built into this mir ror dims automatical ly depend ing up on the light ins ide t he
vehicle, it can also be adjusted manually. When the vehicle is shifted into reverse and the LCD
monitor is displaying the image of the area behind the vehicle, the brightness of the screen can be
adjusted by pressing the Power button on the face of the monitor.
Rostra Precision Controls, Inc. - 2519 Dana Dr. - Laurinburg, NC 28352 - 800-782-3379 - rostra.com
Page 2
Page 3

Testing and Reassembl y
Testing
1. Reconnect the negative battery cable and torque to 3 ft-lbs.
2. Re-enter any theft deterr ent information (if applicable).
3. Tur n t he ignition sw itch to t he ON p osition.
4. Shift the vehicle into reverse and confirm video feed to your device.
Note: If there is no picture present, re-check all harness connections.
Reassembly
1. Reinstall all trim pieces taking special care to ensure harnesses and wiring connections are properly secured.
2. Make s ure no har ness es ar e bent or pi nched by trim pieces .
3. Reconnect all disconnected bulbs and check for funct ion.
Installation Tips
• Confirm proper cable extension connecto r orientatio n and always verify proper ends are ro ut ed in correct
direction.
• It is a good idea to dry-fit all pieces in this kit before permanently attaching them to ensure proper
orientation and operation before beginning installation for familiarization with components.
• Always treat any metal exposed during installation with a rust preventative compound to prevent system
failure due to rust and/or corrosion.
• Alwa ys sea l any holes d rille d with the provided sealing put ty to prevent water in fi ltration through
unprotected areas.
• Confirm integrity of mechanical and electrical connections before moving to next installation sequence.
Troubleshooting
Mirror/Monitor Not Working No Video No Reverse Override
Verify 12-volts to monitor red
wire.
Verify ground < 10 Ohms
resistance.
Verify secure connection t o
monitor extension harness.
Verify extension harness
connection to camera.
Verify harnesses are m ate d
correctly at camera.
Verify 12-volts and ground
connection at camera.
Check connectivity of green
rev erse wire.
Verify extension harness
connection to camera.
Rostra Precision Controls, Inc. - 2519 Dana Dr. - Laurinburg, NC 28352 - 800-782-3379 - rostra.com
Page 3
 Loading...