

Rosieres RVC 6378 RB User Manual

USER INSTRUCTIONS
COOKERS
NOTICE D'EMPLOI ET D'INSTALLATION
CUISINIERES
GB
FR
USINES DE ROSIÈRES - 30, rue Y. LACELLE - Rosières - 18400 - Lunery - France

CONTENTS
GB
Safety Instructions
1. General Warnings
1.1. Symbols Used In This User Manual
1.2. Declaration Of Compliance
1.3. Safety Hints
1.4. Useful Tips
1.5. Technical Data
2. Installation
2.1. Positioning
2.2. Feet Adjustment
2.3. Dimensions Of The Appliance
2.4. General Appearance And Definition Of The Appliance
2.5. Cookers Without Energy Cable
2.6. Electrical Connection
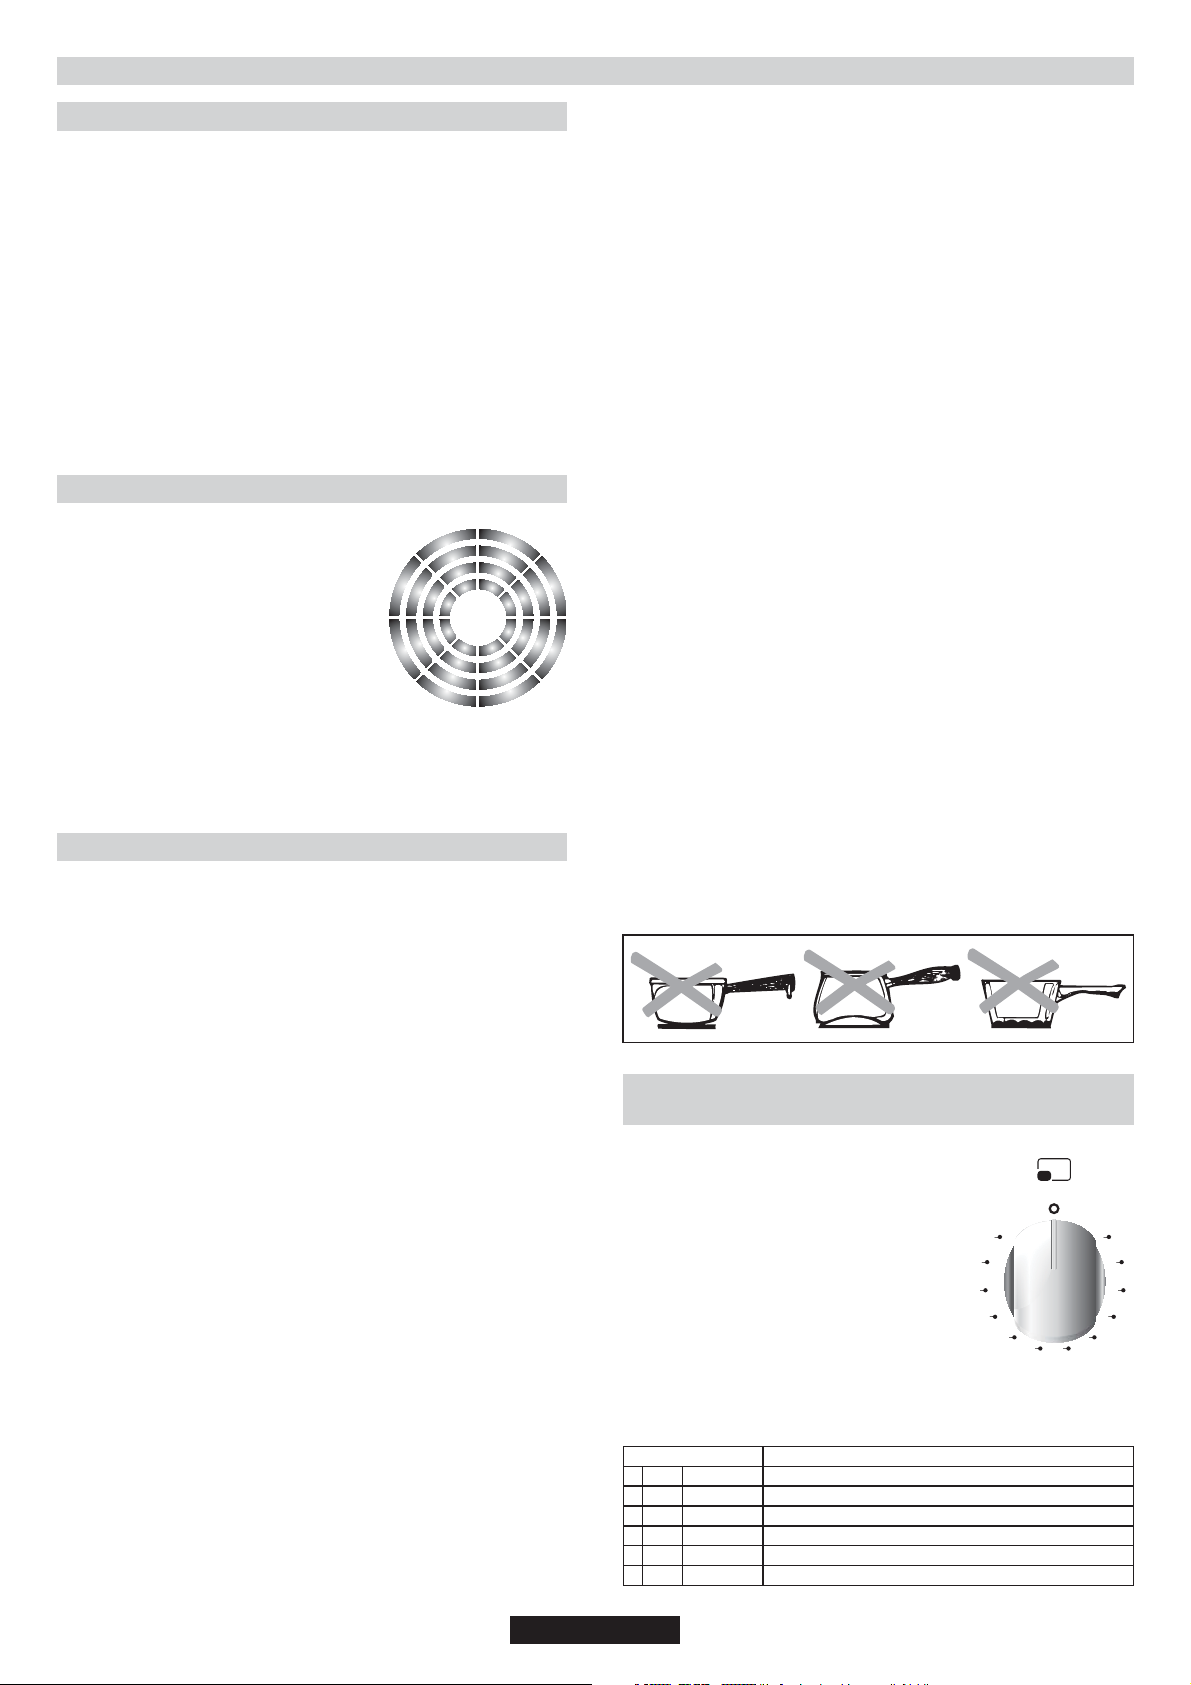
3. Vitroceramic Cooktop
3.1. Description Of Cooking Zones
3.2. Cooktop Cookware Advice
3.3. The Choice Of Cookware
3.4. Control Knobs Of The Vitroceramic Cooktop
4. Use Of The Oven
4.1. Grilling
4.2. Suggestions For Cooking
4.3. Cooking Cake
4.4. Cooking Pizza
4.5. Cooking Fish
4.6. Cooking Meats
4.7. Cooking Turn Spit
4.8. Using The End Of Cooking Timer
4.9. Using The Minute Timer
4.10. Use Of The Electronic Programmer
4.11. Electric Oven
4.12. Cooking Tables
5. Cleaning And Maintenance
5.1. Catalytic Self - Cleaning Oven
6. Service Centre & Troubleshooting
7. Protection Of The Environment
.............................................................................................................................................................................................................08
...............................................................................................................................................................................................03
.............................................................................................................................................................................................04
................................................................................................................................................................04
.............................................................................................................................................................................04
.....................................................................................................................................................................................................04
.......................................................................................................................................................................................................04
..................................................................................................................................................................................................04
.........................................................................................................................................................................................................05
.......................................................................................................................................................................................................05
..............................................................................................................................................................................................05
.........................................................................................................................................................................05
.......................................................................................................................................................................06
.......................................................................................................................................................................................06
.......................................................................................................................................................................................07
.........................................................................................................................................................................07
...............................................................................................................................................................................07
.................................................................................................................................................................................07
..................................................................................................................................................07
...............................................................................................................................................................................................08
.................................................................................................................................................................................08
..................................................................................................................................................................................................08
.................................................................................................................................................................................................08
....................................................................................................................................................................................................08
................................................................................................................................................................................................08
............................................................................................................................................................................................08
....................................................................................................................................................................09
...................................................................................................................................................................................09
..............................................................................................................................................................09
..................................................................................................................................................................................................09
...............................................................................................................................................................................................10
.............................................................................................................................................................................11
..........................................................................................................................................................................11
..................................................................................................................................................................12
......................................................................................................................................................................12
....................................................................................................................................05
SOMMAIRE
Conseils De Sécurité
1. Recommandations Générales
1.1. Symboles Utilisés Dans Ce Mode D'emploi
1.2. Déclaration De Conformité
1.2. Déclaration De Conformité
1.3. Conseils De Sécurité
1.4. Quelques Conseils Utiles
1.5. Données Techniques
2. Installation
2.1. Placement
2.2. Ajustement Des Pieds
2.3. Dimensions De L'appareil
2.4. Apparence Générale Et Définition De L'appareil
2.5. Cuisinières Sans Câble Électrique
2.6. Connexion Électrique
3. Surface De Chauffe Vitrocéramique
3.1. Description Des Zones De Cuisson
3.2. Conseils Relatifs À La Batterie De Cuisine Et Au Plan De Cuisson
3.3. Le Choix De La Batterie De Cuisine
3.4. Bouton De Contrôle Du Plan De Cuisson Vitrocéramique
4. Utilisation Du Four
4.1. Gril
4.2. Suggestions De Cuisson
4.3. Cuire Des Gâteaux
4.4. Cuisson Pizza
4.5. Cuire Les Poissons
4.6. Cuire Les Viandes
4.7. Cuisson Au Tournebroche
4.8. Utilisation De La Minuterie De Fin De Cuisson
4.9. Utilisation De La Minuterie
4.10. Utilisation Du Programmeur Électronique
4.11. Four Electrique
4.12. Tables De Cuisson
5. Nettoyage Et Entretien
5.1. Four Catalytique Autonettoyant
6. Centre De Maintenance Et Résolution De Problèmes
7. Protection De L'environnement
...................................................................................................................................................................................................................18
............................................................................................................................................................................................13
..........................................................................................................................................................................14
....................................................................................................................................................14
..............................................................................................................................................................................14
...............................................................................................................................................................................14
.......................................................................................................................................................................................14
.................................................................................................................................................................................14
.......................................................................................................................................................................................14
........................................................................................................................................................................................................15
.......................................................................................................................................................................................................15
.....................................................................................................................................................................................15
................................................................................................................................................................................15
.............................................................................................................................................15
..................................................................................................................................................................16
......................................................................................................................................................................................16
................................................................................................................................................................17
.................................................................................................................................................................17
................................................................................................................................................................17
.............................................................................................................................17
...........................................................................................................................................................................................18
..................................................................................................................................................................................18
..........................................................................................................................................................................................18
..................................................................................................................................................................................................18
..........................................................................................................................................................................................18
...........................................................................................................................................................................................18
................................................................................................................................................................................18
...............................................................................................................................................19
..............................................................................................................................................................................19
......................................................................................................................................................19
..............................................................................................................................................................................................19
.........................................................................................................................................................................................20
......................................................................................................................................................................................21
........................................................................................................................................................................21
...................................................................................................................................22
.......................................................................................................................................................................22
FR
................................................................................................................17

SAFETY INSTRUCTIONS
WARNING: The appliance and its accessible parts become hot during use. Care should be taken to avoid
touching heating elements.
• Children under 8 Year of age must be kept away from the appliance unless they are continuously
supervised.
• This appliance can be used by children aged from 8 years and above and persons with reduced
physical, sensory or mental capabilities or lack of experience and knowledge if they have been given
supervision or instruction concerning use of the appliance in a safe way and understand the hazards
involved.
• Children must not play with the appliance.
• Cleaning and user maintenance shall not be made by children without supervision.
• WARNING: Unattended cooking on a hob with fat or oil can be dangerous and may result in fire.
• NEVER try to extinguish a fire with water, but switch off the appliance and then cover flame e.g. with a lid
or a fire blanket.
• WARNING: Danger of fire: do not store items on the cooking surfaces.
• WARNING: If the surface is cracked, switch off the appliance to avoid the possibility of electric shock.
• During use the appliance becomes hot. Care should be taken to avoid touching heating elements inside
the oven.
• WARNING: Accessible parts may become hot during use. Young children must be kept away.
• Do not use harsh abrasive cleaners or sharp metal scrapers to clean the oven door glass since they can
scratch the surface, which may result in shattering of the glass.
• The internal bottom surface of the drawer can get hot.
• The oven must be switched off before removing the guard, after cleaning, the guard must be replaced in
accordance with the instructions.
• Only use the temperature probe recommended for this oven.
• Do not use a steam cleaner for cleaning operations
• Any spillage should be removed from the lid before opening.
• The hob surface must be allowed to cool down before closing the lid.
• If present, do not to stare into halogen lamp hob elements.
• WARNING: Avoid possibility of electric shock - ensure the appliance is switched off before replacing the
lamp
• If the range is placed on a base, measures must to be taken to prevent the appliance slipping off the
base.
• A mean for disconnection from the supply mains having a contact separation in all poles that provide full
disconnection under overvoltage category III conditions, must be incorporated in the fixing wiring in
accordance with the wiring rules.
• The instructions state the type of cord to be used, taking into account the temperature of the rear surface
of the appliance.
• If the supply cord is damaged, it must be replaced by a special cord or assembly available from the
manufacturer or its service agent.
• CAUTION: In order to avoid a hazard due to inadvertent resetting of the thermal cutout, this appliance
must not be supplied through an external switching device, such as a timer, or connected to a circuit that
is regularly switched on and off by the utility.
• "CAUTION: Accessible parts may be hot when the grill is in use. Young children must be kept away".
• WARNING: In order to prevent tipping of the appliance, stabilizing means must be installed. Please
refer to the instructions on page 23 of this manual
01 GB03 GB

1. GENERAL WARNINGS
Thank you for choosing one of our products. To get the most out of
your cooker we recommend that you:
•Read the notes in this manual carefully: they contain important
instructions on how to install, use and service this cooker in safety
Keep this booklet in a safe place for easy, future reference.
•In the case of the sale or transfer of the appliance, this manual should
be given together with the appliance in order to guarantee the proper
transfer of the information on installation/usage of the appliance and
the relative warnings .
•Take care to not touch these elements. When the cooker is first
switched on it may give off acrid smelling fumes-this smoke is
harmless we suggest to operate the cookers for 2 hours while empty.
1.1. SYMBOLS USED IN THIS USER MANUAL
For easier comprehension, the symbols below are used in this
user manual.
Safety Information
Information for Environment Protection
This appliance complies with the EU E.E.C directives.
Caution, possibility of tilting
Anti-tip restraints
1.2. DECLARATION OF COMPLIANCE
All parts of this appliance that may come into contact with foodstuffs
comply with the provisions of EEC Directive 89/109. The appliance
complies with European Directives 2006/95/EC and 2004/108/EC,
and subsequent amendments. The appliance also complies with
93/68 General Directives and subsequent amendments.
*Do not touch the oven with wet or damp hands or feet.
*If the main cable is damaged it must be replaced promptly:
*When replacing the cable, follow the instructions given
below:
*Cable replacement must be carried out by qualified
technicians. Use only an approved service centre for repairs end
ensure that only original parts are used.
*When necessary, remove the power cable and replace it
with one of the H05RR-F, H05VVF, and H05V2V2-F type. The cable
have the capacity for the electrical current required by the product.
•Do not leave the appliance unattended before it has cooled down.
If the above instructions are not adhered to, the
manufacturer cannot guarantee the safety of the cooker.
1.4. USEFUL TIPS
•Do not use deformed or unbalanced pans.
•Clean the grill and the fat collecting tray carefully before initial
usage.
•When using cleaning sprays, do not spray on heaters or on the
thermostat.
•Make sure that oven shelves are correctly placed.
•Do not cover oven parts with aluminium foil.
1.5. TECHNICAL DATA
FEATURES
60 x 60 4 Hilight Heater and Electrical Oven
50 x 60 4 Hilight Heater and Electrical Oven
Rating plate (located at the rear of the cooker)
TOTAL ELECTRIC
POWER
8.4 kW
7.6-7.8 kW
1.3. SAFETY HINTS
•The cooker must be used only for the purpose for which it was designed: it
must only be used for cooking food. Any other use, e.g. as a form of
heating, is improper use of the cooker and is therefore dangerous.
•The manufacturers cannot be held responsible for any damage caused
by improper, incorrect or unreasonable use.
•When using any electrical appliance you must follow a few basic rules. If
the appliance breaks down or develops a fault switch it off, disconnect it
from mains, do not touch it, call the authorised Service.
•Always use gloves to remove food from the oven.
•Always keep your appliance clean, for safety and health reasons. Fat and
food residues may cause fire.
•Do not insert your hand between oven hinges. Keep children away.
•Make sure that all the knobs are in the OFF position when the appliance is
not in use.
•The oven drawer is to store empty trays or to keep food warm.
•Do not put flammable, explosive or cleaning materials like nylon bags,
paper, cloths, etc, into the drawer.
•Use only heat resistant pots and pans. Do not use flammable materials.
• It is dangerous to modify or to attempt to modify the properties of
the appliance.
•Particular attention is necessary when you are frying: do not
leave the appliance unattended.
•The appliance is heavy. Take care when moving.
•The emission of hot air is normal while the appliance is working.
Do not close the vents on the oven.
•Some spillage on the appliance may occur, when placing food on
or into the appliance or when removing food with excess fat or
water. Clean such residues immediately after cooking, in order to
prevent unpleasant smells and possible fires.
• When using any electrical appliance you must follow a few basic
rules:
*It is not generally a good idea to use adapters, multiple
sockets for several plugs and cable extension.
*Do not pull the power cable to remove the plug from the
socket.
01 GB04 GB

2. INSTALLATION
Installation have to be made by qualified personnel. The manufacturer
have no obligation to carry this out. If the assistance of the manufacturer is
required to rectify faults arising from incorrect installation, this assistance
is not covered by the guarantee.
The installation instructions for professionally qualified personnel must be
followed. Incorrect installation may cause harm or injury to people,
animals or belongings. The manufacturer cannot be held responsible for
such harm or injury.
WARNING! Care must be taken regarding where the appliance is placed!
It can only be installed in a continuously ventilated room.
Electrical connections must always be disconnected before any repair,
installation or modification.
•Before positioning your appliance, check the properties of the energy
supply and make sure that your appliance is regulated accordingly.
•The appliance must not be installed near flammable materials (e.g.
furniture, curtains, etc.)
•If the range is placed on a base, measures must to be taken to prevent the
appliance slipping off the base.
2.1. POSITIONING
Adjustable feet.
2.3. DIMENSIONS OF THE APPLIANCE
60 x 60
Height (mm)
Width (mm)
Depth (mm)
850
598
600
50 x 60
850
510
600
D
H
750 mm
20 mm 20 mm
400 mm
2.2. FEET ADJUSTMENT
Your appliance has adjustable feet at the lower corners of its chassis.
•The feet can be adjusted individually with the aid of a wrench to guarantee
that the oven is perfectly balanced and levelled, so that any liquids in the
pans is horizontal .
Adjustable feet and wheels.
AA1
CB
A2
4
3
2
1
W
2.4. GENERAL APPEARANCE AND DEFINITION
OF THE APPLIANCE
This User Manual has been drawn up as a guide for several models. Some
of the properties mentioned in this manual may not exist in your appliance.
60 x 60 COOKER
Cook top
1-
Control panel
2-
Drawer
3-
Oven door (Front door)
4-
Hilight Heater 1200W
5-
Double Hilight Heater 1700W
6-
Hilight Heater 2300W
7-
Warning Lamps
8-
Hilight heaters control knobs
9-
Oven knob
10-
Thermostat knob
11-
Electronic programmer
1213-
Moving Foot
14-
Bolt Foot
5
6
5
2
10
11
13
14
7
5
6
7
8
5
1
12
9
3
4
•The maximum height of cooker will be 868mm by fixing the adjustable
front feet and rear wheels to the 4th hole.
•Rear wheels should be fixed to the 2nd hole (picture A1), standard
height. Thus, standard height will be 850 mm.
05 GB
10
1
50 x 60 COOKER
Cook top
2
11
3
4
1-
Control panel
2-
Drawer
3-
8
9
Oven door (Front door)
4-
Hilight Heater 1800W
5-
Hilight Heater 1200W
6-
Warning Lamp
7-
Timer knob
8-
Hilight heaters
9-
control knobs
Oven knob
10-
Fan knob
11-

REMOVING AND CLEANING WIRE RACKS
1- Remove the wire racks by pulling them in the direction of the arrows
(see below)
2- To clean the wire racks either put them in the dishwasher or use a
wet sponge, ensuring that they are dried afterwards.
3- After the cleaning process install the wire racks in reverse order.
5
4
3
2
1
Cable - Section
Cable - Type
Monophase
220-240 V~
3 G 4 mm
H05VV-F
ou H05RR-F
Three-phase
380-415V3N~
2
5 G 1.5 mm
2
H05VV-F
ou H05RR-F
2.5. COOKERS WITHOUT ENERGY CABLE
Cable box connection types
1- Monophase connection 2- Three-phase connection
Attention: A poor clamping can draw away risks dangerous
heating at the level of the cable feeding
L1 : Phase
shunt 1-2 and
shunt 2-3
N : Nautral
shunt 4-5
T Earth
1 Phase
2 Phase
3 Phase
5 Neatural
shunt 4-5
T Earth
2.6. ELECTRICAL CONNECTION
Cookers can be presented with or without enrgy cable. Cable
connection should be done by Autorited service according to
following instructions.
The electrical connection must be made according to the standards
and regulations in force. Before making the electrical connection,
check the following:
•Is the capacity of the electrical connections and safety fuses in the
building sufficient to cope with the load of the appliance? (Check with
the adhesive info label)
•Does the electricity supply line have an earth connection conforming
with the standards in force? A proper earth connection must exist in
your home. If there is not a proper earth connection at your home,
please apply to an authorized technician to deal with this problem.
•Is the socket or the multi-pole switch at a easily reachable point after
the installation of the appliance?
•A plug conforming to standards should be connected to the mains
cable and the cable should be inserted into a safe socket.
•A multi-pole switch must be used between the appliance and the
electricity line if a direct electrical connection to the appliance is
required. (It must comply with standards and be appropriate for the
load)
The green-yellow ground cable must not be interrupted by a switch.
The brown phase cable (from the “L" coded connector of the oven)
must always be connected to the phase line of the mains.
•The power line must be positioned so that it is not exposed to
temperatures higher than 50° C.
•When the power cable must be changed, a cable with a cross section
appropriate to the indicated power must be used. The green-yellow
ground cable should be approximately 2 cm longer than phase and
neutral cables.
•Check the heaters by switching them on for 3 minutes, after having
completed the connection.
•The manufacturer will not accept responsibility for damages
arising due to non-compliance with the safety standards.
If an appliance is not fitted with a supply cord and a plug, or with other
means for disconnection from the supply mains having a contact
separation in all poles that provide full disconnection under
overvoltage category III conditions, the instructions shall state that
means for disconnection must be incorporated in the fixed wiring in
accordance with the wiring rules.
06 GB
3. VITROCERAMIC COOKTOP
3.1. DESCRIPTION OF COOKING ZONES
Highlight zone
A metallic conductor strip is spread uniformly over the whole
surface unit. It is effective within 3 seconds and is suitable for
steady, even and also lengthy cooking.
The glass-ceramic cook top benefits from greater heat output
which is generated by the highlight cooking zones thereby
accelerating the cooking process. Modifications to the design of
the hob have not affected the capacity of the glass to withstand
high temperatures, but they have improved controllability.
With the "Sprinter" facility, reduced cooking times of up to 15% can
be achieved, depending on the method of cooking and the type of
saucepans used.
•Multi-circuit heating elements offer the advantage that several
cooking zone sizes can be used with one heating element.
3.2. COOKTOP COOKWARE ADVICE
Efficient cooking
The extra large highlight zone, will
depending on the dimensions of the cook
ware and/or the quantity of food being
cooked, provide even higher performance
levels.
Using good quality cookware is critical for
obtaining the best performance from your
hob.
Use pans with a large enough diameter to completely
cover the surface unit the size of the pan should be no smaller
than the heated area. If it is slightly wider the energy will be used at
maximum efficiency.
3.3. THE CHOICE OF COOKWARE
The following information will help you to choose cookware which
will give good performance.
Using this type of cookware will prevent hot spots that cause food to
stick. Thick metal pots and pans will provide even distribution of heat.
Porcelain/enamel
Good performance only if the base is thin, smooth and flat.
Glass-ceramic
Not recommended. Poor performance. May scratch the surface.
Suitability of Cooking Pans
Keep in mind that larger pans have larger heating surfaces.
This will help them to cook the food faster than pans with smaller
heating surfaces.
Always use pan sizes proportionate to the amount of the food to be
cooked. In order to prevent splashing, do not use very small pans,
especially for foods with excess liquid. If you use excessively large
pans for quick cooked foods, sausages and liquids will stick and
residues will remain attached to the pan after being emptied.
Closed pans and baking trays or moulds are suggested for cooking
sweets. Splashed sugar and juices from an open pan may stick to the
cooker surface and will be difficult to remove.This is especially
important for pans used for roasting or pressurized cooking at high
temperature.
Do not leave burners unattended without a pan or with an empty pan
on top.
Check the suitability of cooking pans with respect to the following
criteria;
They should be heavy.
They should completely cover the burner surface; they may be a little
bigger but no smaller.
Base surfaces should be completely flat and fit well on the cooking
surface.
•Some parts of the food may be heated while others remain cold due
to the uneven distribution of heat under the pan. Therefore,
continuous stirring of the food being cooked is necessary in the case
of thin-bottomed pans. Heat is more effectively and evenly distributed
with thick-based pans.
•Use of very small pans is not recommended. Wider, low-sided pans
are more suitable for more effective and quicker cooking than small,
deep pans.
•You cannot shorten cooking time by using a small pan over a large
burner. You will only waste gas in this way. However, a pan with a lid
will save energy.
Stainless Steel
Highly recommended. Especially good with a sandwich clad base.
The sandwich base combines the benefits of stainless steel
(appearance, durability and stability) with the advantages of
aluminium or copper (heat conduction, even heat distribution).
Aluminium
Heavy weight recommended . Good conductivity.
Aluminium residues sometimes appear as scratches on the cook
top but can be removed if cleaned immediately. Because of its low
melting point, thin aluminium should not be used.
Cast Iron
Usable, but not recommended. Poor performance. May scratch
the surface.
Copper Bottom / stoneware
Heavy weight recommended. Good performance, but copper may
leave residues which can appear as scratches. The residues can
be removed, as long as the hob is cleaned immediately. However,
do not let these pots boil dry. Overheated metal can bond to glass
hobs. An over heated copper pot will leave a residue that will
permanently stain
the cook top.
Ensure that the base of the pot or pan is dry
when filling pans with liquid or using one that has been stored in
the refrigerator, ensure that the base of the pan is completely dry
before placing it on the hob. This will help to avoid staining the
cook top.
Always use good quality cookware with perfectly flat and
thick bases
3.4. CONTROL KNOBS OF THE
VITROCERAMIC COOKTOP
HOW TO OPERATE THE COOKTOP
Locate the sign corresponding to the
cooking zone that you need.
Turn the control knob to the required
cooking setting.
Initially we recommend that the heat zone
be set at the highest position until the
contents of the saucepan have reached the
required temperature; the heat can then be
reduced to the required cooking setting.
The residual heat indicator light will
come on when the cook top surface
temperature reaches 60 degrees or above.
It will remain on even if the cook top is switched off and will only go out
when the cook top surface has cooled down.
1
2
3
4
5
6
Position
1-2
3-4
5-6
7-8
9-10
11-12
Very Low
Low
Moderate
Medium
High
Very High
To keep a dish hot, melt butter and chocolate...
Slow cooking, sauces, stews, rice pudding poached eggs...
Beans, frozen foods, fruit, boiling water...
Steamed apples, fresh vegetables, pasta, crepes, fish...
More intense cooking, omelettes, steaks...
Steaks,chops, frying...
Some Tips
07 GB
12
10
8
Hilight
2
4
6
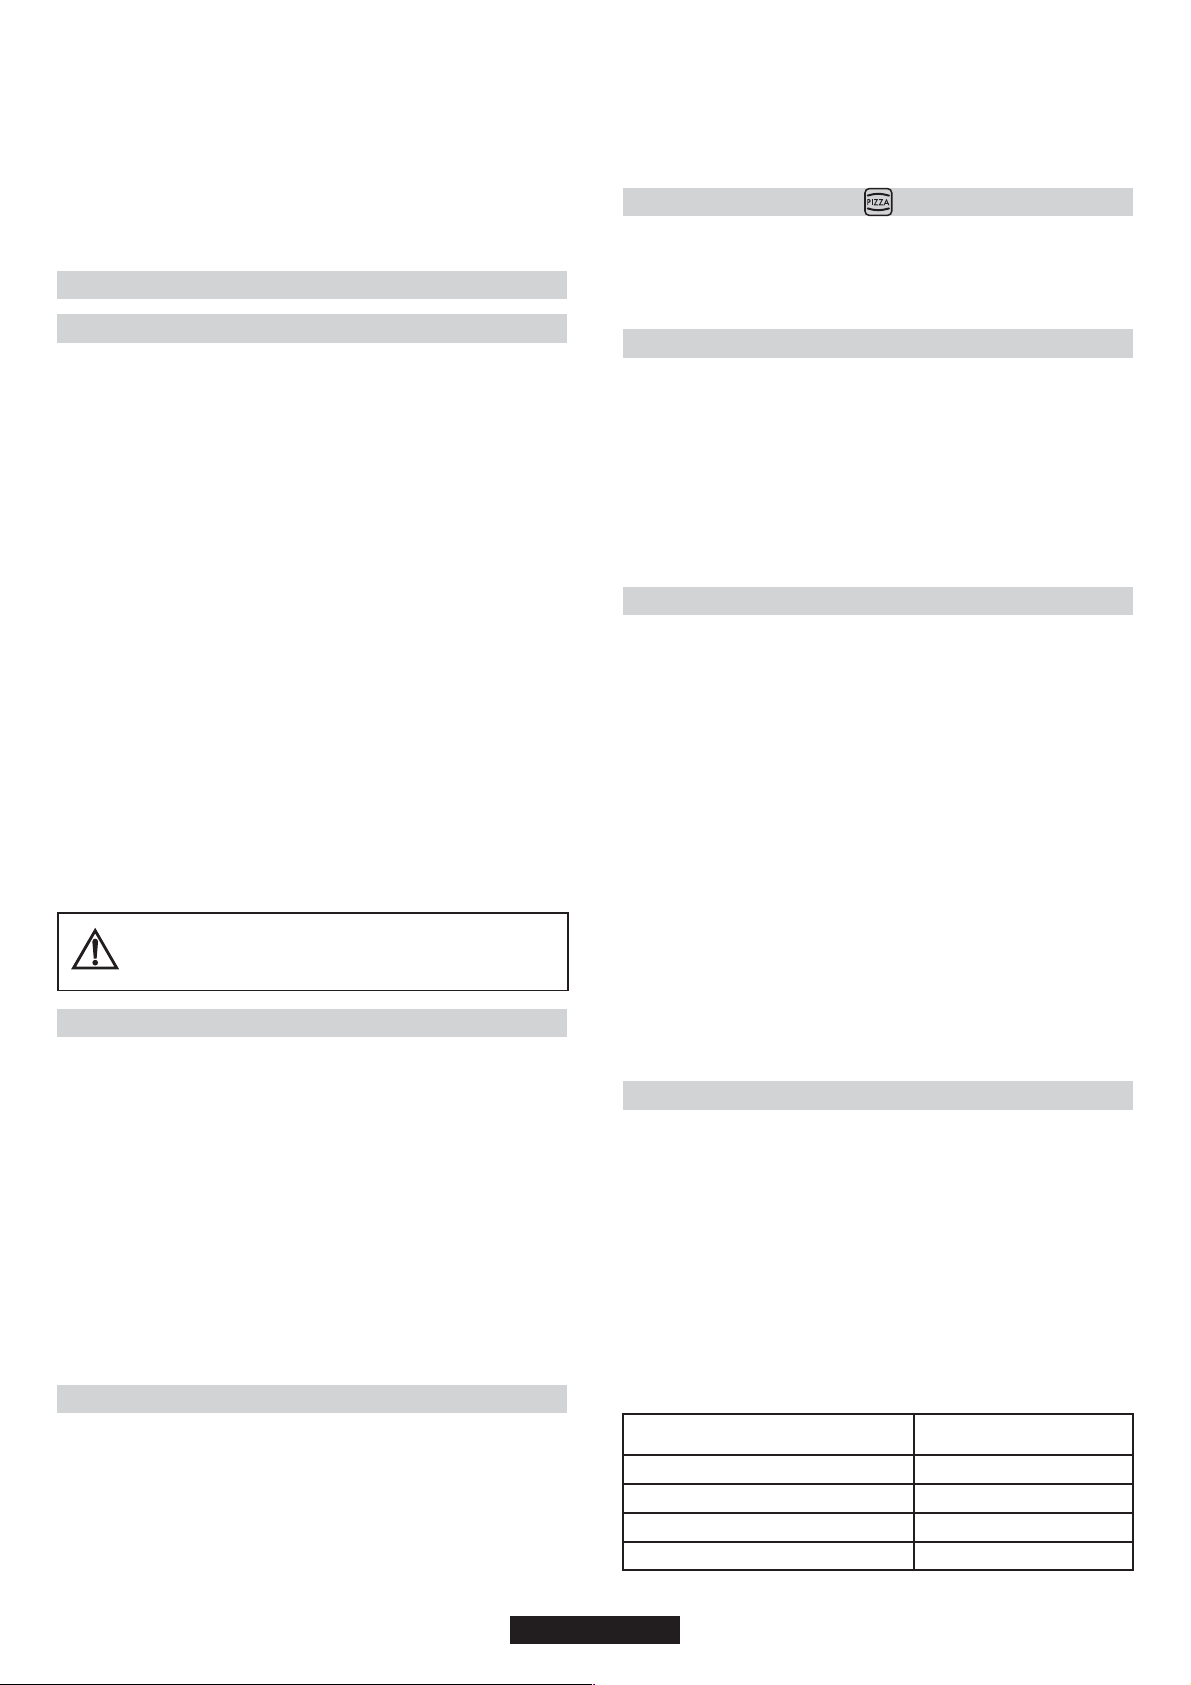
To switch off the cook top, turn the knob to "O".
•The oval heating zone consists of two heating areas: a circular
area and an oval shaped section. Turn the control knob from 1 to
12 to regulate the circular area. To operate the oval section, simply
turn the control knob to position12 and then select a position from
1 to 12.
•The heating area consists of two concentric zones. The inner
circle is activated when the knob is turned to any of the positions
from 1 to 12.The outer ring will only be activated when the control
is turned beyond 12 up to a maximum power.
4. USE OF THE OVEN
4.1. GRILLING
•Grilling gives food a rich brown colour quickly. Depending on the
quantity of the food, you can switch the grill on to different
positions. Almost all food can be cooked under the grill except for
very lean game and meat rolls.
•Meat and fish that is going to be grilled should first be lightly
doused with oil.
•Place a fat collecting tray beneath during grilling. Put some water
into the tray to prevent unpleasant smells and to prevent the fat
catching fire.
•Grilling is usually preferred for cooking pieces of meat, for
example steaks, which are not too thick, different sized meat
parts, cleaved hunted birds, fish, some vegetables (e.g.
courgettes, aubergines, tomatoes, etc.) together with meat and
fish products on spits.
Oil the fish lightly before putting it directly under the grill.
Add salt on meat after cooking, salt fish into the cleavage before
cooking.
•The distance from the grill will depend on the thickness of the
meat or fish. If the distance is correctly judged, the outer parts will
not be burnt and the inside will not remain raw.
•Prevent unpleasant odours and smoke caused by dripping fats
and sauces by pouring 1-2 glass of water into the fat-collecting
tray.
•You can also use the grill for toasting, toasted bread or
sandwiches, for example, and also to cook certain fruits (bananas,
grapefruit or pineapple slices, apples etc.). However, fruit must not
come into contact with the heating elements.
Never cover oven inner walls or the bottom with
aluminium foil. Accumulated heat can damage the
oven enamel and your meal.
4.2. SUGGESTIONS FOR COOKING
Traditional Cooking
Heat is generated from the upper and lower heaters. Generally,
the middle shelf position is preferable for cooking. However, if the
top or bottom surface of the food must be cooked more, place it on
the upper or lower shelf.
Convection Cooking (with Fan)
•The food is cooked by evenly distributed preheated air blown into
the oven by the help of the fan located on the inside back wall of
the oven.
It is possible to cook several dishes simultaneously on different
shelves thanks to the evenly distributed heat inside the oven.
•This type of oven is also very useful for defrosting frozen food. It
can also be used for sterilizing canned food, preparing fruit
syrups, and dehydrating fruits and mushrooms.
4.3. COOKING CAKES
Please keep in mind the following tips
•If the surface of the food is cooked well but it is still raw or partly
raw inside, it must be cooked longer at a lower temperature.
•On the other hand, if the surface of the food is too dry, it should be
cooked at a higher temperature for a shorter time.
4.4. COOKING PIZZA
•Thermostat setting at maximum
•Preheating time 15 min (20 min if possible)
•Position of the tray in either one of the two lowest position
•Cooking time 20 min.
4.5. COOKING FISH
Small fish can be cooked at the maximum temperature from start
to finish. Medium sized fish must be cooked at the maximum
temperature at the beginning and then the temperature must be
slowly reduced. Larger fish must be cooked at lower temperatures
from start to finish. Check the cut at the bottom of fish to
understand whether it is cooked properly. In order to understand
whether the fish properly grilled or not, check the cleavage at the
bottom of the fish. The colour (for grilled fish) should be an even
matt white. This is not the case for salmon and trout.
4.6. COOKING MEATS
•The minimum quantity of meat to be cooked in the oven is 1 kg.
Otherwise, the meat will be too dry.
If you require well done meat, use less fat. If meat has a little fat,
there is no need to use oil. If one side of the meat is fatty, place this
side up. The melted fat will sufficiently grease the part below. Red
meats should be taken out of the fridge at least 1 hour before the
cooking.
•Otherwise the meat may become tough due to the temperature
difference. Do not use salt before cooking, especially when grilling
meat. Salt will draw the blood and juices out of the meat which will
consequently prevent the roasting of the upper surface of the
meat.
•Add salt to roast meat only after half of the cooking time has
elapsed.
•Place the meat to be roasted in a wide, shallow pan.
•Deep sided containers / pans act as a shield against the heat.
Meat can be placed in the oven in a heat resistant pan or directly
onto the grill. Insert a fat / gravy collecting tray beneath the grill.
Sauces must be added at the beginning if the food is cooked for a
short time, while it would be better to add sauces in the last half
hour if the food is cooked for a longer time.
4.7. COOKING TURN SPIT
•The cooker is equipped with a metal turnspit, two forks and a
hook used to support the spit.
•Instruction for use:
- Remove all accessories from the oven;
- Put the deep pan on the bottom of the oven or on the lowest
bench;
- Stick the turnspit through the meat, centered between the two
forks;
- Fix the turnspit into the drive hole located in the bottom wall,
then hang the support hook in the drive located at the top front
of the oven cavity and around the edge of the turnspit.
- Preheating is not necessary with the turnspit.
- Cooking Time Recommended In Turnspit Position;
•Unless otherwise suggested, preheat the oven for at least 10
minutes before use. Do not open the oven door when cooking
cakes otherwise they will not rise (cakes or dishes with yeast and
soufflés). The blast of cold air which will enter the oven will prevent
rising. You can check whether cakes are properly cooked by
inserting a rod into the dough. If the rod comes out dry when you
pull it out, it means that the cake is properly cooked. Do not check
in this way until at least three quarters of the cooking time has
elapsed.
08 GB
Cooking time (min) Electric Oven
Beef (1kg)
Lamb, sheep (1kg)
Veal, Poultry (1kg)
Pork (1 kg)
20/30
30/40
60/70
65/75
 Loading...