

Page 1
MANUEL D
INSTRUCTIONS
FR
PLANS DE CUISSON À
ENCASTRER
INSTRUCTION BOOKLET
BUILT-IN COOKTOPS
GB
Page 2

Page 3

FR
MANUEL D
PLANS DE CUISSON À
INSTRUCTIONS
ENCASTRER
Page 4

Page 5

Avertissements et conseils importants pour l'utilisation
IMPORTANT
portée de la main pour tout le cycle de vie de la table de cuisson. Lire attentivement ce manuel et
toutes les indications qu'il contient avant l'utilisation de l'appareil. Conserver les pièces de
rechange éventuelles fournies. L
conformément aux normes en vigueur. Cet appareil est prévu pour un usage domestique et est
fabriqué pour remplir la fonction suivante : cuisson et réchauffage des aliments. Tout autre
usage est considéré impropre.
Le fabricant décline toute responsabilité pour une mauvaise installation, pour toute
modification, inca
Vérifier que le produit n'ait pas été endommagé pendant le transport.
Les éléments de l
pas être laissés
L
emballage est constitué de matériau recyclable et porte le symbole
Ne pas disperser dans l'environnement.
Cet appareil n'est pas destiné à être utilisé par des personnes (
irresponsables ou sans conaissance sur l
surveillées, ou instruites sur l
sécurité.
Surveillez les enfants
L
installation et tous les branchements gaz/électriques doivent être exécutés par du personnel
qualifié, conformément aux normes de sécurité et aux lois en vigueur, sur la base des indications
fournies p
Attention:
On recommande d
La sécurité électrique n'est assurée que lorsque le produit est raccord
terre efficace.
Il est dangereux de modifier ou d'essayer de modifier l
pas tenter de réparer seuls l
Après avoir utilisé la table de cuisson, s
fermeture et fermer le robinet principal d
Si l
on décide de ne plus utiliser cet appareil, avant de l
inopérant comme prévu par les lois en vigueur en matière de santé et de protection de
l
environnement, en rendant inoffensives les parties qui pourraient constituer un danger pour les
enfants.
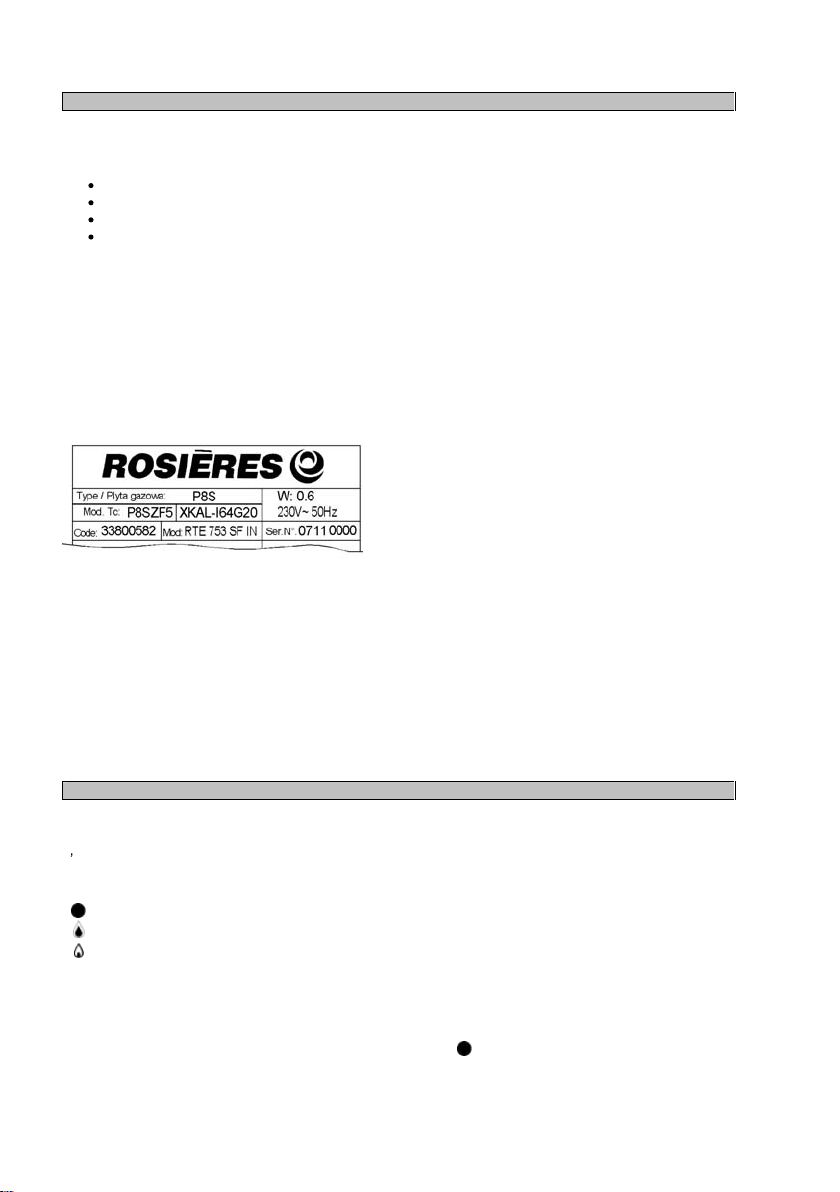
La plaque d'identification, avec les données techniques, se trouve visiblement positionnée sous le
carter et annexée à ce manuel. La plaquette sous le carter ne doit jamais être enlevée.
Les illustrations pour l'utilisation de l'appareil sont regroupées dans la partie finale de ce manuel.
! Ce manuel fait partie intégrante de l'appareil. Il faut le conserver en bon état et à
installation devra être effectuée par du personnel qualifié et
pacité d
emballage (sacs en plastique, mousse de polystyrène, nylon, etc.) ne doivent
à la portée des enfants car ce sont des sources de danger potentielles.
ar le fabricant.
En cas de démontage, entretien et nettoyage de l
utilisation et des utilisations différentes de celles indiquées.
utilisation de l'appareil, par une personne responsable de leur
pour être sûr qu'ils ne jouent pas avec l'appareil.
utiliser des instruments de prévention et de protection
appareil mais demander l
utilisation du produit, à moins qu
assistance d
assurer que l
arrivée du gaz ou le robinet de la bouteille.
notamment les enfants) incapables,
appareil, faire attention.
appareil. En cas de dysfonctionnement ne
index des manettes soit en position de
éliminer, il est recommandé de le rendre
elles ne soient
é à une installation de mise à
adéquats
un technicien qualifié.
Déclaration de c
Cet appareil est conforme aux directives CE suivantes
90/396/CEE : Appareils à gaz
2006/95/CE : Basse tension
2004/108/CEE : Compatibilité électromagnétique
89/109/CEE: Matériaux ou objets qui peuvent entrer en contact av
Règlement CE n° 1935/2004 : Aptitude des matériaux en contact avec les aliments
IN VETRO
onformité
destination dont les symboles d
plaquette reportée dans le ma
:
Ces instructions ne sont valables que pour les pays de
identification figurent sur la
nuel d
instructions et sur l
ec des denrées alimentaires
appareil.
3
Page 6
CARACTÉRISTIQUES DU PLAN DE CUISSON
Recommandations :
Cet appareil est destiné à être encastré dans un meuble.
La classe d'installation est de type 3 pour la partie à gaz et de t
Les meubles doivent être résistants à une température d'au moins 90°C.
Pour une bonne installation, lire le paragraphe correspondant et les dessins de référence.
L'emploi d'un appareil de cuisson à gaz comporte le dégage
pièce d'installation. Faire en sorte que la cuisine soitbien aérée : laisser ouverts les orifices naturels
d'aération, ou installer un dispositif d'aération mécanique (hotte de ventilation). Un emploiintensif et
prol
ongé de l'appareil peut exiger une aération supplémentaire, comme par exemple l'ouverture
d'une fenêtre, ou une aération plus efficace, comme par exemple en augmentant la vitesse de la
hotte.
Cette notice a été prévue pour plusieurs types de plans. La pl
permet d'établir le modèle correspondant.
Avec les indications fournies dans les prochains paragraphes, vous pourrez savoir comment est composé
votre appareil en consultant la figure présente à la fin du manuel (Fig.
ype Y pour la partie électrique.
ment de chaleur et d'humidité dans la
aque signalétique apposée sur le rétro
1).
POINTS DE CUISSON
Mod: RTE 753 SF
1. Brûleur Auxiliaire gauche (A)
2. Brûleur Auxiliaire droit (A)
3. Brûleur Semi-rapide postérieur droit (SR)
4. Brûleur Semi-rapide postérieur gauche (SR)
5. Brûleur Triple cour
UTILISATION DU PLAN DE CUISSON
(Fig. 1 A)
onne Dual (TC)
Mod: RTF 765 SF
1.
Brûleur
2.
3.
4.
5.
Triple
Brûleur
central
Brûleur
central
Brûleur
Semi-rapide
Brûleur
Semi-Rapideanteriéur
(Fig. 1 B)
couronne
postérieur
anteriéur
postérieur
3,8gauche
Rapide (R)
Auxiliaire
Brûleurs à gaz
L arrivée du gaz aux brûleurs est réglée par les manettes de la fig.4qui commandent les robinets.
En faisant coïncider le cran sur les symboles sérigraphiés, on obtient les réglages suivant
Robinet fermé, aucune distribution de gaz
Débit maximum, distribution maximum de gaz
Débit minimum, distribution minimum de gaz
s :
Allumage des brûleurs
Le présent modèle est muni de soupa
toute éventuelle extinction du brûleur.
Pour rétablir le fonctionnement, reporter la manette en position
illustrées aux paragraphes s
pe de sûreté qui coupe automatiquement l'arrivée du gaz en cas de
et répéter les opérations d'allumage
uivants.
4
droit
droit
(TC)
(A)
(SR)
(SR)
Page 7
Utilisation des brûleurs avec robinet muni de sûreté
o
Tourner la manette du robinet de gaz jusqu'à la position de distribution maximum, puis appuyer et
maintenir enfoncé pendant environ 4÷5 secondes.
Relâcher la manette et régler la flamme en tour
Recommandation
o
Le dispositif d'allumage ne peut être actionné pendant plus de 15 .
Si après ce laps de temps le brûleur ne s'est pas encore allumé, ou s'il s'est éteint
accidentellement, attendre au
:
moins 1 minute avant de répéter l opération.
nant la manette jusqu'à obtenir l intensité souhaitée.
Choix du brûleur
La symbologie estampée sur le bandeau au dessus des manettes (dessin fig.4) indique la correspondance
entre manette et brûleur. Le choix du brûleur le mieux adapté dépend du diamètre et de la
récipients (voir tableau).
Il est important que le diamètre de la casserole soit adapté à la puissance du brûleur afin de ne pas en
compromettre le haut rendement.
capacité des
Diamètre des casseroles
RTE 753 SF RTF 765 SF
Brûleur
Auxiliaire gauche
Auxiliaire droit
Semi-rapide droit
Semi-rapide
gauche
Triple couronne
Diamètre
minimum
60 mm (avec
réduction)
60 mm (avec
réduction)
100 mm 160 mm
100 mm 180 mm
200 mm 260 mm
Diamètre
maximum
140 mm
140 mm
Brûleur
Auxiliaire
Semi-rapide
anteriéur
Semi-rapide
postérieur
Rapide
Triple couronne
Diamètre minimum
60 mm (avec
réduction)
160 mm 200 mm
160 mm 200 mm
200 mm 240 mm
240 mm 260 mm
Diamètre
maximum
140 mm
Adaptation aux différents types de gaz
Au cas où il serait nécessa
préparé, il faut remplacer les injecteurs.
Si les injecteurs de rechange ne sont pas fournis en dotation, ils sont disponibles auprès des Centres
d'Assistance.
Le choix des i
Les injecteurs sont identifiables par leur diamètre exprimé en centièmes de mm et estampé sur le corps des
injecteurs.
Remplacement des injecteurs
njecteurs à remplacer devra être effectué en consultant le tableau des injecteurs.
Retirer les grilles du pl
À l'aide d'une clé fixe, remplacer les injecteurs J (fig. 10) par ceux adaptés au gaz utilisé.
Remonter les brûleurs
Les brûleurs n'ont besoin d'aucun réglage de l'air primaire.
Réglage du minimum
Après av
oir remplacé les injecteurs, allumer le brûleur et dégager la manette. Placer le robinet en position de
minimum, insérer un tournevis à l'intérieur de la tige : visser pour diminuer la flamme, dévisser pour
l'augmenter. (Fig. 10)
Pour le gaz G30/G31, viss
Dans tous les cas, le résultat est celui d'une petite flamme homogène et régulière tout autour de la couronne
du brûleur.
Vérifier enfin qu'aucune extinction ne se produise en tournant rapidement le robinet de la positio
maximum à celle de minimum. Dans le cas des brûleurs munis de sûreté, vérifier que la flamme lèche
légèrement le thermocouple. Vérifier le bon réglage en laissant le brûleur allumé pendant quelques minutes.
S'il s'éteint, augmenter le minimum.
ire d'adapter le plan de cuisson à un gaz différent de celui pour lequel il a été
an de cuisson ainsi que le chapeau du brûleur
er complètement la vis de réglage.
n de
5
Page 8

Utilis
ation des grilles
Les grilles du plan de cuisson ont été conçues pour faciliter et sécuriser l'emploi du produit.
Nous conseillons de vérifier leur bon positionnement et bonne stabilité sur le plan de cuisson avant chaque
utilisation.
Vérifier aussi que l
Grille pour petits récipients (Fig. 2)
Les récipients de petit diamètre doivent être posés uniquement sur la grille du brûleur auxiliaire (le plus petit)
afin d'éviter qu'ils ne se re
es caoutchoucs d appui soient intacts et placés correctement.
-
Option
nversent.
Grille spéciale pour casseroles WOK (Fig. 3)
Les récipients WOK (à fond concave) ne doivent être posés que sur la grille à triple couronne.
Afin de ne pas causer de graves anomalies de fonctionnement au brûleur,
ne pa
s utiliser les casseroles wok sans cette grille spéciale et de ne pas l'utiliser pour les casseroles
nous vous recommandons de
à fond plat.
INSTRUCTIONS D'INSTALLATION
Important !
Ces instructions s'adressent aux installateurs qualifiés.
L appareil doit être installé correcte
ment en conformité aux normes en vigueur.
Toute intervention ne doit être effectuée que lorsque l appareil est débranché de toute source
d'alimentation.
INSTALLATION
L
installation est à la charge de l'acheteur. Le Fabricant est exonéré de ce service.
dérivant d'une installation erronée demandée au Fabricant est exclue de la garantie.
En cas d'encastrement sur un meuble bas équipé de four, il faut adopter quelques mesures de précaution
afin d'assurer une installation conforme aux nor
CIG). Il faut veiller particulièrement à ce que le câble électrique et le tuyau d'alimentation en gaz soient
positionnés de sorte à ne pas entrer en contact avec les parties chaudes de l'enveloppe du
En outre, si l'installation comprend un four sans ventilateur de refroidissement sous le plan de cuisson, il faut
pratiquer des ouvertures dans le module d'encastrement pour garantir une bonne circulation d'air. Ces
ouvertures doivent garantir une su
Installation sur le top (plan du meuble bas)
Le plan de cuisson peut être installé sur tous les meubles, pourvu qu'ils soient résistants à la chaleur
(température minimum de 90°C).
Les
dimensions de la découpe à pratiquer sur le plan du meuble et les distances minimums entre les
cloisons arrières, latérales et au
Tenir compte que :
Lorsque le plan de cuisson n'est pas couplé à un
séparation entre le fond du plan de cuisson et le meuble sous-jacent, ceci à une distance minimum
de 10 mm.
En cas de couplement plan de cuisson/four, intercaler une division à une distance minimum de 15
m
:
mes en matière de prévention des accidents (CEI - UNI
rface libre d'au moins 300 cm2 répartis comme illustré à la figure 8.
-dessus de l appareil sont indiquées aux figures 5 et 6.
four, il est obligatoire d'installer un panneau de
m tout en maintenant une aération comme spécifié à la fig. 8.
Toute intervention
-
four.
Dans tous les cas, le branchement électrique des deux appareils doit être réalisé séparément, aussi
bien pour des raisons électriques que pour en faciliter le retrait.
Il est conseillé d'utilis
er un four muni de refroidissement interne forcé.
6
Page 9

Fixation du plan de cuisson
La fixation au meuble du plan de cuisson doit être effectuée comme suit :
Positionner le joint de scellage fourni en dotation le long du périmètre externe de la découpe
pratiqu
ée dans le meuble, en suivant le schéma indiqué à la fig. 5, de sorte que les extrémités des
bandes soient parfaitement réunies sans se superposer.
Installer bien centralement le plan de cuisson dans la découpe pratiquée sur le meuble.
Fixer au meuble le p
Une bonne installation du joint de scellage offre une garantie absolue contre les infiltrations de liquide.
Pièce d'installation et évacuation des produits de combustion
L appar
eil doit être installé et mis en fonction dans des pièces adéquates et conformes aux
lois en vigueur.
installateur doit se référer aux lois en vigueur en ce qui concerne la ventilation et l'évacuation des produits
L
de combustion.
Nous rappelons à ce pro
puissance (gaz) installée.
Pièce d'installation
La pièce où est placé l appareil à gaz doit avoir une arrivée d'air naturelle, nécessaire à la combustion des
gaz (normes UNI-CIG 712
L'arrivée d'air doit provenir directement d'une ou de plusieurs ouvertures pratiquées sur une section libre
d'au moins 100 cm2 (A, fig.9) ; (au cas où l'appareil ne présenterait pas de soupape de sûreté, cette
ouverture devrait avoir une section
Cette ouverture doit être construite de manière à ne pas obstruer, ni de l'intérieur ni de l'extérieur, et placée
près du sol, préférablement du côté opposé à celui d'évacuation des produits de combustion.
S'il est impossibl
adjacente ayant une ventilation adéquate, pourvu qu'il ne s'agisse pas d'une chambre à coucher, d'une pièce
à risque de danger ou en dépression (UNI-CIG 7129).
e de pratiquer les ouvertures nécessaires, l air nécessaire peut provenir d'une pièce
lan de cuisson avec les brides fournies en dotation comme illustré fig. 7.
pos que l'air nécessaire à la combustion est de 2m3/h pour chaque kW de
9 et 7131)
minimum d'au moins 200 cm2).
Évacuati
on des produits de combustion
Les appareils de cuisson à gaz doivent évacuer les produits de combustion à travers des hottes reliées
directement à des conduits de fumée ou directement à l'extérieur (fig. 9).
S'il est impossible d'installer une hotte, il f
fenêtre de la pièce. Cet électroventilateur doit avoir un débit tel à garantir un renouvellement d'air dans la
cuisine d'au moins 3-5 fois son volume (UNI-CIG 7129).
Composants illustrés
A
: Ouverture pour l'entrée d'air
: Hotte pour l'évacuation des produits de combustion
C
E :
Électroventilateur pour l'évacuation des produits de combustion
Branchement à l'installation du gaz
Avant l installation, contrôler que les conditions
gaz) ainsi que les réglages du plan de cuisson soient compatibles. Pour ceci, vérifier les
caractéristiques reportées sur la plaque signalétique du produit apposée sur le plan de
cuisson et illustrée sur ce man
fig. 9
aut utiliser un électroventilateur appliqué à un mur externe ou à la
de distribution locale (nature et pression du
uel.
7
Page 10

ATTENTION:
Au cas où il serait nécessaire de remplacer le cable d'alimentation, assurez vous
de respecter les codes-couleur suivants dans le branchement de chacun des fils:
BLEU NEUTRE (N)
MARRON PHASE (L)
VERT-JAUNE TERRE
Page 11

ENTRETIEN
Pour bien conserver le plan de cuisson, il faut le nettoyer régulièrement après chaque utilisation, ceci après
l'avoir fait refroidir.
Attention:
Ne jamais retirer les manettes de leur logement.
Ne pas utiliser nettoyeurs à vapeur et à pression
Parties émaillées
Toutes les parties émaillées doivent être lavées en utilisant une éponge et de l'eau savonnée ou d'autres
produits spécifiques non abrasifs. Après le nettoyage, essuyer soigneusement.
Plan inox
Le plan en acier inox doit être nettoyé
commerce.
Après l'avoir rincé, essuyer si possible avec une peau de daim.
Grilles
Les grilles émaillées du plan de cuisson ont été conçues pour être lavées aussi au lave-vaisselle
Dans
la zone des brûleurs, la réduction en acier inox peut prendre une couleur bleuâtre à cause de la
température. On peut en atténuer l'effet en utilisant les éponges ordinaires pour l'acier, disponibles dans le
commerce.
Brûleurs
Les brûleurs, composés de d
nettoyage, il faut les essuyer soigneusement et bien les replacer dans leur logement.
Pour ce qui concerne l'allumage électrique, vérifier que l'électrode E (fig.12) soit touj
Nettoyer la sonde T (fig.12) de manière à permettre un fonctionnement régulier de la soupape de sûreté.
Aussi bien l électrode que la sonde doivent être nettoyées délicatement. Après le nettoyage, bien replacer
les brûleurs dans leur logement.
Pour éviter tout dommage à l'allumage électrique, éviter de l'utiliser en absence de brûleurs
MAINTENANCE
Les appareils n'ont besoin d'aucune maintenance particulière, nous recommandons toutefois de les faire contrôler
au moins une fois tous les deux ans. En cas de difficulté à tourner les manettes ou en cas d'odeur de gaz, fermer le
robinet général et appeler l'assistance technique.
Le robinet défectueux doit être remplacé avec sa garniture.
avec un chiffon humide et des produits spécifiques disponibles dans le
eux pièces, peuvent être retirées et lavés avec des produis appropriés. Après le
.
ours propre.
.
SERVICE D
Si vous ne pouvez pa
éteindre l
NUMERO DE SERIE DU PRODUIT: Où le trouver ?
Il est important que vous communiquiez au Service d Assistance le code de votre produit e
code de 16 caractères qui commence avec le numéro 3) ; celui-ci se trouve sur le certificat de garantie ou la plaque
signalétique située sur l appareil.
Ceci évitera des voyages inutiles des techniciens et permettra (ce qui est trè
de déplacement.
ASSISTANCE A LA CLIENTELE
appareil (ne pas le manipuler) et contacter le Service d
s identifier la cause d
une anomalie :
Assistance.
t le numéro de série (un
s important) d' économiser sur les frais
Page 12

10
Page 13

GB
INSTRUCTION BOOKLET
BUILT-IN COOKTOPS
11
Page 14

12
Page 15

IMPORTANT!
within easy reach during the entire life of the cooktop. Please carefully read this manual and all the
instructions contained herein before using the appliance. Keep any spare parts supplied with the
appliance. Installation must be carried out by a qualified technician and in compliance with current
regulations. This appliance is intended solely for domestic use and is designed for the following
functions:
Check that the appliance has not been damaged during transport.
K
eep all packaging materials (plastic bags, polystyrene foam, nylon, etc.) away from children, as
they are potentially dangerous.
Warning
Please use suitable prevention and protection equipment
The packaging material is recyclable, and marked with the recycling symbol
Dispose of the appliance responsibly.
T
his appliance is not intended for use by persons (including children) with reduced physical,
sensory or mental capabilities, or lack of experience and knowledge, unless they have been given
supervision or instruction concerning use of the appliance by a person responsible for their safet
Children should be supervised to ensure that they do not play with the appliance.
I
nstallation and gas/electrical connections must be carried out by a qualified technician in
accordance with the manufacturer's instructions and in full compliance with current laws and
regulations.
Electrical safety can only be guaranteed if the product is connected to a suitable earth connection.
I
t is dangerous to modify or attempt to modify the appliance. In the event of a malfunction, do not
attempt to repair th
After using the cooktop, ensure the indicator on the knob is turned to the "off" position and close the
mains gas delivery tap or the gas cylinder tap.
S
hould you decide not to use the appliance any longer, before scrapping it make it unusable in
accordance with current environmental health and safety laws, ensuring any parts which might
constitute a danger to children are rendered harmless.
T
he appliance data plate, with technical specifications, is positioned at a visible point under the
safety cover and is also enclosed with this manual. The data plate belowthe safety cover must
under no circumstances be removed.
Illustrations for the use of the appliance are grouped together at the end of this ma
This manual constitutes an integral part of the appliance. It must be kept intact and
cooking and reheating food
: in case of disassembly, maintenance and cleaning of the appliance, be careful
e appliance yourself, but contact a qualified technician.
. Any other use is considered as improper.
nual.
y.
safety
This appliance conforms to the following EC directives:
90/396/EEC
73/23/EEC
89/336/EEC
89/109/EEC
Regulation EC N°1935/2004
G
as safety requirements
L
ow voltage
E
lectromagnetic compatibility
M
aterials or objects destined to come into contact with foodstuffs
-
Replace from 2006/95/EC and modifications
-
Replaced from
Materials or objects destined to come into contact with foodstuffs
2004/108/EC and modifications
13
Page 16

COOKTOP CHARACTERISTICS
Warnings:
This appliance is intended to be built-in on furniture.
The installation class is type 3 for the gas part and type Y for the electric part.
The furniture must be resistant to temperatures up to at least 9
For correct installation, see the relative section and the reference drawings.
The use of a gas cooking appliance leads to the production of heat and humidity in the room in which
it is installed. Make sure the kitchen is well-ventilated: keep the n
install a mechanical ventilation device (hood). Intensive and extended use of the appliance may
require additional airing, such as opening a window, or more efficient ventilation, such as increasing
the speed of the hood.
This handbook is valid for several types of cooktop
verify that it corresponds to your model.
The indications provided in the next sections, along with the figure located at the end of the manual (Fig 1)
will help you become familiar with your appliance.
. The typeplate data shown on the back allows you to
0°C.
atural airing passages open or
COOKING POINTS
,
Mod: RTE 753 SF
1. Left Auxiliary burner (A)
2. Right Auxiliary burner (A)
3. Right back Semi-Rapid burner (SR)
4. Left back Semi-Rapid burner (SR)
5. Dual Triple-Crown burner (TC)
USING THE COOKTOP
(Fig. 1 A)
Mod: RTF 765 SF
1. Left Triple-Crown 3,8 burner (TC)
2.
Middle
3.
Middle
4. Right
rear
5. Right
front
(Fig.
1 B)
rear Rapid burner (R)
front Auxiliary (
Semi-Rapid burner (SR)
Semi-Rapid
A)
burner(SR
Gas burners
The inflow of gas to the burners isadjusted by the knobs in fig.4 that control the taps.
When the knob pointers coincide with the symbols shown below, the following settings are obtained:
Tap closed, no gas supply
Maximum flow, maximum gas supply
Minimum flow, minimum gas supply
Igniting the burners
This model is equipped with a safety valve which, if the burner goes out for any reason, automatically
interrupts the supply of
gas.
14
)
Page 17

To restore operation, move the knob to position
section.
and repeat the igniting operations described in the next
Using burners with safety valves
o
Turn the knob of the gas tap
5 seconds.
Release the knob and adjust the flame by turning the knob until reaching the desired intensity.
o Warning:
The ignition device cannot be operated for more than 15.
If after this
1 minute before repeating the operation.
period the burner still has not lit, or if it has gone out for accidental reasons, wait at least
to the maximum supply position, then press and hold down for about 4
Burner selection
The symbol printed above each knob on the control panel (drawing in fig.4) indicates the corresp
between knob and burner. The selection of the most suitable burner depends on the diameter and capacity
of the cookware (see table).
It is important that the pot diameter is suited to the power of the burner, in order to not compromise its high
efficiency.
ondence
Pot / Pan diameter
RTE 753 SF RTF 765 SF
Burner
Left Auxiliary
Right Auxiliary
Right Semirapid 100 mm 160 mm
Left Semirapid 100 mm 180 mm
Triple Crown 200 mm 260 mm
Adapt
ing to different types of gas
If it is necessary to adapt the cooktop to gas different than that for which it is designed, the injectors will have
to be replaced.
The spare injectors, if not provided with the cooktop, are available at the Service Centres.
The injectors to be replaced should be selected according to the injectors table.
The injectors are identified by their diameter, expressed in hundredths of mm and printed on the body of the
injectors themselves.
Replacement of the injectors
Remove the g
Use an open-end spanner to replace the injectors J (fig. 10) with the appropriate injectors for the gas
to be used.
Reassemble the burners.
Minimum
diameter
60 mm (with
reducer)
60 mm (with
reducer)
rates and the flame spreader from the cooktop.
No primary air regulation is necessary for the burners.
Adjustment
After replacing the injectors, light the burner and take off the knob. Move the tap to the minimum position,
insert a screwdriver in the rod and adjust as follows: screw in to decrease the flame, unscrew to increase the
flame. (fig. 10)
Fo
r G30/G31 gas, screw the adjustment screw in completely.
In any case, the result should be a small flame which is uniform and regular along the entire crown of the
burner.
Finally, check that the flame does not go out when the tap is turned quickly from m
position. For burners with safety valves, check that the flame slightly licks the thermocouple. Verify the
correct adjustment by leaving the burner on for a few minutes. If it goes out, increase the minimum.
of the minimum
Maximum
diameter
140 mm
140 mm
Burner Minimum diamet er
Auxiliary
Semirapid front
Semirapid rear
Rapid
Triple-crown
60 mm (with
reducer)
160 mm 200 mm
160 mm 200 mm
200 mm 240 mm
240 mm 260 mm
aximum to minimum
Maximum
diameter
140 mm
-
15
Page 18

Using the grates
The cookt
We recommend that you check, before each use, the exact positioning and stability of the grate on the
cooktop.
Furthermore, check that the rubber supports are always intact an
Grate for small cookware (Fig. 2) - Optional
This is placed only over the grate of the auxiliary burner (the smallest one) when using cookware with a small
diameter in order to prevent it from tipping over.
Special grate for WOKs (
This is placed only over the grate of the triple crown burner when using a WOK (pan with concave bottom).
To avoid causing serious anomalies in the burner operation, it is recommended that you
without this special grate and do not
Important!
These instructions are intended for a qualified installer.
The appliance must be installed correctly and in compliance with current regulations.
Any work on the appli
supply.
op grates have been designed to make the use of the product convenient and safe.
d arranged correctly.
Fig. 3)
do not use WOKs
use the special grate for flat
INSTALLATION INSTRUCTIONS
-
bottom cookware.
ance must be done with the appliance disconnected from the electrical power
INSTALLATION:
Installation is completely chargeable to the buyer. The Manufacturing Company is exempt from this service.
Any operations requested from the Manufacturing
covered by the guarantee.
If the cooktop is being installed on an oven base, all the necessary precautions must be taken to ensure
installation in compliance with safety regulations (CEI - UNI - CIG).
cable and gas supply pipe are positioned so as to not come in contact with the hot parts of the oven casing.
Furthermore, if an oven without a cooling fan is installed under the cooktop, it is necessary to make
in the built-in unit to ensure proper air circulation. These openings must guarantee a free surface of at least
300 cm2 distributed as shown in figure 8.
Company as a result of incorrect installation are not
Pay particular attention that the electrical
openings
Installation in the top (surface of the furniture)
The cooktop can be installed on all fur
at least 90°C).
The dimensions of the hole to make on the furniture surface and the minimum distances from the back and
side walls and above the appliance are indicated in figures 5 a
Consider that:
When the cooktop is installed without an oven beneath, it is mandatory to use a dividing panel
between the bottom of the cooktop and the furniture underneath, at a minimum distance of 10 mm.
If the cooktop is matched with an oven, pl
maintaining ventilation as specified in fig. 8.
niture, as long as it is heat resistant (withstanding temperatures up to
nd 6.
ace a partition at a minimum distance of 15 mm, while
In any case the electrical connection of the two appliances must be realized separately, both for
electrical reasons as well as to facilitate their extra
ction.
It is recommended that you use an oven with a forced cooling fan.
16
Page 19

Fixing the cooktop
The cooktop must be fixed to the furniture as follows:
Position the appropriate sealing gasket provided with the cooktop along the external perimeter of the
hole
made in the furniture according to the diagram in fig. 5, so that the ends of the strips are
perfectly joined to one another without overlapping.
Arrange the cooktop in the hole on the furniture, making sure that it is centered.
Fix the cooktop to the furn
in fig. 7.
Correct installation of the sealing gasket provides an absolute guarantee against the infiltration of liquids.
Installation room and discharge of combustion products
The appliance must be installed and operated in suitable rooms, and in any case in
compliance with current laws.
The installer must refer to current laws regarding ventilation and evacuation of the combustion products
In this regard, note that the air
installed.
Installation room
The room where the gas appliance is installed must have a natural inflow of air necessary for combustion of
the gas (standards UNI-CIG 7129 and 7131).
The inflow
(A, fig.9); (if the appliance does not have a safety valve, this opening must have a minimum section of at
least 200 cm2).
This opening must be built to ensure t
must be positioned near the floor, preferably on the side opposite the evacuation of combustion products.
When it is not possible to make the required openings, the necessary air may
ventilated as required, as long as this room is not a bedroom, a hazardous environment or under vacuum
(UNI-CIG 7129).
of air must come directly from one or more openings made on a free section of at least 100 cm2
iture with the appropriate brackets supplied with the cooktop as illustrated
.
necessary for combustion is 2m3/h for each kW of power (gas)
hat it does not become obstructed either internally or externally, and it
come from an adjacent room,
Discharge of combustion products
Gas cooking appliances must discharge the combustion products through ho
exhaust flues or directly outdoors (fig. 9).
If a hood cannot be installed, it is necessary to use an electric fan attached to an external wall or window in
the room. This electric fan must have a suitable capacity to guarantee a
3-
5 times its volume (UNI-CIG 7129).
ods connected directly to
n air renewal of the kitchen at least
Components illustrated in fig. 9
A
: Opening for air intake
C
: Hood for evacuation of combustion products
E:
Electric fan for evacuation of combustion products
Connection to the
Before installation, make sure the local distribution conditions (type and pressure of the gas)
and the cooktop adjustments are compatible. To do this, check the data on the product
typeplate attached to the cooktop and shown in this handbook.
The gas connection must be carried out in compliance with the standards UNI-CIG 7129 and 7131. The
cooktop must be connected to the gas system using metal pipes or continuous-wall stainless steel hoses, in
compliance with standard UNI-CIG 9891, with a ma
If metal hoses are being used, make sure that these do not touch any moving parts and are not crushed.
gas system
ximum length of 2 m.
Perform the connection without producing any type of stress on the appliance.
17
Page 20

ATTENTION:
should it be necessary to replace the supply cord,
connect the wire in accordance wi
th the following colours/codes:
BLUE
BROWN
YELLOW-
GREEN
NEUTRAL (N
LIVE (L)
EARTH
)
Page 21

CLEANING
To keep your cooktop in good condition, it should be cleaned regularly after each use once it has cooled.
Attention:
Never remove the knobs from their seats.
Nev
er use steam or high-pressure cleaners.
Enamelled parts
All enamelled parts must be washed only with a sponge and soapy water or using other non-abrasive
products made specifically for enamelled surfaces. After washing, dry thoroughly.
Stainless steel surface
The stainless steel surface should be cleaned with a damp cloth and specific products easily found on the
market.
After rinsing well, if possible, dry with a buckskin cloth.
Grates
The enamelled grates of the cooktop have been designed to be washed even in the dishwasher.
The stainless steel reducer may take on a bluish colouring in the burner area due to the temperature. This
effect may be attenuated using common stainless steel sponges available on the market.
Burners
The burners, composed of two pieces, can be removed and washed with suitable products. After cleaning,
they must be thoroughly dried and replaced precisely on their seats.
With regard to the electric ignition, check that the electrode E (fig.12) is always clean.
Clean the probe T (fig.12) so as to allow regular operation of the safety valve. Both the electrode and the
probe must be cleaned with caution. When finished, replace the burners precisely in their housing.
To prevent damage to the electric ignition, avoid using it when the burners are not in their seats.
MAINTENANCE
The appliances do not require particular maintenance, nevertheless it is recommended to
have them checked at least once every two years. If the knobs become difficult to turn or the
odour of gas is present, close the gen
The defective tap should be replaced together with the gasket.
eral tap and contact technical service.
CUSTOMER ASSISTENCE
If you cannot identify the cause of the operating anomaly, switch off the appliance (do not
subject it to rought treatment) a
PRODUCT SERIAL NUMBER
PRODUCT SERIAL NUMBER.
It is important you to inform the Assistance Service of your product code and its serial
number (a 16 character code which begins with the number 3); this can be found on the
guarantee certificate or on the data plate located on the appliance.
It will help to avoid wasted journerys to technicians, thereby (and most significantly) saving
the corresponding callout charges.
SERVICE
nd contact the Assistance Service.
Where can i find it?
. Wh
ere can I find it
?
19
Page 22

20
Page 23

Cat:
Pays:
Tipo digas/ Gas type / Gassoort / Gasart / Type de gaz / / Tipo de
Pressione gas / Gas pressure / Pression gaz / Gasdruck / Presion gas /
Bruciatori-burners-bruleurs
brenner-quemodores
branders-
A
SR
R
TC 3,3
TC 3,8
TC 4,2
1 M
TC 4,2
2 M
P/F
Tipo digas/ Gas type / Gassoort / Gasart / Type de gaz / / Tipo de
Pressione gas / Gas pressure / Pression gaz / Gasdruck / Presion gas /
Bruciatori-burners-bruleurs
brenner-quemodores
branders-
A
SR
R
TC 3,3
TC 3,8
TC 4,2
1 M
TC 4,2
2 M
P/F
gás / Gaz type
/ Press
Portata - power inputs - débit gas
capacidad - vazão - debiet- vermogen
Max (kW)
gás / Gaz type
/ Press
Portata - power inputs - débit gas
capacidad - vazão - debiet- vermogen
Max (kW)
II 2H 3+
IT GB PT
ão gáS
Min (kW)
1,00 0,72
1,75
3,00
3,30
3,80
4,20
4,20
2,90
ão gáS
1,00
1,75
3,00
3,30
3,80
4,20
4,20
0,30
0,44
0,75
1,50
1,50
In
In
0,30 1,80
In
In
in+Out
1,800,30
in+Out
1,50
Min (kW)
0,37
0,90
1,70
1,70
in+Out
1,800,37 0,660,46
in+Out
1,800,37
1,702,90
II 2E+ 3+
FR BE
G20
20 mbar
Ø Iniettori
injecteur - inyector
injectors - sproeier
0,97
1,15
1,24
1,35
In
0,72 1,00
In
0,72
1,20
G30 G31
28-30/37 mbar
Ø Iniettori
injecteur - inyector
injectors - sproeier
0,50
0,650,50
0,85
0,91
0,98
In
In
0,85
Out
Out
0,95
Out
Out
0,660,46
21
Page 24

Fig.
Fig.
1 A
2
Fig.
Fig.
1 B
3
22
Fig.
4
Page 25

Fig.
5
Mod.
RTE 753
Mod.
RTF 765
ABC
740 500 700
A
740 500 560
BC
D
480
DE
480 40
Fig.
E
7
23
Page 26

Fig.
6
8
Fig.
Fig.
7
24
Fig.
9
Fig.
10
Page 27

Fig.
11
12
IT
Schema elettrico
FR
Schéma électrique
GB
Electrical wiring diagram
Fig.
Fig.
13
A:
Raccordo
B:
Guarnizione
C:
Tubo rigido o tubo flessibile
A:
Raccord
B:
Garniture
C:
Tuyau rigide ou tuyau flexible
A:
Union
B:
Gasket
C:
Pipe or hose
IT
FR
GB
25
Page 28

26
Page 29

In Übereinstimmung mit den Anforderungen der Europäischen
D
Richtlinie 2002/96/EG über Elektro- und Elektronik-Altgeräte
(WEEE) ist vorliegendes Gerät mit einer Markierung versehen.
Sie leisten einen positiven Beitrag für den Schutz der Umwelt und die
Gesundheit des Menschen, w enn Sie dieses Gerät einer gesonderten
Abfallsammlung zuführen. Im unsortierten Siedlungsmüll könnte ein
solches Gerät durch unsachgemäße Entsorgung negative
Konsequenzen nach sich ziehen.
Auf dem Produkt oder der beiliegenden Produktdokumentation ist
folgendes Symbol einer durchgestrichenen Abfalltonne
abgebildet. Es weist darauf hin, dass eine Entsorgung im normalen
Haushaltsabfall nicht zulässig ist Entsorgen Sie dieses Produkt im
Recyclinghof mit einer getrennten Sammlung für Elektro- und
Elektronikgeräte.
Die Entsorgung muss gemäß den örtlichen Bestimmungen zur
Abfallbeseitigung erfolgen.
Bitte wenden Sie sich an die zuständigen Behörden Ihrer
Gemeindeverwaltung, an den lokalen R ecyclinghof für Haushaltsmüll
oder an den Händler, bei dem Sie dieses Gerät erworben haben, um
weitere Informationen über Behandlung, Verwertung und
Wiederverwendung dieses Produkts zu erhalten.
This appliance is marked according to the European directive
GB
2002/96/EC on Waste Electrical and Electronic Equipment (WEEE).
By ensuring this product is disposed of correctly, you will help prevent
potential negative consequences for the environment and human
health, which could otherwise be caused by inappropriate waste
handling of this product.
The symbol on the product, or on the documents
accompanying the product, indicates that this appliance may not be
treated as household waste. Instead it shall be handed over to the
applicable collection point for the recycling of electrical and electronic
equipment.
Disposal must be carried out in accordance with local environmental
regulations for waste disposal.
For more detailed information about treatment, recovery and
recycling of this product, please contact your local city office, your
household waste disposal service or the shop where you purchased
the product.
Cet appareil porte le symbole du recyclage conformément à la
F
Directive Européenne 2002/96/CE concernant les Déchets
d'Équipements Électriques et Électroniques (DEEE ou WEEE).
En procédan t correctement à la mise au rebut de cet appareil, vous
contribuerez à empêcher toute conséquence nuisible pour
l'environnement et la santé de l'homme.
Le symbole présent sur l'appareil ou sur la documentation qui
l'accompagne indique que ce produit ne peut en aucun cas être traité
comme déchet mén ager. Il doit par conséquent être remis à un centre
de collecte des déchets chargé du recyclage des équipements
électriques et électroniques.
Pour la mise au rebut, respectez les normes relatives à l'élimination
des déchets en vigueur dans le pays d'installation.
Pour obtenir de plus amples détails au sujet du traitement, de la
récupération et du recyclage de cet appareil, veuillez vous adresser au
bureau compétent de votre commune, à la société de collecte des
déchets ou directement à votre revendeur.
Dit apparaat is voorzien van het merkteken volgens de Europese
NL
richtlijn 2002/96/EG inzake Afgedankte elektrische en elektronische
apparaten (AEEA).
Door ervoor te zorgen dat dit product op de juiste manier als afval
wordt verwerkt, helpt u mogelijk negatieve consequenties voor het
milieu en de menselijke gezondheid te voorkomen die anders zoude n
kunnen worden veroorzaakt door onjuiste verwerking van dit
product als afval.
Het symbool op het product of op de bijbehorende
documentatie geeft aan dat dit pr oduct niet als huishoudelijk afval mag
worden behandeld. In plaats daarvan moet het worden afgegeven bij
een verzamelpunt voor recycling van elektrische en elektronische
apparaten.
Afdanking moet worden uitgevoerd in overeenstemming met de
plaatselijke milieuvoorschriften voor afvalverwerking.
Voor nadere informatie over de behandeling, terugwinning en
recycling van dit product wordt u verzocht contact op te nemen met
het stadskantoor in uw w oonplaats, uw afvalophaaldienst of de wink el
waar u het product heeft aangeschaft.
Este aparato lleva el marcado CE en conformidad con la Directiva
E
2002/96/EC del Parlamento Europeo y del Consejo sobre residuos de
aparatos eléctricos y electrónicos (RAEE).
La correcta eliminación de este producto evita consecuencias
negativas para el medioambiente y la salud.
El símbolo en el producto o en los documentos que se incluyen
con el producto, indica que no se puede tratar como residuo
doméstico. Es necesario entregarlo en un punto de recogida para
reciclar aparatos eléctricos y electrónicos.
Deséchelo con arreglo a las normas medioambientales para
eliminación de residuos.
Para obtener información más detallada sobre el tratamiento,
recuperación y reciclaje de este producto, póngase en contacto con
el ayuntamiento, con el servicio de eliminación de re siduos urbanos o
la tienda donde adquirió el producto.
Este aparelho está classificado de acordo com a Directiva Europeia
P
2002/96/EC sobre Resíduos de equipamento eléctrico e electrónico
(REEE).
Ao garantir a eliminação adequada deste produto, estará a ajudar a
evitar potenciais consequências negativas para o ambiente e para a
saúde pública, que poderiam derivar de um manuseamento de
desperdícios inadequado deste produto.
O símbolo no produto, ou nos documentos que acompanham
o produto, indica que este aparelho não pode receber um tratamento
semelhante ao de um desperdício doméstico.
Pelo contrário, deverá ser depositado no respectivo centro de
recolha para a reciclagem de equipamento eléctrico e electrónico.
A eliminação deverá ser efectuada em conformidade com as normas
ambientais locais para a eliminação de desperdícios.
Para obter informações mais detalhadas sobre o tratamento, a
recuperação e a reciclagem deste produto, contacte o Departamento
na sua localidade, o seu serviço de eliminação de desperdícios
domésticos ou a loja onde adquiriu o produto.
Questo apparecchio è contrassegnato in conformità alla Direttiva Europea
I
2002/96/EC, Waste Electrical and Electronic Equipment (WEEE).
Assicurandosi che questo prodotto sia smaltito in modo corretto,
l'utente contribuisce a prevenire le potenziali conseguenze negative
per l'ambiente e la salute.
Il simbolo sul prodotto o sulla documentazione di
accompagnamento indica che questo prodotto non deve essere
trattato come rifiuto domestico ma deve essere consegnato presso
l'idoneo punto di raccolta per il riciclaggio di apparecchiature
elettriche ed elettroniche.
Disfarsene seguendo le normative locali per lo smaltime nto dei rifiuti.
Per ulteriori informazioni sul trattamento, recupero e riciclaggio di
questo prodotto, contattare l'idoneo ufficio locale, il servizio di
raccolta dei rifiuti domestici o il negozio presso il quale il prodotto è
stato acquistato.
ǹȣIJȒ Ș ıȣıțİȣȒ ijȑȡİȚ ıȒμĮȞıȘ ıȪμijȦȞĮ μİ IJȘȞ ǼȣȡȦʌĮȧțȒ
GR
ȠįȘȖȓĮ 2002/96/ǼǼ ıȤİIJȚțȐ μİ ǹʌȠȡȡȚʌIJȩμİȞĮ ȘȜİțIJȡȚțȐ țĮȚ
ȘȜİțIJȡȠȞȚțȐ İȟĮȡIJȒμĮIJĮ (WEEE).
ǼȟĮıijĮȜȓȗȠȞIJĮȢ ȩIJȚ IJȠ ʌȡȠȧȩȞ ĮȣIJȩ ĮʌȠȡȡȓʌIJİIJĮȚ ıȦıIJȐ, șĮ ȕȠȘșȒıİIJİ
ıIJȘȞ ʌȡȩȜȘȥȘ ʌȚșĮȞȐ ĮȡȞȘIJȚțȫȞ İʌȚʌIJȫıİȦȞ ȖȚĮ IJȠ ʌİȡȚȕȐȜȜȠȞ țĮȚ
IJȘȞ ĮȞșȡȫʌȚȞȘ ȣȖİȓĮ, ȠȚ ȠʌȠȓİȢ șĮ μʌȠȡȠȪıĮȞ ȞĮ įȘμȚȠȣȡȖȘșȠȪȞ Įʌȩ
IJȠȞ ĮțĮIJȐȜȜȘȜȠ ȤİȚȡȚıμȩ ĮȣIJȠȪ IJȠȣ ʌȡȠȧȩȞIJȠȢ ȦȢ ĮʌȩȡȡȚμμĮ.
ȉȠ ıȪμȕȠȜȠ ʌȐȞȦ ıIJȠ ʌȡȠȧȩȞ, Ȓ ıIJĮ ȑȖȖȡĮijĮ ʌȠȣ ıȣȞȠįİȪȠȣȞ
IJȠ ʌȡȠȧȩȞ, ȣʌȠįİȚțȞȪİȚ ȩIJȚ ĮȣIJȒ Ș ıȣıțİȣȒ įİȞ μʌȠȡİȓ ȞĮ șİȦȡȘșİȓ
ȠȚțȚĮțȩ ĮʌȩȡȡȚμμĮ. ǹȞIJȓ ȖȚ ĮȣIJȩ șĮ ʌȡȑʌİȚ ȞĮ ʌĮȡĮįȠșİȓ ıIJȠ țĮIJȐȜȜȘȜȠ
ıȘμİȓȠ ʌİȡȚıȣȜȜȠȖȒȢ ȖȚĮ IJȘȞ ĮȞĮțȪțȜȦıȘ IJȦȞ ȘȜİțIJȡȚțȫȞ țĮȚ
ȘȜİțIJȡȠȞȚțȫȞ İȟĮȡIJȘμȐIJȦȞ.
ǻȚĮȜȪıIJİ IJȠ IJȘȡȫȞIJĮȢ IJȘȞ IJȠʌȚțȒ ȞȠμȠșİıȓĮ ȖȚĮ IJȘ įȚȐșİıȘ IJȦȞ
ĮʌȠȡȡȚμμȐIJȦȞ.
ȜİʌIJȠμİȡİȓȢ ʌȜȘȡȠijȠȡȓİȢ ıȤİIJȚțȐ μİ IJȘȞ İʌİȟİȡȖĮıȓĮ, IJȘȞ
īȚĮ ʌȚȠ
ʌİȡȚıȣȜȜȠȖȒ țĮȚ IJȘȞ ĮȞĮțȪțȜȦıȘ ĮȣIJȠȪ IJȠȣ ʌȡȠȧȩȞIJȠȢ, ʌĮȡĮțĮȜȠȪμİ
İʌȚțȠȚȞȦȞȒıIJİ μİ IJȠ ĮȡμȩįȚȠ ȖȡĮijİȓȠ IJȘȢ IJȠʌȚțȒȢ ıĮȢ ĮȣIJȠįȚȠȓțȘıȘȢ,
IJȘȞ IJȠʌȚțȒ ıĮȢ ȣʌȘȡİıȓĮ ĮʌȠțȠμȚįȒȢ ȠȚțȚĮțȫȞ ĮʌȠȡȡȚμμȐIJȦȞ Ȓ IJȠ
țĮIJȐıIJȘμĮ ȩʌȠȣ ĮȖȠȡȐıĮIJİ ĮȣIJȩ IJȠ ʌȡȠȧȩȞ.
Denna produkt är märkt enligt EG-direktiv 2002/96/EEC beträffande
S
elektriskt och elektroniskt avfall (Waste Electrical and Electronic
Equipment, WEEE).
Genom att säkerställa en korrekt kassering av denna produkt bidrar
du till att förhindra potentiella, negativa konsekvenser för vår miljö
och vår hälsa, som annars kan bli följden om produkten inte hanteras
på rätt sätt.
Symbolen på produkten, eller i medföljande dokumentation,
indikerar att denna produkt inte får behandlas som vanligt hushållsavfall.
Den skall i stället lämnas in på en lämplig uppsamlingsplats för återvinning
av elektrisk och elektronisk utrus tning.
Produkten måste kasseras enligt lokala miljöbestämmelser för
avfallshantering.
För mer information om hantering, återvinning och återanvändning av
denna produkt, var god kontakta de lokala myndigheterna, ortens
sophanteringstjänst eller butiken där produkten inhandlades.
5019 106 00637
27
Page 30

Dette apparatet er merket i samsvar med EU-direktiv 2002/96/EC
N
om avhending av elektrisk og elektronisk utstyr (Waste Electrical and
Electronic Equipment - WEEE).
Forsikre deg om at dette produktet blir avhendet på korrekt vis, slik
at det ikke kan utgjøre noen helse- eller miljørisiko.
Symbolet på produktet eller på dokumentene som følger med
det, viser at dette produktet ikke må behandles som
husholdningsavfall. Lever det til et autorisert mottak for resirkulering
av elektrisk og elektronisk utstyr.
Avhending må skje iht. de lokale renovasjonsforskriftene.
For nærmere informasjon om håndtering, kassering og resirkulering
av dette produktet, kontakt kommunen, renovasjonsvesenet eller
forretningen der du anskaffet det.
Dette produkt er mærket i henhold til EU-direktiv 2002/96/EF om
DK
Kasseret elektrisk og elektronisk udstyr (WEEE).
Ved at sikre, at dette produkt bliver skrottet korrekt, hjælper man
med til at forhindre potentielle, negative konsekvenser for miljøet og
folkesundheden, der kunne opstå gennem uhensigtsmæssig
bortskaffelse af dette produkt.
Symbolet på produktet eller på dokumenterne, der ledsager
produktet, angiver, at produktet ikke må bortskaffes sammen med
husholdningsaff aldet. Det skal i stedet afleveres på en gen brugsstation
for elektrisk og elektronisk udstyr.
Det skal skrottes i henhold til gældende lokale miljøregler for
bortskaffelse af affald.
For yderligere oplysninger om håndtering, genvinding og genbrug af
dette produkt bedes man kontakte de lokale myndigheder,
renovationsselskabet eller forretningen, hvor produktet er købt.
Tämä laite on merkitty WEEE-direktiivin (Waste Electrical and
FIN
Electronic Equipment) 2002/96/EC mukaisesti.
Varmistamalla, että tuote poistetaan käytöstä asianmukaisesti, voidaan
auttaa estämään sellaiset ympäristö- ja terveyshaitat, jotka saattaisivat
aiheutua jätteiden asiattomasta käsittelystä.
Symboli tuotteessa tai sen dokumentaatiossa tarkoittaa, ettei
laitetta saa hävittää kotitalousjätteiden mukana. Sen sijaan tuote on
toimitettava sähkö- ja elektroniikkakomponenttien keräys- ja
kierrätyspisteeseen.
Laitteen käytöstäpoiston suhteen on noudatettava paikallisia
jätehuoltomääräyksiä
Lisätietoja tuotteen käsittelystä, talteenotosta ja kierrätyksestä saa
kaupungin- tai kunnanvirastosta, paikallisesta jätehuoltoliikkeestä tai
liikkeestä, josta tuote ostettiin.
Niniejsze urządzenie posiada oznaczenia zgodnie z Dyrektywą
PL
Europejską 2002/96/EC w sprawie zużytego sprzętu elektrycznego i
elektronicznego (WEEE).
Zapewniając prawidłowe złomowanie niniejszego urządzenia
przyczynią się Państwo do ograniczenia ryzyka wystąpienia
negatywnego wpływu produktu na środowisko i zdrowie ludzi, które
mogłoby zaistnieć w przypadku niewłaściwej utylizacji urządzenia.
Symbol umieszczony na produkcie lub na dołączonych do niego
dokumentach oznacza, że niniejszy produkt nie jest klasyfikowany jako
odpad z gospodarstwa domowego.
Urządzenie, w celu jego złomowania, należy zdać w odpowiednim
punkcie utylizacji odpadów w celu recyklingu komponentów
elektrycznych i elektronicznych.
Urządzenie należy złomować zgodnie z lokalnymi przepisami dot.
utylizacji odpadów.
Dodatkowe informacje na temat utylizacji, złomowania i recyklingu
opisywanego urządzenia można uzyskać w lo kalnym urzędzie miasta,
w miejskim przedsiębiorstwie utylizacji odpadów lub w sklepie, w którym
produkt został zakupiony.
Tento spotřebič je označený v souladu s evropskou směrnicí 2002/96/
CZ
ES o likvidaci elektrického a elektronického zařízení (WEEE).
Zajištěním správné likvidace tohoto výrobku pomůžete zabránit případným
negativním důsledkům na životní prostředí a lidské zdraví, ke kterým by
nevhodnou likvidací tohoto výrobku mohl o dojít.
Symbol na výrobku nebo na dokumentech přiložených k výrobku
udává, že tento spotřebič nepatří do domácího odpadu. Spotřebič je
nutné odvézt do sběrného místa pro recyklaci elektrického a
elektronického zařízení.
Likvidace musí být provedena v souladu s místními předpisy o ochraně
životního prostředí, které se týkají likvidace odpadu.
Podrobnější informace o zpracování, rekuperaci a recyklaci tohoto
výrobku zjistíte u příslušného místního úřadu, služby pro likvidaci
domovního odpadu nebo v obchodě, kde jste výrobek zakoupili.
28
5019 106 00637
Tento spotrebič je označený v súlade s Európskou smernicou
SK
2002/96/ES o likvidácii elektrických a elektronických zariadení (WEEE).
Zabezpečením, že tento výrobok bude zlikvidovaný správnym spôsobom,
pomôžete predchádzat' potenciálnym negatívnym dopadom na životné
prostredie a ľudské zdravie, ktoré by sa v inom prípade mohli vyskytnút' pri
nevhodnom zaobchádzaní pri likvidácii tohto výrobku.
Symbol na výrobku alebo na sprievodných dokumentoch
znamená, že s týmto výrobkom sa nesmie zaobchádzat' ako s
domovým odpadom. Naopak, treba ho odovzdat' v zbernom stredisku
na recykláciu elektrických alebo elektronických zariadení.
Likvidácia musí byt' vykonaná v súlade s predpismi na ochranu
životného prostredia pre likvidáciu odpadov.
Podrobnejšie informácie o zaobchádzaní, regenerácii a recyklácii tohto
výrobku si vyžiadajte na Vašom miestnom úrade, v zberných surovinách
alebo v obchode, kde ste výrobok kúpili.
A készüléken található jelzés megfelel az elektromos és elektronikus
H
berendezések hulladékairól szóló 2002/96/EK európai irányelvben
(WEEE) foglalt előírásoknak.
A hulladékká vált termék szabályszerű elhelyezésével Ön segít elkerülni
a környezettel és az emberi egészséggel kapcsolatos azon esetleges
negatív következményeket, amelyeket a termék nem megfelelő
hulladékkezelése egyébként okozhatna.
A terméken vagy a termékhez mellékelt dokumentumokon feltüntetett
jelzés arra utal, hogy ez a termék nem kezelhető háztartási
hulladékként. Ehelyett a terméket a villamos és elektronikus
berendezések újrahasznosítását végző telephelyek valamelyikén kell
leadni.
Kiselejtezéskor a hulladékeltávolításra vonatkozó helyi
környezetvédelmi előírások szerint kell eljárni.
A termék kezelésével, hasznosításával és újrahasznosításával
kapcsolatos bővebb tájékoztatásért forduljon a lakóhelye szerinti
polgármesteri hivatalhoz, a háztartási hulladékok kezelését végző
társasághoz vagy ahhoz a bolthoz, ahol a terméket vásárolta.
Данное изделие промаркировано в соответствии с Европейской
RUS
директивой 2002/96/EC по утилизации электрического и
электронного оборудования (WEEE).
Обеспечив правильную утилизацию данного изделия, Вы
поможете предотвратить потенциальные негативные
последствия для окружающей среды и здоровья человек а,
которые могли бы иметь место в противном случае.
Символ на самом изделии или сопроводительной
документации указывает, что при утилизации данного изделия
с ним нельзя обращаться как с обычными бытовыми отходами
Вместо этого, его следует сдавать в соответствующий пункт
приемки электрического и электронного оборудования для
последующей утилизации.
Сдача на слом должна производиться в соответствии с
местными правилами по утилизации отходов.
За более подробной информацией о правилах обращения с
такими изделиями, их утилизации и переработки обращайтесь
в местные органы власти, в службу по утилизации отходов или
в магазин, в котором Вы приобрели данное изделие.
Този уред е маркиран в съответствие с Европейска дире ктива
BG
2002/96/ЕО "Електрическо и електронно оборудване за
отпадъци" (WEEE).
Като се погрижите това изделие да бъде изхвърлено по
правилен начин, вие ще помогнете за предотвратяване на
възможните негативни последствия за околната среда и
здравето на хората, което в противен случай може да бъде
предизвикано от неправилно изхвърляне на това изделие.
Символът върху изделието или върху документите,
приложени към изделието, показва, че това изделие не бива да
се третира като битови отпадъци. Вместо това, то трябва да се
предава в специализиран пункт за рециклиране на
електрическо и електронно оборудване.
При изхвърлянето му спазвайте местните норми за изхвър ляне
на отпадъци.
За по3подробна информация за третирането, възстановяването и
рециклирането на това изделие се обърнете към вашата местна
градска управа, към вашата служба за изхвърляне на битови
отпадъци или към магазина, откъдето сте закупили изделието.
Acest aparat este marcat în conformitate cu Dire ctiva Europeană 2002/96/
RO
CE referitoare la Deșeurile de Echipam ent Electric și Electronic (WEEE).
Asigurându-vă că acest produs este eliminat în mod corect, contribuiţi la
prevenirea potenţialelor consecinţe negative asupra mediului înconjurător
și sănătăţii persoanelor, con secinţe care ar putea fi provocate de aru ncarea
necorespunzătoare la gunoi a acestui produs.
Simbolul de pe produs, sau de pe documentele care însoţesc
produsul, indică faptul că acesta nu poate fi aruncat împreună cu deșeurile
menajere. Trebuie predat la punctul de colectare corespunzător, pentru
reciclarea echipamentului electric și electronic.
Aruncarea la gunoi a aparatului trebuie făcută în conformitate cu
normele locale pentru eliminarea deșeurilor.
Pentru informaţii mai detaliate privind eliminarea, valorificarea și
reciclarea acestui produs, vă rugăm să contactaţi administraţia locală,
serviciul de eliminare a deșeurilor menajere sau magazinul de unde aţi
cumpărat produsul.
Page 31

Page 32

H01A4242
 Loading...