

Page 1

Wired Internet Camera RXS-3211
Quick Installation Guide
Page 2
Wired Internet Camera RXS-3211 Quick Installation Guide
Knowing your IP Camera
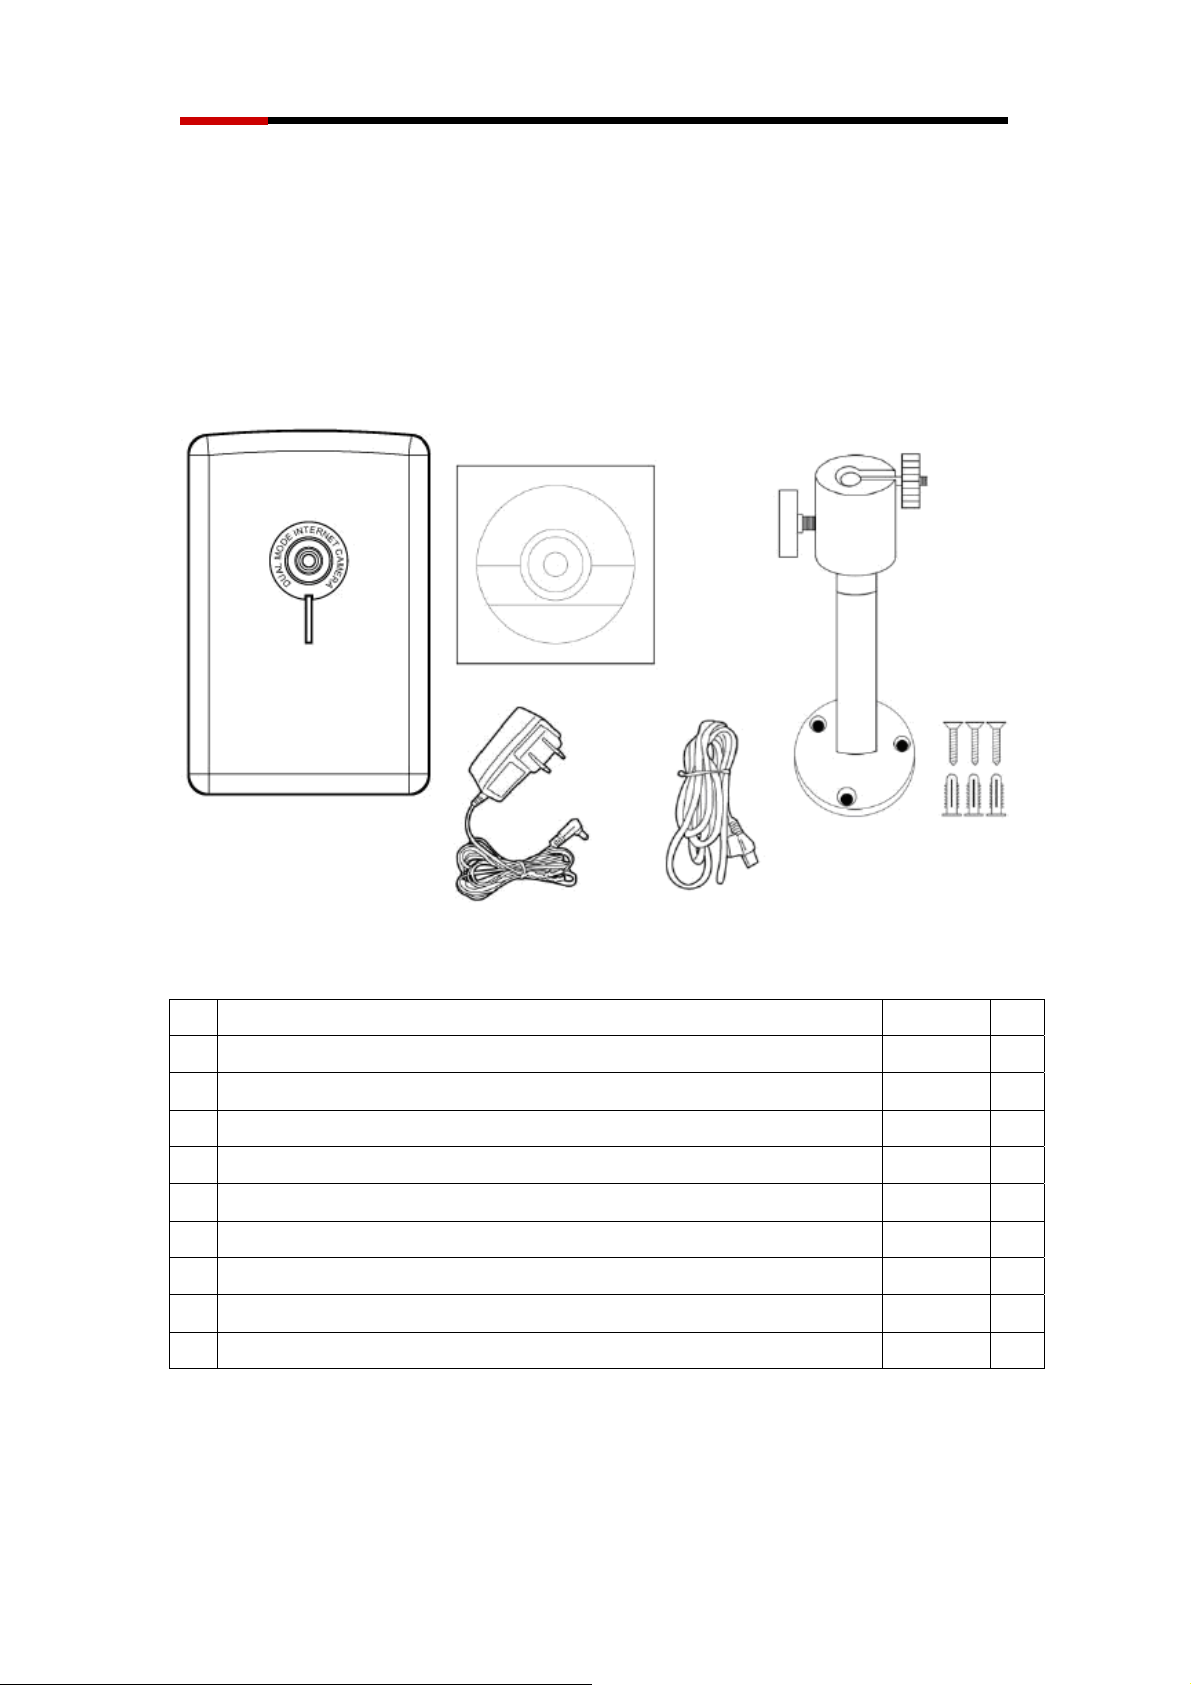
Check your package
Figure 1.1-1
Item Name Quantity
1 Rosewill RXS-3211 Wired Internet Camera 1
2 5V/1A Power Adapter 1
3 Camera Stand accessory kit
Wall Mount Stand 1
Wall Anchors 3
Screws 3
4 39.3in (100cm) Category 5 Ethernet Cable 1
5 Quick Installation Guide 1
6 CD (Including User Manual/Utility/Driver) 1
If any of the above items are missing, please contact Rosewill Support.
□
□
□
□
□
□
□
□
1
Page 3
Wired Internet Camera RXS-3211 Quick Installation Guide
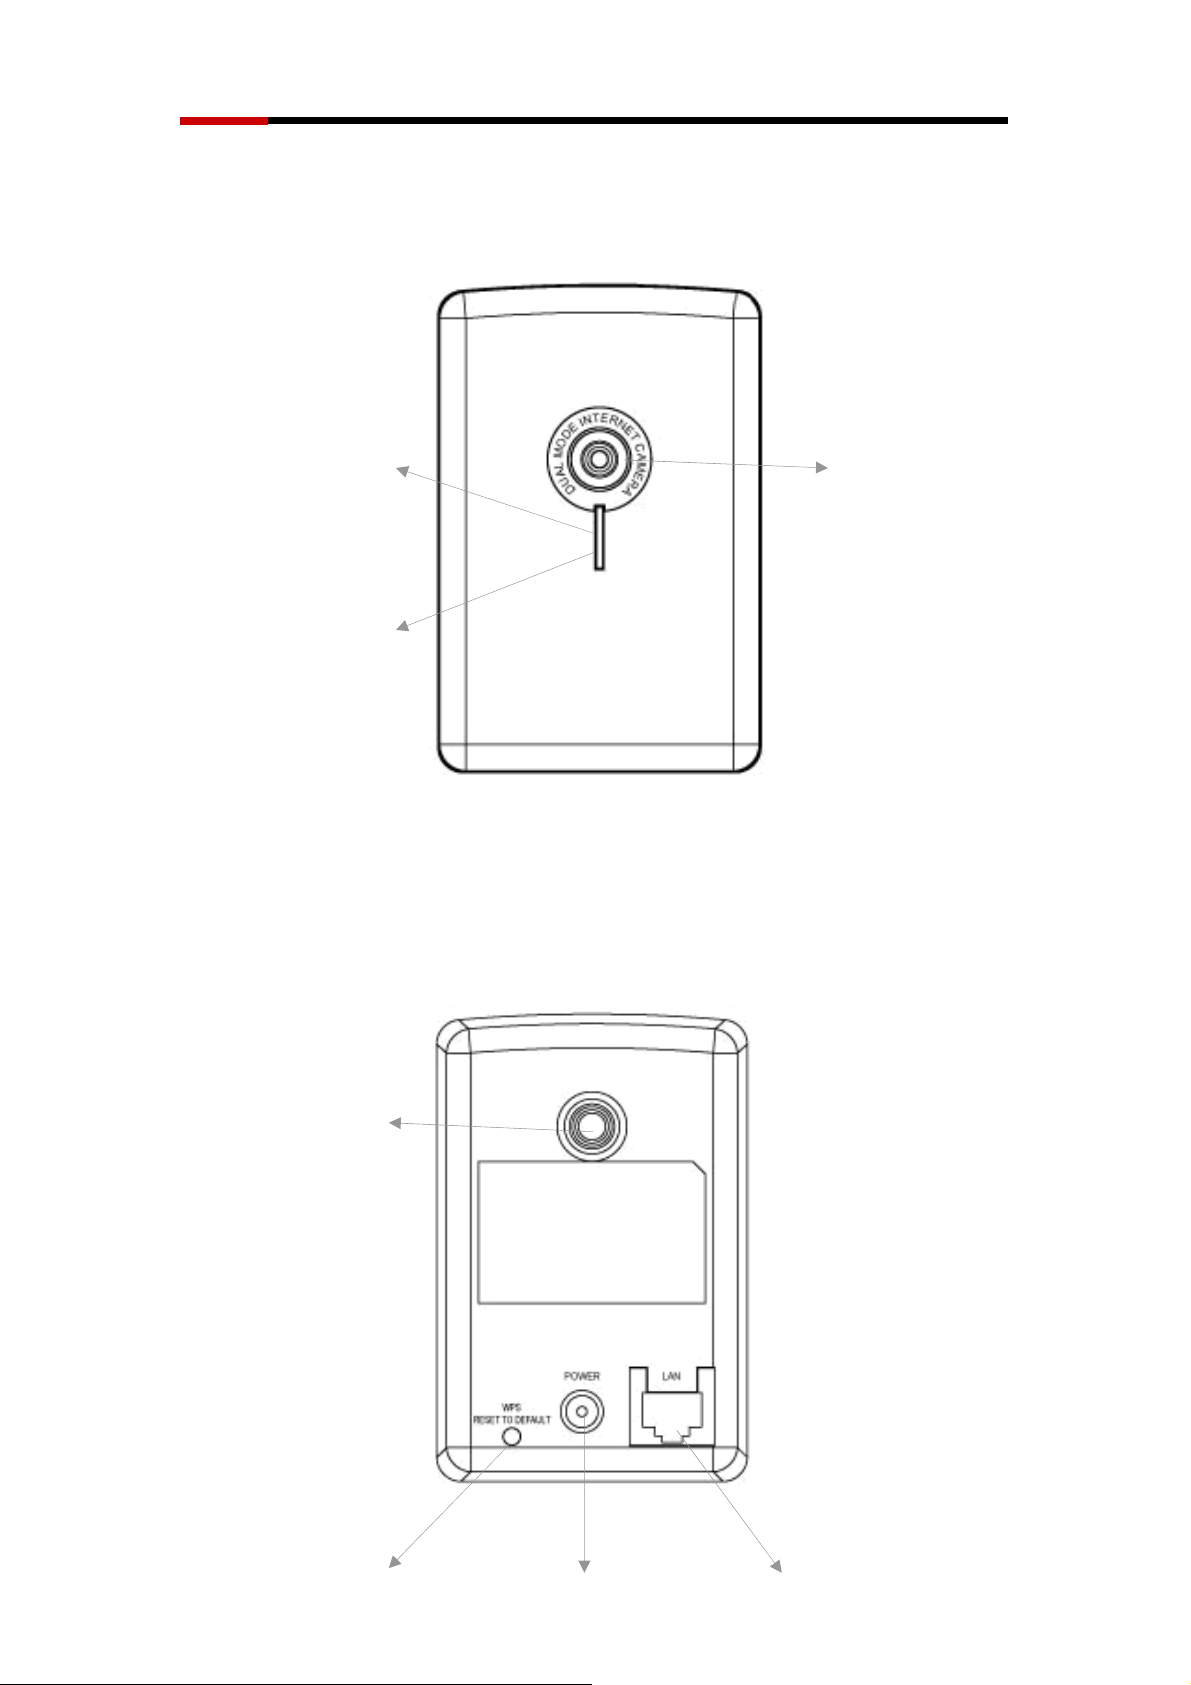
Camera Front and Rear View
Power LED
status
LAN LED
Figure 1.4-1 Front View
Power LED: Indicates power and WPS status
LAN LED: Indicates LAN activity
Camera: Video camera with lens
LED activity for LAN / Power LED will be given later.
Camera
Lens
Stand Connector
WPS
Reset to Default
Figure 1.4-2 Rear View
2
Power Jack
ith 5V DC
W
LAN port
Page 4
Wired Internet Camera RXS-3211 Quick Installation Guide
Stand Connector: Connects to any standard tripod / camera wall holder.
WPS / Reset Button: Press and release this button to activate WPS mode
(WPS mode is not available in Wired Camera); press and hold this button for
10 seconds to clear all settings of this camera and return to factory default.
Power Jack: Connect to 5V power adapter.
LAN Jack: Connect to LAN by Ethernet cable.
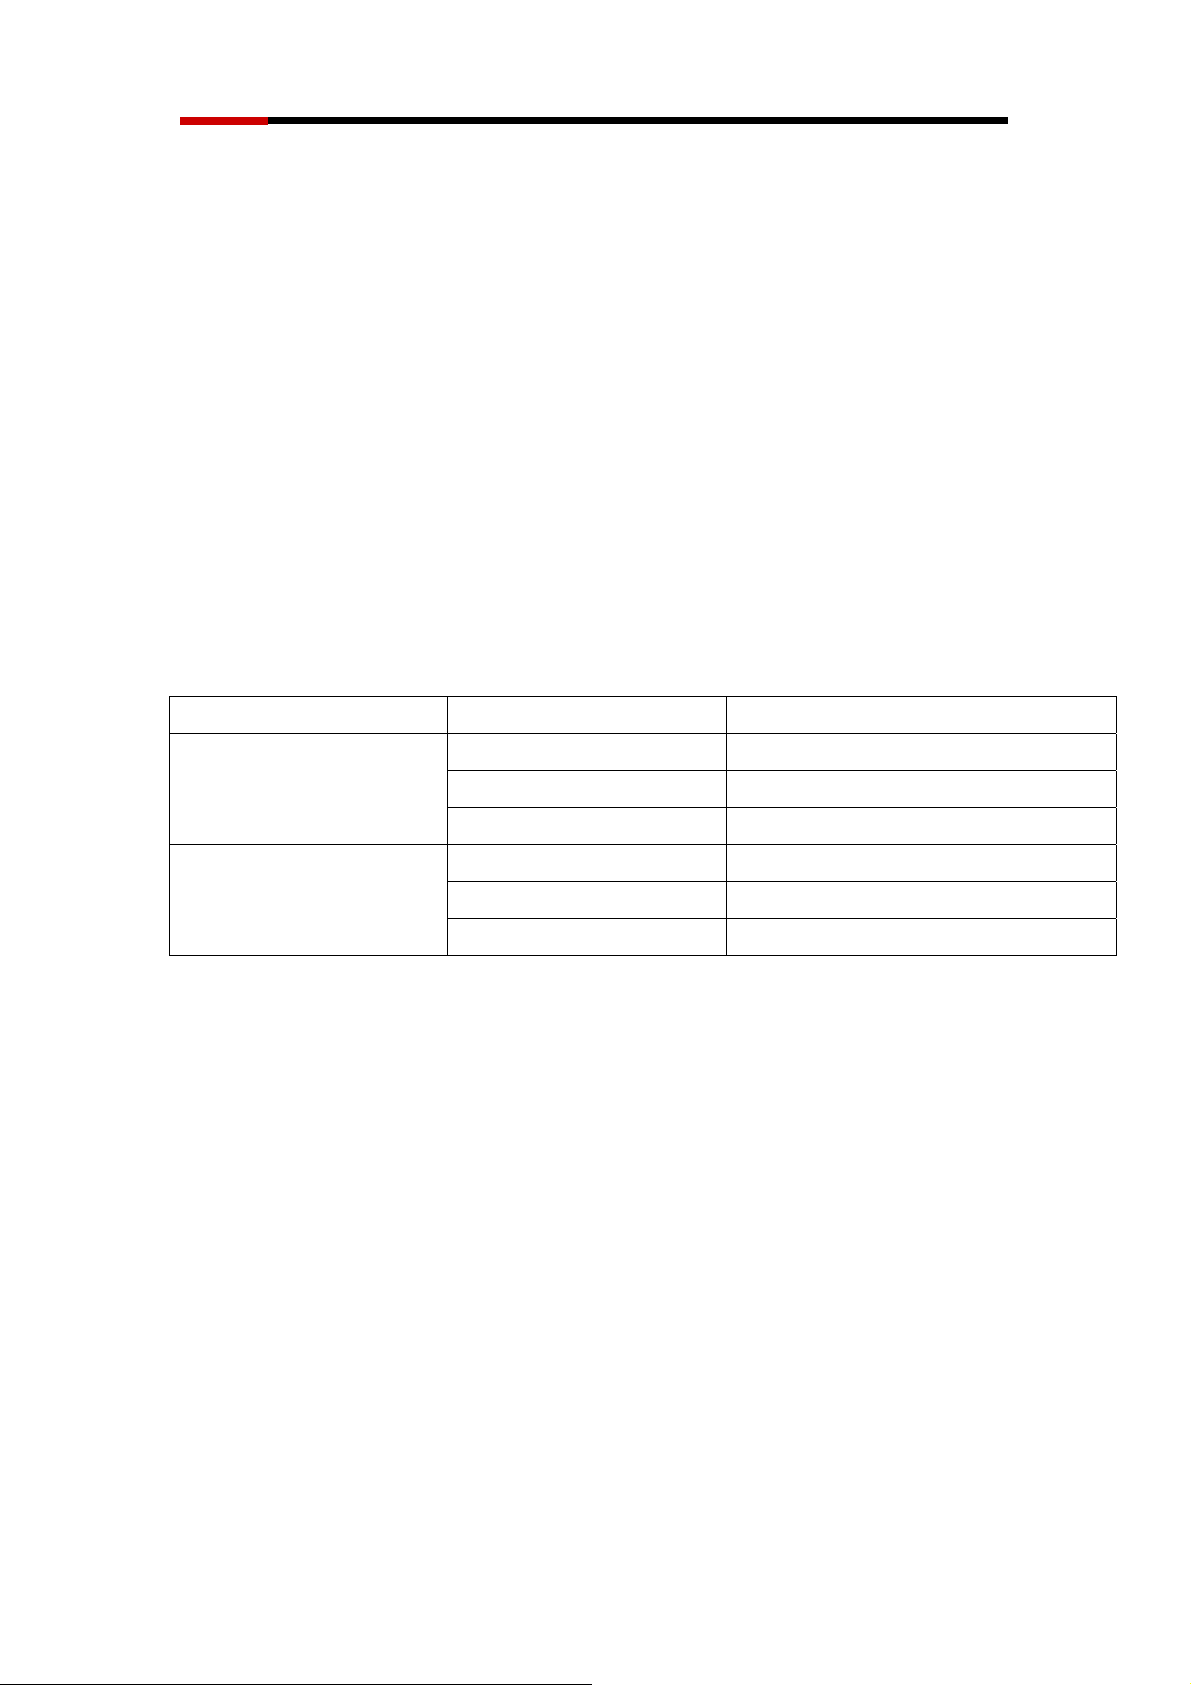
LED Activities Description
LED Name Status Description
Blue
Slow Blinking Camera is booting
Steady On Camera is correctly powered
Off Camera is off
Green
On Camera is correctly powered
Off Camera is not connected to LAN
Flash Camera is logged in
Camera Hardware Installation
Please follow the following instructions to set your IP camera up.
1. Unpack the product package and check if anything missing.
2. Insert supplied LAN cable to “LAN” jack. You can choose to plug the other
end onto one of the following: your computer, and your wired or wireless
router.
3
Page 5

Wired Internet Camera RXS-3211 Quick Installation Guide
Figure 1.6-1
3. Plug the power adapter to wall socket, and connect the power connector to
the power jack located at the back of the IP camera.
Figure 1.6-2
4. Connect your stand to the connector or place the camera in a secure place,
and point the camera to the place you wish to monitor.
4
Page 6

Wired Internet Camera RXS-3211 Quick Installation Guide
Camera Software Installation
Follow the simple steps below to run the Install Wizard to guide you quickly
through the Installation process. The following installation is implemented in
Windows XP. The installation procedures in Windows 2000/XP/Server
2003/Vista/Win7 are similar.
1. Insert the CD shipped along with the Internet Camera into your CD-ROM
drive. The “Autorun.exe” program should be executed automatically. If not,
run “Autorun.exe” manually from “Autorun” folder in the CD.
2. The Install Wizard will show four selections, select the program you want to
install or click “Exit” to install the program later. The following installation
steps are the demonstration of “Install Administrator Utility” and ““Install
16 Chan Camera Viewer“.
“Install the Administrator Utility” provides the driver and Admin
Utility . Administrator Utility helps your computer to search,
configure, and view the camera through IE browser.
5
Page 7

Wired Internet Camera RXS-3211 Quick Installation Guide
Figure 1.7-1
3. First click “Install Adm inistrator Utility“ and when the following window
appears, click “Next”.
Figure 1.7-2
4. You can specify the destination folder of software installation; you can just
use the default folder, and click “Next” to continue.
6
Page 8

Wired Internet Camera RXS-3211 Quick Installation Guide
Figure 1.7-3
5. If you need installation program to create a desktop icon or a quick launch
icon for you, click all items you need here, and click “Next” to continue.
Figure 1.7-4
6. Here lists all options you chose in previous steps, if everything is correct,
click “Install” to start installing procedure, or click “Back” to go back to
7
Page 9

Wired Internet Camera RXS-3211 Quick Installation Guide
previous step to modify installing settings.
Figure 1.7-5
7. The installing procedure will take some time, please be patient.
Figure 1.7-6
8. When you see this window, it means the software installing procedure is
complete. Please click “Finish” to finish the procedure (IP camera
8
Page 10

Wired Internet Camera RXS-3211 Quick Installation Guide
surveillance software will start after you click “Finish” button, if you want to
start it later, uncheck “Launch IP Cam Surveillance Software” box).
Figure 1.7-7
9. After finished the installation of Administrator Utility, please go back to
wizard page and click “Install Surveillance Sof tware“, the system will start
running viewer installation and the procedures are similar to the installation
of administration utility.
Figure 1.7-8
10. When the “Administrator Utility” and “Surveillance Software” installed
completely. You should see both Icons on your desktop.
9
Page 11

Wired Internet Camera RXS-3211 Quick Installation Guide
Administrator Utility
Surveillance Software (16 Channels Camera Viewer)
You have completed the installation process for RXS-3211’s software.
Please follow the user manual:
Chapter 2 lists the details of how to connect your IP Camera with your
computer or router
Chapter 3 lists the details of Camera’s Web Management via IE
(suggested Internet Browser)
Chapter 4 lists the details of the bundled surveillance program
10
 Loading...