

Page 1
[ RX358 Series ]
3.5" SATA HDD to USB & eSATA
Ext. Enclosure w/Int.80mm fan
User Manual
Page 2

3.5" SATA HDD to USB & eSATA Ext. Enclosure w/Int.80mm fan
[ RX358 Series ] User Manual
1
FEATURES
• Support up to 1000GB
• Front Panel Light beam affiliated Power ON/OFF switch
• Power On/Off for internal cooling fan
• OS Supports Win2000/ME/XP/VISTA, and Mac OS 8.6/9.x/10.x and above and
Linux kernel after 2.4.1.0
• Power: 100~240 AC Adapter with 12V/DC output
• SATA to USB 2.0, backward compatible to USB 1.1
• Plug & Play and Hot-Swappable
• Support SATA I/II to eSATA interface
• Material: Rigid Aluminum Body and ABS plastic panel
• Dimension: (LxWxH) 229x124x33mm
NOTICE
Enable Hot-Swap function:
In order to enable HOT-SWAP function, please check to make sure the
Motherboard supports HOT-SWAP function. Otherwise, the hot swappable
Function won't be work as well. (Please refer back to motherboard user guide)
Hardware Assembly Guide
Please register your product at www.rosewill.com for complete warranty information
and future support.
If you have any question while using our products, please feel free to contact us at
feedback@rosewill.com .
We will do our best to help you.
Thank you for purchasing our product and we hope you will enjoy it
Thank you for purchasing a quality Rosewill Product.
Please register your product at www.rosewill.com for complete warranty information
and future support for your product.
Page 3

3.5" SATA HDD to USB & eSATA Ext. Enclosure w/Int.80mm fan
[ RX358 Series ] User Manual
2
Enclosure Figure Description
Front View
A
B
Rear View
C
G
D
E F
A. Ventilation design 1 B. Ventilation design 2
C. Fan Switch D. Power Switch
E. Power Jack F. USB Port
G. eSATA Port
Page 4
3.5" SATA HDD to USB & eSATA Ext. Enclosure w/Int.80mm fan
[ RX358 Series ] User Manual
3
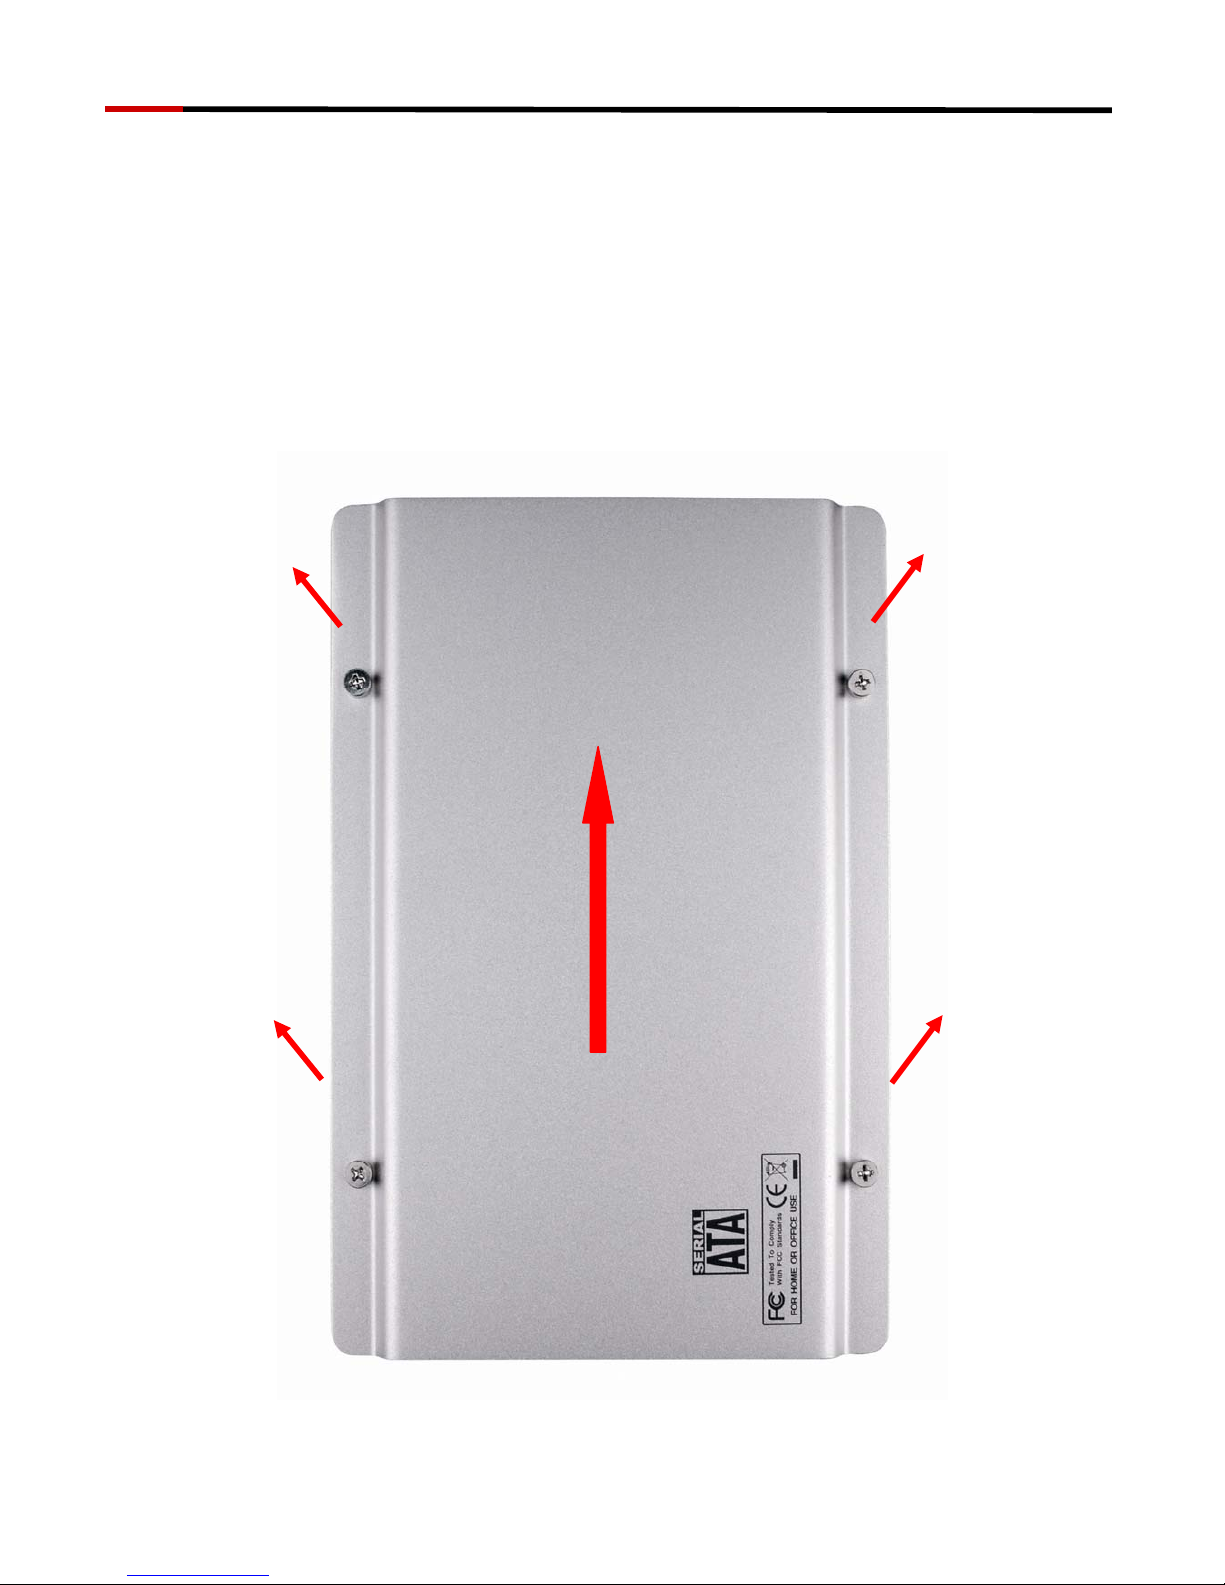
User Assembly Guide
z Please follow the instructions and make sure your HDD is
successfully installed to the mobile disk!
STEP1: Release the 4 screws, and then remove the bottom
aluminum cover.
Page 5

3.5" SATA HDD to USB & eSATA Ext. Enclosure w/Int.80mm fan
[ RX358 Series ] User Manual
4
STEP2: Release 2 screws from back panel, and then slide out the
side plates.
STEP3: Place HDD into the enclosure properly. Connect HDD to
SATA connector.
Page 6

3.5" SATA HDD to USB & eSATA Ext. Enclosure w/Int.80mm fan
[ RX358 Series ] User Manual
5
STEP4: Tight up 4 screws from side to side.
STEP5: Reassemble two side plates back to the enclosure and fix
the screws.
Page 7

3.5" SATA HDD to USB & eSATA Ext. Enclosure w/Int.80mm fan
[ RX358 Series ] User Manual
6
STEP6: Replace the aluminum cover back and tight up 4 screws.
Attention
1. Make sure HDD does not dash the leaves of fan during
assembly.
2. Please leave at least 5cm from air intake ventilator.
Page 8

3.5" SATA HDD to USB & eSATA Ext. Enclosure w/Int.80mm fan
[ RX358 Series ] User Manual
7
HDD Formatting Guide
z You may format your external HDD through USB2.0 connection.
z Please make sure your external HDD is turned on and well
connected to the PC before formatting the HDD.
STEP1: Right-click “My Computer” icon and select the “Manage”
column.
STEP2: Select “Disk Management” and you will see your External
HDD showed “Unallocated”.
Page 9

3.5" SATA HDD to USB & eSATA Ext. Enclosure w/Int.80mm fan
[ RX358 Series ] User Manual
8
STEP3: Right-click on the “Unallocated” blocks and selects “New
Partition”.
STEP4: The “New Partition Wizard” will appear. Please follow the
instruction of the wizard to complete.
Page 10

3.5" SATA HDD to USB & eSATA Ext. Enclosure w/Int.80mm fan
[ RX358 Series ] User Manual
9
STEP5: When new partition is completed, the external HDD will be
recognized as a “New Volume”.
STEP6: Double-click “My Computer”. You will see the new
volume appears on your PC.
Page 11

3.5" SATA HDD to USB & eSATA Ext. Enclosure w/Int.80mm fan
[ RX358 Series ] User Manual
10
NOTICE
Question:Does this SATA enclosure support hot swap?
Answer:Yes, but it depends on the motherboard you have.
1. If your motherboard has an eSATA port in the Back I/O
Connectors Panel as shown in picture # 1 your hot-swap
function is supported and there is no need to install the
eSATA bracket. All you need is connecting the enclosure
with eSATA port at the back of your computer. You can
connect/disconnect the enclosure with your computer at
anytime.
2. If your motherboard only comes with an onboard SATA port
and no eSATA port available. This mean hot-swap is not
supported by your motherboard. You will need to install an
eSATA bracket. Since hot-swap is not supported, you must
connect the enclosure with the computer while it powered off.
The computer will recognize the enclosure during the booting
sequences and you should be able to see the drive after MS
Windows boot up.
 Loading...