

Page 1

Dual INTERNAL (SATA)/EXTERNAL (USB)
2.5" SATA HDD Enclosure
RX251-US
User’s Manual
Page 2
Dual INTERNAL (SATA)/E XTERNAL (USB) 2.5" SATA HDD Enclosur e
RX251-US User Manual
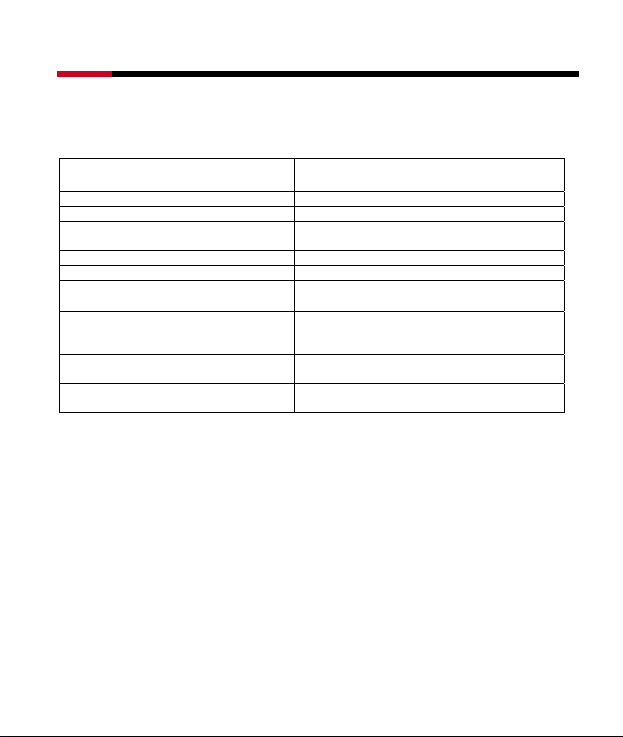
RX251-US Product Specification
Model RX251-US
Chipset JM20336
Internal Interface 2.5” SATA hard drive
External Interface -Portable Mode : USB2.0
Hard Drive Capacity Supported Up to 160GB
Hard Drive size supported 9.5mm (height)
Power Supply -Portable Mode : USB bus power
Operating System Supported -Windows 2000/ME/XP/VISTA
Transfer rate -USB2.0 : Up to 480Mbps
Size(L x W x H) - External enclosure : 141x73x16mm
-Mobile Rack Mode : SATA I
- Mobile Rack Mode : 4 pin to board
-Linux kernel 2.4.1 after
-Mac OS 9.x/10.x and above
-SATA : Up to 1.5 Gps
- Insertion bay 3.5” : 144x100x24mm
-1-
Page 3
Dual INTERNAL (SATA)/E XTERNAL (USB) 2.5" SATA HDD Enclosur e
RX251-US User Manual
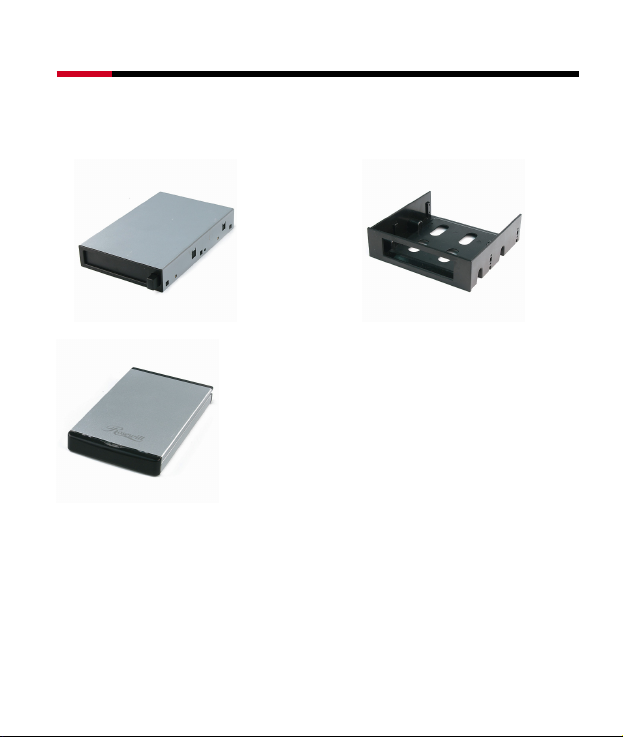
RX251-US Introduction
1. The RX251-US is divided into three parts:
A. 3.5” Insertion Bay B. 5.25 Bracket
C. 2.5” SATA HDD Enclosure.
-2-
Page 4
Dual INTERNAL (SATA)/E XTERNAL (USB) 2.5" SATA HDD Enclosur e
RX251-US User Manual
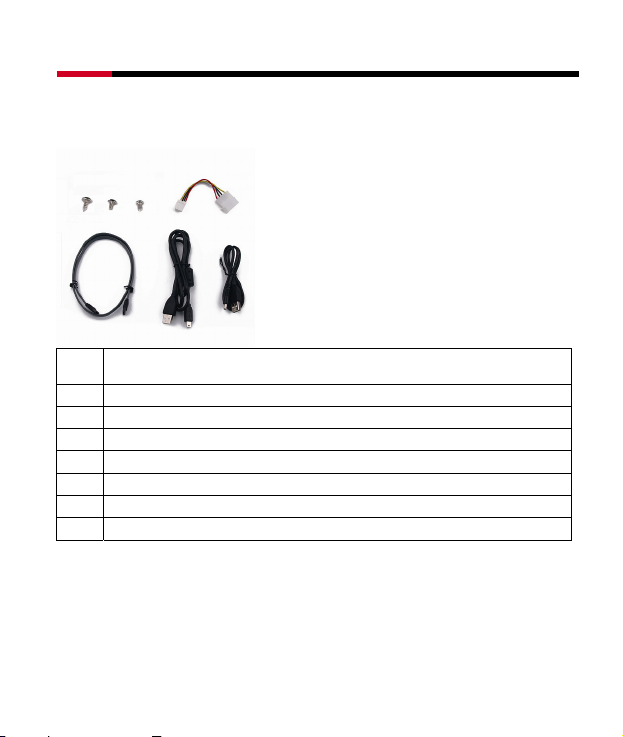
2. Accessories
n o p q
r s t
No. Description
1 Screws for fixing the 5.25” bracket to the PC case.
2 Screws for fixing the 3.5” insertion bay to 5.25” bracket or to a 3.5” drive bay.
3 Screws for fixing a 2.5” SATA hard drive in the 2.5” enclosure.
4 4-Pin power cable to connect to the power supply.
5 SATA cable to connect the 3.5”bay and motherboard.
6 USB 2.0 cable to connect 2.5” enclosure to the computer.
7 USB-Y cable to connect 2.5” enclosure to the computer for providing extra power.
-3-
Page 5
Dual INTERNAL (SATA)/E XTERNAL (USB) 2.5" SATA HDD Enclosur e
RX251-US User Manual
RX251-US Hardware Installation
The RX251-US can be used as mobile rack function in desktop PC and an external storage. The
detailed installation steps are as below:
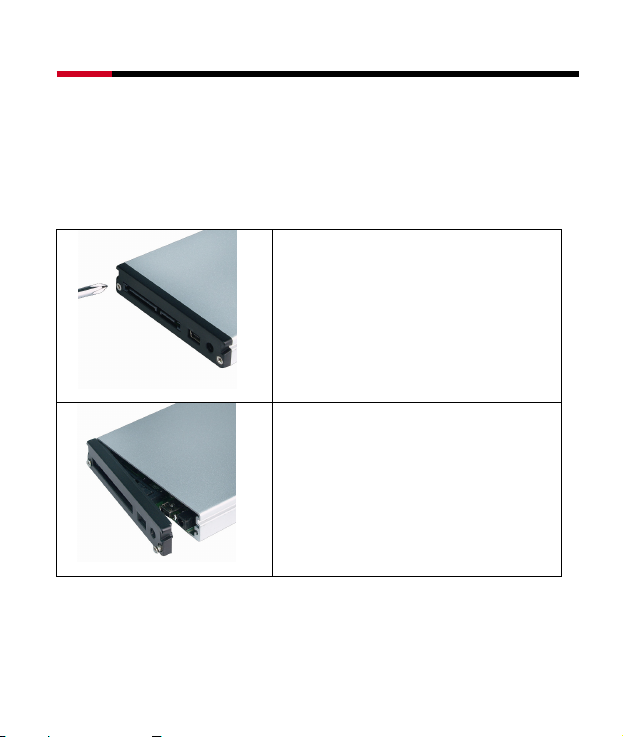
A. Install the hard drive in the enclosure
Unscrew the external enclosure by screw driver.
Open the panel of the enclosure and slide the
board out.
-4-
Page 6

Dual INTERNAL (SATA)/E XTERNAL (USB) 2.5" SATA HDD Enclosur e
Connect the 2.5” SATA hard drive to the
connector on the board. Please check the HDD &
board’s pin is match when installation.
Turn over the board and fix the board and hard
drive by screws.
Slide the board with the hard drive back into the
enclosure.
Close the panel and fix it by screws.
RX251-US User Manual
-5-
Page 7

Dual INTERNAL (SATA)/E XTERNAL (USB) 2.5" SATA HDD Enclosur e
B. In Desktop PC
There are two ways to use the RX251-US in the desktop PC.
Method 1: Install the RX251-US in the 5.25” drive bay
RX251-US User Manual
Slide the 3.5” insertion bay into the
5.25” bracket.
Fasten the 3.5” insertion bay on the
5.25” bracket by screws.
-6-
Page 8

Dual INTERNAL (SATA)/E XTERNAL (USB) 2.5" SATA HDD Enclosur e
RX251-US User Manual
Slide the 3.5” insertion bay and 5.25”
bracket into the available 5.25” drive
bay in the PC case.
Fasten the 5.25” bracket in the PC case
by screws n.
n
r
Connect the one side of the SATA cable
r to the back of the 3.5” insertion bay.
-7-
Page 9

Dual INTERNAL (SATA)/E XTERNAL (USB) 2.5" SATA HDD Enclosur e
RX251-US User Manual
Connect the other side of the SATA
cable to SATA port on the motherboard.
If your motherboard doesn’t have
on-board SATA port, you may install the
SATA add-on cards and connect the
SATA cable to it.
Connect the 4-pin power cable q to the
back of the 3.5” insertion bay.
q
r
From power supply
q
q
Connect the 4-pin power cable q to the
power supply. Please refer to the
manual of the power supply.
-8-
Page 10

Dual INTERNAL (SATA)/E XTERNAL (USB) 2.5" SATA HDD Enclosur e
RX251-US User Manual
Slide the 2.5” enclosure to the 3.5”
insertion bay to the end till the ejection
button is up. Now you can freely access
the hard drive.
When you want to take the enclosure
out, please press the ejection button,
the enclosure will be out.
-9-
Page 11

Dual INTERNAL (SATA)/E XTERNAL (USB) 2.5" SATA HDD Enclosur e
Method 2: Install the RX251-US in the 3.5” drive bay
RX251-US User Manual
Slide the 3.5” insertion bay
into the available 3.5” drive
bay.
Fasten the 3.5” insertion bay
in the PC case by screws o.
o
-10-
Page 12

Dual INTERNAL (SATA)/E XTERNAL (USB) 2.5" SATA HDD Enclosur e
r
RX251-US User Manual
Connect the one side of the
SATA cable r to the back of
the 3.5” insertion bay
Connect the 4-pin power
cable q to the back of the
3.5” insertion bay.
q
r
q
From power supply
q
Connect the 4-pin power
cable q to the power supply.
Please refer to the manual of
the power supply.
r
-11-
Page 13

Dual INTERNAL (SATA)/E XTERNAL (USB) 2.5" SATA HDD Enclosur e
RX251-US User Manual
Slide the 2.5” enclosure to
the 3.5” insertion bay to the
end till the ejection button is
up. Now you can freely
access the hard drive.
-12-
When you want to take the
enclosure out, please press
the ejection button, the
enclosure will be out.
Page 14

Dual INTERNAL (SATA)/E XTERNAL (USB) 2.5" SATA HDD Enclosur e
C. Portable external storage
RX251-US User Manual
Take out the enclosure from
the PC.
s
-13-
Plug the USB cable to the
enclosure.
Connect the USB cable s to
the available port on the
computer.
Page 15

Dual INTERNAL (SATA)/E XTERNAL (USB) 2.5" SATA HDD Enclosur e
t
s
t
RX251-US User Manual
If the hard drive needs more
power, please connect the
USB-Y cable t to increase
the power efficiency.
Connect the USB-Y t cable
to the available USB port on
the computer.
Thank you for purchasing a quality Rosewill Product.
Please register your product at: ww w.rosewill.com for complete warranty information and future s upport for your
product.
-14-
 Loading...