

Page 1
2U SERVER CHASSIS
RSV-Z2600
User Manual
Page 2

2U SERVER CHASSIS RSV-Z2600 User Manual
Contents
Product Overview ...............................................................................................................................................2
Feature .......................................................................................................................................................... 4
Specification ............................................................................................................................................... 4
Installation Guide ................................................................................................................................................5
Top Cover Disassembly ........................................................................................................................... 5
Motherboard, PSU, and HDD Installation ............................................................................................ 6
1
Page 3
2U SERVER CHASSIS RSV-Z2600 User Manual
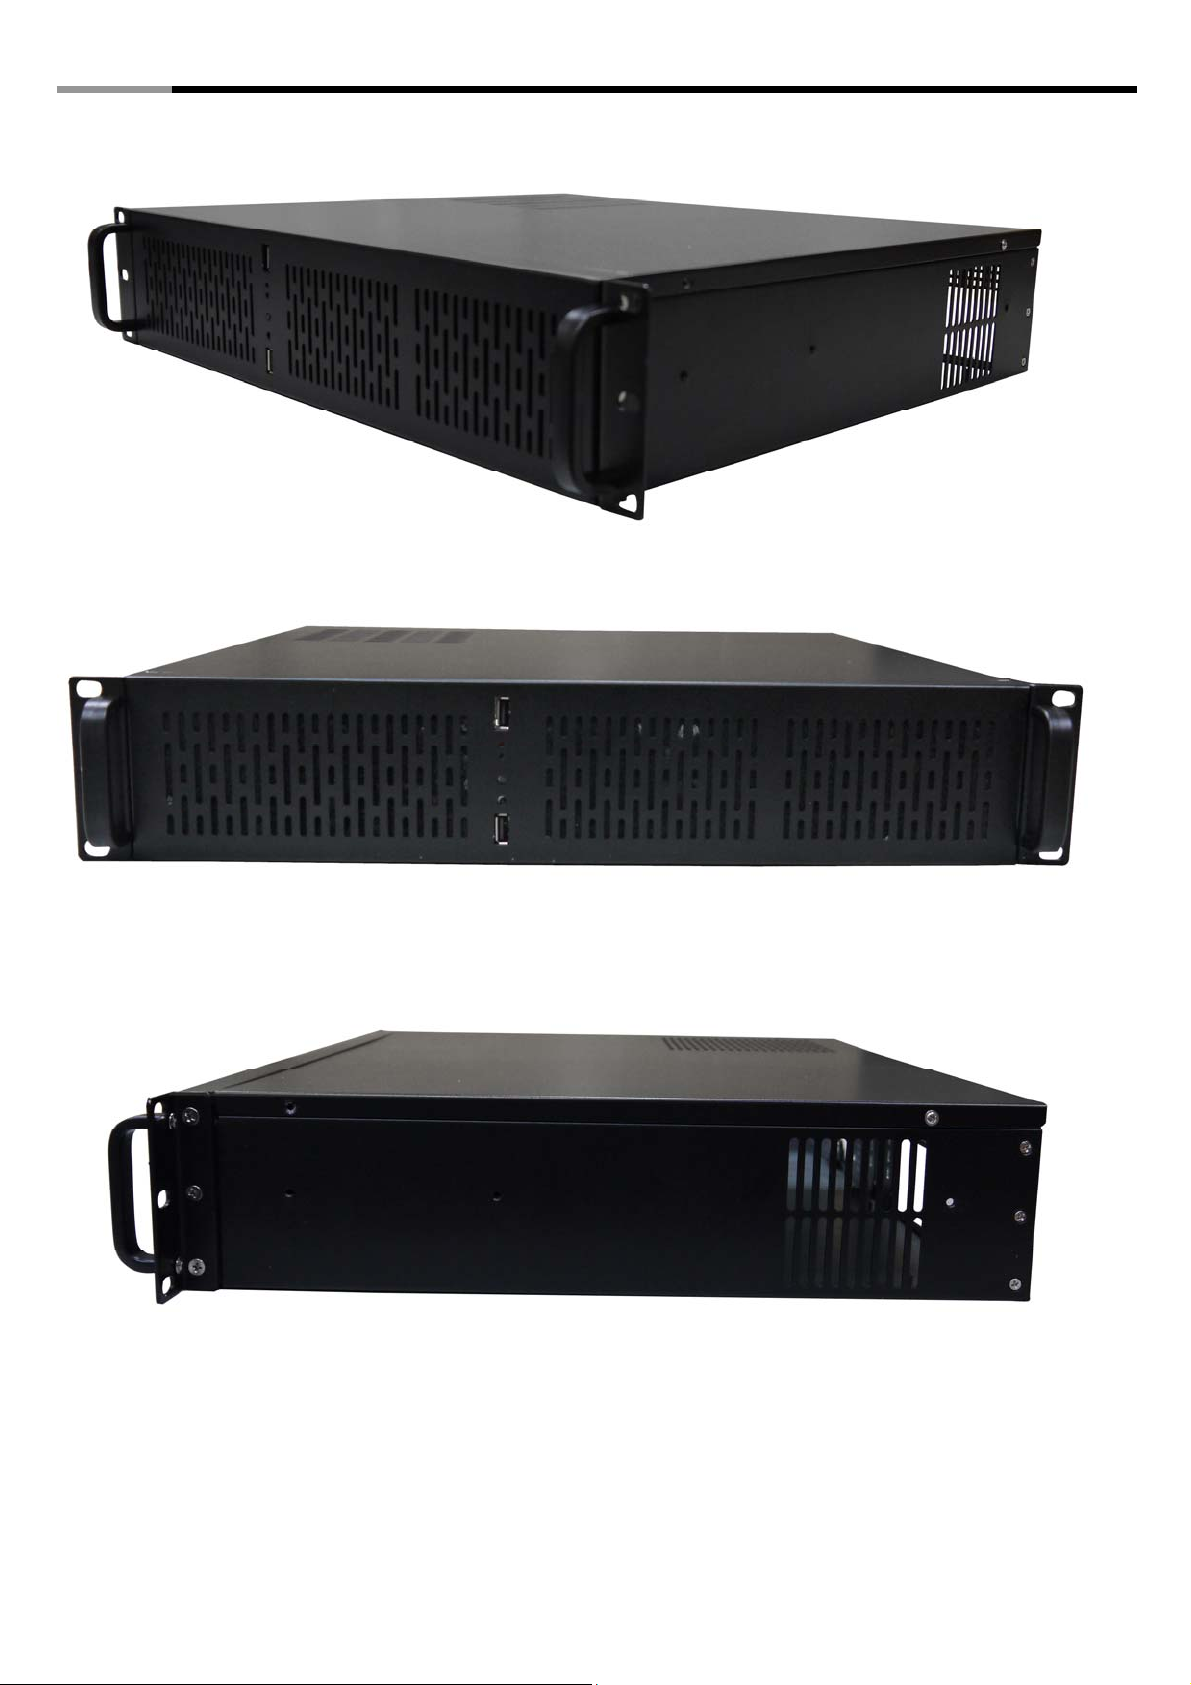
Product Overview
2
Page 4

2U SERVER CHASSIS RSV-Z2600 User Manual
3
Page 5

2U SERVER CHASSIS RSV-Z2600 User Manual
Introduction
RSV-Z2600 is a 2U rackmount server chassis for various kinds of server computer which supports up to 9.6 x
9.6 Micro-ATX and smaller form factor motherboard design and PS2 power supply.
Feature
z Carries a total of 4x internal 3.5" HDDs or 3x Internal 3.5” HDD + 1x Internal 2.5” HDD
z Cooling design carry up to front 3x 80 mm front cooling fans (all are included in RSV- Z2600).
z Special design for add-on cards in the system (4 pieces max).
z 2x USB 2.0 connector in front panel.
z Special Ventilation holes on top of the PSU location for better heat management
Specification
Chassis Type
Color
Case Material
Motherboard Compatibility
Form Factor
80mm Fans
Internal Drive Bays
Expansion Slots
Control & Indicator
Dimensions(L x W x H)
Weight
Package Contents
PIC ITEM PURPOSE
Rackmount
Black
Metal/ Steel, 1.0 mm thickness
Maximum holding: 9.6 x 9.6 Micro-ATX
2U
Cooling System
3 max (All 3x 80mm Fans included)
Expansion
4x 3.5” HDD or 3x 3.5” HDD+1x 2.5” HDD
4
Physical Spec
1x Power switch +1x Reset switch
1x LED (power) +1 x LED (HDD)
2x 2.0 USB
15.0” x 17.1" x 3.5" (381 x 434 x 90 mm)
15.9” x 19.9” x 3.5” (405 x 482 x 90 mm; including handle & Rackmount
Brackets)
Net Weight: 10.56 lbs. (4.8kg) Gross Weight: 14.52lbs. (6.6kg)
RSV-Z2600 Server Case; Screws; Other Accessories
SCREWS x 24 3.5” HDD
SCREWS x 6 POWER SUPPLY
SCREWS x 18 MOTHERBOARD & 2.5” HDD
4
Page 6

2U SERVER CHASSIS RSV-Z2600 User Manual
Installation Guide
Top Cover Disassembly
1. Remove the screws from each side of
the Chassis. (two on each side)
2. Once the screws removed, push the top
cover to remove from the chassis.
5
Page 7

2U SERVER CHASSIS RSV-Z2600 User Manual
Motherboard, PSU, and HDD Installation
1. Due to the limited space of the 2U chassis,
please follow our recommended steps when
installing Motherboard, Power Supply, and
HDD for RSV -Z2600.
2. After remove the top cover, please remove all
HDD cage.
3. Now, you can place a Micro-ATX
Motherboard into the chassis, and fasten the
screws.
6
Page 8

2U SERVER CHASSIS RSV-Z2600 User Manual
4. After installing the Motherboard, you can
follow by installing the Power Supply.
5. To Install Power Supply, you press the Power
Supply against the rear of the Chassis, and
fasten the screws on the four corners.
6. You can then connect all cables for the PSU
and Motherboard.
7. After lock the HDD on to the cage, You can
then install the cage onto the Chassis, from
Left to Right.
Note: You may want to adjust the cables so
they won’t interfere with the other connectors
on the board. Also due to the limitation on
height, RAM with heat sink may cause
issues.
7
Page 9

2U SERVER CHASSIS RSV-Z2600 User Manual
8. For the HDD Cage on the right side, it can
take up to 2x 3.5” HDD or 1x 3.5”HDD + 1x
2.5” HDD. You can place the Cage vertically
when you are using a standard ATX PS2
power supply (140x150x86mm)
9. You can also place the HDD Cage
horizontally if you uses longer ATX power
supply (165x150x86mm)
Thank you for purchasing a quality Rosewill Product.
Please register your product at: www.rosewill.com for complete warranty information and future support for
your product.
8
 Loading...