

Page 1

4U Rackmount Chassis RSV-X4000
User Manual
Page 2
4U Rackmount Chassis RSV-X4000 User Manual
Overview
z Support ATX motherboard
z Lockable front panel door
z Foldable Zink Alloy handle
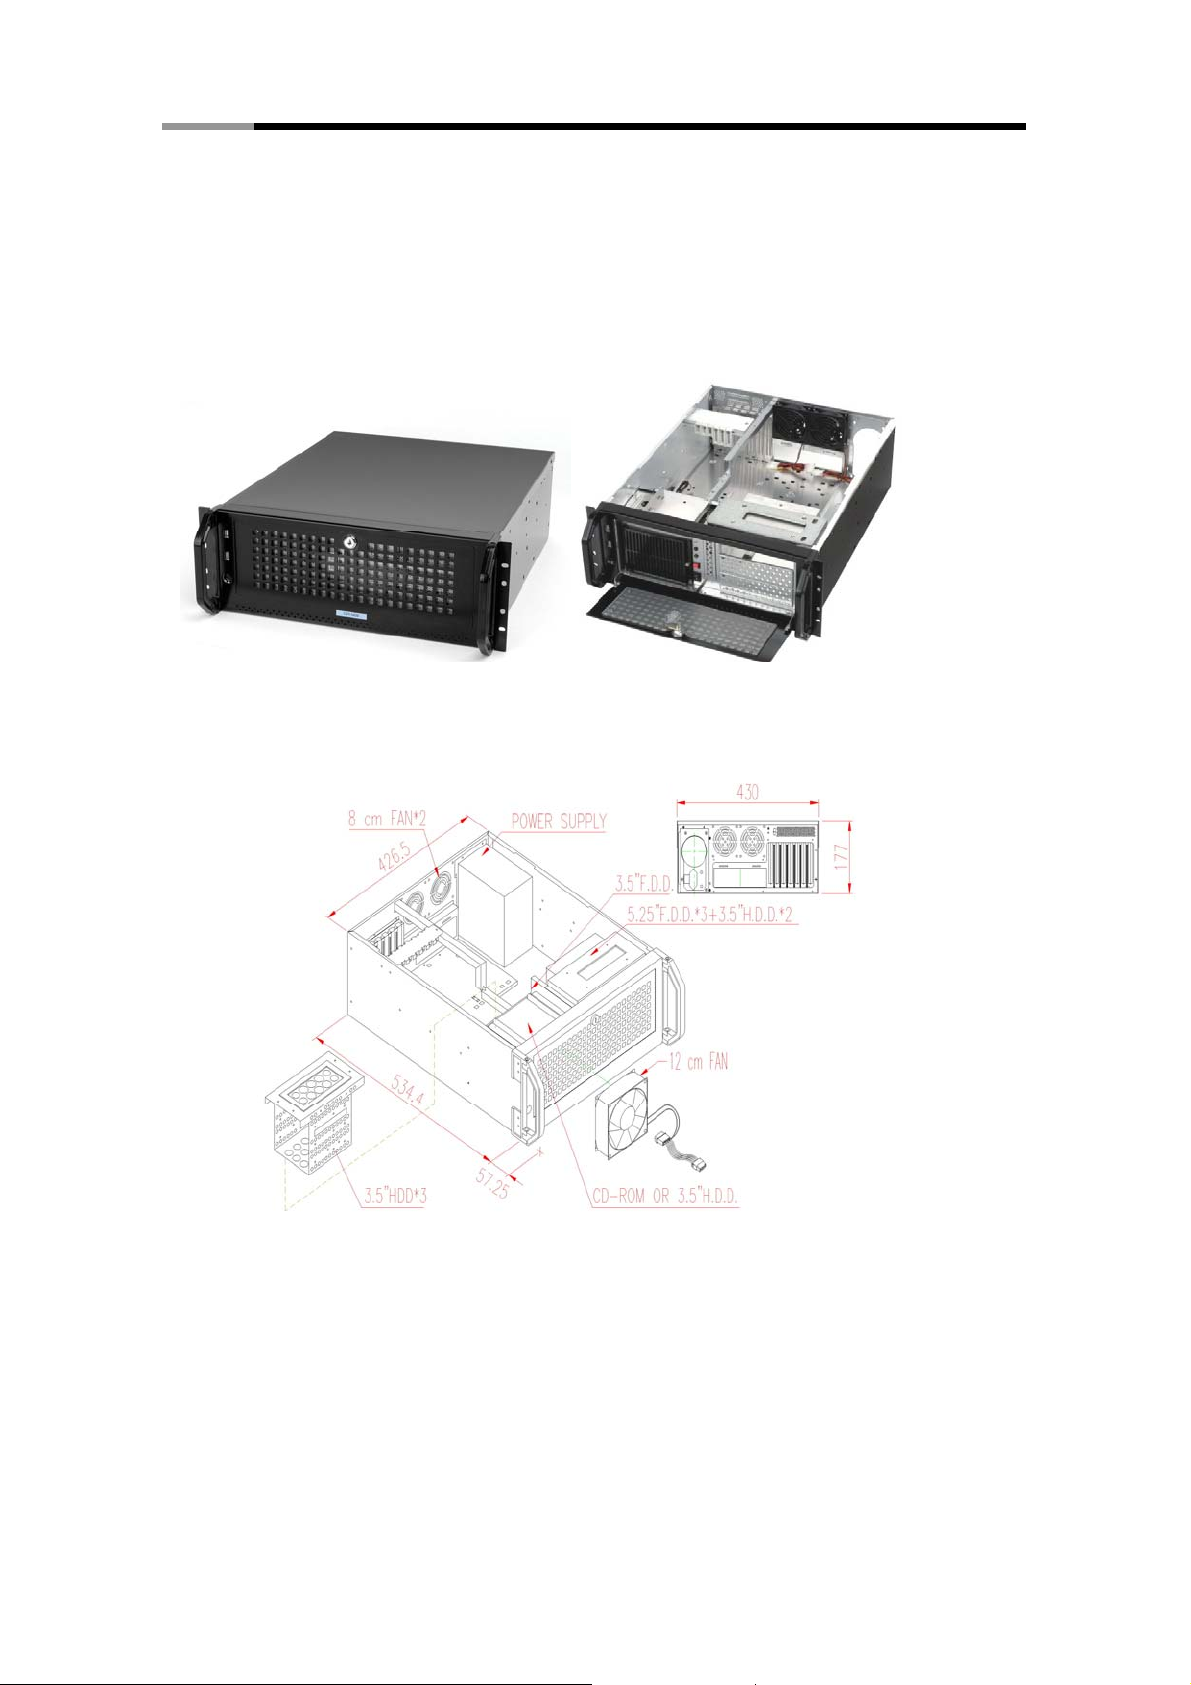
Exploded Diagram
Product Concept
RSV-X4000 is 19” 4U height rackmount chassis designed for
various kinds of server computer. This full sealed and
well-ventilated steel chassis is specially designed to withstand
heavy shock, dust, humidity, trembling, vibration and extremely
high operating temperature in the harsh environment.
1
Page 3
4U Rackmount Chassis RSV-X4000 User Manual
Specification
Dimension: 430mm (w) x 177mm (h) x 536mm (d)
Construction: All SECC with Zinc Alloy handle
Motherboard: Full size ATX
Drive bay: 3 x 5.25” & 7 x 3.5”
Indicator: LED display for power on/off and HDD
Cooling Fan: 8cm x 2 (front) & 12cm x 1 (back)
Power Supply: ATX or Redundant PSU (optional)
Extension Slot: 7 slots
Available Color: Silver & Black
System Installation
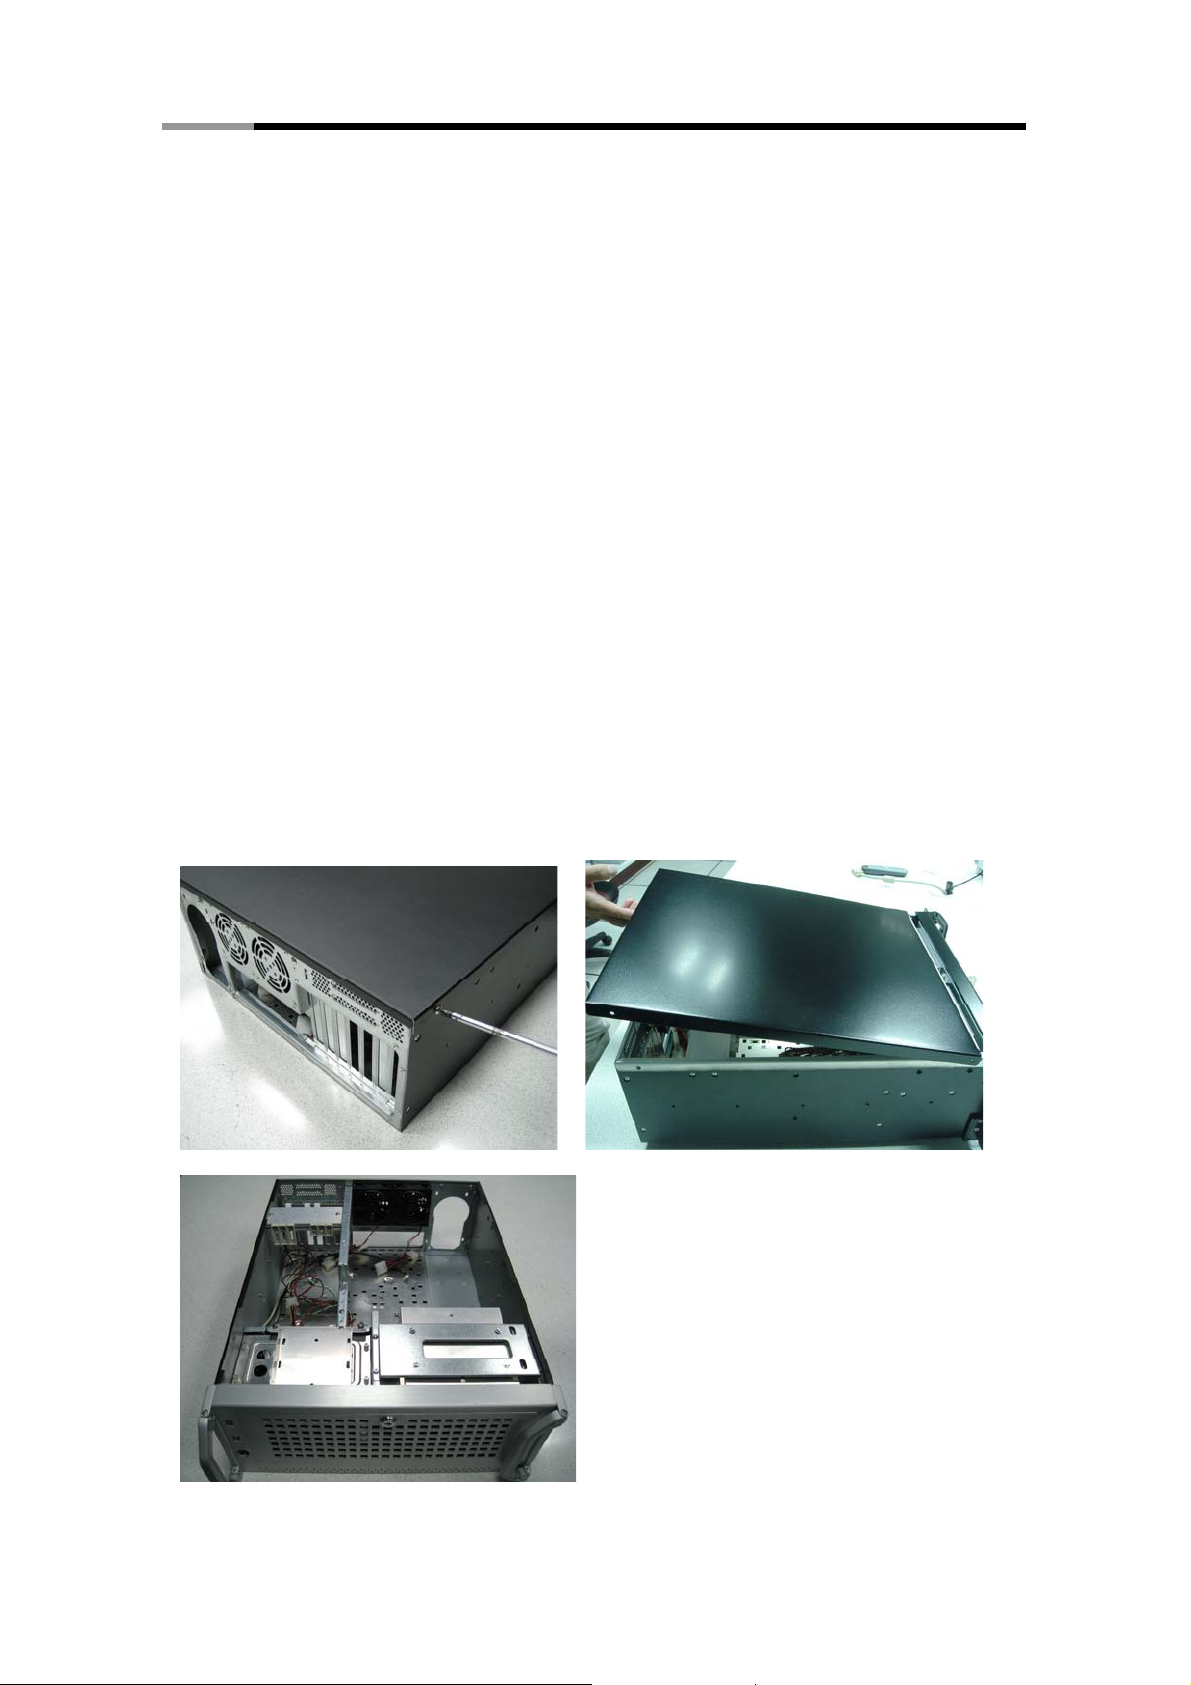
Removing top cover
The top cover is fixed to the chassis by four screws.
z Release screws on the chassis
z Slide the cover out
z Lift up the cover and gently remove the top cover
2
Page 4

4U Rackmount Chassis RSV-X4000 User Manual
Install Storage Device
User may customize the installation of storage device. Basically, 3
x 5.25” and 7 x 3.5” bay are provided.
Motherboard installation
z Unfasten the screws of add-on card retainer
z Take off the add-on card retainer.
3
Page 5

4U Rackmount Chassis RSV-X4000 User Manual
z Put the MB clippers in the accessory bag.
z If you are using big MB, you may need to install plastic stand-off
on the MB screw hole
z Install the MB with screws
5.25” drive bracket installation
z Unfasten screws of on the top of drive bracket.
4
Page 6

4U Rackmount Chassis RSV-X4000 User Manual
z Remove drive bracket from chassis.
z Install 3 x 5.25” device into front 5.25” drive bay
z Install another 3.5” device on the right side of bracket.
5
Page 7

4U Rackmount Chassis RSV-X4000 User Manual
3.5” drive bracket installation
z Remove the screws of on the top of drive bracket.
z Drive bracket being removed
z Install 3 x 3.5” device into 3.5 drive bay and secure it
z Install another 3.5”device on the holder.
6
Page 8

4U Rackmount Chassis RSV-X4000 User Manual
z Install floppy on the holder fasten by screws.
z User may house in the device bracket into the chassis and
fasten all screws.
Install Add-On Card
z Apply add-on cards onto the slots
z Secure add-on cards on card retainer
z CPU, memory and other devices can be mounted at this stage
on the convenience of user.
z Fasten the add-on card retainer back.
Thank you for purchasing a quality Rosewill Product.
Please register your product at : www.rosewill.com for complete warranty information and future support
for your product.
7
 Loading...