

Page 1

Rev:
19100
Wireless Dual Band USB Adapter RNX-N600UB
User Manual
1.0.0
20679
Page 2

CONTENTS
Package Contents .................................................................................................... 1
Chapter 1. Product Overview ................................................................................. 2
1.1 Introduction ................................................................................................................ 2
1.2 Features ..................................................................................................................... 2
1.3 Hardware Overview ................................................................................................... 2
Chapter 2. Installation ............................................................................................. 3
2.1 Hardware Installation ................................................................................................. 3
2.2 Software Installation .................................................................................................. 3
Chapter 3. Connect to a Wireless Network ........................................................... 8
3.1 Connect by ROSEWILL Wireless Utility .................................................................... 8
3.2 Connect by WPS ..................................................................................................... 11
3.2.1 PIN method ................................................................................................. 13
3.2.1.1
3.2.1.2 Enter a PIN into your AP device ................................................... 14
3.3 To connect using Window s built-in wireles s u tility .................................................. 16
3.3.1. In Windows XP ........................................................................................... 16
3.3.2. In Windows Vista ........................................................................................ 18
3.3.3. In Windows 7 .............................................................................................. 20
3.3.4. Windows 8 .................................................................................................. 21
Enter the PIN from your AP device ............................................... 13
Chapter 4. Management ........................................................................................ 24
4.1 Profile ....................................................................................................................... 24
4.1.1 Add a profile ............................................................................................... 24
4.1.1.1
4.1.1.2 Add a profile in ad hoc mo de ........................................................ 26
4.1.2 Modify a profile ........................................................................................... 28
4.1.3 Delete a profile ........................................................................................... 29
4.2 Advanced ................................................................................................................. 29
4.3 About ....................................................................................................................... 30
Add a prof il e in Infrastructure mode .............................................. 24
Chapter 5. AP Mode .............................................................................................. 31
Chapter 6. Uninstall Software ............................................................................... 33
6.1 In Windows XP/Vista/7 ............................................................................................ 33
6.1.1 Uninstall the utility softw ar e from your PC ................................................. 33
6.1.2 Uninstall the driver software from your PC ................................................ 35
6.2 In Windows 8 ........................................................................................................... 37
6.2.1 Uninstall the utility softw ar e from your PC ................................................. 37
Page 3

6.2.2 Uninstall the driver software from your PC ................................................ 38
Appendix A: Specifications ................................................................................... 41
Appendix B: Glossary ............................................................................................ 42
Appendix C: Certification and Regulation ........................................................... 44
Page 4

Wireless Dual Band USB Adapter RNX-N600UB User Manual
Package Contents
Please verify that all the package contents below are available.
1 * RNX-N600UB Wireless Dual Band USB Adapter
1 * Quick Installation Guide
1 * USB cable
One Resource CD for RNX-N600UB, including:
• Rosewill Wireless Configuration Utility and Drivers
• User Manual
• Other helpful information
Make sure that the above items are contained in the package. If any of the above items are damaged
or missing, please contact your distributor.
Note:
The ‘adapter’ mentioned in this User Guide stands for RNX-N600UB Wireless Dual Band USB
Adapter without any explanations.
1
Page 5

Wireless Dual Band USB Adapter RNX-N600UB User Manual
Chapter 1. Product Overview
1.1 Introduction
The adapter is a n 802.11n client device designed to deliver a high-speed and unrivaled wireless
performance for your devices. It has better speed and range with less interf erence compared to
other 11N adapters, thus you can get a better Internet experience, such as downloading, online
gaming, Internet phone calls and video streaming.
With 802.11n technolog y, higher thr oughput im provement by 2T2R, the RNX-N600UB’s auto-sensing
capability allows high packet transf er rate of up to 300Mbps for maximum throughput. It has good
capability on anti-jamming, and it can also interoperat e with 802.11b products. The ada pter supports
WEP, WPA and WPA2 encryption to protect and secure your personal information.
The adapter is easy to install and manage with the Quick Setup Wizard guiding you step-by-step
through the installation process and the ROSEWILL Wireless Configuration Utility leads you to set up a
wireless connectio n fast. With excellent wireless performanc e, reception, and s ecurity protecti on, the
RNX-N600UB is the best choice for easily adding or upgrading wireless connectivity to your devices.
1.2 Features
Complies with IEEE802.11n/g/b/a standards
Supports WPA-PSK/WPA2-PSK, WPA/WPA2, TKIP/AES encryption, WEP encryption
300Mbps maximum throughput for 2.4 and 5.0 GHz
Supports Ad-Hoc and Infrastructure modes
Supports roaming between access points when configured in Infrastructure mode
Supports Windows 8, Windows 7, Windows Vista, and Windows XP
1.3 Hardware Overview
LED status:
Status Working Status
On The adapter has connected to a network.
Flashing Slowly The driver has been installed but no data is being transmitted or received.
Flashing Quickly Data is being transmitted or received.
Note:
When the adapter failed to connect to a wireless net work , the LED ma y be off. Please choose your
network and try to connect again.
2
Page 6

Wireless Dual Band USB Adapter RNX-N600UB User Manual
Chapter 2. Installation
2.1 Hardware Installation
There are two methods:
(1) Plug the adapter into an available USB interface on your computer directly.
(2) Connect the adapter and your computer with the provided USB cable.
Note: When the Found New Hardware wizard appears, click Cancel.
2.2 Software Installation
The adapter’s Setup Wizard will guide you through the installation procedures for Windows 8,
Windows 7, Windows Vista, and Windows XP. The procedures in different systems are quite similar;
therefore here we use the procedures in Windows 7 as an example.
Insert the Resource CD into your CD-ROM drive, and open the folder named RNX-N600UB.
Double-click Setup.exe in the proper folder to start the installation.
1. The InstallShield Wizard window will appear. Click Next to continue.
3
Page 7

Wireless Dual Band USB Adapter RNX-N600UB User Manual
Figure 2-1
2. Choose a setup type. It is recommended to select Install Rosewill Wireless Configuration
Utility and Driver. S electing Install Driver On ly will only install driver and you will not be able to
manage the networks through ROSEWILL configuration utility. Click Next to continue.
Figure 2-2
3. Click Change to specify the des tination location for the software or you can leave it default.
Click Next in the screen below to continue.
4
Page 8

Wireless Dual Band USB Adapter RNX-N600UB User Manual
Figure 2-3
4. Click Install to continue the setup.
Figure 2-4
5. The utility and drivers will install. This may take 1~2 minutes.
5
Page 9

Wireless Dual Band USB Adapter RNX-N600UB User Manual
Figure 2-5
6
Page 10

Wireless Dual Band USB Adapter RNX-N600UB User Manual
6. After all the steps above, you will see the screen below. Click Finish to complete the setup.
Figure 2-6
7. After installation, the utility configuration page will automatically pop up as shown in the
following figure and the icon
refer to Chapter 3 Connect to a Wireless Network
will appear on your desktop. To connect to a network, please
.
Figure 2-7
Note:
If you have onl y installed the dr iver, t he abov e configu ration p age will not pop up. You need to use
the Windows built-in wireless utility to connect to and manage your network.
7
Page 11

Wireless Dual Band USB Adapter RNX-N600UB User Manual
Chapter 3. Connect to a Wireless Network
With both the hardware and software successfully installed into your computer, you can quickly
connect to a wireless network using one of the following methods.
1. To connect using ROSEWILL Wireless Configuration Utility
RNX-N600UB uses the ROSEWILL Wireless Configuration Utility as the management software. The
utility provides you an eas y interf ace to c onnect t o a net work and to change an y settings rel ated to
the wireless adapter.
2. To connect using WPS
Just by pushing th e WPS button, you can set up a wir eless connec tion quickly under the condit ion
that your router or access point supports WPS (also called QSS).
3. To connect using Windows built-in wireless utility
Windows users ma y use t he built-in wireless utility to connect t o a wireless network. For specific
operations, please go to 3.3 To connect using Windows built-in wireless utility
.
3.1 Connect by ROSEWILL Wireless Utility
1. After installation, the ut ility configuration page will automatically pop up on the screen. If the
utility page does not po p up , you ca n launch the utility by double-clicking the
desktop.
icon on your
Figure 3-1
8
Page 12

Wireless Dual Band USB Adapter RNX-N600UB User Manual
2. The Network page will display all wireless networks that are available in your area. To connect
to a network, simply select the wireless network name and click Connect.
SSID (Service Set Identifier) is the name of the wireless network. The adapter will automatically
connect to your target network next time and automatically save it as a profile if you choose
Connect automatically.
Figure 3-2
3. If word None appears behind the SSID, this means the network to be connected is not
security-enabled and you can connect to the network without entering a key. To prevent outside
intrusion and safeguard your network, it is strongly recommended that you set a password to
your router or access point.
Figure 3-3
9
Page 13

Wireless Dual Band USB Adapter RNX-N600UB User Manual
If there is a “lock” icon behind the S SID, this means the w ireless network is secured and the
corresponding security t ype will display. You must know the encr yption k e y/securit y settings to
connect, and ke y in the pass word whic h can be f ound on the conf igurati on pag e of your router
or access point, then click OK to continue. Or push the WPS / QSS button on your router if your
router features the WPS / QSS function to quickl y build a connect ion without having to en ter a
key.
Figure 3-4
4. You have successfully connected to your network and can enjoy the Internet service now. Click
Close to enjoy the Internet.
Figure 3-5
10
Page 14
Wireless Dual Band USB Adapter RNX-N600UB User Manual
5. To view more information about the network currently connected, click Status in the tools
section and the page will display information such as the network type, link quality and wireless
mode.
Figure 3-6
3.2 Connect by WPS
WPS (Wi-Fi Protected Setup) function allows you to add a new wireless device to an existing
network quickly.
1.
If the wireless router supports WPS (or QSS), you can establish a wireless connection
between the wireless card and router using either Push Button Configuration (PBC)
method or PIN method. Three WPS connection methods are li st ed in t he following parts.
PBC (Push Button Configuration) method
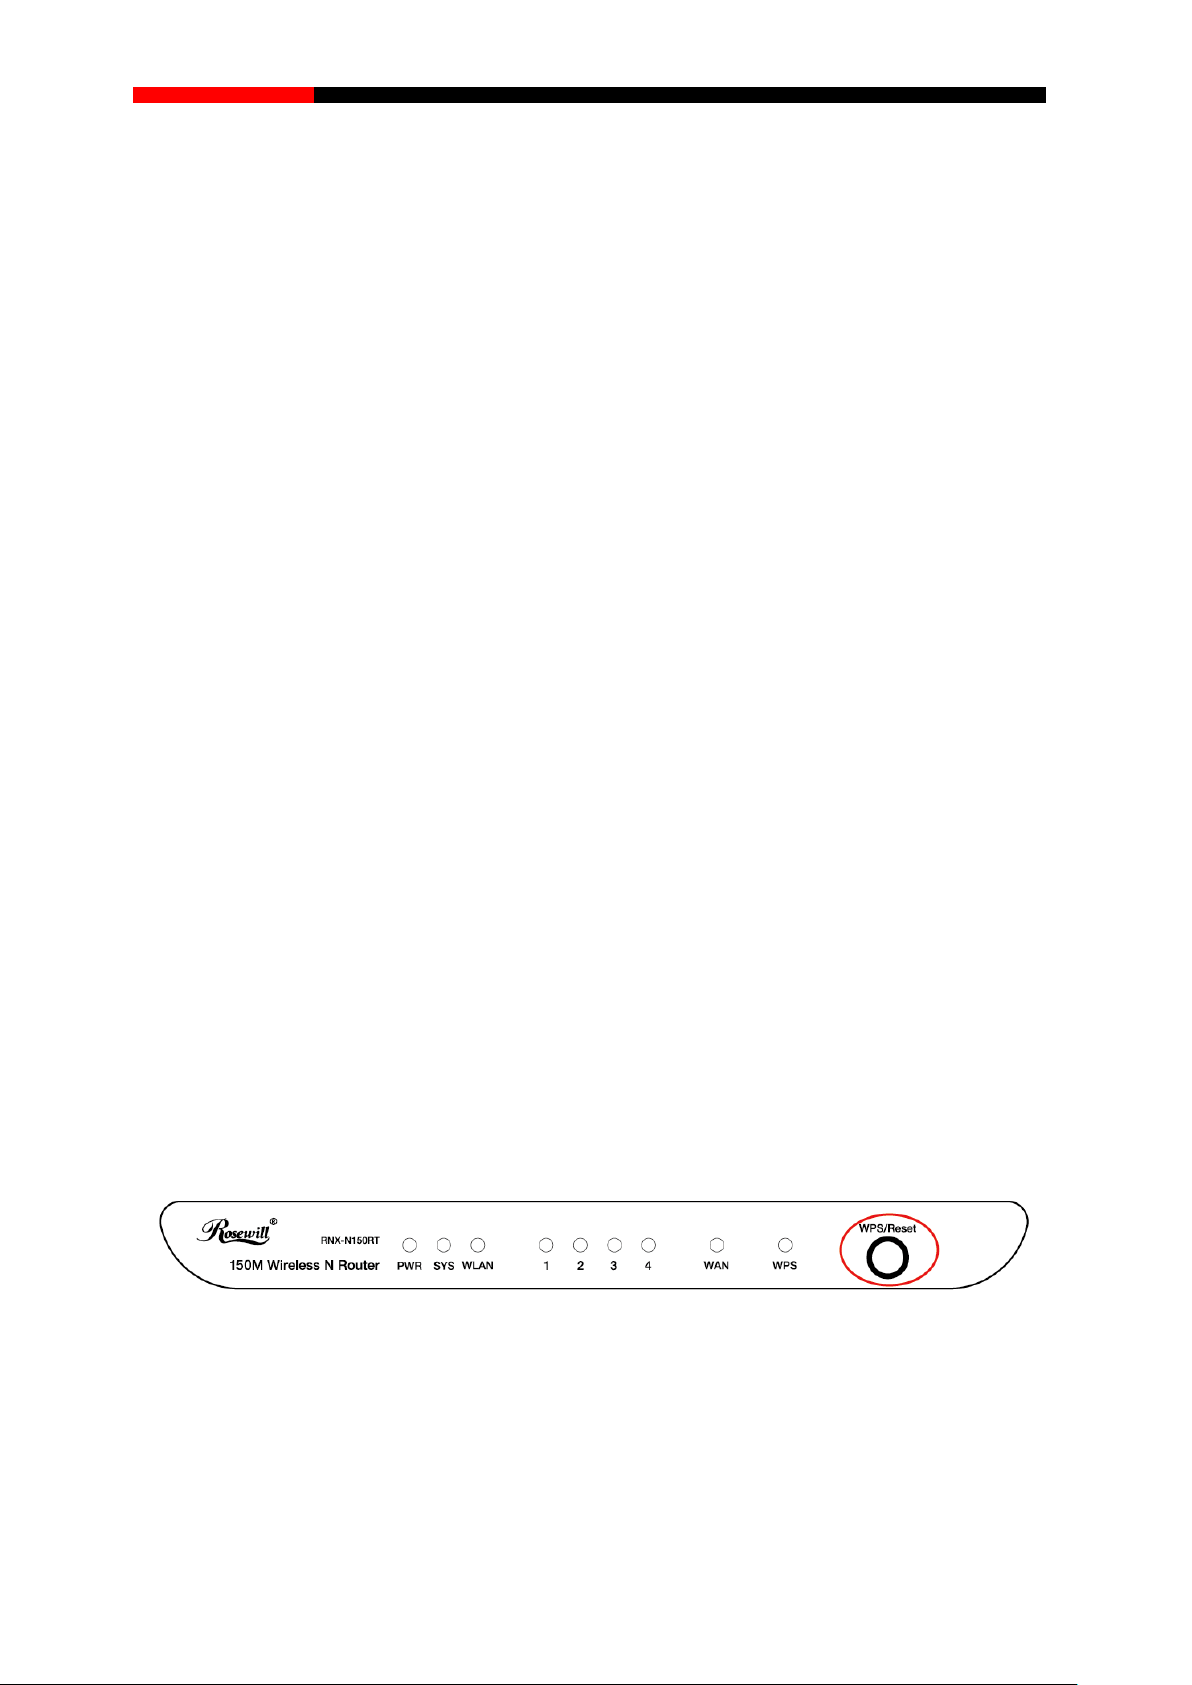
2. Press the WPS button on the back panel of t he router. Here takes Router RNX-N150RT for
example; press the WPS/Reset button for 2~3 seconds.
Figure 3-7
3. Press the WPS button on the adapter. There are two ways:
Press and hold the WPS button on the adapter directly for 2~3 seconds unt il Figure 3-9 appears.
11
Page 15

Wireless Dual Band USB Adapter RNX-N600UB User Manual
Figure 3-8
Figure 3-9
1) Open the utility and click WPS tab. Select Push the button on my access point or
wireless router and then click Connect.
Figure 3-10
4. When the following window appears, you have successfully connected to the network. Click OK
to finish the WPS connection.
12
Page 16

Wireless Dual Band USB Adapter RNX-N600UB User Manual
Figure 3-11
3.2.1 PIN method
There are two ways to configure the WPS by PIN method:
1) Enter the PIN from your AP device.
2) Enter a PIN into your AP device.
Following are detailed configuration procedures of each way.
3.2.1.1 Enter the PIN from your AP device
1. Open the utility and click WPS tab. Select Enter the PIN of my access point or wireless
router. In the empty field beside PIN, enter the PIN labeled on the bottom of the router (here we
use 13492564 as an example). If you have generate d a new PIN code for your router, please
enter the new one instead. Click Connect to continue.
Figure 3-12
13
Page 17

Wireless Dual Band USB Adapter RNX-N600UB User Manual
2. The adapter will be connecting to the target network.
Figure 3-13
3. When Figure 3-11 appears, you have successfully connected to the network.
3.2.1.2 Enter a PIN into your AP device
1. Open the u t il ity and click WPS tab. Select Enter the PIN of this device into my access point
or wireless router. In the fiel d beside PIN, you wil l see the PIN value of the adapter which is
randomly generated. Click Connect to continue.
Figure 3-14
2. Open your router’s W eb-based Utilit y and click WPS link on the left of the m ain menu. Then
click “Add device” and the following f igure wil l ap pear. Enter the PIN value of t he adap ter in t he
empty field beside PIN and then click Connect.
14
Page 18

Wireless Dual Band USB Adapter RNX-N600UB User Manual
Figure 3-15
3. When Connect successfully appears on the screen, the WPS configuration is complete. Or you
can view the adapter’s utility page to see whether the connection has been successful as
shown in Figure 3-16.
Figure 3-16
15
Page 19

Wireless Dual Band USB Adapter RNX-N600UB User Manual
3.3 To connect using Windows built-in wireless utility
3.3.1. In Windows XP
Windows XP users may use the built-in wireless utility. Follow the steps below.
1 Right-click on the utility icon in your system tray (lower-right corner). Select Switch to
Windows Wireless Configuration tool.
Figure 3-17
Or double-click the utility icon to load the utility configuration page. Click Advanced in the tools
section and then select Us e Windows wireless configuration tool in the figure shown below .
Click OK when Figure 3-19 appears to continue.
Figure 3-18
16
Page 20

Wireless Dual Band USB Adapter RNX-N600UB User Manual
Figure 3-19
2 Right-click on the wireless computer icon in your system tr ay (lower-right corner). Select View
Available Wireless Networks.
Figure 3-20
3 The utility will display any available wireless networks in your area. Click on a network
(displayed using the SSID) and click the Connect button.
Figure 3-21
4 If the network is security-enabled, you will be prompted to enter the key as shown below. If not,
you will connect to the network directly without entering a key.
17
Page 21

Wireless Dual Band USB Adapter RNX-N600UB User Manual
Figure 3-22
3.3.2.
In Windows Vista
Windows Vista users may use the built-in wireless utility. Follow the steps below.
Open the wireless uti lity by right-clicking on the wire less com puter icon in your system tr ay as
shown in the figure below. Select Connect to a network.
Figure 3-23
The ut il ity will display any available wire less ne t works in your area. Select t he wir e less net work
you would like to connect and then click Connect.
Figure 3-24
18
Page 22

Wireless Dual Band USB Adapter RNX-N600UB User Manual
If the net work you would like to connect is secur ity-enabled, enter the same security key or
passphrase that is on your r outer. If the n etwor k to be connec ted is not secur e, th e conn ection
will be built without entering a key.
Figure 3-25
You have successfully connected to the network now and can surf the Internet now.
Figure 3-26
19
Page 23

Wireless Dual Band USB Adapter RNX-N600UB User Manual
3.3.3. In Windows 7
Windows 7 users may use the built-in wireless utility. Follow the steps below.
1. Left-click t he wire less ic on
in your s ystem tray (lower-right corner) as sho wn in t he figure
below. The utility will displ ay any available wirel ess network s in your area. Select the wireles s
network (displayed using the SSID) to be connected and then click Connect.
Figure 3-27
2. If the network you would like to connec t is security-enabled, enter the s ame security key or
passphrase that is on your router. Or push the W PS button (also called Q SS) on the rou ter or
access point (You will be prompted to push the button on the window if WPS function is
supported as shown in the figure below). If the network to be connected is not secure, the
connection will be built without entering a key.
20
Page 24

Wireless Dual Band USB Adapter RNX-N600UB User Manual
Figure 3-28
3. You have successfully connected to the network and can use the Internet now.
Figure 3-29
3.3.4.
Windows 8
Windows 8 users may use the built-in wireless utility. Follow the steps below.
1. Click the icon
at the botto m of your screen, and a n e twork list will appe ar at the right sid e
of your screen. Select your target network, and then click Connect.
21
Page 25

Wireless Dual Band USB Adapter RNX-N600UB User Manual
Figure 3-30
2. If the network is unencrypted, you will directly connect to it.
If the network is encr ypted, enter the pas sword (network s ecurity key) and then click Next to
continue.
Figure 3-31
Note:
You can also push the WPS/ QSS button on your router as hinted “You can also connect by pushing
the button on the router”. Then click Next to continue.
3. When Connected appears behind the SSID (as shown below), you have successfully
connected to the target network.
Figure 3-32
Note:
If the adapter is co nnected to the network for the first time, you will be ask ed whether to turn on
sharing or connect to devices. Please select “Yes, ...”or “No, ...” according to your Internet
environment.
22
Page 26

Wireless Dual Band USB Adapter RNX-N600UB User Manual
Figure 3-33
23
Page 27

Wireless Dual Band USB Adapter RNX-N600UB User Manual
Chapter 4. Management
This section will show you how to configure your RNX-N600UB adapter using the ROSEWILL
Wireless Configuration Utility.The RNX-N600UB adapter uses the ROSEWILL Wireless
Configuration Utility as t he m anagement software. The utility prov ides users with an eas y interface
to change any sett ings related to the adapter. Double-click ing on the
start the utility.
icon on your desktop w ill
4.1 Profile
Your wireless networks m ay vary in differ ent places like hom e, office or coffee shop. With Profile
management, you can eas ily save and manage var ious networks to be c onnected, saving you the
trouble of having to repeat the sam e configur ations. Clic k Profile in th e tools sec tion, the f ollowing
page will appear.
Figure 4-1
4.1.1 Add a profile
To add a profile, click the Add button on the bottom of the screen. Then the conf iguration window
will appear.
4.1.1.1 Add a profile in Infrastructure m ode
If you are connecting to a wireless router or access point, select Infrastructure as the Network Type
in the screen that appears and follow the instructions below to finish the setting.
24
Page 28

Wireless Dual Band USB Adapter RNX-N600UB User Manual
Figure 4-2
The following items can be found on the screen.
Profile Name: Enter a name for your profile e.g. Home, Office, Coffee Shop. The same name is
not allowed. Please also note that no space is allowed between words.
SSID: Select the target network from the drop-down list.
Netwo rk Type: Select the network type. If you are connecting to a wireless router or access
point, select Infrastructure. If you are connecting to another wireless client such as an adapter,
select ad hoc.
Security Type: Select the security type from the list. Four options are available:
WPA-PSK/WPA2-PSK, WPA/WPA2, WEP and None. The s ecurity type should be the same
as on your router or access point, otherwise, you will not be able to build a successful
connection.
WPA-PSK/WPA2-PSK uses a passphrase or key to authenticate your wireless connection.
The key mus t be the exact same ke y entered on your wireless router or access point. None
stands for no securit y. It is recommended to enable WPA-PSK/WPA2-PSK on your wireless
router or access point before configuring your wire less adap ter .
Encryption Type: From the drop-down menu, select the encryption type that is the same as on
your router or access point.
Sec urity Ke y: Enter the passphrase exac tly as it is on your wireless router or access point.
Click the Show characters box to see the passphrase. Unchecking it will hide it.
Start this connection automatically: Check this box to automatic ally connect to this network
next time.
Save: Click Save to save your settings.
25
Page 29

Wireless Dual Band USB Adapter RNX-N600UB User Manual
Complete the above settin gs, the Profile page should looks like t he following figure. To connect
to a desired network, just highlight the network you would like to connect to and click the
Connect button on the bottom of the window
Figure 4-3
4.1.1.2 Add a profile in ad hoc mode
If you are connecting to another wireless client such as an adapter, select ad hoc as the Network
Type in the screen that ap pears and fol low the ins tructions be low to f inish the setti ng. This function
doesn’t support in Windows 8.
Figure 4-4
The following items can be found on the screen.
26
Page 30

Wireless Dual Band USB Adapter RNX-N600UB User Manual
Profile Name: Enter a name for your profile e.g. Home, Office, Coffee Shop. The same name is
not allowed. Please also note that no space is allowed between words .
SSID: Select the target network from the drop-down list.
Netwo rk Type: Select the network type. If you are connecting to a wireless router or access
point, select Infrastructure. If you are connecting to another wireless client such as an adapter,
select ad hoc.
Band: This item determines which operating frequency will be used. Two options are available:
2.4Ghz and 5Ghz. It is recommended that your computers and devices running video and voice
applications use the 5Ghz band, while your guest access and computers that are only browsing
the web use the 2.4Ghz band.
2.4 Ghz - You can us e t he 2.4G H z b and t o c on nec t to many classic wireles s de vices like
gaming consoles, laptops, DVRs, etc.
5.0 Ghz - This band is less crowded and is used for time-sensitive music, video streaming
or gaming. Using this band can avoid interference with 2.4GHz networks or noisy devices
like cordless phones and microwave ovens.
Security Type: Select the security type from the list. Two options are available: WEP and None.
None s tands for no secur ity. It is recommended that you select W EP to secure your wireless
network.
Encryption Type: If you select None as the Security T ype, the Encr yption T ype will be None
accordingly. If you select WEP as the Security Type, the Encryption Type will be Open.
Key Index: You can select ASCII or Hexadecimal format on the right. ASC II format stands for
any combination of keyboard characters in t he s p ecif ie d l eng th. H exa dec imal format stands f or
any combination of hexadecimal digits (0-9, a-f, A-F) in the specified length.
• For 64-bit encryption - You can enter 10 hexa decim al dig its (an y c om bination of 0-9, a-f,
A-F, zero key is not permitted) or 5 ASCII characters.
• For 128-bit encryption - You can enter 26 hexadecimal digits (any combination of 0-9, a-f,
A-F, zero key is not permitted) or 13 ASCII characters.
Sec urit y Key: Enter the passphrase. Click the Show characters box to see the passphrase.
Unchecking it will hide it.
Start this connection automatically: Check this box to automatic ally connect to th is network
next time.
Save: Click Save to save your settings.
27
Page 31

Wireless Dual Band USB Adapter RNX-N600UB User Manual
Complete the above set t in g s, t he Prof ile pag e s ho uld l ooks like the following f igure. To connect to a
desired network, just highlight the network you would like to connect to and click the Connect button
on the bottom of the window.
Figure 4-5
4.1.2 Modif y a profil e
You may edit an exis ting profile b y clicking the Modify button f rom the Profile page. For instance,
you m ay l ik e to change the profile name f rom Home to Hom e1 or you may want to spec ify another
SSID for profile Home. After all the changes, click Save to make the changes take effect.
Figure 4-6
28
Page 32

Wireless Dual Band USB Adapter RNX-N600UB User Manual
4.1.3 Delete a profi le
To delete an existing profile, highlight the profile name and click Remove on the bottom of the
screen or press the D e let e butto n on your keyboard. When the following fig ure a ppear s , click OK to
continue.
Figure 4-7
4.2 Advanced
The following configurations can be made on the Advanced page:
1) To select wireless configur ation tool. Here you can decide which tool to use, either the
ROSEWILL Configurati on Utilit y or the W indows wireless configuratio n tool. This option is
available only in Windows XP.
2) To switch to anoth er wireless network adapter. Here you can switch to another adapter
installed in your c omputer. The adapters successfull y installed in your c omputer will be
listed in the drop-down menu if the adapters are supported by this utility.
3) To switch to SoftAP mode. Once enabled, the adapter will be able to work as an AP.
4) To change the power save mode. The default option is OFF.
29
Page 33

Wireless Dual Band USB Adapter RNX-N600UB User Manual
Figure 4-8
4.3 About
The About screen gives you information about the Driver and Utility versions of the adapter.
Right-click on the
UI/WFF/Driver version may differ from that in the figure below. Please refer to the actual interface of
the product.
icon in your system tray and select About from the list. The actual
Figure 4-9
30
Page 34

Wireless Dual Band USB Adapter RNX-N600UB User Manual
Chapter 5. AP Mode
In Soft AP mode, the adapter will work as an AP. Suppose that only one computer in your house can
access the Internet for various reasons like only one WLAN port is available on your wired
broadband router, h owever, other wireless-capab le devices also want to share t he Internet. Then
the adapter can be configured as an AP under the Soft AP mode, saving you the trouble of having to
get a separate access point or a router.
With this feature, a com puter can use a single p hysica l wireles s adapter to connect as a clien t to a
hardware access point while at the same time acting as a software AP allowing other
wireless-capable devices to connect to it.
To switch to this mode, right-click on the utility icon in your system tray and select Switch to SoftAP
mode.
Figure 5-1
Or from the Advanced page of the ut il ity, tick ON und er the S of tAP mode as shown in t he f ol lo wing
figure. Click OK when prompted to confirm the setting.
Figure 5-2
31
Page 35

Wireless Dual Band USB Adapter RNX-N600UB User Manual
The Soft AP icon should then appear beside Advanced icon in the utility.
Figure 5-3
Figure 5-4
SoftAP mode: Select to enable or disable the function.
Internet Connecting Share (ICS): Specify a connecti on through which devices c onnected to
your AP can access the Internet.
SSID: Enter the name for your soft AP (for example, Jone) so that others can know which AP is
yours when trying to connect to it.
Security Type: The security t ype here is set t o be W PA2-P SK which is based on 802. 11i and
uses AES (Advanced Encryption Standard) instead of TKIP. It was designed to im prove the
security features of WEP. W PA2-PSK uses a p assphrase or key to authe nticate your wireless
connection. You needn’t make any configuration here.
Encryption Type: The encryption type here is set to be AES.
Security Code: Enter the Code in the field to make your AP security enabled. It is
recommended that you key in another instead of the default: 12345678. Only entering the
corresponding key can establish a successful connection between your AP other PCs.
IP Address: Here displays the IP address of the SoftAP.
Having completed the above settings, click Apply; then Figure 5-4 will pop up, where you click OK
to make Soft AP mode take effect.
32
Page 36

Wireless Dual Band USB Adapter RNX-N600UB User Manual
Chapter 6. Uninstall Software
6.1 In Windows XP/Vista/7
The software uninstall step s are similar in W indows XP, Windows Vista, and Windows 7, here we
just take Windows 7 for example.
6.1.1 Uninstall the utility software from your PC
1. On the Windows tas k bar, click the Start button, click All prog rams Rosewill, and then click
Uninstall- Rosewill Wireless Configuration Utility.
Figure 6-1
33
Page 37

Wireless Dual Band USB Adapter RNX-N600UB User Manual
2. The following screen will appear.
3. Click Yes.
4. Click Finish.
Figure 6-2
Figure 6-3
34
Page 38

Wireless Dual Band USB Adapter RNX-N600UB User Manual
Figure 6-4
6.1.2 Uninstall the driver software from your PC
1. On the Windows taskbar, click the Start button, and then click All programs Rosewill.
35
Page 39

Wireless Dual Band USB Adapter RNX-N600UB User Manual
Figure 6-5 Device Manager
2. Click Uninstall –Rosewill RNX-N600UB Driver shown in above figure, the system will uninstall
the driver software of the adapter from your PC.
36
Page 40

Wireless Dual Band USB Adapter RNX-N600UB User Manual
6.2 In Windows 8
6.2.1 Uninstall the utility software from your PC
1. Enter the Metro interface,right-click any bla nk place i n the M etro interf ace, the n App Bar will
appear below the Metro in terface, click All apps. Fin d the ROSEWILL application, and click
Uninstall- Rosewill Wireless Configuration Utility.
Figure 6-6
2. Click Yes to start uninstalling the utility software from your PC.
Figure 6-7
3. It may take a few minutes to undergo the whole un-installation proc ess .
37
Page 41

Wireless Dual Band USB Adapter RNX-N600UB User Manual
Figure 6-8
4. Click Finish when the figure below appears.
Figure 6-9
6.2.2 Uninstall the driver software from your PC
1. Enter the Metro interface,right-click any blank place in th e Metr o inter fac e, then App Bar will
appear below the Metro in terface, click All apps. Fin d the ROSEWILL application, and click
Uninstall –Rosewill RNX-N600UB Driver.
38
Page 42

Wireless Dual Band USB Adapter RNX-N600UB User Manual
Figure 6-10
2. Click Yes to start uninstalling the driver software from your PC.
Figure 6-11
3. It may take a few minutes to undergo the whole un-installation proc ess .
Figure 6-12
4. Click Finish when the figure below appears.
39
Page 43

Wireless Dual Band USB Adapter RNX-N600UB User Manual
Figure 6-13
40
Page 44

Wireless Dual Band USB Adapter RNX-N600UB User Manual
Appendix A: Specifications
Normal
Interface USB 2.0 Interface
Standards IEEE802.11a, IEEE 802.11b, IEEE 802.11n, IEEE 802.11g
Operating System Windows 8, Windows 7, Windows Vista, Windows XP
Throughput 300Mbps (Maximal)
11a: 6/9/12/18/24/36/48 /54 Mbps
Radio Data Rate
Modulation
Media Access Protocol CSMA/CA with ACK
Data Security WPA-PSK/WPA2-PSK, WPA/WPA2, WEP, TKIP/AES
Frequency*
Spread Spectrum Direct Sequence Spread Spectrum (DSSS)
Safety & Emissions FCC, CE
Environmental and Physical
Working Temperature 0℃~40 ℃ (32℉~104℉)
Working Humidity 10% ~ 90% RH, Non-condensing
11b: 1/2/5.5/11Mbps
11g: 6/9/12/18/24/36/48/54Mbps
11n: Up to 300Mbps
11a:OFDM
11b:CCK,QPSK,BPSK
11g:OFDM
11n: QPSK,BPSK,16-QAM,64-QAM
2.4~2.4835GHz,5.15~5.25GHz,5.
745~5.825GHz
Storage Temperature -40 ℃~ 70℃(-40℉~158℉)
Storage Humidity 5% ~ 90% RH, Non-condensing
* 1. Only 2.412GHz~2.462GHz is allowed to be use d in USA, which me ans o nly channel
1~11 is available for American users to choose.
2. Rul es on the use of 5GHz band channels may vary according t o different national
laws.
41
Page 45

Wireless Dual Band USB Adapter RNX-N600UB User Manual
Appendix B: Gl ossary
802.11a - Specification for wireless networking at 54 Mbps using OFDM modulation and operating
in radio band at 5GHz.
802.11b - The 802.11b standard specifies a wireless product networking at 11 Mbps using
direct-sequence spread-spectrum (DSSS) technology and operating in the unlicensed radio
spectrum at 2.4GHz, and W EP encryption for sec urity. 802.11b net works are also ref erred to as
Wi-Fi networks.
802.11g - specification for wireless networking at 54 Mbps using direct-sequence
spread-spectrum (DSSS) technology, using OFDM m odulation and operating in the unlicensed
radio spectrum at 2.4GHz, and backward compatibility with IEEE 802.11b devices, and WEP
encryption for security.
802.11n - 802.11n builds upon previous 802.11 standards by adding MIMO (multiple-input
multiple-output). MIMO uses multiple transmitter and receiver antennas to allow for increased
data throughput via s patial multiplexing and increas ed range by exploiting the spatial diversity,
perhaps through coding schemes like Alamouti coding. The Enhanced Wireless Consortium
(EWC) was formed to help accelerate the IEEE 802. 11n development process and prom ote a
technology specification for interoperability of next-generation wireless local area networking
(WLAN) products.
Ad hoc Network - An ad hoc network is a group of computers, e ach with a Wireless Adapter,
connected as an independent 802.11 wireless LAN. Ad hoc wireless computers operate on a
peer-to-peer basis, communicating directly with each other without the use of an access point. Ad
hoc mode is also referred to as an Independent Basic Service Set (IBSS) or as peer-to-peer mode,
and is useful at a departmental scale or SOHO operation.
DSSS - (Direct-Sequence Spread Spectrum) - DSSS generates a redundant bit pattern for all data
transmitted. This bit pattern is called a chip (or chipping code). Even if one or more bits in the chip
are damaged during transmission, statistical techniques embedded in the receiver can recover the
original data without the need of retransmission. To an unintended receiver, DSSS appears as low
power wide band noise and is rejected ( ignored) by most narro wband receivers. However, to an
intended receiver (i.e. another wireless LAN endpoint), the DSSS signal is recognized as the only
valid signal, and interference is inherently rejected (ignored).
FHSS - (Frequency Hopping Spread Spectrum) - FHSS continu ously changes (h ops) the carrier
frequency of a conventional carrier several times per second according to a pseudo-random set of
channels. Because a fix ed frequenc y is not use d, and onl y the transm itter and rec eiver k now the
hop patterns, interception of FHSS is extremely difficult.
Infrastructure Network - An infrastructure network is a group of computers or other devices,
each with a W ireless Adapter, c onnected as an 802. 11 wireles s LAN. In infrastruc ture m ode, the
wireless devices com municate with eac h other and to a wired network b y first going through a n
access point. An inf rastruc ture wireless network connec ted to a wir ed net work is ref erred to as a
Basic Service Set (BSS). A set of two or more BSS in a single network is referred to as an
42
Page 46

Wireless Dual Band USB Adapter RNX-N600UB User Manual
Extended Service Set (E SS). Infrastructure mode is usef ul at a corporation scale, or when it is
necessary to connect the wired and wireless networks.
Spread Spectrum - Spread Spectrum technology is a wideband radio frequency technique
developed by the military for use in reliable, secure, mission-critical communications systems. It is
designed to trade off bandwidth efficiency for reliability, integrit y, and security. In other words,
more bandwidth is consumed than in the case of narrowband transmission, but the trade off
produces a signal t hat is, in effect, louder and thus easier to detect, pro vided that the receiver
knows the parameters of the spread-spectrum signal being broadcast. If a receiver is not tuned to
the right frequency, a s pread-spectrum signal look s like background noise. T here are two main
alternatives, Direct Sequence Spread Spectrum (DSSS) and Frequency Hopping Spread
Spectrum (FHSS).
SSID - A Service Set Identification is a thirty-two character (maximum) alphanumeric key
identifying a wireless loc al area network. For the wireles s devices in a network to com municate
with each other, all devices must be configured with the same SSID. This is typically the
configuration parameter for a wireless PC card. It corresponds to the ESSID in the wireless
Access Point and to the wireless network name. See also Wireless Network Name and ESSID.
WEP - (Wired Equivalent Privacy) - A data privacy m echanism based on a 64-bit or 128-bit or
152-bit shared key algorithm, as described in the IEEE 802.11 standard. To gain access to a WEP
network, you must know th e key. The key is a string of charact ers that you create. When using
WEP, you must determine the level of encryption. The t ype of encryption determines the key
length. 128-bit encryption requires a longer key than 64-bit encryption. Keys are defined by
entering in a string in HEX (hexadecimal - using characters 0-9, A-F) or ASCII (American
Standard Code for I nformation Interchange – alphanumeric characters) format. ASCII form at is
provided so you can ent er a string that is easier to re member. The ASCII string is converted to
HEX for use over the network. Four keys can be defined so that you can change keys easily.
Wi-Fi - A trade name for the 802.11b wireless networking standard, given by the Wireless
Ethernet Compatibility Alliance (WECA, see http://www.wi-fi.net), an industry standards group
promoting interoperability among 802.11b devices.
WLAN - (Wireless Local Area Network) - A group of computers and associated devices
communicate with each other wirelessly, which network serving users are limited in a local area.
WPA - (Wi-Fi Protected Access) - A wireless secur it y protoc ol us es TKIP (Temporal Key Integrity
Protocol) encryption, which can be used in conjunction with a RADIUS server.
43
Page 47

Wireless Dual Band USB Adapter RNX-N600UB User Manual
Appendix C: Certification and Regulation
COPYRIGHT & TRADEMARKS
Specifications are subject to change without notice. is a registered trademark of
Rosewill.Limited. Other brands and product nam es ar e trademarks or registered trademarks of their
respective holders.
No part of the specific ations m ay be reproduc ed in any for m or b y any means or used to m ake any
derivative such as translation, transformation, or adaptation without permission from
Rosewill.Limited Copyright © 2014. All rights reserved. http://www.rosewill.com
FCC STATEMENT
Operations in the 5.15-5.25GHz band are restricted to indoor usage only.
This equipment has been t ested and found to comply with the lim its for a Class B digital device,
pursuant to part 15 of the FCC Rules. These lim its are designed to provide reas onable protection
against harmful int erference in a residenti al installation. This equipm ent generates, uses and can
radiate radio frequenc y energy and, if not installed a nd used in accordance with the ins tructions,
may cause harmful interference to radio communications. However, there is no guarantee that
interference won’t occur in a particular installation. If this equipment does cause harmful interference
to radio or television r eception, which can be d etermined by turning t he equipment off and on , the
user is encouraged to try to correct the interference by one or more of the following measures:
• Reorient or relocate the receiving antenna.
• Increase the separation between the equipment and receiver.
• Connect the equipment into an outlet on a circuit different from that to which the receiver is
connected.
• Consult the dealer or an experienced radio/ TV technician for help.
This device complies with part 15 of FCC Rules. Operation is subject to the following two conditions:
1) This device may not cause harmful interference.
2) This device must accept any interference received, including interference that may cause
undesired operation.
Any changes or modific ations not ex pr ess l y appro ved b y the party responsible for complianc e cou ld
void the user’s authority to operate the equipment.
Note: The manufac turer isn’t responsible for an y radio or tv int erference caused by unauthorized
modifications to th is equipment. Such modif ications could void the user ’s authority to operate th e
equipment.
FCC RF Radiation Exposure Statement:
This equipment complies with FCC radiation exposure limits set forth for an uncontrolled
44
Page 48

Wireless Dual Band USB Adapter RNX-N600UB User Manual
to 10 mW e.i.r.p.
within the band
allow current relaxed regulation. Full
This subsection does not apply for the
environment. End user s must follow the specific operating i nstructions for satisfying RF exposure
compliance. This transmitter must not be co-located or operating in conjunction with any other
antenna or transmitter. This equipment has been SAR-evaluated for use in hand. SAR
measurements are bas ed on 5mm spacing from the bod y and that compliance is achieved at that
distance.
CE Mark Warning
This is a class B produc t. In a dom estic environm ent, this product m ay cause radio inter ference, in
which case the user may be required to take adequate measures.
National Restrictions
This device is intended for home and office use in all EU countries (and other countries following the
EU directive 1999/5/EC) without any limitation except for the countries mentioned below:
Country Restriction Reason/remark
Bulgaria None
Outdoor use limited
France
2454-2483.5 MHz
Italy None
Luxembourg None
Norway Implemented
General authorization required for outdoor
use and public service
Military Radiolocation use. Refarming of the 2.4
GHz band has been ongoing in recent years to
implementation planned 2012
If used outside of own premises, general
authorization is required
General authorization required for network and
service supply(not for spectrum)
geographical area within a radius of 20 km from the
Russian
Federation
Note: Please don’t use the product outdoors in France.
None Only for indoor applications
centre of Ny-Ålesund
45
Page 49

Wireless Dual Band USB Adapter RNX-N600UB User Manual
This device has been desi gned to operate with the antennas listed below which have a maximum
gain of 3 dBi. Antennas not included in this list or having a gain greater than 3 dBi are strictly
prohibited for use with this device. The required antenna impedance is 50 ohms.
To reduce potential r adio interference to other user s, the antenna type and its gain should be so
chosen that the equi valent isotropical ly radiated power (e.i.r .p.) is not more tha n that permitted f or
successful communication.
46
Page 50

Wireless Dual Band USB Adapter RNX-N600UB User Manual
Canadian Compl iance Statement
This device complies with Industry Canada license-exempt RSS standard(s). Operation is subject to
the following two conditions:
(1) This device may not cause interference, and
(2)This device must accept any interference, including interference that may cause undesired
operation of the device.
Cet appareil est conforme aux norms CNR exemptes de licence d’Industrie Canada. Le
fonctionnement est soumis aux deux conditions suivantes:
(1) cet appareil ne doit pas provoquer d’interférences et
(2) cet appareil doit accepter toute interférence, y compris celles susceptibles de provoquer un
fonctionnement non souhaité de l’appareil.
Industry Canada Statement:
Complied with the Canadian ICES-003 Class B specifications
Cet appareil numérique de la classe B est conforme à la norme NMB-003 du Canada.
This device complies with RSS 210 of Industry Canada. This Class B device meets all the
requirements of the Canadian interference-causing equipment regulations.
Cet appareil numériqu e de la Class e B respecte to utes les ex igences du Règ lement sur le matériel
brouilleur du Canada.
Safety Information
When product has power button , the po wer butt on is o ne of the way to shut off the product; when
there is no power button, the only way to completely shut off power is to disconnect the product or
the power adapter from the power source.
Don’t disassemble the product, or make repa irs yourself. You ru n the risk of elec tric shock and
voiding the limited warranty. If you need service, please contact us.
Avoid water and wet locations.
This product can be used in the following countries:
AT BG BY CA CZ DE DK EE
ES FI FR GB GR HU IE IT
LT LV MT NL NO PL PT RO
RU SE SK TR UA
47
 Loading...