

Page 1

Dual Arm Monitor Stand for LCD/LED Displays
RHMS-11002
User Manual
Page 2

Dual Arm Monitor Stand for LCD/LED Displays RHMS-11002 User Manual
IMPORTANT SAFETY INSTRUCTIONS – SAVE THESE INSTRUCTIONS – PLEASE READ ENTIRE MANUAL BEFORE USING THIS
PRODUCT
Specifications
◆ Weight capacity-DO NOT EXCEED: 9*2=18 kg (40 lbs) includes monitor and allaccessories.
◆ Minimum surface thickness: 0.6 ''. (15mm)
◆Maximum surface thickness: 3.3 ''. (84mm)
◆Raise/Lower: 11.8 '' (300mm)
◆Extension: 11.8'' (300mm)
◆ Level: ±180°
◆ Swivel: ±5°
◆ Tilt: ±15°
CAUTION: Avoid potential personal injuries and property damage!
Do not use this product for any purpose not explicitly specified by manufacturer.
If you do not understand these instructions, or have doubts about installation, disassembly or use of this product, contact
manufacturer customer Service.
Manufacturer is not responsible for any damage or injury caused by incorrect assembly or useage
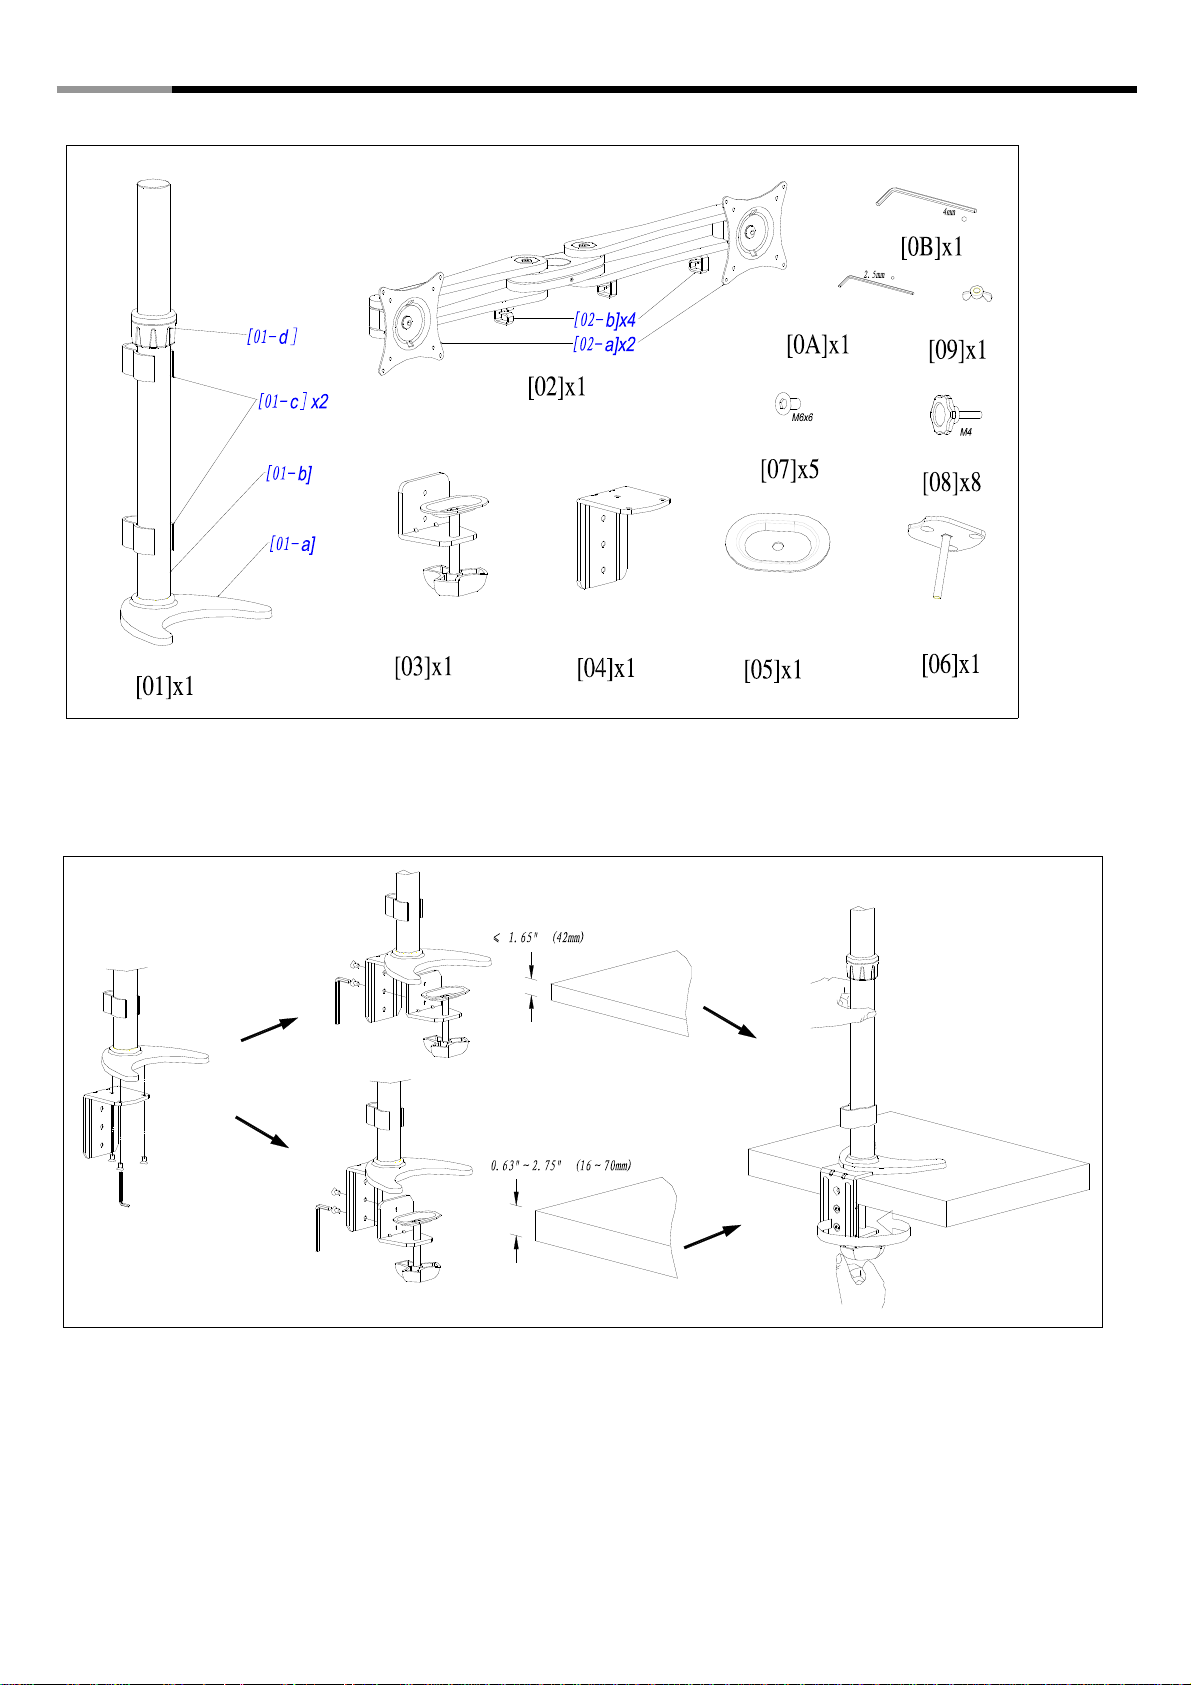
Supplied Parts and Hardware Kit
Before starting assembly, verify all parts are included and undamaged. If any parts are missing or damaged, do not return the item to your dealer but
please contact Sunnyford Systems Customer Service. Never use damaged parts!
NOTE: Not all hardware included will be used.
1
Page 3
Dual Arm Monitor Stand for LCD/LED Displays RHMS-11002 User Manual
Step 1 –Attach base assembly to desk
A : Desk Clamp 0.6"(16mm)<board depth <2.75"(70mm)
2
Page 4

Dual Arm Monitor Stand for LCD/LED Displays RHMS-11002 User Manual
B : Through-Desk 1"(25.4mm)diameter<=2.95"(75mm)
You need disassemble the base[02] assembly at first ,then assembling again according to the
following pic
C: Grommet Hole 2.95"(75mm)<=hole diameter<=3.9"(100mm)
3
Page 5

Dual Arm Monitor Stand for LCD/LED Displays RHMS-11002 User Manual
D: Side Mount board depth >2.95"(75mm)and no mount hole
Step 2 –Insert the mount arm[02] to base[01]
WARNING:TIGHTENING TORQUE[01-d] BEFORE INSERT THE MOUNT
4
Page 6

Dual Arm Monitor Stand for LCD/LED Displays RHMS-11002 User Manual
Step 3 –Lcd mornitor assembling
Insert the hand screw [08],through the mount board[01-a] , into the threaded hole in the back
of the monitor and lock it.
Step 4 –Adjusted the rotating friction
As following chart ,adjusting the tightness of head,middle and base location, insert the
attached wrench [0A]into the lock screw to keep proper friction during rotation .
5
Page 7

Dual Arm Monitor Stand for LCD/LED Displays RHMS-11002 User Manual
Step5 –Cables placement
Route the cables through the clip [02-b] under the arm and [01-c] on the pole
Thank you for purchasing a quality Rosewill Product.
Please register your product at : www.rosewill.com for complete warranty information and future support for your product.
6
 Loading...