

Page 1
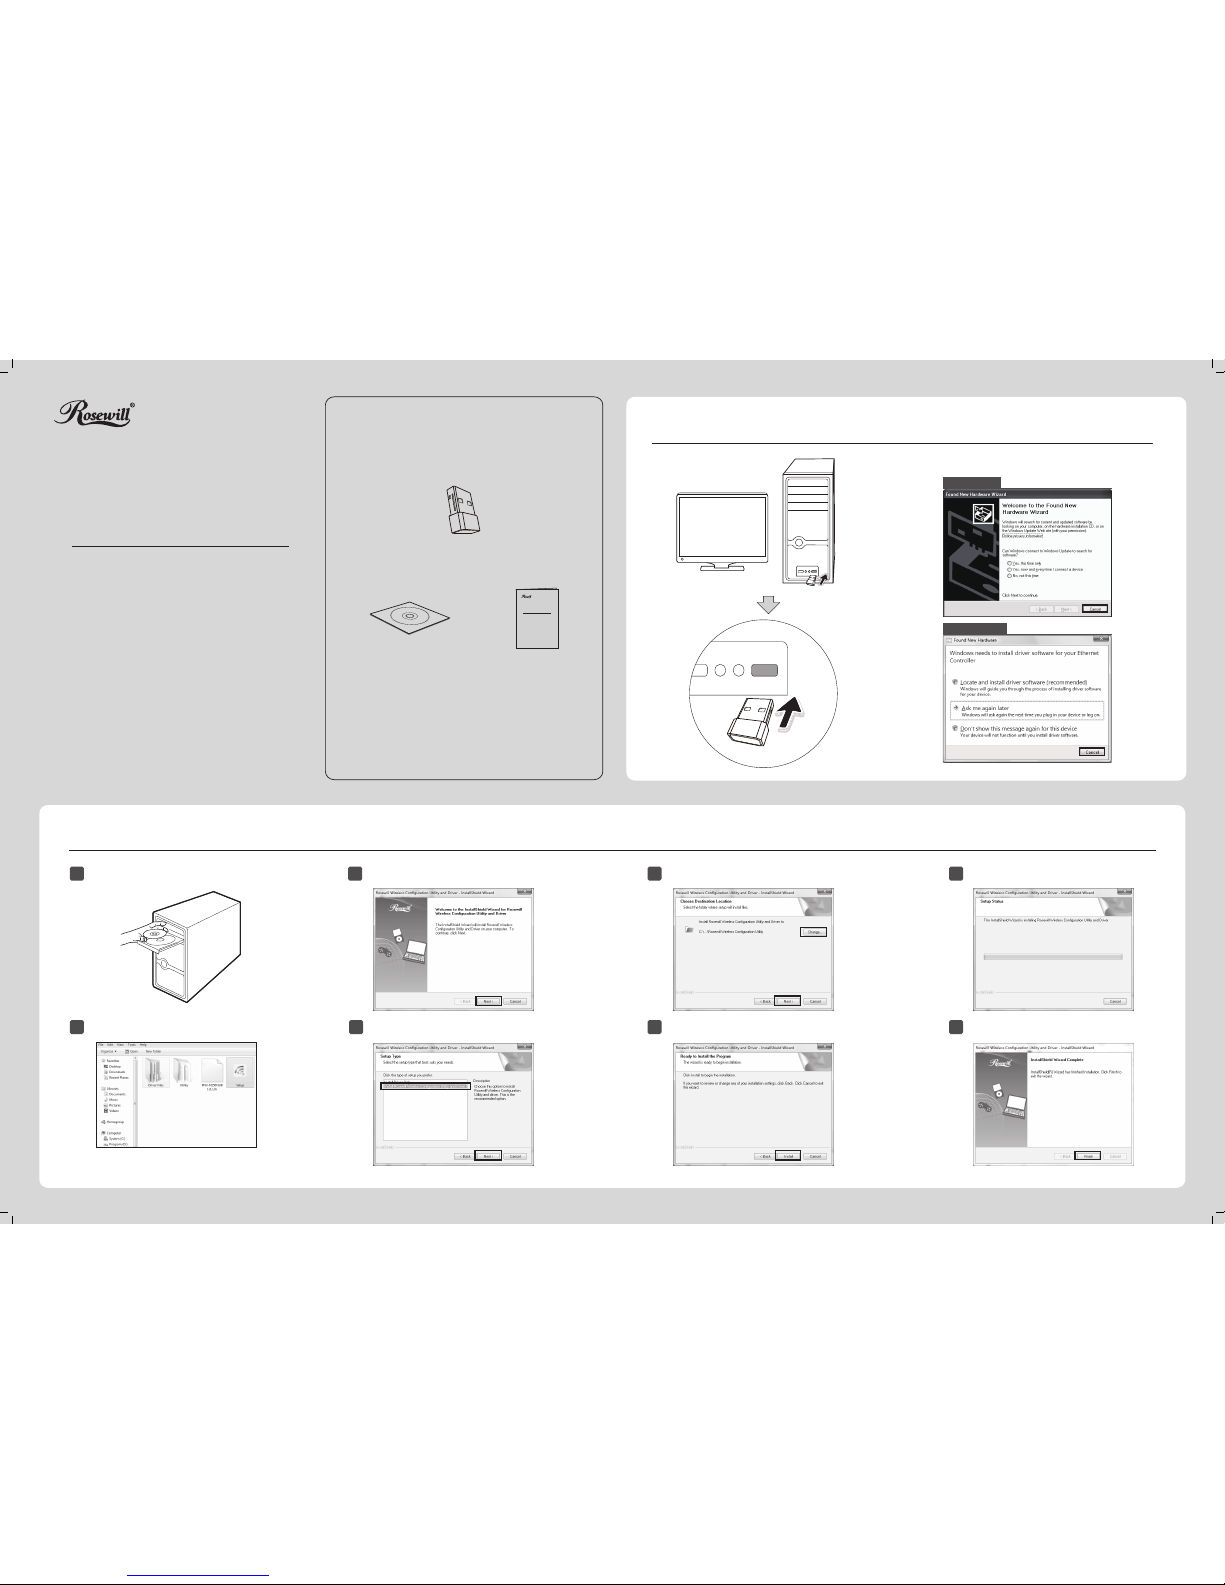
Hardware Connection
1
For Windows Vista
For Windows XP
You may see the Found New Hardware Wizard after the
adapter has been inserted. Please click Cancel.
1
Insert the Rosewill Resource CD into the CD-ROM
drive.
Browse the Resource CD and click
Setup
.
2
Select Install Rosewill Wireless Configuration
Utility and Driver
,
and then click Next.
4
5
Click Change... to specify the destination location
or you can leave it default. Click Next to continue.
6
Click Install to install the driver and utility
for your adapter.
Software Installation
2
(The installation procedures in Windows XP/ Vista/ 7/ 8 are similar. Here we use the procedures in Windows 7 as an example.)
The following screen will then appear.
Click Finish to complete the setup.
8
7
The installation process may take 1-2 minutes.
The InstallShield Wizard window will appear.
Click Next to continue.
3
Package Contents
System Requirement
Resource CD QIG
· Windows XP · Windows Vista · Windows 7 · Windows 8
MODEL NO. RNX-N150NUB
Quick Installation Guide
N150 Wireless Nano USB Adapter
RNX-N150NUB
MODEL NO. RNX-N150NUB
Quick Installation Guide
N150 Wireless Nano USB Adapter
7109504765 REV 1.0.0
Page 2
For more conguration methods of WPS, please refer to the User Guide on the Resource CD.
Appendix: Connect to Wireless Router by WPS
If your wireless Router features the WPS/QSS function, you can also set up a wireless connection in this way.
Connect to Network
3
(You can skip to Appendix: Connect to Wireless Router by WPS to quickly connect to a network if your Router or Access Point features WPS/QSS function.)
2
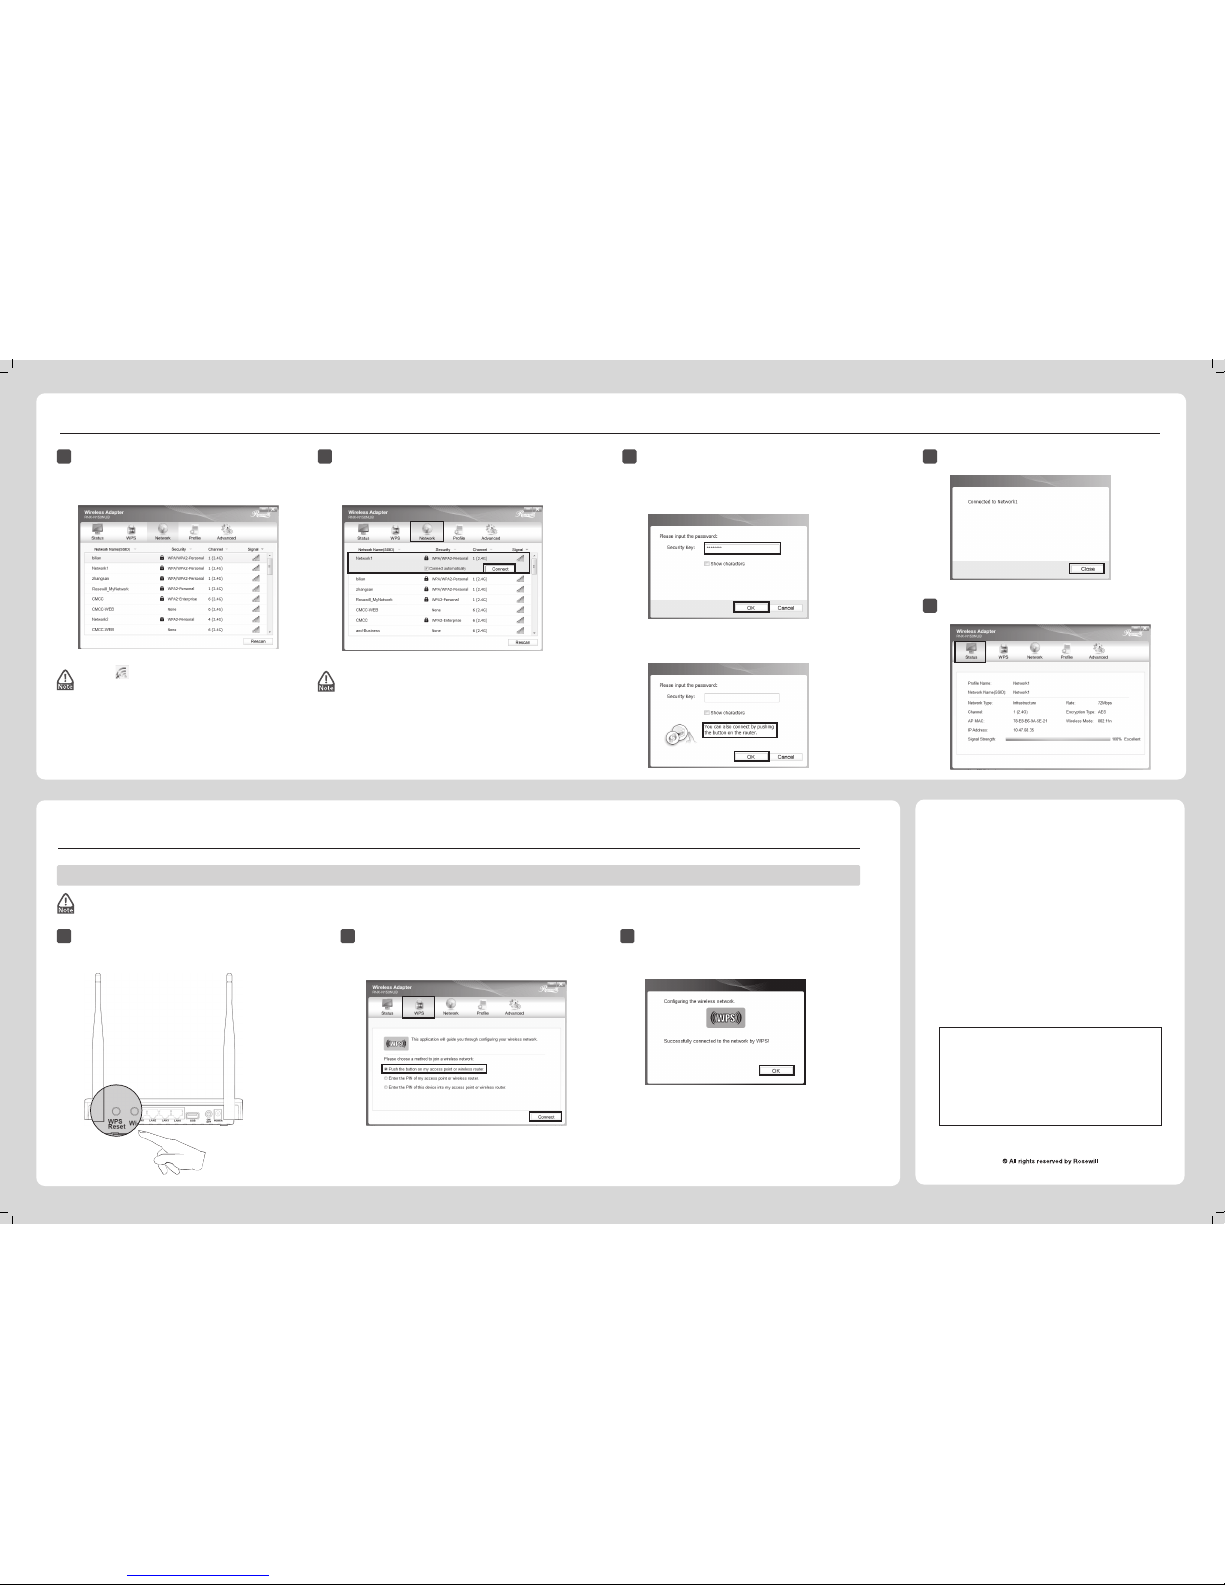
Click Network in the tools section to display a list of available
wireless networks. Highlight the target network name (e.g.
Network1) and then click Connect to build a connection.
Launch the conguration utility and click WPS in the
tools section. Select Push the button on my access
point or wireless router and then click Connect.
2 3
Wait for the connection process to complete.
The following screen indicates successful connectivity.
Click OK to nish the WPS connection.
The following screen indicates successful connectivity.
Click Close to enjoy the Internet.
4
1
After installation, the conguration page will pop up
on your desktop.
1
Push the WPS/RESET button on the Router.
(Here we use a router as an example.)
3
Method One:
Input the wireless password into the Security Key eld and
then click OK to continue.
If the network is unsecured, you will directly connect to it.
If it is secured (with WPA/WPA2-PSK), there are two ways to
connect to it.
To view more information about the network connected,
click Status in the tools section.
5
Method Two:
Without entering a key, push the WPS/QSS button on your
Router as hinted “You can also connect by pushing the button
on the router”. Then click OK to continue.
The icon will appear on your desktop. Double-clicking
on the icon can start the utility.
Here we only choose a wireless network with the security
type of WPA/WPA2-Personal as an example to elaborate
the following steps.
If you want to know more about the connection to a
wireless network with the security type of
WPA/WPA2-Enterprise, please refer to the User Guide on
the resource CD included.
Thank you for purchasing a High-Quality Rosewill Product.
To download the latest software and user guide, please visit
Rosewill ocial website at www.rosewill.com
If you have any question while using our products, feel free to
contact us.
Support Phone Number: 800-575-9885
Support Email: [email protected]
 Loading...