

Page 1

ROSEN
Rosen Entertainment Systems
1 120 California Avenue Corona CA 92881
(909) 898-9808
www.rosenentertainment.com
9000514
UN7000
7” Universal
Headrest
Monitor
Owner’s Manual
and Installation Guide
Page 2

Page 3
Installation
Flush Mounting
The kit includes a protective trim ring and an optional spacer ring for
use when the mounting surface is uneven.
1. Select appropriate locations in your vehicle for the monitor
and for the power supply module.
2. Be sure there is sufficient depth for the trim ring. Add the
spacer ring for shallow locations with uneven curved surfaces
such as upholstery . Be sure there is enough sp ace for both
the trim ring and for any excess interconnect cable.
3. Ensure that the interconnect cable will reach from the monitor
location to the power supply module.
4. Create the required opening for the monitor and trim ring. Be
sure it is not too large, and that there is enough space behind
the trim ring to store any excess interconnect cable. Excess
cable does not fit within the trim ring.
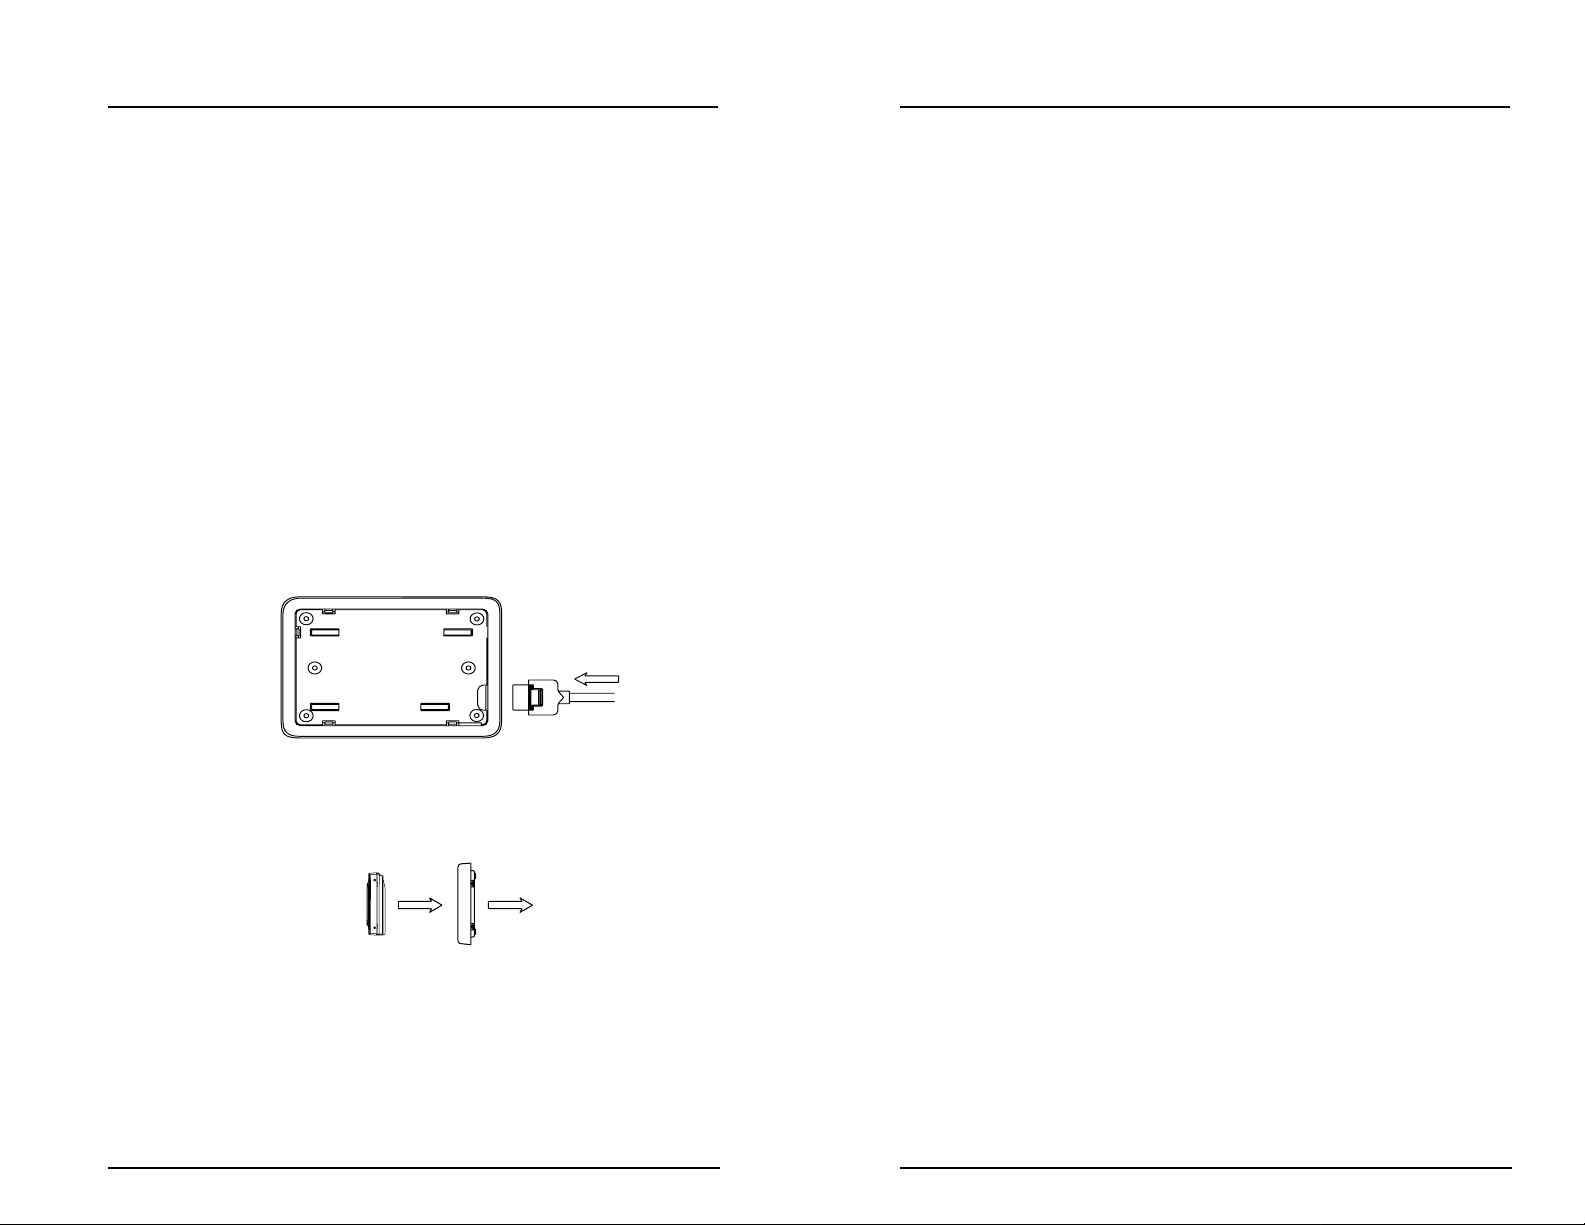
5. Route the cable through the opening in the trim ring:
Trim Ring
Cable
Table of Contents
Introduction and System Overview ................................................4
Operating Guide ..............................................................................5
Remote Control ..................................................................................5
Front Panel Controls ..........................................................................6
Turning On and Off the Monitor..........................................................7
Changing Video Inputs.......................................................................7
Dimming the Backlight .......................................................................8
Adjusting the Color, Brightness, and Tint............................................8
Image Formats...................................................................................9
Reset All Settings .............................................................................10
Installation ......................................................................................11
Box Contents....................................................................................11
Electrical Installation ........................................................................12
Physical Mounting............................................................................13
Pedestal Mounting..................................................................................13
Flush Mounting.......................................................................................14
6. Mount the trim ring with the screws provided.
7. Connect the cable to the monitor.
8. Securely snap the monitor into place.
Trim Ring
Monitor
If you need to remove the monitor from the trim ring, insert the tool
provided between the monitor and the trim ring to release the monitor
from the flexible locking retainer tabs. Gently pull the monitor from the
trim ring. Very gentle pressure can be applied using the tool provided
or a credit card.
UN7000 7” Widescreen Universal Monitor Page 14
UN7000 7” Widescreen Universal Monitor Page 3
Page 4

Introduction and System Overview
Installation
Introduction and System Overview
Congratulations on your purchase of a Rosen Widescreen Universal
Monitor! This widescreen flat panel LCD monitor features advanced
display technology and versatile installation options.
Y our Rosen Widescreen Universal Monitor includes the following
features:
• 16:9 aspect ratio. Sometimes called “widescreen,” this is the
same aspect ratio used by next generation digital
televisions.
• 7" screen (measured diagonally).
• Adjustable backlight to compensate for ambient lighting
conditions.
• Normal, Zoom, and Full screen formats.
• Front panel and remote controls. These controls allow
adjustment of the video settings, control of the backlighting,
format, and video source. (For more information, see “
Remote Control” on page 4).
• RCA video inputs.
• RCA auxiliary video output.
Important Notices
• NEVER install this monitor where it can be viewed from the
driving position; this is a violation of many state and local
vehicle codes.
• Use this monitor only after proper installation by a qualified
installer.
• Avoid mounting locations where there is a risk of impact
with a passenger in the event of an accident.
• Always mount the monitor securely using the mounting
hardware that is provided. Do not use the monitor unless it
is properly secured to the vehicle.
• Avoid touching the LCD screen except when cleaning it with a
soft dry cloth.
Physical Mounting
Two mounting options are available - pedestal mounting or flush
mounting.
Pedestal Mounting
T o install the pedest al mount:
1. Select appropriate locations in your vehicle for the pedestal
and for the power supply module.
2. T est fit the mounting pedestal foot in the desired location:
• Be sure that the monitor will be able to slide onto the
pedestal without interference.
• Be sure that the mounting location can accommodate
screws safely . Never screw into any surface without first
inspecting behind and below it.
3. Ensure that the interconnect cable will reach from the monitor
location to the power supply module location.
4. If the mounting surface is not perfectly flat, bend the flanges
on the mounting foot for the best fit without yet removing the
backing from the flange’s double-sided tape.
5. Remove the tape backing and press the pedestal into place.
6. Screw the pedestal into place with the mounting screws
provided.
7. Slide the monitor onto the pedestal as shown, and tighten the
adjustment knob. Adjust viewing angle as needed.
UN7000 7” Widescreen Universal Monitor Page 4
UN7000 7” Widescreen Universal Monitor Page 13
Page 5

Installation
Operating Guide
Electrical Installation
Begin installation of the Widescreen Universal Monitor by installing
the power supply module and routing cables, as shown.
RCA connections:
Video source 2
(Input)
Video Out
Power Supply Module
Four-wire power harness:
Yellow:
12V(+) constant power (battery)
Red:
12V(+) switched (accessory)
Black:
negative chassis ground
Blue:
12V(+) output, 1A capable
Video source 1
(Input)
Monitor
Interconnect Cable
Operating Guide
Remote Control
The remote control includes the following buttons for use with this
monitor: Monitor Menu, Mode, Up, Down, and Power. Other buttons
on the remote do not control the monitor.
Down
Up
CH/DISC/SET
MUTE
BAND
DISP
MODE
MENU
Mode
Monitor Menu
6
MEMORY
9
VOL
Power
POWER
123
5
748
0
SCAN
SAVE
REP
RC-1029A
MOBILE AV REMOTE CONTROL
Note: This system is intended for 12-volt negative-ground
systems only.
Note: To avoid damage to the power supply module, never leave
the blue wire bare when unused or when it is shorted to
the chassis ground.
UN7000 7” Widescreen Universal Monitor Page 12
UN7000 7” Widescreen Universal Monitor Page 5
Page 6

Operating Guide
Installation
Front Panel Controls
The front panel controls are located on the lower edge of the monitor .
IR Remote
Receiver
Down Up Power/
UN7000 7" Monitor
Menu
Mode
Installation
The Widescreen Universal Monitor includes mounting options
described in the following sections. Before you install the monitor,
consider the following important notices:
• NEVER install this monitor where it can be viewed from the
driving position; this is a violation of many state and local
vehicle codes.
• Avoid mounting locations where there is a risk of impact with
a passenger in the event of an accident.
• Always mount the monitor securely using the mounting
hardware that is provided. Do not use the monitor unless it is
properly secured to the vehicle.
• The Installer accepts all responsibility for the suitability of
this product installation. Rosen Entertainment Systems is not
liable for any damages, incidental or otherwise, which may
occur from the installation of this product.
Box Contents
The Rosen Widescreen Universal Monitor includes the following
parts and equipment:
• monitor
• remote control
• power supply module
• mounting pedestal
• flush mounting trim ring
• spacer ring for the flush mount trim ring
• monitor interconnect cable
• four-wire power supply harness
• mounting screws
• removal key to release the monitor from flush mount trim ring
UN7000 7” Widescreen Universal Monitor Page 6
UN7000 7” Widescreen Universal Monitor Page 11
Page 7

Operating Guide
Operating Guide
Reset All Settings
The Reset menu option enables you to restore all settings to their
original factory values.
T o reset all settings:
1. Press Menu on the monitor or Monitor Menu on the remote
control. The OSD menu appears.
2. Press Menu on the monitor or Monitor Menu on the remote
control until the arrow points to “Reset.”
3. Press or to return all settings to factory defaults.
4. Press Menu on the monitor or Monitor Menu on the remote
control again to exit the menu. The menu disappears after 5
seconds if no buttons are pressed.
T urning On and Off the Monitor
T o turn on the monitor:
• Press and release the POWER button on the monitor or the
remote control.
To turn off the monitor:
• Press and hold the POWER button on the monitor or the
remote control.
Changing Video Inputs
The monitor can be used with either NTSC or PAL video signals.
NTSC is the North American video standard and is compatible with
all Rosen video sources.
To change the active video input:
1. Press the POWER button to turn on the monitor.
2. Press MENU on the monitor or MENU on the remote control.
The following screen appears in the monitor.
AV1 : NTSC
MODE
MENU
UN7000 7” Widescreen Universal Monitor Page 10
“A V1” appears briefly when A V1 is the active input.
“A V2” appears briefly when A V2 is the active input.
3. Press or to toggle between NTSC or P AL.
4. Press POWER on the monitor, or MODE on the remote
control to toggle between “A V1” and “A V2.”
5. Press MENU on the monitor, or MENU on the remote control
again, to exit the menu.
UN7000 7” Widescreen Universal Monitor Page 7
Page 8

Operating Guide
Dimming the Backlight
The Widescreen Universal Monitor features an adjustable backlight
that dims or brightens the monitor to enhance viewing in varying
lighting conditions.
T o adjust the backlight:
1. Press the Menu button on the monitor or Monitor Menu on
the remote control. The OSD menu appears.
COLOR
BRIGHT
TINT
DIMMER
FORMAT
RESET
MODE
MENU
2. Press Menu on the monitor or Monitor Menu on the remote
control until the arrow points to “Dimmer.”
3. Press or to turn the dimmer on or off.
4. Press Menu on the monitor or Monitor Menu on the remote
control three times to exit the menu. The menu disappears
after 5 seconds if no buttons are pressed.
Operating Guide
MODE
MENU
COLOR
32
4. Press Menu on the monitor or Monitor Menu on the remote
control again to exit the menu. The menu disappears after
5 seconds if no buttons are pressed.
Image Formats
The Widescreen Universal Monitor includes three image formats:
“Normal,” “Full,” and “Zoom.” “Normal” is used in most VHS
applications. “Full” can use the widescreen image produced by
DVDs. In order to use the DVD’s “enhanced for 16:9 television,”
(sometimes known as anamorphic video or widescreen) set the
monitor’s image format to “Full.”
Normal Full
Zoom
Adjusting the Color, Brightness, and T int
If necessary , you can adjust the color, brightness, and tint of the
monitor.
To adjust color, brightness, or tint settings:
1. Press the MENU button on the monitor or Monitor Menu on
the remote control. The OSD menu appears.
2. Press MENU on the monitor or on the remote control until the
arrow points to “Color ,” “Brightness,” or “Tint.”
3. Press the and buttons to adjust the setting. The setting
will be displayed on the screen, as shown. There are 64 steps
of adjustment. The default setting is 32 on a 64-step scale.
UN7000 7” Widescreen Universal Monitor Page 8
T o change the image format:
1. Press Menu on the monitor or Monitor Menu on the remote
control. The OSD menu appears.
2. Press Menu on the monitor or Monitor Menu on the remote
control until the arrow points to “Format.”
3. Press or to select a format.
4. Press Menu on the monitor or Monitor Menu on the remote
control again to exit the menu. The menu disappears after 5
seconds if no buttons are pressed.
UN7000 7” Widescreen Universal Monitor Page 9
 Loading...