

Rosemount TankMaster Mobile Inventory Management Software Installation Manual Manuals & Guides
Page 1

Rosemount™ TankMaster™ Mobile
Inventory Management Software
Installation Manual
00809-0200-5120, Rev AE
March 2022
Page 2

TankMaster™ Mobile
NOTICE
Read this manual before working with the product. For personal and system safety, and for optimum product performance,
ensure you thoroughly understand the contents before installing, using, or maintaining this product.
For equipment service or support needs, contact your local Emerson Automation Solutions/Rosemount Tank Gauging
representative.
2
Page 3

Installation Manual Contents
00809-0200-5120 March 2022
Contents
Chapter 1 Introduction.............................................................................................................. 5
1.1 Manual overview..........................................................................................................................6
1.2 System architecture.....................................................................................................................7
1.3 Workspace.................................................................................................................................11
1.4 Before you begin........................................................................................................................14
1.5 Technical documentation.......................................................................................................... 15
Chapter 2 Getting started.........................................................................................................17
2.1 System requirements.................................................................................................................17
2.2 Quick start installation guide..................................................................................................... 19
Chapter 3 Install the Rosemount™ TankMaster™ Mobile server software..................................21
3.1
Preparations.............................................................................................................................. 21
3.2 Software installation overview................................................................................................... 22
3.3 Docker installation.....................................................................................................................26
3.4 Data Server and Application Server setup...................................................................................29
Chapter 4 Install the Tank Server Connector............................................................................. 41
4.1 Preparations.............................................................................................................................. 41
4.2 Rosemount™ TankMaster™ Tank Server Connector installation...................................................
4.3
Connect to Tank Server..............................................................................................................47
41
Chapter 5 Server management.................................................................................................51
5.1 Edit an Application Server.......................................................................................................... 52
5.2 Edit a Tank Server...................................................................................................................... 54
Chapter 6 Sign in procedure..................................................................................................... 57
6.1 Sign in........................................................................................................................................57
Chapter 7 License management............................................................................................... 59
7.1 License management.................................................................................................................59
Chapter 8 Service and maintenance......................................................................................... 69
8.1 Uninstall TankMaster Mobile......................................................................................................69
8.2 Reinstall TankMaster Mobile...................................................................................................... 73
8.3 Uninstall Tank Server Connector................................................................................................ 74
8.4 Uninstall Docker........................................................................................................................ 77
8.5 TankMaster™ Administration Utility........................................................................................... 79
8.6 Servers.......................................................................................................................................80
8.7 Backup and restore....................................................................................................................81
8.8 Reset user..................................................................................................................................82
8.9 Change URL............................................................................................................................... 83
Rosemount TankMaster Mobile 3
Page 4

Contents Installation Manual
March 2022 00809-0200-5120
8.10 Certificate management..........................................................................................................84
8.11 Install an Additional Application Server....................................................................................85
8.12 Administration mode...............................................................................................................91
8.13 Software updates.....................................................................................................................93
8.14 Tank Server Connector setup...................................................................................................93
4 Installation Manual
Page 5

Installation Manual Introduction
00809-0200-5120 March 2022
1 Introduction
This is an introduction to the Rosemount™ TankMaster™ Mobile Inventory Management
software.
Rosemount TankMaster Mobile is an application for remote monitoring of tank farms. It is
designed for standard web browsers and mobile phones. The application connects with
servers that run Rosemount TankMaster inventory management software.
The graphical interface gives you a clear overview of tanks. Various views are available for
different levels of detail.
Rosemount TankMaster Mobile is designed to meet applicable requirements for network
and system security in international standard IEC 62443-3-3. It is designed for an
architecture that supports segmentation of network layers and separate security zones
with different access levels for various components.
Rosemount TankMaster Mobile is designed for the Docker platform. This ensures stable
and reliable operation and simple installation in various computer network environments.
Subscribe to software updates
You can subscribe to Rosemount TankMaster Mobile updates for a specified period of
time.
A license gives you access to software upgrades and security patches when available.
Software updates are available on TankMaster.Rosemount.com/ServiceCenter.
Related information
Software updates
Rosemount TankMaster Mobile 5
Page 6

Introduction Installation Manual
March 2022 00809-0200-5120
1.1 Manual overview
This manual provides information on installing, and maintaining the Rosemount
TankMaster™ Mobile system.
Chapter Introduction provides a description of the TankMaster Mobile workspace and
system architecture.
Chapter Getting started provides system requirements and guidelines for installing the
Rosemount TankMaster Mobile system.
Chapter Install the Rosemount™ TankMaster™ Mobile server software describes installation
steps for installing Rosemount TankMaster Mobile.
Chapter Install the Tank Server Connector describes how to install the Tank Server
Connector.
Chapter Server management describes how to edit application server and tank server
features.
Chapter Sign in procedure describes how to sign in to TankMaster Mobile.
Chapter License management describes various license management options.
™
Chapter Service and maintenance describes various maintenance functions such as
backup, restore and more.
6 Installation Manual
Page 7

Installation Manual Introduction
00809-0200-5120 March 2022
1.2 System architecture
Rosemount™ TankMaster™ Mobile is a web-based system that allows you to collect realtime data and status information from Rosemount TankMaster Inventory Management
systems. You may use desktop computers, laptops, tablets, and mobile phones to monitor
tank farms via standard web browsers.
Rosemount TankMaster Mobile supports a network topology where different access
points can be placed on different network layers as illustrated in Figure 1-1.
The system architecture is designed to meet high security requirements based on
segmented networks with multiple layers isolated by firewalls.
A network is typically partitioned into separate network segments. The objective of
network topology is to ensure that only authorized devices are connected to the network,
and that their connectivity is restricted to the network segments where they are used.
The system can be setup with multiple access points (via Application Servers) on different
network layers. Privileges are assigned to each Application Server in the system. A client
connecting to a server on one network layer may have different privileges than a client on
a second network layer.
Users are required to sign in for access to the TankMaster Mobile system. Full
authentication requires registered devices which are validated by the TankMaster Mobile
system for access to the system. All data is encrypted for secure communication.
Your site dictates PC addressing, applications allowed, timing of Windows Software
Updates, and so on for the TankMaster Mobile Server. You must ensure that the
TankMaster Mobile computer is compatible with site policy with regard to anti-virus
software, security (such as PC hardening), and software updates.
Components
Components in the TankMaster Mobile system:
• Web Server/NGINX Reverse Proxy
• Application Server
• Identity Server
• Data Server
• Tank Server Connector
• Docker software platform
The Tank Server and Tank Server Connector are running on the same Rosemount
TankMaster workstation. In a segmented topology the TankMaster workstation is typically
installed on a Plant Network Layer 2 protected by firewalls. The Tank Server Connector
communicates with the existing TankMaster system's Tank Server. It collects
measurement data and status information and provides it to the Data Server.
TankMaster Mobile components are installed on a separate machine on Plant Network
Layer 3 as illustrated in Figure 1-1.
Rosemount TankMaster Mobile 7
Page 8

Introduction Installation Manual
March 2022 00809-0200-5120
Clients connect to the system via a Web Server/Reverse Proxy. The Application Server
provides data to clients and can be configured to provide limited features for selected user
groups.
Application Servers can be added to an existing TankMaster Mobile system. This may be
useful, for example, in case you would like to provide access for clients on a Business
Network Layer 4.
8 Installation Manual
Page 9

Installation Manual Introduction
00809-0200-5120 March 2022
Figure 1-1: TankMaster Mobile System Architecture
Rosemount TankMaster Mobile 9
Page 10

Introduction Installation Manual
March 2022 00809-0200-5120
User documentation
User documentation is organized as illustrated in Figure 1-2 to cover installation and
operation.
Figure 1-2: TankMaster Mobile System and User Documentation Architecture
10 Installation Manual
Page 11

N
A
M
L
C DB
F
H
GE
I
J
K
Installation Manual Introduction
00809-0200-5120 March 2022
1.3 Workspace
TankMaster Mobile web application start page has menus and icons for easy navigation to
the various TankMaster functions.
Figure 1-3: Menus and Icons on the Start Page
A. Overview tab
Movement
B.
C.
Watchlist
D. Inventory
E. Add tank group
F. Shortcut to My Profile
G. User account ("Administration Mode" appears to the left when signed in as
administrator)
H. Print
I. Message
J. Sign out
K. Menu options (Administration Mode
TankMaster)
L. Tank card
M. Tank groups
N. Tank card size (small, medium, large)
(1)
, My Profile, Sign Out, Help Center, About
(1) Available for administrator accounts
Rosemount TankMaster Mobile 11
Page 12

Introduction Installation Manual
March 2022 00809-0200-5120
Administration Mode
New menu options appear when you sign in to Administration Mode .
Figure 1-4: Menus in Administration Mode
12 Installation Manual
Page 13

Installation Manual Introduction
00809-0200-5120 March 2022
1.3.1 Start page menus
Summary of start page menus.
Table 1-1: Menus and icons on the start page
Item Description
Overview Presents an overview of tanks and tank groups
Movement Shows all tanks with moving product surface, i.e. tanks which are
filled or emptied
Watchlist Presents a group of tanks of special interest
Add tank group Lets you add a new group with the desired tanks
User account User account currently signed in
Print Shortcut to print dialog.
Message The message flag indicates that a message is available. Click the
icon to read messages.
Sign out Sign out from this account
Menu options List of menu options:
• Administrator Mode
• My Profile
• Sign out
• Help center
• About TankMaster
Tank card Tank cards are available in small, medium, and large size
Tank groups Available tank groups
Shortcut to My Profile Opens My Profile with Account and Tank Groups
Select tank card size Select the desired tank card size; small, medium, or large
Rosemount TankMaster Mobile 13
Page 14

Introduction Installation Manual
March 2022 00809-0200-5120
1.4 Before you begin
To install and use TankMaster Mobile software, you should be familiar with:
• Microsoft® Windows
• Your local area network (LAN) configuration and security settings
• Network components installed on your system
• System requirements
• System management functions such as backup and restore
• Synchronizing system clocks for servers and clients
Related information
Software installation overview
14 Installation Manual
Page 15

Installation Manual Introduction
00809-0200-5120 March 2022
1.5 Technical documentation
The Rosemount™ Tank Gauging System includes a wide portfolio of user documentation.
For a complete list, see product pages on Emerson.com/Rosemount.
Reference manuals
• Rosemount Tank Gauging System Configuration Manual (00809-0300-5100)
• Rosemount 2460 System Hub (00809-0100-2460)
• Rosemount 2410 Tank Hub (00809-0100-2410)
• Rosemount 5900S Radar Level Gauge (00809-0100-5900)
• Rosemount 5900 Proof Test with Reference Reflector (00809-0200-5900)
• Rosemount 5900C Radar Level Gauge (00809-0100-5901)
• Rosemount 2240S Multi-Input Temperature Transmitter (00809-0100-2240)
• Rosemount 2230 Graphical Field Display (00809-0100-2230)
• Rosemount 5300 Guided Wave Radar (00809-0100-4530)
• Rosemount 5408 Radar Level Transmitter (00809-0300-4408)
• Rosemount Tank Gauging Wireless System (00809-0100-5200)
• Rosemount TankMaster WinOpi (00809-0200-5110)
• Rosemount TankMaster Software Installation Manual (00809-0400-5110)
• Rosemount TankMaster WinSetup (00809-0100-5110)
• Rosemount TankMaster Floating Roof Monitoring (00809-0500-5100)
• Rosemount TankMaster Full containment tanks (00809-0500-5110)
• Rosemount TankMaster Network Configuration (303042EN)
• Rosemount 5900 Radar Level Gauge and Rosemount 2410 Tank Hub Safety Manual
Option S (00809-0400-5100)
• Rosemount TankMaster Mobile User Guide (00809-0100-5120)
• Rosemount TankMaster Mobile Installation Manual (00809-0200-5120)
Rosemount TankMaster Mobile 15
Page 16

Introduction Installation Manual
March 2022 00809-0200-5120
Product data sheets
• Rosemount Tank Gauging System (00813-0100-5100)
• Rosemount TankMaster Inventory Management Software (00813-0100-5110)
• Rosemount TankMaster Mobile Inventory Management Software (00813-0100-5120)
• Rosemount 2460 System Hub (00813-0100-2460)
• Rosemount 2410 Tank Hub (00813-0100-2410)
• Rosemount 5900S Radar Level Gauge (00813-0100-5900)
• Rosemount 5900C Radar Level Gauge (00813-0100-5901)
• Rosemount 2240S Multi-input Temperature Transmitter (00813-0100-2240)
• Rosemount 565/566/765/614 Temperature and Water Level Sensors
(00813-0100-5565)
• Rosemount 2230 Graphical Field Display (00813-0100-2230)
• Rosemount 5300 Level Transmitter (00813-0100-4530)
• Rosemount 5408 Level Transmitter (00813-0100-4408)
16 Installation Manual
Page 17

Installation Manual Getting started
00809-0200-5120 March 2022
2 Getting started
2.1 System requirements
Hardware and software requirements for TankMaster Mobile Data server and Application
server.
Version
1.3.1
Hardware
• 64-bit processor
• Intel® i7 processor or similar (minimum 4 cores)
• Internal memory (RAM): Minimum 16 GB
• Hard disk drive:
— Minimum: 100 GB free disk space
— Recommended: 256 GB
Software
• Microsoft® Windows Server 2019, English (United States) based Standard Desktop
Experience version 1809 OS Build 17763.2300 or later.
• Firewall: open appropriate ports on the TankMaster Mobile server
• Supported web browsers for Microsoft Windows: Chrome
• Supported web browsers on Android devices: Chrome
• Supported web browsers on iOS devices: Safari
Other requirements
• Tank Server Connector and TankMaster Mobile can not be installed on the same server.
Tank Server Connector is installed on the same server as TankMaster Classic, and
TankMaster Mobile is installed on a separate server.
• Installation requires administrator privileges.
• To access the TankMaster Mobile system you need to make sure that the ports
specified in Table 2-1 are open:
Table 2-1: Firewall Connections
Node Protocol Port
Data Server (Main node) TCP 2377, 5011, 5671, 7946
(1)
80, 443
Data Server (Main node) UDP 4789, 5011, 5671, 7946
Rosemount TankMaster Mobile 17
Page 18

Getting started Installation Manual
March 2022 00809-0200-5120
Table 2-1: Firewall Connections (continued)
Node Protocol Port
Data Server (Main node) ICMPv4 (ping)
Tank Server Connector TCP 5805
Additional App Server TCP 2377, 4433
Additional App Server UDP 4789, 7946
Additional App Server ICMPv4 (ping)
Firewall Layer 3 TCP 80, 443
Firewall Layer 3 UDP 5671
Firewall Layer 4 TCP 2377, 5011, 7946
Firewall Layer 4 UDP 4789, 5011, 7946
(1)
5805+1
5671
(1)
5805
5805+1
(1)
(1)
(1)
(1)
, 7946
Firewall Layer 4 ICMPv4 (ping)
External network nodes Appropriate ports
(1) User configurable, i.e you may choose a port that complies with local IT policies
TankMaster
The following requirements refer to the server machine that hosts the Tank Master Tank
Server and the Tank Server Connector:
• TankMaster version 6.F0 and higher
• Operating system Microsoft Windows 2012 Server R2 may not be used on TankMaster
machine due to security limitations
Certificates
TankMaster Mobile requires digital certificates for a secure and trusted communication.
Self-signed certificates are automatically distributed to all servers upon installation of
TankMaster Mobile. The self-signed public root certificate needs to be distributed securely
to clients using the system in order to be trusted by web browsers.
In case your organization has trusted root certificates from a root certificate vendor, you
may use these instead of the self-signed certificates.
Related information
System architecture
18 Installation Manual
Page 19

Installation Manual Getting started
00809-0200-5120 March 2022
2.2 Quick start installation guide
This is a brief introduction how to setup the Rosemount™ TankMaster™ Mobile system.
The following steps need to be managed in order to properly setup a Rosemount
TankMaster Mobile system. More information is provided in appropriate sections of this
installation manual.
1. Setup a server machine for
requirements are fulfilled.
2. Ensure that TankMaster version 6.F0 or higher is installed on the TankMaster
workstation.
3. Install Docker on the TankMaster Mobile machine.
4. Install Rosemount TankMaster Mobile on the dedicated machine.
5. Install Tank Server Connector on the TankMaster workstation.
6. Configure the TankMaster Mobile system:
• Connect the TankMaster Mobile server to the Tank Server on the TankMaster
workstation
• Configure users and user groups
7. Activate your Rosemount TankMaster Mobile license.
Figure 2-1: Installation of components on various servers
Rosemount TankMaster Mobile. Ensure that system
Rosemount TankMaster Mobile 19
Page 20

Getting started Installation Manual
March 2022 00809-0200-5120
20 Installation Manual
Page 21

Installation Manual Install the Rosemount™ TankMaster™ Mobile server software
00809-0200-5120 March 2022
™
3 Install the Rosemount™ TankMaster
Mobile server software
3.1 Preparations
Before you begin installing the Rosemount TankMaster Mobile application, make sure that
hardware and software system requirements are fulfilled.
Make sure that you have required information such as IP addresses, server names, firewall
ports, service accounts, and other essential information.
The following information is required:
• IP address of the TankMaster Mobile computer
• IP address of the TankMaster Tank Server computer (will be needed after installation
when connecting to TankMaster Tank Server)
Prior to installing Rosemount TankMaster Mobile you also need to:
• Assign computers that fulfill system requirements to host the TankMaster Mobile
application and the Tank Server Connector. The Tank Server Connector is installed on
the same machine as the Rosemount TankMaster software.
• Make sure that Docker is installed and up and running on the TankMaster Mobile
computer.
• No other services than TankMaster Mobile services may be running in the Docker
environment. Other services will automatically be terminated by the installer program.
• Multiple network cards must not be enabled during installation of TankMaster Mobile.
Make sure that only one network card is enabled. Once installation is finished other
network cards may be enabled again.
It is recommended that you collaborate with the IT department in order to integrate the
TankMaster Mobile application with your network infrastructure.
Note
TankMaster Mobile is running in a Docker environment. In the event that Docker is used on
the server machine for other services than TankMaster Mobile, they will automatically be
terminated by the software installer. No other services may be used by Docker on a
TankMaster Mobile server machine.
Related information
System requirements
Docker installation
Certificate management
Rosemount TankMaster Mobile 21
Page 22

Install the Rosemount™ TankMaster™ Mobile server software Installation Manual
March 2022 00809-0200-5120
3.2 Software installation overview
This is an introduction to the Rosemount™ TankMaster™ Mobile installation procedure.
Installation procedure
Installation of the system includes the following steps:
• Install Docker on the machine where TankMaster Mobile will be installed
• Install the TankMaster Mobile server software
• Install the Tank Server Connector on the computer where the TankMaster Tank Server
is installed
• Configure the system:
— Connect the TankMaster Mobile server to the TankMaster Tank Server
(Administrator mode; Servers>Tank Servers)
— configure users and user groups (Administrator mode; Users>User administration)
• Activate the TankMaster Mobile license
• Optional: setup custom certificates
Note
Once TankMaster Mobile is installed, ensure that clocks in servers and clients are
synchronized. They may be located in different time zones as long as using accurate
system time.
Related information
Docker installation
Data Server and Application Server setup
Rosemount TankMaster Tank Server Connector installation
Connect to Tank Server
Tank Server Connector setup
Administration mode
Software updates
22 Installation Manual
Page 23

Installation Manual Install the Rosemount™ TankMaster™ Mobile server software
00809-0200-5120 March 2022
3.2.1 System components
This is a brief summary of software components installed with the TankMaster Mobile
system.
Table 3-1: System Components
Component Description
Tank Server Connector The Tank Server Connector runs as a service on the same
computer as the Tank Server and connects the existing Tank
Server with the TankMaster Mobile system. It is installed on the
same hardware and operating systems as the Tank Server.
Data Server The Data Server collects data from one or several Tank Server
Connectors and provides data to Application Servers. It also
manages users, system settings and logging.
SQL Server The SQL Server is a database that stores persistent data in the
system.
Identity Server The Identity Server is responsible for authenticating users. The
Identity Server also manages authentication between servers in
the system.
Application Server The Application Server interacts with the Data Server to retrieve
information. All communication with clients and Data Server is
encrypted.
Reverse Proxy Server The Reverse Proxy runs the web server. It routes client requests
to Application Server and Identity Server running on a different
network layer.
Docker Docker is an application that is used to run TankMaster Mobile in
an isolated environment called a container. This allows efficient
use of computer resources.
Administration Utility Includes functions for server management, backup and restore,
user password reset, web server URL handling, and certificate
management.
Backup & Restore service Lets you make system backup and restore installation. This
function is included in the Administration Utility.
Related information
System architecture
Rosemount TankMaster Mobile 23
Page 24

Install the Rosemount™ TankMaster™ Mobile server software Installation Manual
March 2022 00809-0200-5120
3.2.2 Certificates
Digital certificates allow clients to check if the received data is coming from a trusted
Server (Client/Server model).
Clients connect to Rosemount TankMaster™ Mobile servers using digital certificates.
Servers and clients require separate web certificates. Self signed certificates are generated
by the Data Server and distributed to all servers in the system.
Installation of server certificates is done automatically upon installation of TankMaster
Mobile.
Once a client machine is approved by, and registered in, the TankMaster Mobile system, a
root certificate can be downloaded. This option is provided from the start page when
signing in the first time.
Should you want to use CA (Certificate Authority) web certificates, begin the process of
establishing the chain of trust. CA certificates can be applied after installation.
You are responsible for system security, practices, and processes, and for the proper
configuration and use of the Rosemount TankMaster Mobile product.
24 Installation Manual
Page 25

Installation Manual Install the Rosemount™ TankMaster™ Mobile server software
00809-0200-5120 March 2022
3.2.3 Installation utility
Rosemount TankMaster Mobile software installation is easily managed by utilizing the
TankMaster Installation Utility and wizards.
The TankMaster Installation Utility is available in the folder that contains all the
installation files.
Figure 3-1: TankMaster Installation Utility
Double-click the TankMaster Installation Utility.exe.
Figure 3-2: Installation Utility
The Installation Utility presents buttons for installation of the various components.
Buttons will show different color depending on component availability in the installation
package:
Blue
Gray
Rosemount TankMaster Mobile 25
the program package is available
the program is installed or the program package is not available
Page 26

Install the Rosemount™ TankMaster™ Mobile server software Installation Manual
March 2022 00809-0200-5120
3.3 Docker installation
Docker needs to be installed prior to installing the Rosemount™ TankMaster™ Mobile
package. Both these software packages are installed by utilizing the Rosemount
TankMaster Installation Utility.
Related information
Docker
Docker docs
Installation utility
3.3.1 Install Docker
This is an instruction for installing the Docker software.
Prerequisites
Ensure that system requirements are fulfilled for the TankMaster Mobile server machine as
well as any additional Application server machine.
Procedure
1. Locate the installation file named
the file.
The TankMaster Installation Utility is located on the Rosemount TankMaster
Mobile software installation DVD, or in the downloaded and extracted zip-file if
downloaded from the TankMaster.Rosemount.com/ServiceCenter web site.
2. In the
Rosemount TankMaster Utility, select Manage Docker.
TankMaster Installation Utility and double-click
26 Installation Manual
Page 27

Installation Manual Install the Rosemount™ TankMaster™ Mobile server software
00809-0200-5120 March 2022
3. Select Install Docker.
4. Wait until the installation process is finished.
5. When Docker installation is completed you will be prompted to restart the
computer now (
y) or manually at a later occasion.
3.3.2 Update Docker
This is an instruction for updating the Docker software.
Prerequisites
Ensure that the new software installation package is available.
Important
Make sure that the Docker software is upgraded prior to upgrading the Rosemount
TankMaster™ Mobile Server software.
Rosemount TankMaster Mobile 27
™
Page 28

Install the Rosemount™ TankMaster™ Mobile server software Installation Manual
March 2022 00809-0200-5120
Procedure
1. Locate the installation file named
TankMaster Installation Utility and double-click
the file.
The TankMaster Installation Utility is located on the Rosemount TankMaster
Mobile software installation DVD, or in the downloaded and extracted zip-file if
downloaded from the TankMaster.Rosemount.com/ServiceCenter web site.
2. In the
TankMaster Installation Utility, select Manage Docker.
3. Select Update Docker.
4. Wait until the installation process is finished.
5. When Docker installation is completed you will be prompted to restart the
computer now (y) or manually at a later occasion.
28 Installation Manual
Page 29

Installation Manual Install the Rosemount™ TankMaster™ Mobile server software
00809-0200-5120 March 2022
3.4 Data Server and Application Server setup
Related information
Software installation overview
Installation utility
3.4.1 Data Server and Application Server installation
Follow this instruction to install the Rosemount™ TankMaster™ Mobile Server software. The
installation wizard automatically installs all the necessary components.
Prerequisites
Prior to installing the Rosemount TankMaster Mobile software you need to ensure that
Docker is installed and up and running.
Make sure that server address and port number are available when requested during the
installation process.
Procedure
1. Locate the installation file named
the file.
The TankMaster Installation Utility is located on the Rosemount TankMaster
Mobile software installation DVD, or in the downloaded and extracted zip-file if
downloaded from the TankMaster.Rosemount.com/ServiceCenter web site.
2. In the
TankMaster Installation Utility, select Manage TankMaster Mobile.
TankMaster Installation Utility and double-click
Rosemount TankMaster Mobile 29
Page 30

Install the Rosemount™ TankMaster™ Mobile server software Installation Manual
March 2022 00809-0200-5120
3. Select Install TankMaster Mobile.
The Rosemount TankMaster Mobile installation wizard appears:
4. Click Next to proceed with the installation procedure.
5. Review and check the box to accept the end-user license agreement. Click
Next to
continue.
30 Installation Manual
Page 31

Installation Manual Install the Rosemount™ TankMaster™ Mobile server software
00809-0200-5120 March 2022
6. Accept the suggested destination folder, or click Change to select another folder.
Click Next.
7. Enter the host server IP address and HTTPS port number for the web server. As an
alternative you may enter a URL and HTTPS port number. This is the URL that is used
to connect to the TankMaster Mobile server by web browsers in mobile phones,
tablets, and computers. Note that the port must be open in applicable firewalls.
Ensure that appropriate ports recommended by your local IT department are used.
Click Next.
Example:
a. 10.70.148.60:443
b.
tankmaster.com:443
Rosemount TankMaster Mobile 31
Page 32

Install the Rosemount™ TankMaster™ Mobile server software Installation Manual
March 2022 00809-0200-5120
8. Enter the TankMaster Mobile server IP address. This address needs to be accessible
by other computers where TankMaster Mobile will be installed. Click Next to
continue.
9. Create an Administrator account. Enter your email address. The temporary
password must be changed when signing in the first time. Click Next to continue.
32 Installation Manual
Page 33

Installation Manual Install the Rosemount™ TankMaster™ Mobile server software
00809-0200-5120 March 2022
10. Click Install to start the installation process.
11. Please wait until the installation is completed.
Note
In case you cancel an ongoing installation, it may take some time until you will see
that the installer has stopped the installation process. Once the installation is
canceled, it is recommended that you uninstall the program to make sure that
there are no remaining files.
Rosemount TankMaster Mobile 33
Page 34

Install the Rosemount™ TankMaster™ Mobile server software Installation Manual
March 2022 00809-0200-5120
12. Once the installation is completed, select the Show server statuses... check box in
case you want the Servers window to open automatically. It will show an overview of
current status for installed components. Click Finish to complete installation of
TankMaster Mobile. The computer does not need to be restarted.
13. If check box Show server statuses on finish was selected, the TankMaster
Administration Utility program will open automatically. The Servers tab will open
and show current server statuses.
34 Installation Manual
Page 35

Installation Manual Install the Rosemount™ TankMaster™ Mobile server software
00809-0200-5120 March 2022
Postrequisites
Once the Rosemount TankMaster Mobile server is installed;
1. Install the
Tankserver Connector if not done.
2. Sign in to TankMaster mobile on a computer other than the one where TankMaster
Mobile was installed.
3. Enter Administration Mode.
4. Configure the system:
• connect the TankMaster Mobile server to a TankMaster Tank Server
(Administration mode; Servers>Tank Servers)
• configure users and user groups (Administration mode; Users>User
administration)
Once TankMaster Mobile is configured, proceed with:
• activating your license
• optional: setup custom certificates (not needed in case self-signed certificates will be
used)
It is recommended that you create a backup copy of the system once the installation is
completed. The Rosemount TankMaster Administration Utility offers backup and restore
functionality.
Related information
Install the Tank Server Connector
Software installation overview
Backup and restore
Administration mode
License management
Rosemount TankMaster Mobile 35
Page 36

Install the Rosemount™ TankMaster™ Mobile server software Installation Manual
March 2022 00809-0200-5120
3.4.2 Update TankMaster™ Mobile
This is an instruction on how to update the Rosemount TankMaster Mobile Server
software.
When updating TankMaster Mobile, an automatic backup is created. It will be stored in the
repository that is setup for system backups
will be stored in the \backup sub folder located in the TankMaster Mobile installation
folder. Default installation folder is: C:\Program Files\Rosemount\TankMaster
\TankMasterMobile. However, a different folder may have been selected for the current
TankMaster Mobile installation.
Prerequisites
It is recommended that you make a backup copy before updating the TankMaster Mobile
system.
Note
When updating TankMaster Mobile, current certificates (self-signed or custom) will be
overwritten by new self-signed certificates that come with the updated version of
TankMaster Mobile. Any custom certificates need to be installed again.
Procedure
1. Locate the installation file named
the file.
(2)
. If no backup setup is done, then the backup
TankMaster Installation Utility and double-click
The TankMaster Installation Utility is located on the Rosemount TankMaster
Mobile software installation DVD, or in the downloaded and extracted zip-file if
downloaded from the TankMaster.Rosemount.com/ServiceCenter web site.
In the
2.
(2) See Related information at the end of this instruction for more information.
36 Installation Manual
TankMaster Installation Utility, select Manage TankMaster Mobile.
Page 37

Installation Manual Install the Rosemount™ TankMaster™ Mobile server software
00809-0200-5120 March 2022
3. Select Update TankMaster Mobile.
The Rosemount TankMaster Mobile installation wizard appears:
4. Click Next to continue.
5. Review and check the box to accept the end-user license agreement. Click
Next to
continue.
Rosemount TankMaster Mobile 37
Page 38

Install the Rosemount™ TankMaster™ Mobile server software Installation Manual
March 2022 00809-0200-5120
6. The Licensing Check dialog only appears in case your license is not valid for the
updated version. Then you will need to visit TankMaster.Rosemount.com/
ServiceCenter and extend the license. You may cancel the installation now and
update the license before you continue. In case you decide to proceed with
installing the new version, you may update the license at a later occasion. You will
be granted a trial period of 90 days that allows you to update your license anytime
within that period. Click Next to continue.
7. Click Install to finish the installation procedure.
Note
TankMaster Mobile will stop during the installation procedure.
Note
You may need to update Tank Server Connector if the current version is
incompatible with the updated TankMaster Mobile version.
38 Installation Manual
Page 39

Installation Manual Install the Rosemount™ TankMaster™ Mobile server software
00809-0200-5120 March 2022
8. Once the installation is completed click Finish to complete the installation. The
computer does not need to be restarted.
Postrequisites
You may need to update Tank Server Connector if the current version is incompatible
with the updated TankMaster Mobile version.
Related information
Backup and restore
Rosemount TankMaster Mobile 39
Page 40

Install the Rosemount™ TankMaster™ Mobile server software Installation Manual
March 2022 00809-0200-5120
40 Installation Manual
Page 41

Installation Manual Install the Tank Server Connector
00809-0200-5120 March 2022
4 Install the Tank Server Connector
4.1 Preparations
Before you begin installing the Tank Server Connector make sure that hardware and
software system requirements are fulfilled.
The following information is required:
• IP address of the TankMaster Tank Server computer
• Firewall ports that must be open
Prior to installing the Tank Server Connector you also need to:
• Verify that the computer that will host the Tank Server Connector fulfills system
requirements. The Tank Server Connector is installed on the same machine as the
Rosemount™ TankMaster™ software. See system requirements for Rosemount
TankMaster inventory management software.
Related information
System requirements
4.2 Rosemount™ TankMaster™ Tank Server Connector installation
Follow this instruction to install the Tank Server Connector.
Prerequisites
Prior to installing the Tank Server Connector you need to make sure that the TankMaster
workstation is properly prepared. For example, ensure that no pending Windows updates
will start during the installation.
Procedure
1. Locate the installation file named
the file.
The TankMaster Installation Utility is located on the Rosemount TankMaster
Mobile software installation disk, or in the downloaded and extracted zip-file if
downloaded from the TankMaster.Rosemount.com/ServiceCenter web site.
TankMaster Installation Utility and double-click
Rosemount TankMaster Mobile 41
Page 42
Install the Tank Server Connector Installation Manual
March 2022 00809-0200-5120
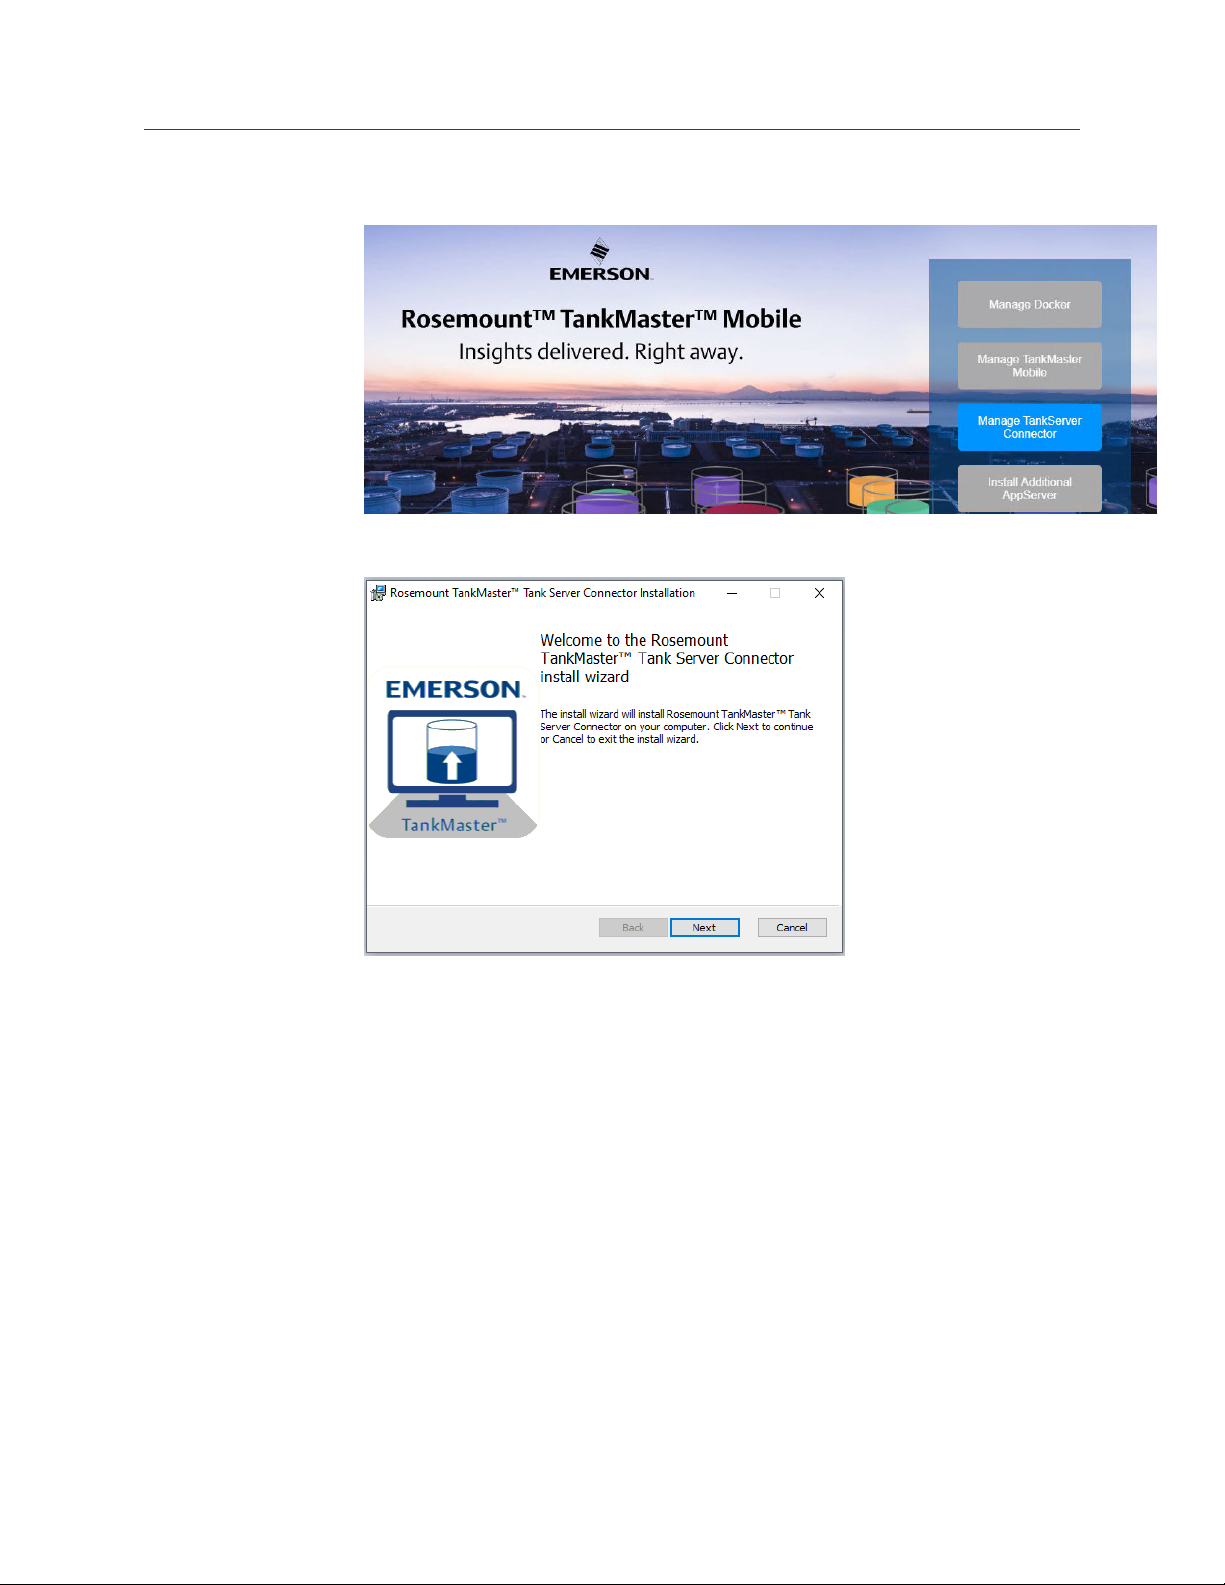
2. In the Rosemount TankMaster Utility, select Manage Tank Server Connector.
3. Select Install Tank Server Connector.
The Rosemount TankMaster Tank Server installation wizard appears:
4. Click Next to proceed with the installation procedure.
42 Installation Manual
Page 43

Installation Manual Install the Tank Server Connector
00809-0200-5120 March 2022
5. Review and accept end-user license agreement. Click Next.
Now the installation wizard performs a system requirement check.
6. Accept the suggested folder, or click
Change to select another destination folder.
Click Next.
Rosemount TankMaster Mobile 43
Page 44
Install the Tank Server Connector Installation Manual
March 2022 00809-0200-5120
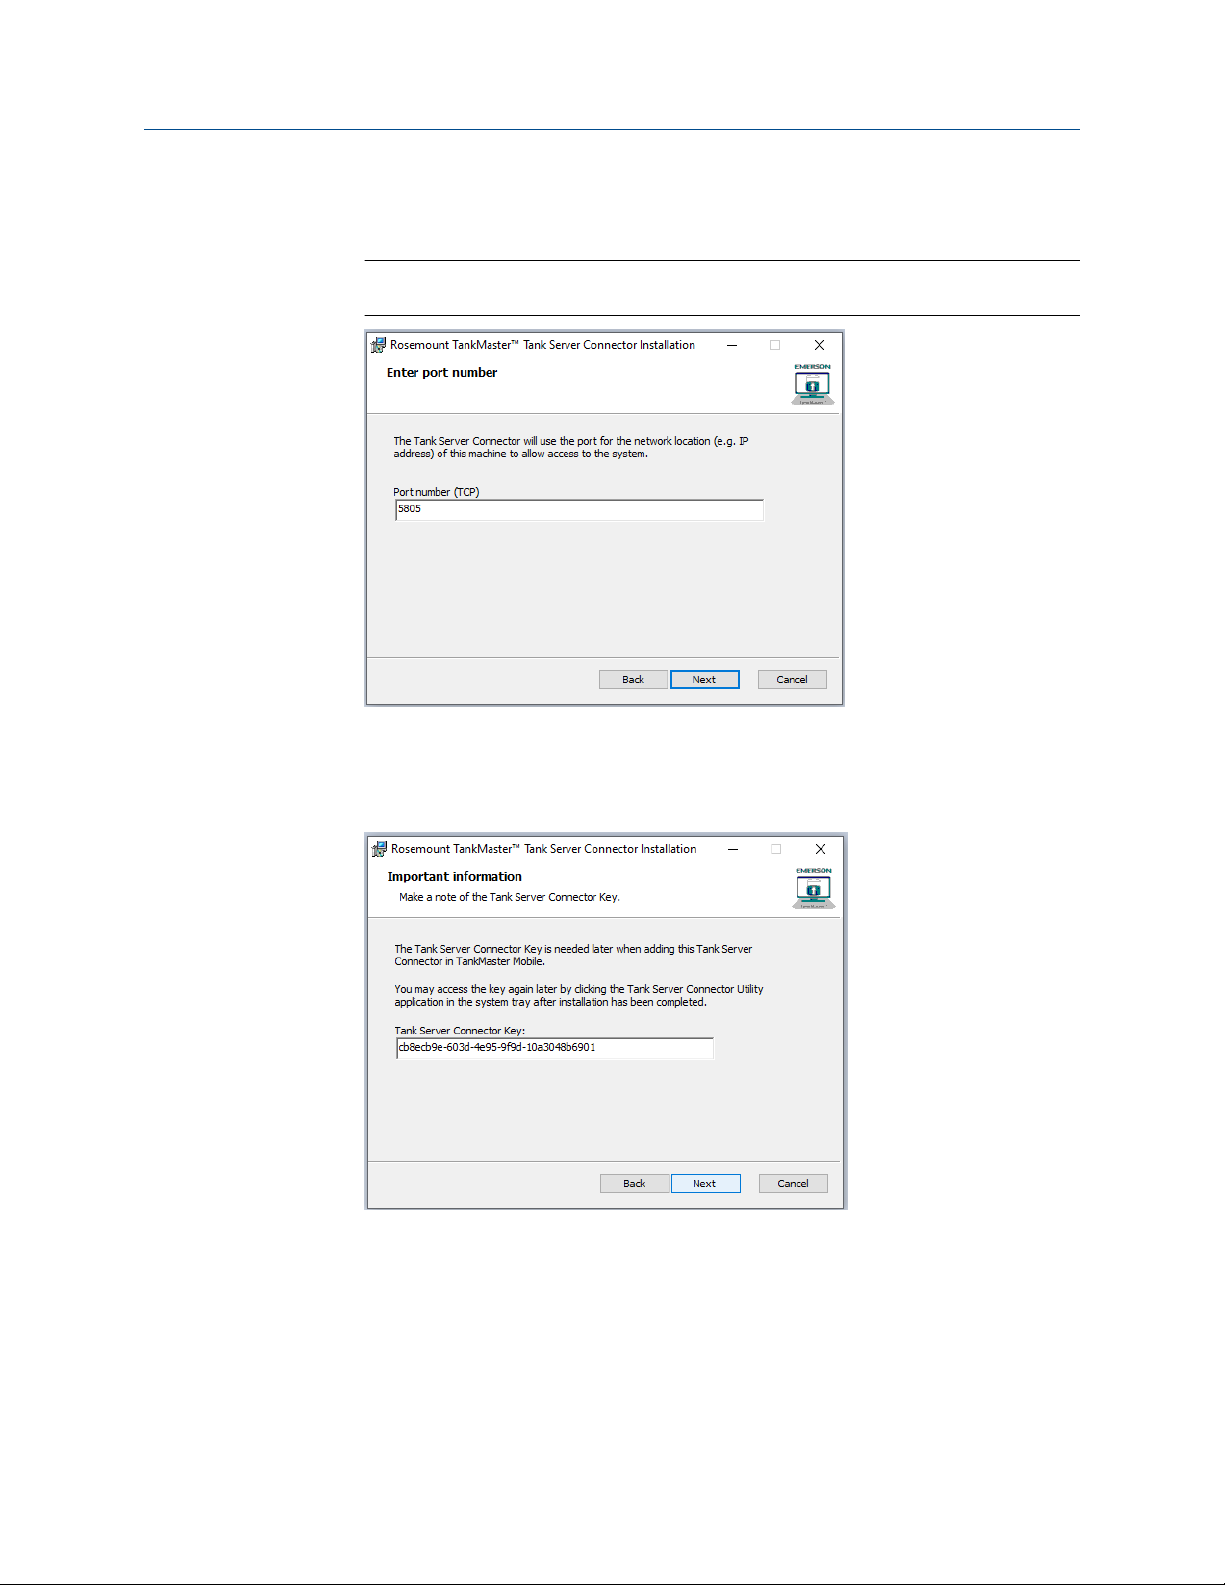
7. Enter the port number to be used for the machine where the Tank Server Connector
will be installed. Click Next.
Note
Ensure that the port is open in the firewall.
8. Make a note of the Tank Server Connector key. You will need this key in a later step
when adding a tank server in TankMaster Mobile. You may access the key again
after installation is completed by opening the Tank Server Connector Utility
application from the system tray. Click Next to continue.
44 Installation Manual
Page 45

Installation Manual Install the Tank Server Connector
00809-0200-5120 March 2022
9. Click Install to start the installation process.
Make sure to make a note of port number and Tank Server Connector key. You will
need this information later when connecting TankMaster Tank Server to
TankMaster Mobile.
10. Click
Finish to complete installation of the Tank Server Connector.
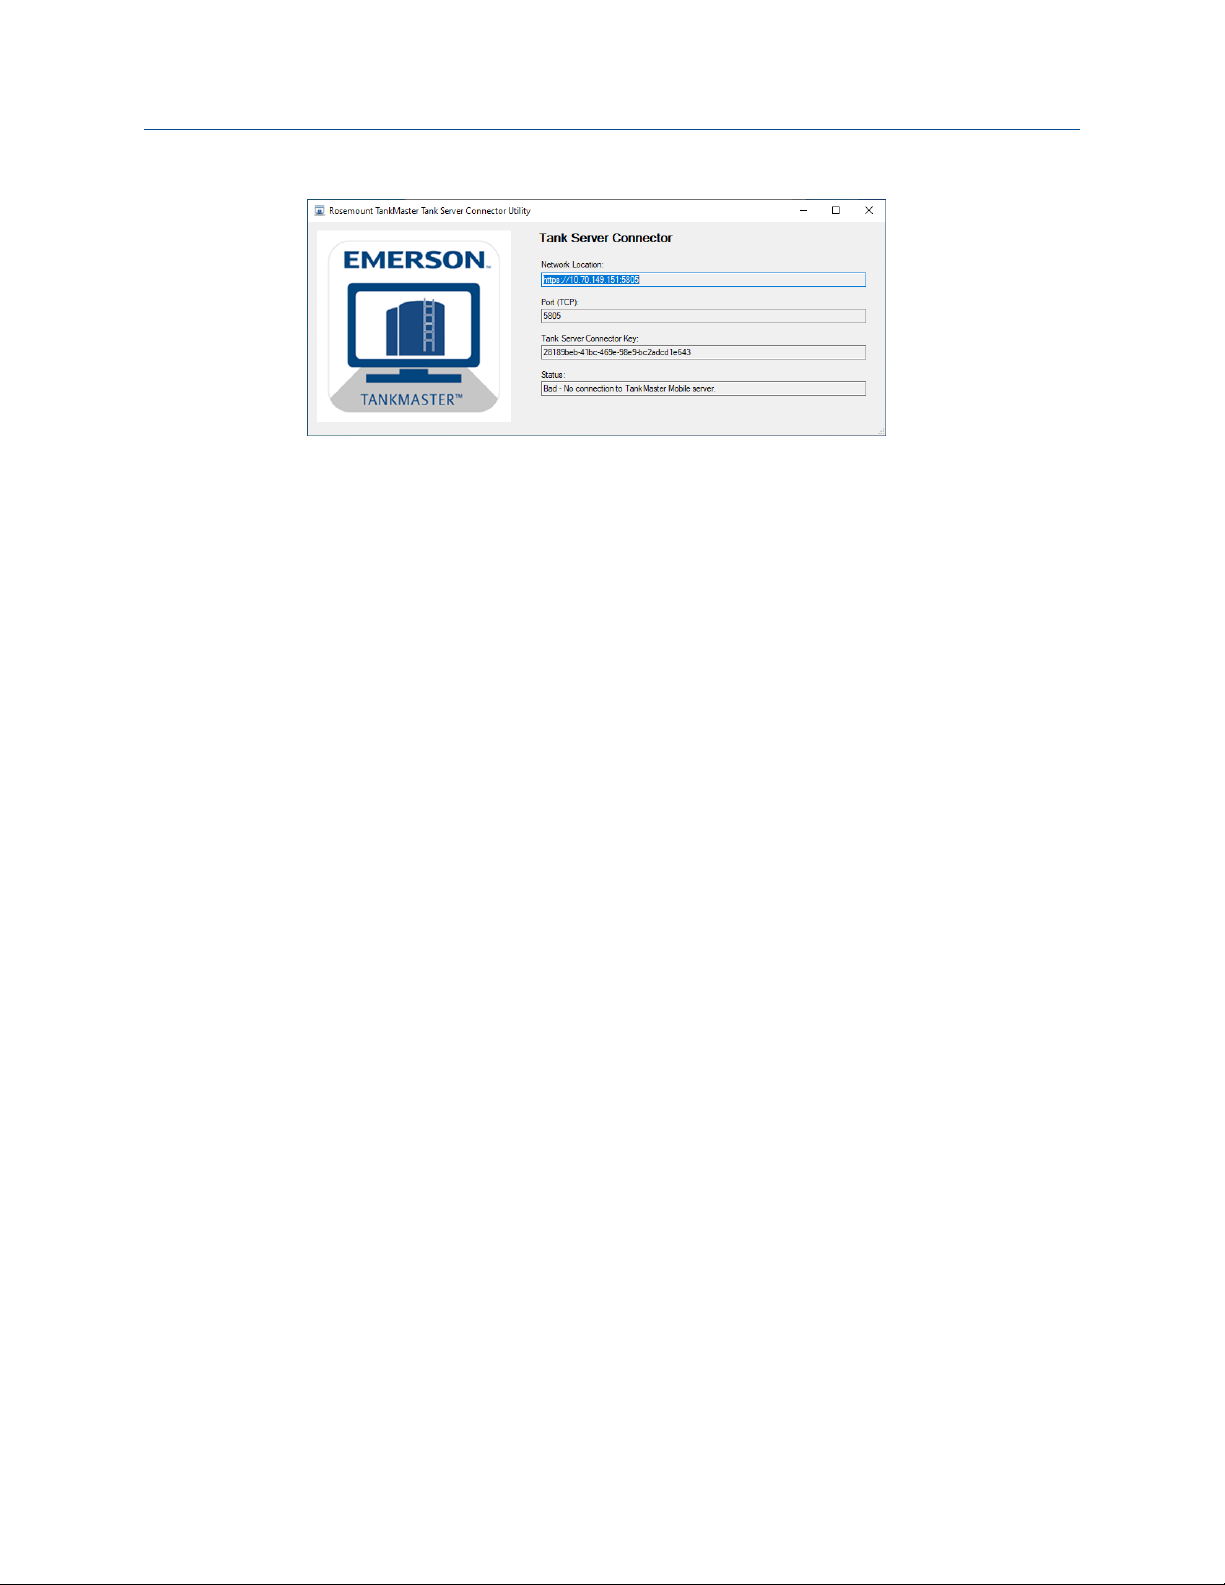
Postrequisites
Once the Tank Server Connector is installed you will need to configure TankMaster Mobile
for access to the Tank Server Connector machine. The following information is required:
• network location of the Tank Server Connector machine
• port number
• Tank Server Connector key
When installation is completed, you may open the Tank Server Connector Utility to check
the server status:
Rosemount TankMaster Mobile 45
Page 46
Install the Tank Server Connector Installation Manual
March 2022 00809-0200-5120
Related information
Installation utility
Connect to Tank Server
46 Installation Manual
Page 47
Installation Manual Install the Tank Server Connector
00809-0200-5120 March 2022
4.3 Connect to Tank Server
Follow this procedure to connect Rosemount™ TankMaster™ Mobile to the desired Tank
Server.
Prerequisites
Make sure that you have the following information available:
• Tank Server name
• Network location (IP address) of the TankMaster Tank Server machine
• Port number
• Tank Server Connector key
Procedure
1. Open the
Note
Web application must be accessed from other PC in the network than the
TankMaster Mobile server machine.
2. Sign in as administrator and enter Administration Mode.
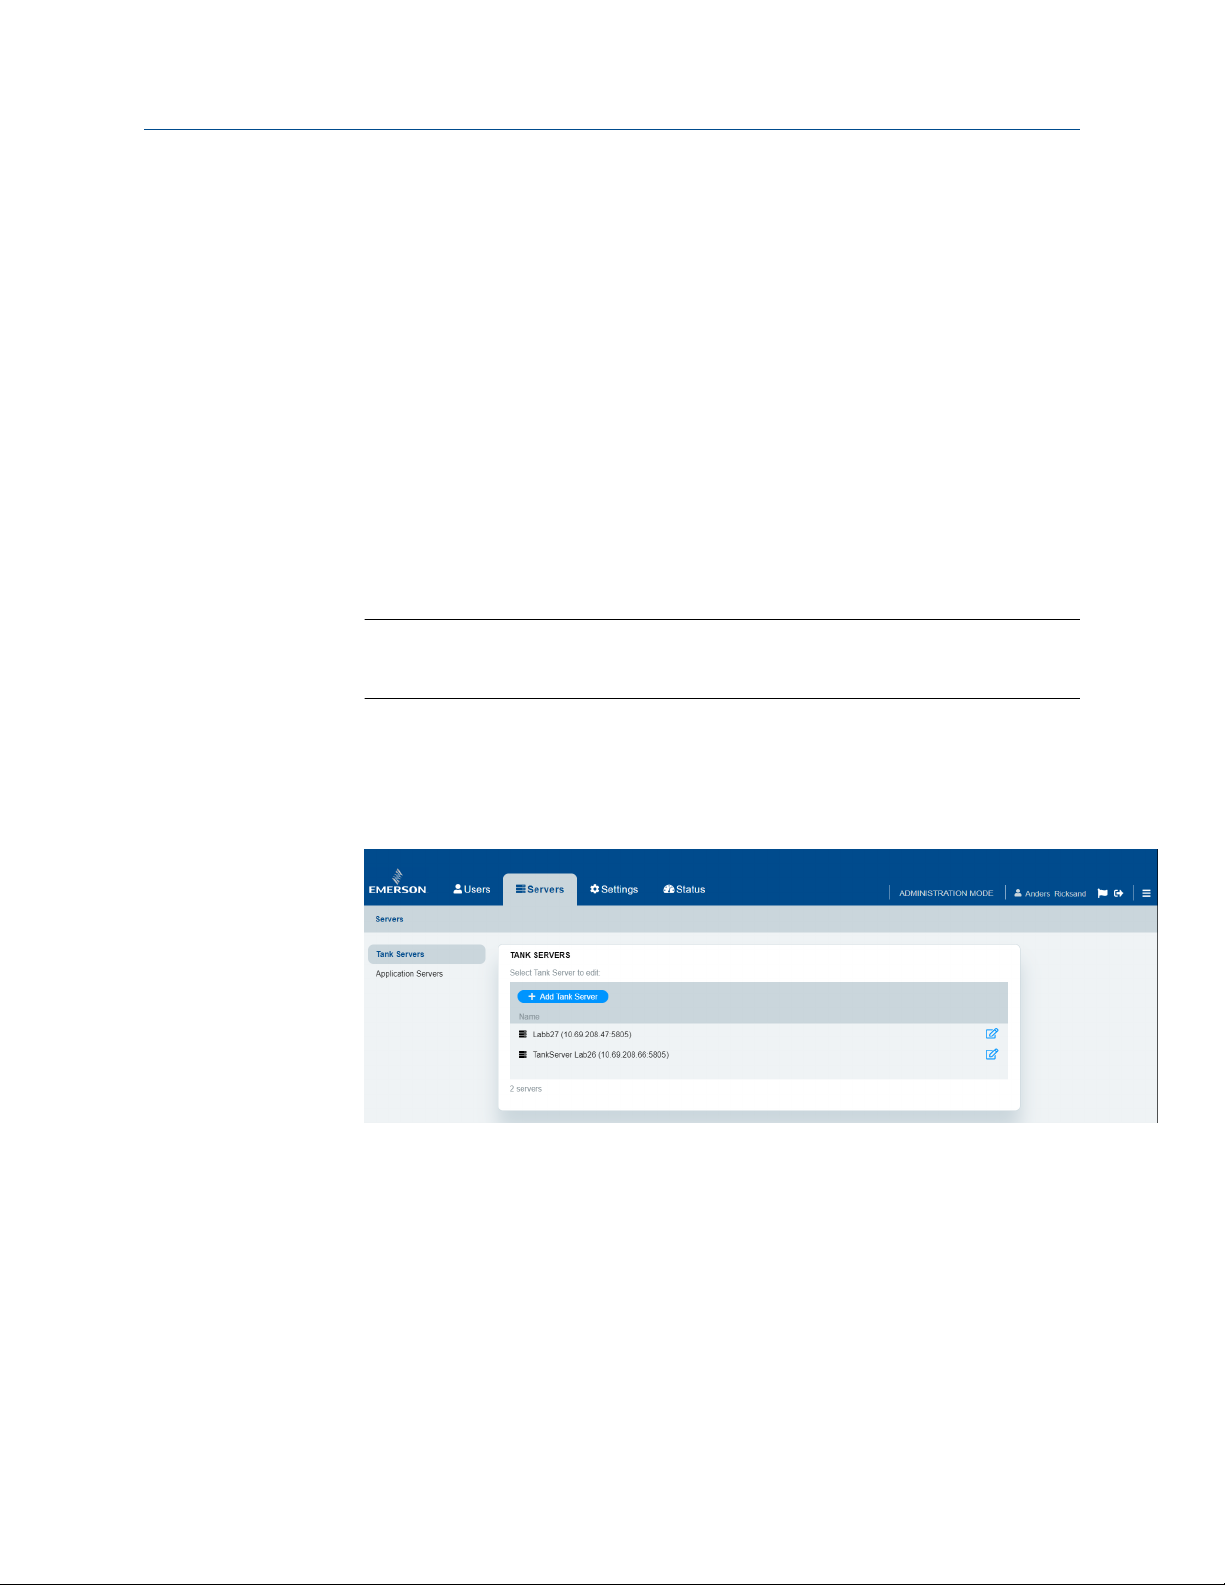
3. Open the
4. Select Tank Servers.
5. Select the Add Tank Server button.
TankMaster Mobile desktop web application.
Servers menu.
Rosemount TankMaster Mobile 47
Page 48

Install the Tank Server Connector Installation Manual
March 2022 00809-0200-5120
6. Under General enter the required information for the tank server to connect:
• Tank Server name
• Description (optional)
• Network location (IP address) of the TankMaster Tank Server machine
• Port number. Default is 5805.
You can change to other port in case you need to align with site policies.
• Tank Server Connector key.
Use the key that was provided during installation of Tank Server Connector.
• Server Alias (optional). The Alias is used as prefix to tank names for this server.
Example: Alias "A-" for tank TK-101 results in tank name "A-TK-101".
It is recommended to leave server alias blank if only one Tank Server is
connected.
7. Click Save.
48 Installation Manual
Page 49

Installation Manual Install the Tank Server Connector
00809-0200-5120 March 2022
8. Select the Status menu and verify that the tank server is connected.
Related information
Server management
System requirements
Rosemount TankMaster Tank Server Connector installation
Rosemount TankMaster Mobile 49
Page 50

Install the Tank Server Connector Installation Manual
March 2022 00809-0200-5120
50 Installation Manual
Page 51

Installation Manual Server management
00809-0200-5120 March 2022
5 Server management
The Servers menu allows you to add new Tank Servers and edit existing servers. For
Application Servers you may configure features that will be available for user groups.
The Servers menu is available when you are signed in as administrator in Administration
Mode.
Figure 5-1: Servers Menu
Related information
Administration mode
Rosemount TankMaster Mobile 51
Page 52

Server management Installation Manual
March 2022 00809-0200-5120
5.1 Edit an Application Server
This options lets you edit description of and features for Application Servers.
Prerequisites
Prior to configuring a new Application server, it needs to be installed on a machine and
connected to the TankMaster Mobile network.
To configure available Application Server features:
Procedure
1. Open the
TankMaster Mobile desktop web application.
2. Sign in as administrator and enter Administration Mode.
3. Open the Servers menu.
4. Select the desired Application Server.
5. Select Edit.
Summary of features:
Table 5-1: Application Server Features
Feature Description
Movement Access to view that shows tank movement.
Inventory View (Future
option)
Access to view that shows inventory by product.
Reports Print current view on demand.
Tank Details View that shows all tank variables.
Tank Notes Set and view notes for selected tanks.
52 Installation Manual
Page 53

Installation Manual Server management
00809-0200-5120 March 2022
6. Select desired features that should be available for users who connect via this
Application Server.
User group access to Application Server features is configured in TankMaster Mobile
by the system administrator. In order to make a feature item available for user
groups, it needs to be selected here. Then an administrator may configure different
access restrictions for different user groups as required.
Related information
Install an Additional Application Server
Rosemount TankMaster Mobile 53
Page 54

Server management Installation Manual
March 2022 00809-0200-5120
5.2 Edit a Tank Server
You may extend the list of available Tank Servers as well as edit current information on
existing servers.
Follow this procedure to edit a Tank Server:
Procedure
1. Open the
2. Sign in as administrator and enter Administration Mode.
3. Open the Servers menu.
4. Select the desired server from the list, and click the Edit button.
TankMaster Mobile desktop web application.
54 Installation Manual
Page 55

Installation Manual Server management
00809-0200-5120 March 2022
5. Edit the required input fields.
The following input fields are available:
• Tank Server Name
• Description
• Network Location (IP address)
• Port
• Tank Server Connector Key
• Server Alias (optional)
Rosemount TankMaster Mobile 55
Page 56

Server management Installation Manual
March 2022 00809-0200-5120
56 Installation Manual
Page 57

Installation Manual Sign in procedure
00809-0200-5120 March 2022
6 Sign in procedure
The sign in procedure may differ slightly depending on whether you are signing in with a
new device or not.
6.1 Sign in
Follow this procedure to sign in to the TankMaster Mobile web application.
This is the standard sign in procedure when using a registered device.
Procedure
1. Navigate to the TankMaster Mobile web page. Use the IP address (or URL) that was
entered when installing the TankMaster Mobile program.
2. Optional: If a root certificate is not installed, you will be prompted the option to
download a certificate prior to signing in. The root certificate allows your client
machine to authenticate the TankMaster Mobile server. Even without a root
certificate you will have a secure connection.
3. Enter your credentials.
4.
Select Sign In.
Note
First time you sign in you will be prompted to register your device and change your
password.
5. Now you are signed in.
Related information
Install digital certificate
Rosemount TankMaster Mobile 57
Page 58

Sign in procedure Installation Manual
March 2022 00809-0200-5120
58 Installation Manual
Page 59

Installation Manual License management
00809-0200-5120 March 2022
7 License management
7.1 License management
This section describes how to add a new Rosemount™ TankMaster™ Mobile license and
various license management tasks.
The Rosemount TankMaster Mobile software can be used for a trial period of 90 days. After
90 days you need to activate your license.
A notification is displayed on the start page on the remaining number of days until the trial
period expires.
You will find information on license updates and TankMaster Mobile subscriptions on the
TankMaster.Rosemount.com/ServiceCenter web site.
7.1.1 Add and activate new license
This procedure describes how to add and activate a new Rosemount™ TankMaster™ Mobile
license.
Prerequisites
Prior to managing your TankMaster Mobile license, you need to ensure that:
• TankMaster Mobile is installed and up and running
• Serial number and Product key are available. You will find them in the DVD box that
was shipped with the TankMaster Mobile software package.
Procedure
1. Open the TankMaster Mobile web app and sign in.
2.
Enter Administration mode.
3. Open the Settings menu.
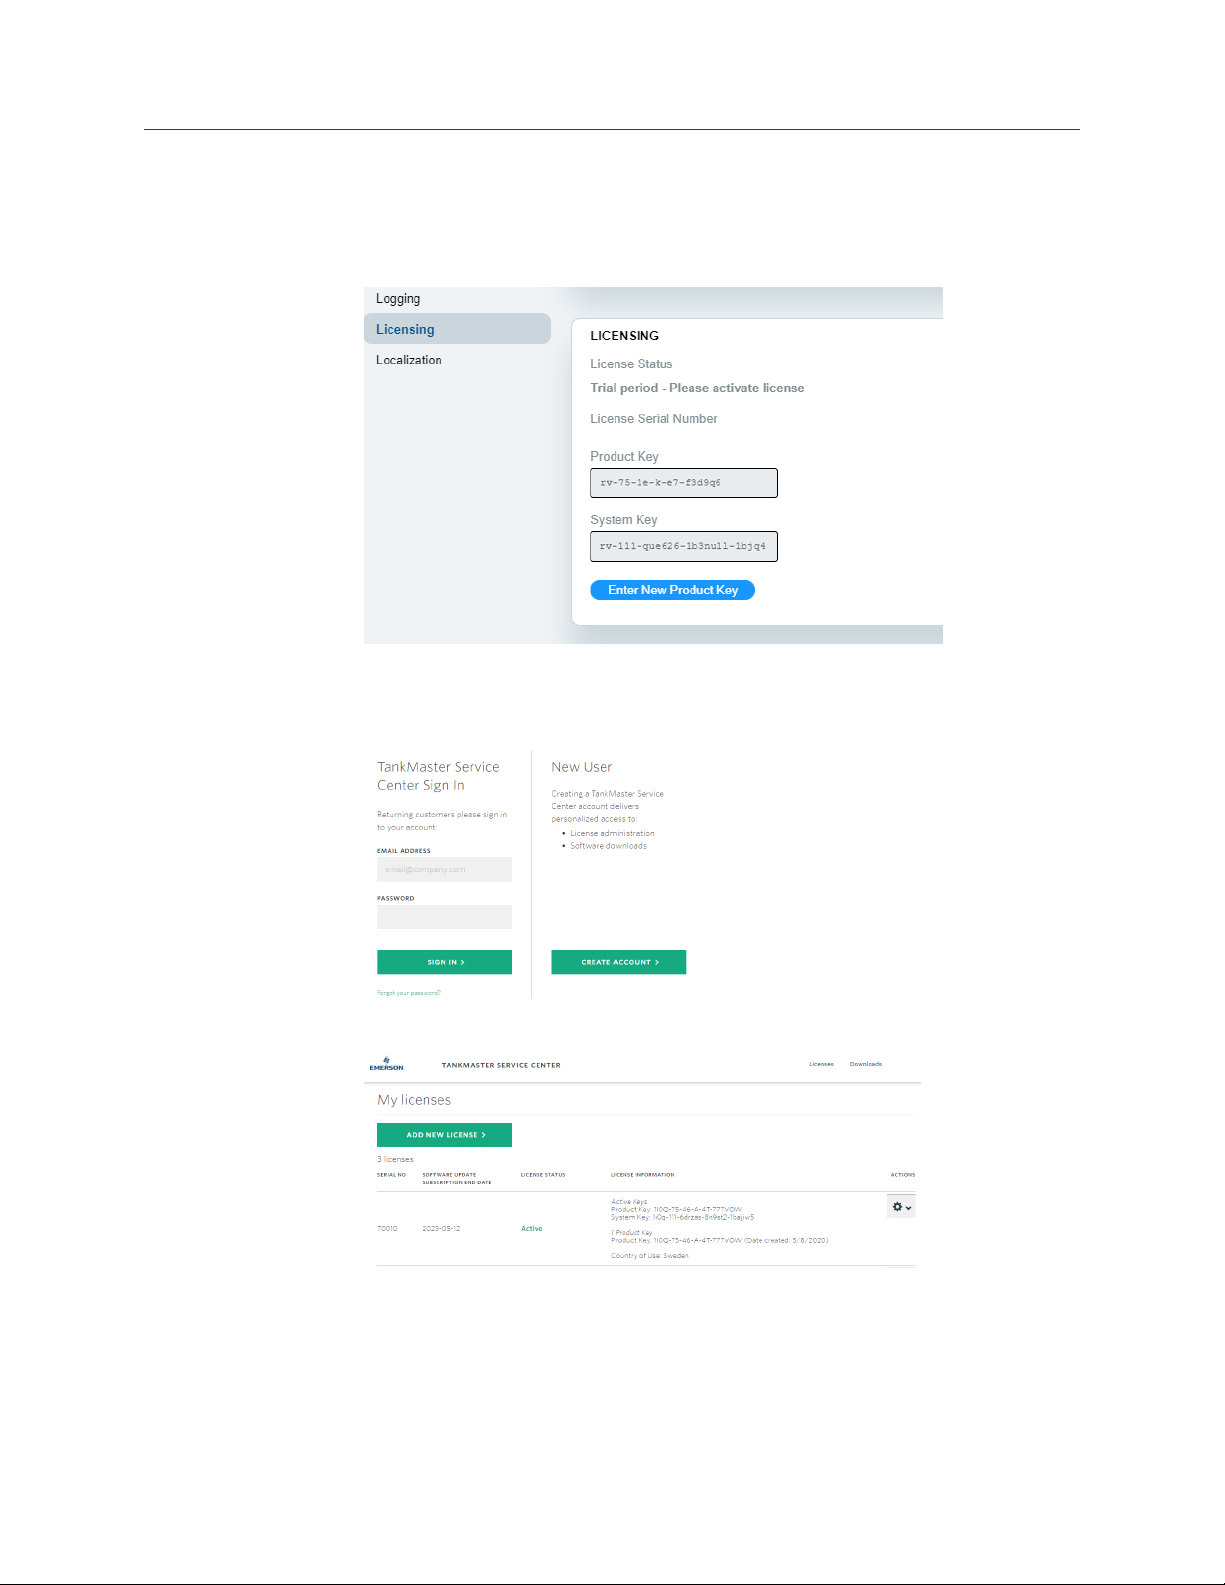
4. Navigate to the Licensing page.
5. Click Enter New Product Key.
Rosemount TankMaster Mobile 59
Page 60
License management Installation Manual
March 2022 00809-0200-5120
6. Enter the Product Key. You will find it in the DVD box that was shipped with the
product.
Once the Product key is entered, the System Key will automatically appear.
7. Copy or make a note of the System Key.
8. Navigate to
TankMaster.Rosemount.com/ServiceCenter and sign in to your account
or create a new account if you are a new user.
9. Under My Licenses click Add New License.
10. Enter Serial No., Product key and Country of Use.
11. Click
Add License.
A message appears saying: "License with serial number xxxx has been added".
12. Enter the System Key that was shown on the TM Mobile Licensing page.
13. Click Activate License.
60 Installation Manual
Page 61

Installation Manual License management
00809-0200-5120 March 2022
14. Select option Download or Email activation key.
In case you select the email option, note that the Activation key must be
downloaded to the server.
15. Return to the TankMaster Mobile web app.
16.
Navigate to the Licensing page.
17. Click Activate License.
18. Browse to the appropriate folder, select the Activation key, and click OK.
A response appears showing the TankMaster Mobile license options.
19. Verify that license options are correct according to model code.
Rosemount TankMaster Mobile 61
Page 62

License management Installation Manual
March 2022 00809-0200-5120
7.1.2 Upgrade license with new options
This procedure describes how to upgrade a Rosemount™ TankMaster™ Mobile license with
new options.
Prerequisites
Prior to managing your TankMaster Mobile license, you need to ensure that:
• TankMaster Mobile is up and running
• Serial number and Product key are available. You will find them on the DVD that was
shipped with the TankMaster Mobile software package.
Procedure
1. Navigate to
account.
2. Open My Licenses.
3. Under Actions, select Upgrade options.
4. Select desired options for:
• Features
• Number of tanks
• Concurrent users
5. Click Continue.
6. Verify ordering info.
7. Click Create pdf to create an order with new model code.
8. Send the order to Emerson.
A new Product key will be shipped as soon as the order is confirmed.
9. Open the TankMaster Mobile web app and sign in.
10. Enter Administration mode.
11. Open the Settings menu.
12. Navigate to the Licensing page.
13. Click Enter New Product Key.
14. Enter the Product Key. You will find it on the DVD box that was shipped with the
product.
Once the Product key is entered, the System Key will automatically appear.
TankMaster.Rosemount.com/ServiceCenter and sign in to your
15. Copy or make a note of the System Key.
16. Navigate to the Rosemount TankMaster Service Center and sign in to your
account.
17. Under My Licenses click Re-activate.
18. Enter the new System Key that was shown on the TM Mobile Licensing page.
19. Click Activate License.
62 Installation Manual
Page 63

Installation Manual License management
00809-0200-5120 March 2022
20. Select option Download or Email Activation key.
In case you select the email option, note that the Activation key must be
downloaded to the server.
21. Return to the TankMaster Mobile web app.
22.
Navigate to the Licensing page.
23. Click Activate License.
24. Browse to the appropriate folder, select the Activation key, and click OK.
A response appears showing the TankMaster Mobile license options.
25. Verify that license options are correct according to model code.
Rosemount TankMaster Mobile 63
Page 64

License management Installation Manual
March 2022 00809-0200-5120
7.1.3 Transfer license to a new server
This procedure describes how to move a Rosemount™ TankMaster™ Mobile license to a
new server.
Prerequisites
Prior to managing your TankMaster Mobile license, you need to ensure that:
• TankMaster Mobile is up and running
• Serial number and Product key are available. You will find them on the DVD that was
shipped with the TankMaster Mobile software package.
Procedure
1. Start by installing
2. On the new server, open the TankMaster Mobile web app and sign in.
3. Enter Administration mode.
4. Open the Settings menu.
5. Navigate to the Licensing page.
6. Click Enter New Product Key.
Use the Product Key from the old server installation.
A System Key for the new server is generated.
7. Copy or make a note of the System Key.
8. On the old server, open the TankMaster Mobile web app and sign in.
9. Enter Administration mode.
10. Open the Settings menu.
11. Navigate to the Licensing page.
12. Click Transfer license to a different server.
A dialog appears with information on the transfer option.
13. Click Transfer.
A Transfer Key is generated.
Note
Generating a Transfer Key will disable the license on the current server.
Rosemount TankMaster Mobile on the new server machine.
14. Copy the Transfer key.
15. Navigate to
account.
16. Select My licenses → Actions → Transfer.
17. Enter the Transfer Key and click the Transfer License button.
The Activate License dialog appears.
18. Enter the System Key that was generated on the Licensing page on the new TM
Mobile server.
19. Click Activate License.
64 Installation Manual
TankMaster.Rosemount.com/ServiceCenter and sign in to your
Page 65

Installation Manual License management
00809-0200-5120 March 2022
20. Select one of the options Download or Email Activation Key.
21. On the
new TM Mobile server, make sure that the Activation Key is stored in the
appropriate folder.
22. Return to the TankMaster Mobile web app.
23. Navigate to the Licensing page.
24. Click Activate License.
25. Browse to the appropriate folder, select the Activation key, and click OK.
A response appears showing the TankMaster Mobile license options.
26. Verify that license options are correct according to model code.
Rosemount TankMaster Mobile 65
Page 66

License management Installation Manual
March 2022 00809-0200-5120
7.1.4 Update license subscription/software update period
This procedure describes how to update a Rosemount™ TankMaster™ Mobile license
subscription.
Procedure
1. Navigate to
account.
2. Open My Licenses.
3. Under Actions, select Renew software update period.
4. From the drop-down list, select the desired software update period: 1 year, 3 year,
or 5 years.
In case the current software update period is still valid, then the new period will be
added after the current period expires.
Note
By renewing the update period you will get access to new software versions. The
current version will still work regardless if the update period is renewed or not
5. Click Continue.
6. Verify that Serial number is correct.
Click Create pdf to create an order for the new software update period.
7.
The pdf file will include the license serial number and an item number.
8. Send the order to your local sales representative.
Your software update period extension will be confirmed via email.
TankMaster.Rosemount.com/ServiceCenter and sign in to your
66 Installation Manual
Page 67

Installation Manual License management
00809-0200-5120 March 2022
7.1.5 Update software revision
This procedure describes how to update the Rosemount™ TankMaster™ Mobile software to
a new revision.
Prerequisites
Prior to managing your TankMaster Mobile license, you need to ensure that:
• TankMaster Mobile is up and running
• Your license has an active software update period.
Procedure
1. Navigate to
account.
2. Open My Licenses.
3. Under Actions, select Downloads.
4. Download the appropriate software revision.
5. Install the new software revision on the TankMaster Mobile server.
TankMaster.Rosemount.com/ServiceCenter and sign in to your
Rosemount TankMaster Mobile 67
Page 68

License management Installation Manual
March 2022 00809-0200-5120
68 Installation Manual
Page 69

Installation Manual Service and maintenance
00809-0200-5120 March 2022
8 Service and maintenance
8.1 Uninstall TankMaster Mobile
In case you need to uninstall the Rosemount™ TankMaster™ Mobile software, there are
various options available.
Prior to uninstalling the system, make sure to create a Transfer key and store it in a safe
place. The Transfer key key ensures that you license is still valid and allows you to install
TankMaster Mobile again.
8.1.1 Uninstall Rosemount™ TankMaster™ Mobile
This section shows how to remove the Rosemount TankMaster Mobile software from the
server.
Prerequisites
Ensure that users are signed out of TankMaster Mobile.
Procedure
1. Locate the installation file named
the file.
The TankMaster Installation Utility is located on the Rosemount TankMaster
Mobile software installation DVD, or in the downloaded and extracted zip-file if
downloaded from the TankMaster.Rosemount.com/ServiceCenter web site.
2. In the
TankMaster Installation Utility, select Manage TankMaster Mobile.
TankMaster Installation Utility and double-click
3. Select Uninstall TankMaster Mobile.
The Rosemount TankMaster Mobile Setup wizard appears:
Rosemount TankMaster Mobile 69
Page 70

Service and maintenance Installation Manual
March 2022 00809-0200-5120
4. Click Next to proceed.
5. Select the
Remove option. This option lets you completely remove TankMaster
Mobile from your computer.
70 Installation Manual
Page 71

Installation Manual Service and maintenance
00809-0200-5120 March 2022
6. Select the Remove button to start the removal procedure.
7. Wait until the removal process is finished.
8. Select Finish to complete uninstallation of TankMaster Mobile.
Rosemount TankMaster Mobile 71
Page 72

Service and maintenance Installation Manual
March 2022 00809-0200-5120
Postrequisites
Restart the computer and verify that Rosemount TankMaster Mobile is removed.
72 Installation Manual
Page 73

Installation Manual Service and maintenance
00809-0200-5120 March 2022
8.2 Reinstall TankMaster Mobile
In case you would like to reinstall the Rosemount™ TankMaster™ Mobile software, we
recommend that you follow this procedure.
Prior to reinstalling the system, make sure to have your Transfer key available in order to
be able to activate your license.
Related information
Install the Rosemount TankMaster Mobile server software
Install an Additional Application Server
Uninstall TankMaster Mobile
Docker installation
8.2.1 Reinstall procedure
This is a description of the recommended procedure for re-installation of a Rosemount
TankMaster Mobile system.
Procedure
1. Uninstall the
This includes TankMaster Mobile as well as the Tank Server Connector.
2. Uninstall Docker from the TankMaster Mobile server. In case there is an additional
Application server, Docker needs to be uninstalled from that server as well.
3. Restart both servers.
4. Install Docker on the TankMaster Mobile server and any additional Application
server.
5. Install TankMaster Mobile.
6. Install additional Application server that was installed prior to re-installation.
Related information
Uninstall TankMaster Mobile
Data Server and Application Server setup
Install an Additional Application Server
Rosemount TankMaster Mobile system.
Rosemount TankMaster Mobile 73
Page 74

Service and maintenance Installation Manual
March 2022 00809-0200-5120
8.3 Uninstall Tank Server Connector
Follow this instruction in case you need to uninstall the Rosemount™ TankMaster™ Tank
Server Connector software.
Prerequisites
Ensure that users are signed out of TankMaster Mobile.
Prerequisites
Ensure that Tank Server Connector Utility is closed by selecting Exit.
Procedure
1. Locate the installation file named
the file.
The TankMaster Installation Utility is located on the Rosemount TankMaster
Mobile software installation disk, or in the downloaded and extracted zip-file if
downloaded from the TankMaster.Rosemount.com/ServiceCenter web site.
2. In the
Rosemount TankMaster Utility, select Manage Tank Server Connector.
TankMaster Installation Utility and double-click
74 Installation Manual
Page 75

Installation Manual Service and maintenance
00809-0200-5120 March 2022
3. Select Uninstall Tank Server Connector.
The Rosemount TankMaster Tank Server Connector Setup wizard appears:
4. Click Next to proceed.
5. Select the Remove option. This option lets you completely remove the Tank Server
Connector from your computer.
Rosemount TankMaster Mobile 75
Page 76

Service and maintenance Installation Manual
March 2022 00809-0200-5120
6. Select the Remove button to start the removal procedure.
Wait until the removal process is finished.
7. Select Finish to complete uninstallation of the Tank Server Connector.
Postrequisites
Verify that Rosemount TankMaster Tank Server Connector is removed.
76 Installation Manual
Page 77

Installation Manual Service and maintenance
00809-0200-5120 March 2022
8.4 Uninstall Docker
This instruction shows how to uninstall the Docker software.
Prerequisites
Ensure that users are signed out of TankMaster Mobile. Make sure that TankMaster Mobile
and TankMaster Server Connector are shut down.
Procedure
1. Locate the installation file named
the file.
The TankMaster Installation Utility is located on the Rosemount TankMaster
Mobile software installation DVD, or in the downloaded and extracted zip-file if
downloaded from the TankMaster.Rosemount.com/ServiceCenter web site.
2. In the
3. Select Uninstall Docker.
TankMaster Installation Utility, select Manage Docker.
TankMaster Installation Utility and double-click
4. Wait until the removing process is finished.
Rosemount TankMaster Mobile 77
Page 78

Service and maintenance Installation Manual
March 2022 00809-0200-5120
5. When uninstallation is completed you will be prompted to restart the computer
now (y) or manually at a later occasion.
78 Installation Manual
Page 79
Installation Manual Service and maintenance
00809-0200-5120 March 2022
8.5 TankMaster™ Administration Utility
The TankMaster Administration Utility includes maintenance tools that let you backup and
restore the system, reset user account passwords, and other advanced functions which
may only be performed by a TankMaster Mobile system administrator.
In order to use the Administration Utility you need to sign in to Administrator Mode on
the TankMaster Mobile server machine.
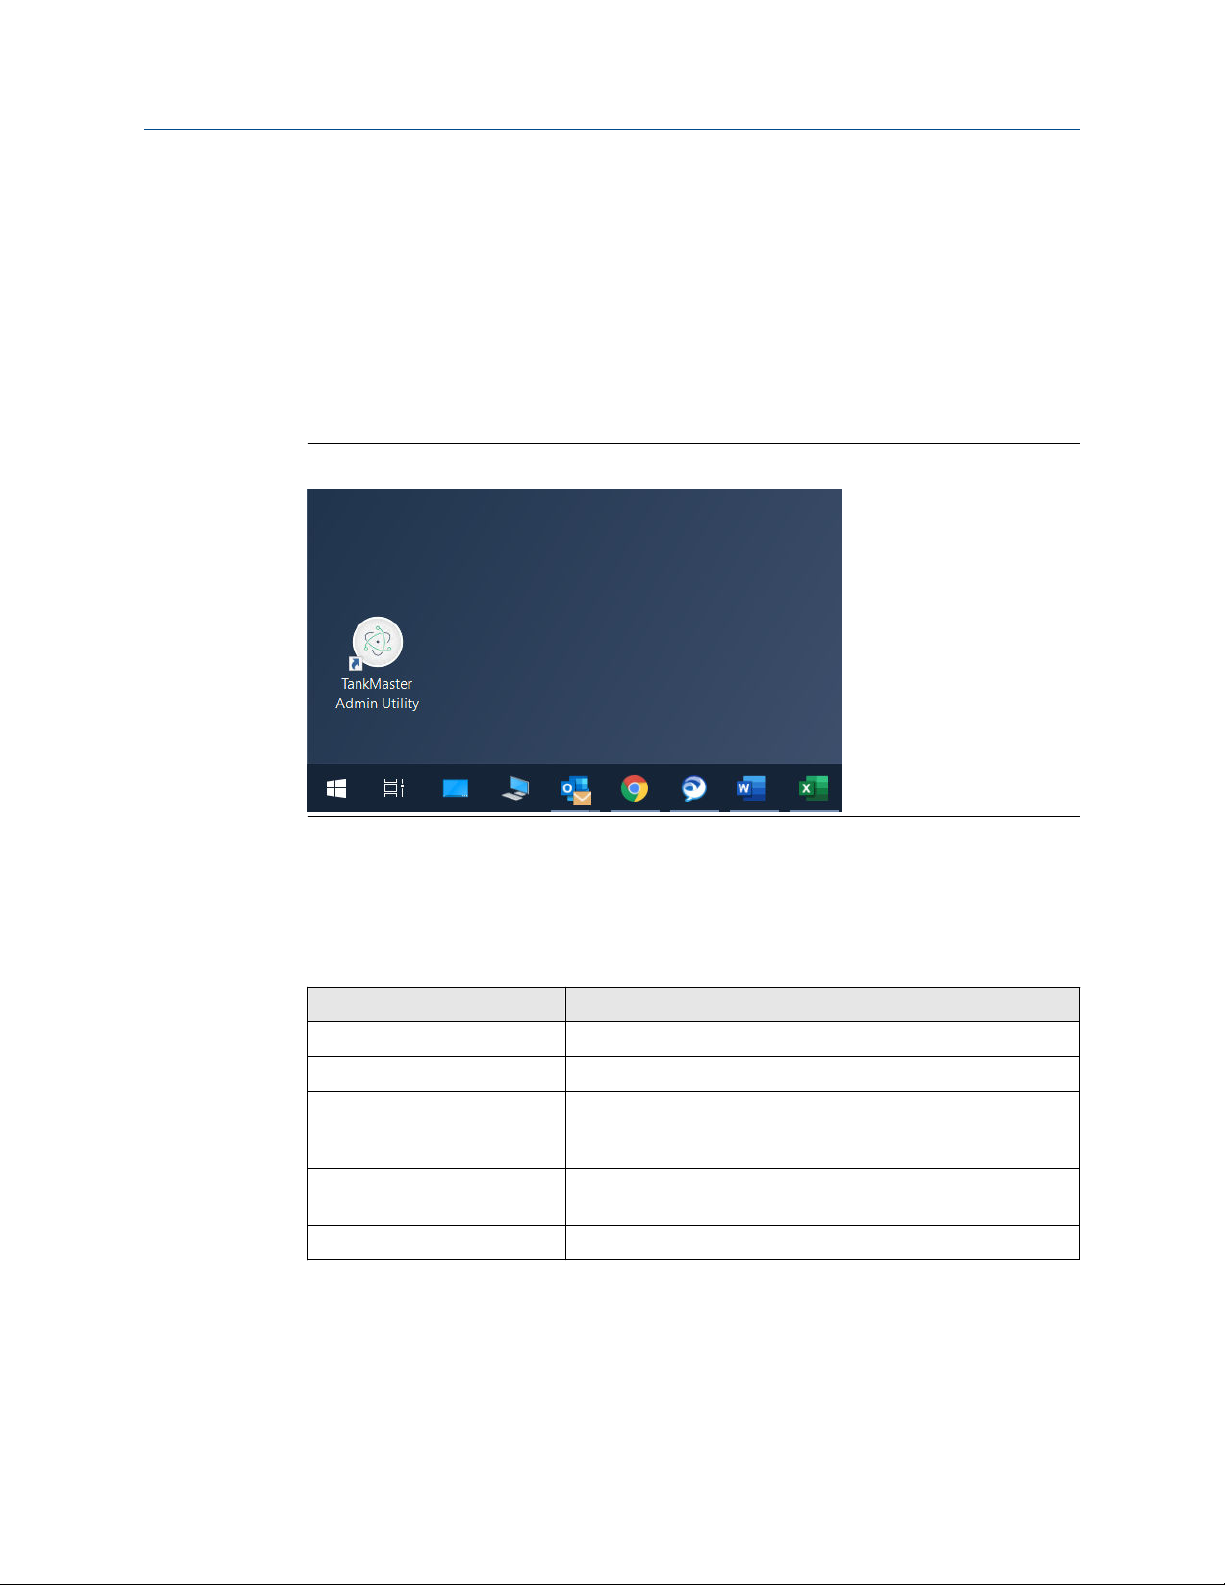
Open the utility by double-clicking the TankMaster Admin Utility icon on the desktop.
Figure 8-1: Administration Utility Icon
8.5.1 TankMaster™ Administration Utility options
The following menu options are available.
Table 8-1: Menu Options in the TankMaster Mobile Administration Utility
Menu option Description
Servers Manage Tank Servers and Application Servers.
Backup & Restore Make backup copy of the TankMaster Mobile system.
Users Reset user password. Advanced function to be used by system
administrator in case no TankMaster Mobile system
administrator is available.
Change URL Allows changing the URL and IP address to the TankMaster
Mobile web server.
Certificate Management Lets you manage digital certificates.
Rosemount TankMaster Mobile 79
Page 80

Service and maintenance Installation Manual
March 2022 00809-0200-5120
8.6 Servers
The Administrator Utility has a Servers tab that lets you manage servers in the
TankMaster Mobile system.
The Servers window allows you to install new Application servers to the Rosemount
TankMaster™ Mobile system. This is useful in case you would like to add a server with
restricted access for certain user groups.
The Servers section also lets you restart servers. Select the desired server and select
Restart.
The Servers option requires Windows administrator privileges on the server machine.
Figure 8-2: Server Management
™
80 Installation Manual
Page 81

Installation Manual Service and maintenance
00809-0200-5120 March 2022
8.7 Backup and restore
The Administrator Utility has a Backup and Restore function.
The Backup and Restore window lets you store a backup of the current Rosemount
TankMaster™ Mobile system.
The Restore option lets you use a backup file to restore the TankMaster Mobile system.
Note that the backup file is password protected. Ensure that the password is stored in a
safe location. You will not be able to use the backup file unless the password is entered
when restoring the system.
You may configure backup files to be saved automatically.
The Backup and Restore function requires Windows administrator privileges on the server
machine.
Figure 8-3: Backup and Restore
™
Rosemount TankMaster Mobile 81
Page 82

Service and maintenance Installation Manual
March 2022 00809-0200-5120
8.8 Reset user
The Users tab lets you reset password, and temporarily disable two-factor authentication.
This function should only be used in special situations when there is no user available with
administrator authorization for the TankMaster Mobile system.
Figure 8-4: User Management
82 Installation Manual
Page 83

Installation Manual Service and maintenance
00809-0200-5120 March 2022
8.9 Change URL
The Change URL tab lets you change URL for the TankMaster™ Mobile web server. Port
number may also be changed if needed.
In case the IP address of the server machine has changed you can update it here.
Figure 8-5: Change URL
Rosemount TankMaster Mobile 83
Page 84

Service and maintenance Installation Manual
March 2022 00809-0200-5120
8.10 Certificate management
The Certificate management window lets you manage self-signed and custom certificates.
Various options are available:
• Install custom certificates. This function lets you install custom certificates instead of
using the self-signed certificates installed by the system. A recovery backup of the selfsigned certificates will automatically be created. These self-signed certificates can be
restored by using the Restore All Certificates function.
• Update self-signed certificates installed by the system. Note that this will generate new
self-signed certificates and will overwrite custom certificates in case such certificates
are installed. A recovery backup of the current certificates will automatically be
created.
• Restore certificates from backup. This function can be used to restore self-signed
certificates installed by the system. This may be useful in case of malfunctioning
custom certificates.
Figure 8-6: Certificate Management
Note
When updating TankMaster Mobile, current certificates (self-signed or custom) will be
overwritten by new self-signed certificates that come with the updated version of
TankMaster Mobile. Any custom certificates need to be installed again.
84 Installation Manual
Page 85

Installation Manual Service and maintenance
00809-0200-5120 March 2022
8.11 Install an Additional Application Server
This is a description of how to install an Additional Application Server to an existing
TankMaster Mobile system. An additional Application Server may be useful if you need to
set up limited functionality for clients external to the plant network. For example, you may
allow external clients to monitor tanks but not access administration capabilities.
Related information
Edit an Application Server
8.11.1 Preparations
Before you begin installation of an Additional Application Server:
• Assign a computer that fulfills hardware and software system requirements to host the
Application server
The following information is required during the installation procedure:
• TankMaster Mobile Application Server network location (URL or IP address)
• Firewall ports that must be open
Related information
System requirements
Servers
8.11.2 Generate installation package for Additional Application Server
This is and instruction how to generate a file package for installing an Additional
Application server.
Procedure
1. Open the
desktop:
Administration Utility by double-clicking the program icon on the
Rosemount TankMaster Mobile 85
Page 86

Service and maintenance Installation Manual
March 2022 00809-0200-5120
2. Select menu option Servers. In the Add Application Server pane, select the
Generate Scripts button.
3. In the dialog that appears, click Generate Scripts to continue. Select Cancel in case
you want to abort.
4. Once the script has generated the zip file with the Application Server file package, a
dialog appears with further instructions:
a) Location of the generated script:
\TankMaster\TankMasterMobile\AddAppServer
\AddAppServer.zip.
b) Copy the zip-file to the desired location on the machine where you will install
the Additional AppServer.
The generated zip file contains a software package that includes the
Installation Utility, Docker, and Additional Application Server.
C:\Program Files\Rosemount
8.11.3 Install Additional Application Server
Follow this instruction to install an Additional Application server.
Procedure
On the server machine where you are going to install an Additional Application
1.
Server, locate the
86 Installation Manual
AddAppServer.zip file which contains the installation package.
Page 87

Installation Manual Service and maintenance
00809-0200-5120 March 2022
The generated zip file contains a software package that includes the Installation
Utility, Docker, and Additional Application Server.
2. Extract the zip file. A folder structure will appear that contains all the installation
files:
3. Run the TankMaster Installation Utility.
4. Select
Manage Docker.
5. Select Install Docker (see Install Docker).
6. Restart the machine and wait for Docker to start.
Note
You may for example open Windows Task Manager/Services to check that Docker is
up and running.
7. Run the TankMaster Installation Utility again.
Rosemount TankMaster Mobile 87
Page 88

Service and maintenance Installation Manual
March 2022 00809-0200-5120
8. Select Install Additional AppServer.
9. Once the script is completed, select the Enter key to exit.
10. Return to the TankMaster Mobile machine and open Admin Utility again.
11. In the list of servers, select the new
Application Server, then select the Add
Application Server button.
88 Installation Manual
Page 89

Installation Manual Service and maintenance
00809-0200-5120 March 2022
12. Enter the desired Application server name, description (optional), Web server
location (URL or IP address), and port number. Note that you may not use the same
port number as other Application Servers. The port must be open in appropriate
firewalls. Ensure that you use ports recommended by your local IT department.
13. Select Start Appserver.
Now the Application server will be connected to the TankMaster Mobile system.
14. Wait until status for the new Application and Web servers is changed from
Preparing to
Running.
Rosemount TankMaster Mobile 89
Page 90

Service and maintenance Installation Manual
March 2022 00809-0200-5120
15. Once the new application server has been added, wait for all servers to have status
Running in Admin Utility.
16. Verify access to TankMaster Mobile via each application server using Chrome web
browser.
17.
If the TankMaster Mobile system cannot be accessed via one of the application
servers:
a) Restart all Windows servers.
b) Wait for all servers to have status Running in Admin Utility.
c) Verify access to TankMaster Mobile via each application server using Chrome
web browser.
Postrequisites
Once the new Application Server is up and running you may proceed with configuration of
the server features. You will find those settings in TankMaster Mobile under the Servers
menu.
90 Installation Manual
Page 91

Installation Manual Service and maintenance
00809-0200-5120 March 2022
8.12 Administration mode
In administration mode you can manage system settings such as connecting to tank
servers and application servers. In addition to that, administration mode allows you to
create user accounts and user groups as well as manage security settings and various
other system related tasks.
8.12.1 Enter administration mode
To enter Administration Mode:
Procedure
1. On the right-hand side of the menu bar, click
2. Enter your password.
The Users menu will open automatically in case a tank server is available. Otherwise
the Servers menu will open.
Administration Mode.
Rosemount TankMaster Mobile 91
Page 92

Service and maintenance Installation Manual
March 2022 00809-0200-5120
3. Configure user accounts, servers, or system settings.
4. Exit Administration mode when finished.
Postrequisites
Verify that new users, user groups, tank servers, and application servers are accessible.
92 Installation Manual
Page 93

Installation Manual Service and maintenance
00809-0200-5120 March 2022
8.13 Software updates
Software updates is important for maintaining system functionality and security.
All Rosemount™ TankMaster™ Mobile updates are signed for integrity. It is important that
you maintain up-to-date software updates.
Software updates can be found at TankMaster.Rosemount.com/ServiceCenter.
Related information
License management
8.14 Tank Server Connector setup
The Tank Server Connector is installed on the same machine as the Tank Server. It
automatically connects to the Tank Server.
The connector installer contains 3 components:
• TankServerConnector.SelfHosted (Windows service)
• TankServerConnector.SetupSelfHosted (Windows service)
• Manage TankServerConnector (Tray application)
Tank Server Connector setup self hosted
TankServerConnector.SetupSelfHosted manages information from TankMaster Mobile to
install self-signed certificates, setup SSL, and configure the URL to the authorization server
at setup. When the self-signed certificates are about to expire TankMaster Mobile will send
new certificates to this service.
Tank Server Connector self hosted
TankServerConnector.SelfHosted is the main component. All functionality apart from the
setup described above is handled by this service.
Manage Tank Server Connector
The tray application Manage TankServerConnector shows the status of the connector and
the setup key that needs to be entered into TankMaster Mobile when the Tank Server
Connector is added. It has convenience functions to start and stop the
TankServerConnector.SelfHosted service.
Rosemount TankMaster Mobile 93
Page 94

Service and maintenance Installation Manual
March 2022 00809-0200-5120
Figure 8-7: Tank Server Connector Utility
Standard installation
The standard installation installs both the TankServerConnector.SetupSelfHosted and
TankServerConnector.SelfHosted to run as LocalSystem.
If running as LocalSystem or using automatic management of certificates is not preferable,
a few options exist with self-signed or custom certificates. Note that none of these is
needed to run the connector. The standard installation is in a functional and secure state.
Related information
Software installation overview
Installation utility
94 Installation Manual
Page 95

Installation Manual
00809-0200-5120 March 2022
Rosemount TankMaster Mobile 95
Page 96

00809-0200-5120
Rev. AE
2022
For more information:
©
2022 Emerson. All rights reserved.
Emerson.com
Emerson Terms and Conditions of Sale are available upon
request. The Emerson logo is a trademark and service mark of
Emerson Electric Co. Rosemount is a mark of one of the
Emerson family of companies. All other marks are the property
of their respective owners.
 Loading...