

AnoScreen™
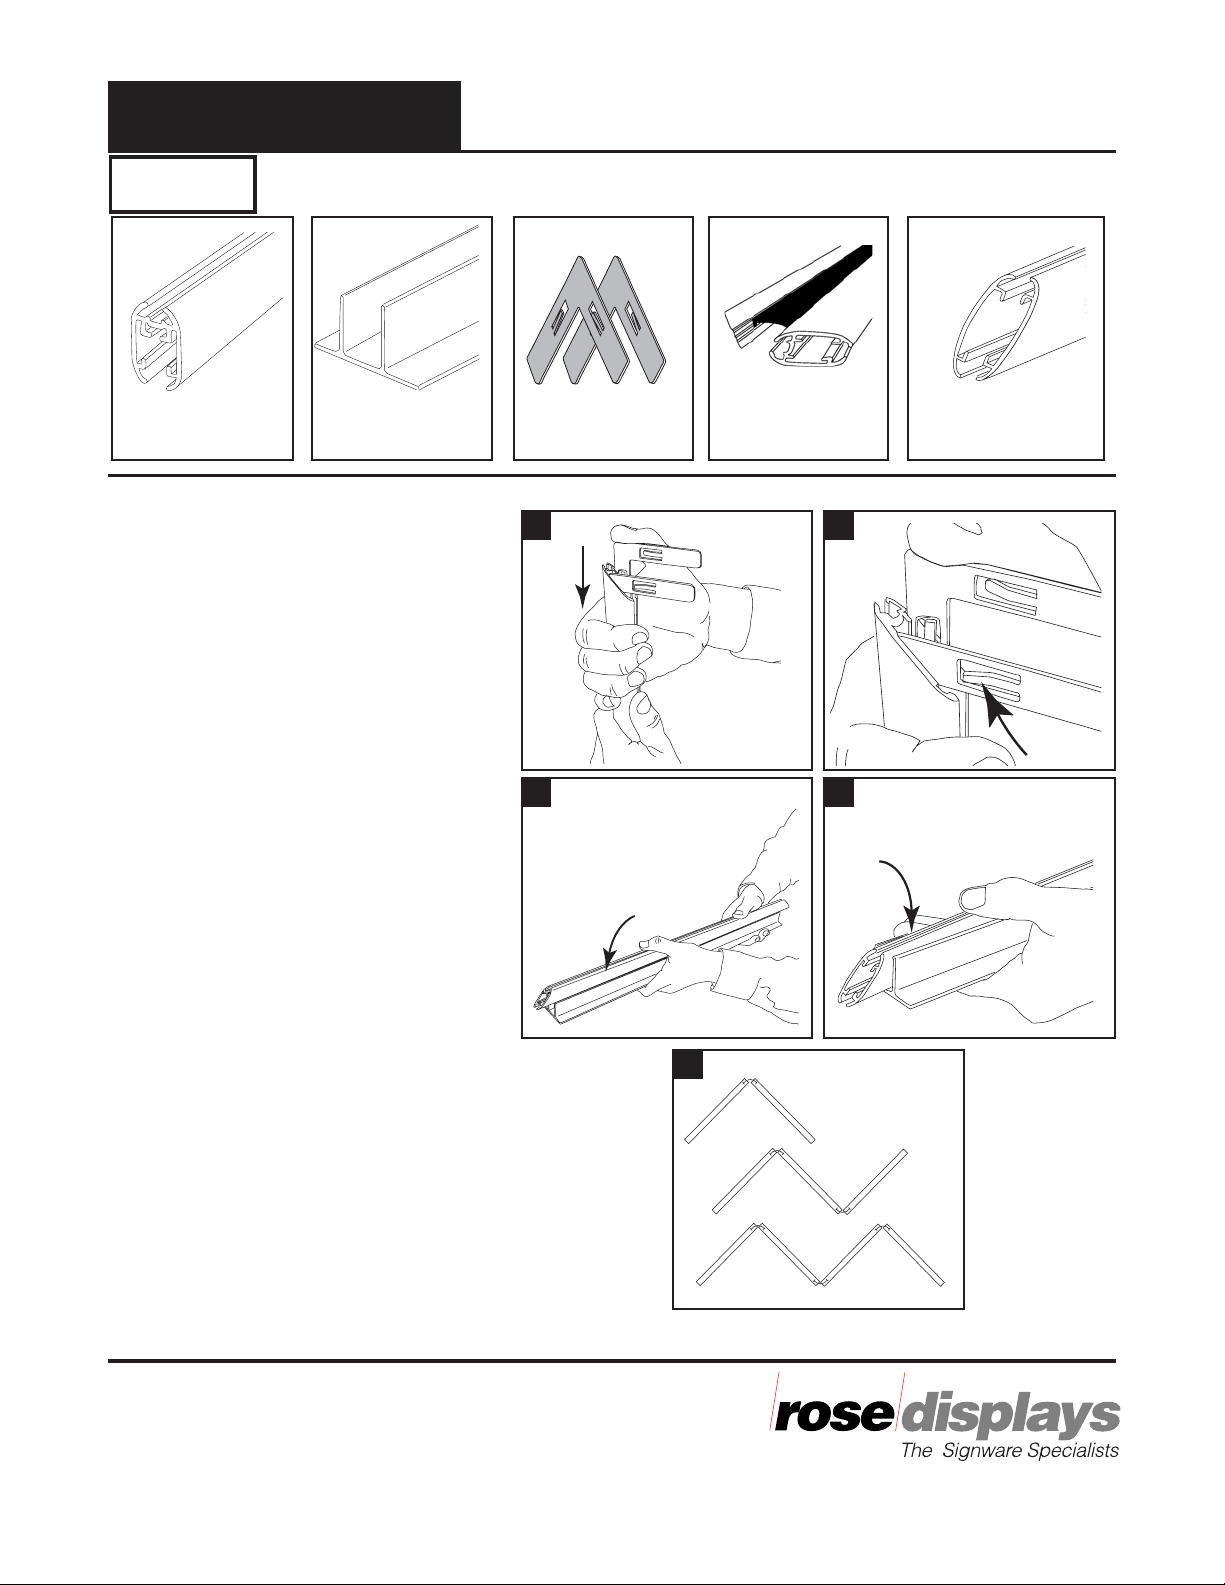
Parts
Ano rails
Vario Base Corner Brackets Split Rails
Instruction Sheet
Ver tical Rails
with Flex Spine
Instructions For Assembly
Step 1
Insert corner brackets into ends of
bottom rails, using thumb, as shown
in illustration. 2 brackets per end of
each rail. Fig. 1
Detail Fig. 1a- Corner bracket tension
tabs face toward outside of frame.
Step 2
Snap base Ano rail sections into the
Vario base section.
Start at one end and work the Vario
base onto the Ano rail.
Step 3
Lay out parts as they will be configured
on the floor. (2, 3 or 4 panels)
1 1a
2 2a
3
3
2a
3
The AnoScreen™ is a registered trademark of Rose Displays, Ltd. Neither
the manufacturer nor any sales agent may be held liable for injury, loss or
damage resulting from the use of these products.
Part #02INAnoScreenVario.
Incept-8.15.02
2 Panel
3 Panel
4 Panel
(continued on other side)
35 Congress Street, Salem, MA 01970
Tel# 1-800-631-9707 Fax# 1-800-560-2890
e-mail:signware@rosedisplays.com
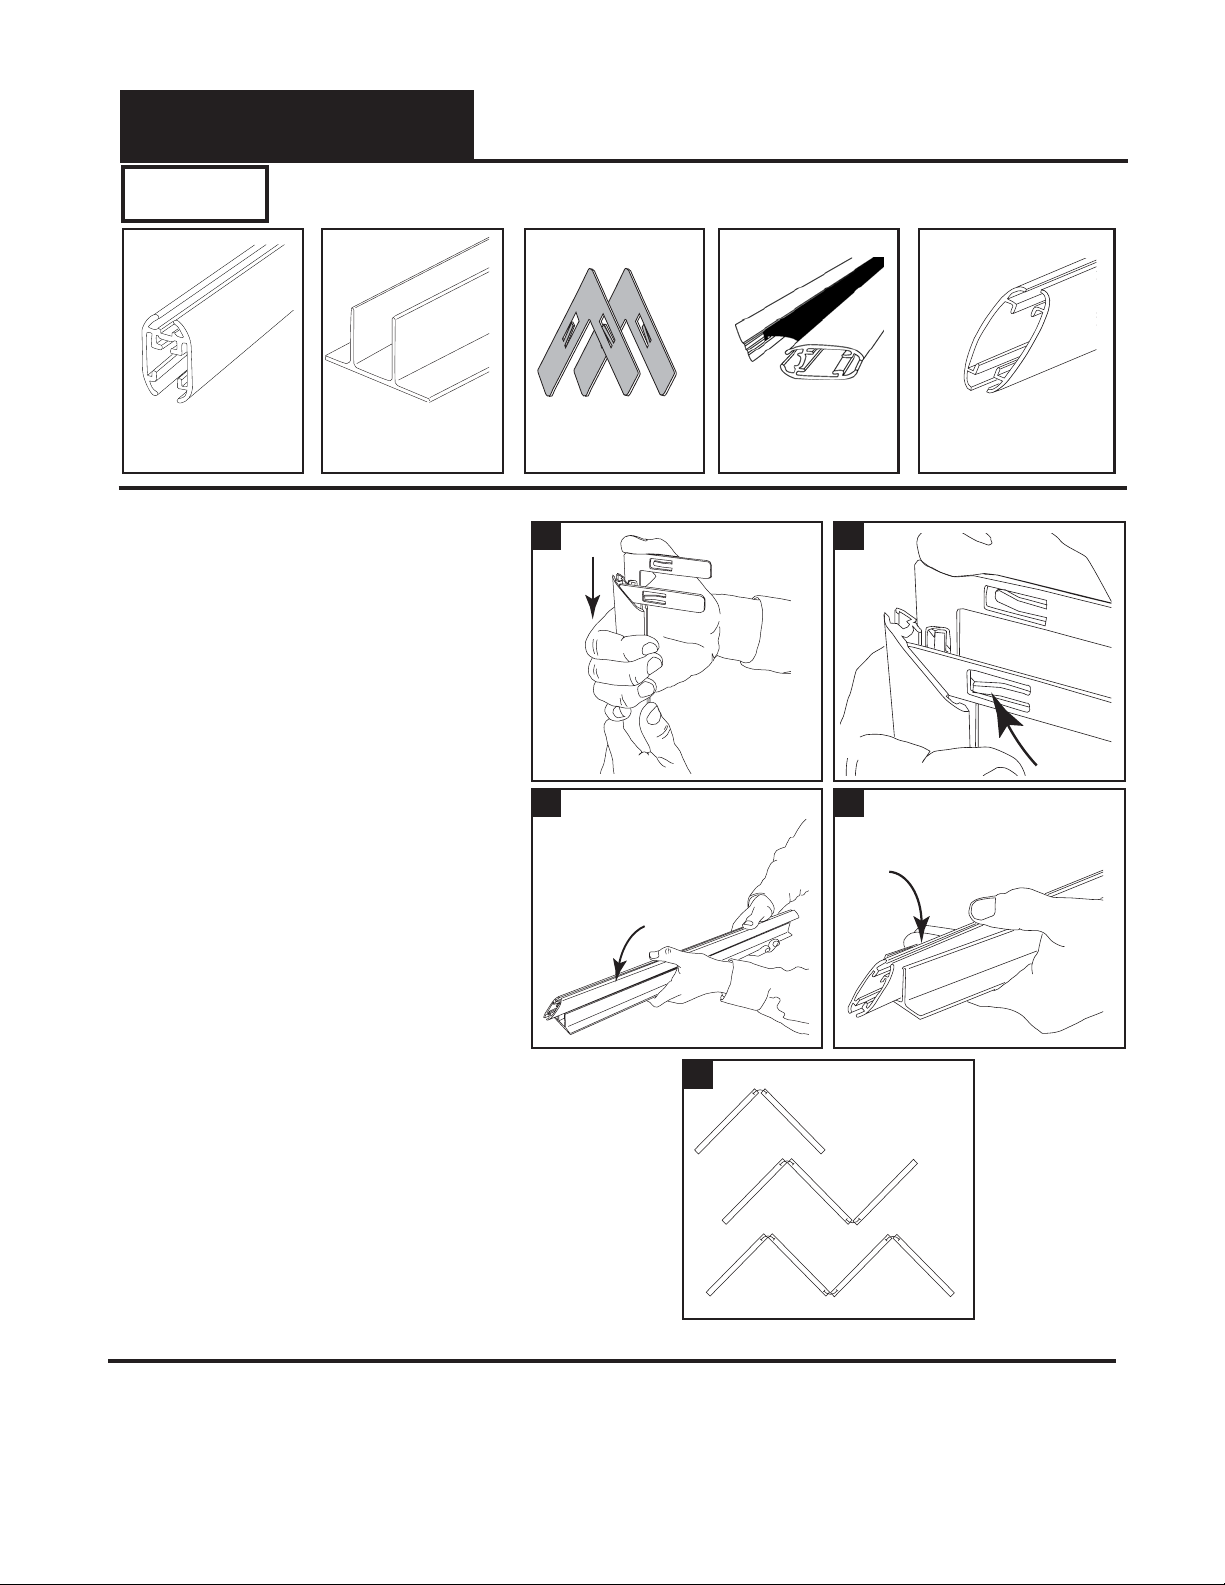
AnoScreen™
Parts
Vario Base Corner Brackets Split Rails
Instruction Sheet
Vertical Rails
with Flex SpineAno rails
Instructions For Assembly
Step 1
Insert corner brackets into ends of
bottom rails, using thumb, as shown
in illustration. 2 brackets per end of
each rail. Fig. 1
Detail Fig. 1a- Corner bracket tension
tabs face toward outside of frame.
Step 2
Snap base Ano rail sections into the
Vario base section.
Start at one end and work the Vario
base onto the Ano rail.
Step 3
Lay out parts as they will be configured
on the floor. (2, 3 or 4 panels)
1 1a
2 2a
3
3
2a
The AnoScreen™ is a trademark of Rose Displays, Ltd. Neither the
manufacturer nor any sales agent may be held liable for injury, loss or
damage resulting from the use of these products.
Part #02INAnoScreenVario.
Incept-8.15.02
2 Panel
3 Panel
4 Panel
(continued on other side)

AnoScreen™
Instruction Sheet (side 2)
Instructions For Assembly Continued
Step 4
Assemble the vertical rail assemblies onto
the upward facing corner brackets already
inserted into the bottom rails. All 4
brackets can go into the vertical rails at
one time, or you cando one side at a
time.
Note: Make sure grommets are on the
top end of the vertical panels. Use the
two vertical rails without flex spine
connectors on the outside edges of the
outermost panels.
Step 5
Insert corner brackets into ends of split
rails, using thumb, as shown in illustration. 1bracket per end of each split rail.
Step 6
Assemble split rails onto top ends of
vertical rails, one inside and one
outside of each panel of the
AnoScreen.
4
5 6
7
Step 7
Insert and change signs through top
of each panel.
Vario Base
The AnoScreen™ is a registered trademark of Rose Displays, Ltd. Neither
the manufacturer nor any sales agent may be held liable for injury, loss or
damage resulting from the use of these products.
Part #02INAnoScreenVario.
Incept-8.15.02
Corner brackets
& Split Rails
35 Congress Street, Salem, MA 01970
Tel# 1-800-631-9707 Fax# 1-800-560-2890
e-mail:signware@rosedisplays.com

AnoScreen™
Instruction Sheet (side 2)
Instructions For Assembly Continued
Step 4
Assemble the vertical rail assemblies onto
the upward facing corner brackets already
inserted into the bottom rails. All 4
brackets can go into the vertical rails at
one time, or you cando one side at a
time.
Note: Make sure grommets are on the
top end of the vertical panels. Use the
two vertical rails without flex spine
connectors on the outside edges of the
outermost panels.
Step 5
Insert corner brackets into ends of split
rails, using thumb, as shown in illustration. 1bracket per end of each split rail.
Step 6
Assemble split rails onto top ends of
vertical rails, one inside and one
outside of each panel of the
AnoScreen.
4
5 6
7
Step 7
Insert and change signs through top
of each panel.
Vario Base
The AnoScreen™ is a trademark of Rose Displays, Ltd. Neither the
manufacturer nor any sales agent may be held liable for injury, loss or
damage resulting from the use of these products.
Part #02INAnoScreenVario.
Corner brackets
& Split Rails
Incept-8.15.02
 Loading...