

AnoQuick™ with Peg
Instruction Sheet
Parts
AnoQuick
12A300R
Instructions for Hanging
Instructions for Hanging
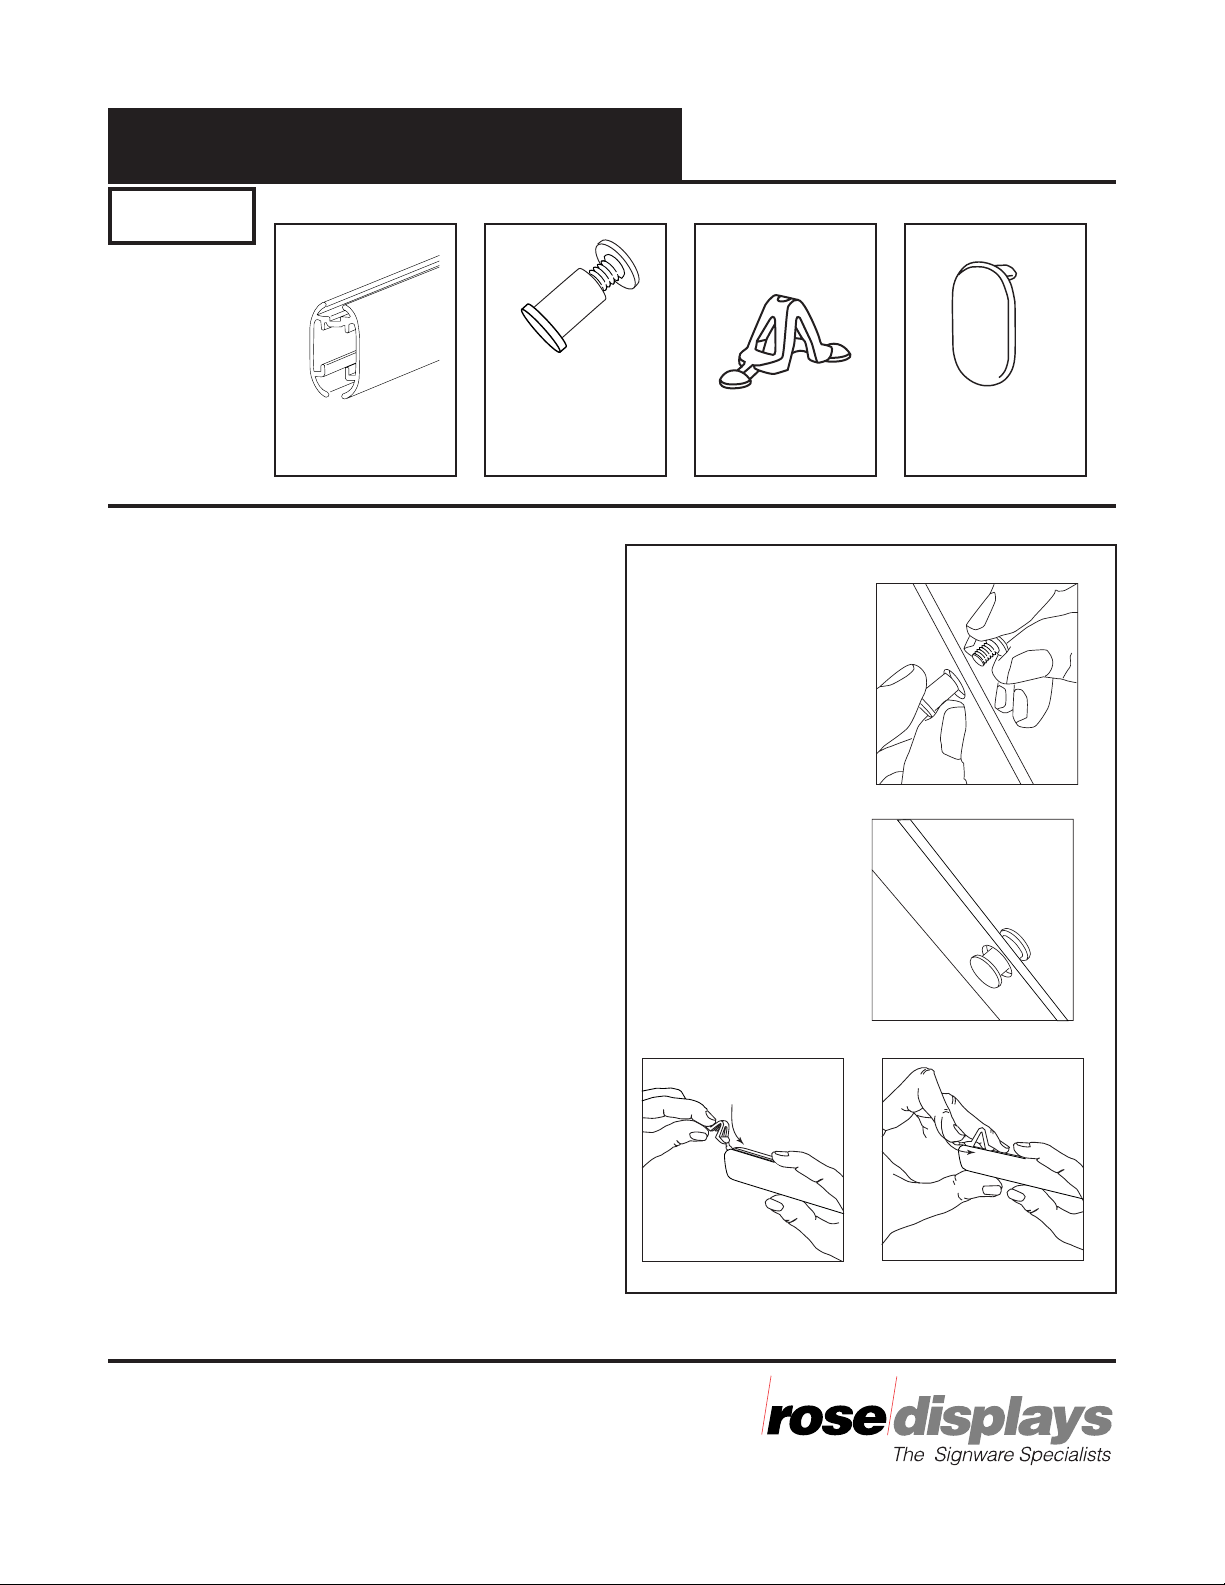
Step 1
When using AnoQuick to hang 1/8” Sintra or an
equally heavy substrate, have your printer punch
two 1/4” holes along the top and bottom edges of
print — or only the top if no bottom holder is
being used. Fig. 1
Note: Each hole must be centered 1/4” in from the
edge of the substrate.
Step 2
Push both parts of the peg together through each
of the punched holes. Fig. 2
Step 3
Install MultiClip in the top AnoQuick Holder.
Holding clip at slight angle, first insert one round
end, then press down on other round end and push
MultiClip into holder. Fig. 3
Note: For OneUp applications place the
MultiClip in the center of the AnoQuick Holder.
Pegs
06-1920
MultiClip
1UP-0100
Figure 1
Figure 2
Figure 3
End Caps
06-5525
The AnoQuick is a registered trademark of Rose Displays, Ltd. Neither
the manufacturer nor any sales agent may be held liable for injury, loss or
damage resulting from the use of these products.
Part # 02INSAnoQw/PegMCEndcap
Incept-8.15.02
35 Congress Street, Salem MA 01970
Tel# 1-800-631-9707 Fax# 1-800-560-2890
e-mail:signware@rosedisplays.com
AnoQuick™ with Peg
Instruction Sheet
Parts
AnoQuick
12A300R
Instructions for Hanging
Instructions for Hanging
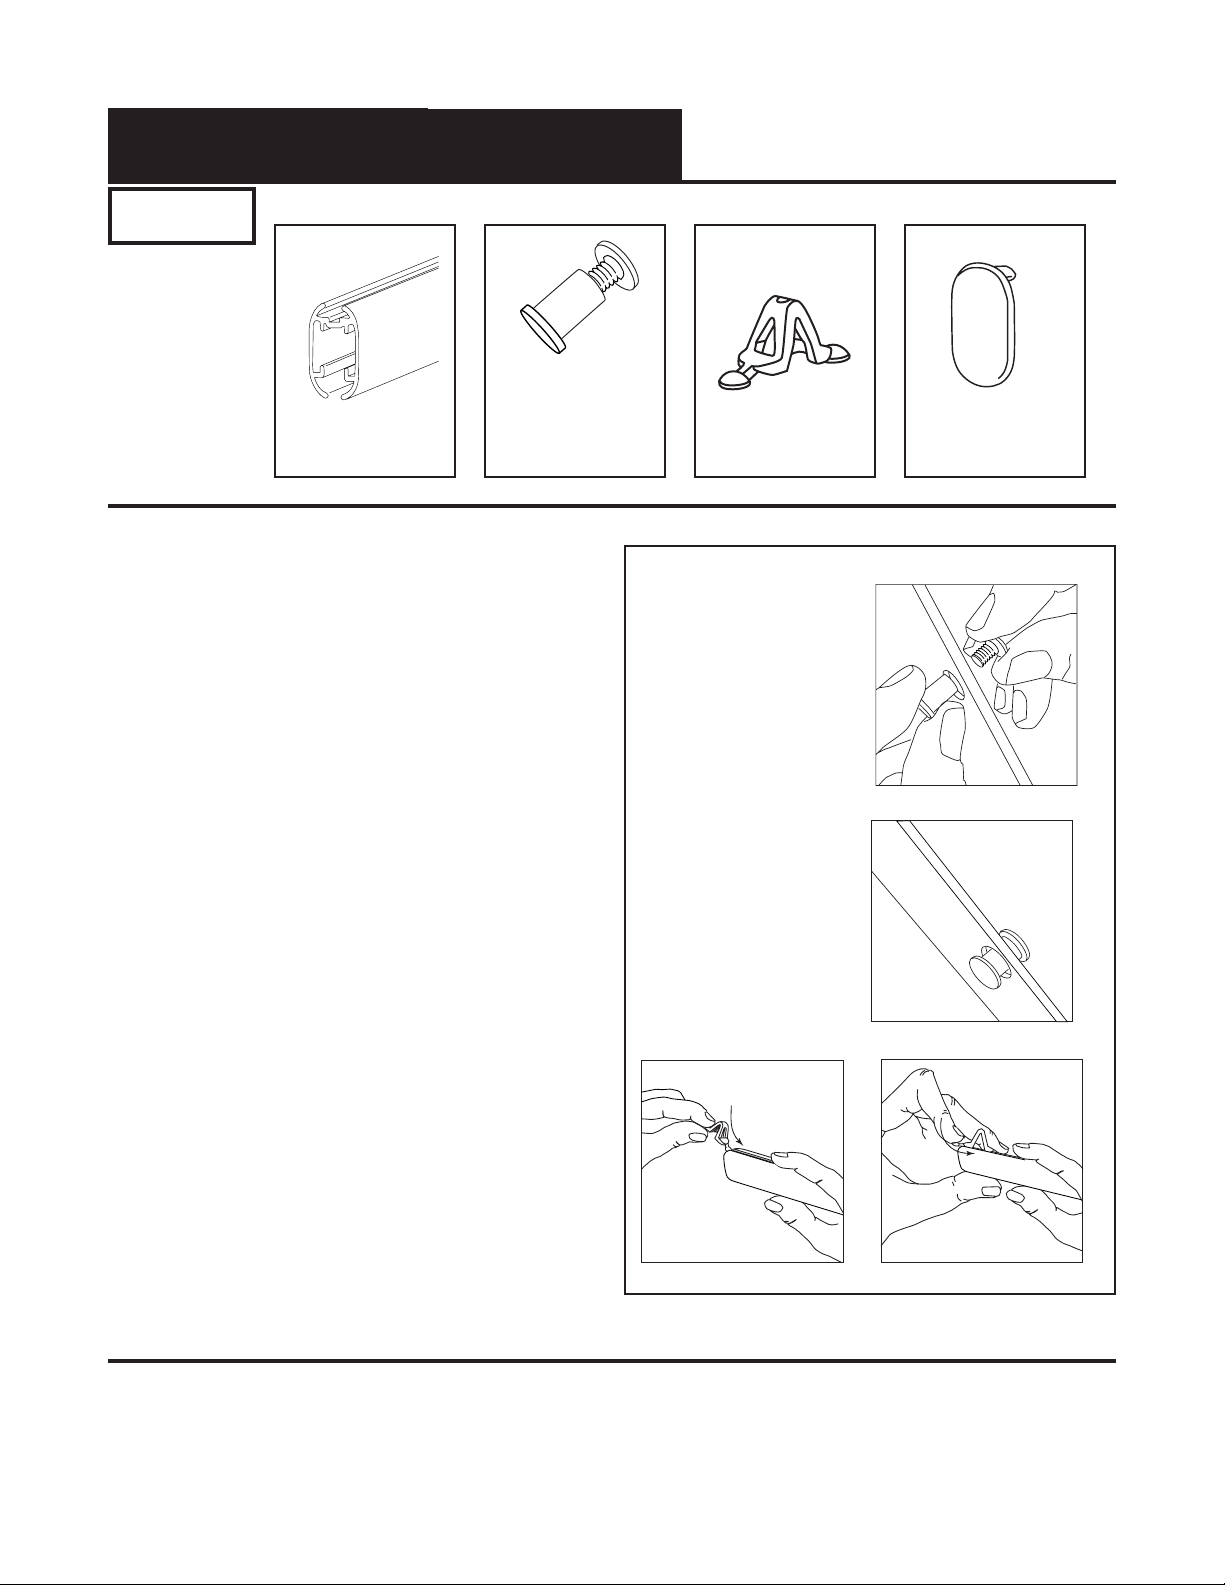
Step 1
When using AnoQuick to hang 1/8” Sintra or an
equally heavy substrate, have your printer punch
two 1/4” holes along the top and bottom edges of
print — or only the top if no bottom holder is
being used. Fig. 1
Note: Each hole must be centered 1/4” in from the
edge of the substrate.
Step 2
Push both parts of the peg together through each
of the punched holes. Fig. 2
Step 3
Install MultiClip in the top AnoQuick Holder.
Holding clip at slight angle, first insert one round
end, then press down on other round end and push
MultiClip into holder. Fig. 3
Note: For OneUp applications place the
MultiClip in the center of the AnoQuick Holder.
Pegs
06-1920
MultiClip
1UP-0100
Figure 1
Figure 2
Figure 3
End Caps
06-5525
The AnoQuick is a registered trademark of Rose Displays, Ltd. Neither
the manufacturer nor any sales agent may be held liable for injury, loss or
damage resulting from the use of these products.
Part # 02INSAnoQw/PegMCEndcap
Incept-8.15.02
AnoQuick™ with Peg
Instruction Sheet
Parts
AnoQuick
12A300R
Instructions for Hanging
Instructions for Hanging
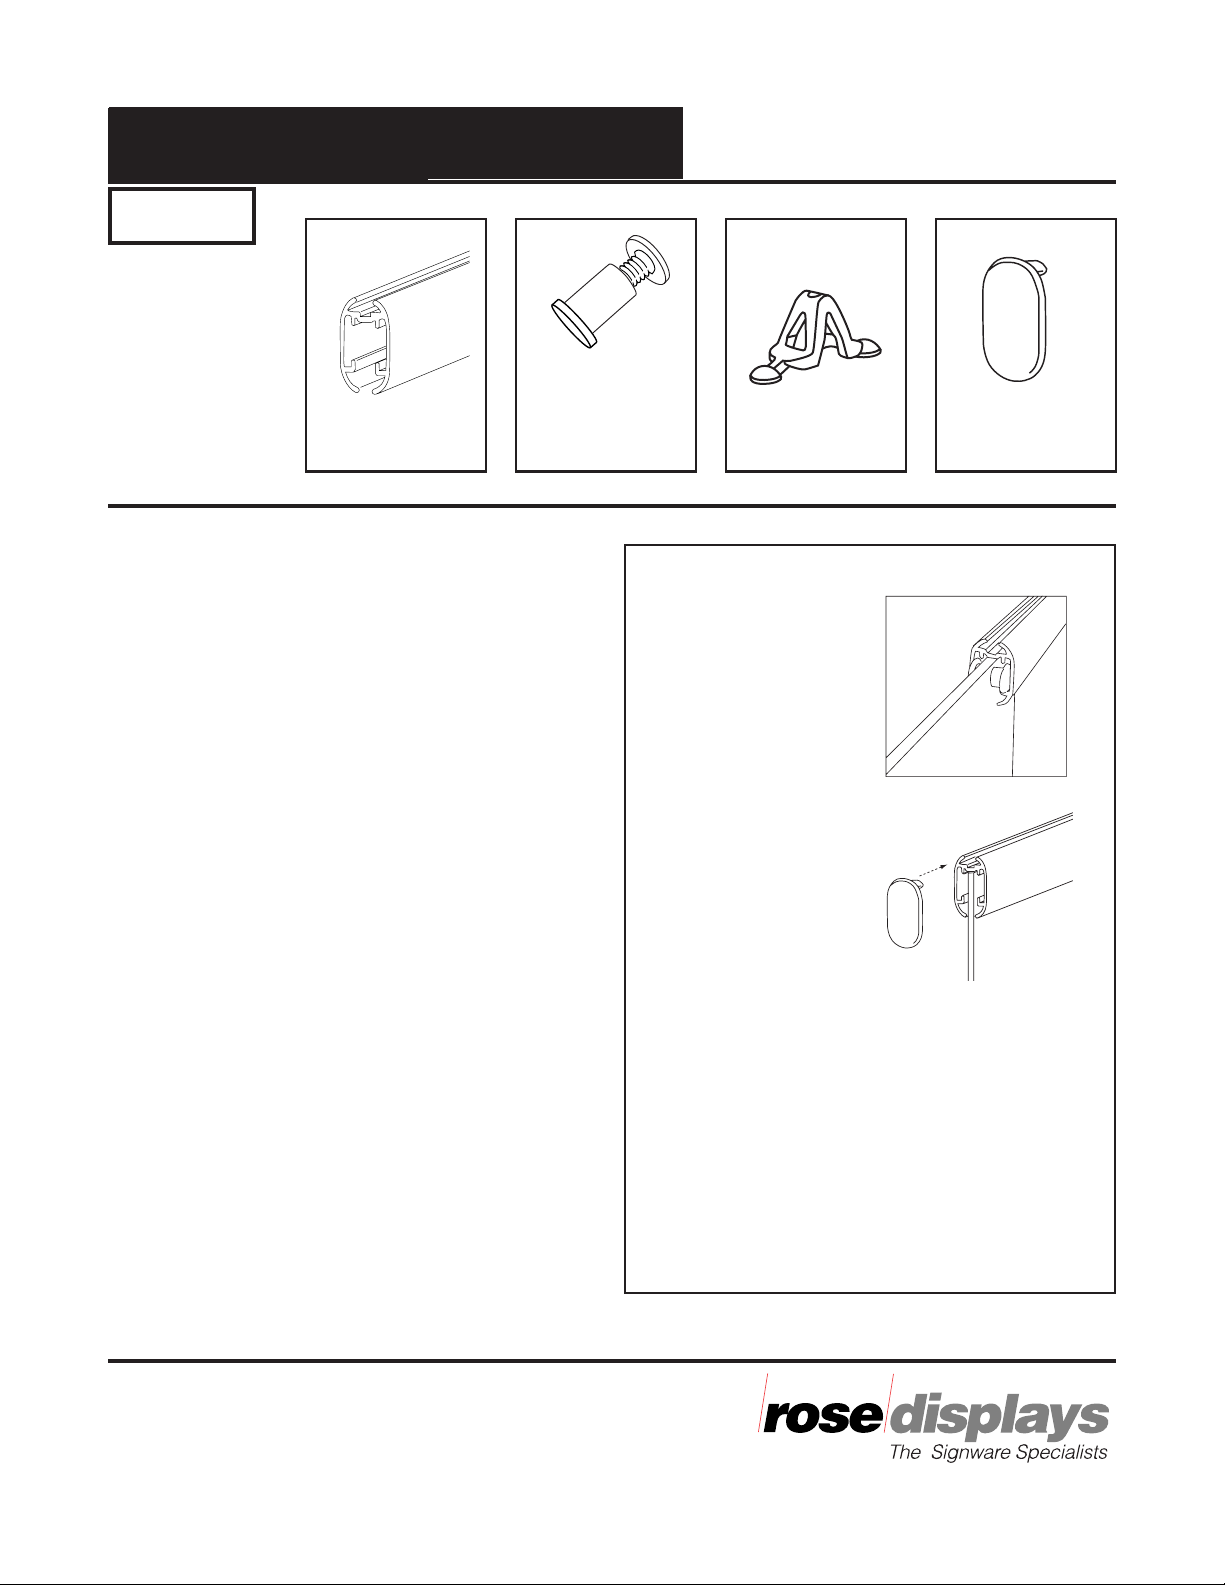
Step 4
Slide AnoQuick onto substrate. The pegs should
slide into the side rails. Fig. 4
Note: This is the easiest way to safely hang
heavier substrates.
Step 5
Push end caps into place. Fig. 5
Note: To remove poster with pegs, simply rotate
end cap up out of the way.
Step 6
Suspend poster.
Important note:
Please save and reuse the AnoQuick Holder, Pegs,
End Caps and MultiClips for future projects.
Pegs
06-1920
MultiClip
1UP-0100
Figure 4
Figure 5
End Caps
06-5525
The AnoQuick is a trademark of Rose Displays, Ltd. Neither the
manufacturer nor any sales agent may be held liable for injury, loss or
damage resulting from the use of these products.
Part #02INSAnoQw/PegMCEndcap
Incept-8.15.02
35 Congress Street, Salem MA 01970
Tel# 1-800-631-9707 Fax# 1-800-560-2890
e-mail:signware@rosedisplays.com

AnoQuick™ with Peg
Instruction Sheet
Parts
AnoQuick
12A300R
Instructions for Hanging
Instructions for Hanging
Step 4
Slide AnoQuick onto substrate. The pegs should
slide into the side rails. Fig. 4
Note: This is the easiest way to safely hang
heavier substrates.
Step 5
Push end caps into place. Fig. 5
Note: To remove poster with pegs, simply rotate
end cap up out of the way.
Step 6
Suspend poster.
Important note:
Please save and reuse the AnoQuick Holder, Pegs,
End Caps and MultiClips for future projects.
Pegs
06-1920
MultiClip
1UP-0100
Figure 4
Figure 5
End Caps
06-5525
The AnoQuick is a trademark of Rose Displays, Ltd. Neither the
manufacturer nor any sales agent may be held liable for injury, loss or
damage resulting from the use of these products.
Part #02INSAnoQw/PegMCEndcap
Incept-8.15.02
 Loading...