

Page 1
AnoFrame™
Parts
Instruction Sheet
Instructions for Hanging
Instructions for Hanging
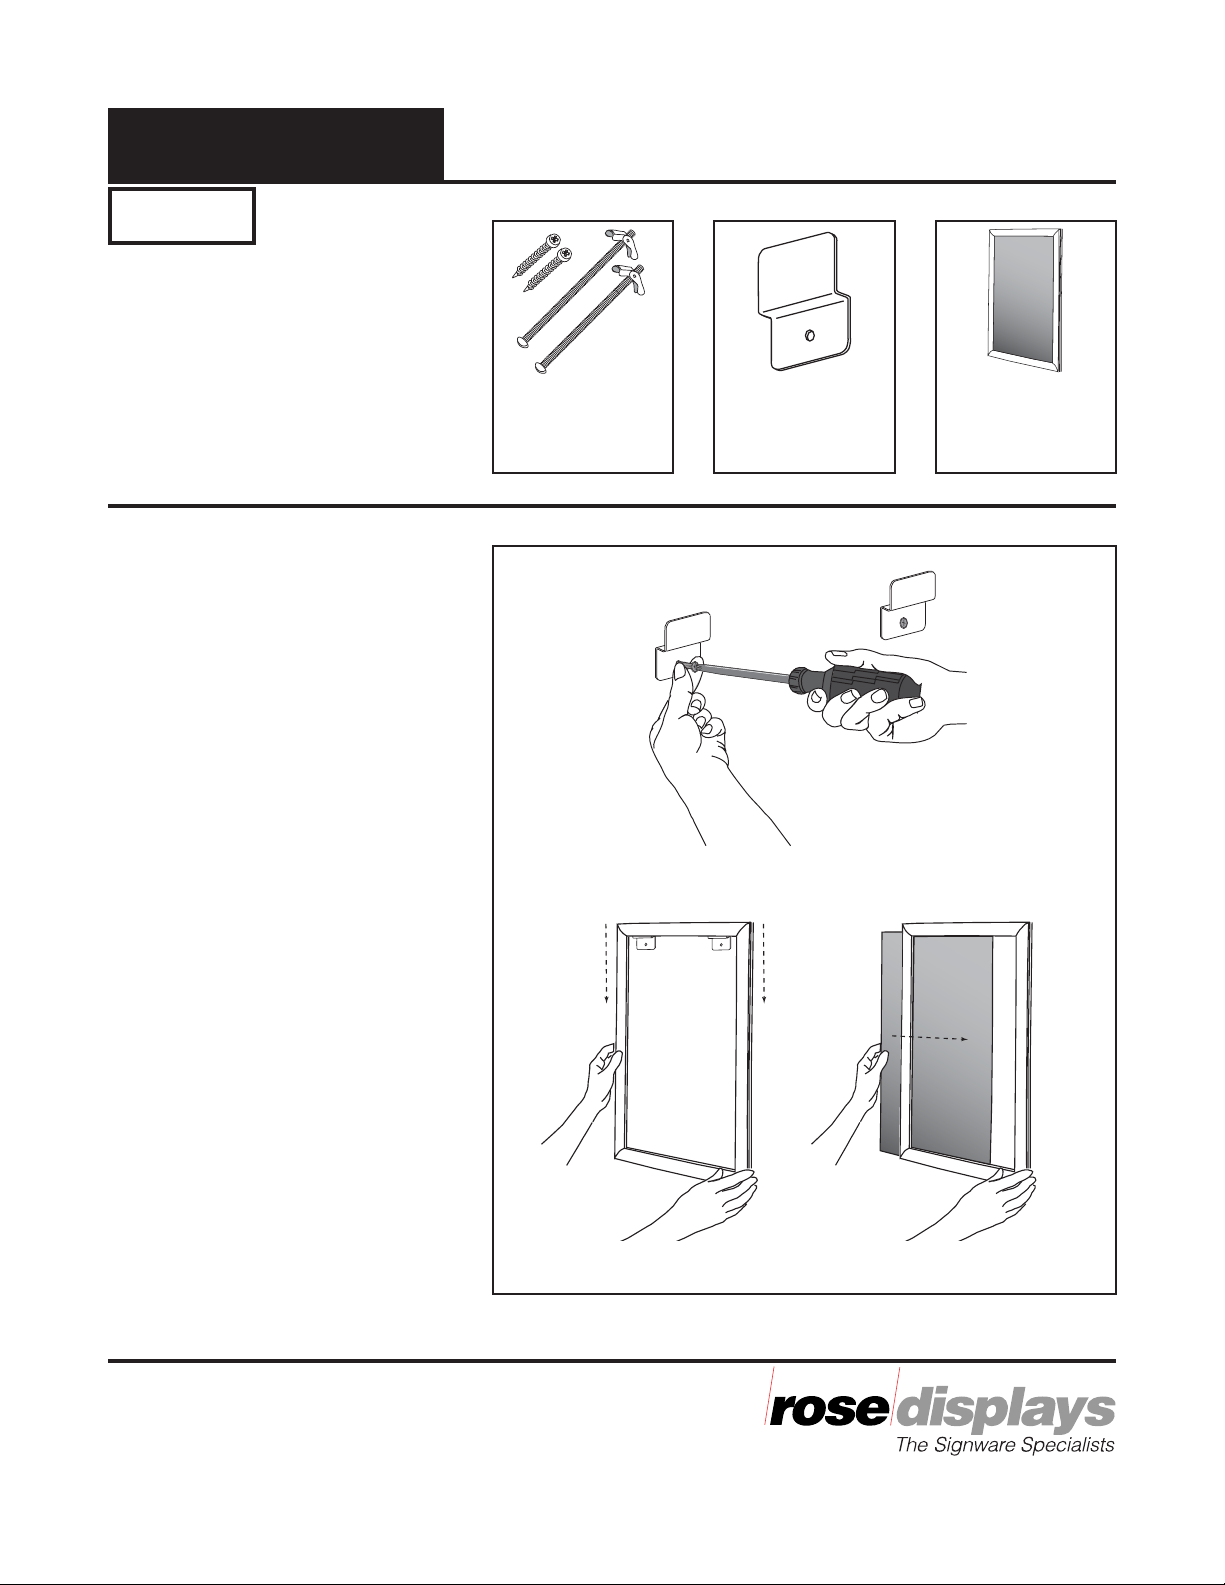
Step 1
Install wall mounting hangers
using wood screws and a Phillips
head screwdriver. Make sure that
the wall mounting hangers are
level. Fig. 1
Note: The use of togglebolts is
recommended for drywall installations
(predrilling 3/8” holes is necessary).
Step 2
Slide AnoFrame onto wall mounting clips. Fig 2.
Wood Screws
or Toggleblots
2010SC
25-0013
Wall Mounting
Hangers
06-6067
Figure 1
AnoFrame
12AF100-H
Step 3
Insert poster. Fig 3.
If necessary, graphics can be inserted
before hanging the AnoFrame.
The AnoFrame™ is a trademark of Rose Displays, Ltd. Neither the
manufacturer nor any sales agent may be held liable for injury, loss or
damage resulting from the use of these products.
Part #02INSAnoFrameAssembled
Incept-9.06.02
Figure 2 Figure 3
35 Congress Street, Salem, MA 01970
Tel# 1- 800 631-9707 Fax# 1-800-560-2890
e-mail:signware@rosedisplays.com
Page 2
AnoFrame™
Instruction Sheet
Parts
Instructions for Hanging
Instructions for Hanging
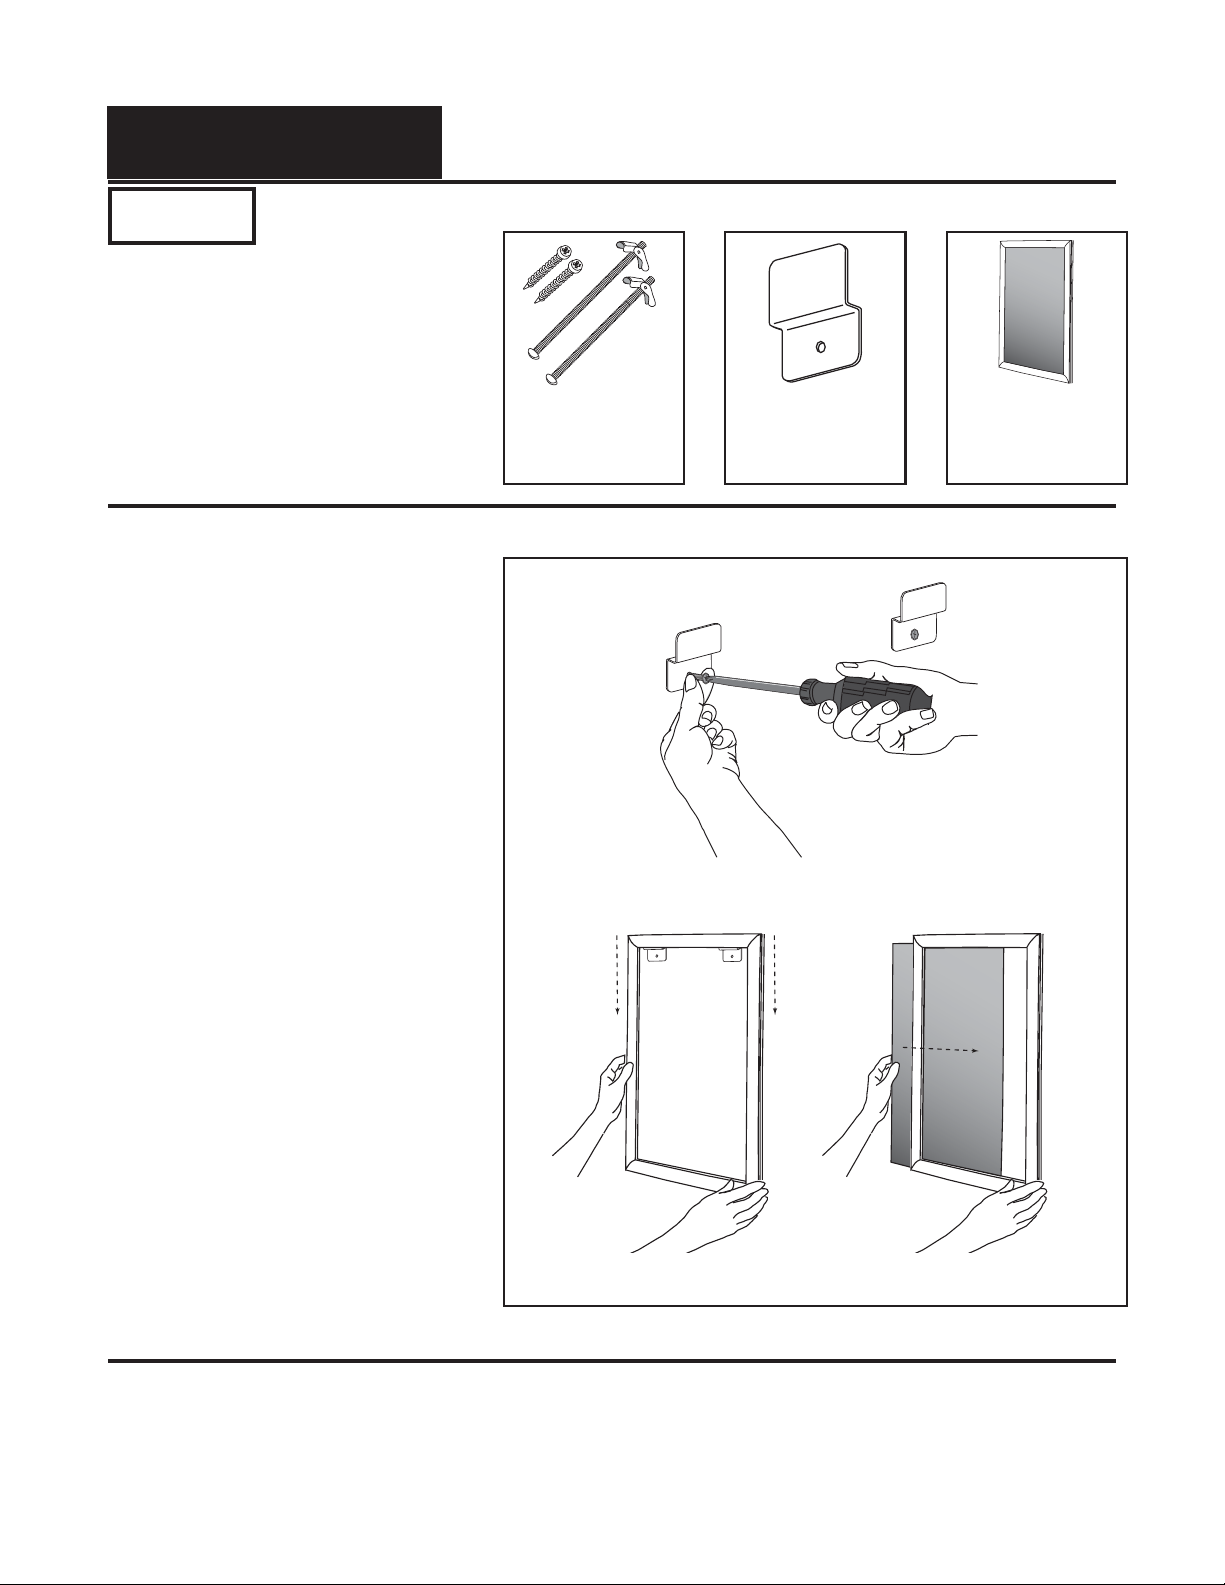
Step 1
Install wall mounting hangers
using wood screws and a Phillips
head screwdriver. Make sure that
the wall mounting hangers are
level. Fig. 1
Wood Screws
or Toogleblots
2010SC
25-0013
Wall Mounting
Hangers
06-6067
AnoFrame
12AF100-H
Note: The use of togglebolts is
recommended for drywall installations
(predrilling 3/8” holes is necessary).
Step 2
Slide AnoFrame onto wall mounting clips. Fig 2.
Step 3
Insert poster. Fig 3.
If necessary, graphics can be inserted
before hanging the AnoFrame.
Figure 1
Figure 2 Figure 3
The AnoFrame™ is a trademark of Rose Displays, Ltd. Neither the
manufacturer nor any sales agent may be held liable for injury, loss or
damage resulting from the use of these products.
Part #02INSAnoFrameAssembled
Incept-9.06.02
 Loading...