

Page 1
AnoConnector
TM
Parts
Instruction Sheet
AnoGotcha
12AG400
Instructions for Hanging
Instructions for Hanging
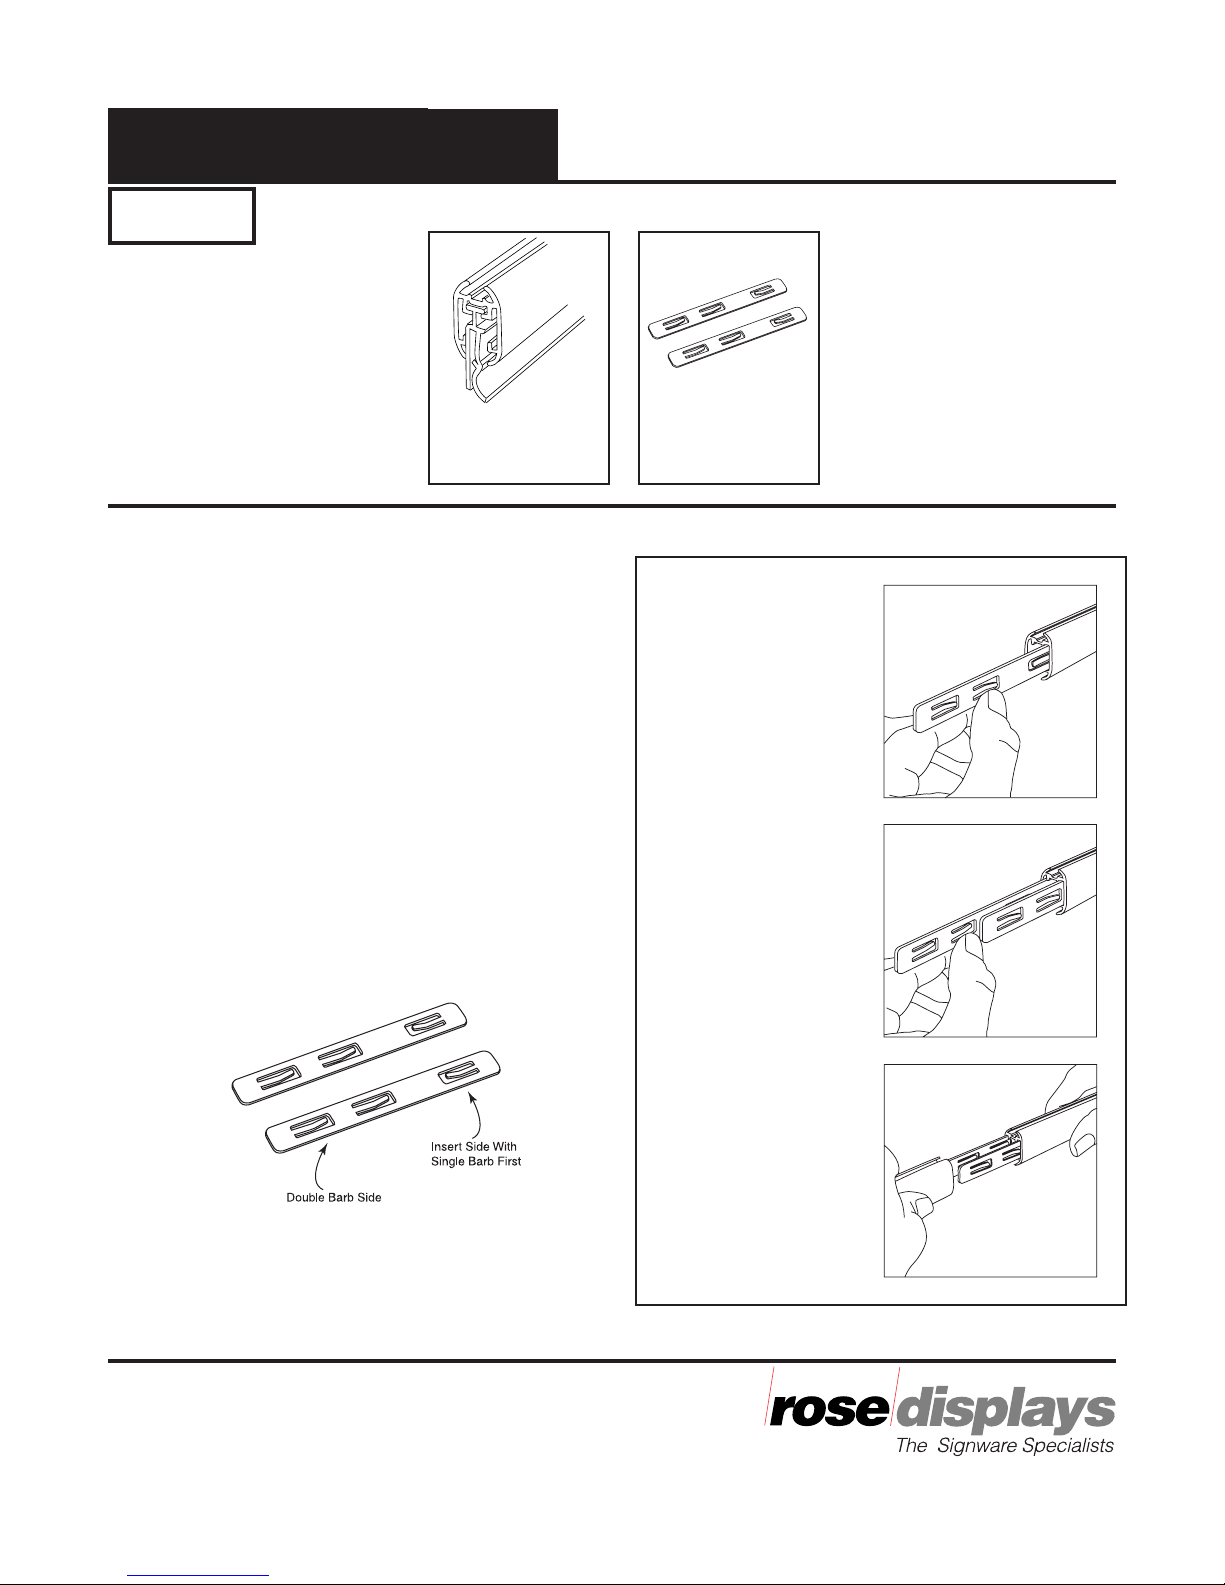
Step 1
Push one AnoConnector into one end of first
AnoGotcha rail. Be sure to start with single barb
side of the AnoConnector going into rail first.
Push in until it stops at the middle barb. Fig. 1
Note: The AnoConnector can also be used to
connect lengths of AnoQuick and AnoMulti.
Step 2
Repeat with second AnoConnector going into
back slot of first AnoGotcha rail. Fig. 2
Step 3
Push second AnoGotcha holder onto first assembly. Fig. 3
AnoConnectors
06-2930
Figure 1
Figure 2
Important note:
It is very important to insert single barb side first.
The middle barb acts as a stop for the
AnoGotcha rail.
The AnoConnectorTM is a trademark of Rose Displays, Ltd.
Neither the manufacturer nor any sales agent may be held
liable for injury, loss or damage resulting from the use of
these products. Part #02INSAnoConnectorAnoGotcha
Incept-8.15.02
Figure 3
35 Congress Street, Salem, MA 01970
Tel# 1- 800 631-9707 Fax# 1-800-560-2890
e-mail:signware@rosedisplays.com
Page 2
AnoConnector
TM
Parts
Instruction Sheet
AnoGotcha
12AG400
Instructions for Hanging
Instructions for Hanging
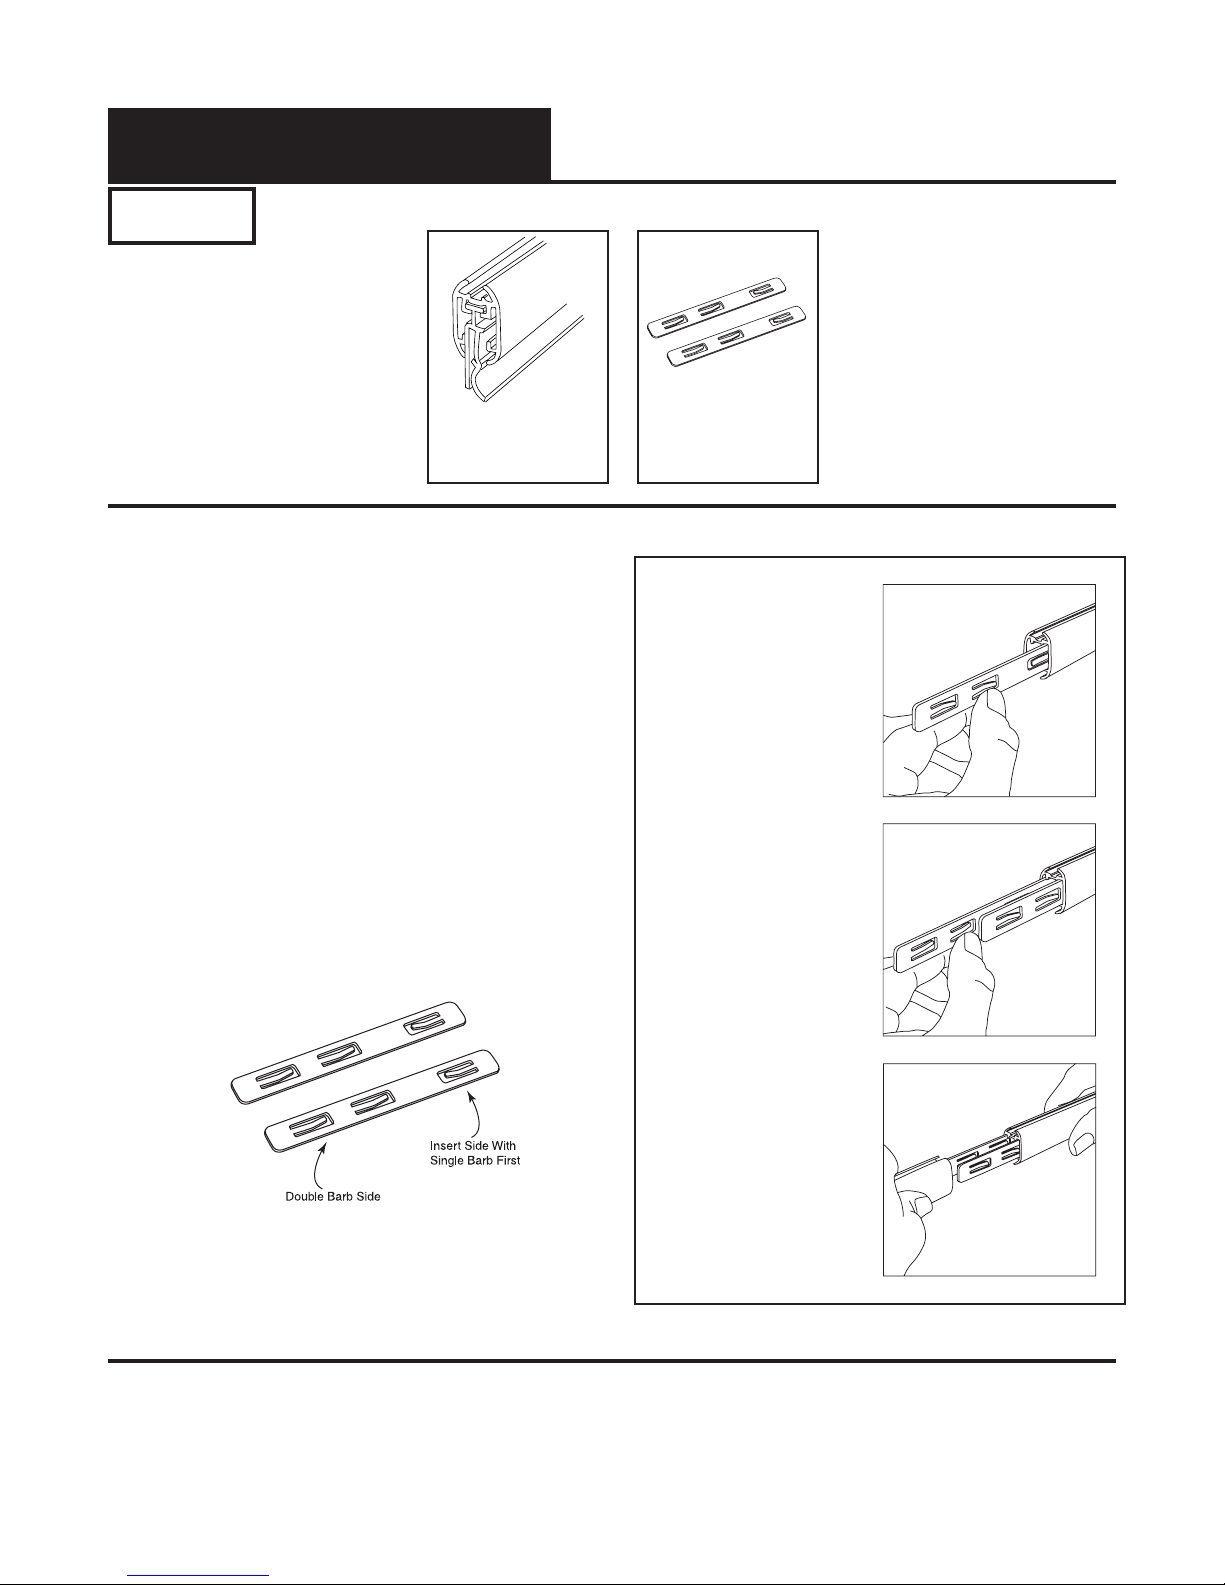
Step 1
Push one AnoConnector into one end of first
AnoGotcha rail. Be sure to start with single barb
side of the AnoConnector going into rail first.
Push in until it stops at the middle barb. Fig. 1
Note: The AnoConnector can also be used to
connect lengths of AnoQuick and AnoMulti.
Step 2
Repeat with second AnoConnector going into
back slot of first AnoGotcha rail. Fig. 2
Step 3
Push second AnoGotcha holder onto first assembly. Fig. 3
AnoConnectors
06-2930
Figure 1
Figure 2
Important note:
It is very important to insert single barb side first.
The middle barb acts as a stop for the
AnoGotcha rail.
The AnoConnectorTM is a trademark of Rose Displays, Ltd.
Neither the manufacturer nor any sales agent may be held
liable for injury, loss or damage resulting from the use of
these products. Part #02INSAnoConnectorAnoGotcha
Incept-8.15.02
Figure 3
 Loading...