

Page 1
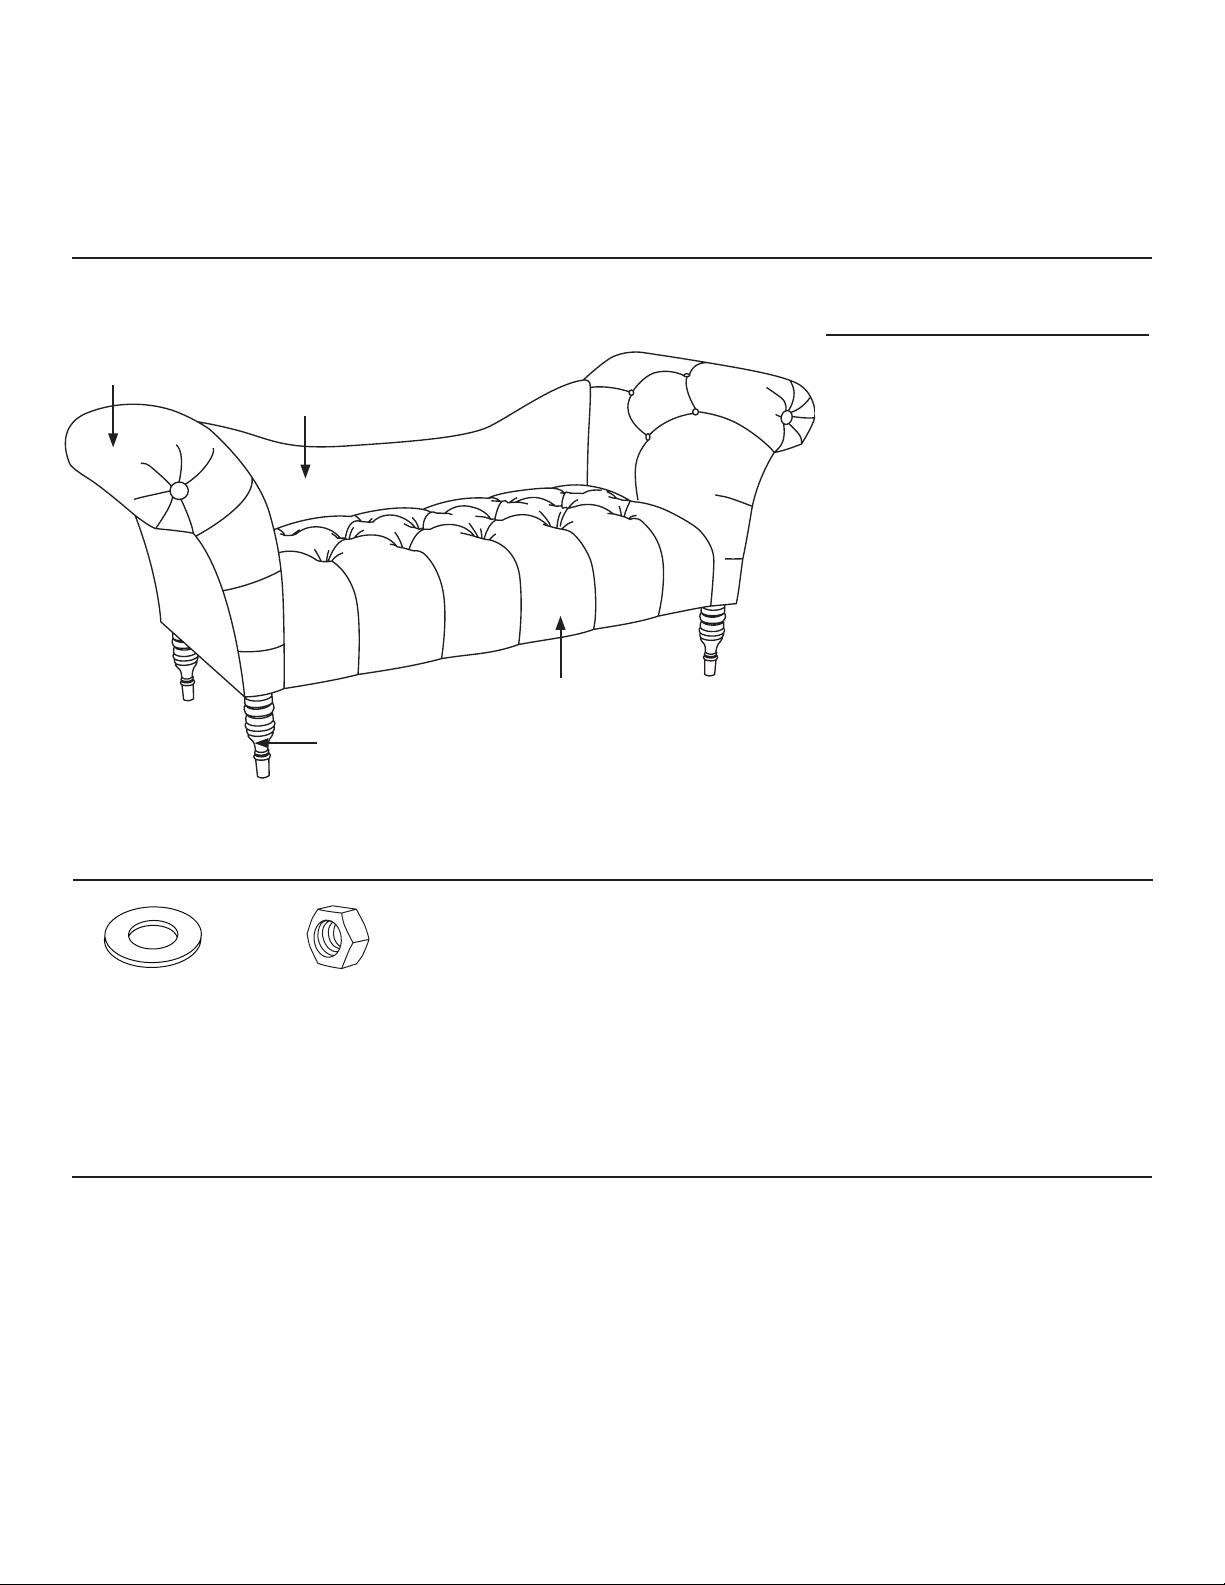
components
Chaise Assembly
item description qty
C
hardware
B
A Seat 1
B Back 1
C Arms 2
D Legs 4
Please note: actual product may
look dierent than illustration.
A
D
(H1) x 16
1 1/4" flat washer
larger
limited warranty
We guarantee our upholstered furniture against defects in construction for a period of one (1) year. When
a structural defect is brought to our attention, we will repair or replace it at our option at no charge to the customer (inculdes parts and labor,
not transportation costs). Fabric wearability for upholstered furniture is not covered by the warranty. Vacuum for regular cleaning.
PLEASE DISPOSE OF PLASTIC BAG(S) AND CARTON(S) RESPONSIBLY.
(H2) x 8
5/16" nut
Please note: you will need a wrench to complete this assembly.
This assembly requires two people.
1
Page 2
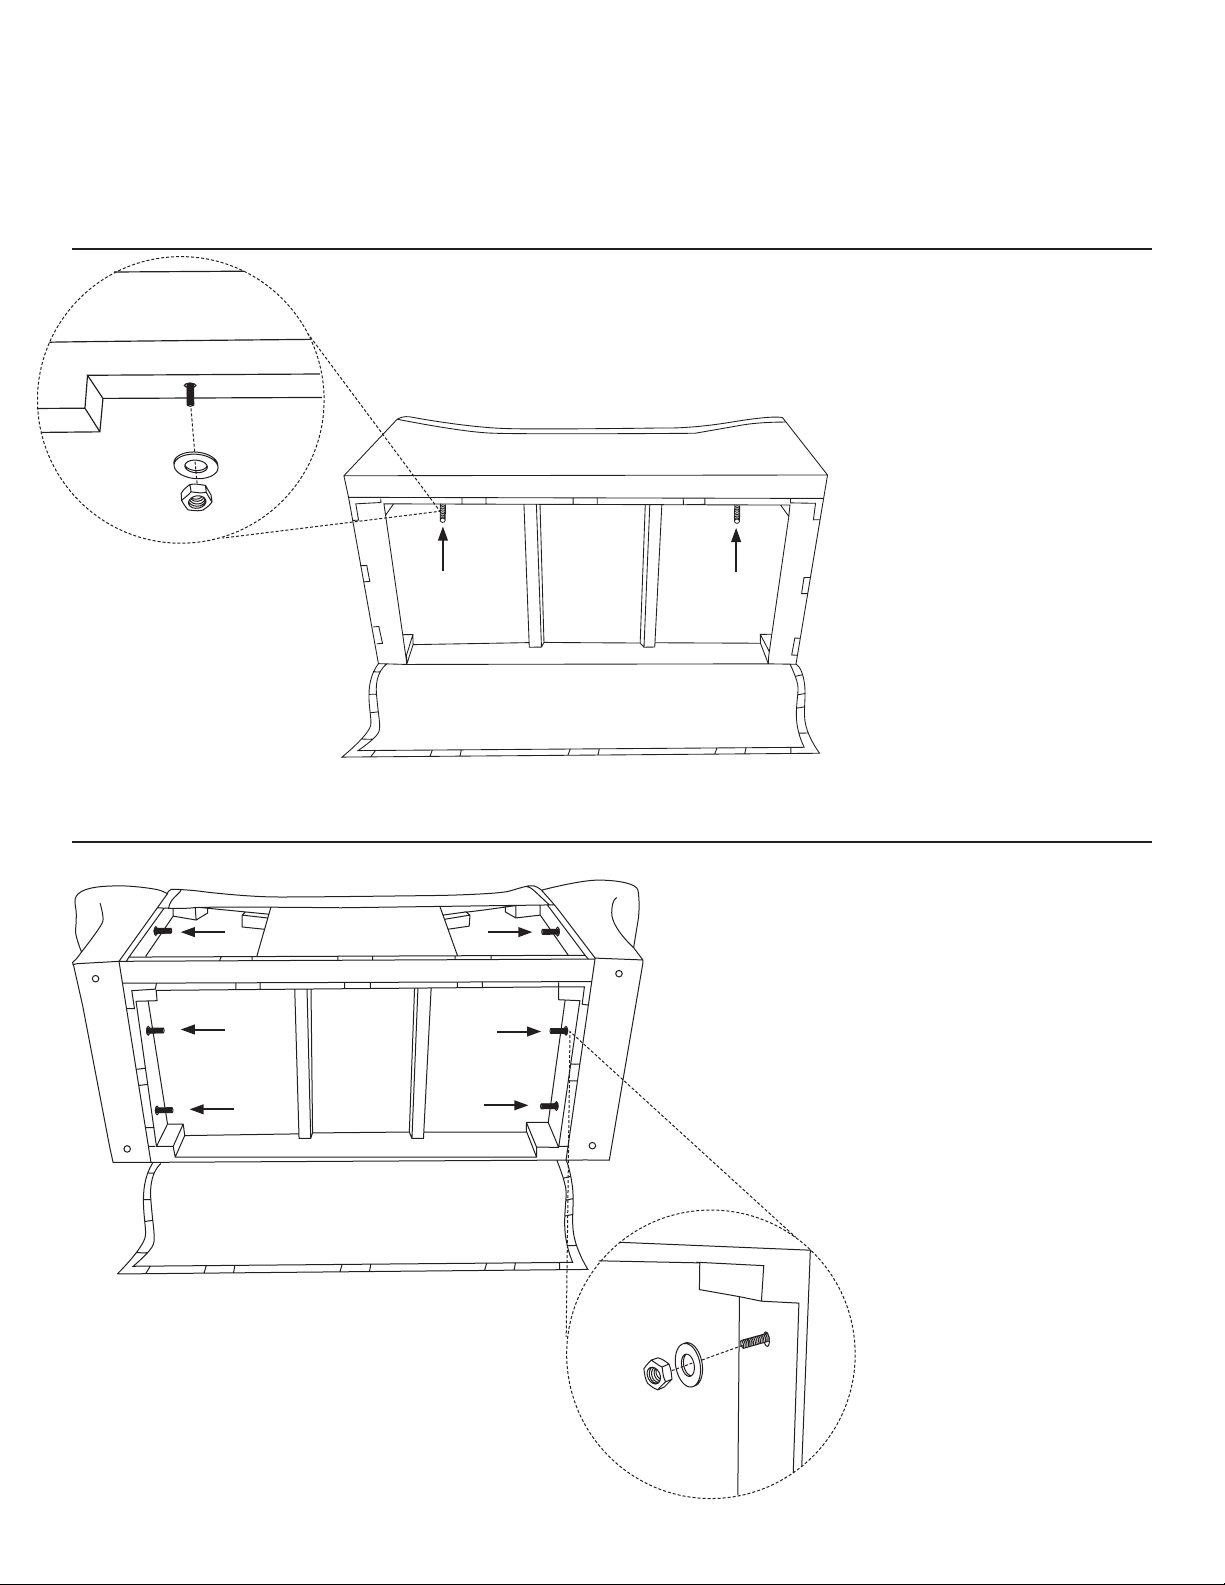
step 1
Chaise Assembly
1.1
Peel back velcro on the bottom
of (A) seat.
Carefully place bolts of (B) back
into holes of (A) seat, making
sure the sides and bottoms of
both pieces are flush.
1.2
Attach (B) back to (A) seat using
(H1) washers and (H2) nuts.
Tighten with wrench.
step 2
2.1
Peel back velcro on (B) back.
Starting on one side of the
chaise, carefully insert bolts of (C)
arm into holes of (A) seat and (B)
back.
2.2
Attach (C) arm to (A) seat and (B)
back using (H1) washers and (H2)
nuts.
Repeat process on both sides.
Tighten with wrench and replace
velcro on all pieces.
2
Page 3
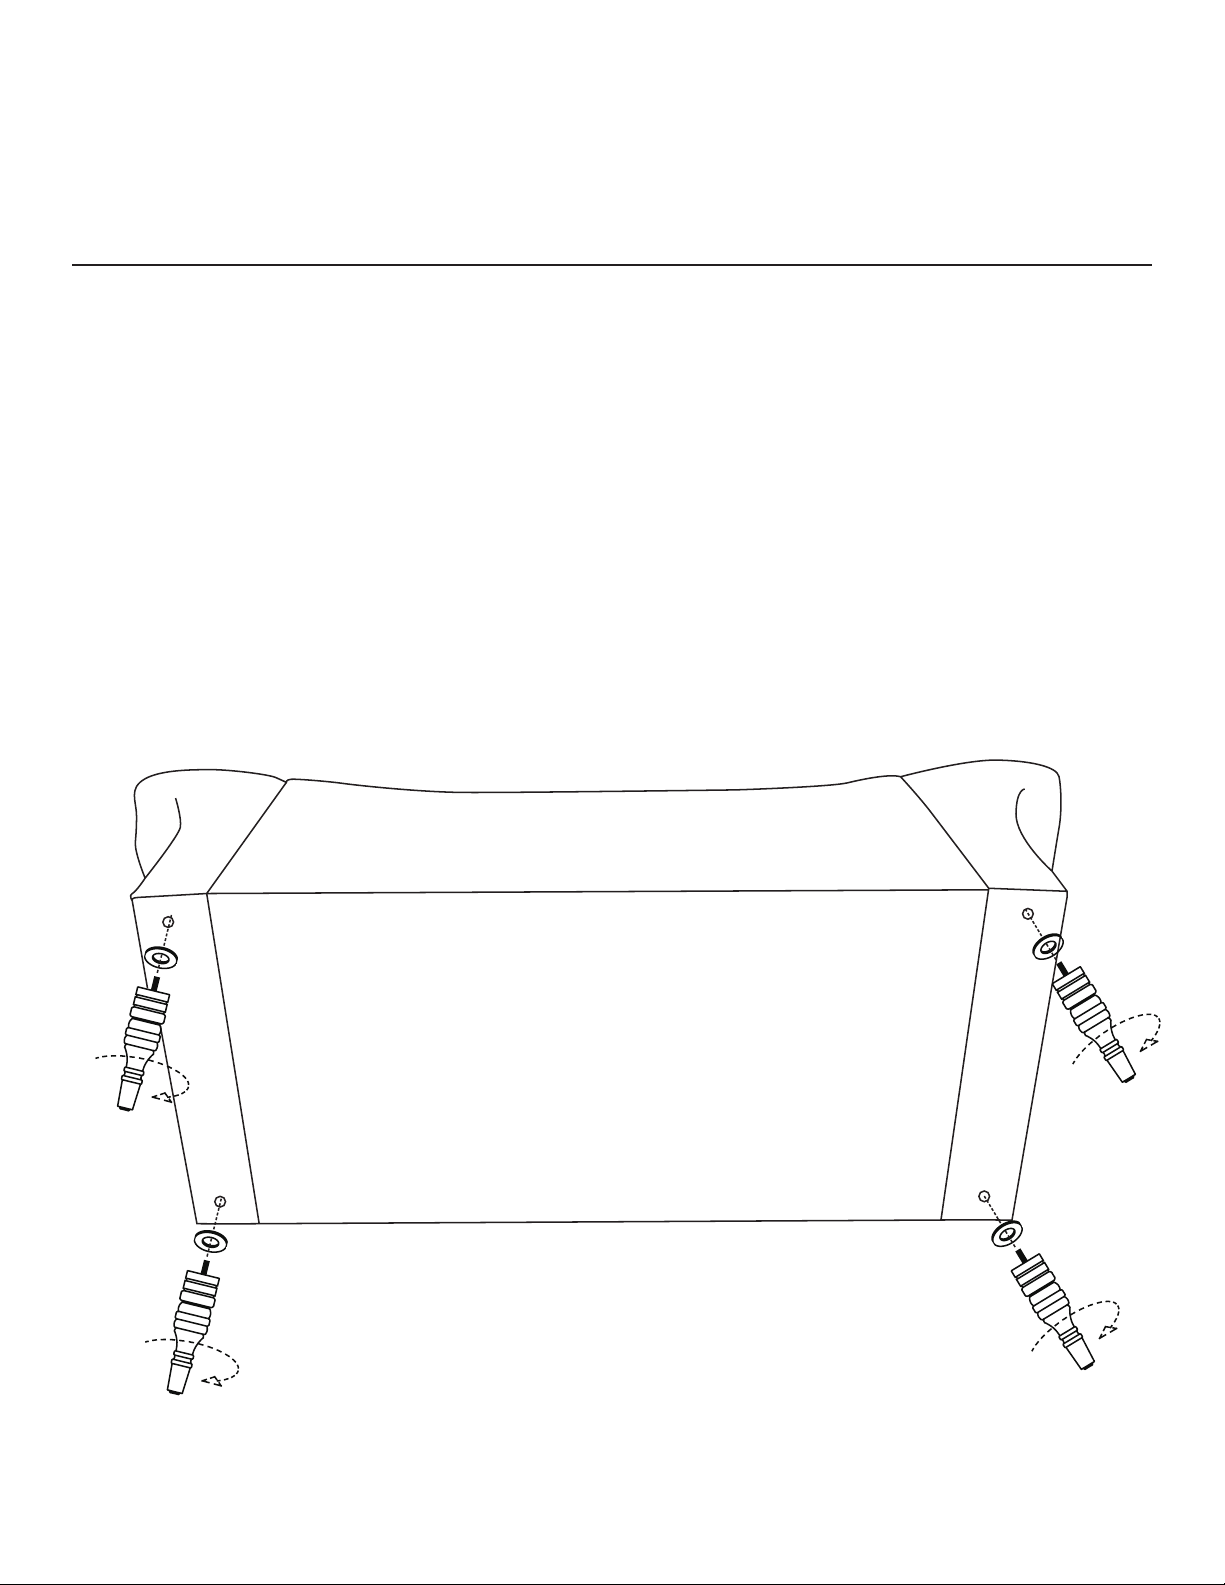
step 3
Chaise Assembly
3.1
Remove plastic caps from (B) legs, and attach to (A)
chaise using one (H1) washer per leg.
Once legs are secure, turn chaise upright to check
if level.
If chaise is not level, unscrew the shortest leg and add
an additional (H1) washer.
Repeat as needed.
Please note: you may have extra (H1) washers
depending on how many you use to level the chaise.
3
 Loading...