

Page 1

Quantity
Description
1
6x12 Axiom Tray
1
6x12 Axiom Frame
2
Axiom Runners
1
Axiom Block
4
Rubber Feet
4
1/8” Screws
12
3/16” Screws
Axiom Housing Upgrade Contents:
6”x12” Axiom Housing
Assembly Instructions
www.rosco.com
Page 2
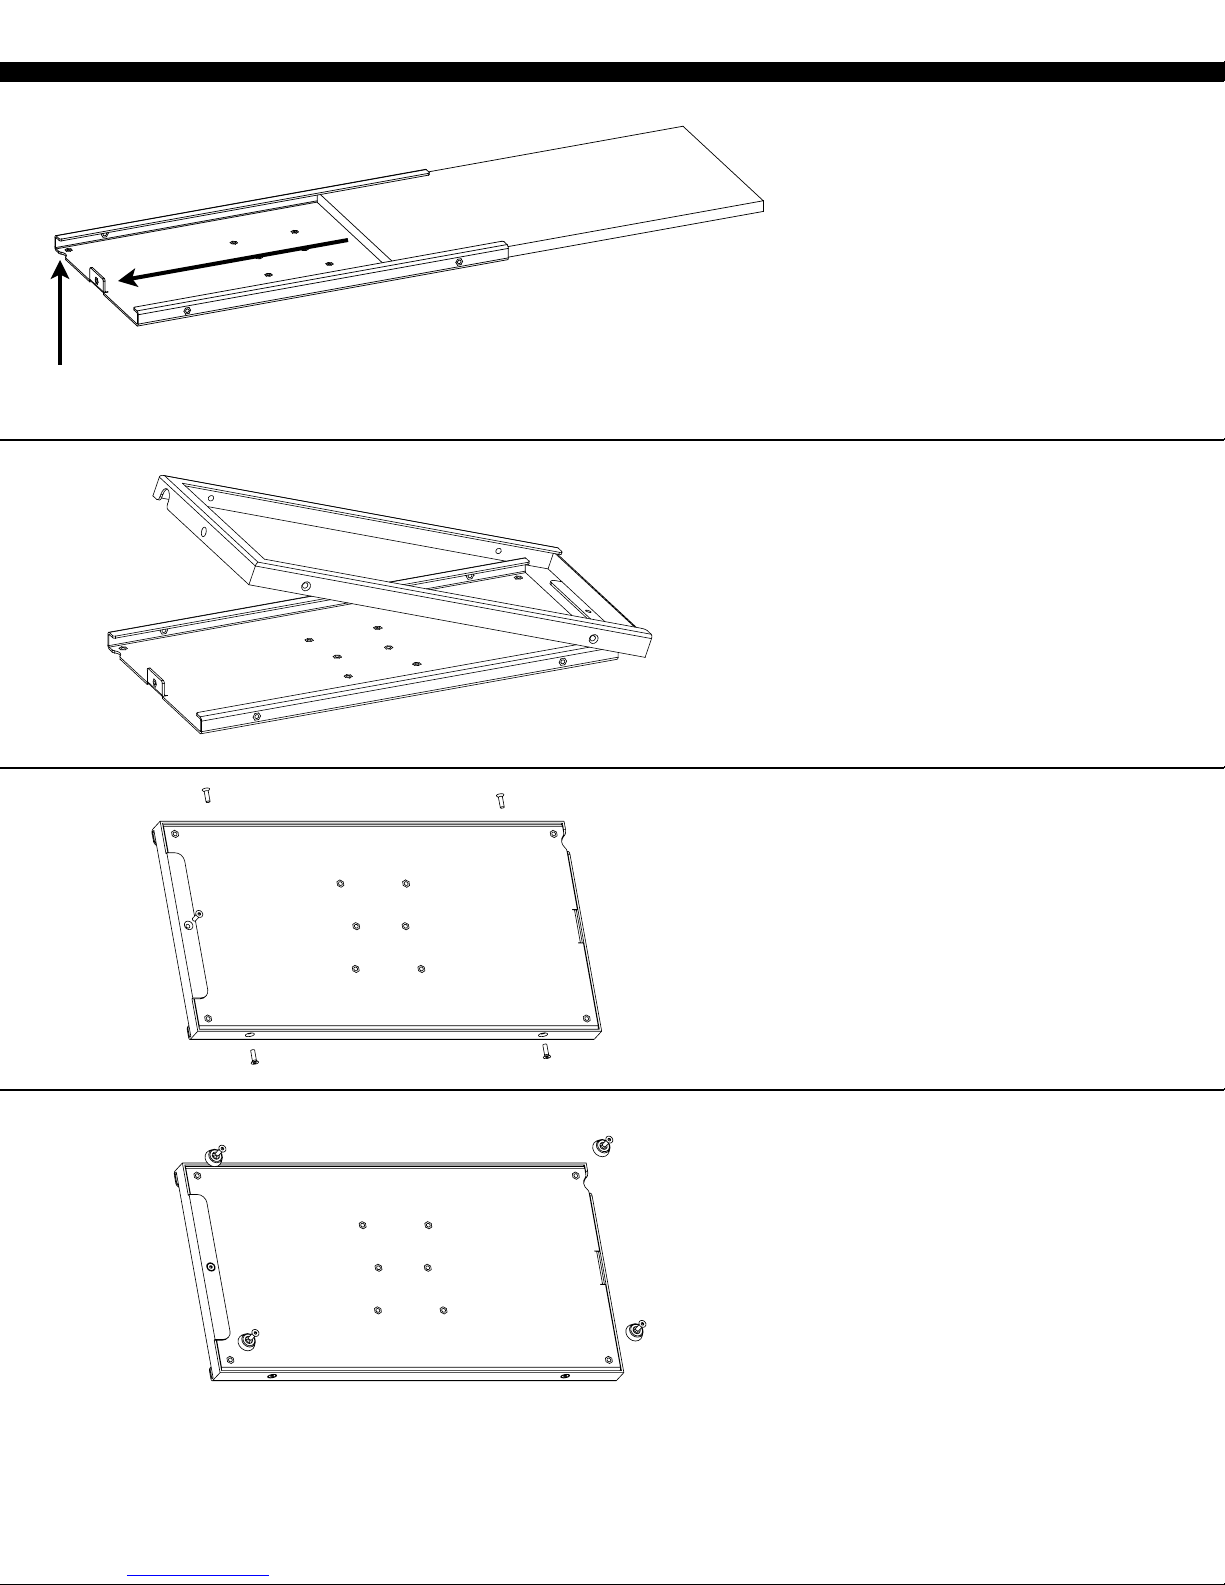
Semi-Circle Notch
Step 1: Insert LitePad into Tray
Slide the 6”x12” LitePad into the
Axiom Tray. Be sure that the wire or
connector exiting the LitePad lines up
with the semi-circle notch in the Tray.
Step 2: Pair Axiom Tray and Frame
Slide the Axiom Tray into the Frame
as shown in the image to the left.
One end of the Tray must slide into
the Frame before the other. The
semi-circle notch in the Tray should
line up with the semi-circle notch in
the Frame.
Step 3: Screw Frame to Tray
Screw in (5) 3/16” screws into all of
the holes indicated on the image to
the left. Use a standard #2 Phillips
head screw driver. Do not use
excessive torque.
Step 4: Attach Rubber Feet
Attach the (4) Rubber Feet using (4)
3/16” screws to the places indicated
on the image to the left. Use a
standard #2 Phillips head screw
driver. Do not use excessive torque.
www.rosco.com
Page 3

Step 5: Attach Axiom Black
Attach the Axiom Block using (2)
3/16” screws as indicated in the
image to the left. Use a standard #2
Phillips head screw driver. Do not
use excessive torque.
Step 6: Attach Axiom Runners
Attach the (2) Axiom Runners using
(4) 1/8” screws as indicated in the
image to the left. Use a standard #2
Phillips head screw driver. Do not
use excessive torque.
Additional LitePad Accessories
LitePad 2 CH/DMX Dimmer
Rosco Laboratories
52 Harbor View Ave., Stamford, CT 06902
1-800-ROSCO NY
1265 Los Angeles St., Glendale, CA 91204
1-800-ROSCO LA
LitePad Axiom Battery Holder
Also in London, Toronto, Madrid, São Paulo and Sydney
Axiom Baby Pin Bracket
Learn more at www.rosco.com
 Loading...