

Page 1
ONE AND TWO SPEED
A UTOMATIC WASHERS
Use & Care Guide
For questions about features, operation/performance,
parts, accessories or service call: 1-800-447-6737
In Canada, for assistance call: 1-800-461-5681,
for installation and service call: 1-800-807-6777
or visit our website at
www.roperappliances.com/canada
Table of Contents.......................................................2
www.roper.com or
3953960
Page 2

TABLE OF CONTENTS
WASHER SAFETY ...................................................................... 3
PARTS AND FEATURES............................................................ 4
WASHER USE.................................................................................5
Understanding Washer Cycles ....................................................5
Loading.........................................................................................5
Normal Washer Sounds...............................................................6
Starting Your Washer...................................................................6
Selecting a Cycle and Time .........................................................8
Rinse and Spin.............................................................................9
Drain and Spin..............................................................................9
Adding Liquid Chlorine Bleach ....................................................9
Adding Liquid Fabric Softener.....................................................9
Self-Cleaning Lint Filter................................................................9
WASHER CARE ...........................................................................10
Cleaning Your Washer ...............................................................10
Water Inlet Hoses.......................................................................10
Vacation, Storage and Moving Care..........................................10
TROUBLESHOOTING ..................................................................11
ASSISTANCE OR SERVICE.........................................................13
In the U.S.A. ...............................................................................13
In Canada...................... .............................................................1 3
WARRANTY .............................................................. ........... .........16
2
Page 3
WASHER S AFETY
Your safety and the safety of others are very important.
We have provided many important safety messages in this manual and on your appliance. Always read and obey all
safety messages.
This is the safety alert symbol.
This symbol alerts you to potential hazards that can kill or hurt you and others.
All safety messages will follow the safety alert symbol and either the word “DANGER” or
“WARNING.” These words mean:
You can be killed or seriously injured if you don't
immediately follow instructions.
You can be killed or seriously injured if you don't
follow instructions.
All safety messages will tell you what the potential hazard is, tell you how to reduce the chance of injury, and tell you
what can
happen if the instructions are not followed.
IMPORTANT SAFETY INSTRUCTIONS
WARNING:
precautions, including the following:
■
Read all instructions before using the washer.
■
Do not wash articles that have been previously
cleaned in, washed in, soaked in, or spotted with
gasoline, dry-cleaning solvents, other flammable,
or explosive substances as they give off vapors
that could ignite or explode.
■
Do not add gasoline, dry-cleaning solvents, or
other flammable, or explosive substances to the
wash water. These substances give off vapors
that could ignite or explode.
■
Under certain conditions, hydrogen gas may be
produced in a hot water system that has not been
used for 2 weeks or more. HYDROGEN GAS IS
EXPLOSIVE. If the hot water system has not
been used for such a period, before using the
washing machine, turn on all hot water faucets
and let the water flow from each for several
minutes. This will release any accumulated
hydrogen gas. As the gas is flammable, do not
smoke or use an open flame during this time.
To reduce the risk of fire, electric shock, or injury to persons when using the washer, follow basic
■
Do not allow children to play on or in the washer. Close
supervision of children is necessary when the washer
is used near children.
■
Before the washer is removed from service or
discarded,
remove the lid.
■
Do not reach into the washer if the tub or agitator is
moving.
■
Do not install or store the washer where it will be
exposed to the weather.
■
Do not tamper with controls.
■
Do not repair or replace any part of the washer or
attempt any servicing unless specifically recommended
in this Use and Care Guide or in published user-repair
instructions that you understand and have the skills to
carry out.
■
See Installation Instructions for grounding
requirements.
SAVE THESE INSTRUCTIONS
3
Page 4
PA RTS AND F EATURES
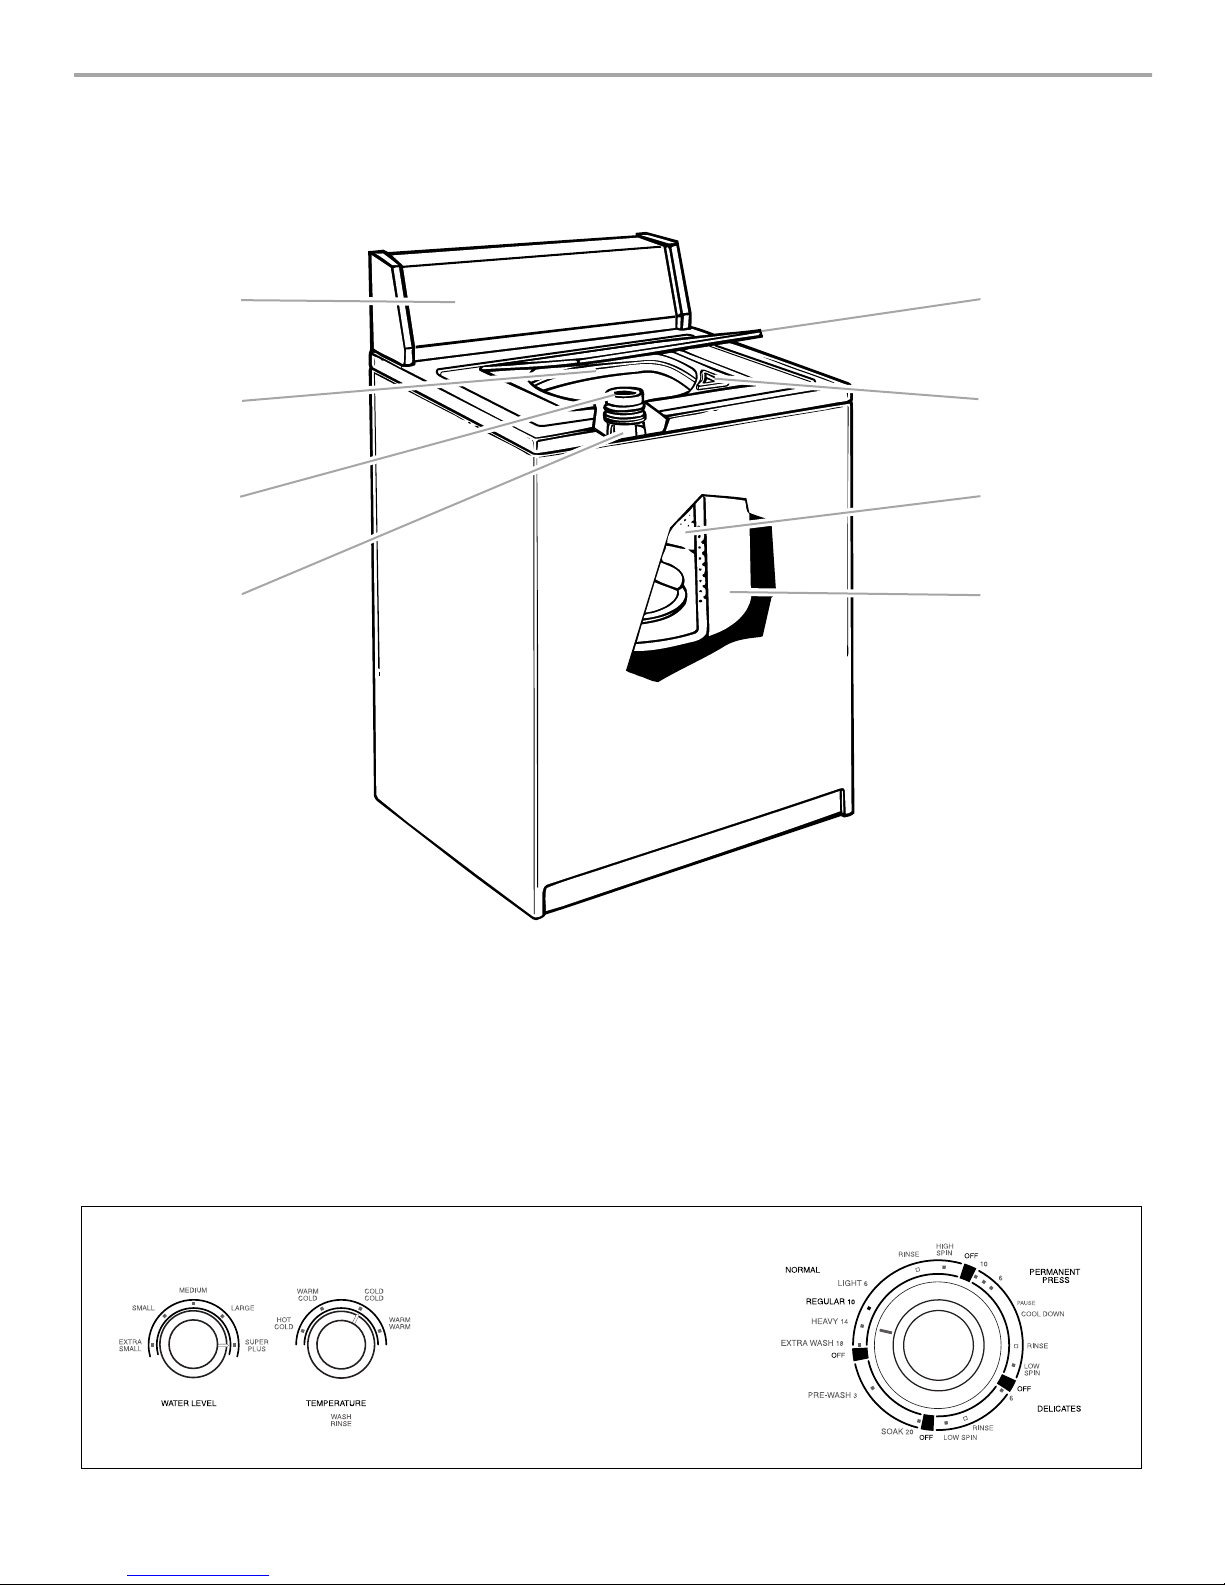
This manual covers several different models. The washer you have purchased may have some or all of the parts and features listed
below.
1
2
3
4
5
6
7
8
1. Control panel
2. Model and serial number label
3. Liquid fabric softener dispenser
4. Agitator
5. Lid
6. Liquid bleach dispenser
†
Control panel
7. Basket
†
8. Tub
Other features your washer may have
Water level selector
Temperature selector
†
On some models
4
Page 5
W ASHER USE
Understanding W asher Cy cles
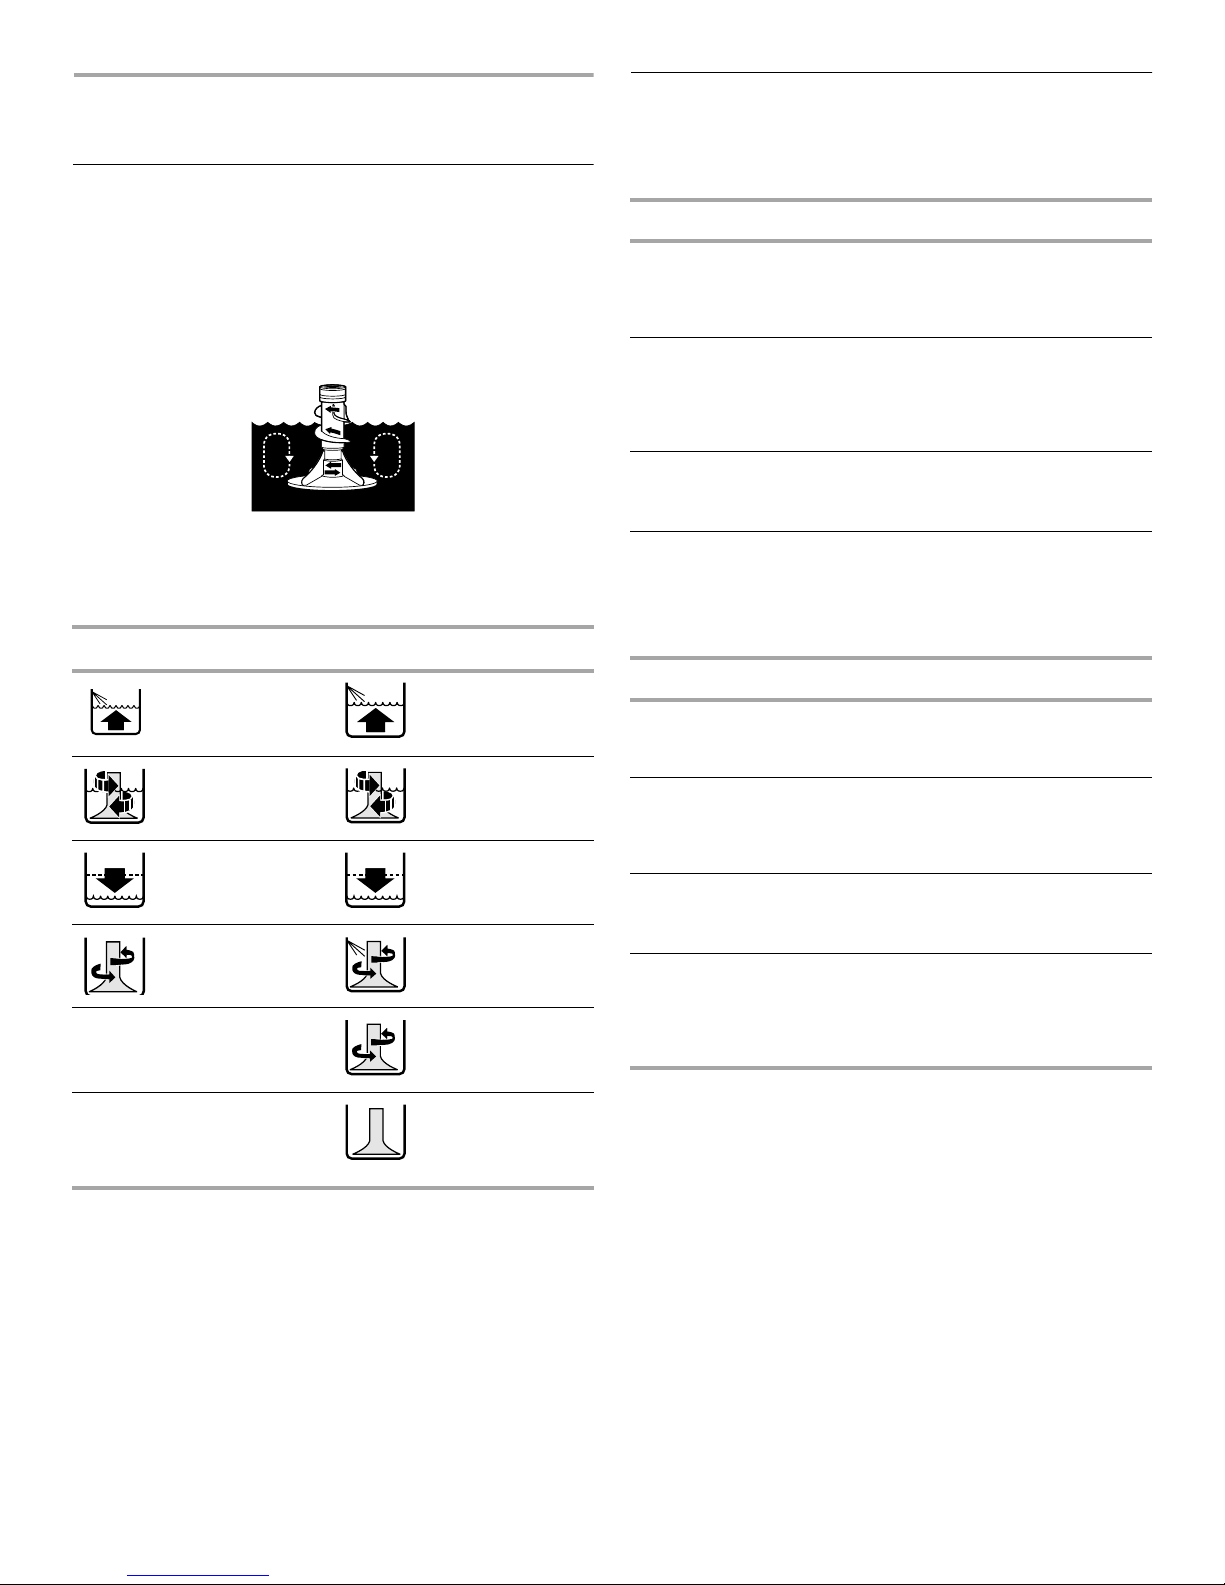
When the Cycle Control knob is set to a number and pulled out,
the washer fills (to the selected water level) before agitation and
timing start. The washer begins agit ating imm ediately aft er filling;
agitation occurs with the washer lid up or down.
During agitation, the ag itato r cr e ates a co ntinuo us r ollo ver ac tion
(on some models) that provides a thorough cleaning of the wash
load.
Loading
Loading suggestions
For these suggested full-sized loads, set the WATER LEVEL
selector to the highest setting.
SUPER CAPACITY WASHERS
Heavy Work Clothes
3 pair pants
3 shirts
4 pair jeans
Delicates
3 camisoles
1 quilted robe
4 slips
4 panties
Towels
10 bath towels
10 hand towels
1 coverall
1 overall
2 bras
2 nighties
1 baby’s dress
14 wash cloths
1 bath mat
After agitation starts, the Cycle Control knob turns clockwise until
it points to an OFF area and the cycle ends.
NOTE: The washer pauses briefly throughout each cycle. These
pauses are normal for washer operation.
WASH RINSE
1. Fill 1. Fill
2. Wash
selected
time
3. Drain
4. Spin 4. Spin-Spray
†
The Permanent Press
cycle partially drains, fills,
agitates briefly, and
drains.
†
No agitation
2. Rinse
3. Drain
No agitation
rinse
5. Spin
6. Off
Mixed Load
3 double sheets
4 pillowcases
8 T-shirts
6 pair shorts
EXTRA LARGE CAPACITY WA SHERS
Heavy Work Clothes
2 pair pants
3 shirts
Delicates
3 camisoles
4 slips
4 panties
Towels
8 bath towels
8 hand towels
Mixed Load
2 double sheets or
1 king size sheet
4 pillowcases
6 T-shirts
2 shirts
2 blouses
8 handkerchiefs
3 pair jeans
1 coverall
2 bras
2 nighties
10 wash cloths
1 bath mat
6 pair shorts
2 shirts
2 blouses
6 handkerchiefs
5
Page 6
Normal Washer Sounds
Your new washer may make sounds your old o ne didn’ t. Because
the sounds might be unfamiliar, you may be concerned about
them. These sounds are normal.
During washing
When you select a small load size setting, your washer has a
lower water level. This can cause a clicking sound from the upper
part of the agitator.
During drain
If water is drained quickly from your washer (depending on your
installation), you may hear air being pulled through the pump
during the end of draining.
After drain and before spin
When the cycle changes from draining to spinnin g, you may he ar
gears engaging.
Starting Y our W asher
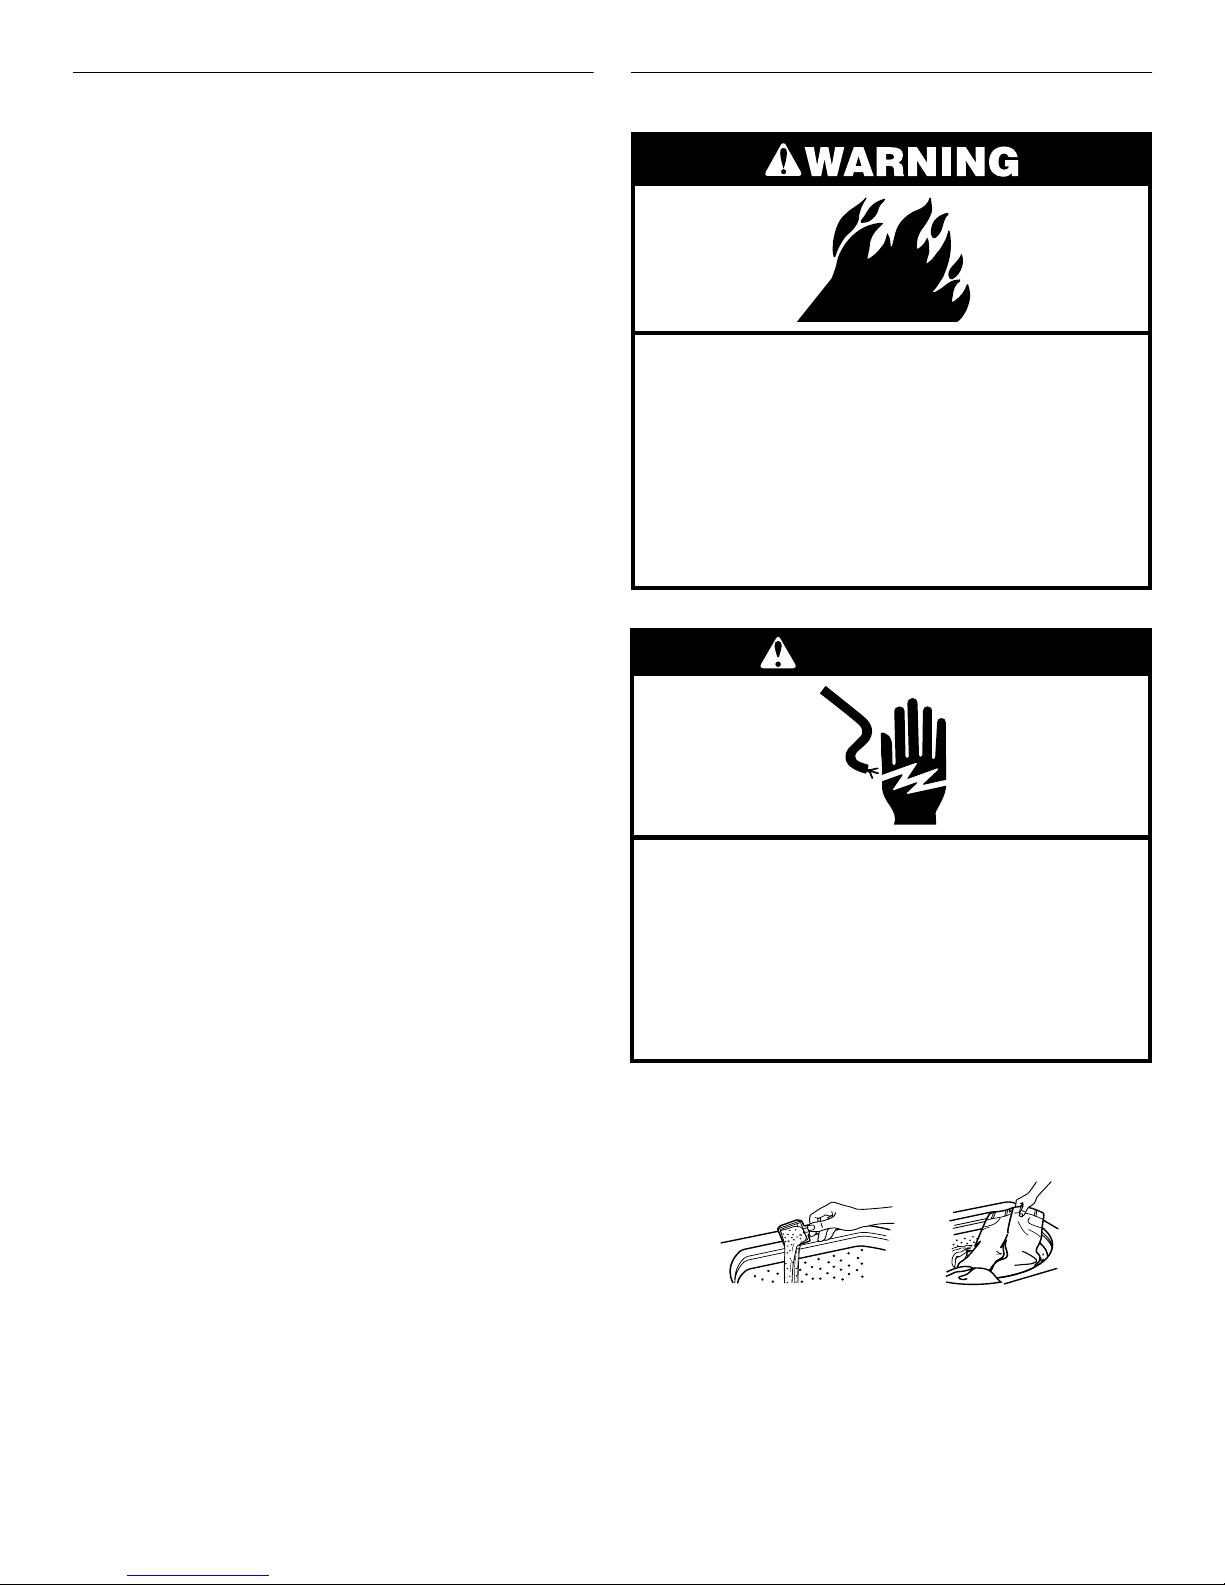
Fire Hazard
Never place items in the washer that are
dampened with gasoline or other flammable
fluids.
No washer can completely remove oil.
Do not dry anything that has ever had any type of
oil on it (including cooking oils).
Doing so can result in death, explosion, or fire.
WARNING
Electrical Shock Hazard
Plug into a grounded 3 prong outlet.
Do not remove ground prong.
Do not use an adapter.
Do not use an extension cord.
Failure to follow these instructions can result in
death, fire, or electrical shock.
Measure deter gen t and po ur it into the washer. If desired, add
1.
powdered or liquid color safe bleach. Add extra detergent for
the Extra Wash cycle.
Drop a sorted load of clothes loosely into your washer.
■ Load evenly to maintain washer balance. Mix large and
small items.
■ Items should move easily through the wash water.
Overloading can cause poor cleaning.
■ To reduce wrinkling of permanent pr ess clothes and som e
synthetic knits, select a water level setting to provide
more space (see step 5).
6
Page 7
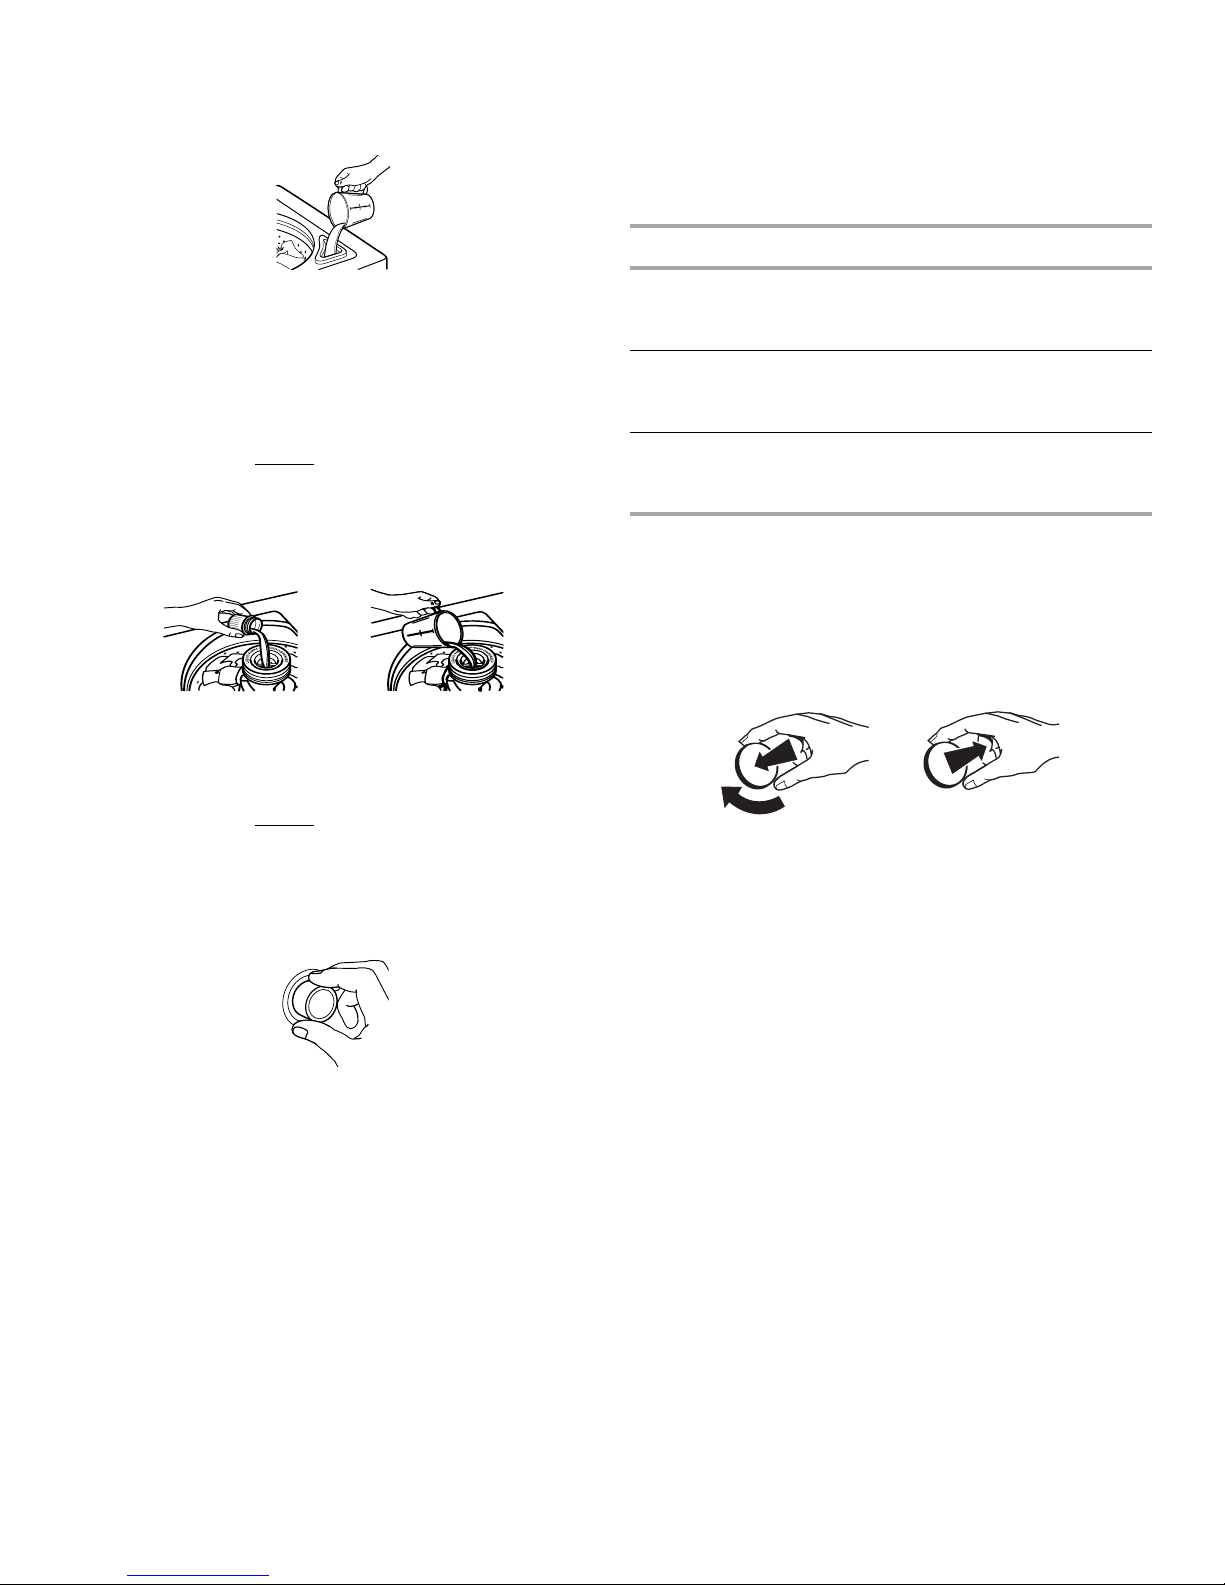
2. (OPTIONAL STEP) Pour measured liquid chlorine bleach into
the liquid chlorine bleach dispenser (on some models).
Bleach will be dispensed automatically during the wash part
of the cycle.
6. Set the TEMPERATURE selector (on some models) to the
correct setting for the type of fabric and soils being washed.
Use the warmest water safe for fabric. Follow garment label
instructions
NOTE: On models with temperature selections in the Cycle
Control knob, see "Cycle Time and Temperature Options" in
the "Selecting a Cycle and Time" section.
Water Temp Use For
■ Never use more than 1 cup (250 mL) for a full load. Use
less with a smaller load size.
■ Follow the manufacturer’s directions for safe use.
■ To avoid spilling, use a cup with a pouring spout. Do not
let bleach splash, drip, or run down into the washer
basket.
■ Use only liquid chlorine bleach in this dispenser.
NOTE: On models without a bleach dispenser, see "Adding
Liquid Chlorine Bleach."
3. (OPTIONAL STEP) Pour measured liquid fabric softener into
the liquid fabric softener dispenser (on some models).
Softener is added automatically during the rinse portion of
the cycle.
Dilute liquid fabric softener by filling the dispenser with warm
water until liquid reaches the crossbar in the opening.
■ Do not spill or drip any fabric softener on the clothes.
■ Use only liquid fabric softener in this dispenser.
NOTE: On models without a fabric softener dispenser, see
"Adding Liquid Fabric Softener."
4. Close the washer lid.
5. Turn the WATER LEVEL selector (on some models) to the
correct se tting for you r wash load and the type of f abric be ing
washed.
Hot
111°F (44°C)
or above
Warm
90°-110°F
(32°-43°C)
Cold
70°-90°F
(21°-32°C)
Whites and pastels
Heavy and greasy soils
Bright colors
Moderate to light soils
Colors that bleed or fade
Light soils
NOTE: In wash water temperatures colder than 70ºF
(21ºC), detergents do not dissolve well. Soils can be difficult
to remove. Some fabrics can retain wear wrinkles and have
increased pilling (the formation of small lint-like balls on the
surface of garments).
7. Push in the Cycle Control knob and turn it clockwise to the
wash cycle you want. Reduce the wash time when using a
small load size setting. See “Selecting a Cycle and Time.”
Pull out the Cycle Control knob to start the washer.
To stop or restart your washer
■ To stop the washer at any time, push in th e Cycle Co ntrol
knob.
■ To restart the washer, close the lid (if open) and pull out
the Cycle Control knob.
■ Choose a load size that allows the load to move fr e ely for
best fabric care. See "Loading".
■ You may change the load size selection after the washer
has started filling by turning the selector to a different
setting.
7
Page 8
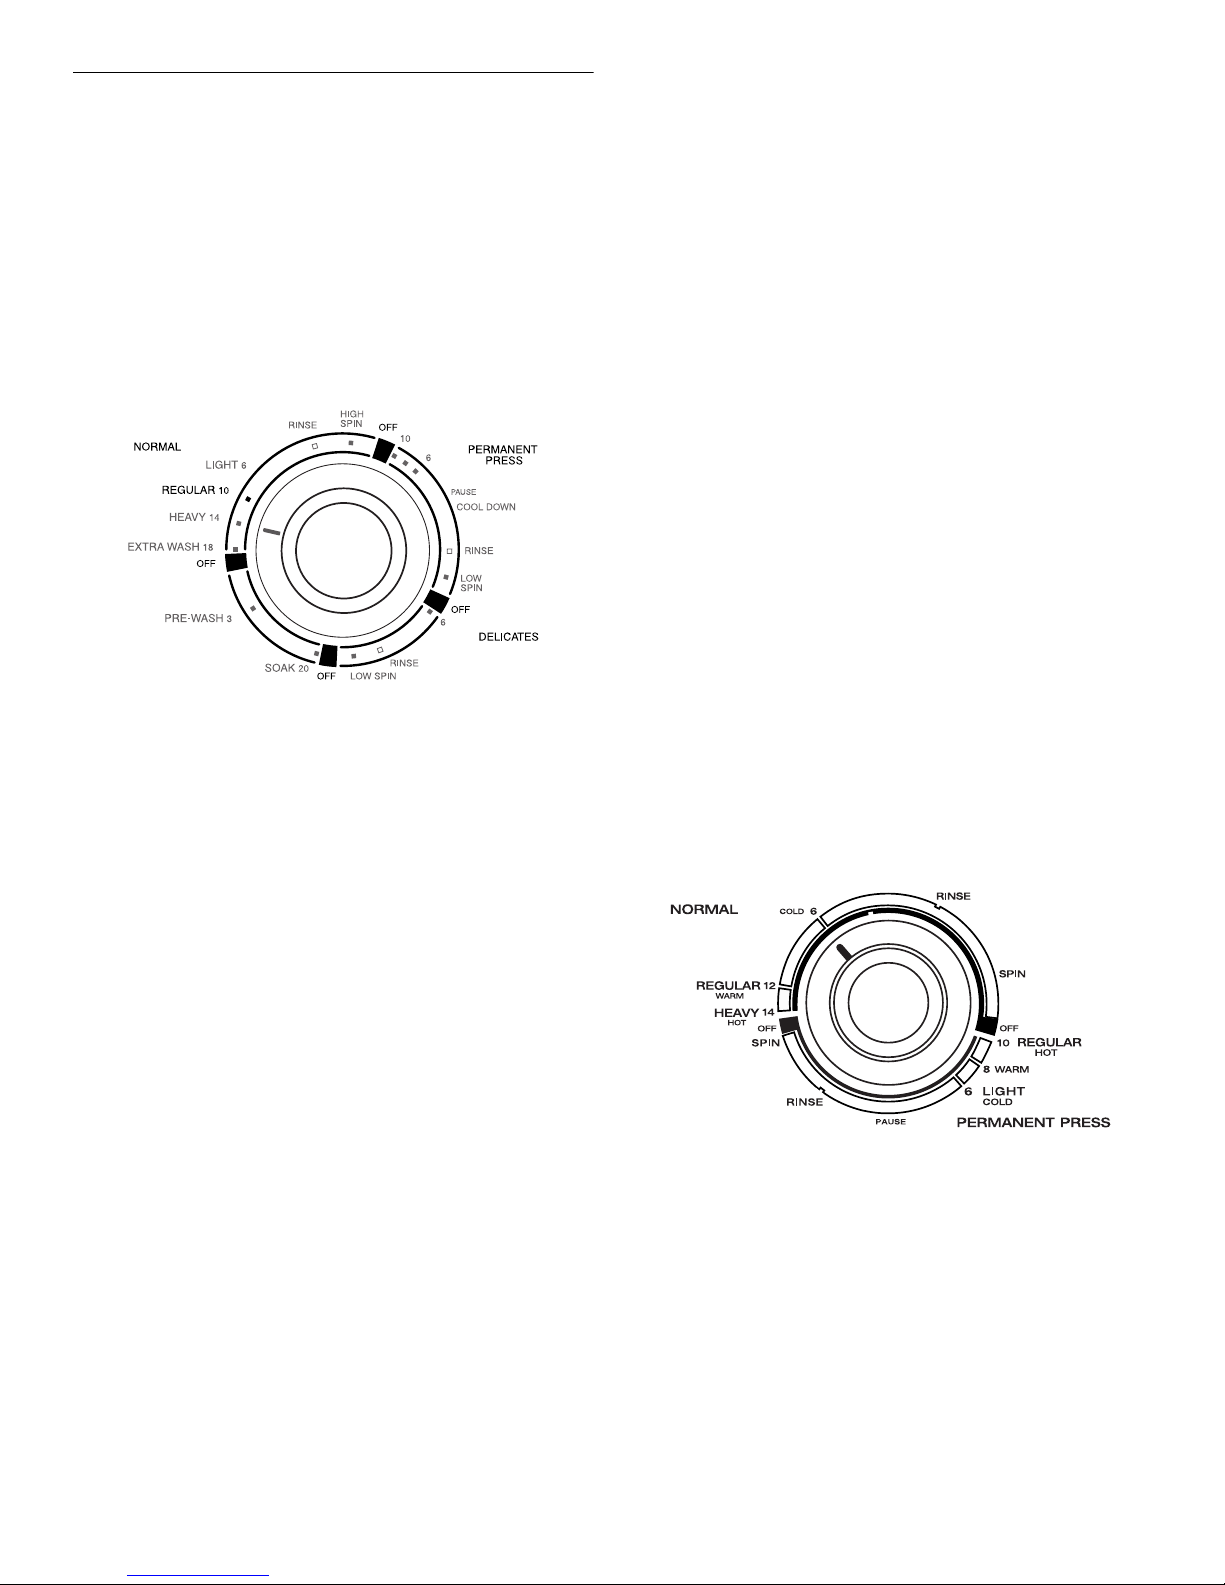
Selecting a Cyc le and Time
This section describes the available wash cycles and will help
you make the best cycle selections for your wash loads. Each
cycle is designed for different types of fabric and soil levels.
■ The washer pauses briefly throughout each cycle. These
pauses are normal. Refer to “Normal Washer Sounds” to
learn more about the sounds you may hear during a wash
cycle.
■ Refer to “Understanding Washer Cycles” to learn what
happens during a wash cycle.
NOTE: This manual covers several different models. The washer
you purchased may vary fr om the model shown an d will not h ave
all of the cycles described.
One-speed models
Normal cycle
This cycle features longer spins to short en dr ying time . Sele ct up
to 14 minutes of wash time, depending on whether your load is
heavily, moderately, or lightly soiled.
Extra Wash - Select the 18-minute Extra Was h cycle to wash
heavily soiled loads that need maximum soil removal. Use two
times the recommended amount of detergent for this cycle.
Permanent Press cycle
This cycle features a c ool-dow n rinse and sh orter sp ins to red uce
wrinkling. Select up to 10 minutes of wash time for cleaning
permanent press and some synthetic fabrics that are lightly to
moderately soiled.
Gentle cycle
This cycle featur es a b rief ser ies of ag itations and soak s, followed
by a short spin. Select up to 6 minutes of wash time to gently
clean special-care items that are lightly to moderately soiled.
T wo-speed models
Normal cycle
This cycle features high-speed agitation and longer spin speeds
to shorten drying time. Use this cycle for cleaning cotton and
linen fabrics. Select up to 14 minutes of wash time, depending on
whether your load is heavily, moderately, or lightly soiled.
Extra Wash - Select the 18-minute Extra Wash cycle to wash
heavily soiled loads that need maximum soil removal. Use two
times the recommended amount of detergent for this cycle.
Permanent Press cycle
This cycle features a cool-down rinse and low spin speeds to
help reduce wrinkling. Select up to 10 minutes of wash time for
cleaning permanent press and some synthetic fabrics that are
lightly to moderately soiled.
Delicates
This cycle features low agitation speed for gentle soil removal.
Low spin speeds help reduce wrinkling. Use this 6-minute cycle
for cleaning lightly to moderately soiled delicate items and
washable knits.
Soak cycle
This cycle features brief periods of agitation and soak time to
help remove heavy soils and stains that need pretreatment. Use
warm water when soaking laundry. Hot water can set stains. Use
the amount of detergent or presoak additive recommended by
the manufacturer. After the Soak cycle ends, add detergent and
set a new wash cycle.
Pre-Wash cycle
This cycle features a brief period of agitation to help remove
heavy soils and stains that need pr etr eatm ent. Use the amount of
detergent or presoak additive recommended by the
manufacturer. After the Pre-Wash cycle ends, add detergent and
set a new wash cycle.
Cyc le Time and T emperature Opti ons
Some models have the water temperature included in the cycle
selections of the Cycle Control knob.
8
To select different wash time and temperature combinations:
First select the water temperature (HOT, WARM or COLD) then
turn to the new wash time. For example, for 14 minutes of wash
time in the Normal cycle with Cold water:
1. Push in the Cycle Control knob and turn it clockwise to the
Cold setting.
2. Pull out the Cycle Control knob and allow washer to fill.
3. When the washer has filled, push in and turn the Cycle
Control knob to 14 minutes of wash time.
4. Pull out the Cycle Control knob to start washer.
Page 9
Rinse and Spin
When using extra deterg ent for he avily soiled clothes, o r washing
special-care items, you may find an extra rinse and spin is
needed.
1. Push in the Cycle Control knob and turn it clockwise to any of
the Rinse settings.
2. Pull out the Cycle Control knob. The washer fills to the
selected load size, agitates, drains, and spins.
Drain and Spin
A drain and spin may help shorten drying times for some heavy
fabrics or special-care items by removing excess water.
1. Push in the Cycle Control knob and turn it clockwise to any of
the Spin settings.
2. Pull out the Cycle Control knob. The washer drains, then
spins.
Adding Liquid Chlorine Bleach
Always measure liquid chlorine bleach. Do not guess. Never use
more than 1 cup (250 mL) for a full load. Follow manufacturer’s
directions for safe use. Use a cup with a pouring spout to avoid
spilling.
1. Let the washer fill and begin agitating the load.
2. Add bleach to the wash cycle so it can be removed in the
rinse cycle. Pour bleach around the agitator, not directly on
the load.
■ Follow directions on the care labels. Do not use chlorine
bleach on wool, silk, spandex, acetates, or some flameretardant fabrics.
■ When soaking with chlorine bleach, add detergent to
soak water.
NOTE: Undiluted bleach will damage any fabric it touches. The
damage appears as rips, holes, tears, or color loss and may not
show up until several washings later.
Adding Liquid Fabric Softener
Always dilute fabric softener with ½ to 1 cup (125 to
250 mL) warm water. Undiluted fabric softener can stain fabrics.
■ Add diluted fabric softener only in the final rinse.
■ Fabric softener should not be mixed with other laundry
products. Greasy stains can form. To remove greasy stains,
wet the stain and rub with liquid detergent or a bar of soap.
Rewash.
■ Too much fabric softener can make some items (diapers and
towels) nonabsorbent. If this happens, use less fabric
softener, or do not use it every time.
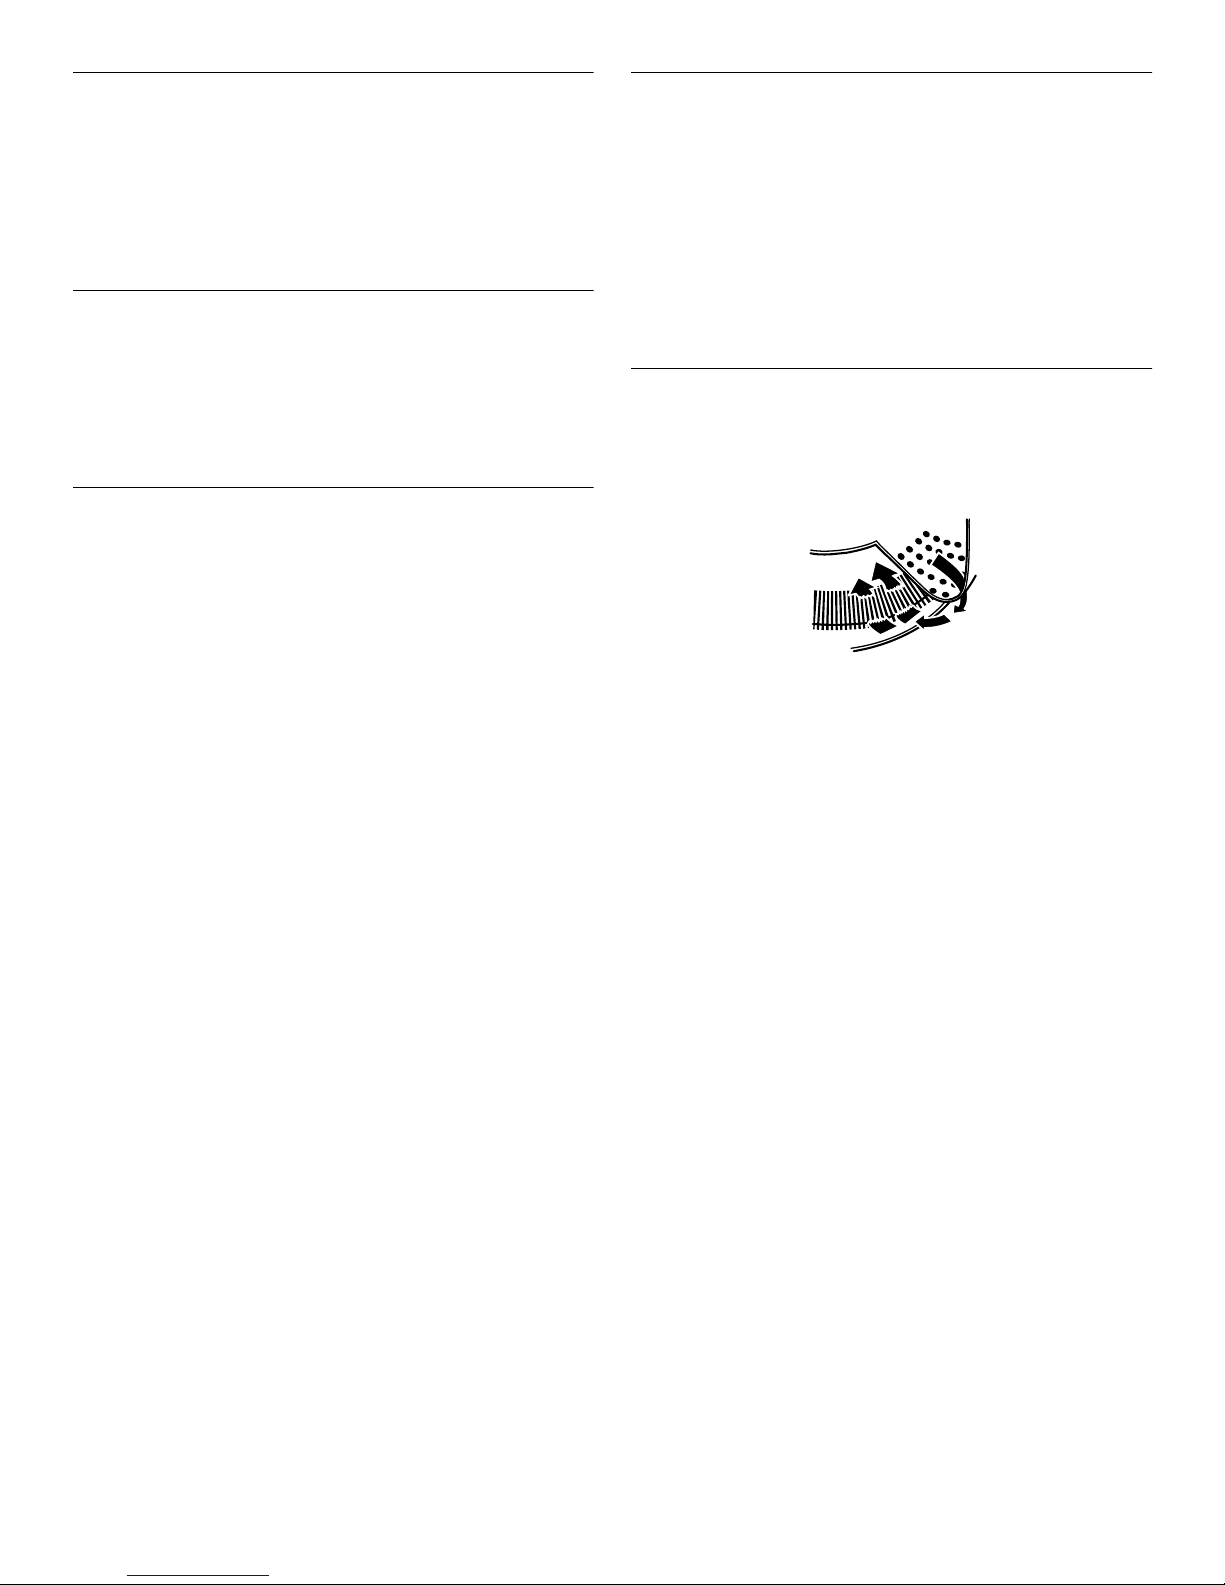
Self-Cleaning Lint Filter
Your washer has a self-cleaning lint filter at the bottom of the
basket. Was h and r inse wat er flo w over the filt er du ring a gitat ion,
separating the lint from the water. The lint spins out of the system
during the spin part of the cycle.
If your washer drains into a tub, remove any lint collected in the
tub or strainer.
9
Page 10
W ASHER CARE
Cleaning Y our W asher
Cleaning the exterior
Use a soft, damp cloth or sponge to wipe up any spills such as
detergent or bleach. Occasionally wipe the outside of your
washer to keep it looking new.
Cleaning the interior
Clean your washer interior by mixing 1 cup (250 mL) of chlorine
bleach and 2 cups (500 mL) of detergent. Pour this into your
washer and run it through a complete cycle using hot water.
Repeat this process if necessary.
Remove any hard water deposits using only cleaners
NOTE:
labeled as washer safe.
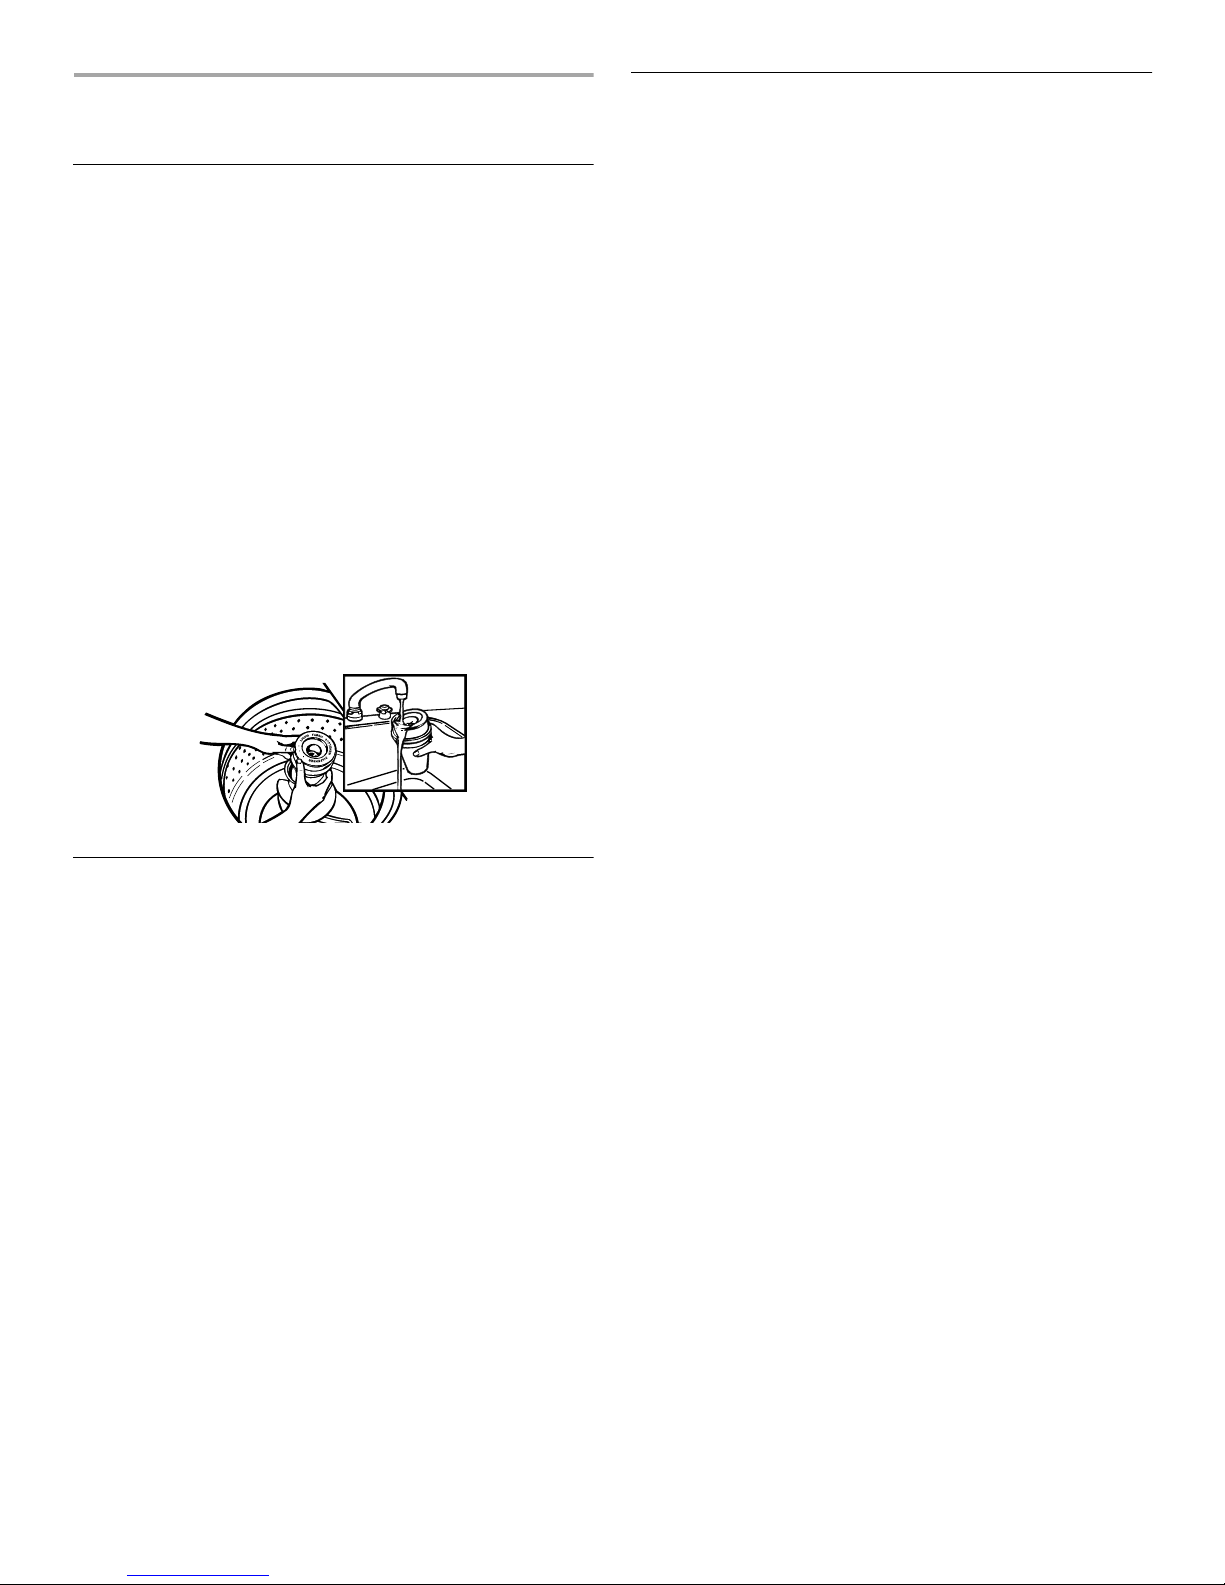
Cleaning the liquid fabric softener dispenser
Flush dispenser per iodic ally with warm water, as shown. Remove
the dispenser by grasping the top of the dispenser with both
hands and squeezing and pushing upwards with thumbs. Clean
the dispenser by rinsing it under a water faucet. Replace it after
cleaning.
Do not wash clothes with this dispenser removed. Do not
NOTE:
add detergent or bleach to this dispenser; it is for liquid fabric
softener use only.
V acation, Storage and Moving Care
Install and store your washer where it will not freeze. Because
some water may stay in the hoses, freezing can damage your
washer. If storing or moving your washer during fr eezing weat her,
winterize it.
Non-use or vacation care
Operate your washer only when you are at home. If you will be on
vacation or not using your wa sher for an extended perio d of time,
you should:
■ Unplug washer or disconnect power.
■ Turn off the water supply to the washer. This helps avoid
accidental flooding (due to a water pressure surge) while you
are away.
To winterize washer
Shut off both water faucets.
1.
Disconnect and drain water inlet hoses.
2.
Put 1 quart (1 L) of R.V.-type antifreeze in the basket.
3.
Run washer on a dr ain and spin setting (see “Drain and S pin”)
4.
for about 30 seconds to mix the antifreeze and water.
Unplug washer or disconnect power.
5.
To use washer again
Flush water pipes and hoses.
1.
Reconnect water inlet hoses.
2.
Turn on both water faucets.
3.
Plug in washer or reconnect power.
4.
Run the washer thr ough a compl ete c ycle w ith 1 cu p (250 mL)
5.
of detergent to clean out antifreeze.
W ater Inlet Hoses
Replace inlet hoses after five years of use to reduce the risk of
hose failure. Periodically inspect and replace inlet hoses if
bulges, kinks, cuts, wear or leaks are found.
When replacing your inlet hoses, mark the date of replacement
on the label with a permanent marker.
10
Page 11
TROUB LESHOOTING
■
Is your voltage low?
Check your electrical sour c e or call an electr ician. Do not use
an extension cord.
First try the solutions suggested here and possibly avoid
the cost of a service call...
Washer won’t fill, rinse or agitate
■
Check the following:
Is the power cord plugged into a grounded 3 prong outlet?
Is the indicator on the Cycle Control knob properly lined up
with a cycle? Turn the Cycle Control knob to the right slightly
and pull to start.
Are the water inlet valve screens clogged?
Are both the hot and cold water faucets turned on?
Is the water inlet hose kinked?
■
Does the water level seem too low, or does the washer
appear to not fill completely?
The top of the agitator is much higher than the highest water
level. This creates a perception that the washer is not filling
completely. This is normal.
Washer stops
■
Check the following:
Is the power cord plugged into a grounded 3 prong outlet?
Is the indicator on the Cycle Control knob properly lined up
with a cycle? Turn the Cycle Control knob to the right slightly
and pull to start.
Are the water inlet valve screens clogged?
Are both the hot and cold water faucets turned on?
Is the water inlet hose kinked?
■
Is there power at the plug?
Check your electrical source or call an electrician.
■
Has a fuse blown or is the circuit breaker open?
If problem continues, call an electrician.
■
Are you using an extension cord?
Do not use an extension cord.
■
Is the washer in a no rmal pause in the Ca sua l/P er ma ne nt
Press (or Hand Washables) cycle?
The washer pauses for about 2 minutes in the Casual/
Permanent Press cycle. Allow the cycle to continue.
The Hand Washables cycle (on some models) features
periods of agitation and soak.
■
Is the washer overloaded?
Wash smaller loads.
Washer continues to fill or drain, or the cycle seems
stuck
■
Is the top of drain hose lower than the water level in
washer?
The top of the ho se m ust b e hi g her than the wate r level in the
washer for proper operation. See the Installation Instructions.
■
Does the drai n ho se f it t oo tig htl y in th e st and pi pe, o r i s it
taped to the standpipe?
The drain hose should be loose yet fit securely. Do not seal
the drain hose with tape. The hose needs an air gap. See the
Installation Instructions.
Washer makes noise
■
Is the load balanced and the washer level?
The wash load should be balanced and not overloaded.
The washer must be level. The front feet should be properly
installed and the nuts tightened. Reset the rear leveling legs
(if needed). See the Installation Instructions.
■
Did you completel y rem ove the yell ow shippin g strap wit h
cotter pins?
See the Installation Instructions.
■
Are the gea rs eng a g ing af te r t he dr ain an d b efore spin, or
is the upper part of agitator clicking during wash?
These are normal washer noises.
Washer leaks
■
Check the following:
Are the fill hoses tight? Are the fill hose washers properly
seated? Is the drain hose clamp properly installed? See the
Installation Instructions.
■
Is the sink or drain clogged?
Sink and standpipe must be able to handle 17 gallons (64 L)
of water per minute.
■
Is water deflecting off the tub ring or the load?
Center the tub before starting the washer.
The wash load should be balanced and not overloaded. The
fill or spray rinses can deflect off the load.
The washer must be level. The front feet should be properly
installed and the nuts tightened. Reset the rear leveling legs
(if needed). See the Installation Instructions.
■
Check household plumbing for leaks.
Washer basket is crooked
Washer won’t drain or spin
■
Is the drain hose clogged, or the end of the drain hose
more than 72 inches (183 cm) above the floor?
See the Installation Instr uctions for prope r instal lation of dr ain
hose.
■
Is the lid open?
The lid must be closed during operation.
■
Is there excessive sudsing?
Always measure detergent. Follow manufacturer’s directions.
If you have very soft water, you might need to use less
detergent.
■
Was the washer basket pulled forward during loading?
The wash load should be balanced and not overlo aded. Push
the basket to the center before starting wash.
■
Is the load balanced and the washer level?
The wash load should be balanced and not overloaded.
The washer must be level. The front feet should be properly
installed and the nuts tightened. Reset the rear leveling legs
(if needed). See the Installation Instructions.
■
The washer basket moves while washing.
This is normal.
11
Page 12
Agitator operation
■
The top of the agitator is loose, or moves in only one
direction.
This is normal.
Dispensers clogged or bleach leaking
■
Did you follow t he man ufactur er ’s directions when ad ding
detergent and fabric softener to the dispensers
?
Measure deter gen t and fabr ic softener. Carefully pour into the
dispensers. Wipe up all spills.
Dilute fabric softener in the fabric softener dispenser.
■
Did you put powdered or color-safe bleach in the liquid
chlorine bleach dispenser?
Add powdered or liquid color-safe bleach directly to the
basket. Do not use the chlorine bleach dispenser for colorsafe bleach.
Load too wet
■
Did you use the ri ght cycle for the load be ing washed?
Select a cycle with a higher spin speed (if available).
■
Did you use a cold rinse?
Cold rinses leave loads wetter than warm rinses. This is
normal.
Residue or lint on load
■
Did you sort properly?
Sort lint givers (towels, chenille) from lint takers (corduroy,
synthetics). Also sort by color.
■
Did you overload the washer?
The wash load must be balanced and not overloaded. Lint
can be trapped in the load if overloaded. Wash smaller loads.
■
Check the following:
Was paper or tissue left in the pockets?
Did you use enough detergent? Follow manufacturer’s
directions. Use enough detergent to hold the lint in the water.
Is your water colder than 70°F (21°C)? Wash water colder
than 70°F (21°C) may not completely dissolve the detergent.
Stains on load
■
Did you follow t he man ufactur er ’s directions when ad ding
detergent and fabric softener?
Measure dete r gent and fabr ic sof tener. Use enough deter gent
to remove soil and hold it in suspension.
Dilute fabric softener and add to the rinse portion of a cycle
only. Do not drip fabric softener on clothes.
■
Is there above average iron (rust) in water?
You may need to install an iron filter.
■
Did you properly sort the load?
Sort dark clothes from whites and lights.
■
Did you unload the washer promptly?
To avoid dye transfer, unload the washer as soon as it stops.
■
Did you use the right cycle for the load being washed?
Use the Casual/Permanent Press cycle or another cycle with
low spin speeds (if available) to reduce wrinkling.
■
Did you overload the washer?
The wash load must be balanced and not overloaded. Loads
should move freely during washing.
■
Was the wash water warm enough to relax wrinkles, or
are you using warm rinses?
If safe for the load, use warm or hot wash water. Use cold
rinse water.
■
Are the hot and cold water hoses reversed?
Check to be sure the hot and co ld water hoses ar e conn ected
to the right faucets. See the Installation Instructions.
Load is tangled or twisted
■
Did you overload the washer?
The wash load must be balanced and not overloaded. Loads
should move freely during washing.
■
Did you wrap items around the agitator?
Drop items loos ely into the washer. Do not wrap items arou nd
the agitator.
Gray whites, dingy colors
■
Did you properly sort the load?
Dye transfer can occur when mixing whites and colors in a
load. Sort dark clothes from whites and lights.
■
Was the wash temperature too low?
Use hot or warm washes if safe for the load. Hot w ater should
be at least 111°F (44°C) to clean heavy or greasy soils.
■
Did you use enough detergent, or do you have hard
water?
Use more detergent for washing heavy soils in cold or hard
water.
■
Are the hot and cold water hoses reversed?
Check to be sure the hot and co ld water hoses ar e conn ected
to the right faucets. See the Installation Instructions.
Garment damage
■
Check the following:
Were sharp items removed from pockets before washing?
Empty pockets, zip zippers, snap or hook fasteners before
washing.
Were strings and sashes tied to prevent tangling?
Were items damaged before washing? Mend rips and broken
threads in seams before washing.
■
Did you overload the washer?
The wash load must be balanced and not overloaded. Loads
should move freely during washing.
■
Did you properly add chlorine bleach?
Do not pour chlorine bleach directly on load. Wipe up bleach
spills. Undiluted bleach will damage fabrics.
■■■■
Did you follow the manufacturer’s care label instructions?
Load is wrinkled
■
Did you unload the washer promptly?
Unload the washer as soon as it stops.
12
Page 13
ASSISTANCE OR SERVICE
Before calling for assistance or service, please check
“Troubleshooting.” It may save you the cost of a service call. If
you still need help, follow the instructions below.
When calling, please know the purchase date and the complete
model and serial number of your appliance. This information will
help us to better respond to your request.
If you need replacement parts
If you need to order replacement parts, we recommend that you
only us e FSP
and work right because they are made with the same precision
used to build every new ROPER
To locate FSP replacement parts in your area:
In the U.S.A., call the Customer Interaction Center at
1-800-447-6737
In Canada, call
service center.
Call the Roper Customer Interaction Center toll free:
1-800-447-6737.
Our consultants provide assistance with:
■ Features and specifications on our full line of appliances
■ Installation information
■ Use and maintenance procedures
■ Accessory and repair parts sales
■ Specialized customer assistance (Spanish speaking, hearing
impaired, limited vision, etc.)
■ Referrals to local dealers, repair parts distributors, and
service companies
Roper designated service technicians are trained to fulfill the
product warranty and provide after-warranty service anywhere in
the United States.
To locate the Roper designated service company in your area,
you can also look in your telephone directory Yellow Pages.
®
factory specified parts. These parts will fit right
®
appliance.
, or your nearest designated service center.
1-800-807-6777
, or your nearest designated
In the U.S.A.
In Canada
Call the Inglis Limited Consumer Relations Center toll free:
1-800-461-5681
Our consultant s provide assistance with:
■ Features and specifications on our full line of appliances
■ Referrals to local dealers
For service in Canada
Call
1-800-807-6777.
trained to fulfill the product warranty and provide after-warranty
service anywhere in Canada.
For further assistance
If you need further assista nce, you can write t o Inglis Limited with
any questions or concerns at:
Consumer Relations Center
Inglis Limited
1901 Minnesota Court
Mississauga, Ontario L5N 3A7
Please include a daytime phone number in your correspondence.
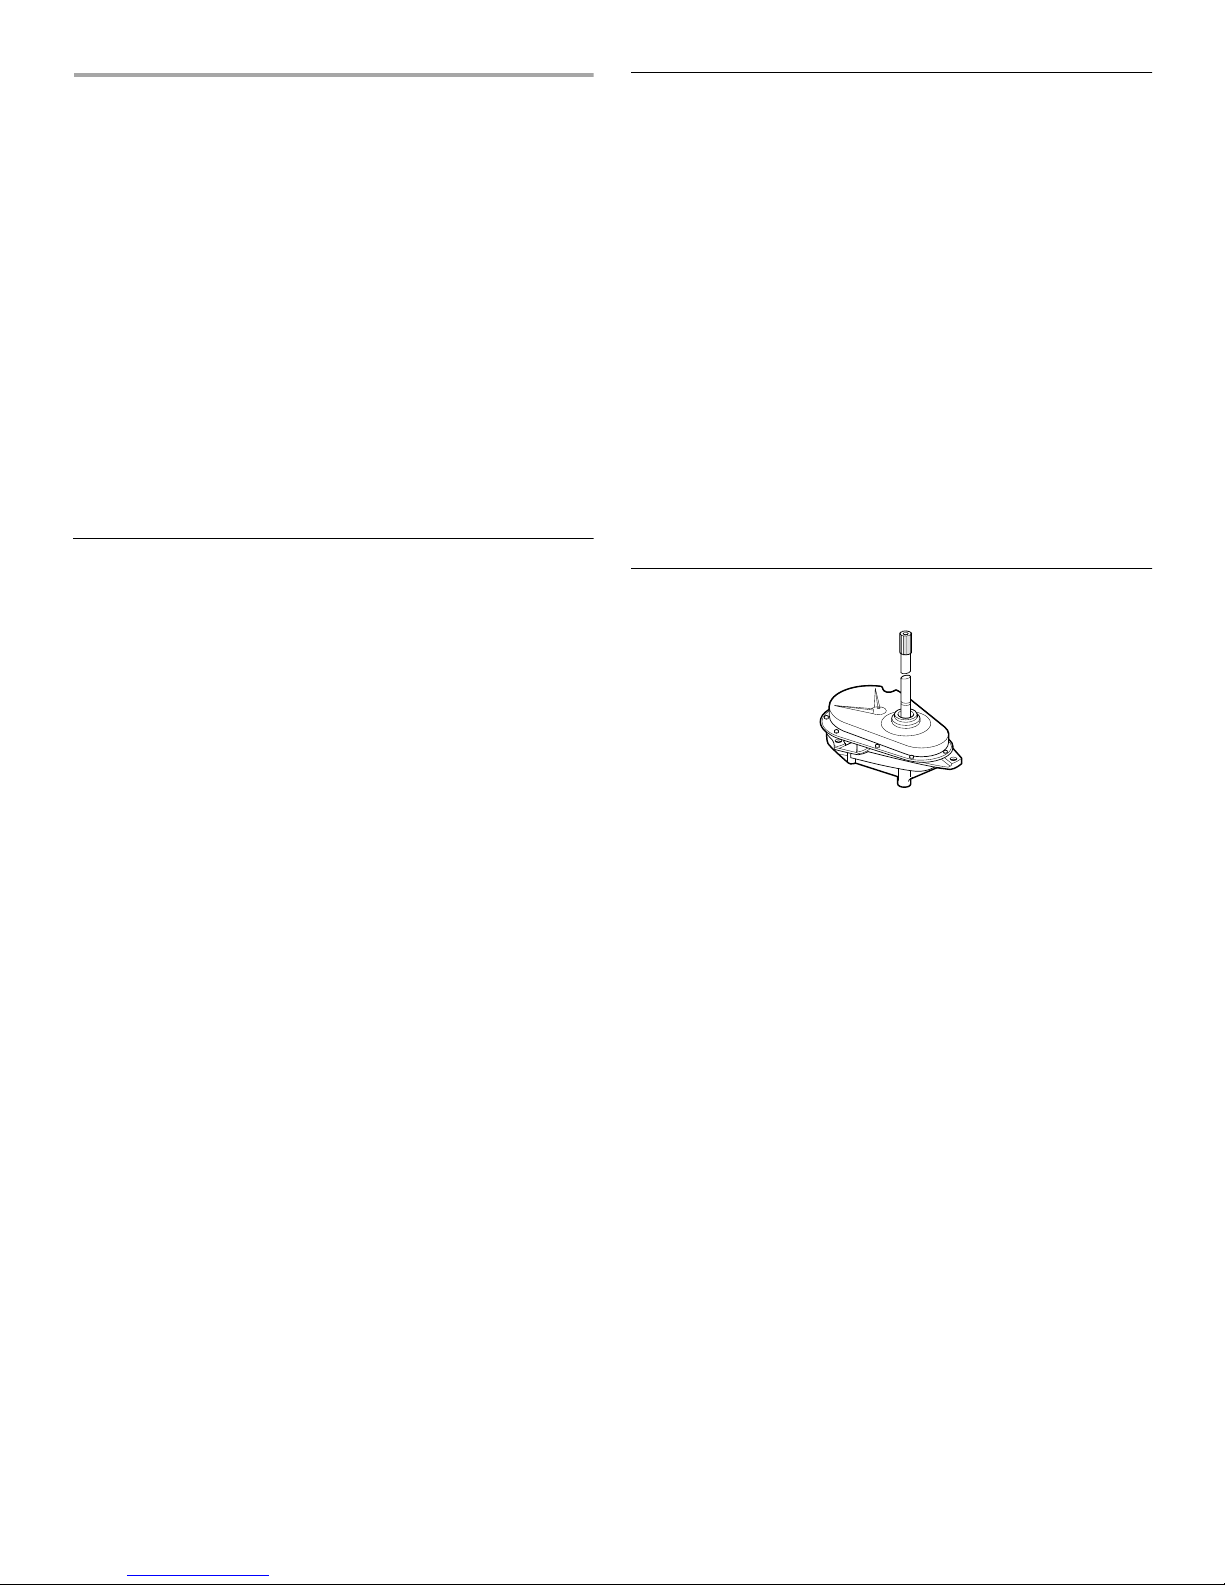
Gearcase assembly covered by your warranty
8:30 a.m. - 6:00 p.m. (EST).
Inglis designated service technicians are
For further assistance
If you need further assistance, you can write with any questions
or concerns to:
Roper Brand Home Appl iances
Customer Interaction Center
c/o Correspondence Dept.
MD 8020
553 Benson Road
Benton Harbor, MI 49022-2692
Please include a daytime phone number in your correspondence.
13
Page 14

RO P ER® W ASHER W ARRANTY
ONE-YEAR FULL WARRANTY
For one year from the date o f pur chase, when th is washer is operated and m aintained acc ord ing to instruction s attached to or fu rn ish ed
with the product, Whirlpool Corporation will pay for FSP® replacement parts and repair labor to correct defects in materials or
workmanship. Service must be provide d by a Roper designated service company.
SECOND THROUGH FIFTH YEAR LIMITED WARRANTY
For the second through fifth year from the date of purchase, when this washer is operated and maintained according to instructions
attached to or furnished with the product, Whirlpool Corporation will pay for FSP® replacement parts for any part of the gearcase
assembly, if defective in materials or workmanship.
Whirlpool Corporation will not pay for:
Service calls to correct the installation of your washer, to instruct you how to use your washer, or to replace house fuses or correct
1.
house wiring or plumbing.
Repairs when your washer is used in other than normal, single-family household use.
2.
Damage resulting from accident, alteration, misuse, abuse, fire, flood, acts of God, improper installation, installation not in
3.
accordance with local electrical and plumbing codes, or use of products not approved by Whirlpool Corporation.
Any labor costs during the limited warranty.
4.
Replacement parts or repair labor costs for units operated outside the United States and Canada.
5.
Pickup and delivery. This product is designed to be repaired in the home.
6.
Repairs to parts or systems resulting from unauthorized modifications made to the appliance.
7.
In Canada, travel or transportation expenses for customers who reside in remote areas.
8.
THIS ROPER APPLIANCE IS WARRANTED BY WHIRLPOOL
CORPORATION AND INGLIS LIMITED. WHIRLPOOL
CORPORA TION AND INGLIS LIMITED SHALL NOT BE LIABLE
FOR INCIDENTAL OR CONSEQUENTIAL DAMAGES.
Some states and provinces do not allow the exclusion or
limitation of incidental or consequential damages, so this
exclusion or limitation may not apply to you. This warranty gives
you specific legal rig hts and you may also have o ther ri ghts which
vary from state to state or province to province.
Keep this book and your sales slip together for future
reference. You must provide proof of purchase or installation
date for in -warranty service.
Write down the follo wing informatio n about your washer to better
help you obtain assistance or service if you ever need it. You will
need to know your complete model number and serial number.
You can find this information on the model and serial number
label/plate, located on your appliance as shown in “Parts and
Features.”
Outside the 50 United Stat es and Can ad a, t his wa rr ant y d oe s
not apply . C ontact yo ur author ized Roper d ealer to det ermine
if another warranty applies.
If you need service, first see “Troubleshooting.” Additional help
can be found by checking “Assistance or Service,” or call our
Customer Interaction Center at
in the U.S.A. or write: Roper Brand Home Appliances, Customer
Interaction Center, c/o Correspondence Dept., MD 8020, 553
Benson Road, Benton Harbor, MI 49022-2692. In Canada, call
Inglis Limited at
Dealer name____________________________________________________
Address ________________________________________________________
Phone number __________________________________________________
Model number _______________ _____ _____ ___________________ _____ _
Serial number __________________________________________________
Purchase date __________________________________________________
1-800-807-6777
1-800-447-6737
.
from anywhere
3/00
3953960
© 2000 Whirlpool Corporation. ® Registered Trademark of Whirlpool, U.S. A. 03/00
All rights reserved. Inglis Limit e d licensee in Can ada Printed in U.S. A.
 Loading...