

Roper B9907X0, B9908B3 Use And Care Manual
BUILT4iii SELF CLEANiNG
*
OVEN - MICROWAVE INSERTABLE
.
USE AND CARE MANUAL
.
Copy Your Model and Serial Numbers
IN THE BOX BELOW
Model and Serial numbers are on
a plate on the front frame behind
the oven door. If you call for service,
or with a question, have this information ready.
Kee this book, your installation
gui 8 e, your warranty and the sales
slip together.
Model No.:
Serial No.:
Purchase Date:--
r/34&p/
991
P&t No. 336t55

.-
SAFETY RULES
...........................
.3-4
BURNERlGNlTlON
..........................
.4
HOW TO USE YOUR OVEN
l
Clock and Oven Controls
.......................
.5-6
l
Oven Light
.....................................
.
l
Rack and Pan Arrangement
............
:.
........
.7
l
Oven Vent
....................................
...7
l
Moisture.
......................................
.7
l
New Oven Odor .................................
.
l
Preheating
...................................
...7
COOKING HINTS
..........................
.8-9
l
Using Foil
....................................
...8
.
Choosing Oven Cookware
........................
.8
l
Common Baking Problems and Causes .............
.8
.
Broiling Tips
...................................
.9
l
Positioning Broiler Pan
..........................
.9
CLEANING AND CARE . . . . . . . . lo-14
l
Oven Cleaning . . . 10,ll
l
Cleaning Instructions . . . . .12
l
Removable Oven Racks and Guides . . . . . . . .12
. Removable Oven Door . . . .,, . . .13
; l Replacing the Microwave Oven Fuse . . . . . . . . . . . . .14
l
Reptacing the Oven Light . . . . . . . . . . . . . . .15
PREVENTING SERVICE CALLS . , . . . . . . . . . .14,15
.
L.P. BURNER ADJUSTMENTS
The adjustments in your Installation Guide must be made before
you try to use your oven.
If you are using Liquified Petroleum Gas (bottled gas) all L.P.
adjustments in your installation guide must be made before use.
If your oven is not properly adjusted, flames may be too high,
or the range may use too much fuel, release toxic fumes or cook
poorly.
FOR YOUR SAFETY
If you smell gas:
1. Open windows.
2. Don’t touch electrical switches.
3. Put out any open flame.
4. Call your gas supplier at once.
I
FOR YOUR SAFETY
Do not store or use gasoline or
other flammable vapors and liquids
near this or any other appliance.
IMPORTANT INSTRUCTIONS
Read the Safety Rules below and all operating instructlons
before using this appliance.
GENERAL
Keep this manual for further use.
Y
Be sure your oven is properly installed and-grounbed by
a qualified technician,
Never try to repair or replace any part of the oven unless
specifically recommended in this manual. All other servicing should be done by a qualified technician.
Never block the flow of ventilation air. Always keep oven
vent ducts open for free air flow. The oven vent duct is below
the control panel.
PROTECT YOUR CHILDREN
Teach your children not to play with oven controls. As they
become old enough, teach them to use the oven safely and
correctly.
Never leave children alone or unwatched in an area where
an oven is in use. Children should never be allowed to sit
or stand on the open oven door. Never leave the oven door
open when the oven is unattended.
SAFETY
Never use your oven for warming or heating a room. Such
use can be dangerous as well as damaging to oven
parts.
Never wear loose fitting or hanging clothes while using your
oven. Such clothes may catch fire and cause serious injury.
Never heat &opened food containers. Pressure build-up
may make container burst and cause injury...
Always use care when opening oven door. Let hot air or
steam escape before removing or replacing food.
Always move oven racks while oven is cool. If a rack must
be moved while the oven it hot, do not let the pot holder
touch the hot heatrng element in the oven.
Always use dry pot holders when removing pans from the
oven. Moist or damp pot holders can cause steam burns.
Do not let a pot holder touch a hot heating element. Do not
use a towel or other bulky cloth.
Never touch oven heating elements or interior surfaces of
tr . oven. Heating elements and nearby areas may be hot
enough to burn you even though they are dark in color. During and after use, do not let clothing or flammable materials
touch heating elements or oven surfaces until they have had
time to cool. Other surfaces that may become hot during
use are the oven vent door and the oven door.
3
GREASE FIRES
Always keep the appliance area clear and free from things
that wrll~burn, gasolrne and other flammable vapors and IIquads. Never store materials In an oven. Flammable Gems
may catch fire and plastic Items may melt and burn.
When brorlrng, always remember to remove the broiler pan
from the oven and clean it when you are done cookrng. If
you leave a broiler pan full of grease in the oven and later
use the oven, you may have a broiler fire.
Never use aluminum foil to line the oven bottom, except
as suggested on page 8 of this manual. Improper use of
these liners may create a fire hazard
PUlTlNG OUT AN OVEN FIRE
If you do have an oven fire, do not try to
move the pan. Instead:
1. Keep oven door closed.
2. Turn oven off.
3. If the fire continues, throw baking soda
on the fire.
Never use water on a grease fire - it will
only spread the flames. Never pick up a
flaming pan.
SELF-CLEANING OVEN
Always remove the oven racks, the broiler pan and other
utensils before a self-cleaning cycle.
Never use any type of commercral oven cleaner or oven
liner protecilve coating In or around any part of your oven.
Do not use any type of aerosol product near-your oven
because the chemical that produces the spraying action.
may, in the presence of heat, cause metal parts to corrode
and could be flammable.
The door gasket is essential for a good seal so care should
be taken not to rub, damage, or move the gasket. Clean
only wrth hydrogen peroxide. See page 10.
Clean only oven parts listed In this manual. See pages 1 O- 13
for special cleaning instructions.
4
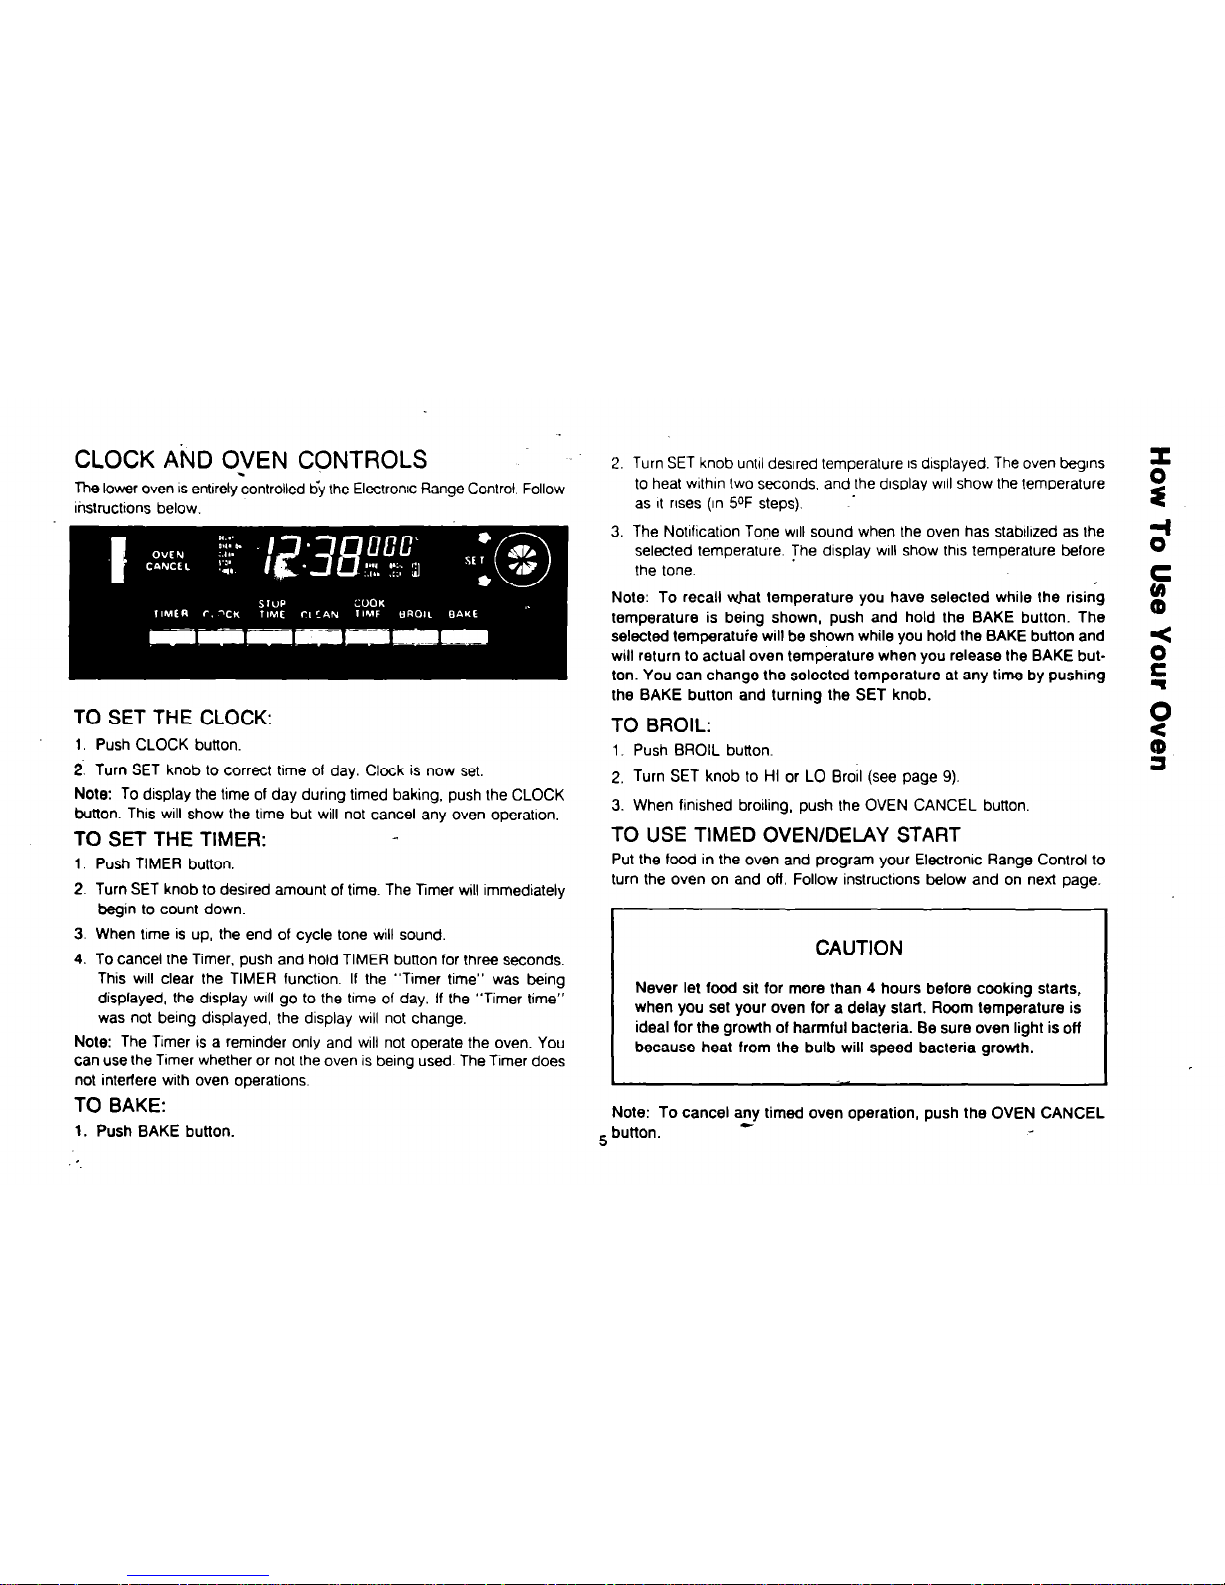
CLOCK AklD OJIEN CQNTROLS
2. Turn SET knob until desired temperature IS dlsplayed. The oven beglns
The lower oven IS entirely controlled 6y the Electronic Range Control. Follow
ltitrucltons below.
TO SET THE CLOCK:
1. Push CLOCK button.
2. Turn SET knob to correct time of day. Clock is now set.
Note: To display the time of day during timed baking, push the CLOCK
button. This will show the time but will not cancel any oven operation.
TO SET THE TIMER:
1. Push TIMER button.
2. Turn SET knob to desired amount of time. The Timer will immediately
begin to count down.
3. When time is up, the end of cycle tone will sound.
4. To cancel the Timer, push and hold TIMER button for three seconds.
This WIII clear the TIMER function. If the “Timer time” was being
displayed, the display WIII go to the time of day. If the “Timer time”
was not being displayed, the display will not change.
Note: The Timer is a reminder only and will not operate the oven. You
can use lhe Timer whether or not lhe oven is being used The Timer does
not interfere with oven operations.
TO BAKE:
1. Push BAKE button.
to heat within two seconds, and the display WIII show the temperature
as It rises (In 5OF steps).
.
3. The Notlflcation Tone will sound when the oven has stabtllzed as the
selected temperature. The display WIII show this temperature before
the tone.
Note: To recall what temperature you have selected while the rising
temperature is being shown, push and hold the BAKE button. The
selected temperatuie will be shown while you hold the BAKE button and
will return to actual oven temperature when you release the BAKE button. You can change the selected temperature at any lime by pushmg
the BAKE butlon and turning the SET knob.
TO BROIL:
1. Push BROIL button.
2. Turn SET knob to HI or LO Broil (see page 9).
3. When finished broiling, push the OVEN CANCEL button.
TO USE TIMED OVEN/DELAY START
Put the food in the oven and program your Electronic Range Control to
turn the oven on and off. Follow instrucIions below and on next page.
CAUTION
Never let food sit for more than 4 hours before cooking starts,
when you se1 your oven for a delay start. Room temperature is
ideal for the growth of harmful bacteria. Be sure oven light is off
because heat from the bulb will speed bacteria growth.
Note: To cancel any timed oven operation, push the OVEN CANCEL
5 button.
 Loading...