

Page 1
USER MANUAL
RP410
Page 2

Catalogue
Manual information .................................................................................................................. 1
Safety Instruction....................................................................................................................... 3
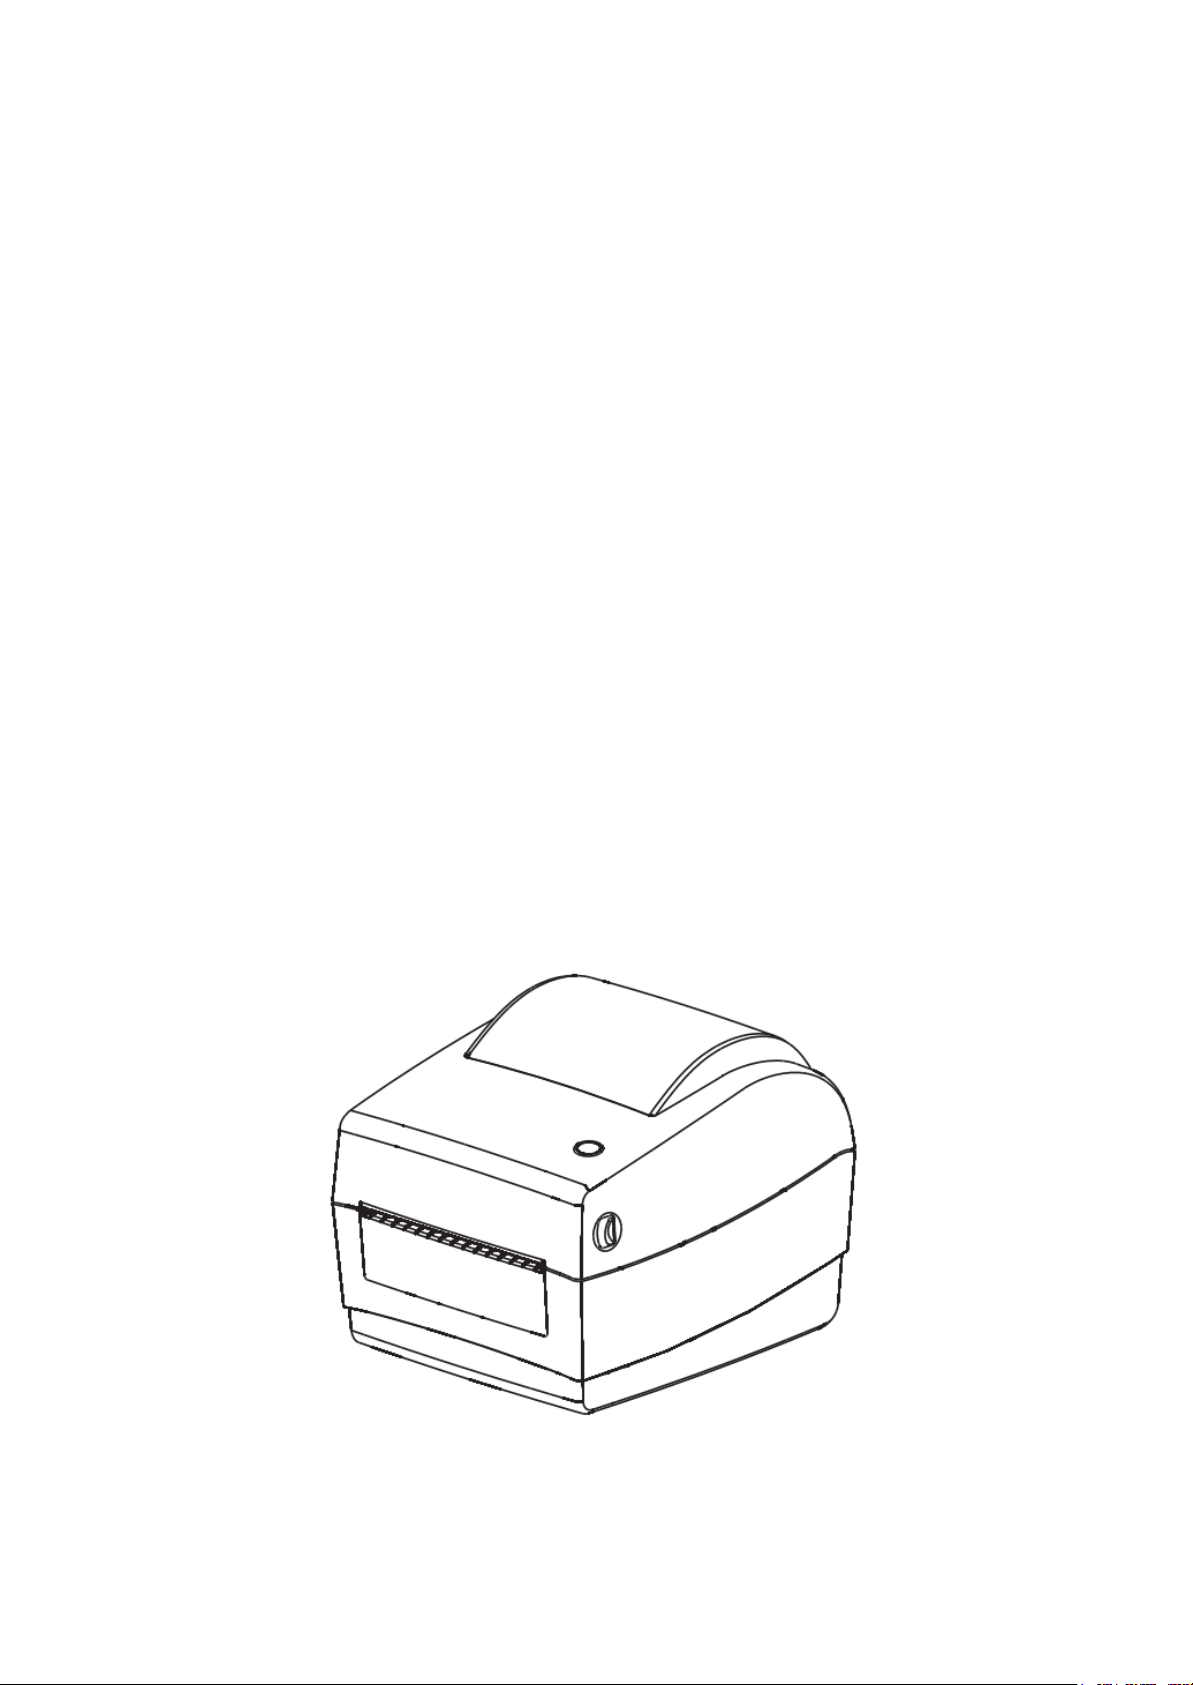
1. Product introduction ........................................................................................................... 5
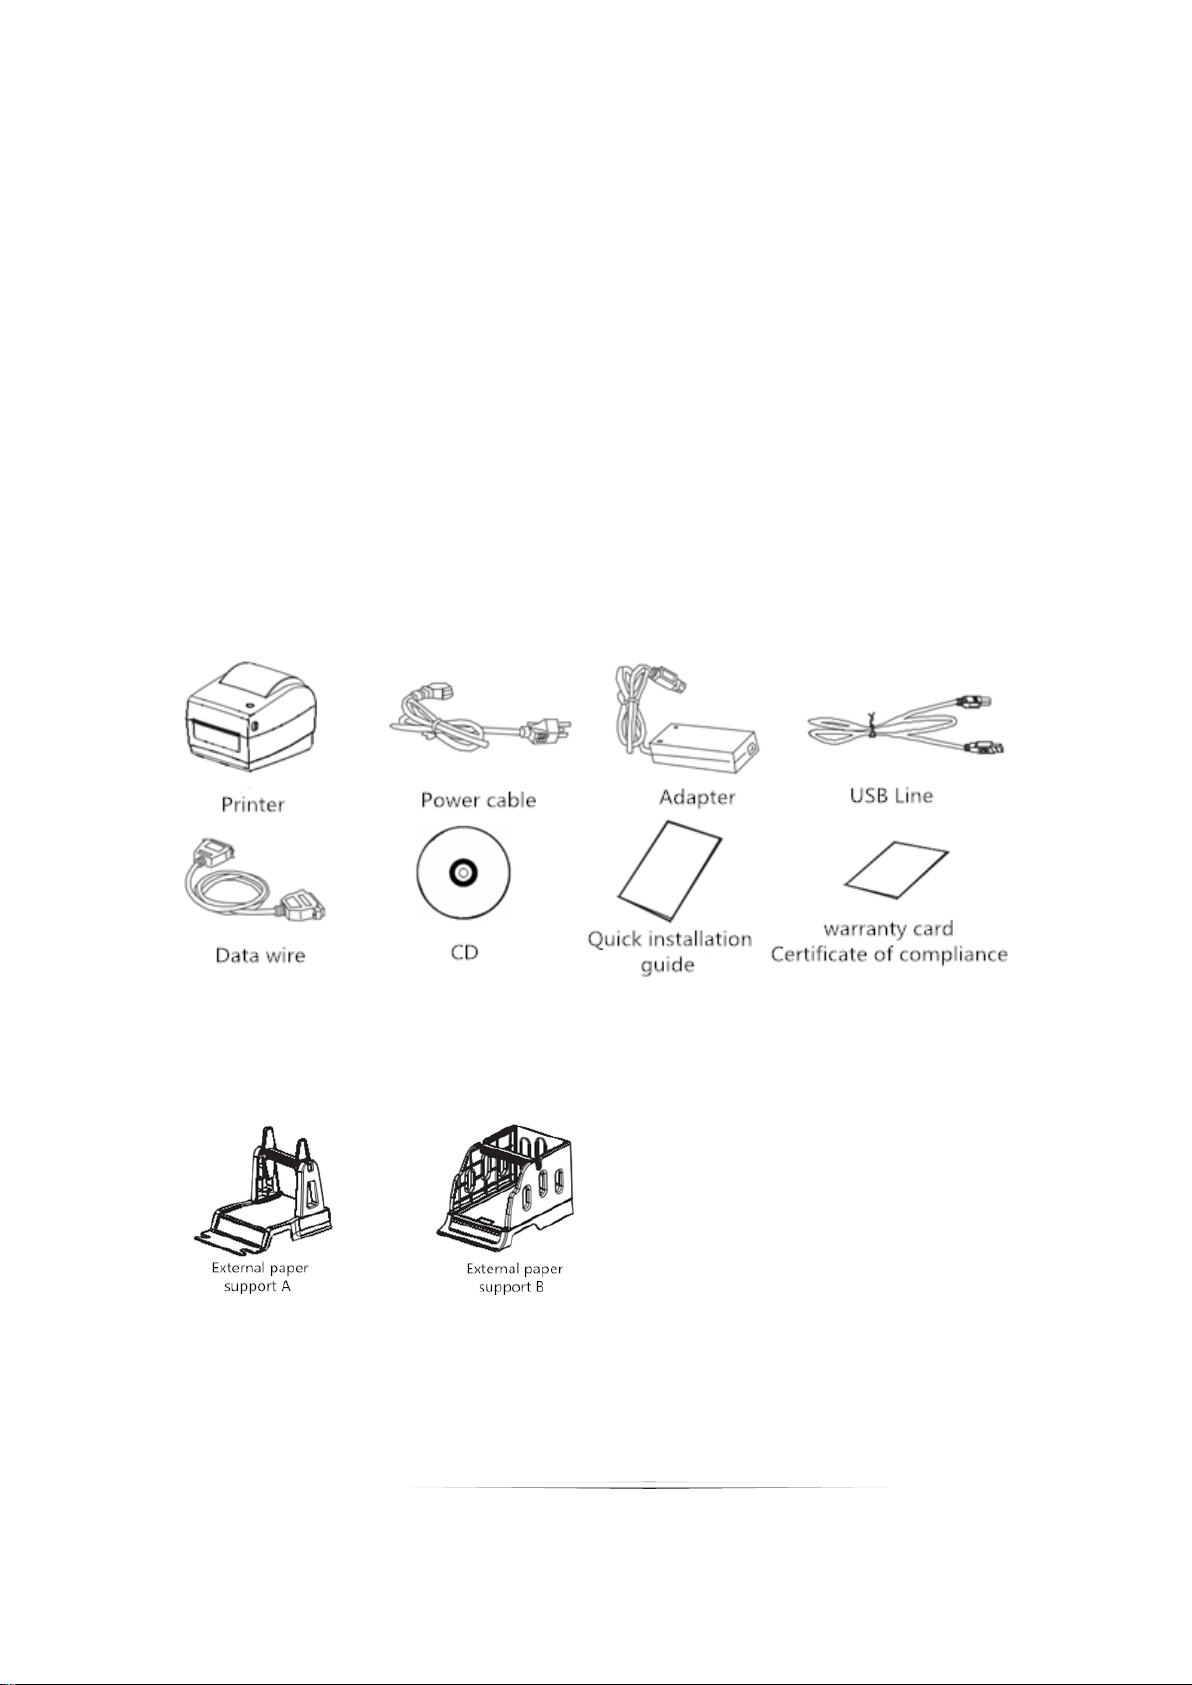
1.1 Box list ................................................................................................................................ 5
1.2 Appearance and components ................................................................................... 6
2. Product Specification .......................................................................................................... 7
2.1 Specification ..................................................................................................................... 7
3. Installation ............................................................................................................................... 8
3.1 Power connection .......................................................................................................... 8
3.2 How to connect printer and PC ................................................................................ 9
3.3 Install paper roll ............................................................................................................ 10
3.3.1 Inside ......................................................................................................................... 10
3.3.2 Outside ..................................................................................................................... 11
3.4 The operator panel ...................................................................................................... 13
3.4.1 The operational method of FEED ................................................................... 13
3.42 Led indication of printer status ........................................................................ 13
3.5 Printing Test ................................................................................................................... 14
3.5.1 Print Self-test Page .............................................................................................. 14
3.5.2 Use Windows Driver Programs to Print ........................................................ 14
3.6 Label Study ..................................................................................................................... 14
4. Clean the printer ................................................................................................................. 15
4.1 Clean the printer head ............................................................................................... 15
4.2 Clean the sensor, the rubber roller and paper path ........................................ 16
5. Troubleshooting .................................................................................................................. 16
5.1 FAQ.................................................................................................................................... 16
Page 3

Manual information
This manual includes product user, installation, etc.
Please refer to the below details for all kinds of technical issues and territory.
1. Manual for driver and program.
This manual includes information such as windows instruction for driver
and program and main function.
2. Printer practical tools manual
This manual includes usage method of option of product function,
amendment of operating conditions, etc.
3. Program Manual
This manual includes information of command of label printer.
1
Page 4

FCC Warning
Changes or modifications not expressly approved by the party responsible for
compliance could void the user’s authority to operate the equipment.
This device complies with Part 15 of the FCC Rules. Operation is subject to
the following two conditions:
(1) This device may not cause harmful interference, and
(2) This device must accept any interference received, including interference
that may cause undesired operation.
Note: This equipment has been tested and found to comply with the limits for
a Class B digital device, pursuant to Part 15 of the FCC Rules. These limits are
designed to provide reasonable protection against harmful interference in a
residential installation. This equipment generates, uses, and can radiate radio
frequency energy, and if not installed and used in accordance with the
instructions, may cause harmful interference to radio communications.
However, there is no guarantee that interference will not occur in a particular
installation. If this equipment does cause harmful interference to radio or
television reception, which can be determined by turning the equipment off
and on, the user is encouraged to try to correct the interference by one or
more of the following measures:
– Reorient or relocate the receiving antenna.
– Increase the separation between the equipment and receiver.
– Connect the equipment into an outlet on a circuit different from that to
which the receiver is connected.
– Consult the dealer or an experienced radio/TV technician for help.
FCC Radiation Exposure Statement:
This equipment complies with FCC radiation exposure limits set forth for an
This equipmen
radiator& your body.
t should be installed and operated
with minimum distance 20cm between the
uncontrolled environment .
2
Page 5

Safety Instruction
Please read the following precautions to avoid personal injury or equipment
damage before installing and using the printer.
1. Safety warning
Warning: The print head is heating component, during printing
and immediately after printing; do not touch the print head and
peripheral components.
Warning: Do not touch the print head and the connection plug, so
as to avoid electrostatic damage to the print head.
2. Safety Precautions
1. Do not plug several products in one multi-outlet
2. You can only use this package supplied adapter.
3. Do not pull the plug by pulling the cable way
4. Do not plug or unplug the power cord when your hands wet.
5. Do not bend the cable, or place it under heavy objects.
6. Install the printer on a stable surface.
7. Use only approved accessories, do not try to disassemble, repair, or
modification the printer.
8. Do not let water or other objects in the printer.
9. Leave enough space for operation and maintenance around the
printer.
10. The printer should be away from water, keep out of sunlight and
heat.
11. Don not USE or preserve the printer in a high temperature, humidity
or Severe pollution place.
12. Avoid to place the printer in a vibration and impact environment.
13. Connect the power adapter to a proper grounding socket, and avoid
3
Page 6

to use same power socket with large electrical machine or other can
cause the power supply voltage fluctuation device.
14. Please disconnect the power of the printer power adapter, If a long
time do not use the printer.
15. In order to keep good quality of printing and long life of the product,
suggest to use recommended by the same quality of paper.
16. Plug or disconnect each interface, must turn off the power,
Otherwise it may cause the printer control electrical damage of the
road.
17. Keep this manual for reference.
4
Page 7
1. Product introduction
1.1 Box list
Caution:
1. open the printer packaging, keep the packaging materials, to facilitate
the future of packaging and transportation
2. if there is any damage or loss of goods, please contact the dealer who
sell the product
Standard accessories
Optional accessories
5
Page 8

1.2 Appearance and components
Front view
Rear View
Inner View
6
Page 9

2. Product Specification
Project
Parameters
Printing
Printing method
Thermal Transfer/Direct Thermal
Resolution
203dpi
Max printing width
104mm
Printing speed
5inch/s 127mm/s (hoisting speed 150mm
realizable 150mm)
Interface
USB 2.0
Storage
RAM
Flash
Barcode
type
1D
2D
Detecting
Function
Sensor
Gap sensor, Paper End Sensor, uncover
sensor, black mark sensor
Power
supply
External Power
Specification:24V 2.5A Peak Value:8A
LED
indicator
Unit Key
RGB LED
Paper
Type
Tagboard, Continuation paper, Black mark
paper
Label Width
Min 26.7mm max 120mm
Label Height
Min 20mm max 300mm
Command
TSC
Character
Operation
Temperature
0°C~50°C
Storage
Temperature
-10°C~60°C
Dimension
217mm*182mm*170mm
Net Weight
1.4kg
2.1 Specification
8M
4M(expand memory 8M realizable)
Code 39、Code 93、ITF、EAN 128、Code
128、subsetsA、B、C、Codabar、EAN-8、
EAN-13 、 UPC-A 、 UPC-E 、 EAN and UPC
2(5) 、 digits 、 add-on 、 MSI 、 MSIC 、
PLESSEY、CPOST、ITF 14、EAN 14
QR code
7
Page 10

Accessories
Adaptor、USB cable、Power cable、CD、
user manual、Warranty Car、Certificate,、
paper tray(optional)
Reliable
data
TPH lifespan
50km
Software
Operation System
XP/Win7/Win8/Win10
3. Installation
3.1 Power connection
1. PLS take attention to make confirmation if the printer power button on
“off” position.
2. Connect adaptor plug with printer outlet at second step.
3. Adaptor pin plug contact with power socket.
4. PLS connect the other side of the power cable to the power plug socket.
8
Page 11

Caution:
PLS make sure use our original compatible power adaptor to avoid
damaging the printer.
If do not using printer for an extended period, PLS disconnect it from
power.
3.2 How to connect printer and PC
PLS follow up below step for connecting.
1. PLS make sure the printer is off.
2. PLS contact PC and printer with communication cable like as
USB/Serial/Parallel.
9
Page 12

3.3 Install paper roll
3.3.1 Inside
1. Open fixing seat, put in paper roll with printed face above.
2. Make paper front through paper guide, pull paper exceed rubber roller,
adjust paper guide to fix the paper according to the paper width.
10
Page 13

3. Close printer cover, press down to hear “ka” to lock.
3.3.2 Outside
1. Make paper front through paper-feeding slot on the back of printer,
confirm the printed face on above.
2. Open fixing seat, push up the L seat to lock.
11
Page 14

3. Make paper front through paper guide, pull paper exceed rubber roller,
adjust paper guide to fix the paper according to the paper width.
4. Close printer cover, press down to hear “ka” to lock.
12
Page 15

printer status
Operation of FEED
Function
standby
press
Feed in a blank paper automatically
standby
Press(3 seconds)
Enter into the learn mode of cover
sheet
Power off
Hold (release after
power on)
Print out self test page
Open the cover
Press 10 seconds
Factory Reset
Continuous
printing
Print pause
Print pause
Resume Printing
Led status
Green light shine
Green light slow flashing
Printer working
Blue light shine
RAM Test Errors
Pink light shine
Printer head over heat
Red light shine
The above cover is not covered
Red light flashing
No paper detected
Yellow light shine always
Low input voltage
Yellow light flashing
Paper jam
White light shine always
Print pause
3.4 The operator panel
3.4.1 The operational method of FEED
press
press
3.42 Led indication of printer status
The representative of the printer status
Normal standby
13
Page 16

3.5 Printing Test
3.5.1 Print Self-test Page
When initially install printer or any problems happen to printer, you can make
a self-test page to check status of firmware version, printer parameter setting,
printing quality and related setting information of external equipments etc.
Once you confirm printer does not have any problems after self-testing,
please check other devices or software. Self-testing function is working
independently with other devices and software.
Self-test page printing methods as follow:
1. Make sure printer is power linked, and paper roll installed properly.
2. Make sure is power off, and the cover is closed properly.
3. Hold the paper feed button, then press the power button; when printer is
power on please loosen the feed button.
3.5.2 Use Windows Driver Programs to Print
1. Install Windows driver, refer to “RP4xx Windows Driver manual” to finish
driver installation.
2. Windows driver "port" is set to printer corresponding interface.
3. Use “print self-test page” function of Window driver to make self-testing.
3.6 Label Study
Cautions: In the following cases, user better study some label positioning
knowledge, as to better locate label position:
First time to install and use printer;
Use printer after first senor clearance;
Re-use printer after a very long time;
Change new type of paper rolls;
During printing, printer can not recognize mark effectively.
14
Page 17

Under the printer ready state, long press paper feed 3s, after the status lights
(blue one) flash 2 times, release feed button. But if the printer is studying
under continuous feed mode, this study will be invalid Users can also make
the study from the printer tool software (see "printer setup tool instructions").
Cautions: After the completion of the study, please open the cover,
roll back the blank label paper for real printing, to avoid
the waste of paper.
4. Clean the printer
Dust, foreign matter, sticky substance or other blocking contaminants within
the printer head or within the printer may lower the print quality. Follow the
following methods to clean the printer head when it is dirty.
※ Note
Turn off the power before cleaning the printer
The printer head will be hot after printing. PLS turn off the printer and wait for
2 to 3 minutes before cleaning the printer head.
During cleaning, DO NOT touch the heated part of the printer head to avoid
damage due to static electricity to it.
DO NOT scratch or damage the printer head.
4.1 Clean the printer head
1. Open the printer cover, use the cleaning pen (or cotton swab moistened
with diluted alcohol (ethanol or isopropanol) to clean the printer head
with the direction from the center to two ends.
2. DO NOT use the printer immediately after cleaning the printer head. Need
to wait for the cleaning alcohol used to dry completely (about 1-2 minutes)
and the printer head is completely dry before using the printer.
15
Page 18

Problems
Possible Causes
Recommended Solution
light is off
a. AC socket and
adaptor plug are not
properly connected
with printer plug;
b. Printer power switch
is off;
a. PLS double check if AC socket
and adaptor plug are properly
connected with printer plug or
not;
b. Switch on the power;
Not printing
a. Communication
cable is not properly
connecting printer &
PC;
b. Fault setting the
communication
a. Reconnect communication
cables;
4.2 Clean the sensor, the rubber roller and paper path
1. Open the printer cover and remove the paper roll.
2. Use a dry cloth or cotton swab to wipe off dust or foreign matter.
3. Place cloth or cotton swab dipped in alcohol for medical. And use it to
remove adhesive foreign substances or other contaminants.
4. DO NOT use the printer immediately after cleaning the parts. Need to wait
for the cleaning alcohol used to dry completely (about 1-2 minutes) and
the printer head is completely dry before using the printer.
※ Clean the parts when the print quality or paper detection performance
descends.
5. Troubleshooting
5.1 FAQ
The contents of the table below are common problems and problem-solving
methods for general operators. If you are already in accordance with our easy
way to troubleshooting, but the printer still not work normally, PLS contact the
manufacturer's customer service department in order to get more help.
16
Page 19

interface;
b 3.42 reference manual printer
various states of LED indicator,
confirm whether the printer in
the standby state (green light
normally on);
Incorrect
positioning
a. No label locating
learning;
b. Seam mark detection
sensor components
position offset;
c. Selection mode
error;
a. Do label locating learning(take
reference of Point 3.6);
b. PLS open the cover to check
the seam mark detection
components position offset.
Black mark paper: The mark
detection components move
according to the black mark
position, so the detection
sensor can detect the black
mark. Label paper/continuous
paper: detection sensor should
be in the range of paper width;
c. PLS use the setting tool to
check the printer info, to
confirm the paper type is
c. Printer status error;
17
Page 20

consistent with the paper
loaded in the printer, it can be
changed by setting tool;
Poor print
quality
a. Incorrect paper
loading;
b. Improper setting of
printing density and
speed;
c. Printer head/rubber
roller has dust or
glue;
d. Printer head
damaged;
a. Reloading paper(take reference
of Point 3.3 loading the media);
b. Use setting tool or software to
adjust the printer printing
density and speed. Setting tool
adjusting concentration for
coarse adjustment, drive to
adjust concentration for fine-
tuning;
c. Cleaning printer head/rubber
roller(take reference of Point
4.1 cleaning printer head/Point
4.2 cleaning sensor, rubber
roller and paper path);
d. Use setting tool to check the
head defect point, if the printer
head damaged, PLS contact
with the manufacturer's
customer service department
for repairing;
Printing
incomplete
a. Paper is not placed
centered;
b. Label size setting
incorrect;
a. Adjust paper position;
b. Set correct label size;
18
Page 21

Bluetoothcommunication
RP rinterscanprovidedualmodeBluetooth4.0(SPP+BLE),itcan
410
communicatewithapple4S,ipad3,ipad4latermodels.Effectivecommunication
distancelessorequal10m。
p
Bluetoothdefaultpairingpassword:0000,
itcanbesettingupwithparametersettings.
Formoredetails《Toolsettingmanul》。
 Loading...