

Page 1

Operating manual
Croissomat
SCM50
Edition BD414202
04.2014
Technical specication subject to change without notice
www.rondo-online.com
Page 2

Page 3

RONDO Burgdorf AG
Heimiswilstrasse 42
CH-3400 Burgdorf/Schweiz
Tel. +41 (0)34 420 81 11
Fax +41 (0)34 420 81 99
info.ch@rondo-online.com
www.rondo-online.com
RONDO Schio s.r.l.
Via Lago di Albano, 86
I-36015 Schio (VI)
Tel. +39 0445 575 429
Fax +39 0445 575 317
sales.it@rondo-online.com
RONDO GmbH & Co. KG
D-57299 Burbach
Hoorwaldstrasse 44
Tel. +49 (0)2736 203-0
Fax +49 (0)2736 203130
info.de@rondo-online.com
RONDO S.à.r.l.
PAE «Les Pins»
F-67319 Wasselonne Cédex
Tel. +33 (0)3 88 59 11 88
Fax +33 (0)3 88 59 11 77
info.fr@rondo-online.com
RONDO Ltd.
Unit 7, Chessington Park
Lion Park Avenue
Chessington, Surrey KT9 1ST/GB
Tel. +44 (0)20 8391 1377
Fax +44 (0)20 8391 5878
info.uk@rondo-online.com
RONDO Asia
A-2-21, Jalan Kuchai Maju 2
Kuchai Entrepreneurs Park
Off Jalan Kuchai Lama
58200 Kuala Lumpur/Malaysia
Tel. +60 3 7984 55 20
Fax +60 3 7984 55 95
info.my@rondo-online.com
RONDO China
Unit 1511, 15F, South Tower
Fuli Yingli Bulding, No. 3
Hua Qiang Road
Guangzou P.R.C. 510623
China
Tel. +86 20 838 822 11
Fax +86 20 838 886 01
info.cn@rondo-online.com
RONDO IBERIA
Ronda del Golf Este
Finca Doña María
Las Amapolas 8 -1b
29630 Benalmádena-Costa, Malaga
España
Tel. +34 952 961 043
Fax +34 952 961 088
info.es@rondo-online.com
RONDO Inc.
100, State Street
Moonachie, N.J. 07074/USA
Tel. +1 201 229 97 00
Fax +1 201 229 00 18
info.us@rondo-online.com
RONDO Inc.
267 Canarctic Drive
Downsview, Ont. M3J 2N7/Canada
Tel. +1 416 650 0220
Fax +1 416 650 9540
info.ca@rondo-online.com
OOO RONDO Rus
Dmitrovskoe Chaussée 157, Str. 4
RU-127411 Moskau/Russland
Tel. 007 495 665 67 93
Fax 007 495 665 67 94
info@rondo-online.ru
Page 4

Page 5
Page 6

Page 7

Index
1 Safety information 10
1.1 Explanation of Symbols 10
1.2 Explanation of warning signs 10
1.3 Safety elements 10
1.3.1 Safety guards 10
1.4 Safety instructions and information which must be followed 11
2 Transporting, setting up, connecting, dismounting and storing the machine 14
2.1 Machine delivery 14
2.2 Transportation 14
2.3 Unpacking the machine 14
2.4 Setting up the machine 15
2.4.1 Tightening the conveyor belts 15
2.4.2 Fitting tool 16
2.4.3 Croissant roller 16
2.4.4 Installing bypass table (option) 17
2.5 Requirements for putting the machine into operation 18
2.6 Moving direction test 18
3 General data about the machine 19
3.1 General information 19
3.1.1 Authorized use 19
3.1.2 Noise values 19
3.1.3 Temperatures 20
3.1.4 Ambient humidity 20
3.1.5 Machine weight 20
3.2 Prerequisites 20
3.3 Full view of the machine 21
3.4 Operating elements 22
3.4.1 Mains Switch 22
3.4.2 Safety guards 22
3.4.3 Emergency-stop key 22
3.4.4 Control panel 22
3.4.5 Longitudinal cutting 22
3.4.6 Guillotine 23
3.4.7 Hold-down rollers 23
3.4.8 Croissant roller 23
Edition BD414202
04.2014
Croissomat
Operating manual
7
Page 8

Index
4 Starting the machine 24
4.1 Preparing for operational readiness without bypass table 24
4.2 Preparing for operation readiness with bypass table 24
4.3 Starting/Stopping the machine 25
5 Operation 26
5.1 General functional description of the Croissomat 26
5.1.1 Operating elements 26
5.2 Operating instructions 27
5.2.1 Switching on the machine 27
5.2.2 General notes 27
5.3 Product selection and product definition 28
5.4 Pause times 28
5.5 Operating modes 29
5.5.1 Set-up mode 29
5.5.2 Normal mode 29
5.5.3 Bypass mode 29
5.6 Special functions 30
5.6.1 Maintenance function 30
5.6.2 Operating hours counter 30
5.6.3 Indication safety guard open 30
5.7 The longitudinal cutting device and the guillotine 31
5.8 Croissant roller 33
5.9 Lowering the infeed table 33
6 Cleaning 34
6.1 Cleaning 34
6.1.1 Croissant roller 34
6.1.2 Care 38
7 Maintenance 39
7.1 General information for maintenance of the machine 39
7.2 Maintenance list 39
7.3 Replacement parts list 40
Edition BD414202
04.2014
Croissomat
Operating manual
8
Page 9

Index
8 Trouble shooting 41
9 Technical data 44
9.1 Technical data Croissomat 44
9.2 Additional information 45
Hint for operating manual: The numbers of the illustrations
(Ex.
1) are numbered chapterwise.
Edition BD414202
04.2014
Croissomat
Operating manual
9
Page 10
Safety information
1 Safety information
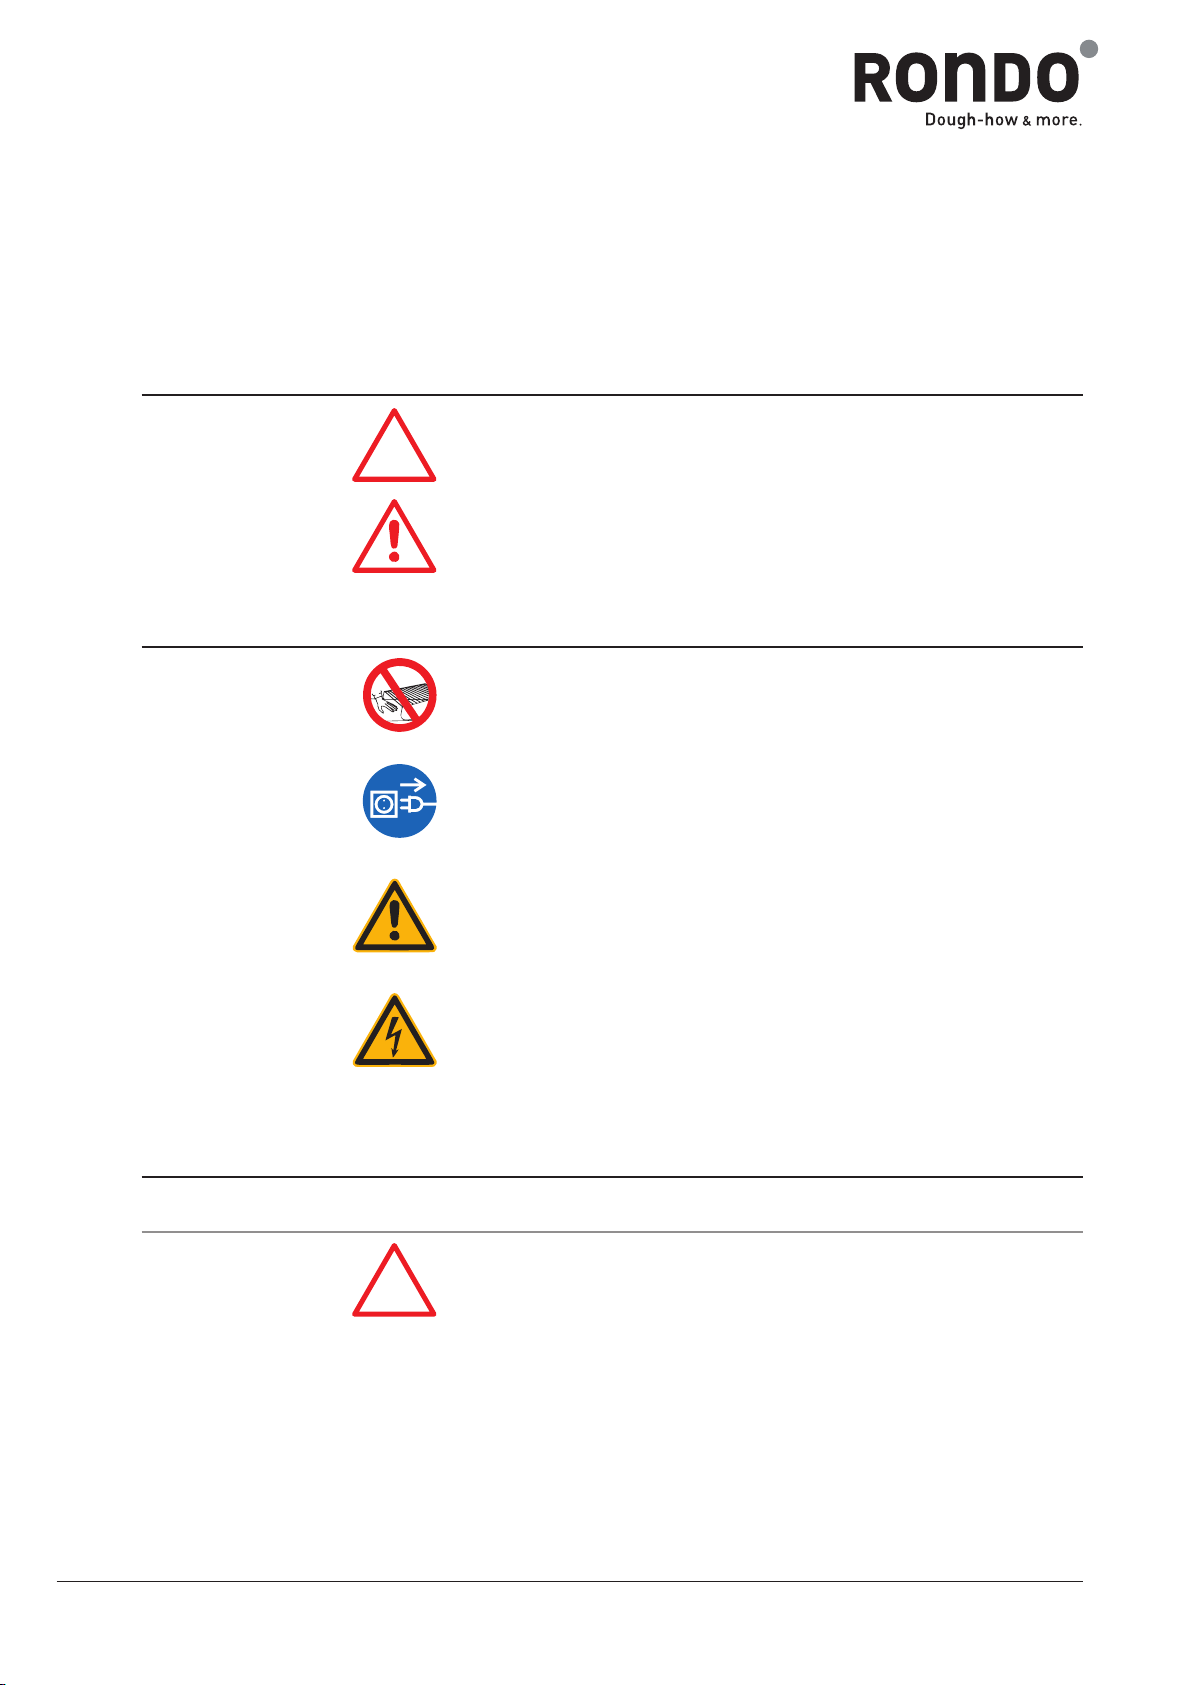
1.1 Explanation of Symbols
All the sections in this operating manual containing safety instructions
which absolutely must be observed are marked with this symbol and
with a number.
All the sections in this operating manual containing information which
absolutely must be observed are marked with this symbol.
1.2 Explanation of warning signs
1.3 Safety elements
1.3.1 Safety guards
Sign indicating Prohibited Activity
Reaching under the closed safety guard is prohibited!
Instruction and Information Signs
Make sure to disconnect the mains plug before opening!
Danger Warning Sign
Danger Warning
High-voltage Warning Sign
Warning against electrical shock.
Disconnect mains plug before opening.
Edition BD414202
04.2014
Operation
1
The safety guards fulfill a dual purpose:
1. They protect the operator from inadvertent contact with the cutting
tool and the dangerous zone.
2. By lifting up the safety guard the machine stops immediately.
Raising the safety guard even just slightly will stop the machine
from continuing to operate. By closing the safety guard the
machine mustn't start by oneself.
Croissomat
Operating manual
10
Page 11

Safety information
1.4 Safety instructions and information which must be followed
Read the operating manual before operating the machine.
The machine from RONDO is intended for use in the foodstuffs indus-
2
try for the production of unfilled croissants by means of cutting, stamping and rolling-up of dough pieces in thicknesses of up to 7 mm.
However, the machine is not suitable for the processing of other products (e.g. modelling clay or other types of mouldable masses which are
not dough products).
Any other use of these units is not in accordance with the purpose for
which they are built. Therefore, the manufacturer will not be liable for
any accidents or damage resulting from unauthorized use; the risk in
any such instance will be borne solely by the user.
Authorized use also means that the user must follow all instructions
3
4
5
6
prescribed by the manufacturer in respect of operation, maintenance
and service.
Any work on the electrical components of the machine, in particular the
correct professional mounting of the mains plug, may only be carried
out by qualifield personnel who are familiar with the relevant safety instructions. Defective cables and mains plugs must be immediately replaced by qualified personnel.
Protective covers over the electrical controls and the mechanical moving parts may only be removed by professionally qualified personnel
and must be remounted before the machine is put back into operation.
Any unauthorized changes made to the machine, and in particular, to
the safety devices on the machine will automatically exclude any liability on the part of the manufacturer for accidents or damage sustained
as a result of such changes.
Edition BD414202
04.2014
The machine may only be connected to the mains using the mains
7
8
plug! No permanent electrical installation may be made using, for example, terminal screws. The mains plug serves as a mains isolation
device. It has to be clearly visible at all times and freely accessible.
The machine may only be connected to the mains once it has been
fully assembled.
Croissomat
Operating manual
11
Page 12

Safety information
9
10
11
12
Before beginning any repair, service or cleaning work on the machine,
the electricity supply to the machine must be disconnected (pull out
mains plug).
Safety devices on the machine may not be adjusted, by-passed or
expanded.
Operation of the machine when any of the safety devices is out of order
is prohibited.
Defective cables and plugs must be replaced immediately by qualified
personnel.
13
14
15
16
17
18
Defective safety devices must be immediately replaced with new original parts from RONDO.
When transporting the machine, the croissant roller must be dismount-
ed.
Fitting and take-off of croissant roller has to be done by 2 person. Special attention has to be paid to the correct engagement of the croissant
roller to the basic machine.
Reaching under the closed safety guard is prohibited!
Do not reach with the fingers into the safety guard!
Do not deposit any loose objects such as knives, tools or articles of
clothing, etc. in the area where the dough is processed.
Check periodically to ensure that there are no loose screws in the area
where the dough is processed.
Edition BD414202
04.2014
19
Due to the risk of injury at the sharp edges, cutting tools must be exchanged carefully and correctly. Wear suitable protective gloves to prevent injuries. Cutting tool that are not in the cutting station must be
stored in a safe place.
Croissomat
Operating manual
12
Page 13

Safety information
20
21
22
23
Any disposal of the installation must be carried out in accordance with
environmentally-accepted practices. The operators are fully responsible for ensuring that such practices are followed.
The machine may not be operated without the scrapers.
Machine parts located in the areas in which the dough is being processed, and whose surface coating becomes worn (e.g. chromium
plating), must be replaced.
The machine must never be cleaned using spray water, high-pressure
cleaner, steam-cleaning machine or any similar cleaning methods.
24
25
26
27
28
29
This machine is not designed to be used in explosive ambient.
Prior to the first starting-up, the complete machine must be thoroughly
cleaned.
All still existing protective foils on the machine must be removed.
Defective parts must be replaced with new original parts by RONDO.
After every use, the machine has to be cleaned thoroughly. Not thoroughly cleaned machines can be a health-hazard for the consumer.
Non-ionising radiation is not intentionally produced but only given off
for technical reasons by electric equipment (e.g by electric motors). In
addition the machine has no strong permanent magnets. By keeping a
safe distance (the distance from the source field to the implant)
of 30 cm, interference with active implants (e.g. pacemakers, defibrillators) can be excluded with a high degree of probability.
Edition BD414202
04.2014
RONDO will not accept liability when any of the above safety instructions / notes have not been complied with!
Croissomat
Operating manual
13
Page 14

Transporting, setting up, connecting, dismounting and storing the machine
2 Transporting, setting up, connecting, dismounting and stor-
ing the machine
2.1 Machine delivery
The machine is delivered in its original packaging.
• Report any claims for damage caused as a result of transportation
directly to the freight handlers (see the packaging: The delivery
documentations are contained on the outside of the packaging)
2.2 Transportation
15
2.3 Unpacking the machine
When transporting the machine must be packed in the original packaging or in accordance with the instructions of the manufacturer to guarantee stability. When being transported, the machine must be fastened
onto a pallet. The croissant roller must be separate to pack up.
The machine must not be tipped over. (For machine weight,
see 9.1 Technical data Croissomat)
The machine must be set up on a level, even floor surface.
For further information regarding the ambient conditions required for
the machine, see 3.1 General information.
• Unpack tool and attachments
• Check all items received against the delivery slip for complete-
ness
Edition BD414202
04.2014
Croissomat
Operating manual
14
Page 15

Transporting, setting up, connecting, dismounting and storing the machine
2.4 Setting up the machine
Two people are required to set up the machine.
According to the machine type, the infeed table must be put in a higher
positon before setting up.
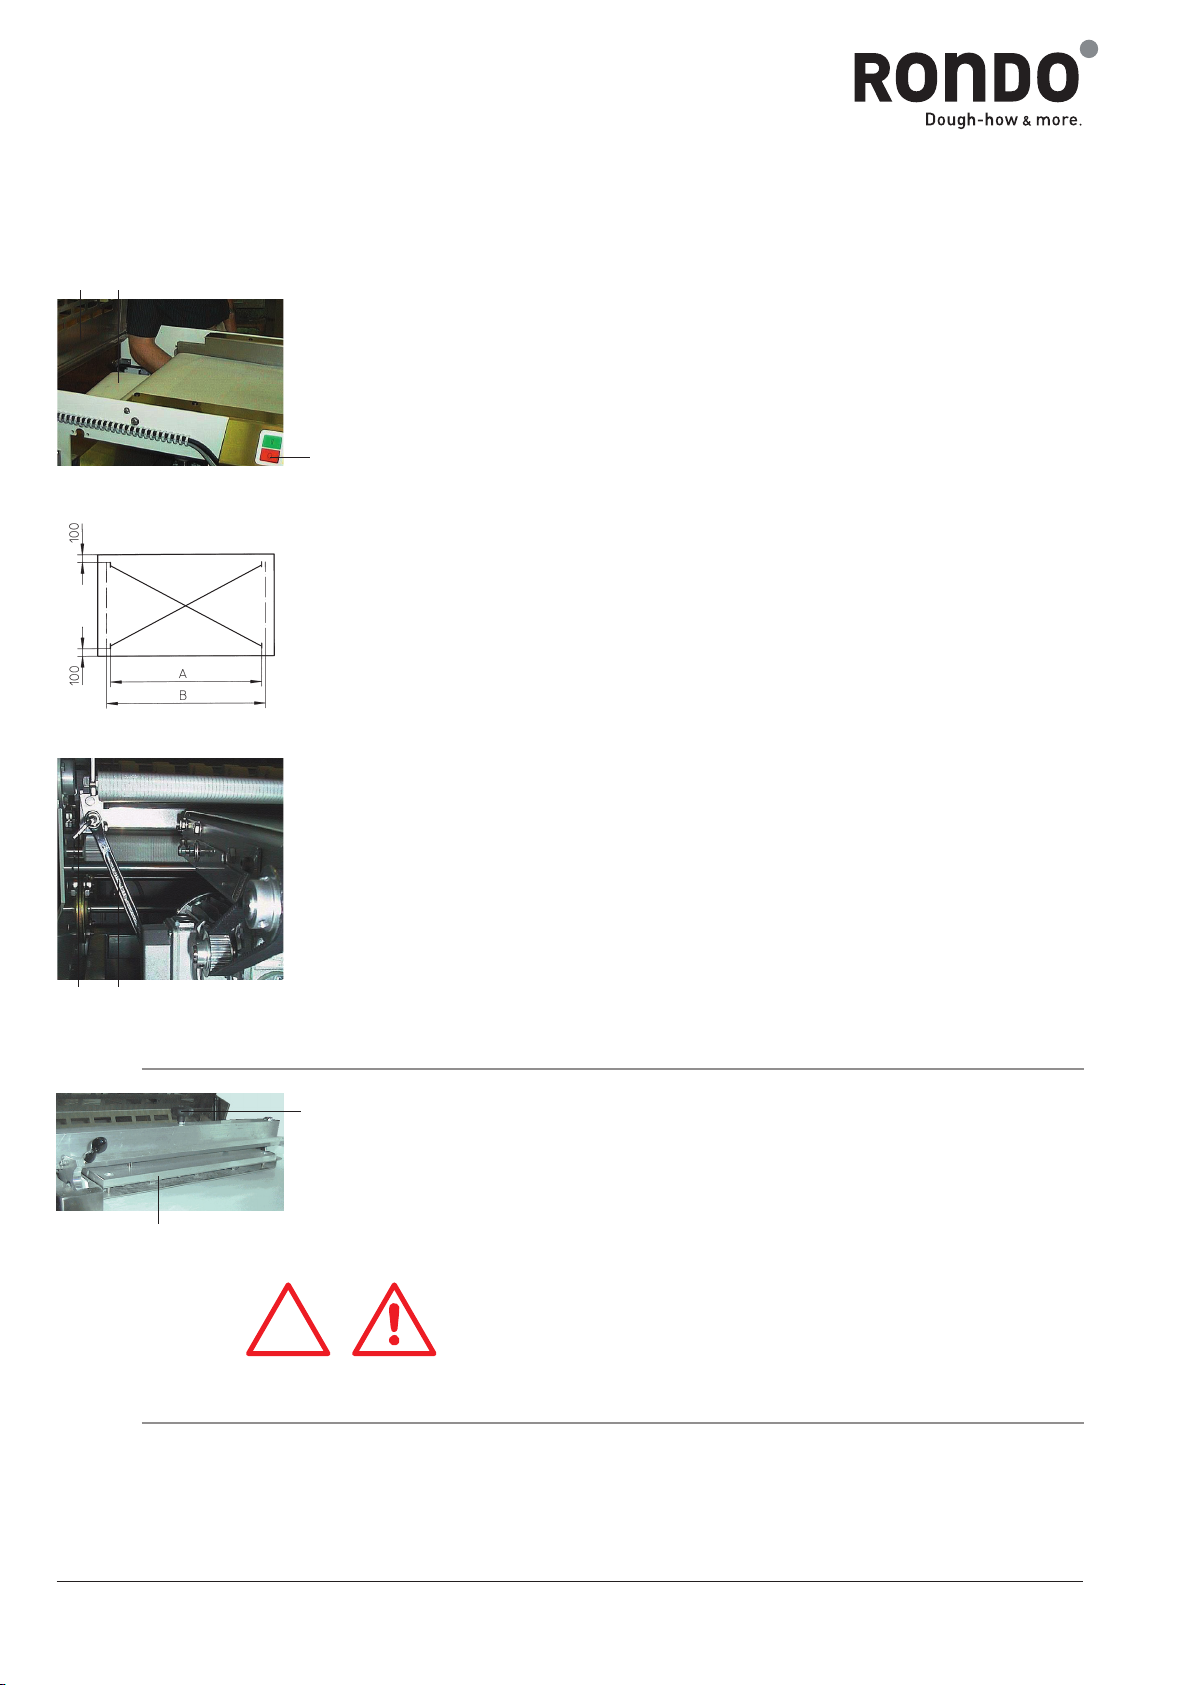
2.4.1 Tightening the conveyor belts
The belts are installed and adjusted properly by the manufacturer.
Tension the belts just as much as they will not have slip.
For tightening proceed as follows:
• Retighten the left and right tension nut (1) evenly and parallel
"X"
• Remeasure Distance "X" on both sides using a millimeter measur-
ing instrument
The distance "X" must be exactly equal on both sides
• Switch on the machine (see 5.2.1 Switching on the machine)
1
If the belt runs off towards one side, proceed as follows:
• Loosen the tension nut on the opposite side
or
• Retighten tension nut on the side where it runs off
• Monitor the belt and, if necessary, correct it until it runs exactly in
the middle of the table
If necessary, repeat this procedure several times. Routinely monitor
the belt during the initial hours that the machine is operational and, if
necessary, correct it again.
Tighten and adjust the conveyor belts with patience!
Prior to carrying out each further correction, allow the machine to run
for at least 30 seconds.
Before putting the machine into operation, the conveyor belts must be
lightly rubbed with flour in order to prevent the dough from sticking to
the belt.
Edition BD414202
04.2014
Attention!
A gap can develop between the synthetic conveyor belt and the
idle roller if the belt is worn on the edge or is damaged. If this is
the case, the belt must be replaced.
Reason: Risk of injuries to fingers in the area of the idle roller.
Croissomat
Operating manual
15
Page 16
Transporting, setting up, connecting, dismounting and storing the machine
In order to adjust the delivery belt proceed as follows before carrying
out the actual belt tensioning:
3 4
• Press the red key (2)
• Set the main switch to position "0" (Off)
• Open the safety guard (3)
• Turn the turning table (4) by hand by 90°
2
5
D
C
2.4.2 Fitting tool
6
• Release the belt tension by Allen key (C) and box spanner (D)
• Mark the belt with a pencil (5),
dimension A has to be 800 mm (even)
• Tense the belt by hand by means of the Allen key (C),
dimension B = 801 mm +/- 0,5 mm (right and left)
• Secure the set screw by the box spanner (D)
7
The safety guard must be removed before fitting the tool. The stamping
tool (6) is inserted from the machine input side in the direction of belt
travel up to the stop in the pressing bar and tightened with the starhandle (7). The corresponding longitudinal cutting shaft is inserted into
the longitudinal cutting device. The longitudinal cutter is lowered onto
the belt using the handle.
19
2.4.3 Croissant roller
Edition BD414202
04.2014
Attention!
Risk of injury on the sharp cutting tool!
The croissant roller can easily be fitted to the machine by two people.
After attaching the croissant roller, the plug of the connection cable
must be fixed to the machine.
Croissomat
Operating manual
16
Page 17

Transporting, setting up, connecting, dismounting and storing the machine
2.4.4 Installing bypass table (option)
The protective cover (8) must be removed before inserting the bypass
table.
• Center the catch of the machine table's driving roller in the
8
receiver in the front section of the housing
• Unscrew the bolt (9)
• Guide the center of the machine table's driving roller to the bolt
9
In order to snap the machine table into place, proceed as follows:
• Tug lightly on the conveyor belt until the catch snaps into place
• Tighten the bolt (9) by a key SW6
• Push forked support into the support guide
• Insert catch plug (10) of the forked support into one side of the
table
• Bend up the forked support and secure it to the opposite side of
10
the table
• Connect cable to the plug
Edition BD414202
04.2014
Croissomat
Operating manual
17
Page 18

Transporting, setting up, connecting, dismounting and storing the machine
2.5 Requirements for putting the machine into operation
Power supply and frequency at the mains circuit to which the machine
4
8
is connected must be in accordance with specifications contained on
the sign "Electrical connected loads" (This sign is found on the cable
lead-through on the machine base).
Direct connection to the mains without a mains plug is prohibited!
The mains plug serves as a mains isolation device.
Any work on the electrical components of the machine, in particular the
correct professional mounting of the mains plug, may only be carried
out be qualified personnel who are familiar with the relevant safety in-
structions.
(An electro circuit diagram is delivered with every machine. It is to be
found next to the electrical control in the machine base).
7
2.6 Moving direction test
Connect the machine plug to the mains
The infeed table must be engaged in the working position according to
the model in order to commission the machine.
After the Croissomat has been connected to the mains supply, the
moving direction must be tested. If the belts run in reverse, two phases
must be switched in the mains plug.
Edition BD414202
04.2014
Croissomat
Operating manual
18
Page 19

General data about the machine
3 General data about the machine
3.1 General information
3.1.1 Authorized use
The machine is intended for use in the foodstuffs industry for the pro-
2
duction of unfilled croissants by means of cutting, stamping and rollingup of dough pieces in thicknesses of up to 7 mm.
However, it is not suitable for the processing of other products (e.g.
modelling clay or other types of mouldable masses which are not
dough products).
Any other use of these units is not in accordance with the purpose for
which they are built. Therefore, the manufacturer will not be liable for
any accidents or damage resulting from unauthorized use; the risk in
any such instance will be borne solely by the user.
3.1.2 Noise values
This product is a technical working tool which is designated to be used
exclusively for work.
Persons handling the product must be instructed accordingly and at
least 16 years of age.
Cutting
Making longitudinal cuts in a dough band with a maximum thickness of
7 mm.
Stamping
Stamping a dough-band into diagonally opposing dough triangles. The
weight of the stamping dies is between 8 and 12 kg. They are changed
maximum 2-3 times a day.
Rolling
Rolling up dough triangles in the croissant roller starting from the long
side.
The emission value at place of operation is less than “70 dB(A)”.
Edition BD414202
04.2014
The accuracy class of the acoustic emission measurement corresponds to class 2 (± 2.5 dB) according to:
DIN EN ISO 11201 / DIN EN ISO 11202 /
DIN EN ISO 11203 / DIN EN ISO 11204
Croissomat
Operating manual
19
Page 20

General data about the machine
3.1.3 Temperatures
3.1.4 Ambient humidity
The ambient temperatures permissible for the machine:
+5 ºC to +40 °C
Permissible temperatures for storage of the machine: -25 ºC to +55 °C,
for brief periods up to +70 °C
The admissible ambient humidity for the machine lies in the area
of 30 % - 95 %, relative humidity, uncondensed.
3.1.5 Machine weight
3.2 Prerequisites
Total weight = approx. 420 kg
(see 9.1 Technical data Croissomat)
In order that dough can be sheeted by the machine, the following prerequisites must be met:
• The infeed table is engaged in the working position according to
the model
• Longitudinal cutter and stamping tool are inserted
• The calibrator unit is engaged according to the model and connected to the power supply
• Dough band maximally 7 mm thick and 620 mm wide
Edition BD414202
04.2014
Croissomat
Operating manual
20
Page 21

General data about the machine
3.3 Full view of the machine
10
7
946
5
3 4
8
1 Infeed table
2 Longitudinal cutting device with cutting roller
3 Guillotine with stamping tools
4 Safety guard
2
1
5 Hold-down rollers
6 Panning belt
7 Transverse belt with turning mechanism
8 Croissant roller
9 Control panel with emergency stop key
10 Mains switch
11 Calibrator (Option)
12 Bypass table (Option)
12
11
Edition BD414202
04.2014
Croissomat
Operating manual
21
Page 22

General data about the machine
3.4 Operating elements
3.4.1 Mains Switch
10
3.4.2 Safety guards
The mains switch (10) interrupts the supply of electrical current.
1
3.4.3 Emergency-stop key
3.4.4 Control panel
9
3.4.5 Longitudinal cutting
14
3
2
16
The safety guard (4) protect the operator from danger injury.
If the safety guard is lifted during the machine operation, the machine
will stop.
The emergency-stop key (9) serves to stop the machine.
The control panel (9) is used to operate and program the machine.
(See 5.1.1 Operating elements)
The handle (13) on the brace serves for opening and closing the longitudinal cutting device (2).
13
Edition BD414202
04.2014
19
Warning!
Risk of injury when closing the longitudinal cutting device when
the cutting shaft is fitted.
Croissomat
Operating manual
22
Page 23

General data about the machine
3.4.6 Guillotine
3.4.7 Hold-down rollers
The star handle (14) bar serves to secure the stamping tool and must
always be tight in stamping mode.
3 rows 5 rows
15 17
4 rows 6 rows
3.4.8 Croissant roller
The narrow hold-down roller (15) can be adjusted to the product size
and used in the raster plate (16). Care should be taken to ensure that
the hold-down roller is parallel to the long hold-down roller (17). The
individual rollers are to be set according to the picture on the left.
16
Edition BD414202
04.2014
18
The three feed levers (18) on the croissant roller serve to optimise the
rolling-up behaviour of the croissants.
Croissomat
Operating manual
23
Page 24

Starting the machine
4 Starting the machine
4.1 Preparing for operational readiness without bypass table
• Engage the infeed table in the working position according to the
model
• Connect the croissant roller and, according to the model, the
calibrator using the connecting cable.
1
2
• Lower the output table (1) of the croissant roller into the desired
working position
• Insert stamping tool and cutting roller
Close the longitudinal cutting device (2)
Attention!
Risk of injury when closing the longitudinal cutting device when
the cutting roller is fitted.
• Close the safety guards
• Turn the main switch on the machine to "ON"
4.2 Preparing for operation readiness with bypass table
• Engage the infeed table in the working position according to the
model
• Connect the croissant roller and, according to the model, the
calibration unit using the connecting cable.
Edition BD414202
04.2014
19
• By-pass table fitted and checked that it is secure
See 2.4.4 Installing bypass table (option)
• Fit stamping tool and cutting shaft
Close the longitudinal cutting device
Attention!
Risk of injury when closing the longitudinal cutting device when
the cutting roller is fitted.
• Close the safety guards
• Turn the main switch on the machine to "ON"
Croissomat
Operating manual
24
Page 25

Starting the machine
4.3 Starting/Stopping the machine
Starting
• Press the green key on the foil key pad
Stopping
• Press the red key on the foil key pad
• Emergency-stop key and safety guard are not intended to be
used for stopping the machine as they serve as safety elements
Edition BD414202
04.2014
Croissomat
Operating manual
25
Page 26

Operation
5 Operation
5.1 General functional description of the Croissomat
The Croissomat croissant machine is computer controlled and is intended for the production of croissants in the following working modes:
Key (4) : Normal mode
Production of croissants in various sizes using
the croissant roller.
Key (3) : Set up mode
In set-up mode, two rows of croissants can be
produced each time the machine is switched on,
after which the croissant roller is stopped.
5.1.1 Operating elements
1 3 4
6 7813
2 5 15 11 12
Key (5) : Bypass mode
Operating mode for continuous operation. No one
croissants are rolled out.
Function keys
1. Start key green
2. Off key red
3. Set up mode
4. Normal mode
5. Bypass mode
6. Selection key 1 croissant roller mode
7. Selection key 2 croissant roller mode
14
8. ON/OFF key for guillotine
Data display
11. Display for product size with product selector key
Edition BD414202
04.2014
12. Display for pause time with pause key
13. "+" - key
14. "-" - key
15. Safety guard display
Croissomat
Operating manual
26
Page 27

Operation
5.2 Operating instructions
17
5.2.1 Switching on the machine
5.2.2 General notes
Before setting the machine into action, make sure that:
• it is made ready for operation as described in chapter 4.1 Preparing for Operational Readiness without bypass table
• no loose objects, such as knives, dough scrapers, reelers or
others are on the machine tables
When the main switch on the machine is switched on the machine
starts up in normal mode. The last product size value selected appears
in the product size display and the guillotine ON/OFF switch is active.
The machine is ready for operation.
Select working mode
Select the desired operating mode by pressing the corresponding key
1-3. The red LED indicates the selected working mode.
ON/OFF switch for guillotine
The guillotine can be switched on and off by pressing the guillotine ON/
Off switch (8). The red LED illuminates when the guillotine is switched
on. The guillotine automatically switches on when the machine is
switched on.
Selection keys 1 croissant roller mode and 2 croissant roller mode
They are used to switch between operation with one only or both croissant rollers when two croissant rollers are attached (depending on machine type). The current operating mode is displayed by means of the
corresponding LED next to the keys. If only one croissant roller is fitted,
the keys have no effect. On switching on the machine, the 2 croissant
roller mode is active if 2 croissant rollers are fitted.
Edition BD414202
04.2014
Safety guard display
On pressing the emergency stop key or on opening one of the safety
guards the machine is stopped immediately. The red LED next to the
safety guard display is activated. The machine can only be restarted
with the start key (1) when all safety guards are closed and the emergency stop key is unlocked.
Croissomat
Operating manual
27
Page 28

Operation
5.3 Product selection and product definition
Product selection and definition can only be carried out with the
machine stationary.
By pressing the product selector key (11), access is obtained to the
set-up mode for the product basis. The product size display flashes
slowly. Using the "+" - and "-" - keys (13/14), a choice can be made
from one of five stored values. After 5 s without change the displayed
value is accepted and the display ceases to blink.
If a value is to be changed or re-entered, the product selector key (11)
must be pressed for 2 s. The value begins to flash rapidly and can now
be adjusted with the "+" - and "-" - keys in a range of 60 - 220. After
5 s without change the displayed value is accepted and the display
ceases to blink.
A maximum of five values can be stored. If all five are in use, and a new
value is to be entered, one of the old ones must be overwritten.
5.4 Pause times
The pause time can be adjusted both while the machine is stationary and in operation.
By pressing the pause key (12), access is obtained to the set-up mode
for the pause time. The pause time display begins to flash. Using
the"+,-" keys (13/14), the pause time can be adjusted between 00.0 s
- 20.0 s in 0.5 s steps. After 5 s without change the displayed value is
accepted and the display ceases to blink.
Edition BD414202
04.2014
Croissomat
Operating manual
28
Page 29

Operation
5.5 Operating modes
5.5.1 Set-up mode
5.5.2 Normal mode
By pressing the set-up mode key (3), the red LED is activated. On
pressing the start key (1), two rows of croissants are produced. The
croissant roller runs until the stop key (2) is pressed and can be fed
with dough pieces by hand, in order to adjust the rolling-up quality. If
the start key (1) is kept depressed, the machine runs until the start key
is released. The croissant roller continues to run as previously described.
After switching on the main switch, the machine is always in normal
mode. The red LED is active. On pressing the start key (1), the machine starts up and is stopped by pressing on the off key (2).
5.5.3 Bypass mode
Bypass mode can only be used if the bypass table is fitted to the machine and the plug is connected. No other operating mode can then be
selected. In bypass mode, the selector key 1 croissant roller mode (6)
is activated automatically. In this way the advance rates of the two machine belts are identical. The dough pieces are not separated. By
pressing the selector key 2 croissant roller mode (7), the dough pieces
are separated at the belt change-over point.
Edition BD414202
04.2014
Croissomat
Operating manual
29
Page 30

Operation
5.6 Special functions
5.6.1 Maintenance function
+
5.6.2 Operating hours counter
+
By pressing the off key (2) and the "+"- key (13) for 10 seconds, the
discharge belt is brought into the return position in order that the transverse belt can be removed and the discharge belt tensioned or
changed. Resetting is only possible by switching off the mains switch.
By pressing the off key (2) and the pause key (12) for 10 seconds, the
number of operating hours is displayed to the nearest 10 hours. After
10 seconds the operating hours display mode is exited automatically.
5.6.3 Indication safety guard open
The display is only possible when stationary.
If safety circuit is open, the LED "safety guard" illuminates.
The red LED illuminates if:
• Safety guard open (infeed side)
• Safety guard open (outfeed side)
• Safety device on the outfeed side not mounted, respectively plug
on the bypass table not connected
• Protecting device on the Croissant roller has reacted or cable of
the Croissant roller is not pluged in the Croissomat
• Emergency-stop key on the Croissomat is operated
• Emergency-stop key on the calibrator is operated or cable for
calibrator not pluged in
(On the calibrator or in the parking socket on the Croissomat)
Edition BD414202
04.2014
• Protective motor switch Q2 not switched on (in the electrical box)
Croissomat
Operating manual
30
Page 31

Operation
5.7 The longitudinal cutting device and the guillotine
Safety guards
The longitudinal cutting device and the guillotine are covered by a
16
17
safety guard.
A defective pneumatic spring (16) on the safety guard must be
replaced immediately! Reason: risk of injuries caused by falling
safety guard.
Function of the guillotine
The dough triangle stamping tool is fitted to the guillotine. The guillotine
is lowered onto the stationary infeed belt by means of a cam. In this
way the triangles are stamped in the dough-band. The guillotine stops
in the upper dead point.
The cutting pressure is set at the factory and should not be adjusted by
the customer.
Adjusting the guillotine
Loose lock nut (17) completely. Remove pressure bar.
18
19
20
19
Adjust the second lock nut with key SW19. One turn corresponds to
1,75 mm difference in altitude. Turning direction left is decreasing, turn-
ing direction right is increasing the cutting pressure.
Place the pressure bar and fix it with the lock nut (17).
Attention: Adjust by half a turn at maxiumum!
Inserting and removing stamping tools
The stamping tools are designed in such a way that they can only be
fitted to the pressure bar in a certain position. If the stamping tool position is changed, the functional sequence of the machine is interfered
with.
For insertion, the stamping tool (18) together with the tenon blocks
must be slid up to the stop in the pressure bar and fixed by means of
the star handle (19). Removal of the stamping tools takes place in the
reverse order.
Risk of injury on the sharp cutting edges!
Function of the longitudinal cutting device
The longitudinal cutting device serves to hold the cutting shaft and
presses it with constant force onto the infeed belt. One pneumatic
spring (20) on each side ensures restricted contact pressure in order to
prevent the infeed belt from being cut. A defective pneumatic spring
must be replaced immediately since perfect cutting of the dough-band
cannot be guaranteed.
Edition BD414202
04.2014
Croissomat
Operating manual
31
Page 32

Operation
The cutting shaft cuts the dough-band in the longitudinal direction into
the required number of dough strips corresponding to the dough triangle sizes required.
Inserting the cutting shaft
21
Y
X
Risk of injury on the sharp cutting edges!
The longitudinal cutting device is opened using the handle (21) on the
brace. The cutting shaft must be inserted carefully. Always fit the longi-
19
tudinal cutting device correctly. When doing so pay attention to the
plastic part (Y) on the operator side and the plastic part (X) on the
other side. The longitudinal cutting device is closed using the handle.
The longitudinal cutting device must always be closed before closing
the safety guard.
Standard measurements of cutting rollers
Y
Number of rows Width of the dough strips
2 265
3 177
4 133
5 106
6 88
X
wrong right
Edition BD414202
04.2014
23
22
Adjusting the cutting shaft
The knives (22) cut the dough to the breadth.
The knives (23) have to be set 5 mm outside the dough band, so that
they never produce waste.
Croissomat
Operating manual
32
Page 33

Operation
5.8 Croissant roller
25
24
5.9 Lowering the infeed table
The roller gap can be infinitely adjusted from 0.5 - 5 mm by the roller
adjustment lever (24). The adjusted roller gap is fixed by turning the
star handle in clockwise direction on conclusion. The divisions
0.5 - 5 mm on the scale represent the actual roller gap in mm.
The two additional feed levers (25) serve to adjust the spacing between the upper and lower belt. This allows the rolling-up quality of the
croissants, loose or tightly rolled, to be adjusted.
The divisions of 0.5 - 10 on the scale serve only as guide values and
have no connection with the belt spacing.
If it is necessary to carry out a readjustment, it is recommended to set
both levers to the same value at the outset.
26
26
The infeed table (26) can be lowered when the machine is not in use.
To carry this out the table must be slightly lifted with one hand and the
supports (27) pressed upwards with the other hand. The table can then
be lowered.
The table must be raised for machine operation until it engages in the
working position.
Edition BD414202
04.2014
27
Croissomat
Operating manual
33
Page 34

Cleaning
6 Cleaning
6.1 Cleaning
3
3 1
Before cleaning the machine, pull out the mains plug.
9
22
The machine must never be cleaned using spray water, highpressure cleaner, steam-cleaning machine or any similar cleaning
methods.
Removing the Scraper Unit, cleaning and replacing
• Disconnect scraper (1) and loosen tension spring (2)
2
6.1.1 Croissant roller
21
• Dismantle with a key SW 13 the spring clamp (3) either on the left
or the right hand side and carefully slide the scraper blade off
Exchange of scraper blades
Attention
For protection of the fingers, please use a cloth. The edges of the
blades are sharp and there is danger of cutting oneself.
• Assemble the new scraper blades in reverse order
The croissant roller can be dismounted easily from the basic machine,
by 2 persons.
Procedure
• Unplug the connecting cable plug
• Raise the croissant roller
Edition BD414202
04.2014
• Lift the croissant roller away
The croissant roller is mounted by following the procedure in reverse
order.
As the rolling belt and scraper of the croissant roller can be removed
without the use of tools, the time required for the daily cleaning is reduced and optimal hygienic conditions are guaranteed.
Croissomat
Operating manual
34
Page 35

Cleaning
Dismounting the upper belt
• Fold back the swivel yoke (4)
4
• Press the upper belt (5) hard backwards against the spring bolt (6)
and lift out from the front (catch)
• Remove the upper belt
5
The upper belt is mounted by following the procedure in reverse order.
6
7
Adjusting the tension of the felt belt
• Loosen the front and back hexagonal screws (7) by a key (SW13)
and adjust the belt tension by means of the adjustment axle.
• After adjustment, retighten the hexagonal screws!
8
Dismounting the lower belt
• Loosen the front and back hexagonal screws by a key (SW8) and
push out the stopping plate (8)
• Raise the lower belt (9), press back hard against the spring bolt
and lift out at the front (catch)
• Remove the lower belt
9
The lower belt is mounted by following the procedure in reverse order.
7
Adjusting the tension of the felt belt
• Loosen the front and back hexagonal screws (7) by a key (SW13)
and adjust the belt tension by means of the adjustment axle.
Edition BD414202
04.2014
• After adjustment, retighten the hexagonal screws!
Croissomat
Operating manual
35
Page 36

Cleaning
5 11 10
Dismounting the scraper, upper roller
• Unhinge the tension spring (10) at the front and back
• Fold back the guard sheet (5)
• Remove the scraper (11)
The scraper is mounted by following the procedure in reverse order.
12 13
Dismounting the scraper, lower roller
• Turning the catch (12)
• Press the scraper (13) dismount it to the side
The scraper is mounted by following the procedure in reverse order.
Dismounting the infeed table
• Raise the infeed table (14), press back hard against the spring
bolt and lift out from the front (catch)
The infeed table is mounted by following the procedure in reverse or-
der.
Adjusting the conveyor belt. (See 2.4.1 Tightening the conveyor belts)
Edition BD414202
04.2014
14
Croissomat
Operating manual
36
Page 37

Cleaning
Dismounting the outfeed table
• Remove the cover yoke (15)
15
• Raise the outfeed table (16), press hard forwards against the
spring bolt and lift out at the back (catch)
16
The outfeed table is mounted by following the procedure in reverse
order.
Adjusting the prop belt. (See 2.4.1 Tightening the conveyor belts)
If the outfeed table (16) is folded up, the cover yoke (15) must also be
removed.
16
Edition BD414202
04.2014
Croissomat
Operating manual
37
Page 38

Cleaning
6.1.2 Care
daily
Part See
Casing 3.3 Full view of the machine A
Scraper 6.1 Cleaning A
Synthetic conveyor belt 2.4.1 Tightening the conveyor belts B/C
Driving roller 2.4.4 Installing bypass table (option) D
Idle roller 2.4.1 Tightening the conveyor belts D
Croissant roller 6.1.1 Croissant roller A/B
see legend
Only use cleaning agents with a ph-value of 6 to 8! Only cleaning
materials approved for use in the food industry may be used.
Legend
weekly
see legend
A Damp clean using cloth and soapy water
B Dry clean using a brush
C Wet clean using a brush
D Remove excess dough using a brush and plastic scraper
Edition BD414202
04.2014
Croissomat
Operating manual
38
Page 39

Maintenance
7 Maintenance
7.1 General information for maintenance of the machine
3
9
7.2 Maintenance list
Part Activity Period
Conveyor belts check, if necessary: replace
Safety clutch of turning table check if necessary: adjust or replace M
Final stop of turning table check the rubber cushion
Chains in Croissant roller check the tension of chain
Scraper blade check, if necessary: replace A
Chains in Croissant roller grease according to the Service manual A
11
12
For a competent maintenance of the machine, a service contract is
recommended.
Your dealer will be happy to inform you about the various possibilities.
Any defects or damage on the machine must be repaired by an
authorized customer service representative.
check the belt run
if necessary: replace
if necessary: retighten
13
W
M
M
Edition BD414202
04.2014
Legend
W weekly
M monthly
A annually
Croissomat
Operating manual
39
Page 40

Maintenance
7.3 Replacement parts list
13
Item-no. Description Dimensions Application
7536 Round rubber cushion 26 Stop of turning table
125506 Set disk Ø 60 x 21 mm Turning table
125884 Scraper mounted
13753 Tube (felt) Ø 45 x 50 mm Hold-down rollers
126335T02 Synthetic belt 2500 x 556 mm SCM50 Infeed belt
126336 Synthetic belt 1260 x 300 mm SCM50 Transverse belt
126337 Synthetic belt 2070 x 545 mm SCM50 Panning belt
121974 Synthetic belt 2390 x 604 mm SCM50 Bypass table
123398 Synthetic belt 590 x 254 mm Croissant roller infeed table
120702 Prop belt 1810 x 250 mm Croissant roller outfeed table
120666 Lower belt 568 x 248 mm Croissant roller felt belt
120667 Upper belt 531 x 248 mm Croissant roller felt belt
The use of replacement parts not delivered by RONDO can lead to
premature wear or to destruction of machine parts.
Edition BD414202
04.2014
Croissomat
Operating manual
40
Page 41

Trouble shooting
8 Trouble shooting
Symptom Cause/Defect Remedy/Repair
1. No indication on control panel Mains plug not plugged in?
Plug in mains plug.
2. Indication o.k., indication safety
guard open illuminates.
Mains switch not switched on?
Power Supply existing?
Mains plug defective?
Power Supply wrong?
Fuse in basic module not o.k.?
Safety guard closed?
Emergency-stop key unlocked?
Switch on mains switch.
To check by an electrician:
Check Power Supply (all 3 phases)
Check connections in plug
Supply must be according the informa-
tion on the sign "Electrical connected
loads" of the machine
Pull out the mains plug and check the
fuses.
Close safety guard.
Unlock emergency-stop key
(See 5.6.3 Indication safety guard
open).
Edition BD414202
04.2014
Croissomat
Operating manual
41
Page 42

Trouble shooting
Symptom Cause/Defect Remedy/Repair
3. Error messages: Reset the error messages by switching
001 Main switch not activated Let check it by an electrician.
off the mains (mains switch)
003 Sensor Guillotine does not respond
Clear the error (See also point 7).
(Timeout).
004 No impulses by infeed belt
Check sensor and position sensor.
(Timeout).
005 Sensor transport belt (Timeout). Check sensor and position sensor.
006 Sensor belt return front does not
respond (Timeout).
Check sensor and position sensor, or
wrong moving direction, check and
change the phase-sequence in the
plug.
007 Sensor belt return back does not
Check sensor and position sensor.
respond (Timeout).
008 Turning table limit switch right
Check sensor and position sensor.
moving direction don't functioning
(Timeout).
009 Turning table limit switch left moving
Check sensor and position sensor.
direction don't functioning (Timeout).
Edition BD414202
04.2014
Croissomat
Operating manual
42
Page 43

Trouble shooting
Symptom Cause/Defect Remedy/Repair
4. Machine runs intermittently,
stops.
Loose wires (Intermittent contact) By electrician: Adjust wires correctly
5. Conveyor belts loop up, motor
and driving roller are running.
6. Conveyor belt runs over to one
side, tears at the edges.
7. Guillotine stops in lower position. Pressure too high
Belt tension too weak
Driving roller dirty
Irregular conveyor belt tension
Driving roller dirty
Error message 003
Tighten the conveyor belts (see 2.4.1
Tightening the conveyor belts).
Clean driving roller (see 6.1.2 Care).
Tighten conveyor belt (see 2.4.1
Tightening the conveyor belts).
Clean driving roller (see 6.1.2 Care).
Loosen stop nut by a half turning.
New start of machine.
8. All other errors/failures. Inform nearest "RONDO" after-sales
service giving as much information as
possible.
Edition BD414202
04.2014
Croissomat
Operating manual
43
Page 44

Technical data
9 Technical data
9.1 Technical data Croissomat
Technical Data SCM50
Calibrator option
Bypass table option
Width of infeed belt 560 mm
Rated power 3,5 kVA /1,5 kW
Supply voltage 3 x 200 - 420 V, 50/60 Hz
Total length in resting position 1800 mm
Total length 2400mm
Total length with bypass table 3330 mm
Total length with calibrator 3830 mm
Total length with calibrator and bypass table 4760 mm
Width without croissant roller 900 mm
Width with croissant roller 2280 mm
Machine weight 420 kg
Weight of the croissant roller 80 kg
Technical specifications subject to change without notice.
Edition BD414202
04.2014
Croissomat
Operating manual
44
Page 45

Technical data
9.2 Additional information
The Croissomat from RONDO has the following quality features:
• The conveyor belts made of plastic material:
All plastic coated conveyor belts used on our machines are
approved for coming into contact with food stuff and correspond
with the requirements of the directives EU 10/2011 as well as the
FDA (Food and Drug Administration, USA).
• The felt conveyor belts are made of 100% woollen felt. Woollen
felt is used since many years in the bakery industry.
• The parts of the cutting knives and of the stamping dies that are
touching the dough are made of stainless steel (chromium nickel
steel, DIN Mat. no. 1.4301). This material is approved for coming
into contact with food stuff.
• The roller of the manual dough reeler that is touching the dough is
made of aluminium, anodised colourless and is approved for
coming into contact with food stuff.
• The rollers of the croissant roller are hard-chrome plated. This
coating is approved for coming into contact with food stuff.
• The scraper blades are made of POM-C plastic material. This
material is approved for coming into contact with food stuff and
corresponds with the requirements of the directives EU 10/2011
as well as the FDA (Food and Drug Administration, USA.
• The dough catch pans are made of stainless steel (chromium
nickel steel, DIN Mat. no. 1.4301).This material is approved for
coming into contact with food stuff.
Edition BD414202
04.2014
Croissomat
Operating manual
45
 Loading...