

Page 1
www.CoffeeRoastersClub.com
RONCO GEN2 MODEL
Step by step Picture Instructions on assembling and using your Coffee Roaster Kit for
the Ron Popeil "RONCO SHOWTIME" Rotisseries
(CAREFUL!! SOME PARTS MAY BE SHARP!!)
NOTE: Unpack shipping box very carefully. Unpack newspaper
from roasting drum very carefully also (one end-cap is detachable).
Many parts are sharp and may cut you!
At the bottom of the drum there is a small bag of unroasted coffee beans for you.
Please note that the pictures illustrate a GEN2 Model Coffee Roaster Kit
fit on one of the RONCO rotisseries. All of the RONCO's
are essentially the same when it comes to setting up the Coffee Roaster
Kit. As such, these instructions are to be used for all of them.
Now I will be showing you pictures of all items included with the kit,
and telling you what each item is. Please note that it is important that you know
what each item is and does. Also as part of this picture series, I will be showing you step-by-step
how to assemble the Coffee Roaster Kit. At the very end I will provide you directions on how to do a roast:
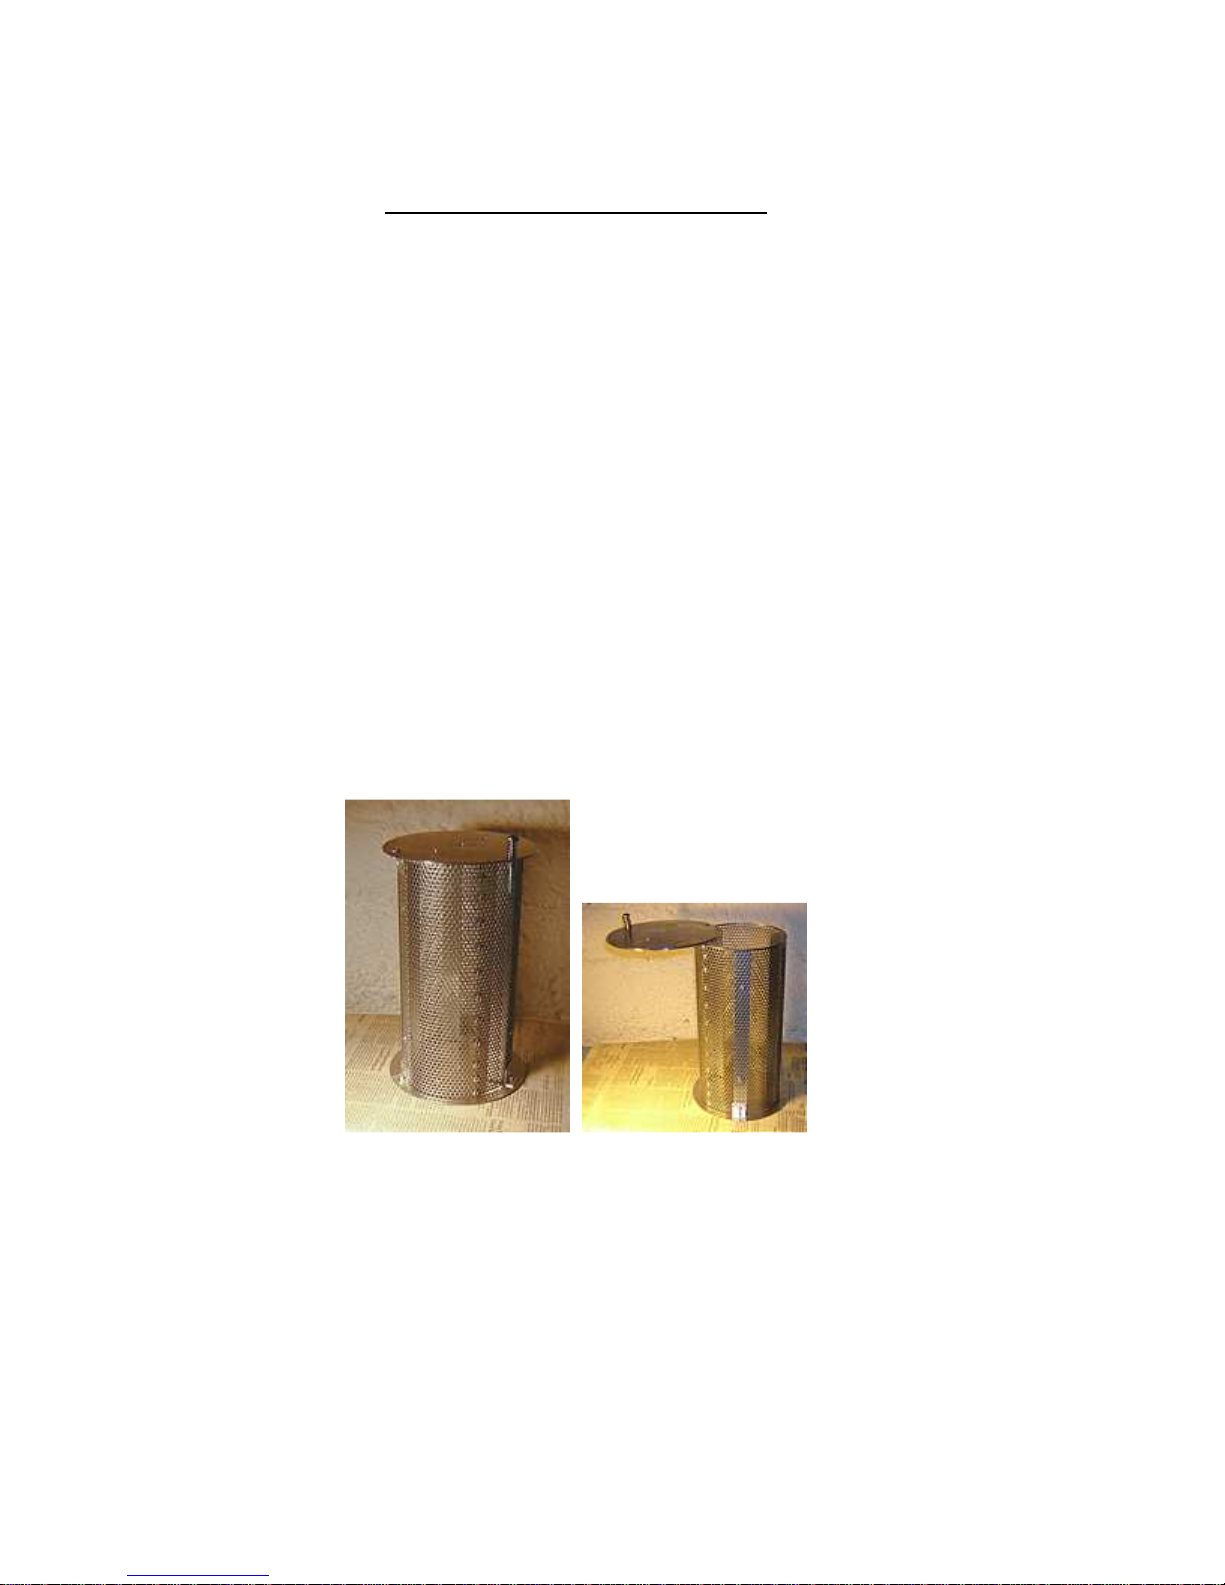
1. Coffee Roaster Drum. Note that only
one end has swingable lid. Be careful of fins on the inside of drum, they are
sharp and can cut!
PDF Created with deskPDF PDF Writer - Trial :: http://www.docudesk.com
Page 2
the remaining gear assembly so that it looks like the following picture:
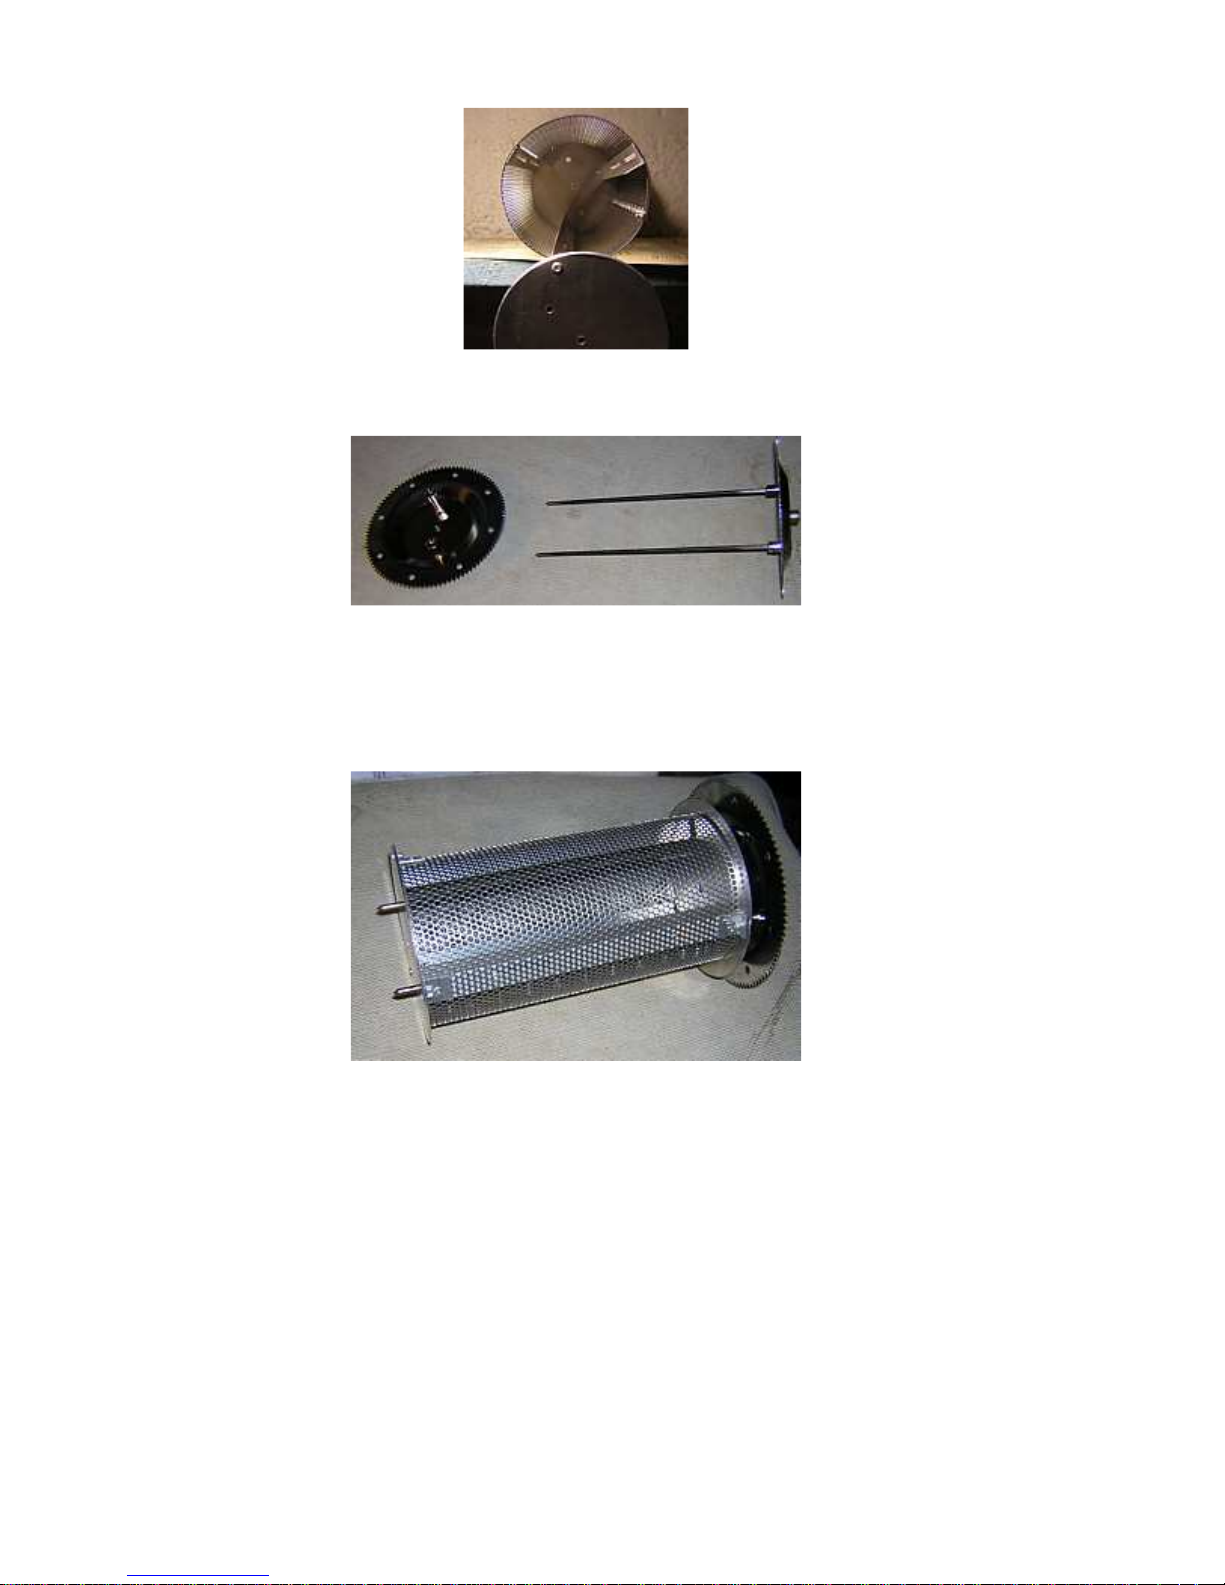
#2. Here is a picture of the drum with showing inside fins.
#3. Here is a picture of the spit rod assembly that fits into the drum unit. When fitting
into the drum assembly, be sure to first enter the drum from the UNDETACHABLE side,
putting the 2 tines into that cap and pushing through until its flanges hit the cap. After
doing such you will then align the swingable cap, making sure the 2 tines stick through the 2 holes provided on
that cap:
REMEMBER: It is prior to putting on the gear assembly, that you would
fill the cylinder with your unroasted coffee beans, making
sure beans do not spill out during this assembly!
After making sure the tines are sticking through that end cap you would then put on
PDF Created with deskPDF PDF Writer - Trial :: http://www.docudesk.com
Page 3
VENTILATED AREA, as it will produce a lot of smoke due to the roasting process. Outdoors is best if
sounds. At this point we are entering what is called a Full City Roast. Much more smoke starts now,
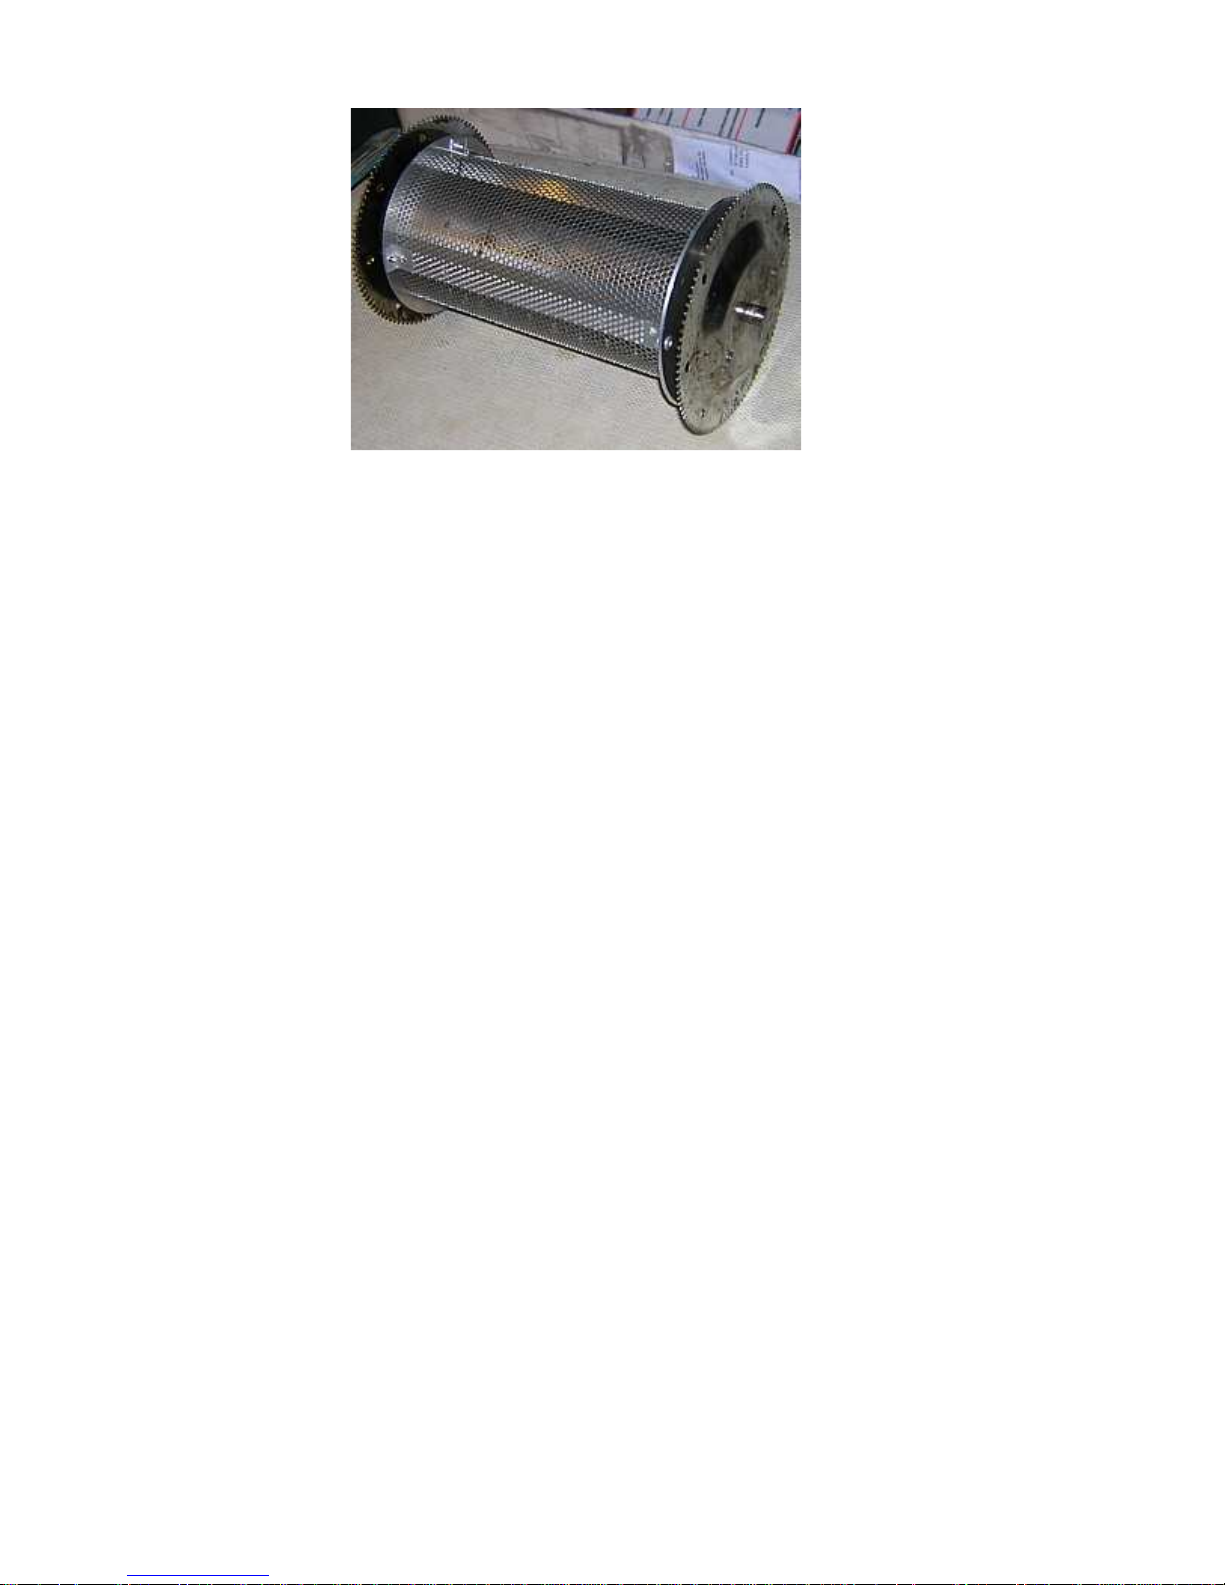
#4. Coffee Roasting Drum with rotisserie assembly fully attached.
THERE YOU HAVE IT! Now just stick it in your RONCO Rotisserie!
ROASTING INSTRUCTIONS
At this point you have the roaster kit filled with filled with up to 1 pounds of
beans. We suggest that you try a smaller amount at first - about 1/2 pound. Or use the 1/2 cup
of beans we supplied.
(CAREFUL!! SOME PARTS MAY BE SHARP and also HOT after use!!)
Put the drum in the Rotisserie, and close the unit.
Turn roaster on, and set for 25 minutes. Make sure you have the roaster in a VERY WELL
you are able to do this.
For the first few minutes the bean remains greenish, then turn lighter yellowish and emit a grassy
smell.
The beans start to steam as their internal water content dissipates.
The steam becomes fragrant. Soon you will hear the "first crack," an audible cracking sound as the
real roasting starts to occur: sugars begin to carmelize, bound-up water escapes, the structure of the
bean breaks down and oils migrate from their little pockets outward.
After the first crack, the roast can be considered complete any time according to your taste. Upon
completion of "First Crack" we generally have a City Roast.
There will then be a short period of hardly any cracking, then you will hear a sharper "second crack"
from the oils of the bean breaking down into various components, and the sugars in the bean
carmalizing and burning.
PDF Created with deskPDF PDF Writer - Trial :: http://www.docudesk.com
Page 4
Nearing completion of second crack we generally have what is called a French Roast.
structure breaks down more and more. The bean will first become an Italian Expresso Roast, further
completely. Remember that they are still cooking, and that due to such you need to stop this cooking
As the roast becomes very dark, the smoke is more pungent as sugars burn completly, and the bean
becoming a very very dark Spanish Roast, then basically charcoal.
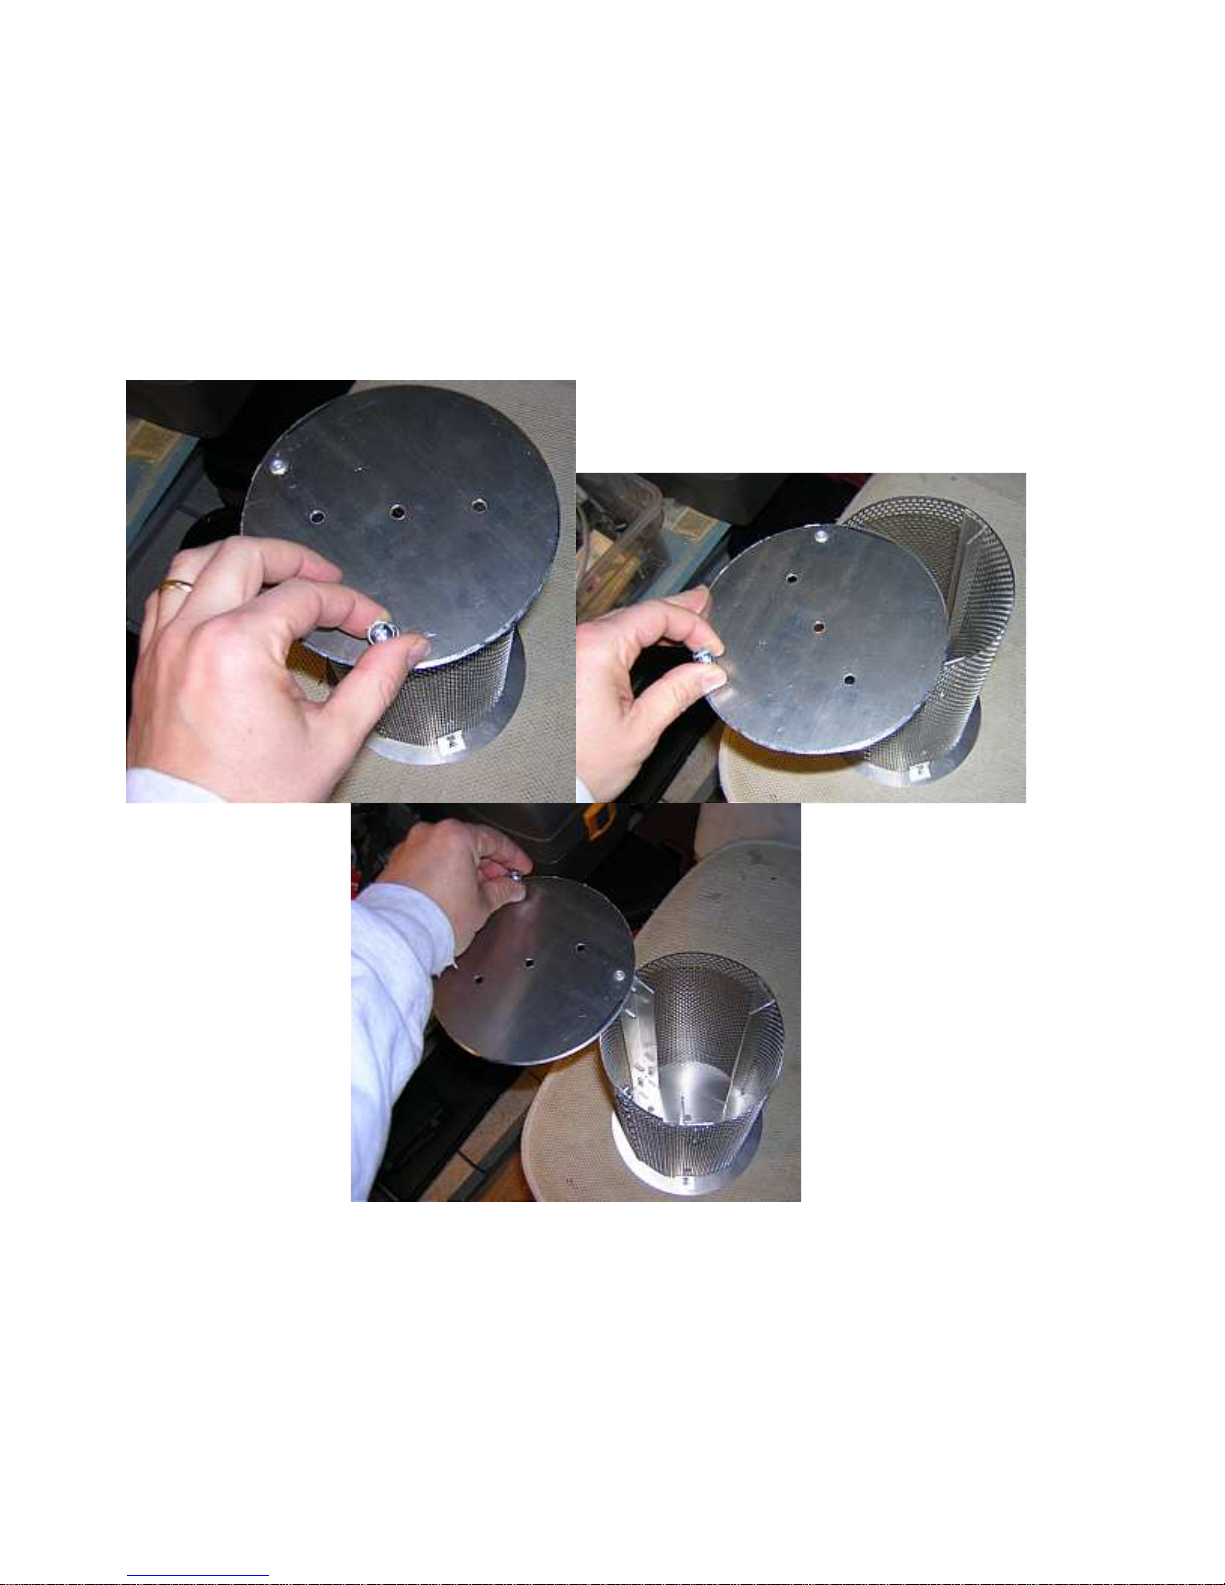
When you get to the point that you desire, it is very important to turn off the Rotisserie and remove
the Coffee Roasting kit, removing the gear assembly enough to swing open the top and pouring out
the beans into an aluminum pan, or equivalent that will not melt or break:
CAUTION!! MAKE SURE YOU USE HEAT PROOF MITTS TO HANDLE THIS VERY
HOT DRUM and all of its parts!
After dumping out the beans be sure to stir them continuously until they have cooled down
process by cooling them off as such.
You will notice "chaff", or bits of dry flakes that have dropped into the drip pan (now chaf collector).
PDF Created with deskPDF PDF Writer - Trial :: http://www.docudesk.com
Page 5

Throw this away. You will also notice such in the coffee beans you have stirred. Please try to
remove this chaf by either blowing on it outside, or vacuuming it up by holding a nozzle over the
you can use in 4 days ... any longer than that and your freshly roasted beans are not considered fresh
beans in the pan. Be sure not to suck any beans up!
Again, you must let your beans "age" for a day (4 hours at the least). Try to make only as much as
any longer!
Any questions please email me at: [email protected]
GOOD ROASTING!
PDF Created with deskPDF PDF Writer - Trial :: http://www.docudesk.com
 Loading...