

DEVON
Installation Sheet
23”/31”/36”
Model:
Note :
Step 1 :
Step 2 :
032523
032531
032536
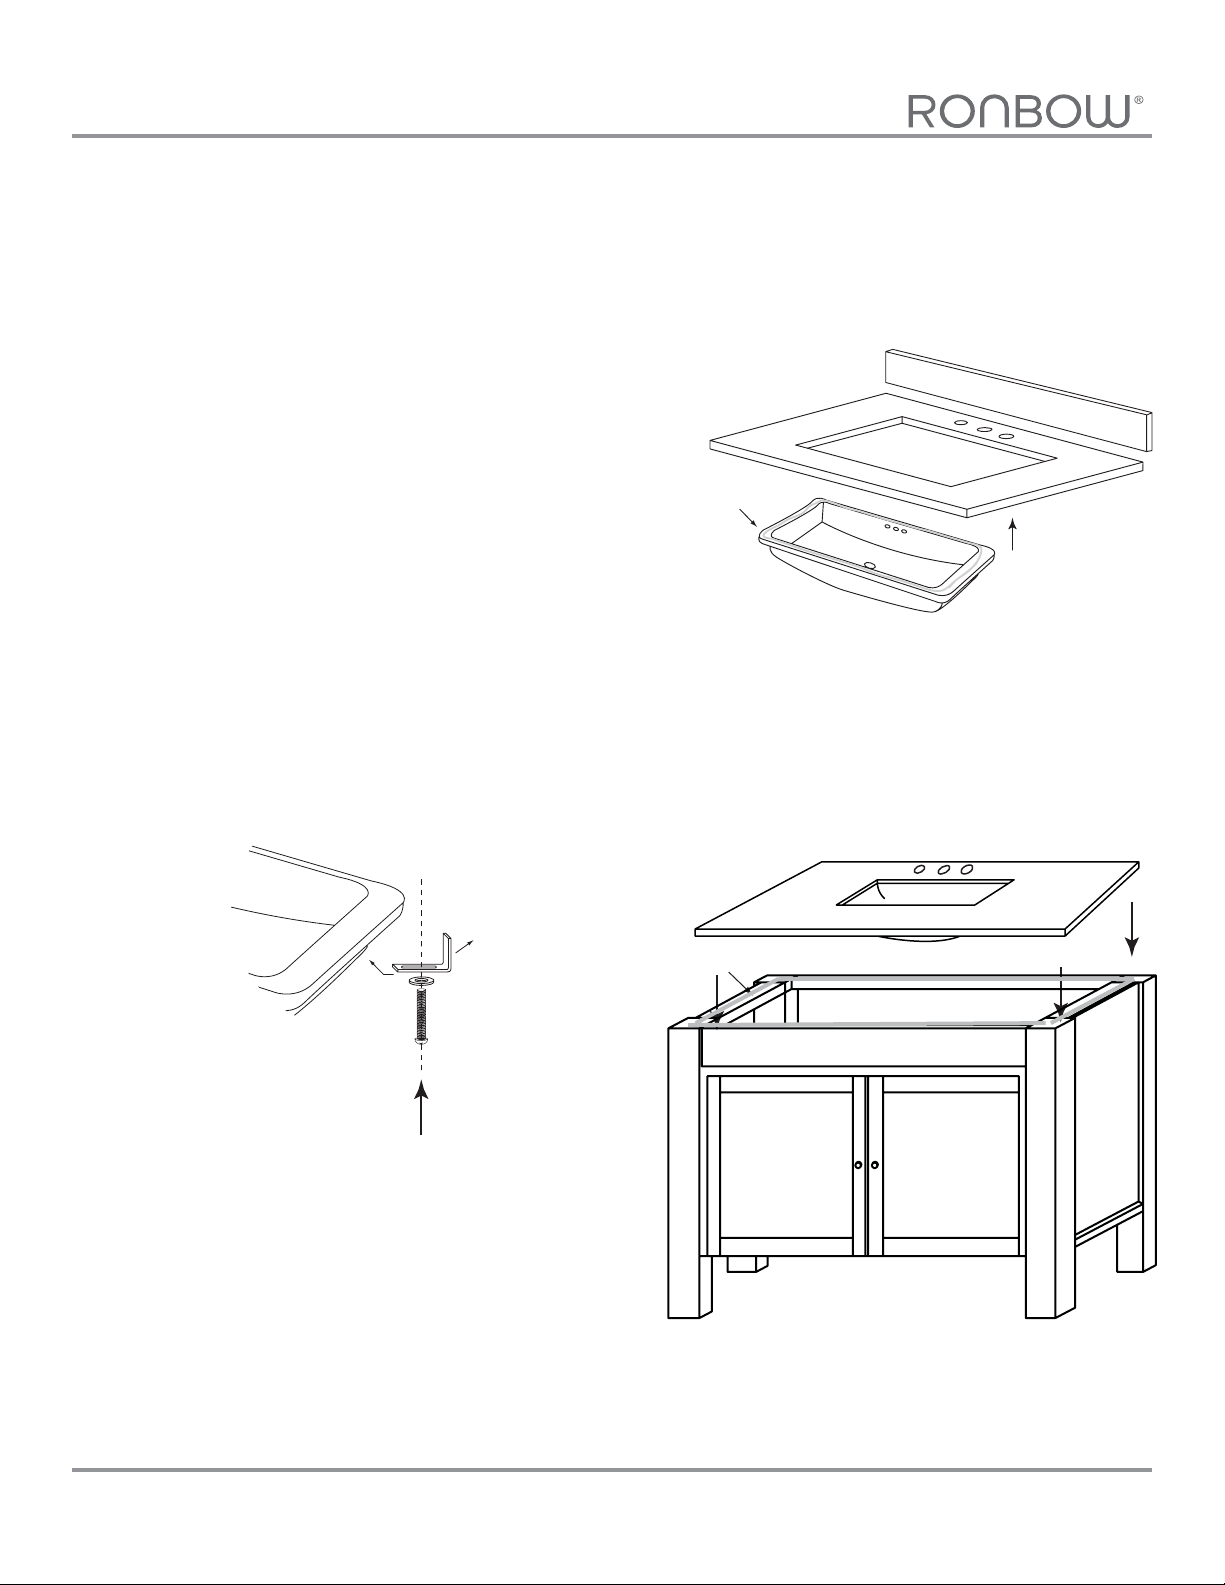
For installing under counter sink with
counter top
Apply adhesive caulking around the
topside of rim near the edge, Carefully
raise sink in place, align, and press firmly
See Figure 1.
Attach 4 undermount-clips to hold
lavatory in place
See Figure 2.
Contempo Collection
Figure 1.
Back Splash
Counter top
adhesive caulking
Figure 2.
Step 3 :
Figure 3.
Undermount Clip
adhesive caulking
Secure top & back splash to cabinet by
using adhesive caulk
See Figure 3.
www.ronbow.com
Ronbow Corporation, All Rights Reserved.
DEVON
Installation Sheet
23”/31”/36”
Model:
Note :
Step 1 :
Step 2 :
032523
032531
032536
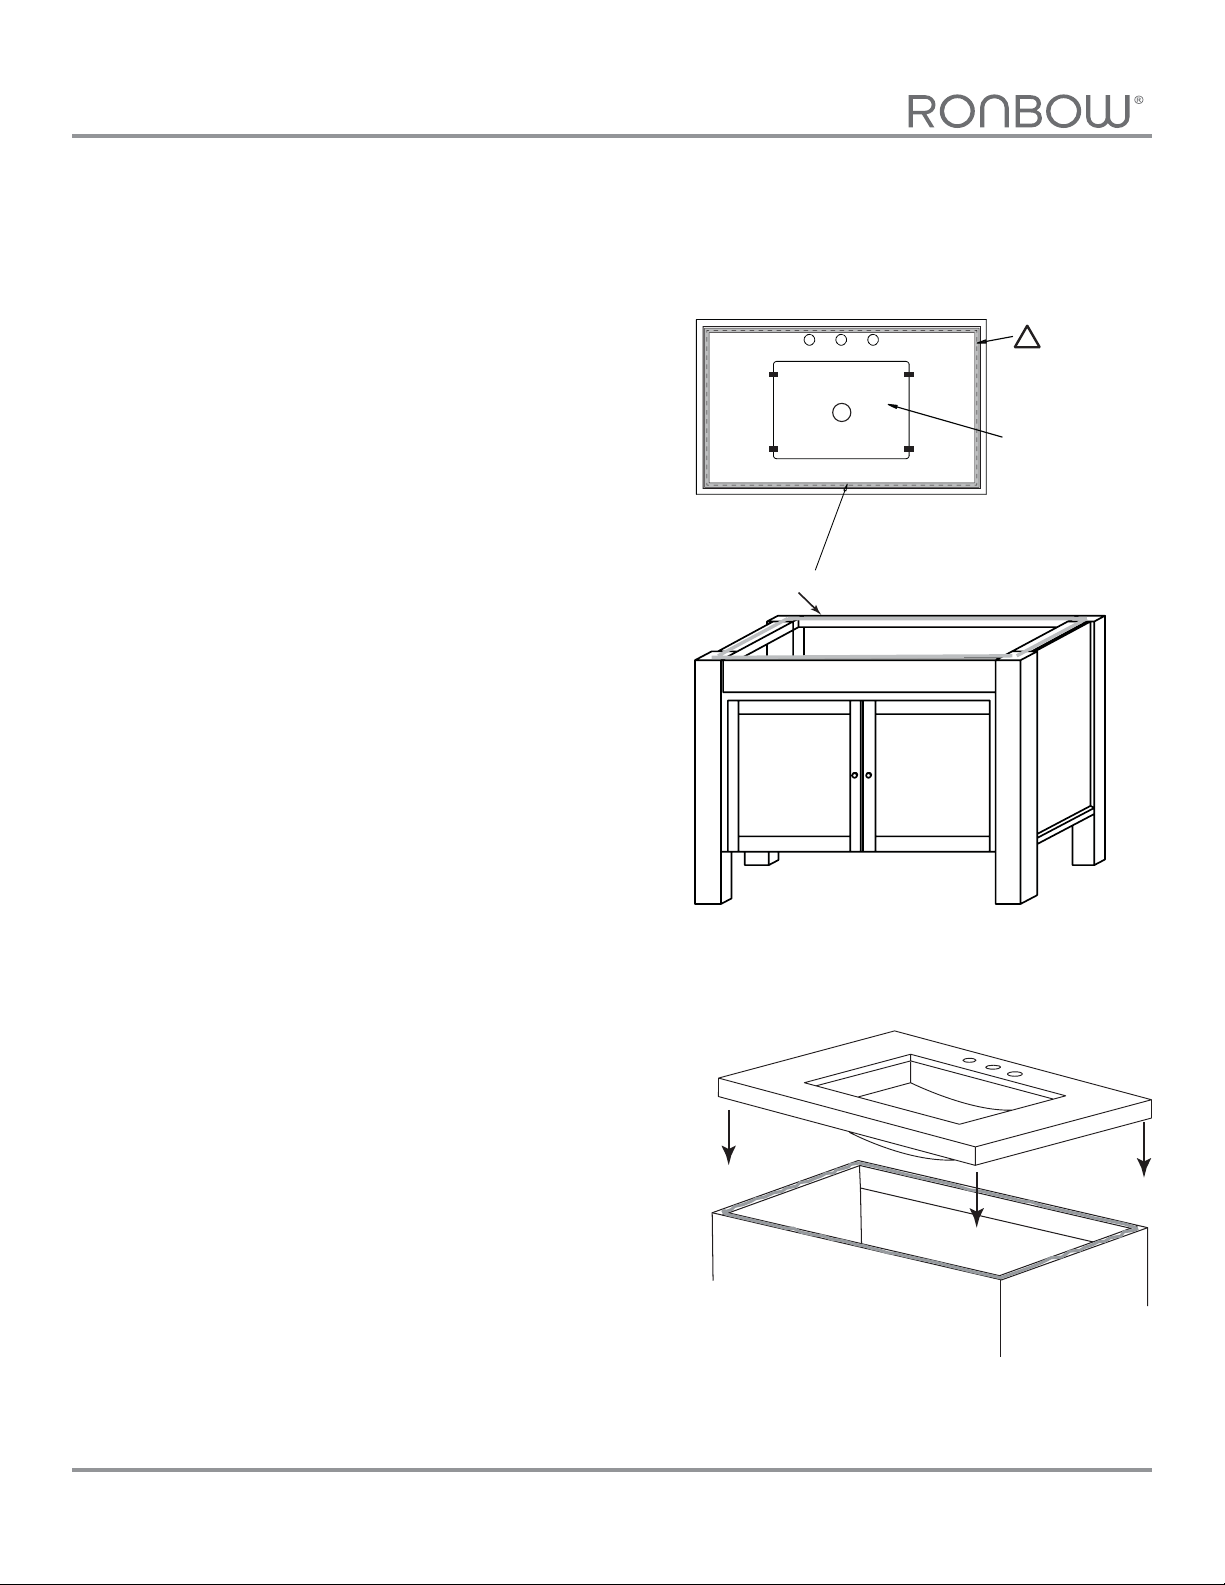
For installing under counter sink with
WideAppeal Top
DO NOT DISCARD WOODEN
INSTALLATION BRACKET!
• Make sure wooden installation
bracket is safely secure
• Install under counter sink by
following specific sink installation
See Figure 1.
• For best results, clean the mounting
surfaces with a dry cleaning cloth
• To prevent over flow of adhesive, use
masking tape to tape o the edges
of the cabinet and the counter top
Figure 1.
Figure 2.
adhesive caulking
Contempo Collection
1. Wooden
!
installation
bracket
2. Undercounter sink
Step 3 :
Apply adhesive on wood bracket and
mounting surfaces of the cabinet
See Figure 2.
Step 4 :
Carefully place countertop on to the
cabinet, align, and press firmly
See Figure 3.
www.ronbow.com
Figure 3.
Ronbow Corporation, All Rights Reserved.

DEVON
Installation Sheet
23”/31”/36”
Model:
Note :
Step 1 :
Step 2 :
032523
032531
032536
For installing Ceramic Sinktop
Place adhesive around top of cabinet
See Figure 1.
Place a generous portion of plumbers’
putty under drain cap and insert
whole drain body inside the bowl and
through the countertop
(There may be a small beveled rubber
washer packaged with your drain, please
discard this and use plumbers’ putty instead)
Contempo Collection
Figure 1.
Figure 2.
Drain Cap
Overflow hole
Thick rubber
washer
Step 3 :
Step 4 :
See Figure 2.
From under the drain, insert the thick
rubber washer and screw on and
tighten the metal nut. Remove excess
plumbers’ putty
See Figure 3.
Attach p-trap to tailpiece
Figure 3.
Drain
Drain Nut
Tailpiece
Metal Nut
Tailpiece
Thick rubber
washer
www.ronbow.com
P-trap
Ronbow Corporation, All Rights Reserved.
 Loading...