

Page 1
AUTOMATE
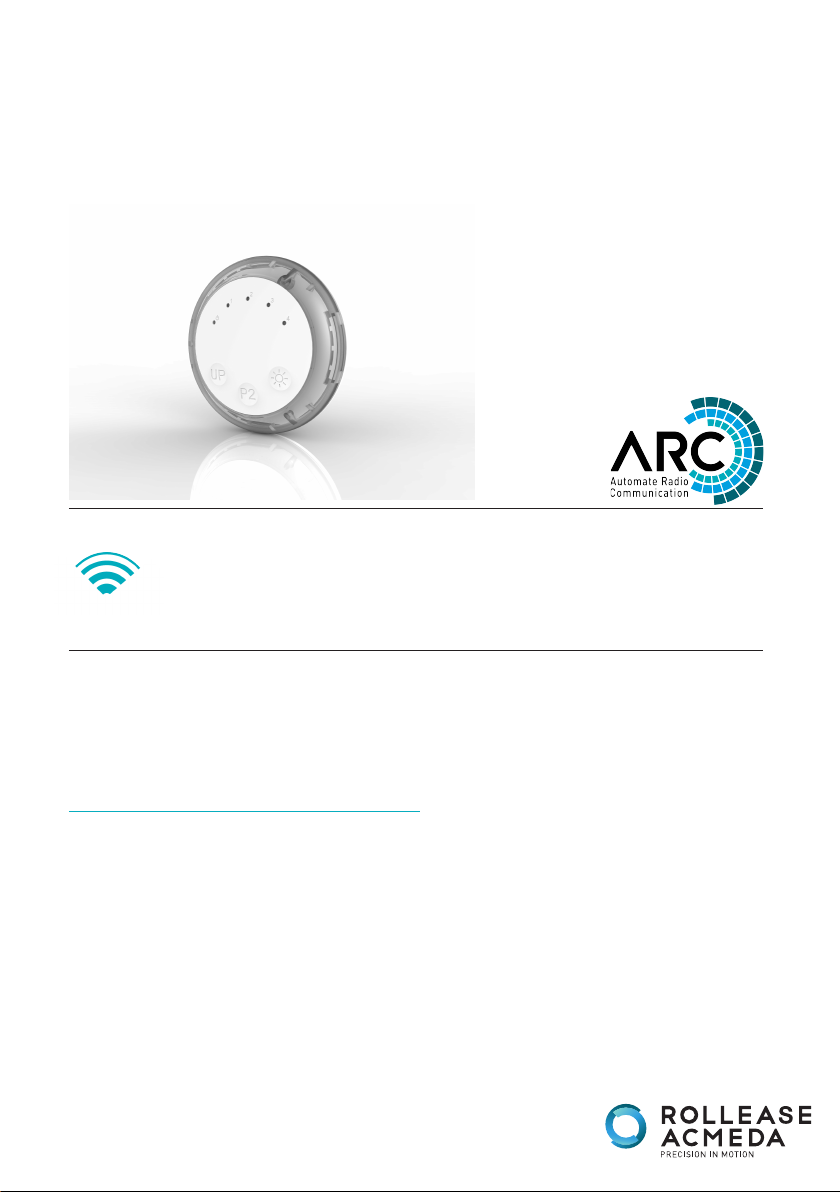
Interior Sun Sensor
433 MHz
Internal sun sensor for automatic shade control.
FEATURES:
• 3 Modes of operation:
- Close Mode
- Open / Close Mode
- Shade Detect Mode
• 4 Light sensitivity levels
• Low battery warning
INSTR. MTRF-SUNSENS V1.1 JULY 2016
Page 2

CONTENTS
1 TECHNICAL DATA / PACK CONTENTS 3
2 SAFETY 4
3 INSTALLATION 5
3.1 Sensor battery 5
3.2 Replacing battery 5
3.3 Mounting 5
4 FUNCTIONAL OVERVIEW 6
4.1 Buttons 6
4.2 Modes 6
4.3 View and change sensor mode 7
4.4 Light levels of light intensity values 7
4.5 Light intensity detection 7
4.6 Low battery notification 7
4.7 UP button 7
5 PROGRAMMING 8
5.1 Protocol selection 8
6 ADDING OR REMOVING SENSOR & CREATING GROUP CONTROL 9
6.1 Using Motor P1 Button 9
6.2 Using a pre-existing Controller 9
7 TROUBLESHOOTING 10
8 NOTES 11
2 | Automate Programming Instructions | Interior Sun Sensor
ROLLEASE ACMEDA
Page 3

1 TECHNICAL DATA / PACK CONTENTS
TECHNICAL SPECIFICATIONS
Voltage: 3V (CR2032)
Standby Current: 5uA
Frequency: 433.92 MHz
Transmitting Power: 10 milliwatt
Ambient Operating Temperature: -10°C -50°C
Light Intensity Level Range: 15 - 75 Klux
Transmission Distance: up to 200 meters (open space)
PACK CONTENTS
1 x Sun Sensor
1 x Instruction Manual
1 x 3V - CR2032 Battery
ROLLEASE ACMEDA Automate Programming Instructions | Interior Sun Sensor | 3
Page 4

2 SAFETY
WARNING: Important safety instructions to be read before installation and use.
Incorrect installation or use can lead to serious injury and will void manufacturer’s liability and warranty.
It is important for the safety of persons to follow the enclosed instructions. Save these instructions for future reference.
• Do not expose to water, moisture, humid and damp environments or extreme temperatures.
• Persons (including children) with reduced physical, sensory or mental capabilities, or lack of experience and knowledge
• should not be allowed to use this product.
• Use or modification outside the scope of this instruction manual will void warranty.
• Installation and programming to be performed by a suitably qualified installer.
• Follow installation instructions.
• For use with motorized shading devices.
• Keep away from children.
• Frequently inspect for improper operation. Do not use if repair or adjustment is necessary.
• Keep clear when in operation.
• Replace battery with correctly specified type.
Rollease Acmeda declares this equipment is in compliance with the essential requirements and other relevant provisions of
R&TT EC Directive 1999/5/EC
This device complies with Part 15 of the FCC Rules / Industry Canada licence-exempt
RSS standard(s). Operation is subject to the following two conditions: (1) this device
may not cause harmful interference, and (2) this device must accept any interference
received, including interference that may cause undesired operation.
Le présent appareil est conforme aux CNR d'Industrie Canada applicables aux
appareils radio exempts de licence. L'exploitation est autorisée aux deux conditions
suivantes : (1) l'appareil ne doit pas produire de brouillage, et (2) l'utilisateur de
l'appareil doit accepter tout brouillage radioélectrique subi, même si le brouillage est
susceptible d'en compromettre le fonctionnement.
Note:
This equipment has been tested and found to comply with the limits for a Class B digital device, pursuant to Part 15 of the FCC
Rules. These limits are designed to provide reasonable protection against harmful interference in a residential installation.
This equipment generates, uses and can radiate radio frequency energy and, if not installed and used in accordance with the
instructions, may cause harmful interference to radio communications.
However, there is no guarantee that interference will not occur in a particular installation. If this equipment does cause
harmful interference to radio or television reception, which Can be determined by turning the equipment off and on, the user is
encouraged to try to correct the interference by one or more of the following measures:
• Reorient or relocate the receiving antenna.
• Increase the separation between the equipment and receiver.
• Connect the equipment into an outlet on a circuit different from that to which the receiver is connected.
•Consult the dealer or an experienced radio/TV technician for help.
Any changes or modifications not expressly approved by the party responsible for compliance could void the user’s authority to
operate the equipment.
Do not dispose of in general waste.
Please recycle batteries and damaged electrical products appropriately.
4 | Automate Programming Instructions | Interior Sun Sensor ROLLEASE ACMEDA
Page 5

3 INSTALLATION
3.1 Sensor battery
3.2 Replacing battery
Pull battery tab out to activate for first use.
Pry open using flat head screw driver
where notches meet on the sensor.
Remove old battery by
pressing up from under the
batterys position.
Push new battery in with the “+”
notches and press together.
3.3 Mounting
1. Ensure surface on glass is clean and free of dust.
2. On the back of the sensor, peel clear plastic off to reveal adhesive.
3. Find desired position on glass for the sensor and press adhesive side to glass.
facing outwards.
Replace cover by aligning
ROLLEASE ACMEDA Automate Programming Instructions | Interior Sun Sensor | 5
Page 6

4 FUNCTIONAL OVERVIEW
4.1 Buttons
Light Level Indicator
Up
P2
Change Light Level
4.2 Modes
Mode 1 - DEFAULT
Close Mode
Pre-set light level reached Pre-set light level reached Pre-set light level reached
Light level stays above pre-set
for 2 mins
Blind goes down Blind goes down Blind goes down until sensor is
Blind stays down Light < pre-set for >15 mins Blind goes up until sensor is
Mode 2
Open / Close Mode
Light level stays above pre-set
for 2 mins
Mode 3
Shade Detect Mode
Light level stays above pre-set
for 2 mins
covered
uncovered
Blind goes back up Light < pre-set for > 15 mins
Blind goes back up
6 | Automate Programming Instructions | Interior Sun Sensor ROLLEASE ACMEDA
Page 7

4.3 View and change sensor mode
To view the current mode, press the SUN button for one second
1 blink indicates mode 1
2 blinks indicate mode 2
3 blinks indicate mode 3
To change the mode:
Hold the SUN button until the LED blinks 5 times. The mode has now shifted up by one. E.g. Mode 2 has
changed to Mode 3.
4.4 Light levels of light intensity values
0 Level Not Operational
1 Level 15kLUX
2 Level 30kLUX
3 Level 45kLUX
4 Level 60kLUX
To Change light level setting: Press the SUN key repeatedly until the desired light level flashes.
4.5 Light intensity detection
Press the SUN and P2 buttons for once second Hold the sensor toward the light
Response
The unit will indicate light level
4.6 Low battery notification
When the battery needs changing, the currently selected light level LED will blink every 2 minutes
4.7 UP button
The up button can be used to manually overide the sensor and tell the shade to go up.
ROLLEASE ACMEDA Automate Programming Instructions | Interior Sun Sensor | 7
Page 8

5 PROGRAMMING
IMPORTANT
Please refer to the relevant documentation of your motor model for instructions on adjusting motor settings.
5.1 Protocol selection
This device can be configured to operate Acmeda line “EL” motors. (The default mode is ARC protocol).
To toggle between ARC & EL modes follow the following steps.
HOLD P2 whilst inserting battery
To check which mode the sensor is currently in, press the UP or P2 button briefly.
Acmeda “EL” Protocol: The current LED will blink slowly 4 times to indicate that the old protocol is
currently set.
ARC Protocol: The current LED will blink fast 8 times to indicate that the new (ARC) protocol is currently
set.
8 | Automate Programming Instructions | Interior Sun Sensor ROLLEASE ACMEDA
Page 9

6 ADDING OR REMOVING SENSOR & CREATING GROUP CONTROL
6.1 Using Motor P1 Button
Hold P1 button on motor head. Hold P2 on sensor to add or remove.
Motor Response Motor Response
6.2 Using a pre-existing Controller
Press P2 on existing
controller.
Motor Response Motor Response Motor Response
IMPORTANT
Consult user manual for your
controller or sensor.
ROLLEASE ACMEDA Automate Programming Instructions | Interior Sun Sensor | 9
Press P2 on existing
controller.
Press P2 on new sensor.
Page 10

7 TROUBLESHOOTING
Problem Cause Remedy
Sensor battery is discharged Replace battery (Ref. Section 3.2)
Motor is not responding
Battery is inserted incorrectly
Radio interference / Shielding
Sensor distance is too far from
motor
Power failure
Incorrect wiring
Check battery polarity
(Ref. Section 3.2)
Ensure remote is positioned away
from metal objects and that aerial on
motor or reciever is kept straight and
away from metal.
Move sensor to a closer position
Check power supply to motor is
connected and active
Check wiring is connected correctly
(refer to motor installation
instructions)
10 | Automate Programming Instructions | Interior Sun Sensor ROLLEASE ACMEDA
Page 11

8 NOTES
ROLLEASE ACMEDA Automate Programming Instructions | Interior Sun Sensor | 11
Page 12

ROLLEASE ACMEDA
AUSTRALIA
110 Northcorp Boulevard,
Broadmeadows VIC 3047
T +61 3 9355 0100 | F +61 3 9355 0110
ROLLEASE ACMEDA
USA
200 Harvard Avenue
Stamford, CT 06902 6320
T +1 203 964 1573 | F +1 203 964 0513
ROLLEASE ACMEDA
EUROPE
Via Conca Del Naviglio 18, Milan
(Lombardia) Italy
T +39 02 8982 7317 | F +39 02 8982 7317
info@rolleaseacmeda.com
rolleaseacmeda.com
Western Australia Branch
Unit 1, 41 Mulgul Road,
Malaga WA 6090
T +61 8 9248 5571 | F +61 8 9248 5572
12 | Automate Programming Instructions | Interior Sun Sensor
Queensland Branch
Unit 2/62 Borthwick Avenue,
Murarrie QLD 4172
 Loading...