

Page 1
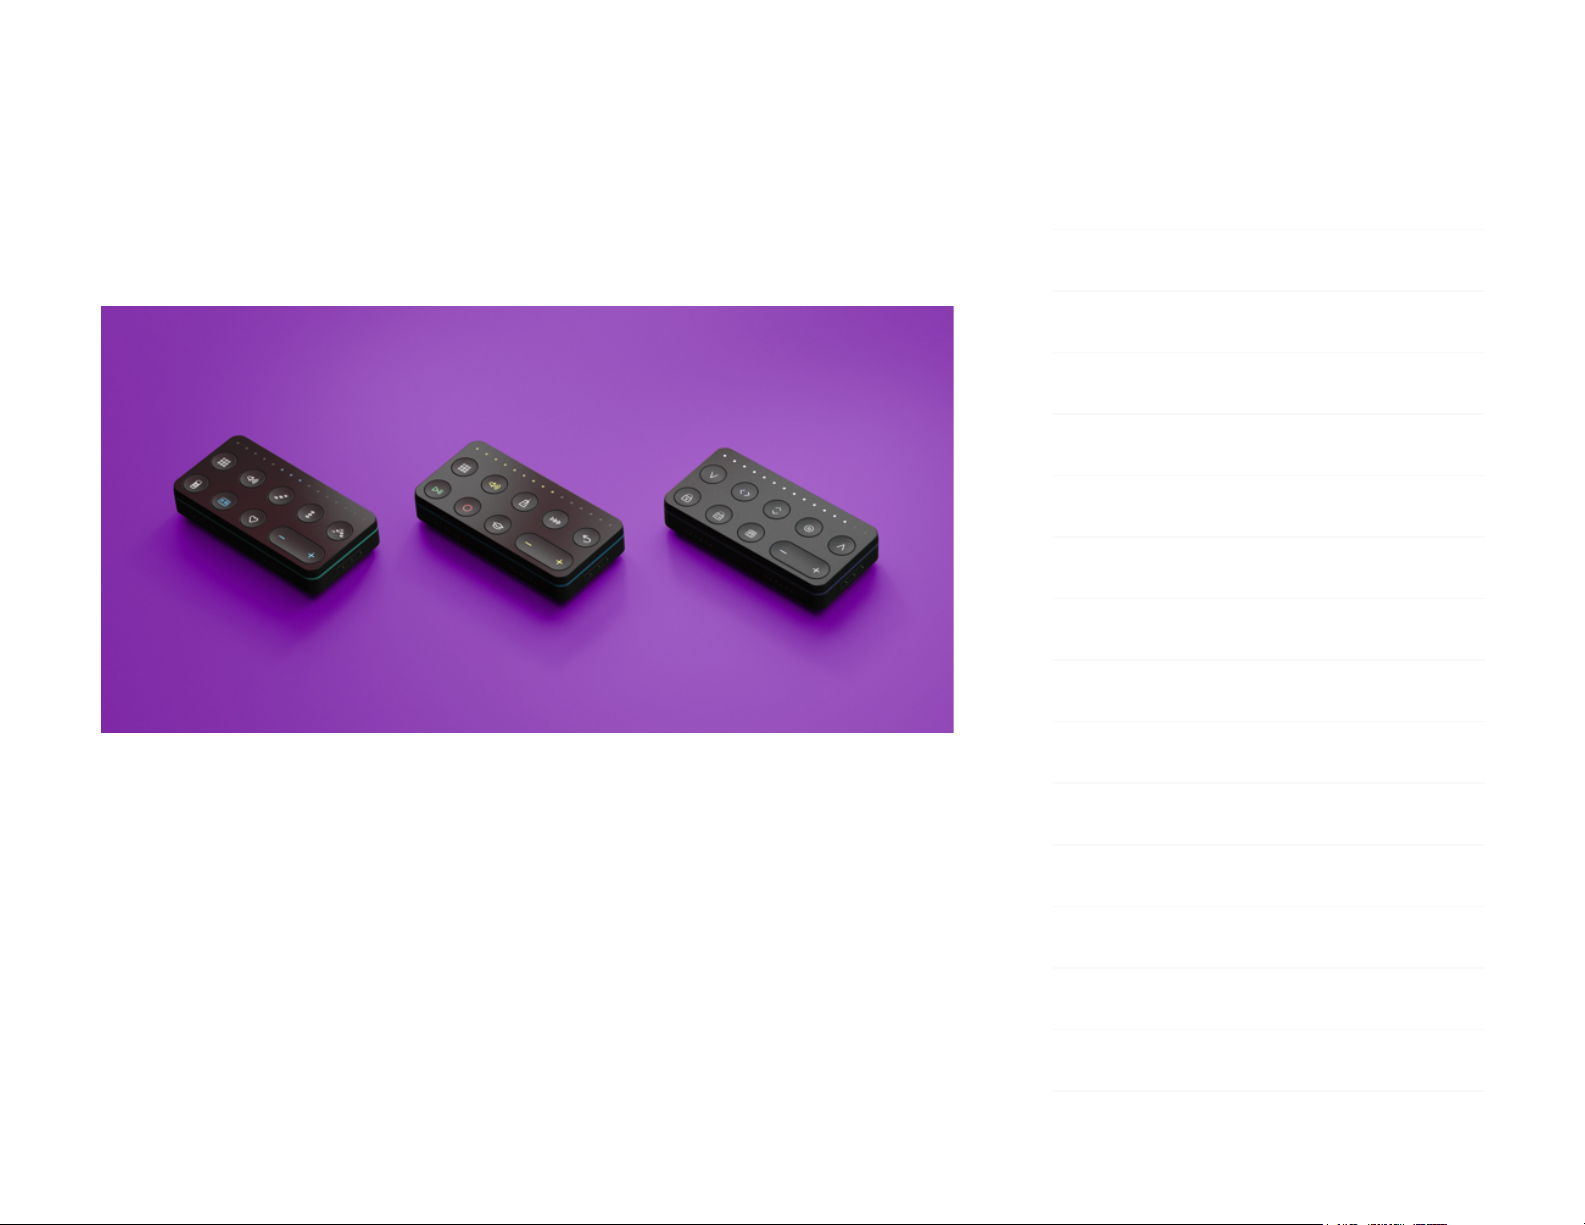
Control Blocks (Live, Loop, Touch)
Creator Manual
1 Introduction – Control Blocks (Live,
Loop, Touch)
Introduction
Hello creator, and welcome to the Creator Manual for Control Blocks –
including the Live Block, Loop Block, Touch Block, and Developer Kit Control
Block. We think of the people who buy and use ROLI’s products as creators
more than customers. Our products are designed to expand the bandwidth of
creative expression and thereby empower people as the creators they are.
1 Introduction – Control Blocks (Live, Loop,
Touch)
2 Glossary of Selected BLOCKS Terms
3 Start
3.1 What are Control Blocks?
3.2 System Requirements
3.3 Charging Your Control Block
3.4 Connecting Your Blocks
3.5 Registering Your Block
3.6 Updating Firmware
4 Control Block Features
4.1 The Front Panel
4.2 Live Block Buttons
4.3 Loop Block Buttons
4.4 Touch Block Buttons
4.5 Developer Kit Control Block Buttons
5 Control Block Appendix
Page 2

Everyone who buys and uses BLOCKS is investing in this vision of creativity and
therefore is also a co-creator of ROLI.
BLOCKS is the most accessible and versatile music creation system ever made.
It is a modular music studio that lets anyone make music whether they’re a
professional musician or a total beginner. Each individual Block is powerful and
intuitive, offering unique capabilities that let people make music in simple but
far-reaching ways. The Blocks connect together to create customisable kits that
suit any budget, skill level, and musical style. With a click of magnetic
connectors, music-makers can build their own instruments as they go.
In the next section we have included a short list of terms specific to BLOCKS.
We will refer to these terms throughout this Creator Manual.
Please note that this is a digital manual updated regularly to reflect software
updates and other improvements. This manual is current up to NOISE v2.4.0.
Support and Feedback
We want you to have the best experience possible with our products and
would love to hear your feedback. Should you have any questions, are
experiencing any problems, or just want to say hello, please don’t hesitate to
get in touch.
The easiest way to reach us is to send a support enquiry from support.roli.com.
We will respond as quickly as possible.
2 Glossary of Selected BLOCKS Terms
BLOCKS
Page 3

A modular music studio built of individual Blocks, each with specific
capabilities, that connect together physically through BLOCKS DNA connectors
and wirelessly through Bluetooth.
Block(s)
The individual hardware components of the BLOCKS system including the
Lightpad Block, Live Block, Loop Block, Seaboard Block, Touch Block, and
Developer Kit Control Block.
BLOCKS Dashboard
A desktop application for modifying and customising the internal settings of
Blocks, making it easy to use BLOCKS with third-party digital audio
workstations and synthesizers.
BLOCKS DNA Connectors
Six-pin connectors that magnetically connect multiple Blocks and also transmit
power and data between the Blocks. Each Control Block has six DNA
Connectors.
Control Block
Any one of several different Blocks with ten buttons and a row of LEDs,
designed to control NOISE functions. Control Blocks include the Live Block,
Loop Block, Touch Block, and Developer Kit Control Block. Control Blocks can
also send MIDI messages to third-party applications.
Equator Player
Based on Equator – ROLI’s custom-built, multi-dimensional sound engine and
software synthesizer – Equator Player is a Windows and MacOS app included
with the Lightpad Block and Seaboard Block. Equator Player takes advantage of
Page 4

the Seaboard Block’s 5 dimensions of touch, maximizing your ability to express
yourself using just the motions of your fingers on your Seaboard Block’s
keywaves and Lightpad Block’s playing surface. It features a simplified user
interface that allows you to easily modify the most important characteristics of
a preset. If you’d like to create your own sounds and have full control of
Equator you may upgrade to the full version of Equator.
The Five Dimensions of Touch (5D Touch)
The feature of real-time control and modulation of sound through the basic
movements of Strike, Press, Glide, Slide, and Lift.
Strike: The velocity and force with which a finger makes contact with the
Lightpad Surface.
Press: The pressure and continuous touch applied to the Lightpad Surface
after the initial Strike.
Glide: Horizontal left and right movements on Lightpad Surface.
Slide: Vertical movements up and down the Lightpad Surface.
Lift: The release velocity or speed of liftoff from Lightpad Surface.
Grid
A fixed configuration of pads on the NOISE interface and the Lightpad Block
surface. Possible grid layouts include 2×2, 4×4, and 5×5. In each grid layout,
the number of pads is the same on the X and Y axis.
Keywave
A wavelike element of the keywave surface of Seaboards that corresponds to a
single key on a standard keyboard. Each of the Five Dimensions of Touch can
be accessed on a single keywave.
Page 5

Keywave surface
The entire playing Seaboard surface including all keywaves and the ribbons
above and below them. The keywave surface corresponds to a keyboard.
Lightpad Block
A Master Block and the central Block in the BLOCKS system. The Lightpad Block
features an illuminated tactile surface that enables creators to shape sound
through Five Dimensions of Touch: Strike, Glide, Slide, Press, and Lift. When
paired with NOISE it builds sequencing, looping, finger drumming and
expressive control into one intuitive device. It can also be used with BLOCKS
Dashboard to expressively control digital audio workstations and software and
hardware synthesizers.
Lightpad Surface
The 15×15 LED matrix made up of individual cells (225) and covered with laser-
etched silicone which makes up the surface of the Lightpad Block and enables
users to play multidimensional or 5D Touch performances.
Live Block
A Control Block that provides quick access to music performance functions, so
creators can be more expressive in real time. The Block’s 10 buttons include
controls for switching scales and octaves, playing chords and arpeggios, and
sustaining notes in NOISE. The Live Block can also be used with BLOCKS
Dashboard to transmit MIDI CC messages in order to control digital audio
workstations and software synthesizers.
Loop Block
Page 6

A Control Block that provides quick access to music production functions so
creators can easily layer sounds into a song in NOISE. The Block’s 10 buttons
include controls for setting a tempo, recording loops, and quantizing loops so
they snap in time with the tempo. The Loop Block can also be used with
BLOCKS Dashboard to send MMC messages to control the trasport functions of
digital audio workstations, and it can also transmit MIDI CC messages in order
to control digital audio workstations and software synthesizers.
Master Block
Master Blocks – including the Lightpad Block and Seaboard Block – are the
central Blocks of the BLOCKS system. To use BLOCKS you need at least one
Master Block. Additional Blocks, including Control Blocks, connect via DNA to
the Master Block.
MPE
Multidimensional Polyphonic Expression (MPE) is a protocol for using standard
MIDI messages to communicate with and enable the operation of
multidimensional instruments such as the Seaboard and BLOCKS. MPE enables
independent, per-note control of multiple sound parameters such as pitch and
timbre.
NOISE
A free modular music app that lets anyone create beats, melodies and songs
using simple, easy-to-learn gestures on the touch screens of mobile devices.
The app’s expressive power can be expanded with BLOCKS. It is at the heart of
the BLOCKS system.
Pad
Page 7

A square that corresponds to a note in the grid layout of the Lightpad Block
and NOISE.
Seaboard Block
The Seaboard Block pairs the powerfully expressive keywave surface of the
Seaboard GRAND and Seaboard RISE with the portability and modularity of
BLOCKS. It is a Master Block and includes 24 keywaves as well as lower and
upper octave switches. Multiple Seaboard Blocks can connect together to
create an extended playing surface.
Touch Block
A Control Block that adjusts the responsiveness of the Seaboard Block’s and
Lightpad Block’s 5D Touch when used with NOISE or desktop applications. The
Touch Block’s 10 buttons control the sensitivity of Strike, Glide, Slide, Press,
and Lift, lock Strike or Glide, or put the Seaboard Block into “piano mode,” by
turning off Glide. The Touch Block can also be used with BLOCKS Dashboard to
transmit MIDI CC messages in order to control digital audio workstations and
software synthesizers.
USB-C
The type of USB connector used to connect and charge the Lightpad Block and
Seaboard Block. There is a female connector on the block itself, and a male
connector on the included USB-C-to-USB-A cable.
3 Start
Page 8
3.1 What are Control Blocks?
Whether you’re playing live or in the studio, every second counts, and there’s
no time for browsing through menus. Control Blocks make it even easier to
Page 9

perform and produce music on BLOCKS with NOISE by putting the most
frequently used functions for performance and production in immediate reach.
In addition, each Control Block can be used with BLOCKS Dashboard to
transmit MIDI CC messages in order to control digital audio workstations and
software synthesizers.
Live Block
The Live Block’s 10 buttons include controls for mode, volume, scales, chord,
arpeggiator, sustain, octave, and favouriting NOISE presets.
Loop Block
The Loop Block’s 10 buttons include controls for mode, volume, tempo, snap,
undo, playing/recording loops, learn, and more.
Touch Block
The Touch Block’s 10 buttons control the sensitivity of the five dimensions of
touch, lock Strike or Glide settings, and put the Seaboard Block into “piano
mode” by turning off dimensions of touch.
Developer Kit Control Block
The Developer Kit Control Block is part of the Developer Kit and allows
developers to create apps for BLOCKS. The Developer Kit Control Block
includes eight switches with RGB LEDs, numbered 0–7 and a –/+ dual button.
When connected to NOISE, the Developer Kit Control Block behaves as a Loop
Block.
3.2 System Requirements
Page 10

For use with NOISE:
Master Block (Lightpad Block or Seaboard Block)
iOS 9 or higher
One of the following iOS devices:
iPhone 6 or higher
iPhone SE
iPad Mini 4 or higher
iPad Air 2
iPad Pro (9.7 and 12.9 inches)
iPod Touch 6th Generation
What about Android?
NOISE is currently available in an early access beta version for Google Pixel and
Samsung S8. More devices will be supported when NOISE for Android is fully
released.
For use with BLOCKS Dashboard:
Mac OSX 10.11 or later
Windows 10*
Minimum RAM: 4GB
Recommended RAM: 8GB
Processor: 2.5GHz Intel Core i5 or faster
For Bluetooth connectivity: OSX 10.10+
* BLOCKS Dashboard works with devices running Windows 10 and above.
However, BLOCKS Dashboard beta does not currently support firmware
updates via Windows due to technical limitations outside of our control.
Page 11

Creators who plan to use BLOCKS Dashboard beta with Windows 10 will need
to update their Blocks either via NOISE on an iOS device or BLOCKS Dashboard
on a MacOS device prior to using it with their PC.
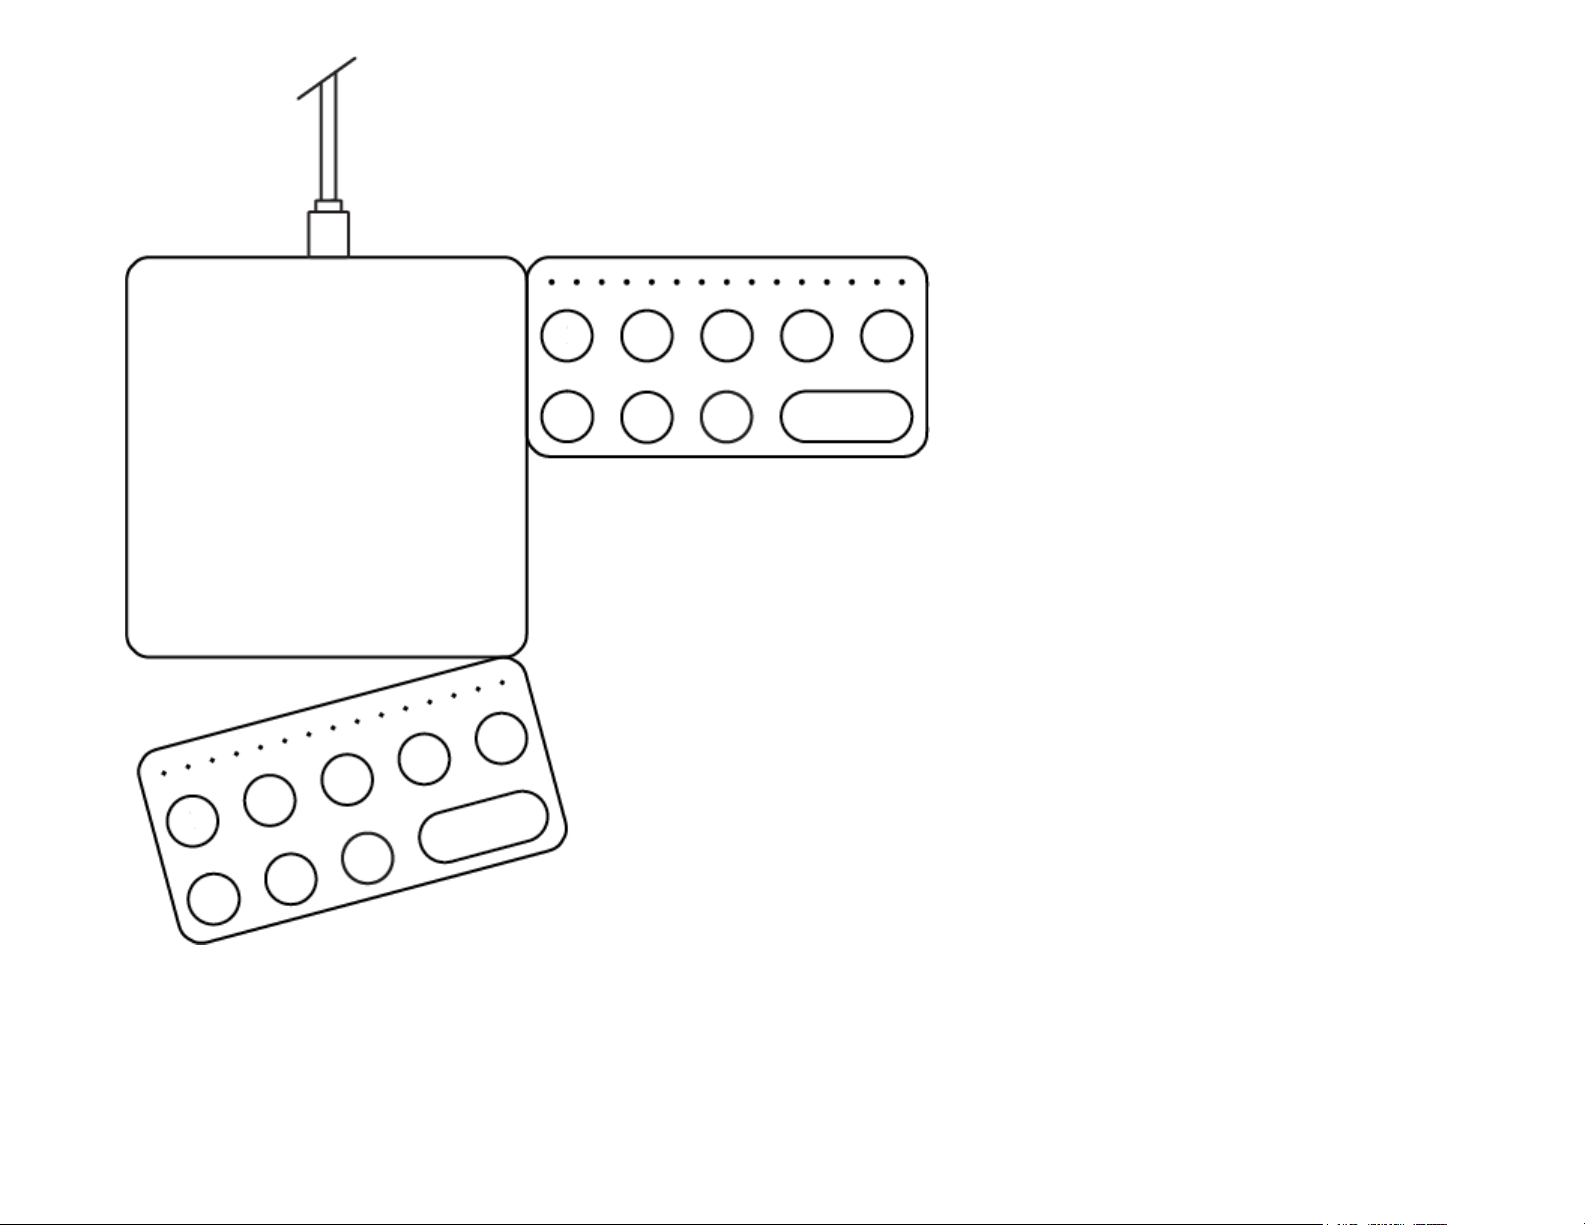
3.3 Charging Your Control Block
First, make sure that your Control Block is adequately charged. To charge your
Control Block, connect it via DNA to a Master Block – either a Lightpad Block or
Seaboard Block – that is connected to a USB 3 power source:
Connect a Lightpad or Seaboard Block to a USB 3 power source (like an
iPad charger or Macbook USB 3 port) with the included USB-C cable.
Page 12

Connect the Control Block to the Lightpad or Seaboard Block via DNA
connectors to begin charging it.
For fastest charging times, turn the Blocks off during charging.
Page 13

In detail: The Lightpad Block requires 5 watts to charge while operating.
Adding a Control Block will add 2.5 watts (7.5 watts total). A BLOCKS system
including a Lightpad Block + Live Block + Loop Block, for example, requires 10
watts total. We recommend using an iPad charger or a USB 3 charger with an
output of 10 watts or higher. Please refer to the table in the Appendix for
charging times.
3.4 Connecting Your Blocks
After you’ve charged your Control Block you’ll be ready to connect it to NOISE.
There are two ways to connect a Control Block to NOISE:
1. Physically attach it to one of the available DNA connectors on a Master
Block like the Lightpad or Seaboard Block, and connect the Master Block
via Bluetooth to NOISE; or
2. Connect the Control Block to NOISE via Bluetooth and do
not
connect it
physically via DNA to other Blocks.
Option 1: DNA Connection
Switch your Blocks on. If you are registering additional Blocks you may turn
them all on to register them simultaneously.
Open NOISE, press the Settings cog in the top right corner of the NOISE
app and select ‘Connect BLOCKS’.
Choose your ‘Seaboard Block’ or ‘Lightpad Block’ from the Bluetooth MIDI
Devices screen to complete MIDI-over-Bluetooth pairing.
Physically attach the Control Block to an available DNA connector on the
Lightpad or Seaboard Block.
(Note: Control Blocks should be connected to
NOISE either by DNA or by Bluetooth but not by both.)
Page 14

The Control Block will automatically turn on. If it does not, simultaneously
press the two leftmost buttons.
Option 2: Bluetooth Connection
Turn your Control Block on by pressing the two leftmost buttons
simultaneously.
Open NOISE, press the Settings cog in the top right corner of NOISE’s main
screen, and select ‘Connect BLOCKS’.
Choose your Block from the Bluetooth MIDI Devices screen to complete
MIDI-over-Bluetooth pairing.
If you also purchased other Control Blocks you can connect them now
following the same steps above.
3.5 Registering Your Block
Once your Block is connected, you’ll want to register it. This will ensure you
have access to any bundled soundpacks or software.
First, if you haven’t already signed in to NOISE, go to the Settings menu and
tap “Log In.” If you haven’t already created an account, tap “I don’t have an
account” and create a new account. Otherwise enter your email address and
password to log in.
Next, with your your Blocks are connected, go to NOISE’s Settings menu
and select “Register Block.”
Page 15

Your Blocks will now be registered to your account.
If you are prompted to update the firmware, you should do so now (see
below).
You are now connected and ready to make music.
If you are using Blocks with third-party applications rather than with NOISE, you
may also register your Blocks on My ROLI. Once you’ve created a MyROLI
account, click “Register a Product.” Enter the serial number found on the
bottom of your Block for both the “Product Registration Code” and “Serial
Number” fields, and then click “Register.”
3.6 Updating Firmware
You may be prompted to update the firmware during this setup. It’s highly
recommend that you update to the latest firmware as periodic updates
improve functionality and introduce new features.
To update the firmware, launch NOISE and connect your Block. In NOISE’s
Settings menu, tap “Update Firmware.” NOISE will look for BLOCKS updates. If
there are new firmware updates, you may select “Update.”
Note: only one Block at a time should be connected via Bluetooth to NOISE
while updating the firmware, and Blocks should be disconnected from
each other via DNA.
The update will take a few minutes to process. When the update is finished,
your Block will restart. After your Block restarts, reconnect it to NOISE by
clicking “OK,” and then in the Settings menu tapping on “Connect Blocks” and
selecting the name of your Block.
Page 16

Blocks need acertain amount of battery remaining in order to update the
firmware. If you are not able to update your Block’s firmware, make sure it is
charged and try again.
To re-connect your Control Block to NOISE after updating the firmware simply
use either option 1 or 2 above.
4 Control Block Features
4.1 The Front Panel
The Indicator Strip
The Indicator Strip comprises 15 LEDs along the top of each Control Block. The
Indicator Strip provides visual feedback on parameters when used with NOISE.
It also serves as a battery indicator for Control Blocks when they are
disconnected from Bluetooth.
Power On / Power Off
To turn Control Blocks on or off, simultaneously press and hold the two buttons
closest to the left edge.
Buttons
In addition to the Indicator Strip, each Control Block’s front panel features 8
function buttons and a minus/plus button. The following sections describe
what each button of each Control Block does when connected to NOISE.
(For
information on using Control Blocks with BLOCKS Dashboard, please see the
BLOCKS Dashboard Creator Manual.)
Page 17

4.2 Live Block Buttons
Mode
This button cycles through the four instrument slots. It can also
be pressed with the Sustain buttonto power the Live Block on or
off.
Volume
This button in conjunction with the + / – button controls volume.
Scale
Page 18

This button turns Scale “ON” or “OFF”. Use the – / + buttons to
select a scale. Available scales include: Major, Minor, Harmonic
Minor, Pentatonic Neutral, Pentatonic Major, Pentatonic Minor,
Pentatonic Blues, Dorian, Phrygian, Lydian, Mixolydian, Locrian,
Whole Tone, Arabic (A), Arabic (B), Japanese, Ryukyu, 8-Tone
Spanish, and Chromatic. The LED Indicator displays the Scale as a combination
of whole steps and half steps.
Chord
This button has 3 functions:
1.) Press once to turn Chord “ON” for the selected Solo
Instrument. Then use – / + to select a chord.
2.) Press a second time to lock the currently selected Chord. The – / + button
will now return to their previous function of changing presets.
3.) Press a third time to turn Chord “OFF”.
The available Chords include: Octave, 5th, Major, Minor, Sus4, Sus2, 7th, Major
7th, Minor 7th, 9th, Minor 9th, Diminished, Augmented, and Min7b5.
Note: If Arp is switched “ON”, Chord will directly determine the notes being
played by the arpeggiator. This makes it possible to generate some very
complex melodies with just one finger.
Arp
Page 19

This button has 3 functions. Pressing it 3 times successively will
do the following:
1.) To turn the Arp “ON” for the selected Solo Instrument. Then
use + / – to select a pattern.
2.) To lock the currently selected Arp pattern. The + / – button will now return to
their previous function of changing presets.
3.) To turn the Arp “OFF”.
The available Arp patterns include: Up, Down, Up Down, Down Up, Up Up
Down, Down Down Up, and Random arpeggiator patterns. The Indicator strip
displays up to seven values to represent the 7 Arp pattern choices.
Sustain
This button sustains all notes for as long as you are holding it.
Sustain is indicated by the Indicator Strip being fully illuminated.
Octave
This button in changes the octave of the currently selected
Instrument. Press the Octave Button one and use the + / – button
changes the octave up and down respectively across a 6-octave
range. Press it again to exit Octave.
Love
Page 20

This adds the currently selected preset to your list of favourites.
+ / –
The Plus / Minus buttons operate in
conjunction with the rest of the buttons
to add or subtract values from the
selected parameter.
4.3 Loop Block Buttons
Mode
This button cycles through the four instrument slots. It also turns
the Loop Block on or off when pressed simultaneously with the
Play/Pause button below it.
Volume
This button in conjunction with the + / – button controls volume.
Click
This button controls the tempo of the project and to turn the Click
“ON” or “OFF”. When it is set to “ON” itthe + / – buttons with
increase or decrease the tempo respectively.
Page 21

Snap
This button straightens the timing or “quantizes” your
performances so they are perfectly in time.
Undo
This button reverts one step back to the previous value.
Play/Pause
This button starts or stops playback of all selected loops in Song
View.
Record
This button initiates the recording of a loop.
Learn
This button enables the “Learn” feature which shows you how to
play the Lightpad Block.
Page 22

+ / –
The Plus / Minus buttons operate in conjunction with
the rest of the buttons to add or subtract values from
the selected parameter.
4.4 Touch Block Buttons
Strike
Adjusts the sensitivity of Seaboard and Lightpad Blocks to your
Strike gestures. When Strike is set to zero, the Blocks
automatically play each note at maximum volume no matter how
hard the surface is struck. Tap the Strike button and press the -/+ buttons to
adjust the Strike sensitivity.
Glide
Page 23

Adjusts the sensitivity of Seaboard and Lightpad Blocks to lateral
finger movements (“Glide”). At maximum glide, the surfaces are
completely continuous, like a violin’s fretboard, whereas at
minimum glide the surfaces behave more like a piano keyboard,
with discrete keys that are unresponsive to sideways movements.
Slide
Adjusts the sensitivity of Seaboard and Lightpad Blocks to up-
down finger movements, allowing you to dictate whether you use
the whole key for modulating a sound parameter, or just a slight
finger movement.
Press
Adjusts the sensitivity of Seaboard and Lightpad Blocks to the
pressure with which a note is held (“Press”), expanding or
narrowing the spectrum of expression available through
continuous pressure on the surface.
Lift
Adjusts the sensitivity of Seaboard and Lightpad Blocks to your fingers’ liftoff
from the surface (“Lift”), which can affect the decay and other aspects of the
sound.
Strike Lock
Page 24

Fixes the strike (velocity) dimension to a specific value, which is
adjustable using the -/+ buttons – perfect if you need to ensure
you play every note at the same volume.
Glide Lock
Also known as “Portamento Mode”, this
automatically glides the pitch between one note and
the next note played, at a rate adjusted by the +/-
buttons.
Piano Mode
Removes all touch response except for Strike (velocity) so your
Block responds in just the same way a traditional piano does.
+ / –
The Plus / Minus buttons operate in conjunction with
the rest of the buttons to add or subtract values from
the selected parameter.
4.5 Developer Kit Control Block Buttons
Page 25

0 — 7
The Developer Kit Control Block has 8 buttons labeled 0–7. When used with
NOISE the Developer Kit Control Block behaves as a Loop Block.
+ / –
The Plus / Minus buttons operate in conjunction with
the rest of the buttons to add or subtract values from
the selected parameter.
5 Control Block Appendix
DNA Connectors
Page 26

Control Blocks each feature 4 DNA connectors. These six-pin connectors
magnetically connect multiple Blocks and also transmit power and data
between the Blocks.
Information About the Battery
Control Blocks feature a 740mAh Li-po (Lithium polymer) battery with a
nominal discharge voltage of 3.7 volts. The battery is capable of powering the
Control Block for over three hours when used constantly and over one month
when turned off. Refer to “Charging Your Block” for details on charging.
The battery will retain over 80% of its capacity for over 300 charge cycles. A
charge cycle is defined as a complete discharge from 100% to 0%, and
subsequent recharge back to 100%. For example, charging a device going from
50% charge up to 100% and back twice would be equivalent to one charge
cycle.
The table below indicates charge times for common configurations with the
Blocks turned off.
BLOCKS Watts Time to charge
Lightpad Block 5W—12W 4 hours—3 hours
Lightpad Block + Control Block 10W—12W 4 hours—3 hours
Lightpad Block + two Control Blocks 10W—12W 4 hours—4 hours
Cleaning Control Blocks
Page 27

Basic care and attention will protect your Control Blocks and help them stay in
optimal condition. Keep them away from direct sunlight, sharp objects or
edges, corrosive solvents, and liquids.
To clean the Control Block’s front panel you may use a damp, bleach-free and
oil-free cleansing wipes. Do not use any abrasive cleansing agents on the
Block.
Technical specifications
Battery Life 3 hours in use; 1 month when off
Bluetooth Range 15 meters
LEDs 15 LED Indicator Strip, 10 backlit buttons
Mass 100g
Dimensions 94mm x 47mm x 20mm
Connectivity
Full MIDI compatibility over USB
(when connected to Master Block) and Bluetooth LE
DNA Connectors 6
Buttons 10 backlit buttons
Included in package Quickstart Guide and Warranty Information
 Loading...