

Roland Corporation RV-5 Owner's Manual
Owner’s Manual
AC & BATTERY
POWERED
FET
DCAC

Thank you, and congratulations on your choice of BOSS RV-5 Digital Reverb.
Before using this unit, carefully read the sections entitled: “USING THE UNIT SAFELY” and
“IMPORTANT NOTES” (separate sheet). These sections provide important information concerning the proper operation of the unit.
Additionally, in order to feel assured that you have gained a good grasp of every feature provided by your new unit, this manual should be read in its entirety. The manual should be
saved and kept on hand as a convenient reference.
A battery is supplied with the unit. The life of this battery may be limited, however, since
its primary purpose was to enable testing.
Copyright © 2002 BOSS CORPORATION
All rights reserved. No part of this publication may be reproduced in any form without the
written permission of BOSS CORPORATION.
2

Features
●
This high-quality, multifunction digital reverb gives you the quality of a studio effect, but
condensed into a compact pedal.
●
Models the sound of the spring reverb from Accutronics, a name synonymous with spring
reverb. The emulation on modeling is so realistic that even the sound of the oscillations resulting from the mutual interference between dual springs is reproduced.
●
Comes with a completely new “modulate” feature for the reverb, which adds modulation
to the hall reverb, producing an extremely pleasant reverb sound.
●
Includes a new type of “gate reverb.” This reverb produces a uniquely distinctive effect
which condenses the reverberation sound.
●
Thanks to a 2-in/2-out stereo configuration, the RV-5 offers three dimensional reverb
sound.
* All product names mentioned in this document are trademarks or registered trademarks of their respective
owners. These names, as used in this manual, are for the purpose of accurately describing the sounds
created with modeling.
3
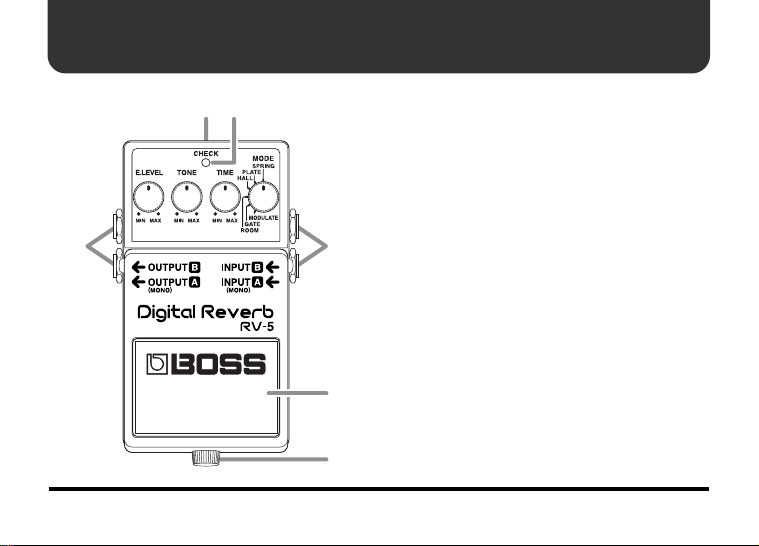
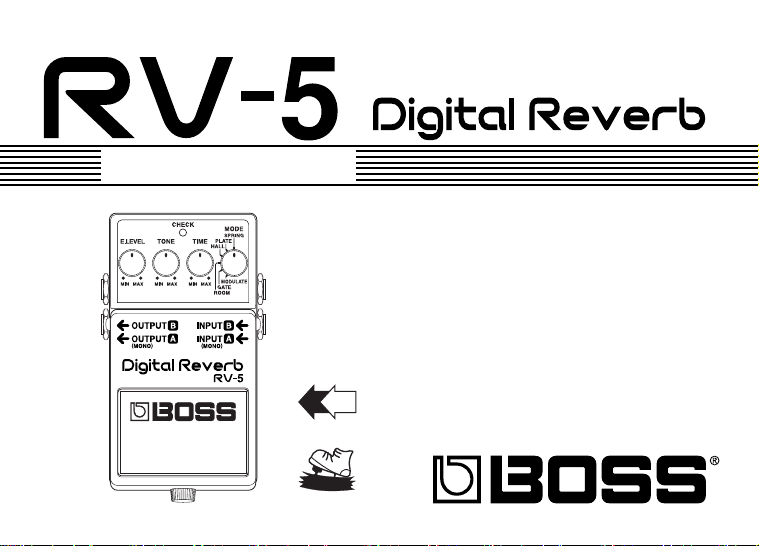
Panel Description
fig.01
1
2
3
4
1. AC Adaptor Jack
Accepts connection of an AC Adaptor (optionally available BOSS PSA-Series). By using an AC Adaptor, you can play without
being concerned about how much battery
power you have left.
* As soon as you connect the AC adaptor, the unit
4
is turned on.
* If there are batteries in the unit while an AC
adaptor is being used, normal operation will
continue should the line voltage be interrupted
(power blackout or power cord disconnection).
* Use only the specified AC adaptor (PSA-Series).
5
6

Panel Description
2. CHECK Indicator
This indicator shows whether an effect is
ON/OFF, and also doubles as the Battery
Check indicator. The indicator lights when
an effect is ON.
* If this indicator goes dim or no longer lights
while an effect is ON, the battery is near
exhaustion and should be replaced immediately.
For instructions on changing the battery, refer
to “Changing the Battery” (p. 12).
* The CHECK indicator shows whether the effect
is being applied or not. It does not indicate
whether the power to the device is on or not.
3. OUTPUT-A (MONO) Jack
OUTPUT-B Jack
The output jacks are used to connect the unit
to an amplifier or another effects unit.
4. INPUT-A (MONO) Jack
INPUT-B Jack
These jacks accept input signals (coming
from a guitar, some other musical instrument, or another effects unit).
* The unit’s functions differ according to how it is
connected. Refer to “Outputting Only the
Effect” (p. 11).
* When running the unit on battery power, the
INPUT-A (MONO) and INPUT-B jacks double
as power switches. Power to the unit is turned
on when you plug into the INPUT-A (MONO)
or INPUT-B jack; the power is turned off when
the cable is unplugged. Be sure to disconnect
any cord plugged into the INPUT-A (MONO)
or INPUT-B jack when not using this effects
device. When the AC adaptor is used, the power
remains on at all times, and this function is
disabled.
5
Panel Description
5. Pedal Switch
Used for switching effects on/off, and for inputting the tempo.
6. Thumbscrew
When this screw is loosened, the pedal will
open, allowing you to change the battery.
* For instructions on changing the battery, refer
to “Changing the Battery” (p. 12).
6
fig.02
8 9 107
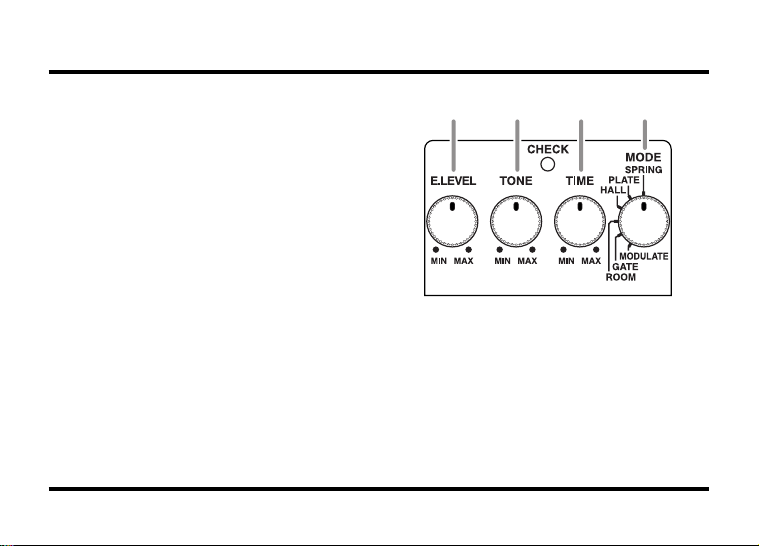
7. E.LEVEL (effect level) Knob
This adjusts the volume of the effect sound.
Turn the knob to the right (clockwise) to increase the effect sound.
 Loading...