

Roland Corporation RPC-SI24 Owner's Manual

Owner’s Manual
Thank you, and congratulations on your choice of the Studio Package Pro.
In order to feel assured that you have gained a good grasp of every
feature provided by your new unit, Owner’s manual should be read
in its entirety. The manual should be saved and kept on hand as a
convenient reference.
Copyright © 2003 ROLAND CORPORATION
All rights reserved. No part of this publication may be reproduced in any form
without the written permission of ROLAND CORPORATION.
http://www.roland.co.jp/

Contents
IMPORTANT NOTES................................................................4
Introduction..............................................................................5
Studio Package Pro..............................................................................................................5
Main Features of Studio Package Pro ...............................................................................5
Setting Up Studio Package Pro..............................................6
Step 1: Installing the RPC-1 ................................................................................................6
Step 2: Connecting Your Equipment.................................................................................7
Step 3: Driver Installation...................................................................................................8
Windows 98...............................................................................................................8
Windows Me .............................................................................................................9
Windows 2000.........................................................................................................11
Windows XP Home/Professional........................................................................12
Step 4: Making RPC-1 Settings.........................................................................................14
RPC-1 Control Panel Settings (Monitor Mixer/Patchbay Settings)................14
Step 5:Installing SONAR...................................................................................................16
To Install SONAR...................................................................................................16
Step 6: SONAR Setting......................................................................................................17
Starting SONAR......................................................................................................17
Setting Up the MIDI In and MIDI Out Devices .................................................17
Setting Up the RPC-1 .............................................................................................18
Setting Up the SI-24................................................................................................19
Opening the Control Surface Toolbar..................................................................19
Quick Start..............................................................................20
Listening to the Demo Song .............................................................................................20
Let’s Try Operating SONAR ............................................................................................21
Transport..................................................................................................................21
CH ASSIGN.............................................................................................................21
Faders 1–12 ..............................................................................................................21
MASTER Fader .......................................................................................................21
STATUS Buttons.....................................................................................................22
CH SELECT Buttons...............................................................................................22
PAN Knobs 1–12.....................................................................................................22
EQ/SEND Button...................................................................................................23
PLUG-IN Button.....................................................................................................23
LOCATE Button......................................................................................................23
SHORT CUT Button...............................................................................................24
VIEW Button ...........................................................................................................24
2

Contents
Record and Play Back a Guitar Performance.................................................................25
Setting the Sampling Rate and the File Bit Depth in the SONAR ...................25
Prepare a New Project in the SONAR .................................................................25
Connect your guitar to the SI-24’s GUITAR (Hi-Z) jack...................................25
Record Your Guitar Performance on Track 1 of the SONAR...........................25
Apply EQ (equalizer) to a Track......................................................................................26
Using FXPad.......................................................................................................................26
Inserting FXPad.......................................................................................................26
Operate the FXPad..................................................................................................26
Connect and Play a MIDI Sound Module/MIDI Keyboard........................................27
Setting Up a MIDI Track........................................................................................27
Play Your Keyboard to Hear the Sound..............................................................27
Recording Your Performance (MIDI Real-Time Recording)............................28
Playing Back the Performance Data.....................................................................28
Advanced Uses......................................................................29
Using the SI-24’s DIGITAL IN .........................................................................................29
Connect Your Digital Device ................................................................................29
Make Settings on the SI-24 and in SONAR.........................................................29
Change the RPC-1 Settings....................................................................................29
Recording Audio from DIGITAL IN to the SONAR.........................................30
Automix in SONAR...........................................................................................................30
Record Fader/Pan Movements ............................................................................30
Play Back the Fader/Pan Movements.................................................................30
Writing a Mix to an Audio File........................................................................................31
Specify the Region that will be Written as an Audio File.................................31
Make Settings for Exporting the Audio...............................................................31
Applying an External Effect .............................................................................................32
Connect the External Effects Processor to the SI-24...........................................32
Set a SONAR Bus as the External Effect Send....................................................32
Send the Signal from Each Track to the External Effect....................................32
Using Software Synthesizers............................................................................................33
Inserting a DXi ........................................................................................................33
Connect a MIDI Keyboard to the SI-24 and Play the Software Synthesizer..33
Using the Roland SI-24 Property Page............................................................................34
To Open the Roland SI-24 Property Page ...........................................................34
To Set Your Options in the Roland SI-24 Property Page ..................................34
Index........................................................................................35
3
IMPORTANT NOTES
• Unfortunately, it may be impossible to restore the contents of data that was stored on a storage
device (e.g., hard disk), or other device once it has been lost. Roland Corporation assumes no
liability concerning such loss of data.
• To avoid disturbing your neighbors, try to keep the unit’s volume at reasonable levels. You may
prefer to use headphones, so you do not need to be concerned about those around you (especially
when it is late at night).
• Unauthorized duplication, reproduction, hiring, and lending prohibited.
• Avoid touching or scratching the shiny underside (encoded surface) of the disc. Damaged or dirty
CD-ROM discs may not be read properly. Keep your discs clean using a commercially available
CD cleaner.
• Unauthorized recording, distribution, sale, lending, public performance, broadcasting, or the like,
in whole or in part, of a work (musical composition, video, broadcast, public performance, or the
like) whose copyright is held by a third party is prohibited by law.
• Do not use this unit for purposes that could infringe on a copyright held by a third party. We
assume no responsibility whatsoever with regard to any infringements of third-party copyrights
arising through your use of this unit.
• Use of the song data supplied with this product for any purpose other than private, personal
enjoyment without the permission of the copyright holder is prohibited by law. Additionally, this
data must not be copied, nor used in a secondary copyrighted work without the permission of the
copyright holder.
• DO NOT play a CD-ROM disc on a conventional audio CD player. The resulting sound
may be of a level that could cause permanent hearing loss. Damage to speakers or other
system components may result.
4
* Microsoft and Windows and DirectX are registered trademarks of Microsoft Corporation.
* Screen shots in this documents are reprinted with permission from Microsoft Corporation.
* Windows® is known officially as: “Microsoft® Windows® operating system.
* Cakewalk is a registered trademark of Twelve Tone Systems, Inc.
* SONAR and the Cakewalk logo are trademarks of Twelve Tone Systems, Inc.
* All product names mentioned in this document are trademarks or registered trademarks of their respective
owners.
Introduction
Studio Package Pro
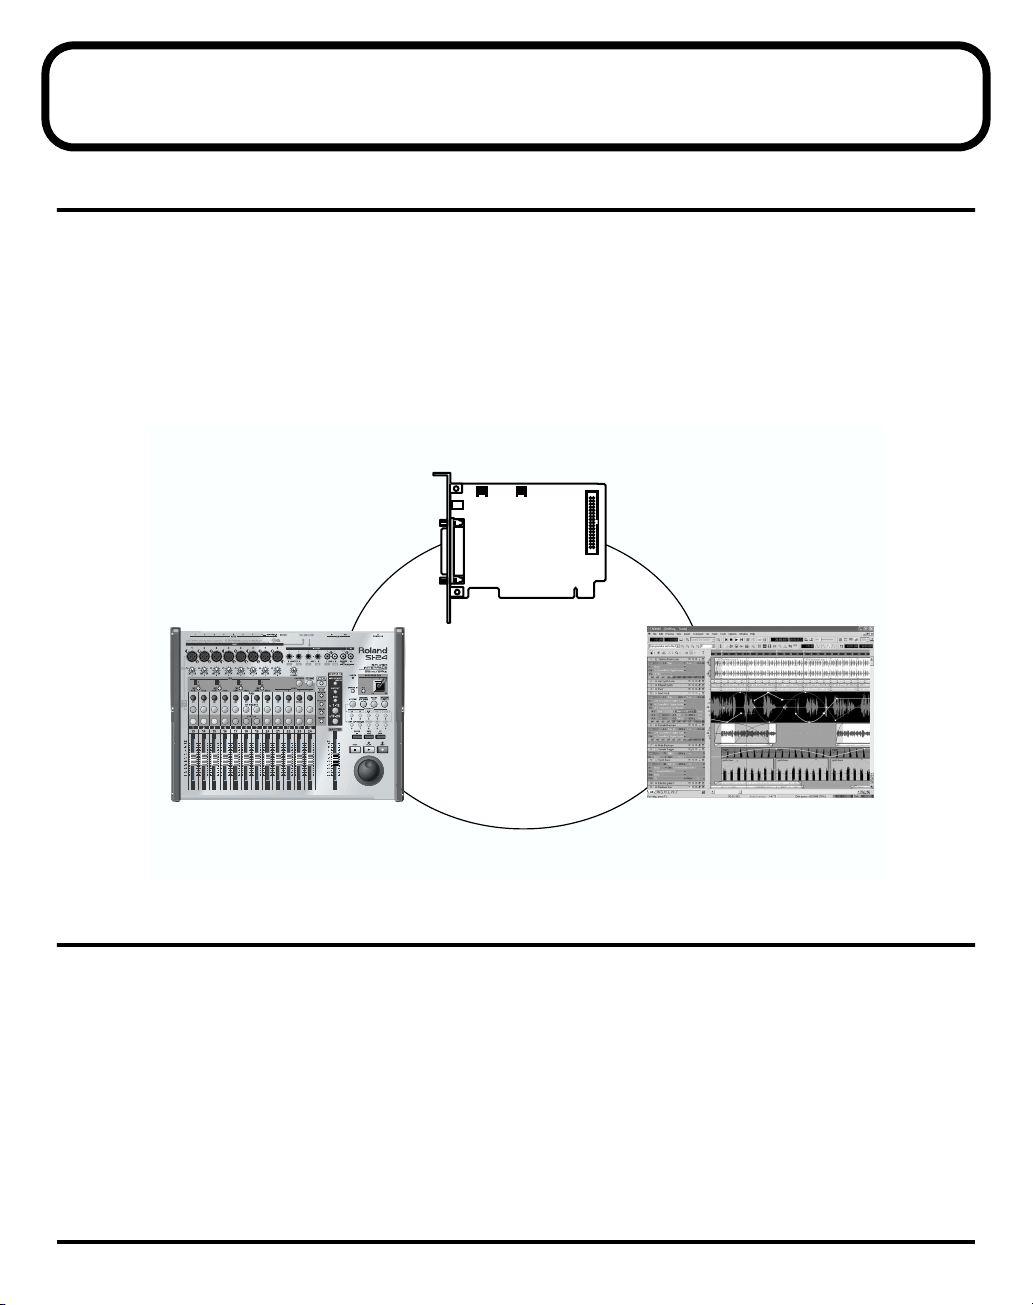
Thank you, and congratulations on your choice of the Roland Studio Package Pro. Studio Package
Pro is a package containing three products: the RPC-1, the SI-24, and Cakewalk SONAR. When
used with your computer, this package delivers a 24-bit digital recording environment.
Before using the product, you should check the items in box according to the owner’s manual of
each product. Then read this manual to set up your product according to “Setting Up Studio
Package Pro” (p. 6).
* In the interest of product improvement, the specifications and/or contents of this package are subject to
change without prior notice.(#962b)
fig.eIncludedItems.eps
RPC-1
R-BUS interface card
Studio Package Pro
SI-24
studio interface
( AD/DA converter plus
remote controller for Cakewalk SONAR )
Main Features of Studio Package Pro
• 24-bit/96kHz recording and mixing system w/ plug-in effects
• Dedicated SI-24 Control Surface w/ motorized faders
• 8x24-bit XLR mic/line inputs w/ phantom power
• Send/receive 8 channels of 24-bit/96kHz digital audio to/from computer
• Knobs for fast control of plug-ins, panning and more
• Cakewalk SONAR software for multi-track, 24-bit/96kHz audio recording and MIDI production
* You can use unlimited audio and MIDI tracks at the same time. However, this may become less depending
on your computer’s processing environment, including differences in hard disk design and the particular
combination of the other devices involved.
Cakewalk SONAR
Digital multitrack recording system
5
1.
2.
3.
4.
5.
6.
7.
Setting Up Studio Package Pro
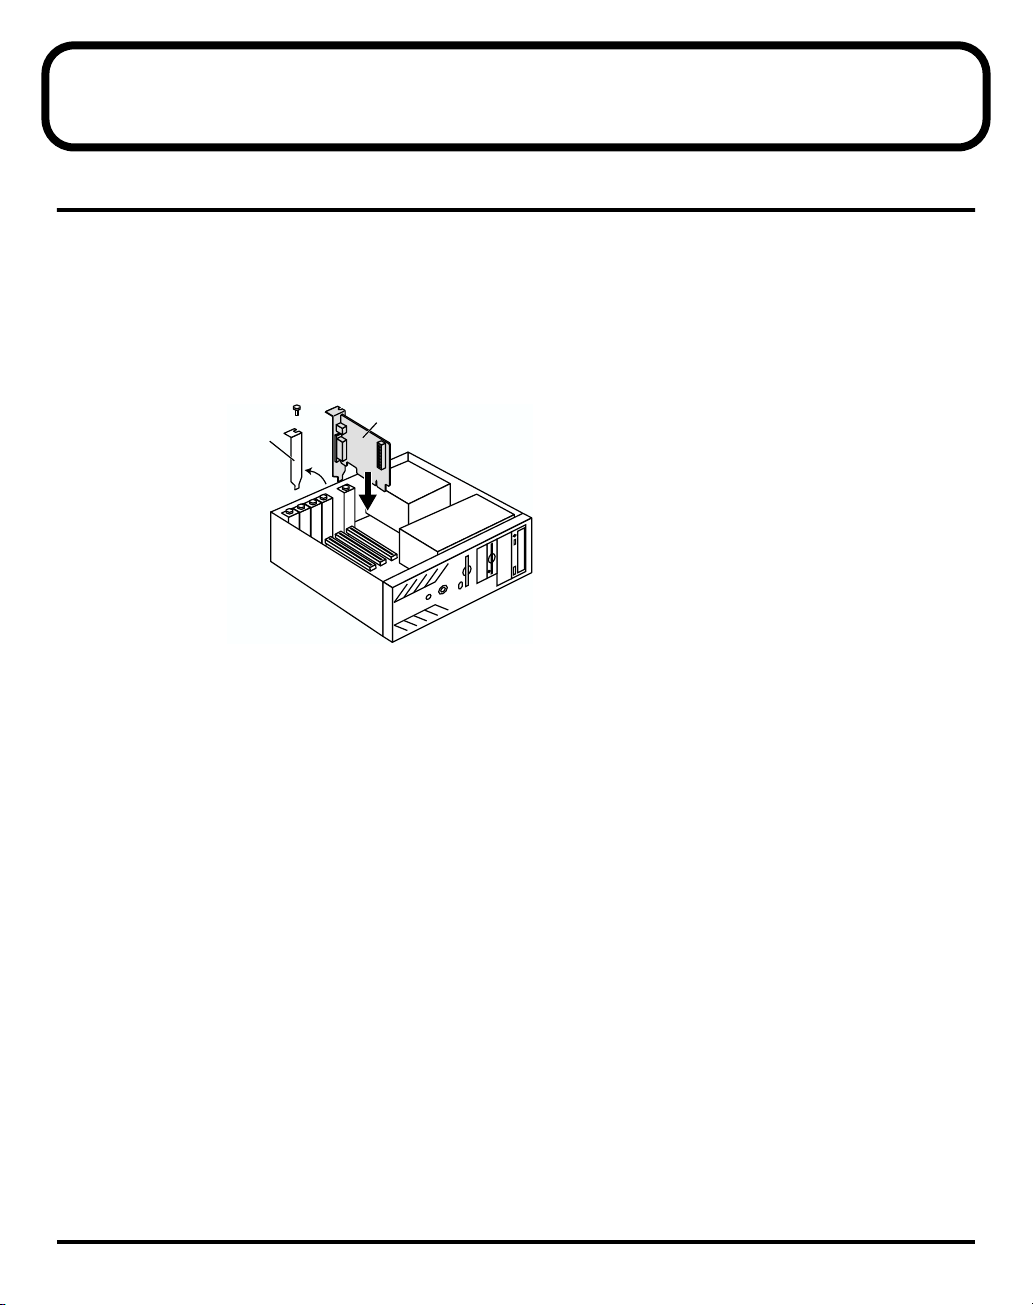
Step 1: Installing the RPC-1
Install the RPC-1 into a PCI slot of your computer. Refer to the owner’s manual of your computer,
and read the section(s) with titles such as “Opening the chassis,” “Installing a PCI card,” or
“Adding an expansion card.” For details on PCI slots and PCI cards, refer to the manual of your
computer.
Turn off the power of your computer, and unplug the power cable.
Remove the cover of your computer.
fig.eRpcset.eps
Cover of The
PCI Slot
RPC-1
Remove the screw from the cover of a vacant PCI slot, and remove the slot cover. (Hold on
to the screw that held the cover in place, since it will be used to fasten the RPC-1.)
Insert the RPC-1 into the PCI slot. When doing so, note that it is not possible to insert the
RPC-1 if it is oriented incorrectly.
Using the screw that had fastened the cover, fasten the RPC-1 in place.
Reattach the cover of your computer.
Connect the power cable to your computer.
6
1.
2.
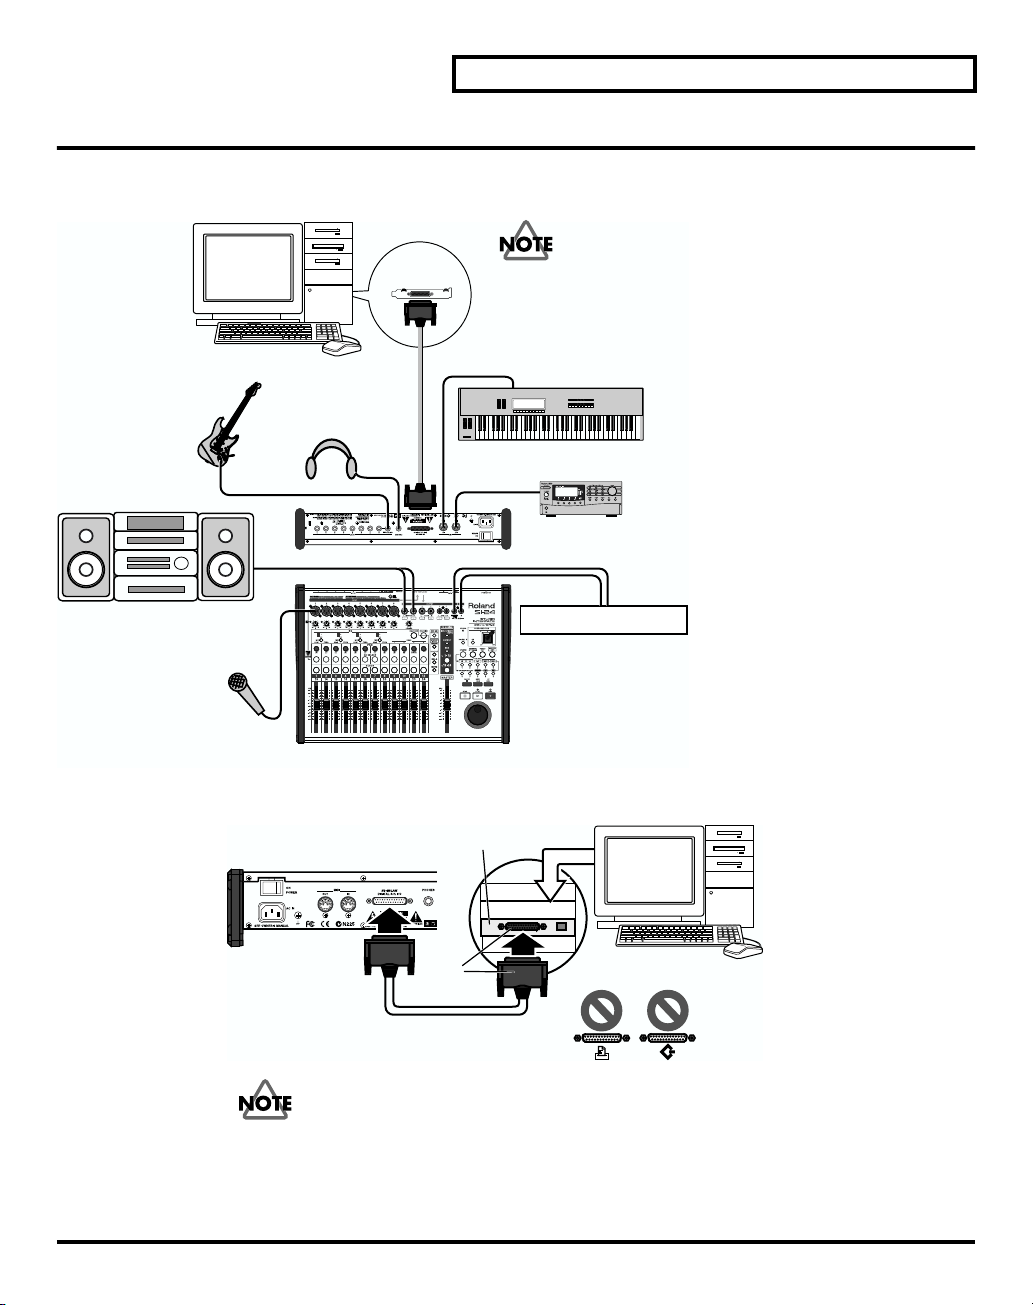
Step 2: Connecting Your Equipment
Turn off the power of your computer and the SI-24, and use the following procedure to connect
each device.
fig.eConnect.eps
RPC-1
hooking up to MID IN/OUT connector on SI-24.
MIDI ch 1 is exclusively used for the communication
between SI-24 and SONAR software.
PC
electric Guitar
stereo Headphones
MIDI
Please select the number of MIDI ch as expect
“1” (use 2–16) when you use MIDI device such
as a MIDI keyboard or a MIDI sound module by
Keyboard etc.
MIDI Sound Module etc.
Setting Up Studio Package Pro
line In jacks of audio devices
mic
Using the R-BUS cable included with the RPC-1, connect the SI-24 to the RPC-1.
fig.eConnectR-BUS.eps
Connect your audio devices and/or headphones.
digital recorder etc.
SI-24
SI-24
RPC-1
blue
R-BUS cable
rear
R-BUS
PC
Be careful not to connect the R-BUS connector to a printer port or SCSI port.
7
Setting Up Studio Package Pro
Connect MIDI and other devices as necessary.
For details on the signal flow when using the MIDI connectors of the SI-24, refer to “MIDI Ctrl:
OFF” of the SI-24 Owner’s Manual.
If your MIDI file contains large amounts of system exclusive messages, the SI-24 may
be unable to process the messages correctly.
MIDI IN/OUT channels 1 are used for remote control of SONAR. If you use MIDI
IN/OUT, please use channels 2–16.
When you turn on the power, turn each device on in the following order.
1. Computer
2. SI-24
3. Audio equipment
Step 3: Driver Installation
* The explanations in this manual include illustrations that depict what should typically be shown by the
display. Note, however, that your unit may incorporate a newer, enhanced version of the system (e.g.,
includes newer sounds), so what you actually see in the display may not always match what appears in the
manual.
3.
■
1.
2.
3.
4.
Windows 98
8
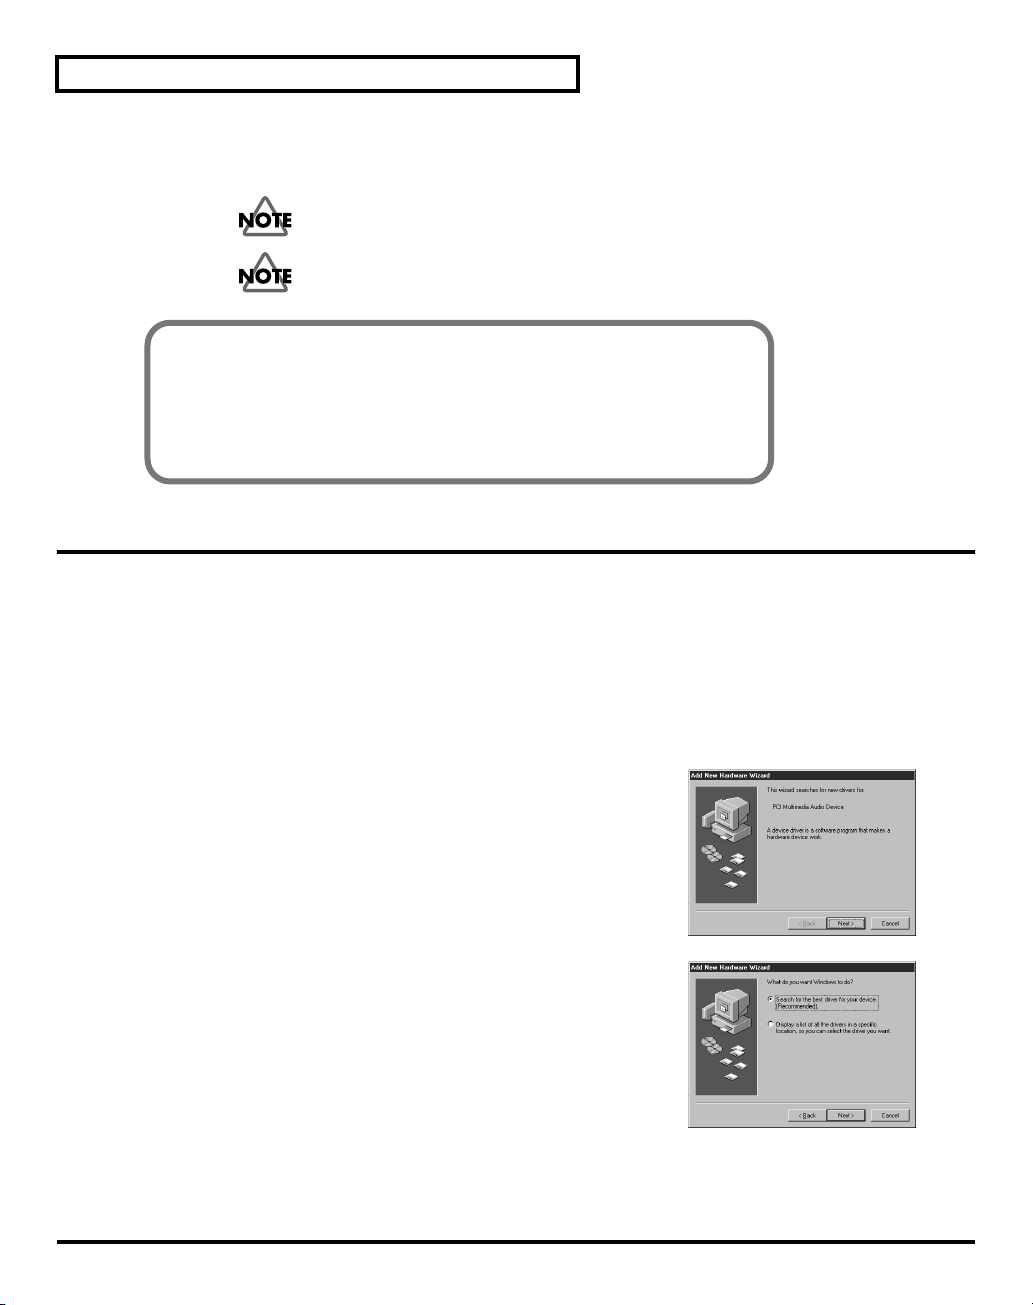
After installing the RPC-1 in a PCI slot, start up your computer.
The RPC-1 will automatically be detected, and the “Add
New Hardware Wizard” will start up. Click “Next.”
Insert the included “Drivers/Update CD-ROM” into your
CD-ROM drive.
Choose “Search for the best driver for your device.
(Recommended).” and click “Next.”
5.
6.
7.
8.
■
1.
2.
Setting Up Studio Package Pro
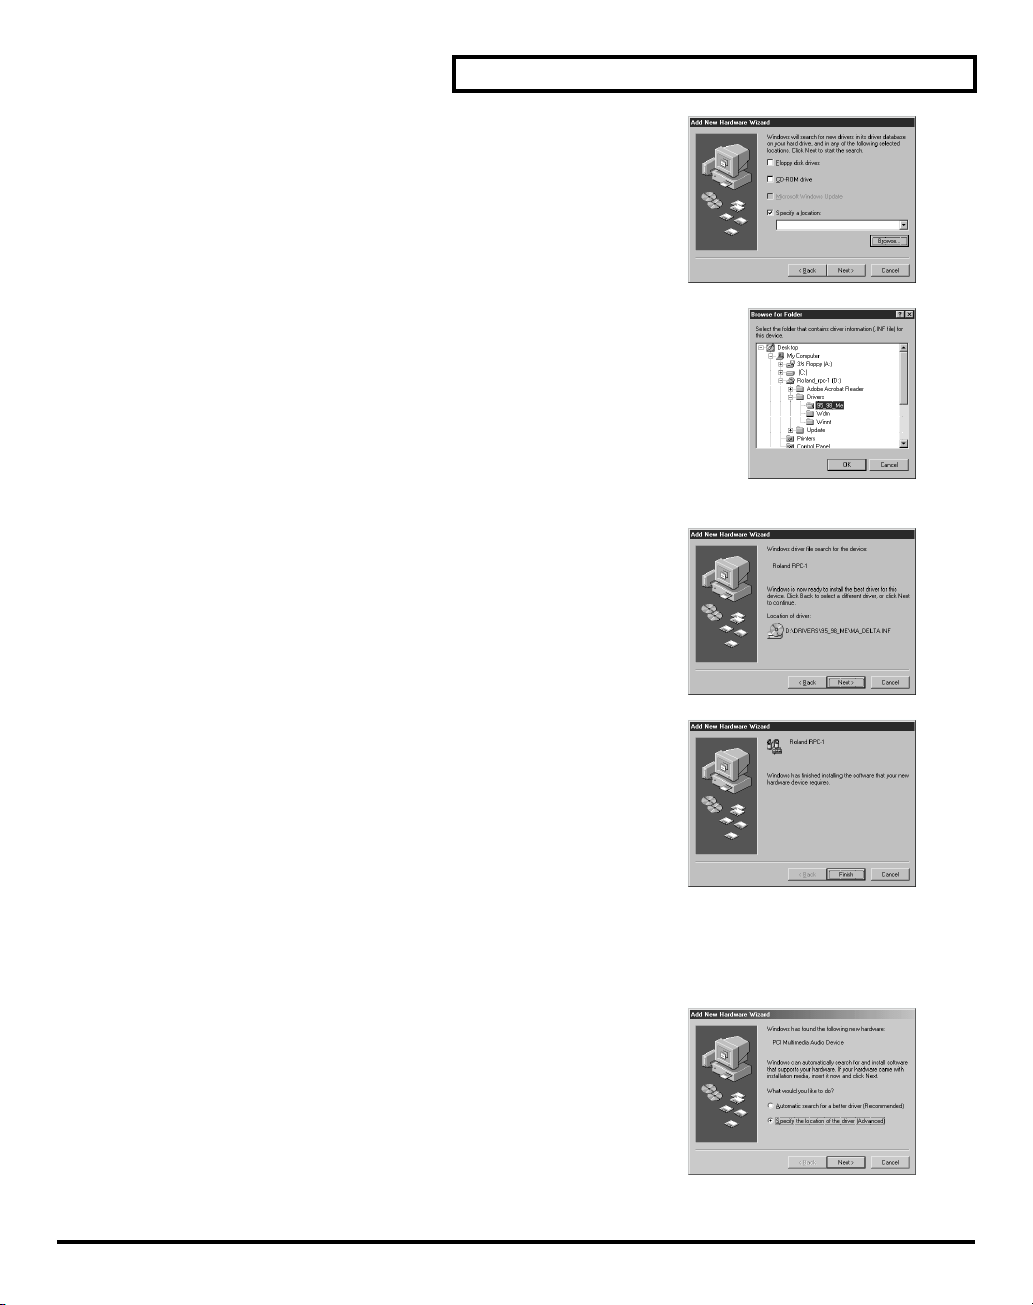
Choose “Specify a location,” and click “Browse.”
On the CD-ROM, select the \Drivers\95_98_Me folder and click
“OK.”
Click “Next,” and driver installation will begin.
3.
4.
A message will appear, indicating that the driver
installation has been completed. Click “Finish.” This
completes the driver installation.
Windows Me
After installing the RPC-1 in a PCI slot, start up your computer.
The RPC-1 will automatically be detected, and the “Add
New Hardware Wizard” will start up.
Insert the included “Drivers/Update CD-ROM” into your
CD-ROM drive.
Choose “Specify the location of the driver (Advanced)”
and click “Next.”
9

Setting Up Studio Package Pro
Choose “Specify a location” and click “Browse.”
On the CD-ROM, select the \Drivers\95_98_Me folder and click
“OK.”
Click “Next” and the search will begin.
5.
6.
7.
8.
9.
10
Click “Next,” and driver installation will begin.
A message will appear, indicating that the driver
installation has been completed. Click “Finish.” This
completes the driver installation.
Windows 2000
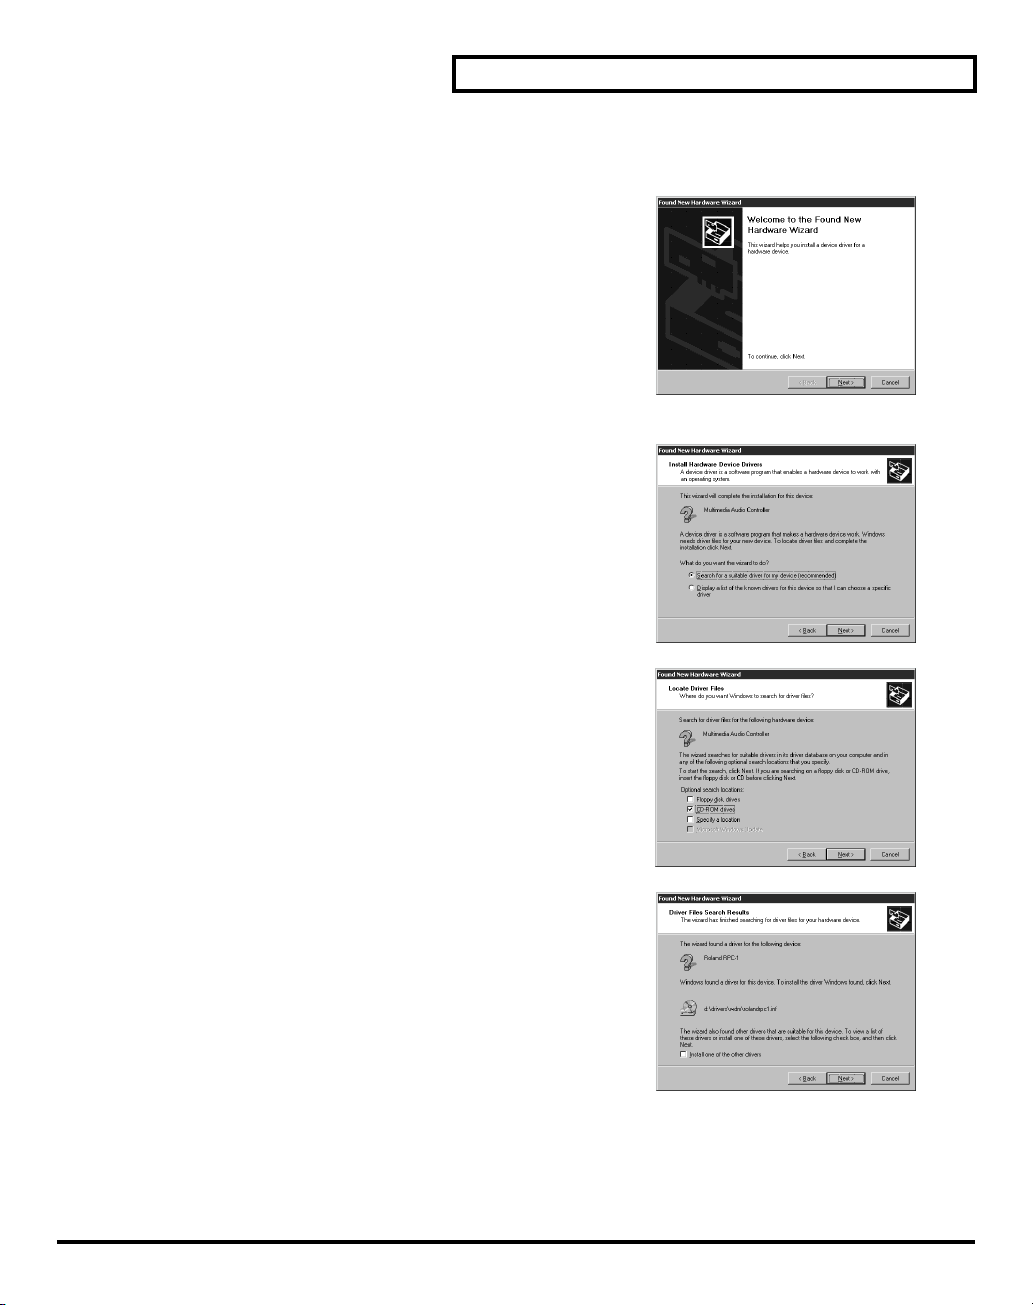
After installing the RPC-1 into a PCI slot, start up your computer.
The RPC-1 will automatically be detected, and the
“Found New Hardware Wizard” will start up. Click
“Next.”
Insert the included “Drivers/Update CD-ROM” into
your CD-ROM drive.
Choose “Search for a suitable driver for my device
(Recommended)” and click “Next.”
■
1.
2.
3.
4.
5.
6.
Setting Up Studio Package Pro
In “Optional search locations,” choose “CD-ROM
drives” and click “Next.”
A message will appear, indicating that the RPC-1
driver was found. Click “Next.”
11
 Loading...