

Quick Start
Welcome to the MV-8000 Production Studio!
This manual is written for people who ...
• Are using the MV-8000 for the first time
• Want to learn what the MV-8000 is
• Want to get started making sounds
●
About the Symbols and icons in this manual
Text in square brackets [ ] refers to buttons on the panel of the MV-8000.
Buttons indicated as [F1 (Sample)] refer to the F1 (function 1) button when the F1
function shown in the LCD is "Sample."
Indicates information that you should be aware of when using the MV-8000.
Indicates a convenient operation or useful music production technique.
Indicates supplementary information about an operation.
Indicates a reference page.
Indicates an explanation of a term.
Before using this unit, carefully read the sections entitled: “IMPORTANT SAFETY
INSTRUCTIONS” (Owner’s Manual p. 2), “USING THE UNIT SAFELY” (Owner’s
Manual p. 3, p. 4), and “IMPORTANT NOTES” (Owner’s Manual p. 5–7). These
sections provide important information concerning the proper operation of the
unit. Additionally, in order to feel assured that you have gained a good grasp of
every feature provided by your new unit, Quick Start and Owner’s Manual should
be read in its entirety. The manual should be saved and kept on hand as a
convenient reference.
©
2003 Roland Corporation
All rights reserved. No part of this publication may be reproduced in any form
without the written permission of ROLAND CORPORATION.
Roland Web Site http://www.roland.co.jp/
Let's get started (Contents)
If the project contains no data,
or if no sounds have been
assigned to the pads, striking
the pads will not produce
sound. You will need to
Import (p. 24, p. 26) or Sample
(p. 27) data into the pads.
b
1
Preparations and concepts .................... 3
Explains how to connect the MV-8000 with peripheral equipment, and how to
turn the power on/off.
Checking the included items...................................................... 3
Preparing your equipment and making connections............. 4
Connecting the power................................................................. 5
Turning on the power ................................................................. 6
Turning off the power................................................................. 7
Basic operations ........................................................................... 8
If you are using the MV-8000
for the first time, wi suggest
that you read the sections in
order, starting with
“Preparations and concepts”
(p. 3).
2
Listening to the demo song ................. 11
When shipped from the factory, the internal hard disk contains demo songs.
To get an idea of the MV-8000's potential, start by listening to these demo
songs.
Moving the time location and operating the sequencer....... 12
3
Using the velocity pads ........................ 13
Try using the pads to play the sounds you heard in the demo songs. The sound
will change according to the force with which you strike the pads. You can
also switch sounds by changing the part that is played by the pads.
Playing other materials ............................................................. 14
4
Creating a song ..................................... 17
Let's create a song by recording your pad performance and by putting sounds
together. We'll use the Loop function to input a drum part, and the Quantize
function to adjust the sense of groove.
Creating a new song.................................................................. 18
Loop recording........................................................................... 19
Creating a track for sequence recording................................. 20
Correcting the timing (Play Quantize) ................................... 21
Recording a live performance.................................................. 22
Saving your completed composition ...................................... 23
With the factory settings,
demo song data will be loaded
automatically when you turn
on the power. If data other
than the demo song is loaded,
you will need to load the demo
project before continuing.
5
Here's how to load data from a commercially-available sampling CD-ROM or
audio CD, or record your own samples from a mic.
6
Index ..................................................................... 29
2
Assembling additional materials ......... 24
Importing sounds from a sampling CD-ROM ...................... 24
Importing sounds from an audio CD ..................................... 26
Sampling ..................................................................................... 27
You must create a “Song”
efore you can sample. For
details on creating a song, refer
to “Creating a new song” (p.
18).
Preparations and concepts
onm
ehttp /
Before using this unit, carefully read the sections entitled: “IMPORTANT SAFETY
INSTRUCTIONS” (Owner’s Manual p. 2), “USING THE UNIT SAFELY” (Owner’s
Manual p. 3), and “IMPORTANT NOTES” (Owner’s Manual p. 5). These sections
provide important information concerning the proper operation of the unit.
Additionally, in order to feel assured that you have gained a good grasp of every
feature provided by your new unit, Quick Start and Owner’s Manual should be
read in its entirety. The manual should be saved and kept on hand as a convenient
reference.
1
Q&A
Q1. How do I output the metronome sound?
Ans 1-1.
Th
e proced
ure fo
r outpu
tting the
m
etronom
e sound is:
1.
Press [MENU].
2.
Select “10 Metronome.”
3.
Press [ENTER].
4.
Select Mode.
5.
Select Output.
Ans 1-2.
T
he pro
ce
dure for o
utpu
tting the
m
etronom
e s
oun
d is:
1
.
In the SEQUENCE screen, press [REC] to access RECORDING PARAMETER.
2.
At this time you can also make the same settings by pressing [F3(Metronome)].
Q2. How do I use the VALUE dial to move the time location?
Ans.
H
old
ing dow
n [JUM
P] an
d turning
the VA
L
UE dial to mo
ve in steps of o
n
e tick.
You cann
ot m
ov
e th
e tim
e location by using the VA
LU
E d
ial a
lone.
Q3. How do I select a sound for a MIDI track?
Ans.
To
select a so
und for
a M
ID
I tra
ck:
1.
Make the current track the MIDI track for which you want to select a sound.
2.
Press [F1 (Track Param)].
3
.
Use Output Assign to select the part you want to use.
If at this p
oint in th
e procedu
re y
ou
fin
d the so
und
y
ou want to u
se, you're do
ne.
If you
w
ant to ass
ign a diff
eren
t sou
nd (pa
tch) to the pa
rt:
4.
Press [INSTRUMENTS].
5.
Make the current part the part whose assignment you want to change.
6
.
Press [F4 (Library)].
7.
Select the sound (patch) that you want to assign.
8
.
Press [F5 (Use This)].
9.
Return to step 1 and select a part.
If a
t th
is poin
t in
the proc
ed
ure yo
u still h
ave
not found
th
e so
und y
ou
want to u
se, yo
u'll n
eed to
cre
ate your ow
n
original p
atch by sam
plin
g or im
po
rting.
Preparations and concepts
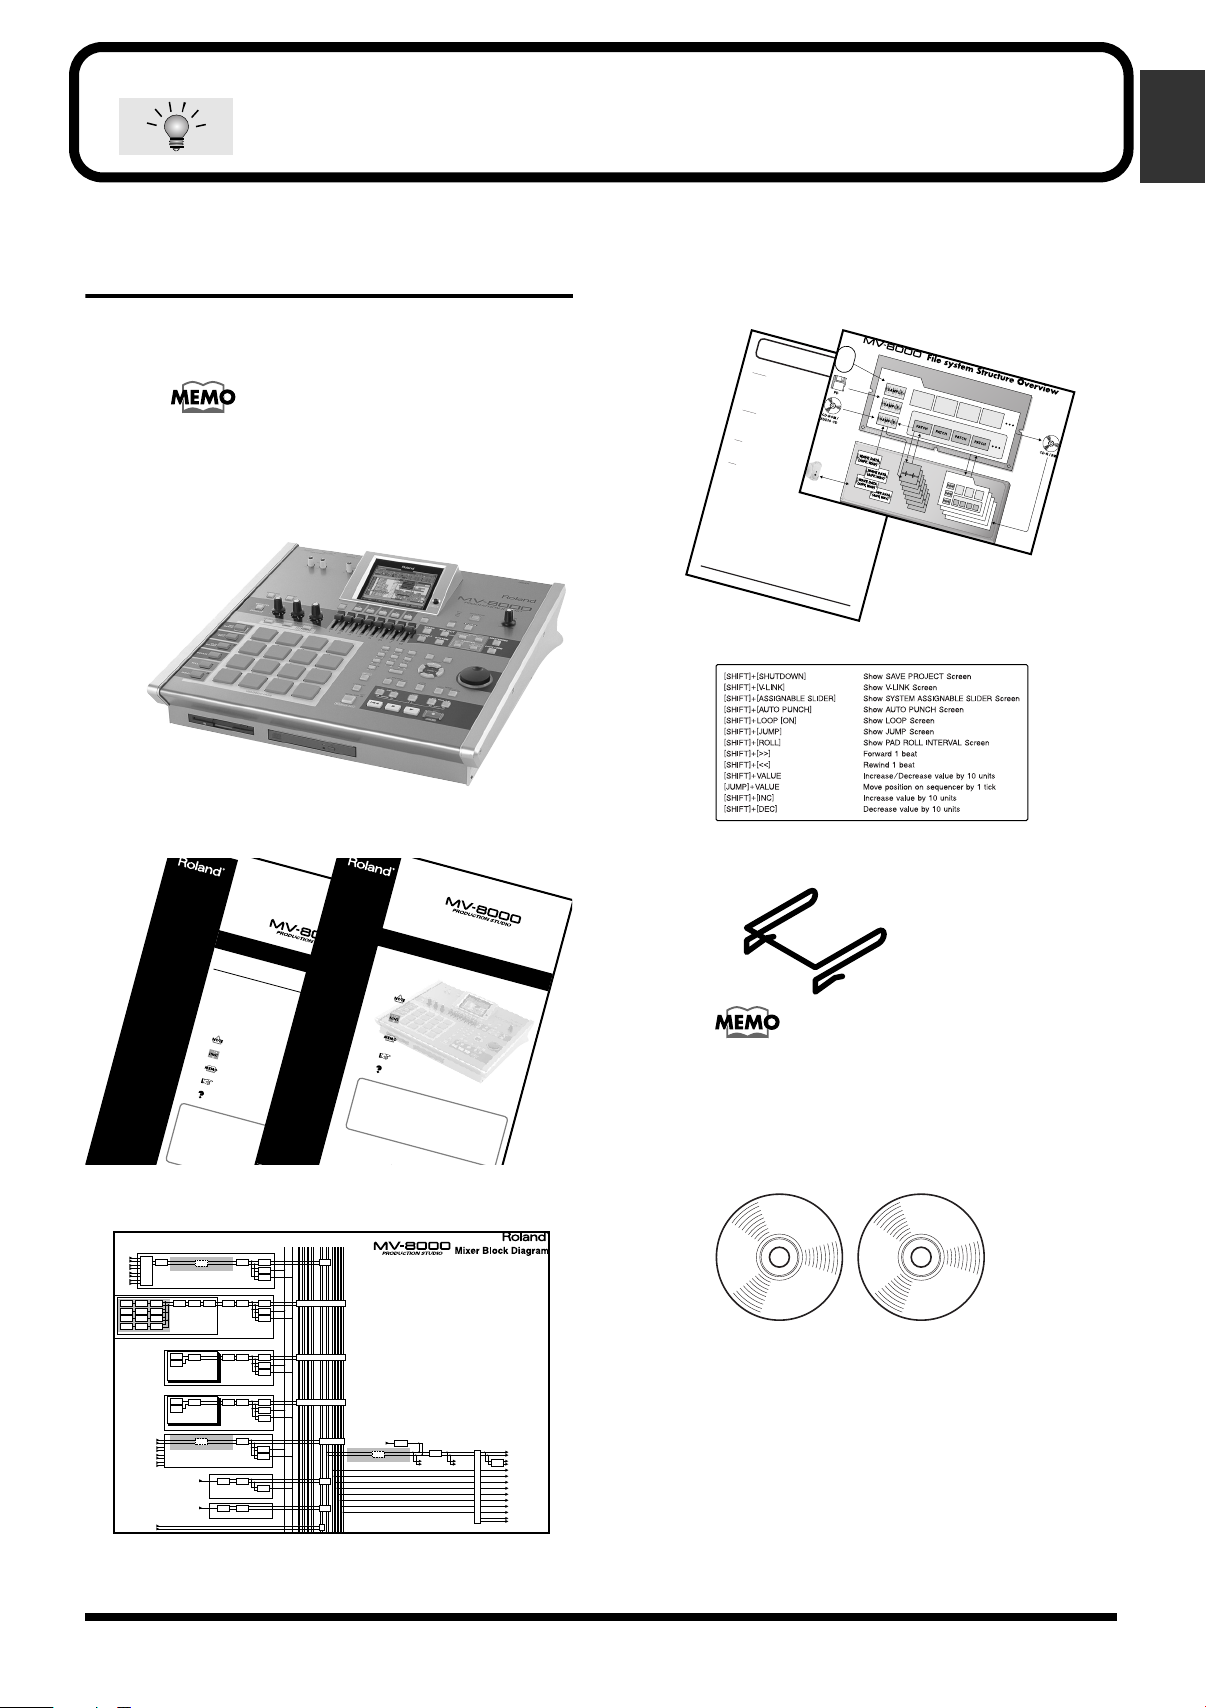
Checking the included
items
The MV-8000 package contains the following
items.
If any of the included items are missing, please
contact a “Roland Service Center” or an
“authorized Roland distributor” (p. 31).
• MV-8000
• Q&A
• File system Structure Overview/surface
• How you use the MV-8000 depends on what
you want to do!/reverse side
• Shortcut labels
• Quick Start (the document you are reading)
• Owner's Manual
Quick Start
Welcome to the MV-8000 Production Studio!
This manual is written for people who ...
•Are using the MV-8000 for the first time
•Want to learn what the MV-8000 is
• Want to get started making sounds
About the Symbols and icons in this manual
Text in square brackets [ ] refers to buttons on the panel of the MV-8000.
Buttons indicated as [F1 (Sample)] refer to the F1 (function 1) button when the F1
function shown in the LCD is "Sample."
Indicates information that you should be aware of when using the MV-8000.
Indicates a convenient operation or useful music production technique.
Indicates supplementary information about an operation.
Indicates a reference page.
Indicates an explanation of a term.
©2003 Roland Corporation
Roland Web Site http://www.roland.co.jp/
©2003 Roland Corporation
All rights reserved. No part of this publicati
without the written permission
Roland Web Sit
Owner’s Manual
About the Symbols and icons in this manual
Text in square brackets [ ] refers to buttons on the panel of the MV-8000.
Buttons indicated as [F1 (Sample)] refer to the F1 (function 1) button when the F1
function shown in the LCD is "Sample."
Indicates information that you should be aware of when
using the MV-8000.
Indicates a convenient operation or useful music
production technique.
Indicates supplementary information about an
operation.
Indicates a reference page.
Indicates an explanation of a term.
• Block diagram sheet/surface
• MV-8000 Structure Overview/reverse side
• Short pin
When the MV-8000 is shipped from the factory, a
shorting pin is installed in the PHONO jacks.
• Backup CD-ROM
• Sample data CD-ROM
3
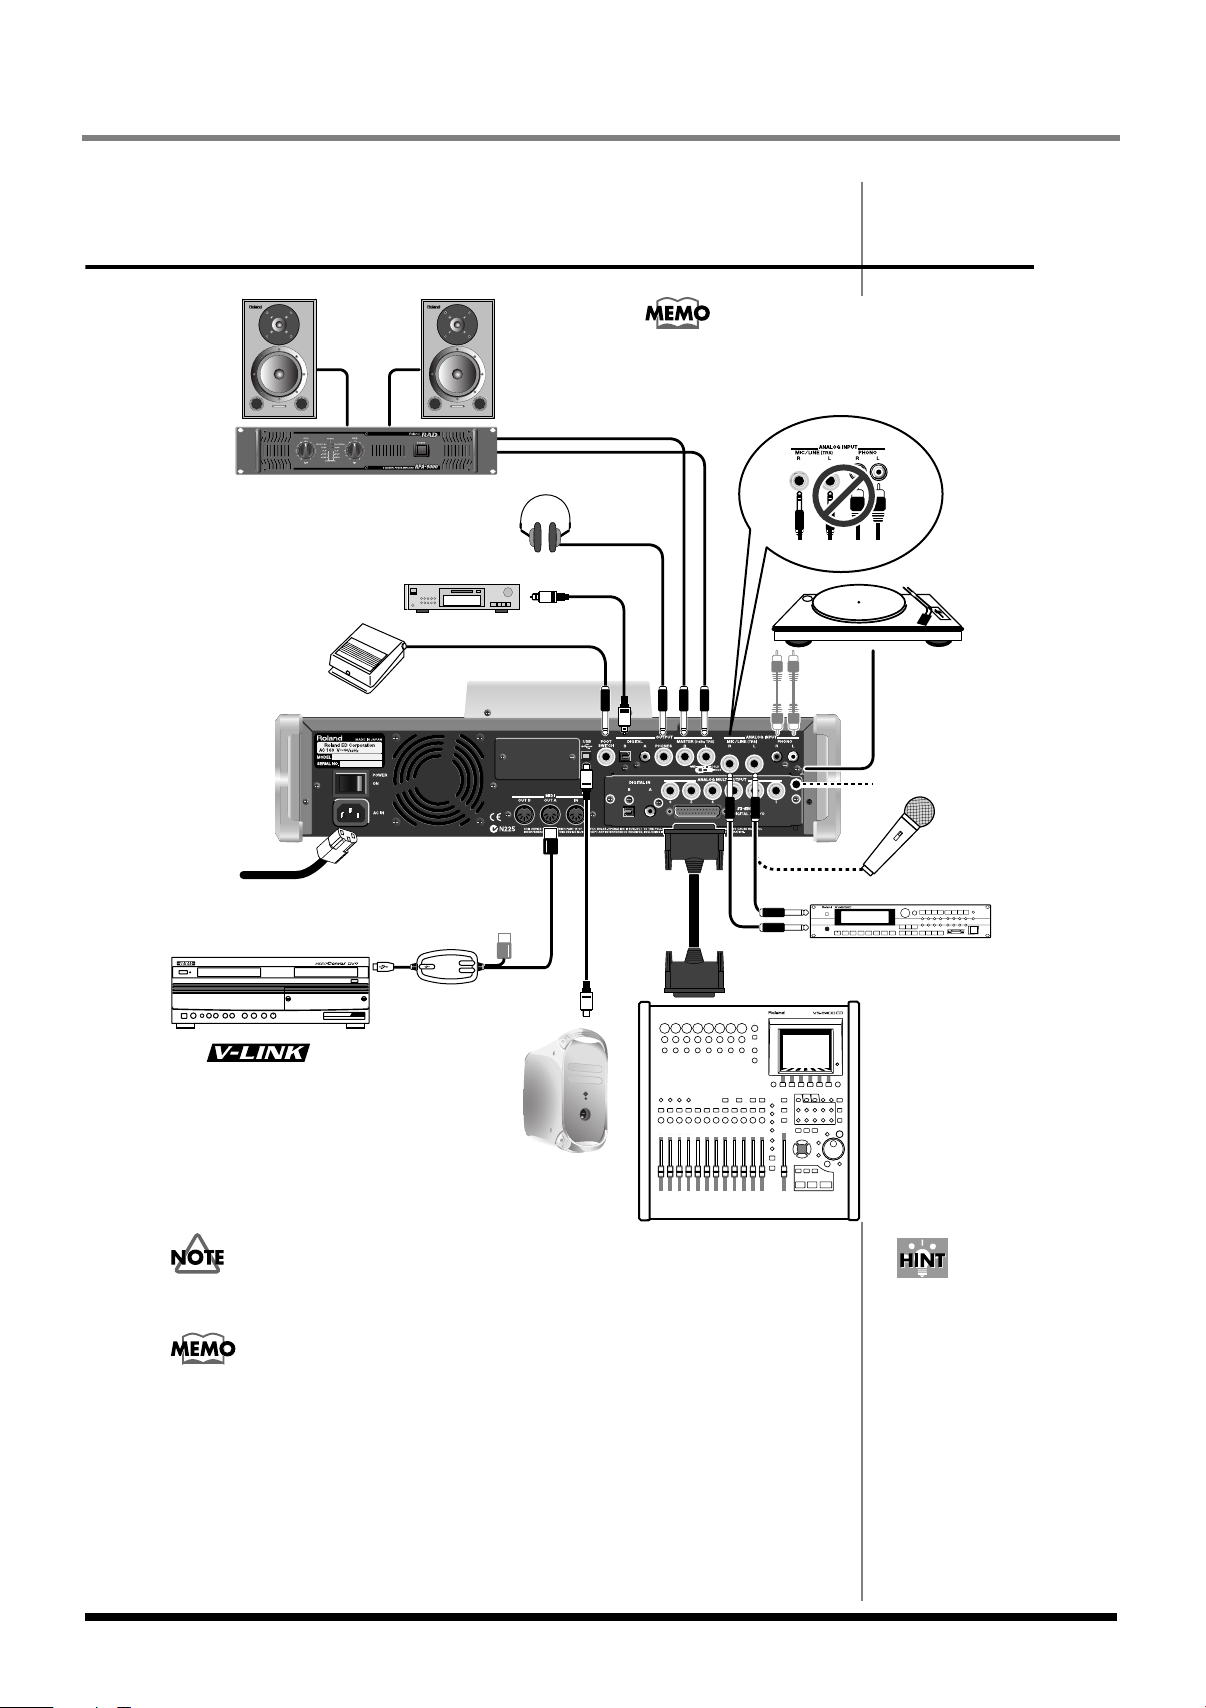
Preparations and concepts
VGA OUT/MOUSE (OPTION)
Computer
e.g., DV-7PR
Device with R-BUS connector
e.g., VS-2400CD
device
Power cable
Edirol
UM-1, etc.
MD Recorder, etc.
Speakers
Power amp
Tu r ntable
Headphones
Foot Switch
Microphone
Ground Connector
Sound module
MV8-OP1 (sold separatery)
You cannot use the PHONO and MIC/LINE analog inputs
at the same time.
If you make connections to MIC/LINE,
the PHONO input will be disabled.
Preparing your equipment and making
connections
In order to prevent malfunctions and speaker damage, you must turn down the
volume of all your equipment and turn off the power before making connections.
• Connect the rear panel ground connector if you are using a turntable. This can
prevent hum noise.
• When connection cables with resistors are used, the volume level of equipment
connected to the inputs (ANALOG INPUT) may be low. If this happens, use
connection cables that do not contain resistors, such as those from the Roland PCS
series.
• If you're not using the PHONO jacks, insert the included short plug. This will
prevent noise from being introduced via the PHONO jacks.
In addition to the equipment
shown above, the following
items can also be convenient.
• Audio CD or CD-ROM
discs containing materials
for sampling
• CD-R or floppy discs for
backup or data exchange
4

Preparations and concepts
Depending on the
circumstances of a
particular setup, you may
experience a discomforting
sensation, or perceive that
the surface feels gritty to
the touch when you touch
this device, microphones
connected to it, or the metal
portions of other objects,
such as guitars. This is due
to an infinitesimal electrical
charge, which is absolutely
harmless. However, if you
are concerned about this,
connect the ground
terminal (see figure) with
an external ground. When
the unit is grounded, a
slight hum may occur,
depending on the
particulars of your
installation. If you are
unsure of the connection
method, contact the nearest
Roland Service Center, or
an authorized Roland
distributor, as listed on the
“Information” page.
Howling could be produced depending on the location of microphones
relative to speakers. This can be remedied by:
• Changing the orientation of the microphone(s).
• Relocating microphone(s) at a greater distance from speakers.
• Lowering volume levels.
Connecting the power
Use the included power cable to connect the MV-8000 to an AC outlet.
To prevent electrical shock, use the included power cable and connect the
ground correctly.
The included power cable has a three-pin plug with a ground pin that can
prevent electrical shock and damage to your equipment.
* Unsuitable places for connection
• Water pipes (may result in shock or electrocution)
• Gas pipes (may result in fire or explosion)
• Telephone-line ground or lightning rod (may be dangerous in the event of
lightning)
Preparations and concepts
5
Preparations and concepts
b
Turning on the power
1
Make sure that the audio devices connected to the MV-
2
8000 are powered-off.
Set the rear panel POWER switch to the ON position.
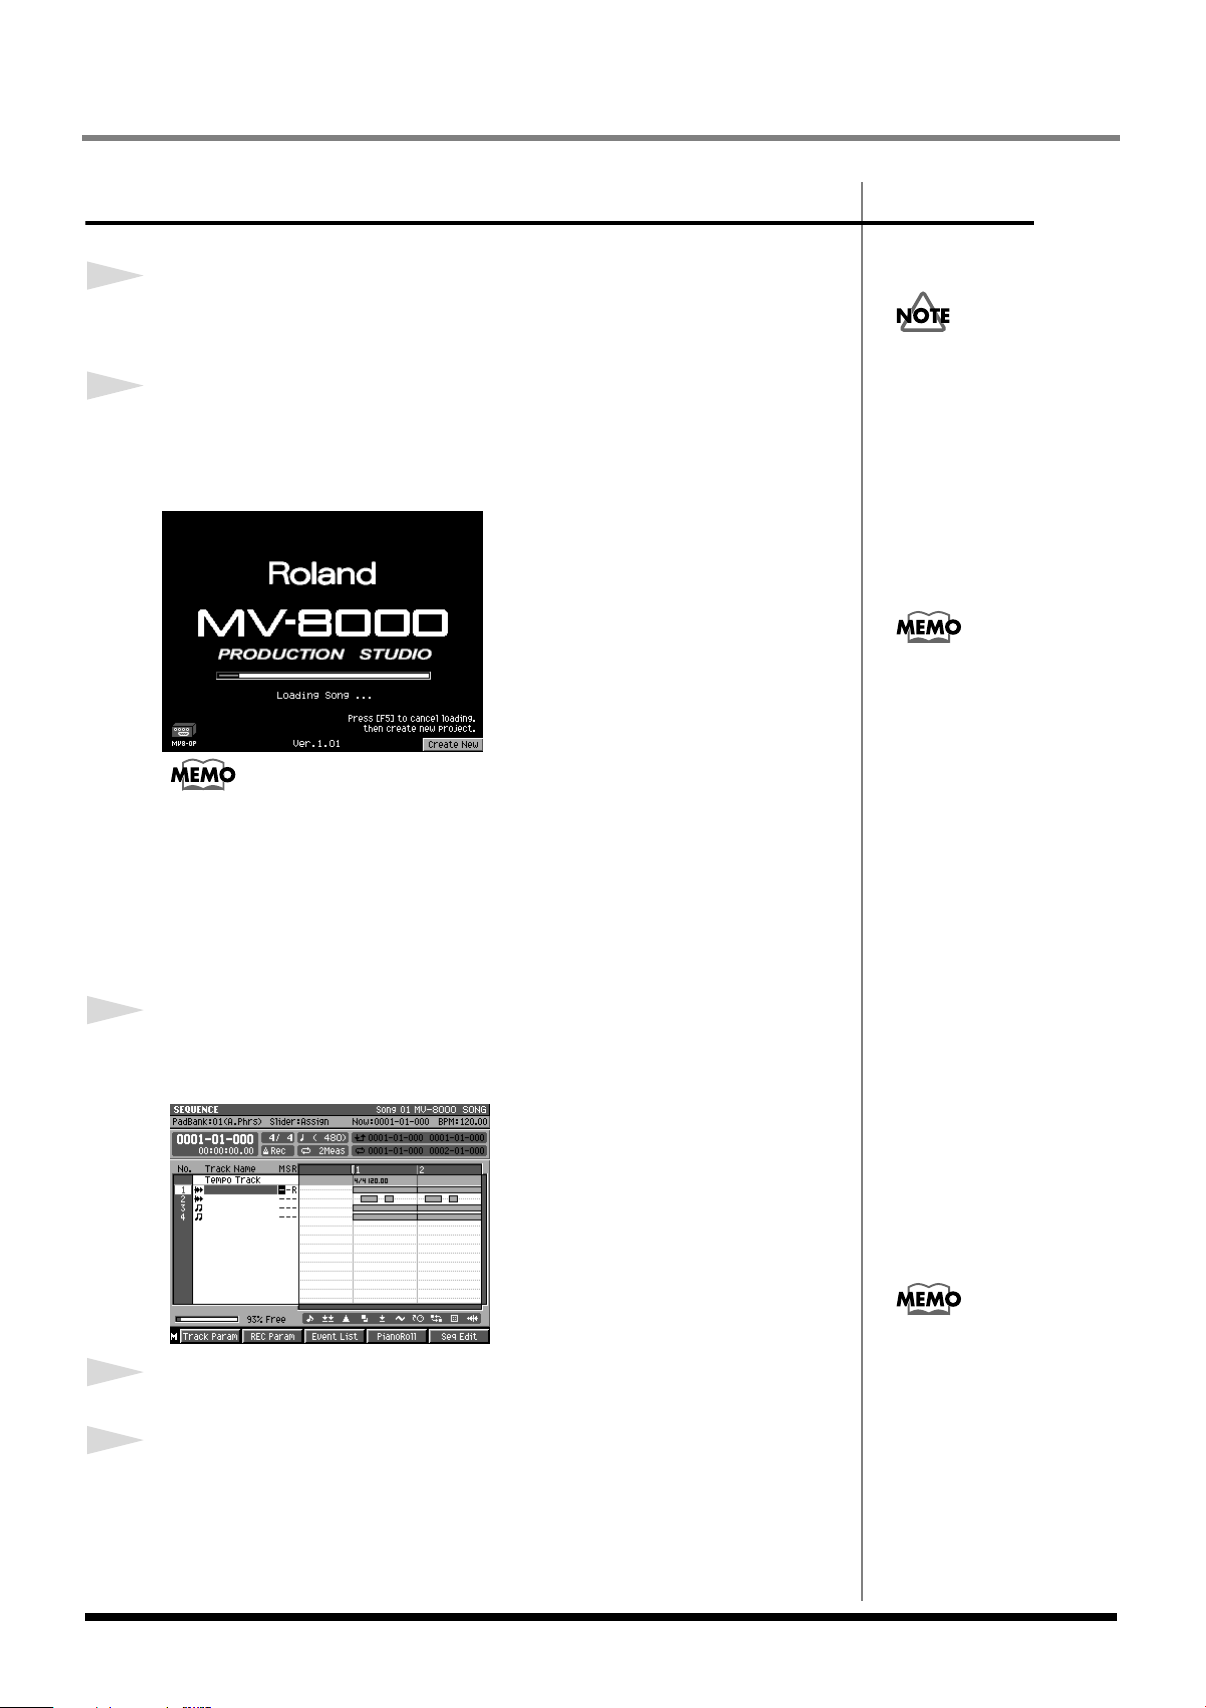
The LCD backlight (illumination) will light, and the opening screen and the
MV-8000's system software version will be displayed.
• When you turn on the power, you may hear a sound even though the MASTER
knob is turned down; this is not a malfunction.
• While the opening screen is displayed, the MV-8000 is checking its system and
loading data required for startup. Please wait until it is ready to operate.
• To cancel loading and to create a new project, press [F5 (Create New)].
• To adjust the contrast of the display, turn the CONTRAST knob located at the right
of the LCD.
After making connections
correctly as described in
Preparing your equipment
and making connections (p.
4), turn on the power using
the procedure given here. If
you fail to observe this
procedure, you risk
malfunctions or speaker
damage.
This unit is equipped with a
protection circuit. A brief
interval (a few seconds) after
power up is required before
the unit will operate normally.
3
4
5
When start-up is complete, the SEQUENCE screen will
appear.
Turn on the power of your audio equipment.
Use the MV-8000's MASTER knob and the volume controls
of your audio equipment to adjust the volume appropriately.
The first time you start up the
MV-8000, demo playback data
will be loaded automatically.
The next time you start up, the
project and song that were
eing used when you last shut-
down the system will be
loaded automatically.
6
Turning off the power
You must perform the Shutdown operation before turning the power off. The
Shutdown operation saves the stored parameters before powering-off, and
safely stops the hard disk.
1
Press .
A message of “SHUTDOWN Are you sure?” will appear.
2
Press (Yes).
A message of “Save Current Project before SHUTDOWN?” will appear.
3
Press (Yes).
Preparations and concepts
Preparations and concepts
4
5
The current project will save. When save process is completed, the
“SHUTDOWN Completed. You May Turn Off.” message will appear.
Turn down the volume of all connected equipment
Turn off the rear panel POWER switch.
Make sure that the “You May Turn Off.” message is displayed before you turn
off the power.
If you turn off the power without performing Shutdown, or if you turn
off the power before “You May Turn Off.” is displayed, the data and
the MV-8000 itself will be damaged. Roland will accept no
responsibility for any damage that results from your failure to
perform the Shutdown operation.
• When you turn off the power, you may hear a sound even though the MASTER
knob is turned down; this is not a malfunction.
• While the Shutdown process is occurring, system parameters and project/song
data is being saved. This will require a certain amount of time before the MV-8000
is ready for you to turn off the power.
If you press [EXIT] in step 3,
shutdown will be cancelled. If
you want to shutdown without
saving the current project,
press [F1 (No)].
7
Preparations and concepts
If functions are shown at the
bottom of the LCD, you can
use the F buttons to select
them directly.
b
Basic operations
Moving the cursor
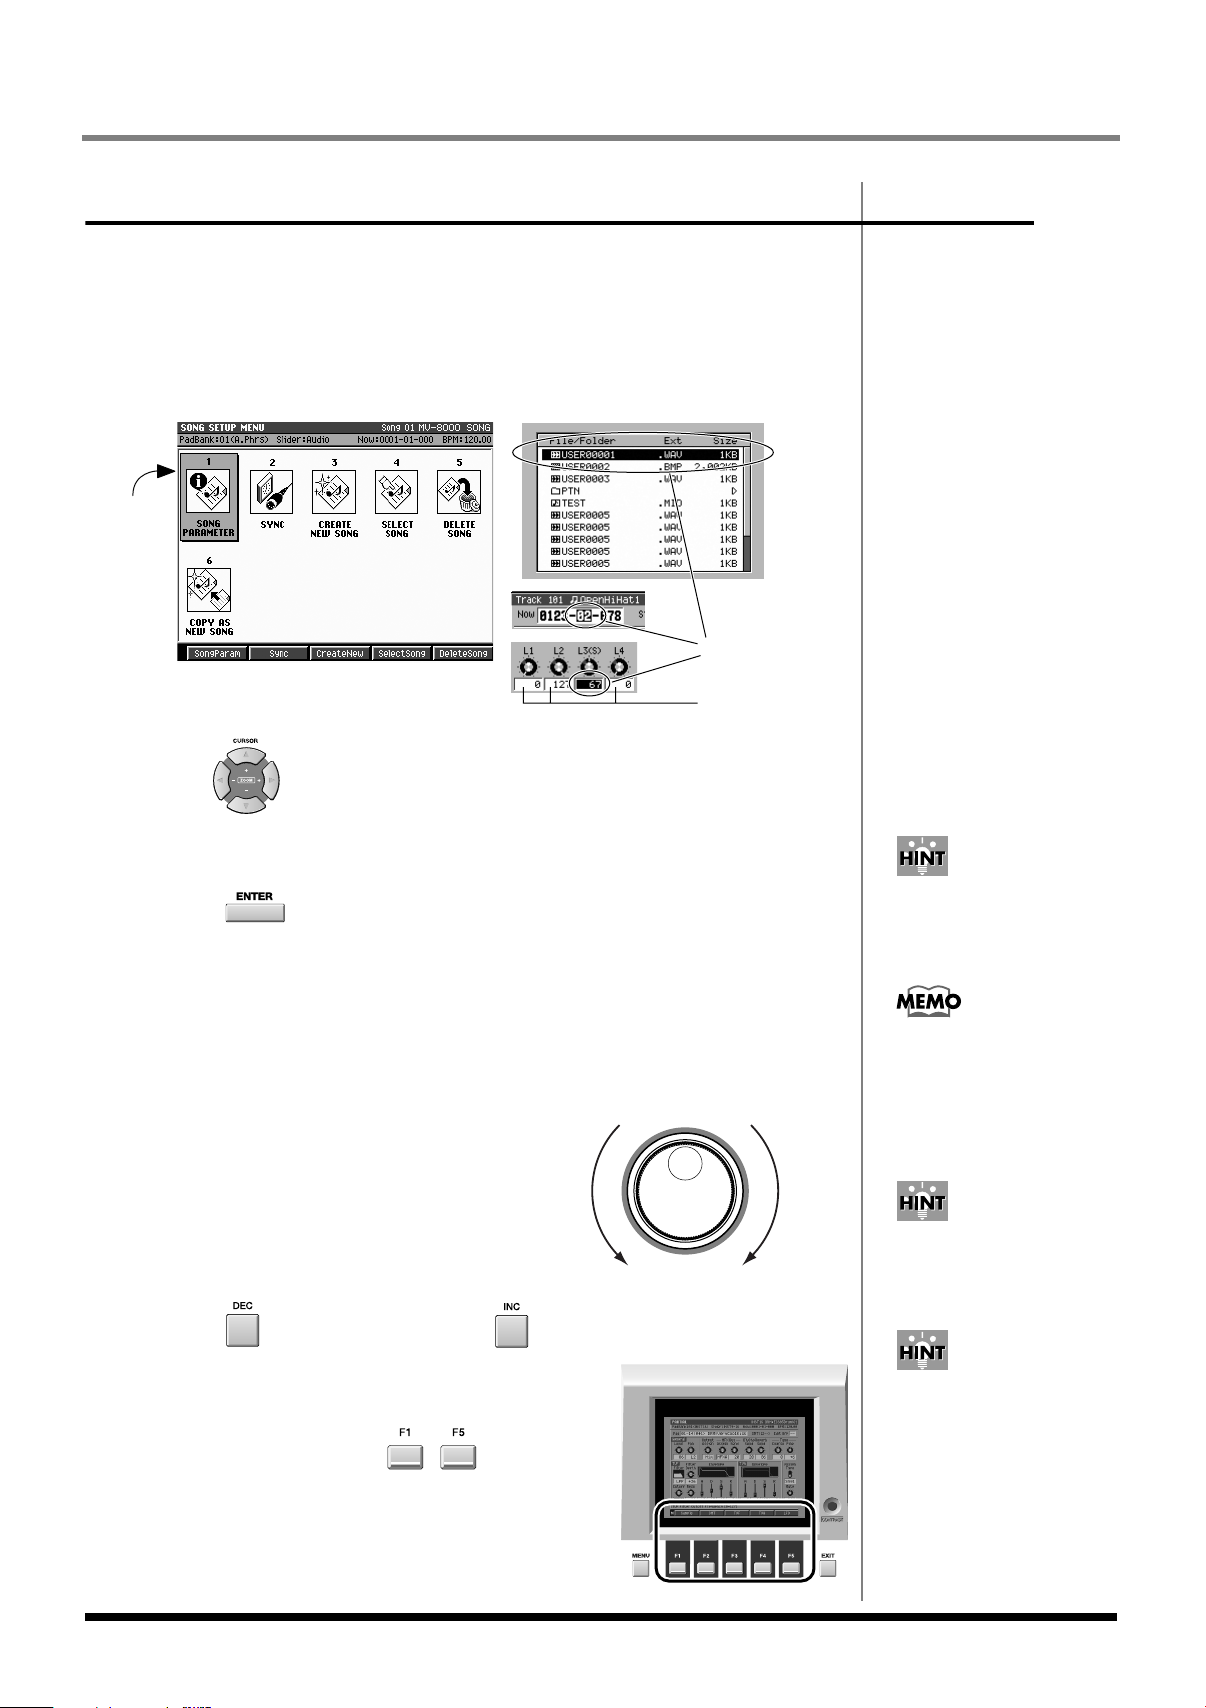
Each screen displays various parameters (items to set) or menus (items to
select). To edit the value of a parameter, move the cursor to the value you
want to edit. To select a menu item, move the cursor to the desired item. The
cursor is enclosed in a frame as shown below.
Cursor
Cursor (highlighted)
Black characters
on white background
(value display)
Use to move the cursor.
●
Finalizing a menu selection
Press to finalize the selected menu item. The selection or command
(operation) will be executed.
Editing the value of a parameter
To edit the value of a parameter, use the VALUE dial or [DEC]/[INC].
●
VALUE dial
Turn the VALUE dial toward the right
to increase the value, or toward the
decrease increase
left to decrease it.
●
[DEC]/[INC]
Press to increase a value. Press to decrease a value.
Using the F (function) buttons
The top panel F buttons ( – ) have various
functions assigned to them depending on the
screen shown in the LCD. These buttons
correspond one-to-one with the function names
shown at the bottom of the LCD.
To edit a parameter value,
move the cursor to an area
displayed in black characters
on a white background.
You can hold down [SHIFT]
and use the VALUE dial or
[INC][DEC] to change a value
in larger steps.
You can continue holding
down [DEC] or [INC] to make
the value continue changing
(“repeat”). At this time, you
can hold down the other
utton as well to make the
value change even faster
(“turbo repeat”).
8
Preparations and concepts
b
Cursor (highlighted)
When you are inputting
lowercase characters, you can
temporarily input uppercase
characters by holding down
[SHIFT] as you input.
When you are in uppercase
input mode, repeatedly
pressing [3] will cycle in the
order of 3
→G→
Using the SHIFT button
Some buttons have more than one function assigned to them; use [SHIFT] to
access these additional functions.
Hold down and press the desired button.
In this manual, operations accessed using the are indicated as [SHIFT] +
[(button name)]. Use [SHIFT] to access the functions whose names are printed
inside a white frame on the panel of the MV-8000.
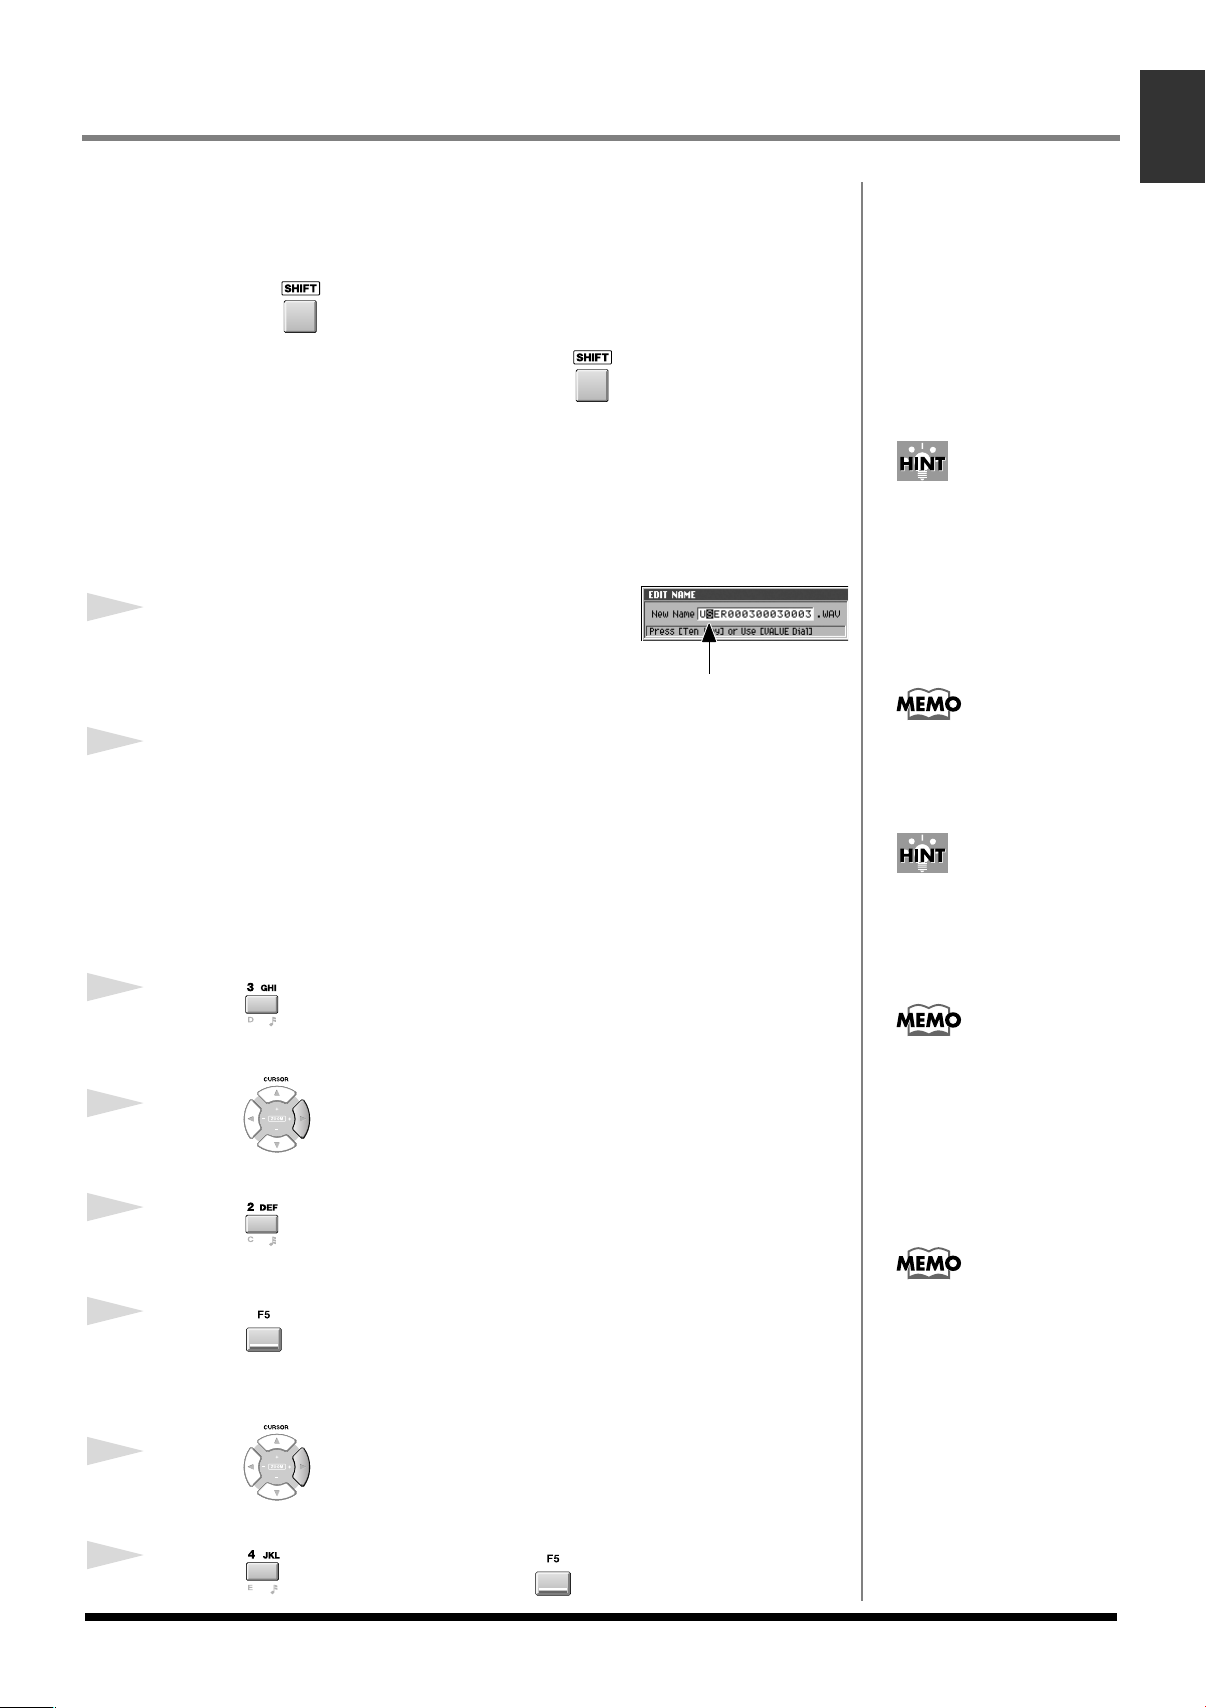
Inputting text
Here's how to input alphanumeric characters, such as when specifying a file
name.
1
Move the cursor to the desired location.
The cursor is the highlighted character, as shown
below.
2
Turn the VALUE dial.
Input the desired character. To move to the next place (toward the right) the
right cursor button.
Preparations and concepts
You can use the SHIFT LOCK
parameter (p.302) to change
the operation of the SHIFT
utton.
If you use the VALUE dial to
input characters, turning the
dial toward the right will select
characters in the order of “a...z,
A...Z, 0...9,!,#...”
●
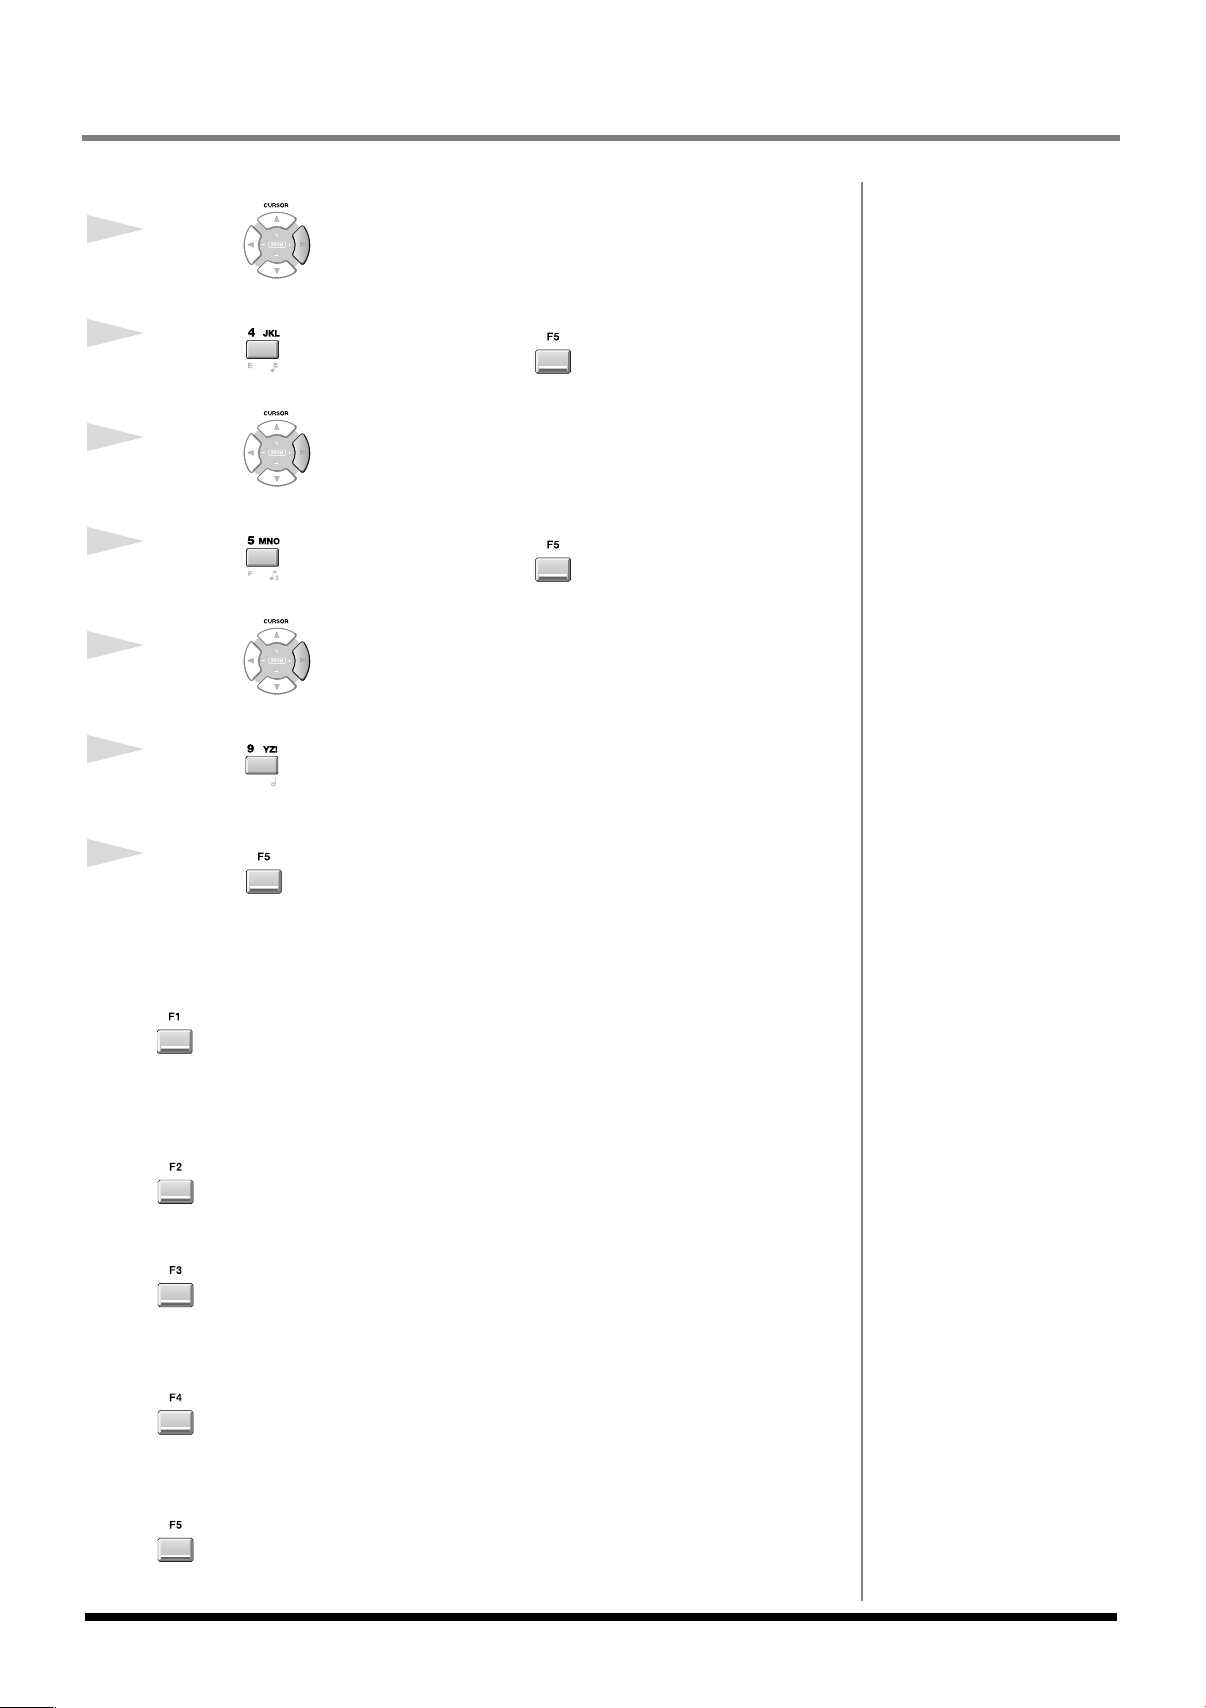
Using the numeric keys to input characters
You can use the numeric keys to input alphanumeric characters. Let's try
inputting “Hello!”
1
Press three times.
“H” will be input at the cursor location.
2
Press .
The cursor will move to the right.
3
Press three times.
“E” will be input.
4
Press (A➜a/a➜A) to switch to lowercase input.
This will switch the type of character that is input. Press [F4 (A➜a/a➜A)] so
that lowercase character is changed.
5
Press .
The cursor will move to the right.
6
Press four times and press (A➜a/a➜A).
H→I→3→G.
When in lowercase character
input mode, pressing [2]
repeatedly will cycle in the
order of 2→D→E→F→2→D.
9
Preparations and concepts
“l” will be input.
7
Press .
The cursor will move to the right.
8
Press four times and press (A➜a/a➜A).
“l” will be input.
9
Press .
The cursor will move to the right.
10
Press four times and press (A➜a/a➜A).
“o” will be input.
11
Press .
The cursor will move to the right.
12
Press four times.
“!” will be input.
13
Press (OK).
You have input “Hello!” This ends the procedure.
●
Part of the F buttons
History
You can recall (and re-input) up to the ten most recent names you input in the
EDIT NAME popup since turning on the power. Selects the name at the cursor
in the history list then press [ENTER].
Insert Space
Inserts a space at the cursor location.
10
Delete
Deletes the character at the cursor location. Characters at the right of the
cursor will be moved forward to fill the gap.
A➜a/a➜A (switch character case)
Switches the character at the cursor location between uppercase and
lowercase.
OK
Finalizes the name and closes the EDIT NAME popup.
 Loading...