


Page 1
Book
Beyond the Reality
The
Book
Beyond the Reality
The
WE DESIGN THE FUTURE
Copyright © 2003 ROLAND CORPORATION
All rights reserved.
No part of this publication may be reproduced in any form
without the written permission of ROLAND CORPORATION.
Visit us online at www.roland.co.jp
www.v-synth.com
All specifications and apperarances are subject to change.
All trademarks are the property of their respective companies.
Printed in Japan March 2003 RAM-3700 C-3 MI-NK
The Book
—Beyond the Reality—
Page 2
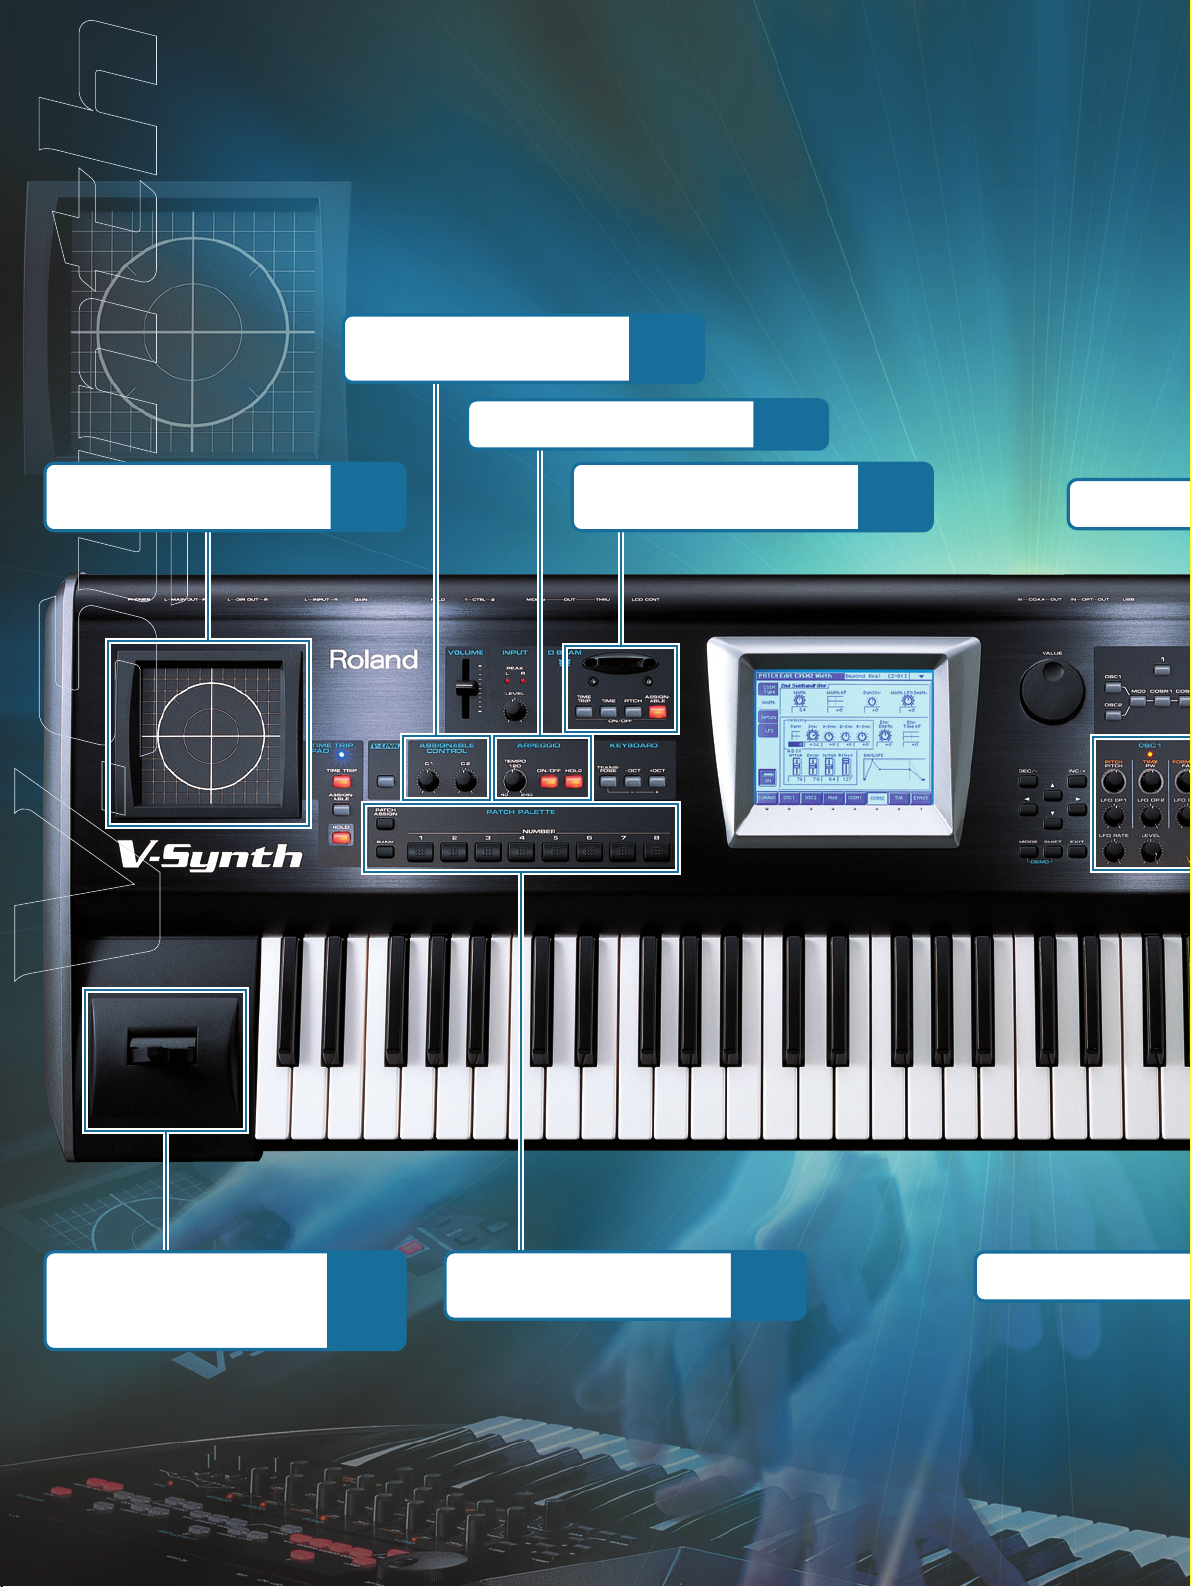
Time Trip Pad
➝ Performance Control
Assignable Control
➝ Performance Control
p.33
Bender/
Moduration lever
➝ Performance Control
p.33
Patch Palette
➝ The Simplest of Patches
p.8
p.33
The Arpeggiator
D Beam
➝ Performance Control
p.33
p.31
The OSC1/OSC
The COS
Next-Generation Synthesis for Unlimite
Next-Generation Synthesis for Unlimite
Page 3
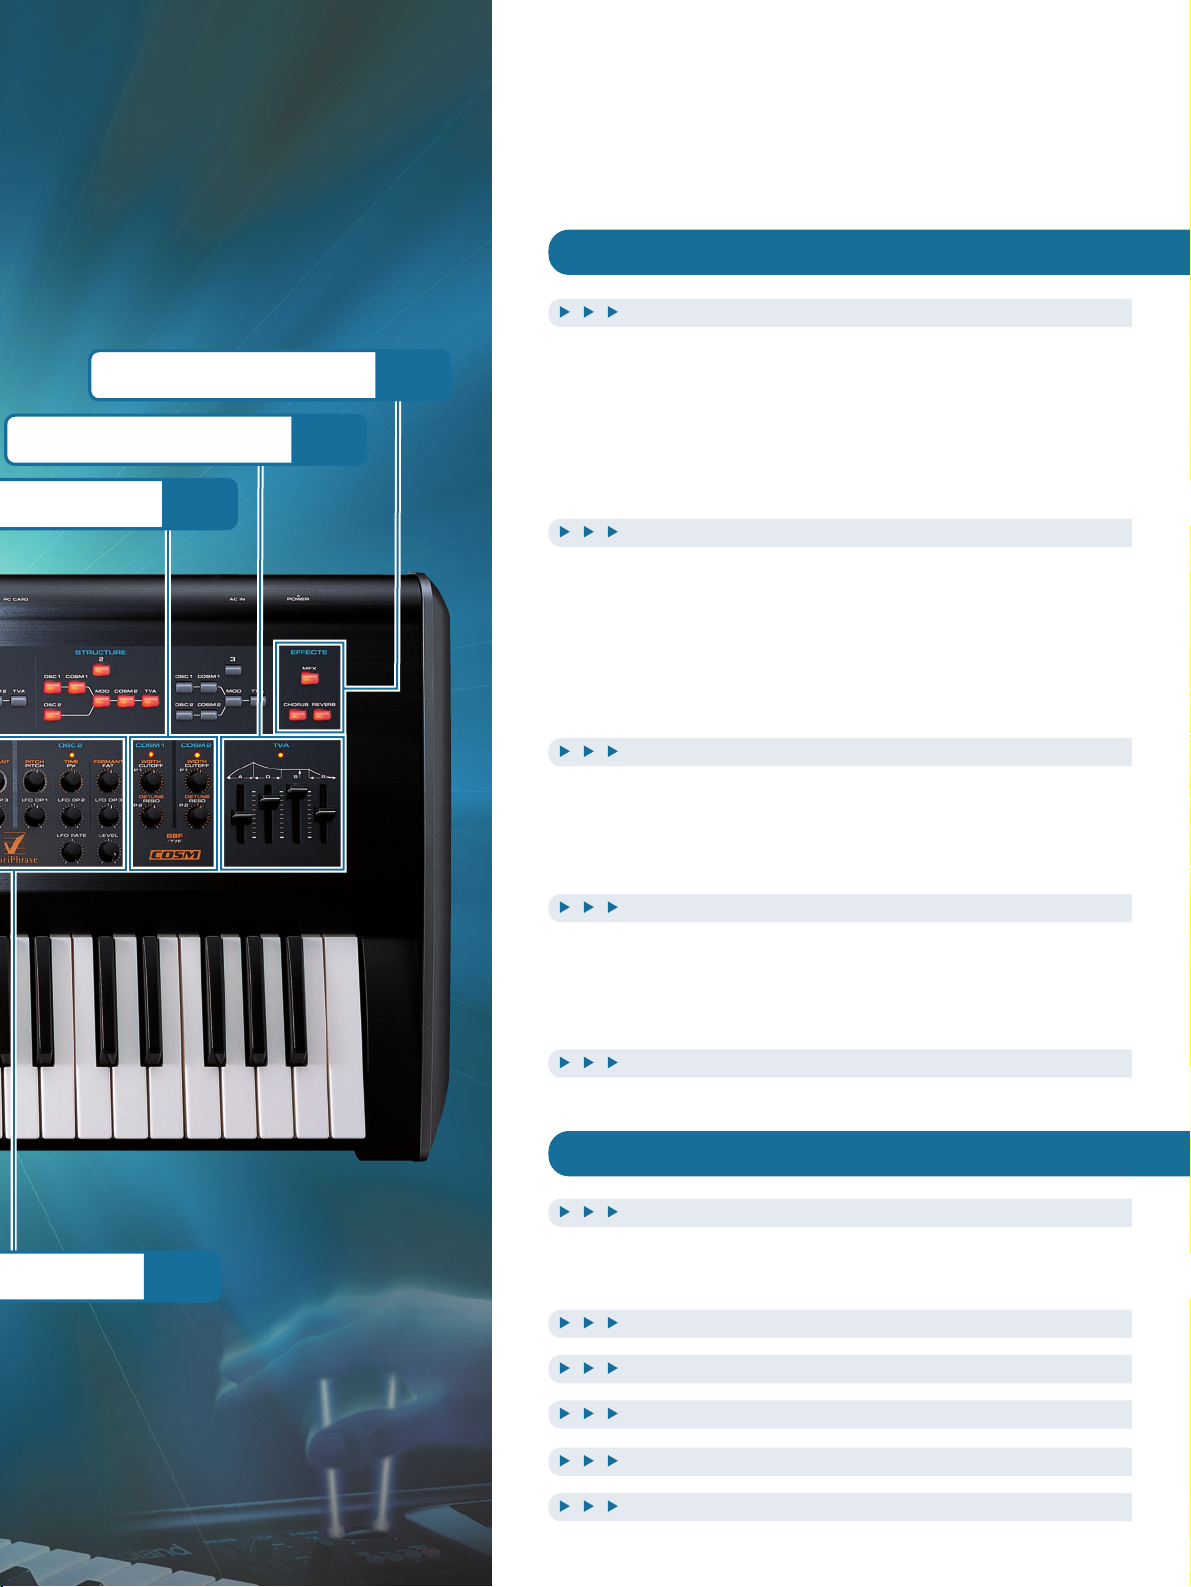
2 Sections p.12
The TVA Section
p.17
p.22
The Effect Section
p.23
Inside the V-Synth - A Tutorial
5
First Steps 6
Introduction . . . . . . . . . . . . . . . . . . . . . . . . . . . . . . . . . . 6
Trying out the Presets . . . . . . . . . . . . . . . . . . . . . . . . . . . 7
The Two Basic Approaches to Programming . . . . . . . . . . 7
Alternative Methods of Setting Values . . . . . . . . . . . . . . 7
The Simplest of Patches . . . . . . . . . . . . . . . . . . . . . . . . . 8
Basic Sound Parameters 12
The OSC1/OSC2 Sections . . . . . . . . . . . . . . . . . . . . . . . 12
The Mod Section . . . . . . . . . . . . . . . . . . . . . . . . . . . . . . 15
The COSM Sections . . . . . . . . . . . . . . . . . . . . . . . . . . . . 17
The TVA Section . . . . . . . . . . . . . . . . . . . . . . . . . . . . . . 22
The Effect Section . . . . . . . . . . . . . . . . . . . . . . . . . . . . . 23
Advanced Sound Programming 24
Sampling and Encoding . . . . . . . . . . . . . . . . . . . . . . . . . 24
Effective Use of Envelopes . . . . . . . . . . . . . . . . . . . . . . 27
Getting More out of a Sample . . . . . . . . . . . . . . . . . . . . 30
Advanced Performance 31
The Arpeggiator . . . . . . . . . . . . . . . . . . . . . . . . . . . . . . 31
Performance Controls . . . . . . . . . . . . . . . . . . . . . . . . . . 33
The Matrix - Assigning Destinations . . . . . . . . . . . . . . . 34
Backing Up your Data 36
Appendices 39
Sound Designers’ Comment 40
Howard Scarr . . . . . . . . . . . . . . . . . . . . . . . . . . . . . . . . 40
Stephane Pigeon . . . . . . . . . . . . . . . . . . . . . . . . . . . . . . 41
Patch List 42
Waveform List 44
Specifications 46
Other Tips 48
Index 51
d Sonic Control.
d Sonic Control.
Page 4
Understanding Sound 1
Randomly moving controls on the panel or changing parameters in the menus is not the best method of arriving at musically useful sounds. Before attempting to create
new sounds on your V-Synth, you should be aware of some fundamental audio principles and how these apply to synthesizers in general. The concepts and examples
in this section have been kept relatively basic for readers with little or no previous experience of synthesizers.
What is Sound?
Throughout our lives we are constantly surrounded by sounds of all kinds.
Physically, sound waves are contractions and expansions in the air, rapid changes
in air pressure which cause our ear-drums to vibrate (like a microphone capsule)
and send corresponding signals to the brain. The physical attributes of a sound
wave determine how it is perceived, and the three elements we can all recognize
are pitch, brightness and volume (loudness).
Pitch
The pitch of a note depends upon how rapidly the wave repeats itself. A more
scientific and general term for pitch is frequency, measured in Hertz (Hz). 1Hz
is defined as 1 cycle (repetition) per second.
Higher frequency notes have higher pitch. Doubling or halving the frequency of
a note shifts the pitch up or down an octave - the most harmonic interval of all.
For example, the note A4 (middle A) has a standard frequency of 440 Hz, so
A5 is 880 Hz and A3 is 220 Hz.
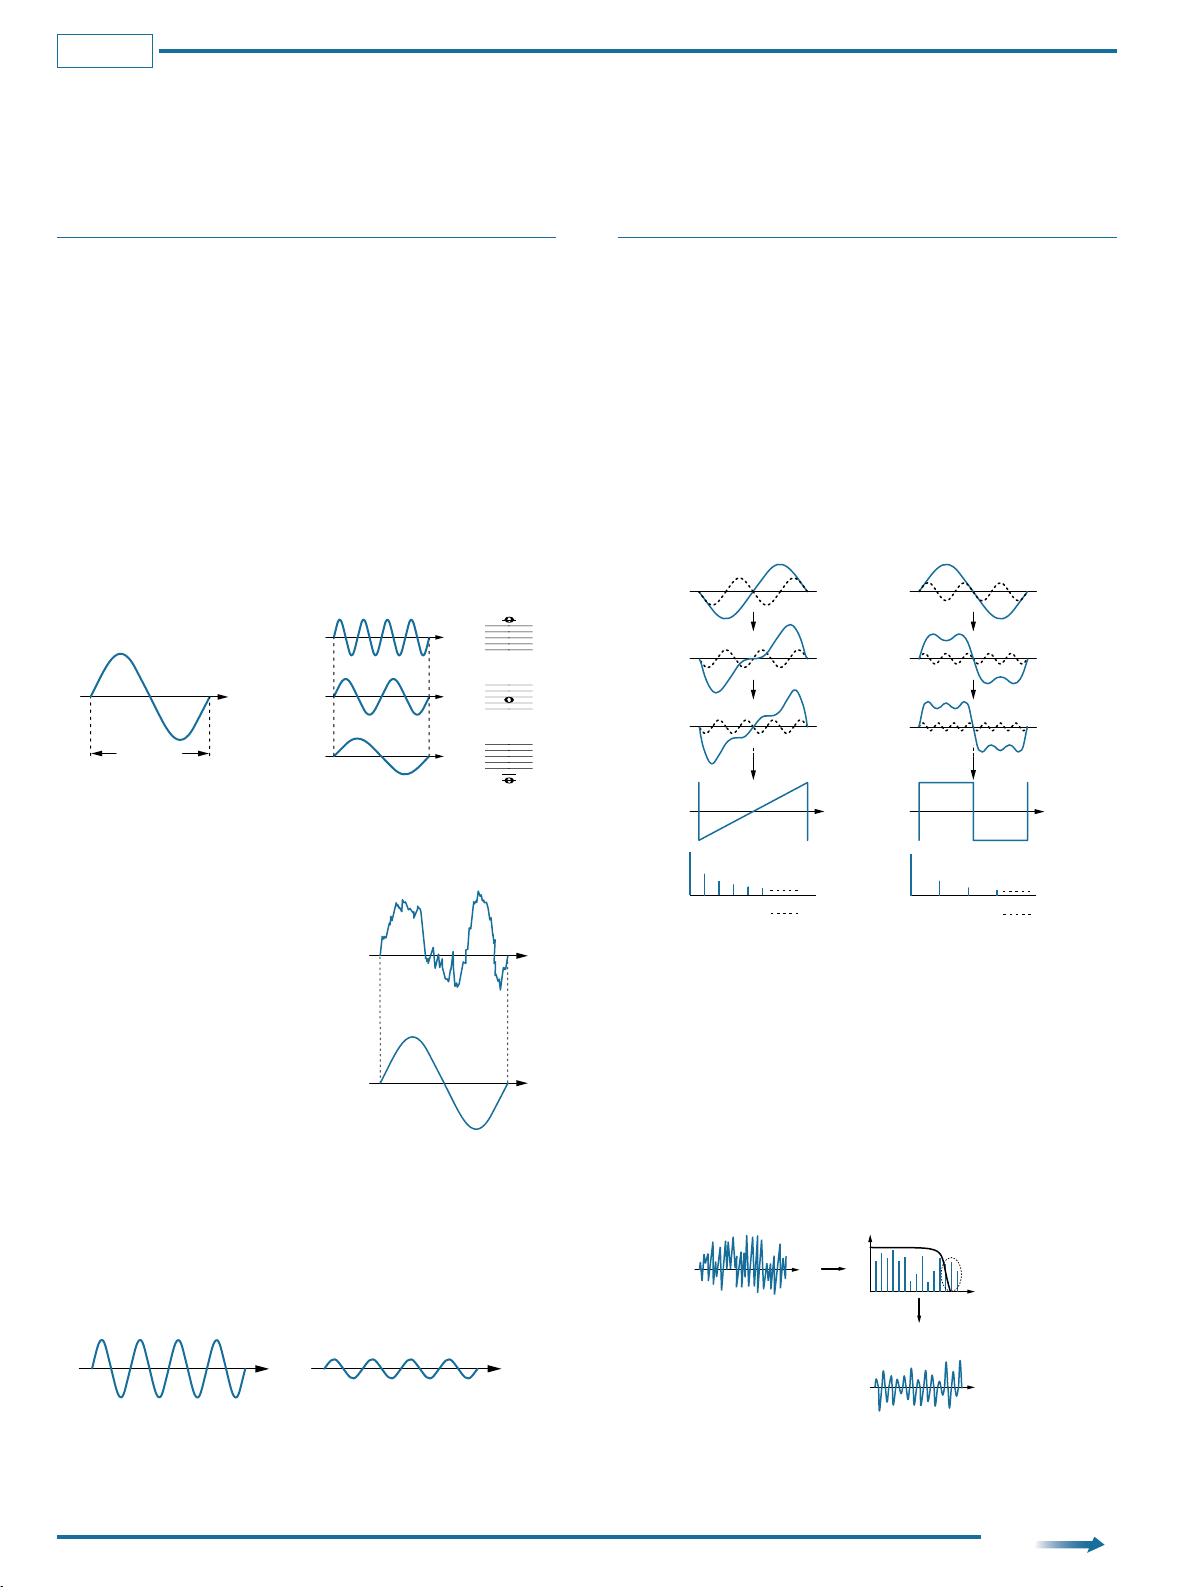
Brightness
The brightness of a wave is generally
determined by how complex it is. The less
smooth the waveform, the brighter it
sounds. If you compare a piano waveform
with a sinewave using an oscilloscope, it is
easy to see why the piano note sounds
brighter than the sine wave.
Volume
The volume of a sound is determined by its amplitude, which is basically the
absolute difference between peaks and troughs in the wave i.e. its height in the
diagram below. Louder sounds have higher amplitude, and softer sounds have
lower amplitude.
Manipulating Partials
A mathematician called Fourier once proved that any sound at all, from a dog
barking to the complete works of Rachmaninov, can be described as a timevariant mixture of many sine waves known as partials or overtones. A very
large number of sinewave oscillators, each with independent control of
frequency and amplitude would be necessary to emulate even a dog barking.
That is why this additive synthesis is much less common than subtractive
synthesis - selectively removing partials from complex waveforms.
Nevertheless, viewing a complex waveform as the sum of its component partials
is useful to understand how subtractive synthesizers work. The typical sawtooth
and square waves in any subtractive synthesizer consist of a fundamental (the
basic frequency) plus integer multiples of this frequency (2x, 3x ... and so on).
Such integer multiples are called harmonic partials, while the non-integer
multiples particularly prominent in drums or natural (non-instrumental) sounds
are called inharmonic partials.
Filters
The more high-frequency partials there are in a sound, the brighter it will be.
Removing some of the higher partials from bright waveforms using a Low Pass
Filter will make the sound mellower, and this is the basic method used in
subtractive synthesis. Many subtractive synthesizers have an optional High Pass
filter to remove lower partials and/or a Band Pass filter to remove high and low
partials at the same time, leaving those in the middle unaffected. Whatever types
of filter are used, all subtractive synthesizers need waveforms with a rich
assortment of partials so that sounds can be modified in interesting ways.
Before being sent through the filter, additional partials can be created using
several methods of interaction between oscillators e.g. synchronisation (Sync),
Ring Modulation (RM) or Frequency Modulation (FM), as well as various
distortion techniques.
time
time
time
1 Hz sound wave
time
A5
(=880 Hz)
A4
(=440 Hz)
A3
(=220 Hz)
1 second
Partials
Sawtooth wave Square wave
time time
Partials
Fundamental
2nd partial
3rd partial
4th partial
5th partial
6th partial
Fundamental
2nd partial
3rd partial
4th partial
5th partial
6th partial
7th partial
Piano waveform (complex)
Sine waveform (smooth)
time
time
"clang"
"poooh"
time
time
soft sound
loud sound
frequency
time
time
bright waveform
Higher partials are cut,
making the waveform more rounded (mellow)
Low Pass Filter
partials
which are cut
level
Column
to p.38
Page 5
Inside the V-Synth - A Tutorial
First Steps 6
Introduction 6
Trying out the Presets 7
The Two Basic Approaches to Programming
7
Alternative Methods of Setting Values 7
The Simplest of Patches 8
Basic Sound Parameters 12
The OSC1/OSC2 Sections 12
The Mod Section 15
The COSM Sections 17
The TVA Section 22
The Effect Section 23
Advanced Sound Programming
24
Sampling and Encoding 24
Effective Use of Envelopes 27
Getting More out of a Sample 30
Advanced Performance 31
The Arpeggiator 31
Performance Controls 33
The Matrix - Assigning Destinations 34
Backing Up your Data 36
Page 6
Inside the V-Synth - A Tutorial
First Steps
6
There is quite a lot of “learning by doing” in this tutorial, and to get the most out of it
you should follow all the instructions strictly from start to finish. Later parts of the tutorial
assume that you have carried out all previous steps to the letter, e.g. that you have saved
a sound called INIT PATCH to patch number 512, and one called “Simplicity” to
number 300, etcetera. Instructions become progressively terse because you will become
more familiar with the programming environment and terminology.
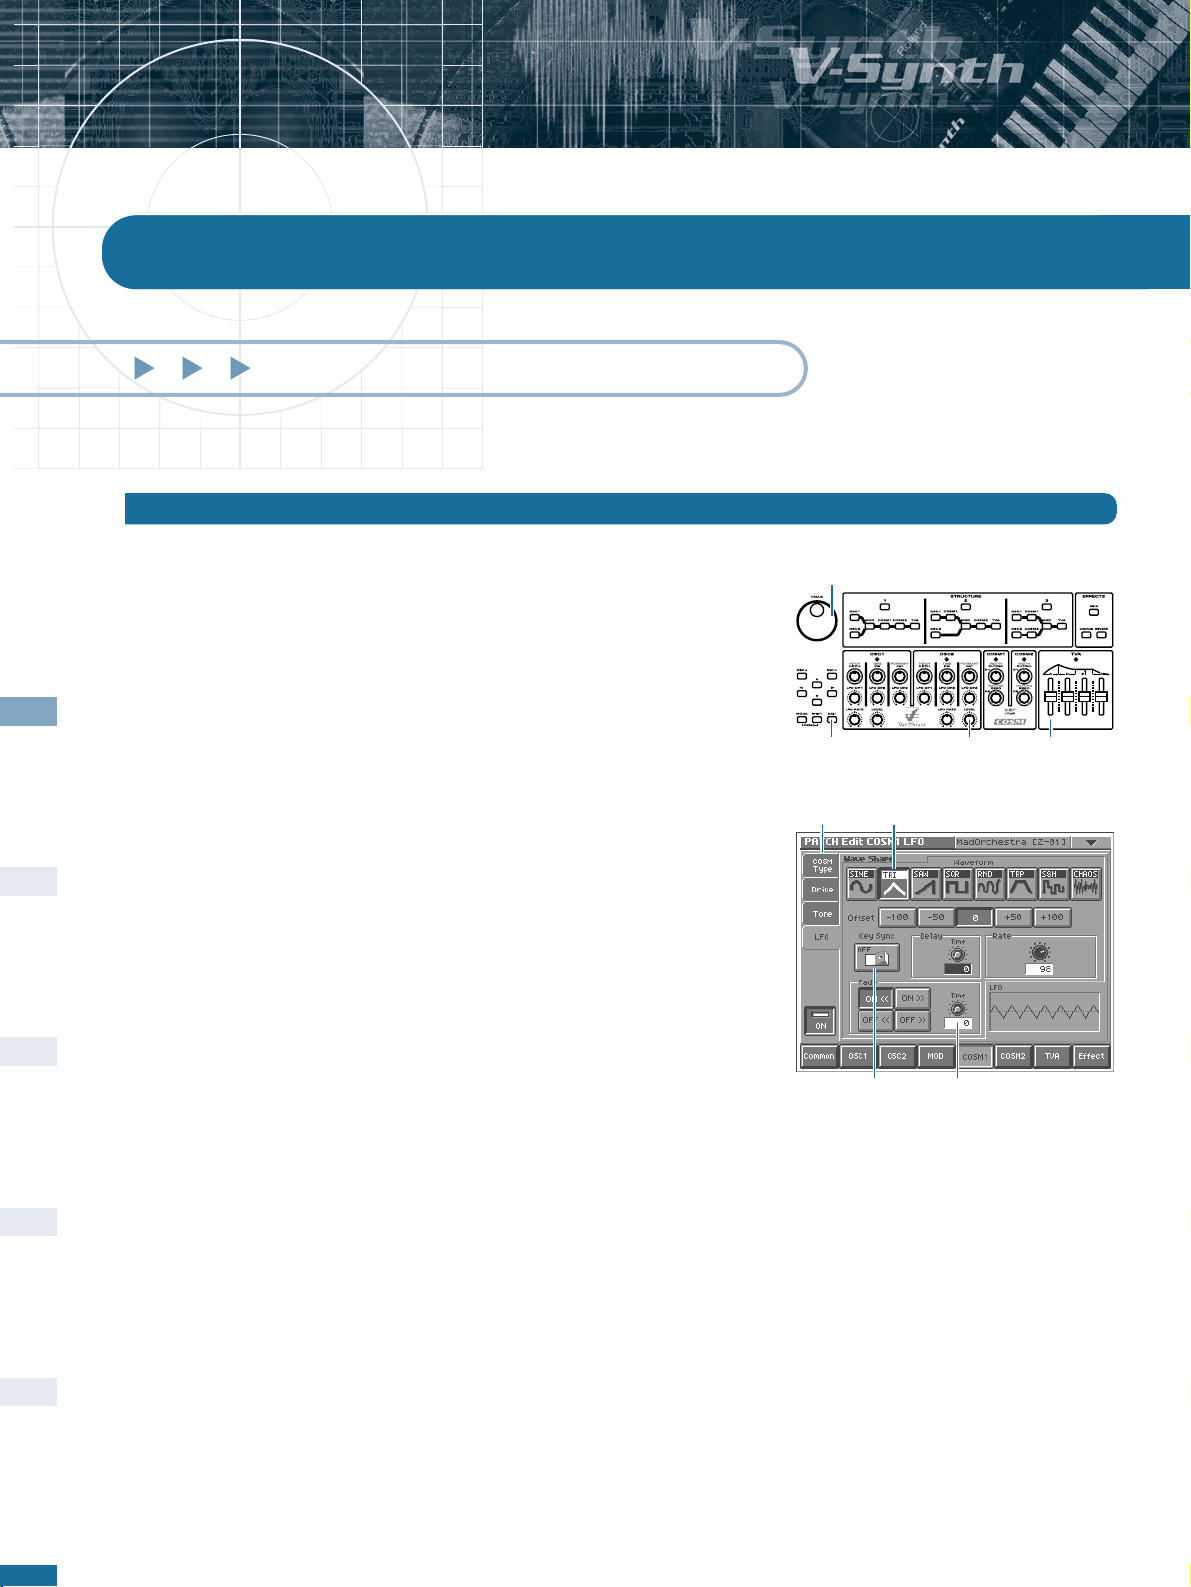
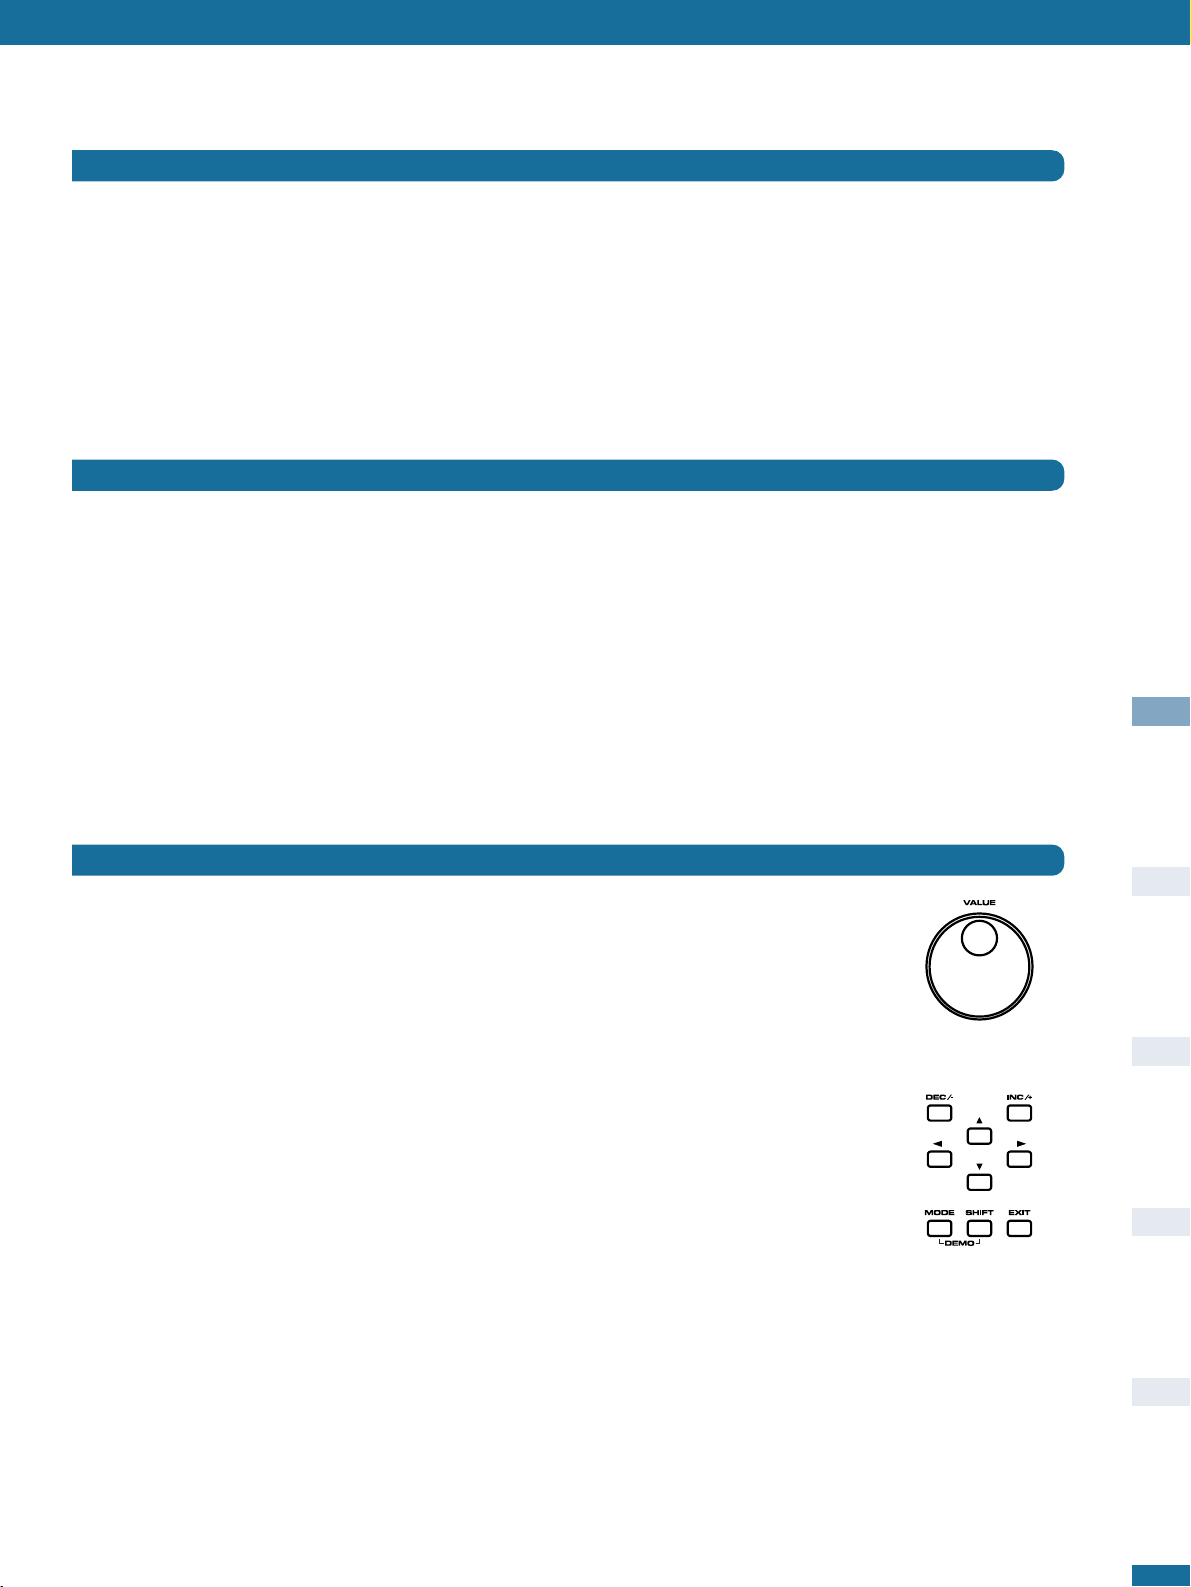
To differentiate between physical and virtual controls, those on the panel are referred to
as KNOB, BUTTON, SLIDER, VALUE DIAL, whereas those appearing on the screen
are referred to as PAD, TAB, CONTROL or even GRAPHIC (depending upon function
and/or appearance).
TABs are used for selecting different pages within a section, and only appear on the left
or right of the screen. The combination pitch-bender and modulation control to the left
of the keyboard is simply referred to as the BENDER.
For the sake of simplicity, only STRUCTURE number 1 is used throughout the tutorial.
Split and Drum modes are not mentioned for the same reason - for further information,
please refer to the Owner’s manual.
Introduction
First Steps
knob sliderbutton
dial
Tab Pad
ControlGraphic
Inside the V-Synth - A Tutorial
Page 7
First Steps
7
One common misconception about programming synthesizers is that it is always easier to modify an existing sound than to start from
scratch. The main problem with modifying existing sounds is that you often have to search for and remove unwanted parameters (which
may be affecting the sound quite drastically), and you can easily end up with a very untidy patch structure.
On the other hand, analysing existing presets in depth can teach you quite a few tricks. Once you have found out how a certain trick is
done, you should then start from scratch and integrate the trick into your own patch. This will improve your programming skills much more
effectively than editing existing presets!
✱
AAfftteerr yyoouu hhaavvee ll eeaarrnnee dd tt hh ee bbaassii cc ss hheerree,, tthheerree ii ss ooff cc oouurrssee nnootthhiinngg ssttooppppiinngg yyoouu ff rroo mm bb eeiinngg iinnss ppiirreedd bbyy ssoommee ooff tthhee eexxiiss ttiinn