

Page 1
What Can Be Done with the V-Drums Tutor . . . . . . . . . . . 3
Getting Ready . . . . . . . . . . . . . . . . . . . . . . . . . . . . . . . . . . . . . . 4
First: Check the Required Items . . . . . . . . . . . . . . . . . . . . . . . . . . . . . . . . . . . . . . . . . . . . . . 4
Step 1: Connect the Computer to the V-Drums . . . . . . . . . . . . . . . . . . . . . . . . . . . . . . . 5
Step 2: Install the
Step 3: Start-up Settings . . . . . . . . . . . . . . . . . . . . . . . . . . . . . . . . . . . . . . . . . . . . . . . . . . . . . 6
V-Drums Tutor . . . . . . . . . . . . . . . . . . . . . . . . . . . . . . . . . . . . . . . . . . . . . . . . 6
Quick Start Guide
Be sure to read this rst.
This chapter explains how to
install the V-Drums Tutor software
and correctly set it up.
Getting Ready Application Guide Troubleshooting
Application Guide . . . . . . . . . . . . . . . . . . . . . . . . . . . . . . . . . . 8
Listening to the Built-in Songs . . . . . . . . . . . . . . . . . . . . . . . . . . . . . . . . . . . . . . . . . . . . . .12
Watch as the Songs Play Back . . . . . . . . . . . . . . . . . . . . . . . . . . . . . . . . . . . . . . . . . . . . . . .14
Playing Along With the Built-in Songs . . . . . . . . . . . . . . . . . . . . . . . . . . . . . . . . . . . . . . .18
Checking Your Accuracy . . . . . . . . . . . . . . . . . . . . . . . . . . . . . . . . . . . . . . . . . . . . . . . . . . . .19
Shortcut Key List . . . . . . . . . . . . . . . . . . . . . . . . . . . . . . . . . . . . . . . . . . . . . . . . . . . . . . . . . . .20
Troubleshooting . . . . . . . . . . . . . . . . . . . . . . . . . . . . . . . . . . . 22
For the following languages, a PDF version of this manual can be found on the CD-ROM.
Deutsch, Français, Italiano, Español, Português, Nederlands
After reading this chapter about
basic operations, you’ll be prepared
to take full advantage of the
V-Drums Tutor.
Refer to this chapter if you have
problems installing or using the
V-Drums Tutor.
Page 2
“Practicing drums can be more enjoyable!”
There are two main enjoyment principles in being able to play a musical instrument:
1. Performing in public.
2. Enjoying your personal development of musical skills through practice.
Everyone knows that “practice makes perfect.”
This software was created to help make your musical skills develop in a more enjoyable manner.
Let the V-Drums Tutor help you become a better drummer!
Page 3
What Can Be Done with the V-Drums Tutor
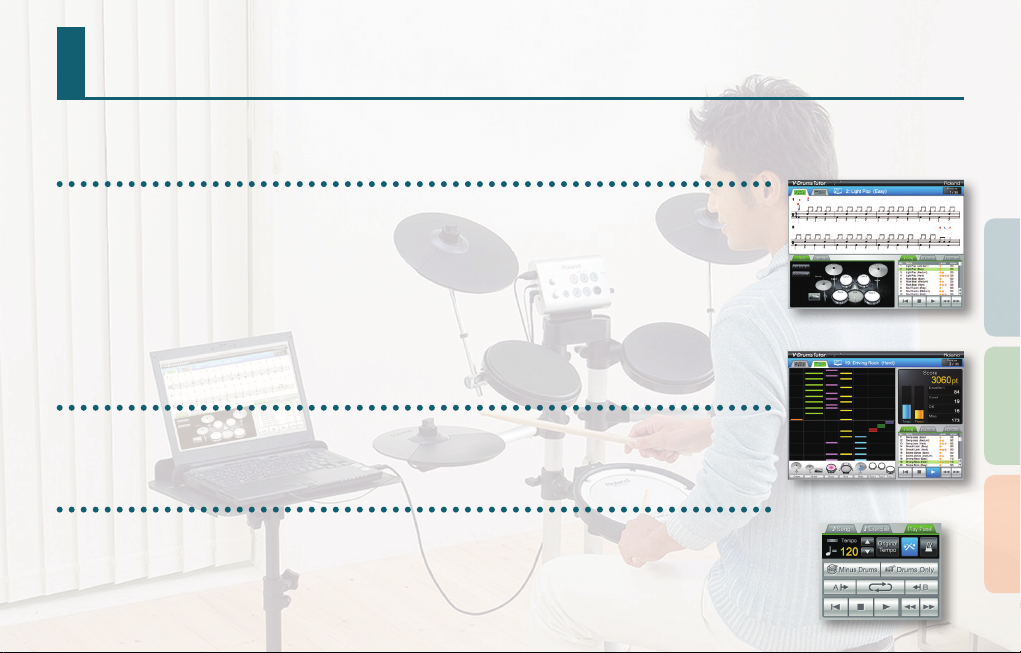
The V-Drums Tutor is a drumming practice software designed to be used with Roland V-Drums, making your practice time simple,
enjoyable, challenging and eective.
Learn how to play drums!
Listen to playing examples!
The V-Drums Tutor contains built-in songs covering a wide range of styles, from basic exercise patterns to songs with backing tracks.
Beginners can start practicing immediately as the V-Drums Tutor respects all musical levels.
Learning with visuals!
There are two types of screens — “Notation” and “Game.”
The “notation screen” shows a ball that bounces with the tempo, as well as the graphics of each pad that is hit, which will light up at
the timing when played. In the “game screen,” blocks scroll downward at the timing of each pad played, so even if you can not read
drum notation, you’ll nd a practice challenge as if you were simply playing a game.
Evaluate your playing!
The V-Drums Tutor is able to evaluate the timing of your playing, and can display “O” and “X” symbols on the drum notation screen
to show how you’re doing, timing wise. This visual feature automatically helps you to progress because you can see your mistakes. The
game screen also provides a numerical score of your performance.
Practice the way that suits you!
When playing with the built-in songs, the V-Drums Tutor allows you to change the tempo , or practice with a specic region repeatedly.
You can also choose a variety of playback methods, such as listening to only the drum part, or listening to only the backing track without
the drum part (i.e., karaoke for drumming).
The built-in songs cover a range of musical levels from beginner to intermediate.
Notation Screen
Getting Ready Application Guide Troubleshooting
Game Screen
Play Panel
3
Page 4
Getting Ready
Start by installing the software.
Log in as a user with administrative privileges
when you perform the installation!
You must install this software while logged in as a user with administrative
privileges. Once you’ve installed the software, it can be used even by users who
do not have administrative privileges.
* For more about administrative privileges, ask the system
administrator of the computer you’re using.
Close all system monitoring software before
installing!
If anti-virus programs or other system monitoring software is installed on
your computer, you must shut down all such software until the installation is
completed. Don’t forget to close applications that might not be shown in the
Windows taskbar or the Mac OS dock.
You’ll be installing the software by performing the following steps.
First: Check the Required Items
Step 1: Connect the Computer to the V-Drums
Step 2: Install V-Drums Tutor
4
Step 3: Start-up Settings
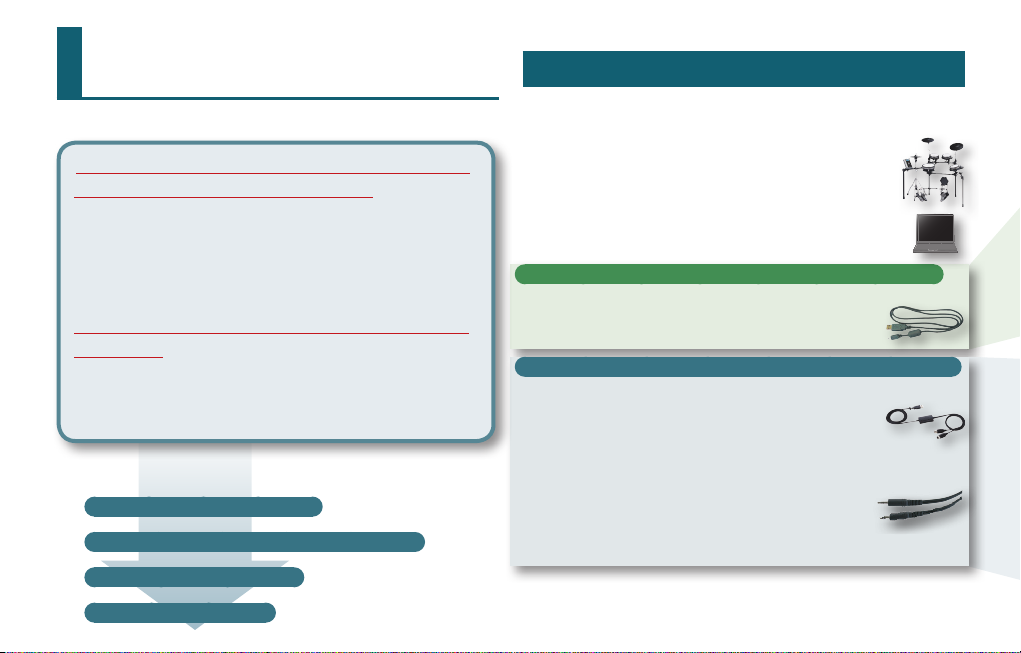
First: Check the Required Items
You’ll need the following items in order to use the V-Drums Tutor, which not
included in the V-Drums Tutor package. You’ll need to obtain them separately.
V-Drums set
* For details on V-Drums models supported by this
software, please refer to http://www.roland.com/.
Computer
Check the package of this product for the operating requirements.
If using a V-Drums module that has a USB COMPUTER port
USB cable (AB type)
If your V-Drums set has a USB COMPUTER port, use a USB cable
to connect the V-Drums to your computer.
If using a V-Drums module that doesn’t have a USB COMPUTER port
USB MIDI interface (such as the Roland UM-ONE)
Use a USB MIDI interface (such as the Roland UM-ONE) to connect
the MIDI OUT connector of your V-Drums to your computer.
Audio cable
Connect your computer’s audio output to the MIX IN jack of
your V-Drums (make sure you use the correct cable, which in
most cases is a mini-stereo jack for the computer side, and
depending on your V-Drums module, either a mini-stereo jack
or standard 1/4” stereo jack).
* To prevent malfunction and/or damage to speakers or other devices, always
turn down the volume, and turn o the power on all devices before making any
connections.
Page 5
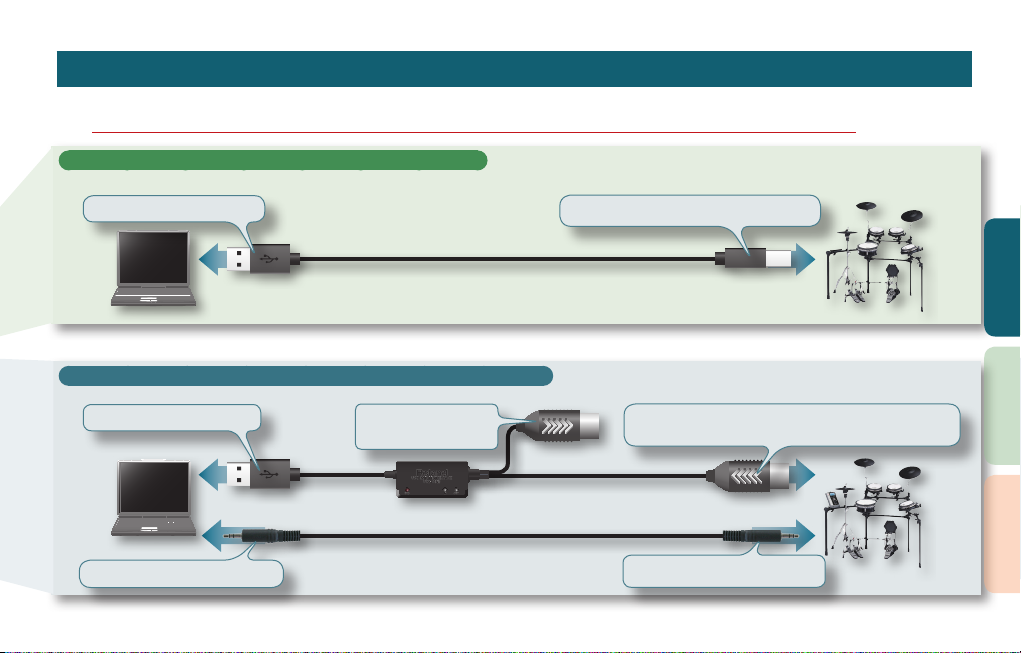
Step 1: Connect the Computer to the V-Drums
The method of connecting to your computer depends on the V-Drums model you’re using. Connect the computer to the module of your V-Drums as shown in the illustration below.
* Before you make connections, the USB driver for your V-Drums or your USB MIDI interface must be installed.
If using a V-Drums module that has a USB COMPUTER port
To the computer’s “USB port”
USB cable (AB type)
If using a V-Drums module that doesn’t have a USB COMPUTER port
To the computer’s “USB port”
To the computer’s “audio output”
The MIDI OUT cable is
not used
USB MIDI interface (the illustration shows the “Roland UM-ONE”)
Audio Cable
* For details on whether each V-Drums model has a USB COMPUTER port, refer to http://www.roland.com/ .
To the sound module’s “USB COMPUTER port”
(TD-20, TD-12, TD-9, TD-4, HD-3, HD-1, etc.)
Connect a MIDI IN cable (or the “TO MIDI OUT” cable if using
the UM-ONE) to the sound module’s “MIDI OUT connector”
To the sound module’s “MIX IN jack”
Getting Ready Application Guide Troubleshooting
5
Page 6
Step 2: Install the
Install the V-Drums Tutor in your computer.
V-Drums Tutor
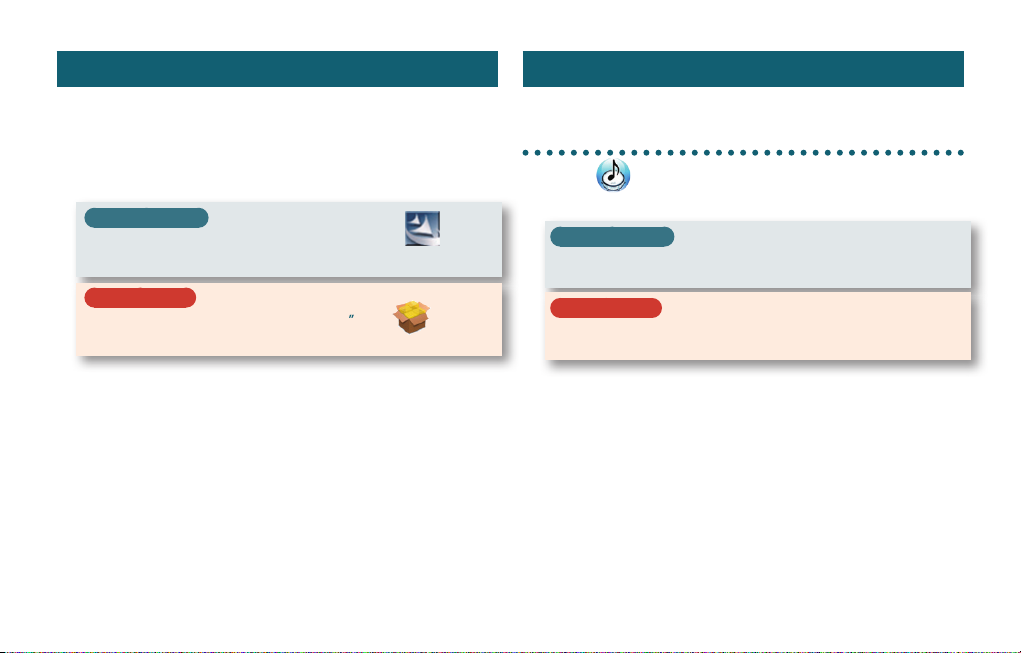
1. Insert the “V-Drums Tutor DT-1” CD-ROM into the CD-ROM drive.
2. On the CD-ROM, double-click the installer located in the “Install”
folder.
Windows users
Double-click “Setup.exe.”
Setup.exe
Mac OS users
Double-click “V-Drums Tutor DT-1 Installer.mpkg.”
V-Drums Tutor DT-1 Installer.mpkg
3. Follow the on-screen instructions to install the software.
4. When you are asked to enter the serial number, type the serial
number printed on the back cover of this manual.
The serial number consists of seven alphanumeric characters, a hyphen, and
seven more alphanumeric characters (xxxxxxx-xxxxxxx). You must also enter
the hyphen.
* If you’re using Windows and a user account control conrmation
message is displayed, click [Allow] (or [Yes]).
6
Step 3: Start-up Settings
Now you can start up the V-Drums Tutor.
Start Up the V-Drums Tutor
V-Drums Tutor DT-1
Windows users
From the “Start” menu, choose “All Programs”–
“V-Drums Tutor DT-1”–”V-Drums Tutor DT-1” to start it up.
Mac OS users
In the “Applications” folder, choose
“Roland”–“V-Drums Tutor DT-1”–“V-Drums Tutor DT-1” to start it up.
If the software does not start up, or if an error message is displayed, refer to the
“Troubleshooting” section “Problems when starting up” (p. 22).
Page 7
Settings for the connected equipment
After you’ve started up the V-Drums Tutor, you’ll need to make settings for the
connected equipment.
* The following port names will not appear if you have not installed the
USB driver for the V-Drums or for your USB MIDI interface. If this is the
case, exit V-Drums Tutor, re-install the USB driver, and then re-start the
V-Drums Tutor with your USB device connected.
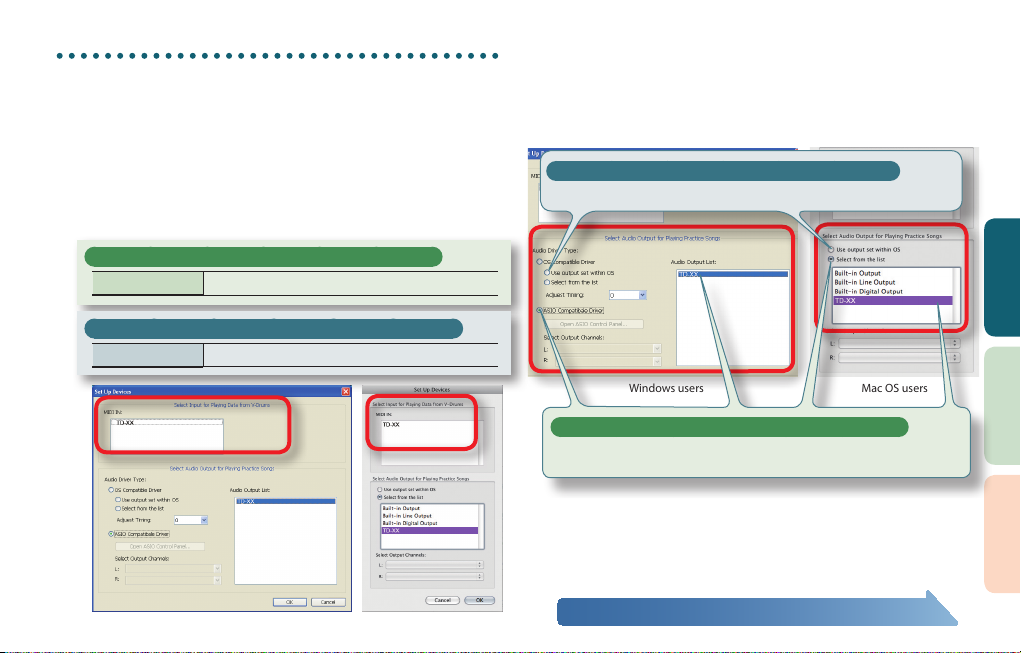
1. From the menu, choose “Setup”–”Set Up Devices....”
2. Make the setting for: “MIDI IN: .”
If you’ve connected the V-Drums via a USB cable
MIDI Input The V-Drums port name (e.g., “TD-XX”)
If you’ve connected a USB MIDI interface (UM-ONE)
MIDI Input The interface port name (e.g., “UM-ONE”)
3.
Specify the “Select Audio Output for Playing Practice Songs” setting.
Specify the device (e.g., sound card) that will play the audio. By default, the sound
will be heard from the audio output specied by your operating system. Make
the following settings.
* For details, refer to the V-Drums Tutor “Help” menu.
If you’ve connected the V-Drums via an audio cable
Choose “Use output set within OS.”
Windows users Mac OS users
If you’ve connected the V-Drums via a USB cable
Choose “ASIO Compatible Driver” (Windows users) or “Select from the list” (Mac
OS users) and select the V-Drums port name (e.g., “TD-XX”) from the list.
* Choose “ASIO Compatible Driver” when using an ASIO-compatible audio device.
4. Click the [OK] button.
When you’ve nished the above settings, you are ready to start using the
V-Drums Tutor.
Getting Ready Application Guide Troubleshooting
Windows users Mac OS users
Refer to “Application Guide” (p. 8).
7
Page 8
Application Guide
Let’s start practicing! The built-in songs are categorized as either “songs” or “exercise patterns.”
By choosing songs or patterns that are appropriate to your playing level, you’ll be able to improve your playing skills eectively.
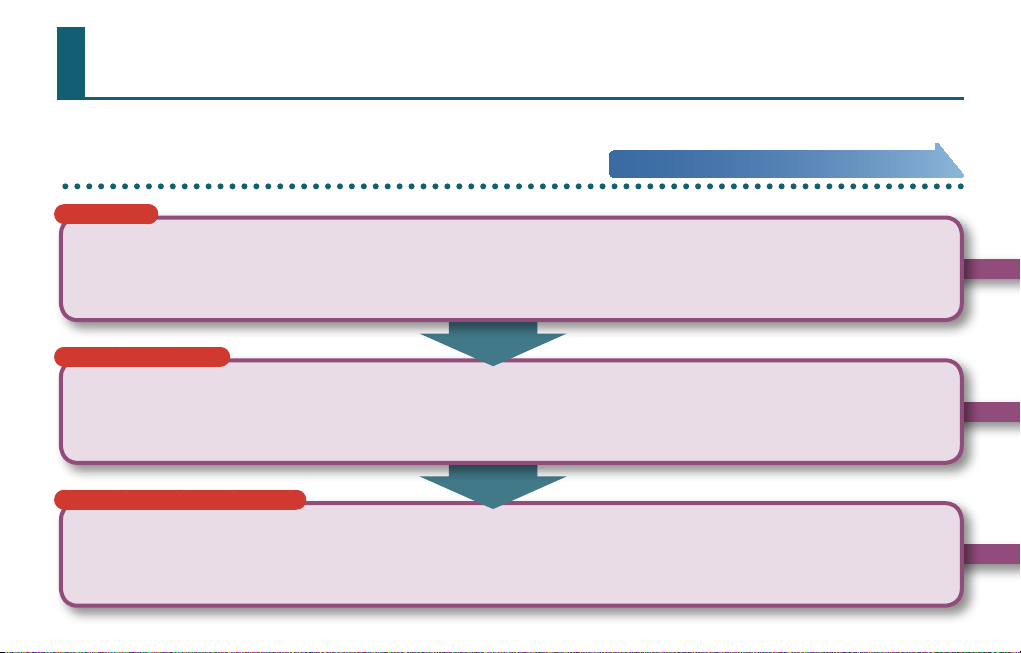
Workow for improvement
A beginner?
Try our a simple 8-beat rhythm!
Just want to have fun?
Enjoy playing!
Want to improve you basic skills?
Using the “Exercise patterns”!
8
For details, refer to “Listening to the Built-in Songs” (p. 12).
If you are a beginner on the drums, learning the 8-beat rhythm is a good place to start.
Songs 1–9 in the “Exercise pattern” list are patterns for practicing 8-beat. Practice song numbers 1 through
9 in order.
After you’ve learned the basic 8-beat, choose a song from the “Song” list that’s appropriate for your level, and
start practicing.
Use the Repeat function (p. 16) to practice the song repeatedly.
Start from song number 10 of the “Exercise patterns” to challenge yourself.
Each of these “Exercise patterns” is a short, one measure pattern. Use the Repeat function to practice it
repeatedly.
Page 9

The basic cycle of practicing
The basic practice cycle is the same for a song at any level. The explanation in this “Application Guide” also follows the four-step cycle shown below.
P
I
S
T
1 2
4
Listen carefully to the song! Watch the guide
Start by listening to the example
performance of the built-in song.
The built-in songs cover a range of levels
from beginner to intermediate, so choose
a song that’s appropriate for your own
level.
“Listening to the Built-in Songs” (p. 12)
Check
When you play your pads, a “O” appears
on hits that match the timing of the
song, and a “X” appears where your
timing was incorrect.
When you’ve learned to play the song correctly, move on to the
next song! Or try playing the same song at a slower or faster tempo.
“Checking Your Accuracy” (p. 19)
3
The drum notation screen shows a ball
that bounces with the tempo as a guide,
and each pad graphic will light up with
the timing that the corresponding pad
should be played.
“Watch as the Songs Play Back” (p. 14)
Play
While listening to the song, play along
on the drums.
The ball will bounce once for each beat.
Play the V-Drums in rhythm with the
bouncing ball.
“Playing Along With the Built-in Songs” (p. 18)
Getting Ready Application Guide Troubleshooting
9
Page 10

Notation screen
When you start up V-Drums Tutor, the drum notation screen will appear. In this screen, you can watch the bouncing ball while you play the drums as indicated by the notes.
Screen tabs
Use these tabs to switch between the “Notation screen” and the
“Game screen” (p. 15).
Drum notation
This shows the drum notation for the currently selected song.
In the drum notation screen, the results of your actual playing are
indicated by “O” and “X” symbols on the notation.
Pads
While the song plays, symbols will appear on the pads that are
sounding. Play the drum pads as indicated by the symbols that
appear.
By clicking pads, you can choose the pads that will play back.
Dynamics
This graph shows the dynamic (strength) with which you play the pads.
Use the tabs above to switch between “Pads” and “Dynamics.”
10
The graph indicates the dynamic of each strike.
Clears the graph display.
Page 11

Song/Exercise pattern list
Here you can select a song/exercise pattern.
For details, refer to next page.
Getting Ready Application Guide Troubleshooting
Play panel
Here are the song playback controls.
Indicates the tempo.
Use the [ ][ ] buttons to change the tempo.
Mutes the drum part, so that only the other musical
parts will play back (karaoke for drums).
Plays back only the drum part.
Back to the beginning Stop
Use the tabs above to switch between the “Song” / “Exercise Patterns” / “Play Panel.”
Returns to the original tempo specied for the song.
Metronome on/o control.
Inserts a count before playback begins.
Activates repeat playback. If the [A] and [B] buttons
are on, the specied region will play back repeatedly.
Play
Rewind/Fast-forward (1 measure at a time)
11
Page 12

1
Listening to the Built-in Songs
Now let’s try actually using the V-Drums Tutor. Start by listening to your chosen song.
1. In the [Song]/[Exercise] tab, choose “Song” or “Exercise Pattern.”
If you click the [Song] tab, a list of songs will appear.
If you click the [Exercise] tab, a list of exercise patterns will appear.
2. In the song list, click one of the built-in songs.
3. Click the [Play] button to play back the song.
12
About the built-in songs
The built-in songs are divided into “Songs” and “Exercise Patterns.”
Songs are classied according to their diculty; shown in the table at right, and the level is
shown in the Level column of the song list.
A beginner?
Start by using “Exercise Patterns” numbers 1–9 to learn how to play a basic 8-beat pattern.
Just want to have fun?
Start with a “Song” that’s appropriate for your level. Use the Repeat function (p. 16) to practice the song repeatedly.
Want to improve your playing skills?
Start with “Exercise Pattern” song number 10, and work to improve your skill. Changing the tempo will also give you more challenges.
Level Explanation
Easy (for complete beginners)
Medium (for beginners)
Hard (for beginners or intermediate players)
Hard (for intermediate players)
Page 13

Songs
You can enjoy practicing drums along with a variety of musical styles.
In some cases, the same song contains drum patterns of dierent levels of diculty, so you can choose the level that’s appropriate for you.
Exercise patterns
These let you practice hand/foot coordination and stick-work. They are also recommended as a warm-up before working on the songs.
Each is a short practice pattern of one measure, so use the Repeat function to practice it repeatedly.
No. Level Song title Advice
1–9
10–12
13–15 Drill Kick 1–3 These help you practice and develop foot control skills.
16–18 Drill Accent 1–3 These help you practice by using accents at various timings.
19 Drill Change Up This is for practicing at a steady tempo while the notes change. Focus on maintaining a consistent striking force.
20–21 Drill Auto Up Down 1–2 By gradually raising and lowering the tempo, these exercises build endurance.
22–57
8-Beat 1–9
Drill Unison 1–2,
Drill Independence
–
R xxx Basic
–
R xxx Vari 1
R xxx Vari 2 These are the same rhythms as Basic, but with a larger number of pads to employ during practice.
R xxx Vari 3 These are the Basic rhythm patterns, as applied to actual drumming. As you practice, imagine that you’re performing a song.
This is a practice pattern for learning 8-beat rhythms. Practice songs 1–9 in order. The 8-beat rhythm is the very basic aspect
of drum playing, and should be mastered before you proceed.
These help you develop independence skills between your hands and feet.
These are basic practices selected from the world-renowned rudiments collection.
Try to hit L/R accurately as you practice. Try setting it so it repeats, and practice it numerous times.
These are arrangements of basic rhythms that should help to advance your practice. Be sure to practice using the correct
hand (L/R). If you want to practice only the snare, click the snare shown in the pad area (p. 17).
P
I
S
T
Getting Ready Application Guide Troubleshooting
13
Page 14

2
Watch as the Songs Play Back
As the song plays back, you’ll see a symbol light up on the surface of the pads
that are sounding.
Watch how the bouncing ball follows the notes, and see which pad should be
played at each timing interval.
Reading drum notation
closed
hi-hat
open
hi-hat
crash
snare
ride
tom 1
tom 2
tom 3
Learn the timing at which to play the pads
The explanation here is for when using the drum notation screen. If you’re not
comfortable with drum notation, you can practice using the “Game screen” (p. 15).
1. Follow the bouncing ball and the moving vertical line in the drum
notation area to learn the timing at which to play the pads.
2. Watch how each pad in the
pad area lights up, and while
listening to the sound, see
which pad should be played.
14
foot closed
• Play the closed hi-hat by striking the hi-hat pad with the hi-hat pedal
depressed.
• Play the open hi-hat by striking the hi-hat pad with the hi-hat pedal released.
• Play the foot closed sound by briskly depressing the hi-hat pedal.
• The “>” symbol denotes an accent. Try to add more
emphasis when striking it.
• L stands for the left hand, R stands for the right hand;
you should strike the corresponding pad.
Wherever an R and L are aligned vertically,
one on top of the other, it means that there
are two corresponding notes, as shown in
the illustration.
In the example illustrated here, you would
play the high-hat with your right hand, and
play the snare with your left hand.
kick
Page 15

Game screen
In the game screen, blocks scroll down from above to indicate the timing at which each pad should be played. Even if you’re not comfortable with drum notation, you can
actually practice by using this game approach. The basic operation is the same as described in “Notation screen” (p. 10).
Blocks
The horizontal lines in this area are the bar line and the beats. When playback begins, the
screen will scroll downward from above. At the moment that a block reaches the very bottom
of the screen, play the corresponding drum.
Score
This indicates the resulting score of your playing, and is calculated according to your timing
accuracy.
Target score (shown as a bar graph)
Current score (shown as a bar graph)
Current score
Getting Ready Application Guide Troubleshooting
Number of excellent hits
Number of good hits
Number of acceptable hits
Number of missed hits
When the score will be cleared
• When you click the [Stop] button after stopping playback
• When you press the [DELETE] key on your computer after
stopping playback
• When you click the [Play] button after stopping playback
• When you select a dierent song
etc...
15
Page 16

Repeat settings
Use the Repeat settings when you want to repeatedly play a song or just a
portion of a song.
MEMO
• If you want to repeatedly play an exercise pattern from the beginning to the
end, simply turn on only the [Repeat] button.
• In the case of a song, you’ll want to use the [A][B] buttons to repeatedly play
just a section of the song while you practice.
Using the [Repeat] button to play repeatedly
This setting will repeatedly play the song from beginning to end.
1. In the Play panel, click the [Repeat] button.
The button will light, and the Repeat function will turn on.
16
Using the [A][B] buttons to repeat a section of the song
This setting lets you specify the section that will be repeated. The section
between A and B will play repeatedly.
1. Specify the location at which the repeat will start.
1-1. Click the [Fast-forward] button to move to the location at which you
want the repeat to start.
1-2. Click the Repeat [A] button.
The button will light; the repeat start location has been set.
A repeat “A” marker will appear at the specied location on the notation in the
notation screen.
2. Specify the location at which the repeat will end.
As you did in step 1, click the Repeat [B] button to specify the repeat end
location.
3. Click the [Repeat] button.
The button will light, and the Repeat function will turn on.
Page 17

Playing back just the drum part
If you want to just listen to the drum part while practicing, you can mute the
accompaniment so only the sound of the drum part will be heard.
1. Click the [Drums Only] button.
The button will light, and the Drum Only function will turn on.
Playing back individual pads
If you want to listen to specic sounds from the kit, you can choose the pads that
will play back. For example, you can select just the kick and snare.
Getting Ready Application Guide Troubleshooting
1. In the pad area, click the pad(s) that you want to play back.
The pad(s) you clicked will be shown as selected.
MEMO
• To de-select a pad, click it once again.
• You can select multiple pads if desired.
• The [All Drums] button selects all pads, and the [Kick+Snare] button selects
only the kick and snare.
17
Page 18

3
Playing Along With the Built-in Songs
First, try playing the drums while you listen to the song play back. The bouncing
ball will bounce once for each beat. Play the V-Drums in rhythm with the song.
1. Select the song that you want to practice with.
2. Click the [Play] button to start playback.
3. Play the V-Drums while you listening to the song.
4. The screen will show “O” and “X” symbols in realtime to indicate
the results of your playing.
You can see your score by switching to the “Game screen” (p. 15) at this time.
18
Changing the tempo
Sometimes it is better to practice at a slower tempo, and then gradually increase
the tempo as you become more familiar with the music.
Use the Play panel to adjust the tempo.
The tempo eld shows the tempo value that’s specied for the currently selected
song.
1. Use the [ ][ ] buttons to change the tempo of the currently
selected song.
MEMO
• If you click the [Original Tempo] button, the tempo is reset to the original
tempo of the song.
• By double-clicking on the numerical tempo value, you can use your
computer’s keyboard to directly enter a numerical tempo value.
Page 19

Performing with the drum part muted
Here’s how to mute the drum part so that you can play along with the other parts
(i.e., karaoke for drumming).
4
Checking Your Accuracy
As you play the V-Drums while the song plays, the results of your performance
will appear on the screen as shown below.
When you play the pads of the V-Drums, a “O” appears, indicating where your
timing is correct, and a “X” appears where your timing is o.
Getting Ready Application Guide Troubleshooting
1. Click the [Minus Drums] button.
The button will light, and the Minus Drums function will be on.
2. Click the [Play] button to start playback.
Only the accompaniment will be heard during playback.
When the performance results will be cleared
The performance results (O X indications) will be cleared in the following
conditions.
• When you click the [Stop] button after stopping playback
• When you press the [DELETE] key on your computer after stopping
playback
• When you click the [Play] button after stopping playback
• When you select a dierent song
etc...
This completes our basic explanations. Now you are ready to start practicing the drums!
For more details on operations, refer to the V-Drums Tutor “Help” menu.
19
Page 20

Shortcut Key List
V-Drums Tutor’s operations can also be performed from your computer keyboard.
Key Action
SPACE Start/stop playback
DELETE
ENTER
/
W
V
S
P
U
E Clear the dynamics graph
Stop playback
Clear the score and performance result
Return the playback location to the
beginning
Rewind/Fast-forward
Enter the measure number at which to
begin playback
Switch between the Drum Notation
and Game screens
Switch between the Song list/Exercise
list/Play panel
Switch between the Pad/Dynamics
graph area
Show/hide the performance results
(O X)
20
Key Action
G
T
L Open Song (Standard MIDI File)
R Turns the Repeat function on/o
A Set/clear the Repeat A marker
B Set/clear the Repeat B marker
C Turn the Count-in function on/o
M Turn the Metronome function on/o
O Turn the Minus Drums function on/o
D Turn the Drums Only function on/o
Key Action
(Song list/Exercise list) Select a song
/
(Play panel) Increase/decrease the
tempo value
(Play panel) Return the tempo to its
original value
(Play panel) Allow the tempo value to
be entered
F Select all pads of the drum part
K
1 Turn the hi-hat Solo on/o
2 Turn the snare Solo on/o
3 Turn the kick Solo on/o
4 Turn the tom 1 Solo on/o
5 Turn the tom 2 Solo on/o
6 Turn the tom 3 Solo on/o
7 Turn the crash Solo on/o
8 Turn the ride Solo on/o
Select only the kick and snare of the
drum part
MEMO
When using the Game Screen, keys 1–6 are assigned to
the pads of the Pad Area starting at the left, and keys 7–8
have no function.
Page 21

Loading your own Standard MIDI File
From the menu, choose
“File”–”Open Song (Standard MIDI File).”
Standard MIDI File formats
• Format: 0 or 1
• Number of measures: 999 or fewer
• Number of events: 99,999 or fewer
• Resolution: 24 TPQN or higher
* V-Drums Tutor displays MIDI channel 10 for the drum
notation. The [Drums Only] and [Minus Drums] functions
is also MIDI channel 10.
* Notes (note numbers) that cannot be played on the
V-Drums are not shown in the drum notation or game
screen (for details, refer to V-Drums Tutor’s “Help” menu).
Notes with velocity values below 20 or notes created on
a MIDI channel other than channel 10 will not be shown
either.
IMPORTANT NOTES
Handling CD-ROMs
• DO NOT play a CD-ROM disc on a conventional audio CD player. The resulting
sound may be of a level that could cause permanent hearing loss. Damage to
speakers or other system components may result.
• Avoid touching or scratching the shiny underside (encoded surface) of the disc. Damaged
or dirty CD discs may not be read properly. Keep your discs clean using a commercially
available CD cleaner.
Additional Precautions
• Unfortunately, it may be impossible to restore the contents of data that was stored hard disk
once it has been lost. Roland Corporation assumes no liability concerning such loss of data.
• To avoid disturbing your neighbors, try to keep the unit’s volume at reasonable levels. You
may prefer to use headphones, so you do not need to be concerned about those around
you.
• In the interest of product improvement, the specications and/or contents of this package
are subject to change without prior notice.
• The explanations in this manual include illustrations that depict what should typically be
shown by the display.
Note, however, that your unit may incorporate a newer, enhanced version of the system (e.g.,
includes newer sounds), so what you actually see in the display may not always match what
appears in the manual.
• The copyright of content in this product (the sound waveform data, style data,
accompaniment patterns, phrase data, audio loops and image data) is reserved by Roland
Corporation and/or Atelier Vision Corporation.
Purchasers of this product are permitted to utilize said content for the creating, performing,
recording and distributing original musical works.
Purchasers of this product are NOT permitted to extract said content in original or modied
form, for the purpose of distributing recorded medium of said content or making them
available on a computer network.
• Roland and V-Drums are either registered trademarks or trademarks of Roland Corporation
in the United States and/or other countries.
• The screen shots in this document are used in compliance with the guidelines of the
Microsoft Corporation.
• ASIO is a trademark of Steinberg Media Technologies GmbH.
• Company names and product names appearing in this document are registered trademarks
or trademarks of their respective owners.
Getting Ready Application Guide Troubleshooting
21
Page 22

Troubleshooting
If you experience a problem, read this chapter rst. It contains information that will help you solve problems. If the material in this chapter does not help you solve the problem, try
accessing the Roland website. It might provide more recent information (http://www.roland.com/).
* For help regarding operations in Windows or Mac OS, refer to the documentation supplied with your computer or operating system.
Problem Item to check Action
Problems when installing V-Drums Tutor
You must log on to Windows using one of the following user names.
Can’t install V-Drums Tutor
Problems when starting up
Can’t start up V-Drums Tutor
Problems when using the software
No sound
22
Did you check the user privileges with
which you logged on to Windows?
Could other software or background
software (such as anti-virus programs)
be running?
Could a large number of applications
be running?
Is the power on?
Have you made the correct settings in
“Setup”–“Set Up Devices...”?
• A user name belonging to the Administrators group, such as Administrator
• A user name whose account type is computer administrator
* For details, consult the system administrator of your computer.
Installation might not occur correctly if other software is running. Be sure to close all other
software before installation.
It may be that there is insucient memory to start up another application. Close other
applications before starting this application. If an error is still displayed, try restarting your
computer.
Check the power switches of your speakers or playback system, and of your sound
module.
Check the settings described in “3. Specify the
“Select Audio Output for Playing Practice Songs” setting.” (p. 7).
Page 23

Problem Item to check Action
No sound
V-Drums Tutor does not respond when
you strike the V-Drums
Problems when loading a MIDI le
Can’t load a MIDI le
Some notes are not shown in the drum
notation or game screen
(If connecting via a USB MIDI interface)
Is your computer’s audio output
connected to the MIX IN jack of your
kit?
(If connecting the V-Drums module via
a USB cable)
Is the V-Drums connected correctly?
(If connecting via a USB MIDI interface)
Is the USB MIDI interface connected
correctly?
Are your computer’s power
conservation settings turned o?
Does your computer or USB hub have
sucient power supply capacity?
Have you specied a Standard MIDI File
that can be loaded?
Could you be using notes that cannot
be shown in the notation?
The sound of V-Drums Tutor comes FROM your computer. In order to hear it mixed
together with your drums, the computer audio output must be connected to the MIX IN
jack of your V-Drums module using an audio cable (p. 5).
Make sure that the V-Drums is connected to your computer’s USB connector (p. 5).
Reinstall the V-Drums driver.
Make sure that the USB MIDI interface is connected to your computer’s USB connector
(p. 5).
Reinstall the USB MIDI interface driver.
Check the MIDI cable (MIDI IN and OUT) connections (p. 5).
If power conservation or power management functions are active on your computer,
disable them. For details on how to do this, refer to your computer’s documentation.
If you are using a notebook computer that is running on its battery, operation may be
unreliable with some models of computer. If this is the case, connect the AC adaptor to
your notebook computer.
Make sure that the Standard MIDI File you specied meets the following conditions.
• Format: 0 or 1
• Number of measures: 999 or fewer
• Number of events: 99,999 or fewer
• Resolution: 24 TPQN or higher
Notes (note numbers) that cannot be played on the V-Drums are not shown in the drum
notation or game screen (for details, refer to V-Drums Tutor’s “Help” menu). Notes with
velocity values below 20 or notes created on a MIDI channel other than channel 10 will
not be shown either.
Getting Ready Application Guide Troubleshooting
For more detailed troubleshooting information, refer to the V-Drums Tutor “Help” menu.
23
Page 24

* You’ll need this number in order to install this software. It cannot be
reissued, so be sure to keep it in a safe place where it will not be lost.
Copyright © 2012 ROLAND CORPORATION
All rights reserved. No part of this publication may be reproduced in any form
without the written permission of ROLAND CORPORATION.
Serial Number
* 5 1 0 0 0 2 4 7 7 7 - 0 1 *
 Loading...