

Page 1
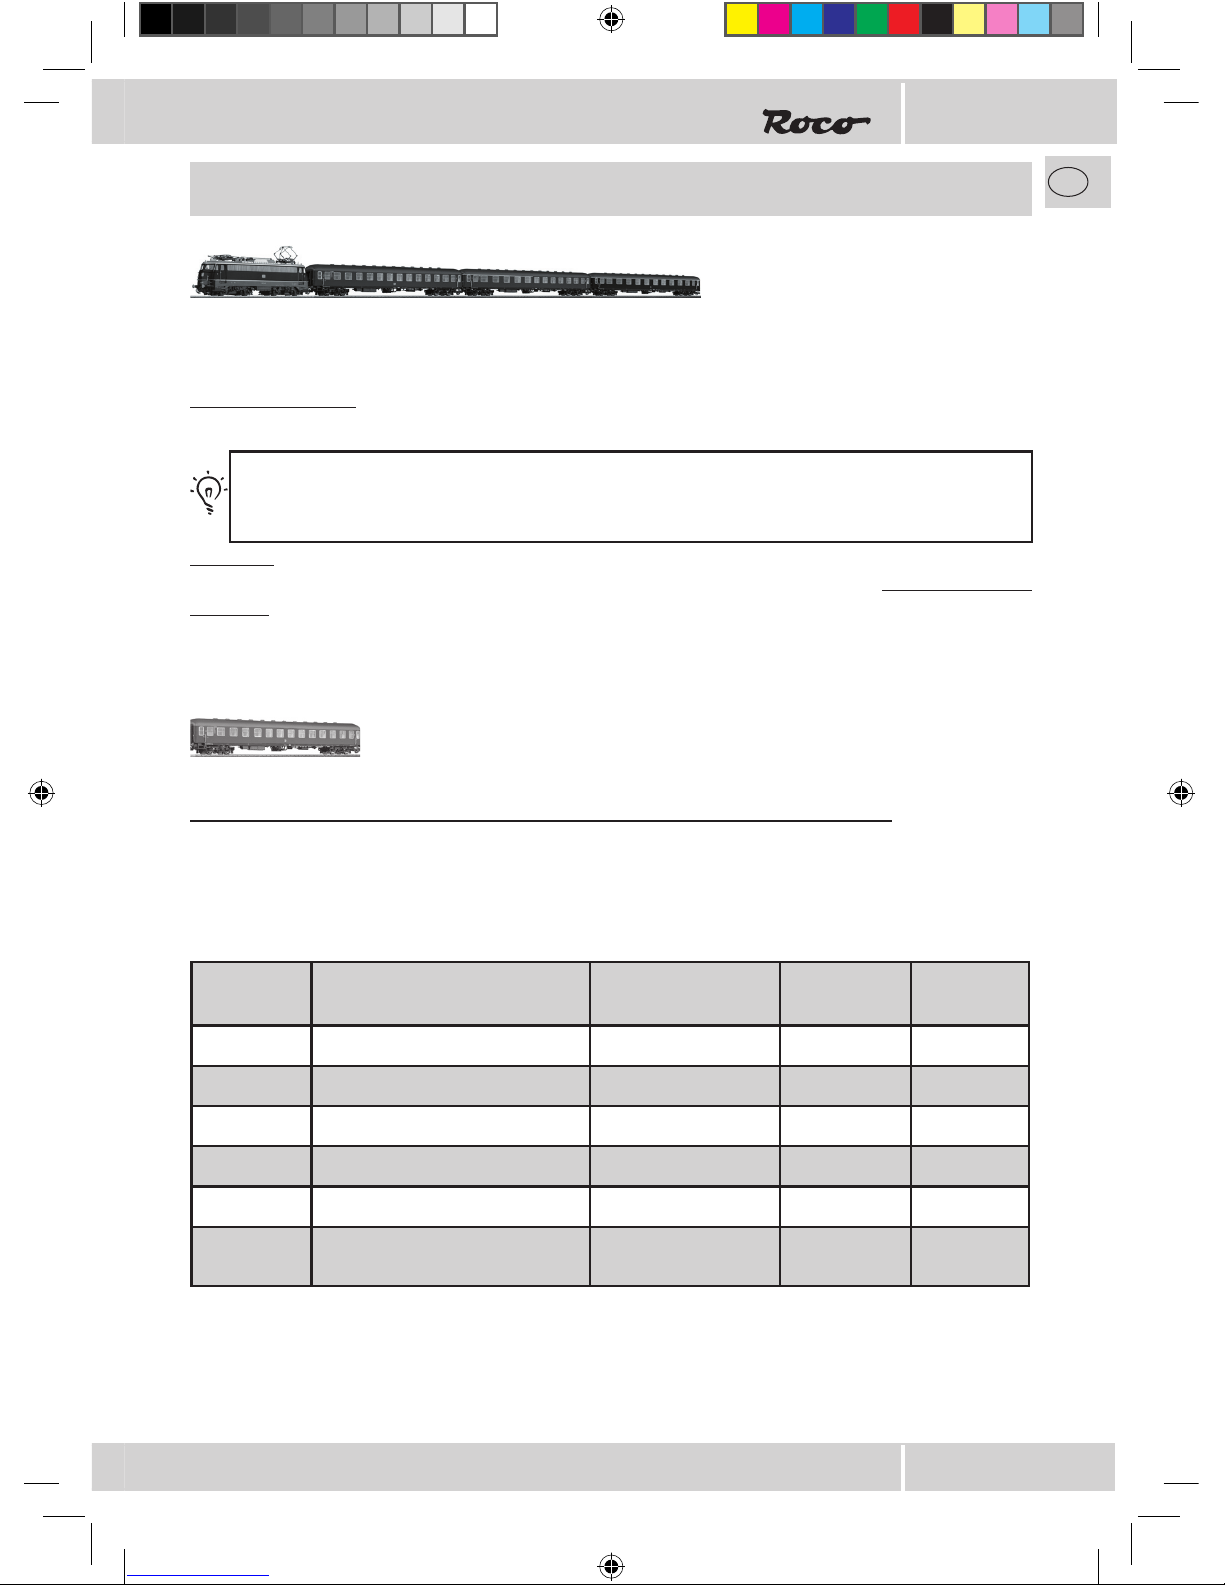
41273
41274
41275
41276
Bedienunsanleitung
Instruction Manual
Manuel d’utilisation
D
................................ 2 − 21
GB
................................ 22 − 41
F
................................ 42 − 61
Multifunktionszug
Multifunction Train
Train multifonctions
Digital Waggon.indd 1 23.10.2008 08:31:52
Page 2
2
2
D
Zeichenerklärung
Gilt nur für Lok
Gilt nur für Wagen
Warnung
Hinweis/Tipp
1) „Märklin“ ist ein eingetragenes Warenzeichen der Geb. Märklin & Cie.
GmbH, Göppingen
2) „Motorola“ ist ein eingetragenes Warenzeichen der Motorola Inc., TempePhoenix (Arizona/USA)
Wichtig für Motorola2) Anwender
Gilt für Lok und Wagen
Digital Waggon.indd 2 23.10.2008 08:31:54
Page 3
3
3
D
INHALTSVERZEICHNIS
Aufstellung und Funktionsübersicht....................................................................................................... 4
Funktionen im Digitalbetrieb
Bahnhofsbetrieb - Ein möglicher Ablauf ............................................................................................... 5
Raum für Individualisierung................................................................................................................... 5
Funktionstastenbelegung (Set Auslieferungszustand) ........................................................................... 6
Lokeinstellungen
Allgemeines............................................................................................................................................ 7
Hinweise zur Verknüpfung von Fahren − Geräusch................................................................................ 7
CV Liste Lok ........................................................................................................................................... 7 – 8
Wageneinstellungen
Adresse................................................................................................................................................... 9
Konfiguration (CV29) ............................................................................................................................. 9
Wageneinstellungen (CV62) .................................................................................................................. 9
Wagen Konfiguration über CV62 (Schaffnerwagen) .............................................................................. 9
Auf Werkszustand rücksetzen ................................................................................................................ 9
CV Liste Wagen ..................................................................................................................................... 10 – 11
CV-Kombinationen
Kombinationen für CV29 und CV49 ....................................................................................................... 12
Betrieb mit DCC-Zentrale (
multi
MAUS)
Programmierarten ................................................................................................................................. 13
Auslesen ................................................................................................................................................ 13
Funktionstastengruppierung für Betrieb auf eigener Adresse ................................................................ 13
Betrieb mit Märklin1)6021
Mehr Funktionen ................................................................................................................................... 14
Programmiermodus................................................................................................................................ 14
Betrieb mit Märklin1) Mobile Station
Inbetriebnahme (Lok) ............................................................................................................................ 16
Inbetriebnahme (Wagen) ....................................................................................................................... 17
Funktionstasten Märklin1) Mobile Station (Lok) .......................................................................................... 18
Funktionstasten Märklin
1)
Mobile Station (Wagen)...................................................................................... 18
Programmieren mit Märklin
1)
Mobile Station .............................................................................................. 18
Analogbetrieb
Funktionen im Analogbetrieb ................................................................................................................ 19
Anhang
Functionmapping (laut NMRA Norm)..................................................................................................... 19
Functionmapping-Tabelle ...................................................................................................................... 20
Warnungen und Hinweise...................................................................................................................... 21
Fehlertabelle Wagen............................................................................................................................... 21
Digital Waggon.indd 3 23.10.2008 08:31:54
Page 4
4
4
D
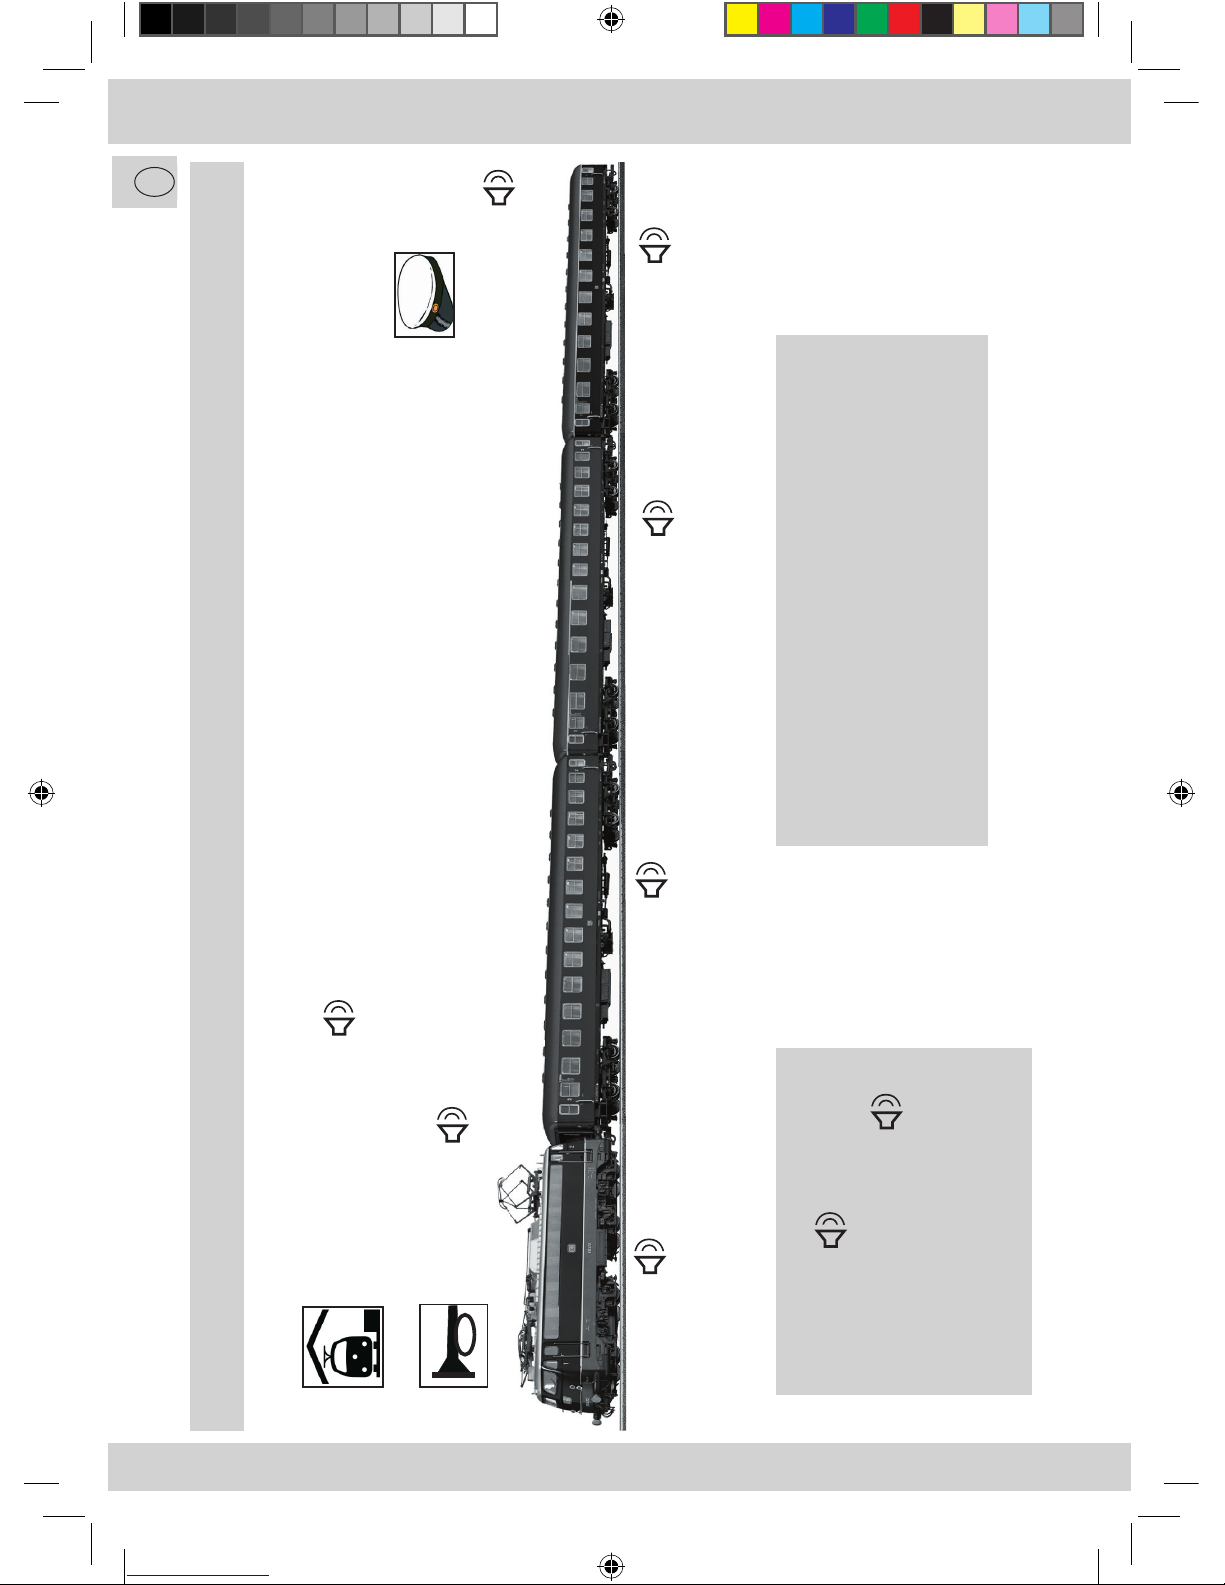
Aufstellung und Funktionsübersicht:
Bahnhofsansage F14
Pfiff F6, F9
Schaffnerwagen F16, F17
LOK
Sound F1
Elektrisch bewegliche
Stromabnehmer F2,F12
Führerstandlicht F5
Stirnlicht (Licht Taste, F0)
mit separat schaltbarer
Schlussbeleuchtung F8
1.Klasse, 1./2. Klasse und 2. Klasse
Wageninnenbeleuchtung (flackerfrei!) F7
beidseitig elektrisch bewegliche Wagentüren F3, F4
2.Klasse
Schlussbeleuchtung Licht-Taste (F0)
LOK 1.Klasse
1./2. Klasse
2.Klasse
mit LokSound/Funktionsdecoder
Digital Waggon.indd 4 23.10.2008 08:31:58
Page 5
5
5
D
Funktionen im Digitalbetrieb
Das Set (Lok und Wagen) ist im Auslieferungszustand über Adresse 3 bedienbar. Der Funktionszug besitzt
19 Funktionen. Die Funktionstasten wurden so definiert, dass auch Benutzer mit weniger Funktionstasten die
Hauptfunktionen (Pantographen, Türen, Sounds, Lichter) einfach erreichen können.
Durch die 20 Funktionstasten der
multi
MAUS ist die Bedienung mit ihr besonders komfortabel.
Bitte beachten Sie als Märklin
1)
6021- oder Mobile Station- Benutzer die Kapitel „Betrieb mit Märklin1)
6021“ bzw. „Betrieb mit Märklin1) Mobile Station“.
Bahnhofsbetrieb – Ein möglicher Ablauf:
Der Lokführer steigt in den Führerstand 1 ein und schaltet zuerst das Führerstandslicht ein. (F5)
Jetzt löst er das Heben eines Pantographen aus, im normalen Fahrbetrieb den hinteren.
(F2)
Er schaltet den Hauptschalter ein, der Kompressor beginnt kurz zu laufen. (F1, F10)
Wenn der Zug im Bahnhof steht, können jetzt die Passagiere auf der Bahnsteigseite einsteigen. (F3 o. F4)
Die Innenbeleuchtung wird in den drei Wagen eingeschaltet.
(F7)
Es ertönt die Bahnhofsdurchsage oder die Schaffneransage. (F14 o. F17
)
Nachdem alle Fahrgäste eingestiegen sind und die Türen geschlossen sind, steigt der Schaffner (F3 o. F4)
mit einem Abfahrtspfiff ein und schließt die letzte Tür.
Zur Abfahrt bereit, schaltet der Lokführer die Außenbeleuchtung ein und das, nicht (F0 u. F5)
mehr benötigte, Führerstandslicht aus.
Mit einem kurzen Pfiff setzt der Lokführer den Zug feinfühlig in Bewegung . (F6, Regler)
Auf offener Strecke wird hochbeschleunigt und wegen Annäherung an einen Bahnübergang (Regler, F9)
ein langer Pfiff ausgegeben.
Raum für Individualisierung
Natürlich können die Lok und die Wagen unabhängig voneinander auf verschiedenen Adressen betrieben
werden. Dazu enthalten die Lok und jeder Wagen einen völlig autarken Multiprotokoll-Decoder.
Zum einfachen Bedienen bei eigener Adresse gibt es für Lok und Wagen auswählbare, leicht einstellbare
Funktionstastengruppierungen.
Mit dem „Functionmapping“ können Sie sich zusätzlich die Funktionstasten beliebig mit Funktionen belegen.
Beim Durchlesen dieser Bedienungsanleitung und beim ersten Ausprobieren werden Sie sehen, dass mit die
-
ser Garnitur das Modell wieder einen großen Schritt an das Original heran rückt.
Nehmen Sie beim Programmieren der Lok die Wagen vom Gleis, weil diese sonst mitprogrammiert
werden.
Nehmen Sie beim Programmieren der Wagen die Lok vom Gleis, weil diese sonst mitprogrammiert
wird.
Digital Waggon.indd 5 23.10.2008 08:31:58
Page 6
6
6
D
Motorola
2)
1.Adresse
Funktionstastenbelegung (Set-Auslieferungszustand)
Die Funktionstasten wurden so belegt, dass das Set (Lok und 3 Wagen) über eine Lok-Adresse (im Auslieferungszustand Adresse 3) bedient werden können.
F-Taste Funktion Art der Funktion Richtungs-
abhängig
Zusatzgeräusch
Licht Stirnlicht Lok EIN/AUS
F01 Loksound EIN/AUS
F02 Stromabnehmer
Führerstand 2 (hinten)
HEBEN/SENKEN
F05 Führerstandslicht
Führerstand 1 (vorne)
EIN/AUS
F06 Pfiff kurz EIN
F08 Schlusslicht Lok EIN/AUS
F09 Pfiff lang EIN/AUS
F10 Kompressor EIN/AUS
F12 Stromabnehmer Fst. 1 (vorne) HEBEN/SENKEN
F13 Rangiergang EIN/AUS
F14 Bahnhofsdurchsage EIN
F15 Führerstandslicht
Fst. 2 (hinten)
EIN/AUS
Licht Schlusslicht Wagen EIN/AUS
F03* Wagentüren Gangseite ÖFFNEN/SCHLIESSEN
F04* Wagentüren Abteilseite ÖFFNEN/SCHLIESSEN
F07 Wageninnenbeleuchtung
LED - flackerfrei
EIN/AUS
F16** Schaffnerpfiff
F17** Schaffneransage
„Alles einsteigen bitte!“
F18 Schlusslichtsperre Wagen
EIN: Schlusslicht leuchtet NIE
AUS: Steuerung über F0
EIN/AUS
WAGEN
LOK
*) Die Türen eines Wagens lassen aus mechanischen Gründen gleichzeitig nur auf einer Längsseite
(„Gang“ oder „Abteil“) die Stellung „offen“ zu!
**) Im Auslieferungszustand ist der 2. Klasse Wagen der Schaffnerwagen. Jeder Wagen kann bei Bedarf
als Schaffnerwagen über CV62 eingestellt werden.
Motorola
2)
1.Adresse
Motorola
2)
2.Adresse
Mot.
2.Adr.
Digital Waggon.indd 6 23.10.2008 08:31:59
Page 7
7
7
D
Lokeinstellungen
Allgemeines
Der in dieser Lok enthaltene LokSound- Decoder wurde optimal auf die Lok eingestellt. Dennoch können
Sie viele Decoder-Eigenschaften Ihren Wünschen anpassen. Dazu lassen sich bestimmte Parameter (die so
genannten CVs – Configuration Variable – oder Register) verändern.
Prüfen Sie aber vor jeder Programmierung, ob diese tatsächlich notwendig ist. Falsche Einstellungen können
dazu führen, dass der Decoder nicht richtig reagiert.
Für einen hohen Fahrkomfort ist der Decoder werkseitig auf 28 Fahrstufen vorprogrammiert. Damit ist er mit
allen modernen DCC- (
multi
MAUS) und Motorola2)-Steuergeräten einsetzbar.
Der LokSound-Decoder wurde speziell für die zusätzlichen Funktionen verändert und darf nicht
gegen einen im Handel erhältlichen Decoder ausgetauscht werden.
Dies kann zu einem Defekt der Pantographenantriebe führen!
Soll die Lok umprogrammiert werden, darf nur die Lok auf dem Programmiergleis stehen. Der
übrige Zug ist unbedingt abzutrennen, da sonst eventuell eine Programmierung nicht ausgeführt
werden kann oder die Wagen mitprogrammiert werden.
Hinweise zur Verknüpfung von Fahren − Geräusch
Bei diesem Sound-Decoder der neuesten Generation ist eine stärkere Verknüpfung von Fahr- und SoundAbläufen vorhanden: So setzt sich die Lok bei eingeschaltetem Sound (Funktionstaste «F1» aktiviert) vorbildentsprechend erst dann in Bewegung, wenn die Sound-Sequenz «Motorstart» vollständig abgeschlossen
und der Zustand «Motorleerlauf» erreicht ist. Umgekehrt wird die Sound-Sequenz «Motor aus» nur dann
nach erneuter Betätigung der Funktionstaste «F1» (jetzt «Sound aus») ablaufen und anschließend in den
Zustand «Motorleerlauf» übergehen, wenn die Lok beim Betätigen der Taste «F1» bereits zum Stehen gekommen ist. Ein schnelles Ein- oder Ausschalten des Sounds über die Taste «F1» ist somit nur dann möglich,
wenn die Lok schon bzw. noch in Bewegung ist.
CV Name Einstellbare Werte Default Werte
1 Adresse (= kurze Adresse) 01 – 99 03
2 Anfahrspannung
(kleinste Kriechgeschwindigkeit)
01 – 75
03
3 Beschleunigungszeit
(vom Stillstand bis Maximalgeschwindigkeit)
00 – 64
14
4 Bremszeit
(von Maximalgeschwindigkeit bis Stillstand)
00 – 64
07
5 Maximalgeschwindigkeit 00 – 64 38
6 Mittengeschwindigkeit
(bei mittlerer Fahrstufe)
00 – 64
22
8 Reset-Funktion
Zurücksetzen aller Werte auf Werkseinstellung; (An lesefähigen Verstärkern/Zentralen
ist die Herstellererkennung lesbar)
00 – 64
08=Reset
CV-Liste Lok
Digital Waggon.indd 7 23.10.2008 08:31:59
Page 8
8
8
D
13 Analogmodus F1-F8 00 – 255 128
17
+
18
Lange Adresse
(Vorraussetzung: In CV29 ist die lange Adresse
eingeschalten)
----------------------
192
00
29 Einstellungen 1
Bit 0: Richtungsumkehr
Bit 1: Fahrstufen (DCC)
Bit 2: Analogbetrieb
Bit 5: Lange Adresse
Siehe Tabelle im Kapitel
„CV-Kombinationen“
06
49 Einstellungen 2
Bit 0: Lastregelung aktiv
Bit 1: 30 kHz Motortaktfreqenz
Bit 2: Licht bei Märklin1) - Delta - Betrieb
Bit 3: Automatische DCC Fahrstufenerkennung
Siehe Tabelle im Kapitel
„CV-Kombinationen“
27
50 Analog-Modus 00 = beide aus
01 = AC-Modus ein
02 = DC-Modus ein
03 = beide ein
03
51 Brems-Modus-Erkennung
Bit 0: Märklin1) 72441
Bit 1: Zimo aktuell
Bit 3: Lenz DC
Wert: 1
Wert: 2
Wert: 8
07
63 Gesamtlautstärke aller Geräusche
(CV 121 -123-Einstellungen beachten!)
00 – 64
55
65 Functionmapping
Ändert die Funktionstastenbelegung, um auch
mit weniger Funktionstasten die wichtigsten
Funktionen ansprechen zu können.
1: Set (default)
2: Betrieb mit Märklin
1)
6021
3: Betrieb mit Märklin
1)
Mobile Station
Set
113 Lichtdimmung vorne
(15=maximale Helligkeit)
00 – 15
15
114 Lichtdimmung hinten
(15=maximale Helligkeit)
00 – 15
15
119 Pantograph Führerstand 1
Ändert die Höhe von Pantograph 1
00 – 20
individuell
eingestellt
120 Pantograph Führerstand 2
Ändert die Höhe von Pantograph 2
00 – 20
individuell
eingestellt
121 Lautstärkeregler für Pantographen
(max. Lautstärke nur, wenn auch CV63=Wert 64)
00 – 64
64
122 Lautstärkeregler für Schaltgeräusch
(max. Lautstärke nur, wenn auch CV63=Wert 64)
00 – 64
64
123 Lautstärkeregler für Fahrgeräusche und
restliche Zusatzgeräusche
(max. Lautstärke nur, wenn auch CV63=Wert 64)
00 – 64
64
Digital Waggon.indd 8 23.10.2008 08:31:59
Page 9
9
9
D
Wageneinstellungen
Wollen Sie andere Decoder (z.B. in Lok, Wagen usw.) programmieren, müssen Sie den Drehtürwagen vom Gleis nehmen, da dieser sonst mitprogrammiert wird.
Adresse
Im Auslieferungszustand ist der Wagen auf Adresse 3 programmiert.
Der Wagen kann über die CV1 auf verschiedene Adressen von 1-99 programmiert werden. Über die lange
Adressierung (CV17/18) sind 9999 Adressen möglich (dabei muss zusätzlich CV29 Bit5 aktiviert werden,
siehe CV-Liste).
Die Schlussbeleuchtung des Wagens ist logisch nur an die Lok gekoppelt (Fahrtrichtung, Akti
-
vierung), wenn die Adressen beider gleich sind.
Konfiguration (CV29)
Über CV29 können Sie Decoderkonfigurationen vornehmen. In der CV-Liste hat jede Konfiguration einen
Wert. Die gewollten Einstellungen (Werte) müssen addiert und CV29 damit programmiert werden.
Bit 0 (Wert 1 oder 0) tauscht die Richtung, wenn der Wagen verdreht an die Lok angehängt wird. Damit
stimmt die Schlussbeleuchtung wieder mit der Richtung überein.
Bit 1 (Wert 2 oder 0) enthält die Fahrstufenanzahl. Diese ist wichtig für ein korrektes, richtungsabhängiges
Leuchten der Schlussbeleuchtung und muss mit der Fahrstufeneinstellung/-bedienung der
multi
MAUS/
Zentrale übereinstimmen. Ein Blinken der Schlussbeleuchtung bei Drehen des Fahrtreglers ist ein Indiz
für eine falsche Fahrstufeneinstellung.
Bit 2 (Wert 4 oder 0) schaltet den Analogbetrieb ein oder aus.
Bit 5 (Wert 32 oder 0) schaltet den „Lange Adresse“-Modus ein oder aus.
Die Kombinationen der Einstellungsmöglichkeiten befinden sich im Kapitel „CV-Kombinationen“.
Wageneinstellungen (CV62)
Weitere Wageneinstellungen betreffend dem Schaffner und der Türbewegung können Sie über CV62 vornehmen.
Im Werkszustand ist der 2. Klasse Wagen als Schaffnerwagen definiert, d.h. Schaffneransage und Pfiff kom
-
men aus diesem Wagen (Der Pfiff ist automatisch eingestellt).
CV62 Wagen Art Werkswert
1. Klasse ohne Pfiff und Ansage 0
1./2. Klasse ohne Pfiff und Ansage 0
2. Klasse mit Schlusslicht mit Pfiff und Ansage 3
Wagen Konfiguration über CV62 (Schaffnerwagen)
Auf Werkszustand rücksetzen
Die CV-Einstellungen des Wagens werden in den Werkszustand zurückgesetzt indem Sie den Wert 8 auf CV8
programmieren.
Die Tür-Mechanik des Wagens begibt sich in den Ausgangszustand indem Sie den Wert 7 auf CV7
programmieren.
Wollen Sie zum Beispiel den 1.Klasse als Schaffnerwagen (d.h. mit Pfiff und Ansage), so programmieren
Sie auf CV62 den Wert „3“.
Digital Waggon.indd 9 23.10.2008 08:32:00
Page 10
10
10
D
CV Name Beschreibung Wert/Erläuterung Bereich Default Wert
1 Wagenadresse
Der Decoder reagiert auf den Adressbereich 1-127. Die
multi
MAUS,
wie auch andere Zentralen, spricht 1-99 über die
kurze Adresse an, den Rest über die lange Adresse (CV17/18).
7 Versionsnummer Interne Software-Version des Decoders
Das Beschreiben mit dem Wert 7 bewirkt das Rücksetzen der
Türen in den Auslieferungszustand.
8 Herstellerkennung Hersteller-ID der Modelleisenbahn GmbH
Das Beschreiben mit dem Wert 8 bewirkt das Rücksetzen
der CV’s in den Auslieferungszustand.
13 Analog F1-F8 Funktionstasten im Analog Modus F7: Innenbeleuchtung AUS (0) / EIN (64) 0/64 0
14 Analog Licht, F9-F14 Funktionstasten im Analog Modus F0: Schlussbeleuchtung AUS (0) / EIN (1) 0/1 0
17 Lange Adresse 100-9999
18 höherwertiges Byte (hByte) 192
niederwertiges Byte (nByte)
Berechnung: Lange Adresse = (hByte-192)*256 + nByte
Bsp.: Adr 170: hByte = 192, nByte = 170
Adr 270: hByte = 193, nByte = 14
Adr 370: hByte = 193, nByte = 114
Sie ersparen sich die Berechnung von CV17/18 wenn Sie die
„LANGE ADRESSE“-Programmierung der
Aktivierung der langen Adresse über CV29.
29 Konfiguration Bit 0: Richtungsumkehr 0: normal, 1: vertauscht 0/1 AUS: 0
Bit 1: Fahrstufen (DCC) 0: 14 Fahrstufen, 2: 28/128 Fahrstufen
siehe Tabelle im Kapitel Bit 2: Analogbetrieb 0: AUS
, 4: Funktionen werden, wie in CV13/14 eingestellt, geschalten 0/4 AUS: 0
„CV-Kombinationen“ Bit 5: Lange Adresse 0: Wagenadresse (CV1) verwenden,
32: Lange Adresse (CV17/18) verwenden
33
- 54
Function Mapping Mit CVs kann man jeder Funktionstaste Funktionen zuordnen.
(siehe im Anhang„Function Mapping“)
56 Erweiterte Konfiguration Bit 0: Funktionstasten speichern 0: ausgeschaltet, 1: eingeschaltet 0/1 9
Bit 3: Märklin1) 2. Adresse
0: ausgeschaltet, 8: eingeschaltet 0/8
61 Funktionstasten-
gruppierung
beschreibt automatisch CV33-54
Wert 0: Standardbelegung für Set mit Lok auf gleicher Adresse
Wert 1: Für DCC-Betrieb auf eigener Adresse
Wert 2: Für
Märklin
1)
6021-Betrieb auf eigener Adresse
Wert 3: Für
Märklin
1)
Mobile Station-Betrieb auf Doppeladresse (Lokdatenbank 37540)
62 Wagen Konfiguration Bit 0: Manueller Schaffner 0: AUS, 1: EIN --> reagiert auf F16,F17 0/1
Bit 1: Automatischer Schaffnerpfiff 0: AUS, 2: EIN --> automatischer Schaffnerpfiff beim Schließen der Türen
Bit 2: Automatische Schaffneransage 0: AUS, 4: EIN --> automatischer Schaffneransage bei Türenbewegung
Bit 3: Schnelles Schließen
--> kürzere Zeit-Abstände beim Schließen der Türen:
Es wird nicht auf die Schaffneransage aus einem anderen Wagen gewartet.
Ist der Wagen selbst ein Schaffnerwagen, so hat das schnelle
Schließen keinen Einfluss.
0: AUS, 8: EIN --> kürzere Zeitabstände beim Schließen der Türen: 0/8
63 Dimmung der
Innenbeleuchtung
Die Helligkeit der Innenbeleuchtung kann über diese CV eingestellt werden. 0-15 12
CV Liste Wagen
Digital Waggon.indd 10 23.10.2008 08:32:00
Page 11
11
11
D
1-99/
1-127
3
161
Sie ersparen sich die Berechnung von CV17/18 wenn Sie die
„LANGE ADRESSE“-Programmierung der
multi
MAUSverwenden.
Aktivierung der langen Adresse über CV29.
0
0/2 EIN: 2
, 4: Funktionen werden, wie in CV13/14 eingestellt, geschalten 0/4 AUS: 0
32: Lange Adresse (CV17/18) verwenden
0/32 AUS: 0
0: ausgeschaltet, 8: eingeschaltet 0/8
0-3 0
0/2
0/4
0: AUS, 8: EIN --> kürzere Zeitabstände beim Schließen der Türen: 0/8
1. Klasse: 0
1./2.Klasse: 0
2. Klasse: 3
Digital Waggon.indd 11 23.10.2008 08:32:00
Page 12
12
12
D
CV-Kombinationen
Kombinationen für CV29 und CV49
CV29 Bit 0 Bit 1 Bit 2
Fahrtrichtung Fahrstufen
Betriebsart Wert Wert
kurze Adresse lange Adresse
normal 14 digital 0 32
vertauscht 14 digital 1 33
normal 28/128 digital 2 (default) 34
vertauscht 28/128 digital 3 35
normal 14 analog+digital 4 36
vertauscht 14 analog+digital 5 37
normal 28/128 analog+digital 6 38
vertauscht 28/128 analog+digital 7 39
Bit 5
CV49 Bit 0 Bit 1 Bit 3
Lastregelung
Motortakt-
frequenz
Märklin1) 2.
Adresse
Wert Wert
keine
Automatische
Fahrstufen-
erkennung
Automa-
tische
Fahrstufener
-
kennung
inaktiv 15kHz aus 0 16
aktiv 15kHz aus 1 17
inaktiv 30kHz aus 2 18
aktiv 30kHz aus 3 19
inaktiv 15kHz ein 8 24
aktiv 15kHz ein 9 25
inaktiv 30kHz ein 10 26
aktiv 30kHz ein 11 27 (default)
Bit 4
Digital Waggon.indd 12 23.10.2008 08:32:01
Page 13
13
13
D
Funktions-
taste
Funktion Art der Funktion Richtungs-
abhängig
Zusatzgeräusch
F00 Wagenschlusslicht EIN/AUS
F01 Wagentüren Gangseite ÖFFNEN/SCHLIESSEN
F02 Wagentüren Abteilseite ÖFFNEN/SCHLIESSEN
F03 Wageninnenbeleuchtung EIN/AUS
F04* Schaffnerpfiff EIN
F05* Schaffneransage
„Alles einsteigen bitte“!
EIN/AUS
*) Im Auslieferungszustand ist der 2. Klasse Wagen der Schaffnerwagen. Jeder Wagen kann bei Bedarf
als Schaffnerwagen über CV62 eingestellt werden.
Betrieb mit DCC-Zentrale (
multi
MAUS)
Da die
multi
MAUS über 20 Funktionstasten und Lichttaste verfügt ist die Bedienung des gesamten Sets mit
ihr besonders komfortabel.
Programmierarten:
Lok und Wagen reagieren auf alle DCC-Programmierarten.
Wir empfehlen: Direkt CV-Programmierung (byteweise) oder POM-Modus (Programmierung am
Hauptgleis).
Das Programmieren ist im Handbuch der
multi
MAUSbeschrieben.
Auslesen:
Mit einer entsprechenden Ausrüstung (z.B. Rocomotion 10785) können Sie die Werte byte- und bitweise
auslesen.
Funktionstastengruppierung für Betrieb auf eigener Adresse
Wenn Sie den/die Wagen alleine, d.h. auf einer anderen Adresse wie die Lok, bedienen wollen, können Sie
hiermit die im Set aufgeteilten Funktionen einfach zu einem Block zusammenfassen.
Programmieren Sie dazu auf CV61 den Wert 1.
Für Experten gibt es die Möglichkeit die Funktionen einzeln zu „mappen“ (siehe Anhang).
Digital Waggon.indd 13 23.10.2008 08:32:02
Page 14
14
14
D
Betrieb mit Märklin1) 6021
Mehr Funktionen
Sie haben beim ersten Probieren sicherlich bemerkt, dass im Auslieferungszustand nicht alle Funktionen wie
in der „Funktionsübersicht“ beschrieben erreichbar sind.
Um mehr Funktionen mit der Märklin1) 6021 ansprechen zu können gibt es für Sie
zum einen: Die „2. Adresse“. Diese ist im Auslieferungszustand aktiviert und um eins höher als die
reguläre Adresse.
Beispiel 1
Adresse (CV1) = 3 (Auslieferungszustand)
2. Adresse = 4
zum anderen: Um mehr Funktionen auf unterschiedlichen Adressen (1. Adresse + 2. Adresse) ansprechen
zu können gibt es eine eigene Funktionstastenbelegung (siehe Tabelle auf der nächsten
Seite), die über CV65 (Lok) bzw. CV61 (Wagen) aktivierbar ist.
Beispiel 2
Lok: Adresse 3 (CV1) und 4
Wagen: Adresse 5 (CV1) und 6
Programmiermodus
Hinweis: Der DIP-Schalter #2 an der Hinterseite der Märklin
1)
6021 muss zum Programmieren ein-
geschalten sein.
Programmieren:
1. Fahrtregler auf ‚0‘ stellen
2. stop + go ca. 1sec. drücken um Reset auszulösen (alternativ die Station Aus/Einstecken)
3. stop drücken
4. Adresse oder ‚80‘ eingeben
5. Während dem Betätigen der Fahrtrichtungsumkehr go drücken
6. CV bei Märklin
1)
6021 zweistellig wie eine Lokadresse eingeben (CV1-79 möglich)
7. Fahrtrichtungsumkehr betätigen
8. Wert zweistellig eingeben (1-79 möglich, für den Wert 0: ‚80‘ eingeben)
9. Fahrtrichtungsumkehr betätigen
10. Der Decoder wurde programmiert und befindet sich im Fahrmodus
Digital Waggon.indd 14 23.10.2008 08:32:02
Page 15
15
15
D
Funktions
Taste
Funktion Art
der Funktion
Richtungsabhängig
Zusatzgeräusch
1. Adresse function Stirnlicht Lok EIN/AUS
1. Adresse f1 Loksound EIN/AUS
1. Adresse f2 Stromabnehmer
Führerstand 2 (hinten)
HEBEN/SENKEN
1. Adresse f3 Führestandslicht
Führerstand 1 (vorne)
EIN/AUS
1. Adresse f4
Schlusslicht Lok EIN/AUS
2. Adresse f1 Pfiff kurz EIN
2. Adresse f2
Stromabnehmer Fst. 1 (vorne) HEBEN/SENKEN
2. Adresse f3 Führerstandslicht Fst. 2 (hinten) EIN/AUS
2. Adresse f4
Bahnhofsdurchsage EIN
Stellen Sie nur die Wagen auf das Gleis!
Programmieren Sie auf CV61 den Wert 2 (siehe Programmiermodus).
Ändern Sie die Adresse (wie in Beispiel 2)
Funktions
Taste
Funktion Art der Funktion Richtungs-
abhängig
Zusatzgeräusch
1. Adresse function Wagenschlusslicht &
Innenbeleuchtung
EIN/AUS
1. Adresse f1 Wagentüren Gangseite ÖFFNEN/SCHLIESSEN
1. Adresse f2 Wagentüren Abteilseite ÖFFNEN/SCHLIESSEN
1. Adresse f3* Schaffnerpfiff EIN/AUS
1. Adresse f4*
Schaffneransage
„Alles einsteigen bitte“!
EIN/AUS
2. Adresse keine Funktionen belegt
*) Im Auslieferungszustand ist der 2. Klasse Wagen der Schaffnerwagen. Jeder Wagen kann bei Bedarf als
Schaffnerwagen über CV62 eingestellt werden.
Stellen Sie nur die Lok auf das Gleis!
Programmieren Sie auf CV65 den Wert 2 (siehe Programmiermodus).
Digital Waggon.indd 15 23.10.2008 08:32:02
Page 16
16
16
D
1. Anlegen der Lok:
„ESC“ drücken
„NEUE LOK“ --> OK drücken
„Datenbank“ --> OK drücken --> bis zu Lok 37540 drehen --> OK drücken ‚BR55‘
Sie haben jetzt erfolgreich die Lok angelegt, jedoch liegt diese noch auf einer anderen Adresse. Um die
Adresse zu ändern gehen Sie wie folgt vor:
2. Einstellen der Adresse
ESC drücken
Nach Rechts drehen „LOK ÄNDERN“ --> OK drücken
„Adresse“ --> OK drücken
Drehen z.B.: bis zu Adresse „3/4“ --> OK drücken
„PROG LOK?“ --> OK drücken (Lichter blinken)
Sie haben jetzt erfolgreich die Adresse eingestellt und können mit der Lok fahren.
Um die Funktionen wie in der Tabelle auf der nächsten Seite ansprechen zu können, gehen Sie wie folgt vor:
3. Einstellen der Funktionstasten:
„ESC“ drücken
Nach Rechts drehen „LOK ÄNDERN“ --> OK drücken
2x nach Links drehen „REG“ --> OK drücken
Drehen bis REG „65“ blinkt --> OK drücken
Drehen bis REG 65: „3“ blinkt --> OK drücken (Lichter blinken)
Die Lok wird jetzt mit der passenden Funktionstastenbelegung programmiert.
Sie können jetzt die Funktionen laut Tabelle schalten. Um den Namen zu ändern gehen Sie wie folgt vor:
4. Ändern des Namens:
„ESC“ drücken
Nach Rechts drehen „LOK ÄNDERN“ --> OK drücken
Nach Rechts drehen „NAME“ --> OK drücken
Buchstaben mit Drehregler ändern
Weiter durch Drücken des Drehknopfes
Zurück durch drücken von „ESC“
Fertig mit OK
Betrieb mit Märklin1) Mobile Station
Inbetriebnahme:
Stellen Sie die Lok ohne Wagen auf das Gleis!
Digital Waggon.indd 16 23.10.2008 08:32:03
Page 17
17
17
D
1. Anlegen des Wagen (gleich wie Anlegen einer neuen Lok):
„ESC“ drücken
„NEUE LOK“ --> OK drücken
„Datenbank“ --> OK drücken --> bis zu Lok 37540 ‚BR55‘ drehen --> OK drücken
Sie haben jetzt erfolgreich die Wagen angelegt, jedoch liegen diese noch auf einer anderen Adresse. Um die
Adresse zu ändern, gehen Sie wie folgt vor:
2. Einstellen der Adresse (auf andere Adresse wie Lok um alle Funktionen bedienen zu können):
„ESC“ drücken
Nach Rechts drehen „LOK ÄNDERN“ --> OK drücken
„Adresse“ --> OK drücken
Drehen z.B.: bis zu Adresse „5/6“ --> OK drücken
„PROG LOK?“ --> OK drücken
Die Wagen werden jetzt auf der neuen Adresse programmiert (Es ertönt 3mal ein Pieps-Ton).
3. Einstellen der Funktionstasten:
„ESC“ drücken
Nach Rechts drehen „LOK ÄNDERN“ --> OK drücken
2x nach Links drehen „REG“ --> OK drücken
Drehen bis REG „61“ blinkt --> OK drücken
Drehen bis REG 61: „3“ blinkt --> OK drücken
Die Wagen werden jetzt mit der passenden Funktionstastenbelegung programmiert (Es ertönt 3mal ein
Pieps-Ton).
4. Ändern des Namens:
„ESC“ drücken
Nach Rechts drehen „LOK ÄNDERN“ --> OK drücken
Nach Rechts drehen „NAME“ --> OK drücken
Buchstaben mit Drehregler ändern
Weiter durch Drücken des Drehknopfes
Zurück durch drücken von „ESC“
Fertig mit OK
Stellen Sie die 3 Wagen ohne Lok auf das Gleis!
Digital Waggon.indd 17 23.10.2008 08:32:03
Page 18
18
18
D
Funktions
Taste
Funktion Art
der Funktion
Richtungsabhängig
Zusatzgeräusch
Wagenschlusslicht EIN/AUS
Wagentüren Gangseite ÖFFNEN/SCHLIESSEN
Wagentüren Abteilseite ÖFFNEN/SCHLIESSEN
Schaffnerpfiff EIN/AUS
Schaffneransage
„Alles einsteigen bitte“!
EIN/AUS
Innenbeleuchtung EIN/AUS
Funktionstasten Märklin1) Mobile Station (Wagen)
Programmieren mit Märklin1) Mobile Station
1. „ESC“-Taste drücken
2. Nach Rechts drehen „LOK ÄNDERN“ --> OK drücken
3. 2x nach Links drehen „REG“ --> OK drücken
4. Drehen bis der gewünschte CV blinkt --> OK drücken
5. Drehen bis der gewünschte Wert blinkt --> OK drücken
Die Lok bestätigt das Programmieren mit kurzem Blinken.
Der Wagen bestätigt das Programmieren mit Blinken der Innenbeleuchtung und zusätzlichen Tönen.
Funktionstasten Märklin1) Mobile Station (Lok)
Funktions
Taste
Funktion Art der Funktion Richtungs-
abhängig
Zusatzgeräusch
Stirnlicht Lok EIN/AUS
Loksound EIN/AUS
Stromabnehmer
Führerstand 2 (hinten)
HEBEN/SENKEN
Führestandslicht
Führerstand 1 (vorne)
EIN/AUS
Schlusslicht Lok EIN/AUS
Pfiff kurz EIN
Stromabnehmer Fst. 1
(vorne)
HEBEN/SENKEN
Führerstandslicht Fst. 2
(hinten)
EIN/AUS
Bahnhofsdurchsage EIN
Digital Waggon.indd 18 23.10.2008 08:32:06
Page 19
19
19
D
Analogbetrieb
Funktionen im Analogbetrieb
Über CV13/14 können die Schlussbeleuchtung und die Innenbeleuchtung immer aktiv oder abgeschaltet werden. Im Analogbetrieb sind keine Funktionen schaltbar. Der Analogbetrieb wird über CV29 eingeschaltet.
Die Schlussbeleuchtung ist im Analogmodus DC richtungsabhängig. Wird der Wagen gezogen,
so leuchtet die Schlussbeleuchtung, wird er geschoben, so erlischt die Schlussbeleuchtung.
Da bei langsamer Geschwindigkeit eine zu niedrige Spannung am Gleis anliegt, funktioniert der
Analogbetrieb nur eingeschränkt (ab ~7V).
Wir empfehlen, bei Verwendung von Bremsstrecken den Analogbetrieb auszuschalten (CV29).
Anhang
Functionmapping (laut NMRA Norm)
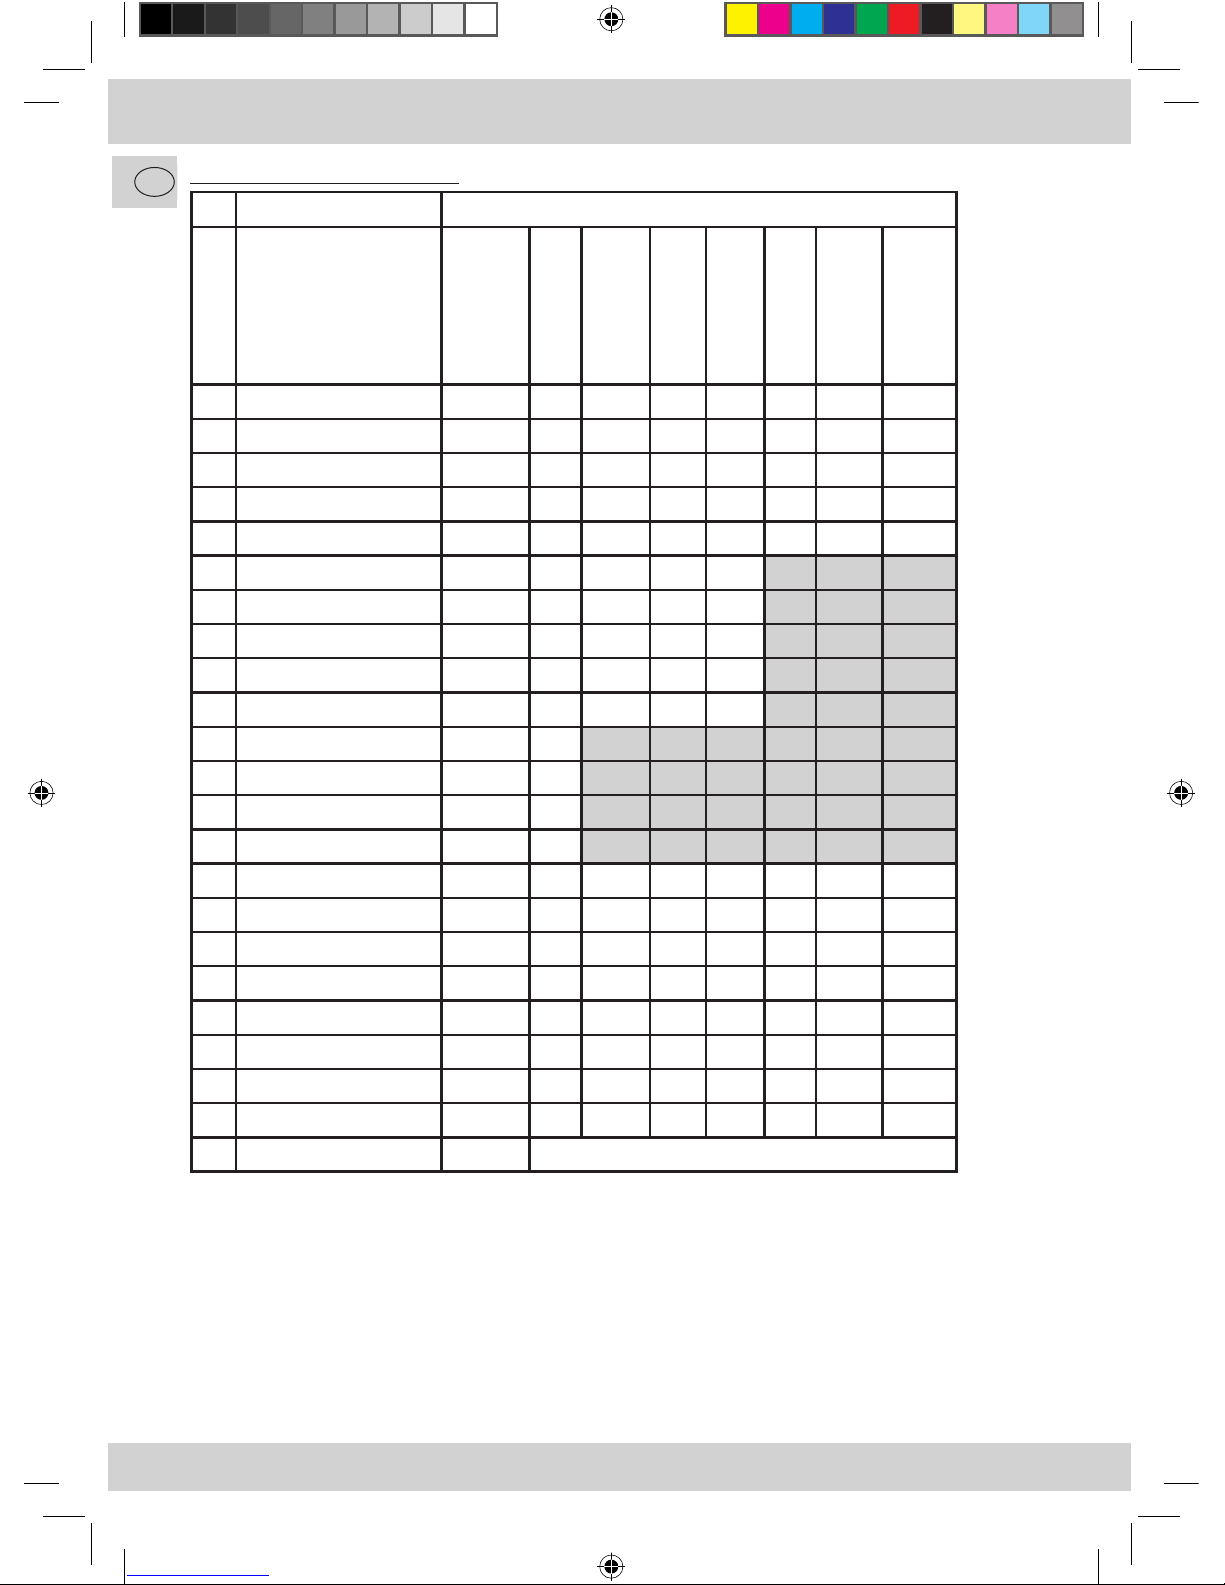
Mit dem Functionmapping können Sie eine oder mehrere Funktionen einer Funktionstaste zuordnen.
Vorgehensweise:
Programmieren Sie auf die CV neben der gewünschten Funktionstaste den Wert der in dieser Zeile bei der
Funktion steht (siehe Tabelle nächste Seite).
Sie können pro Funktionstaste mehrere Funktionen kombinieren, indem Sie deren Werte addieren. Der
graue Bereich ist aufgrund der Norm nicht möglich.
Achten Sie darauf, nicht beide Türen (Gang/Abteil) auf eine Funktion zu legen, da − mechanisch
bedingt − nur eine Seite geöffnet werden kann.
Beispiele:
Sie wollen die Schlussbeleuchtung und die Wageninnenbeleuchtung mit der Lichttaste (F0) gleichzeitig
schalten:
In der Zeile von CV33 hat die Schlussbeleuchtung den Wert 1, die Wageninnenbeleuchtung den Wert 32.
--> Programmieren Sie auf CV33 den Wert 33 (1+32).
Sie wollen die Tür-Gangseite mit F8 und die Tür-Abteilseite mit F9 schalten:
In der Zeile von F8 hat die Tür-Gangseite den Wert 8. In der Zeile von F9 hat die Tür-Abteilseite den Wert 2.
Sie wollen die Türpaare der 3 Wagen einzeln öffnen (Klasse 1: F11 & F12, Klasse 2: F13 & F14, Klasse 3: F15
& F16), aber alle 3 Wagen über eine Adresse ansprechen:
Die Wagen müssen dazu einzeln programmiert werden:
1. Klasse: In der Zeile von F11 (CV45) hat die Tür-Gangseite den Wert 1. In der Zeile von F12 (CV46)
hat die Tür-Abteilseite den Wert 2.
1./2. Klasse: In der Zeile von F13 (CV47) hat die Tür-Gangseite den Wert 64. In der Zeile von F14 (CV48)
hat die Tür-Abteilseite den Wert 128.
2. Klasse: In der Zeile von F15 (CV49) hat die Tür-Gangseite den Wert 64. In der Zeile von F16 (CV50)
hat die Tür-Abteilseite den Wert 128. Den Schaffnerpfiff der vorher auf F16 war legen Sie
auf F19: CV53 --> 8
Digital Waggon.indd 19 23.10.2008 08:32:07
Page 20
20
20
D
CV Funktionstaste
Tür Abteilseite
Tür Gangseite
Wageninnen-
beleuchtung
Schaffneransage
Schaffnerpfiff
Schlusslicht-
sperre
Schlusslicht-
beleuchtung
33 F0 Licht vorwärts 128 64 32 16 8 n.b. 2 1*
34 F0 Licht rückwärts n.b. n.b. n.b. n.b. n.b. n.b. 2 n.b.
35 F1 128 64 32 16 8 n.b. 2 1
36 F2 128 64 32 16 8 n.b. 2 1
37 F3 128 64* 32 16 8 n.b. 2 1
38 F4 16* 8 4 2 1
39 F5 16 8 4 2 1
40 F6 16 8 4 2 1
41 F7 16 8 4* 2 1
42 F8 2 8 4 2 1
43 F9 2 1
44 F10 2 1
45 F11 2 1
46 F12 1
47 F13 128 64 32 16 8 n.b. 2 1
48 F14 128 64 32 16 8 n.b. 2 1
49 F15 128 64 32 16 8 n.b. 2 1
50 F16 128 64 32 16 8* n.b. 2 1
51 F17 128 64 32 16* 8 n.b. 2 1
52 F18 128 64 32 16 8 n.b. 2* 1
53 F19 128 64 32 16 8 n.b. 2 1
54 F20 128 64 32 16 8 n.b. 2 1
*Default
n.b. : nicht benützt
Functionmapping-Tabelle
Funktion
Digital Waggon.indd 20 23.10.2008 08:32:07
Page 21
21
21
D
Die Türen müssen aktiv durch den Bediener über den voreingestellten Befehl F03 oder F04
geschlossen werden. Sie schließen nicht automatisch bei Anfahren des Zuges!
Für Schäden, die daraus entstehen, wenn mit noch geöffneten Türen gefahren wird, kann keine
Gewähr übernommen werden (Gefahrpunkte sind Zugbegegnungen in Kurven, Tunnelportale,
Oberleitungsmaste etc.!).
Die Ausladung eines Wagens mit geöffneter Tür auf der Geraden beträgt 25mm von der Gleismitte aus (zulässiges Lichtraumprofil in der Breite von Gleismitte aus nach NEM301: 20mm), in
der Außenkurve beim R2-Radius 32mm!
Fehlerbild Maßnahme
Wagen reagiert nicht, weder Türen,
noch Innenbeleuchtung
Kontrollieren Sie die Wagenadresse.
Programmieren Sie auf die CV8 den Wert 8 um die
Einstellungen wieder in den Auslieferungszustand zu
setzen.
Türen öffnen nicht, kein Türensound
Programmieren Sie auf die CV7 den Wert 7 um die
Hardware wieder in den Auslieferungszustand zu
setzen.
Eine Türe geht, die andere nicht
Programmieren Sie auf die CV7 den Wert 7 um die
Hardware wieder in den Auslieferungszustand zu
setzen.
Türen öffnen nicht, Türensound
hörbar, Motor hörbar
Getriebe defekt
Schlusslicht flackert Vergleichen Sie die Fahrstufen Ihrer Zentrale mit der
Einstellung in CV29.
Warnungen und Hinweise
Fehlertabelle Wagen
Aus verschiedenen Gründen (Wagen haben keine Pantographen) wurde auf den Oberleitungsbetrieb verzichtet.
Digital Waggon.indd 21 23.10.2008 08:32:07
Page 22
22
GB
Valid for locomotive
and carriage
Symbols
Only valid for the locomotive
Only valid for the carriage
Information/tip
Important for Motorola2) users
Warning
1) “Märklin“ is the registered trademark of the Gebr. Märklin & Cie. GmbH
Göppingen
2) „Motorola“ is the registered trademark of the Motorola Inc.,
Tempe-Phoenix (Arizona/USA)
Digital Waggon.indd 22 23.10.2008 08:32:08
Page 23
23
GB
CONTENTS
Setup and Overview of Functions.......................................................................................................... 24
Digital Operation Functions
Station operation – a possible scenario ............................................................................................... 25
Room for customisation........................................................................................................................ 25
Function key mapping........................................................................................................................... 26
Locomotive Settings
General information.............................................................................................................................. 27
Informations about the linking of running with sound.......................................................................... 27
CV list for the locomotive .................................................................................................................... 27 – 28
Carriage Settings
Address................................................................................................................................................. 29
Configuration (CV29)............................................................................................................................ 29
Carriage settings (CV62) ...................................................................................................................... 29
Carriage settings via CV62 (conductor’s carriage) ............................................................................... 29
Resetting to the default setting ........................................................................................................... 29
CV list for the carriage.......................................................................................................................... 30 – 31
CV Combinations
Combinations for CV29 and CV49 ....................................................................................................... 32
Operation with a DCC Command Station (
multi
MAUS)
Programming modes ............................................................................................................................ 33
Reading CVs ......................................................................................................................................... 33
Function key grouping for operation at own address ........................................................................... 33
Operation with Märklin1)6021
More functions ..................................................................................................................................... 34
Programming mode............................................................................................................................... 34
Operation with the Märklin1) Mobile Station
Start-up (locomotive)............................................................................................................................. 36
Start-up (carriage)................................................................................................................................. 37
Märklin
1)
Mobile Station function keys (locomotive) ....................................................................................... 38
Märklin1) Mobile Station function keys (carriage)....................................................................................... 38
Programming with the Märklin
1)
Mobile Station........................................................................................ 38
Analogue Mode
Analogue mode functions .............................................................................................................. 39
Annex
Function mapping (in accordance with NMRA standard)...................................................................... 39
Function mapping table ....................................................................................................................... 40
Warnings and instructions..................................................................................................................... 41
Troubleshooting table............................................................................................................................ 41
Digital Waggon.indd 23 23.10.2008 08:32:08
Page 24
24
GB
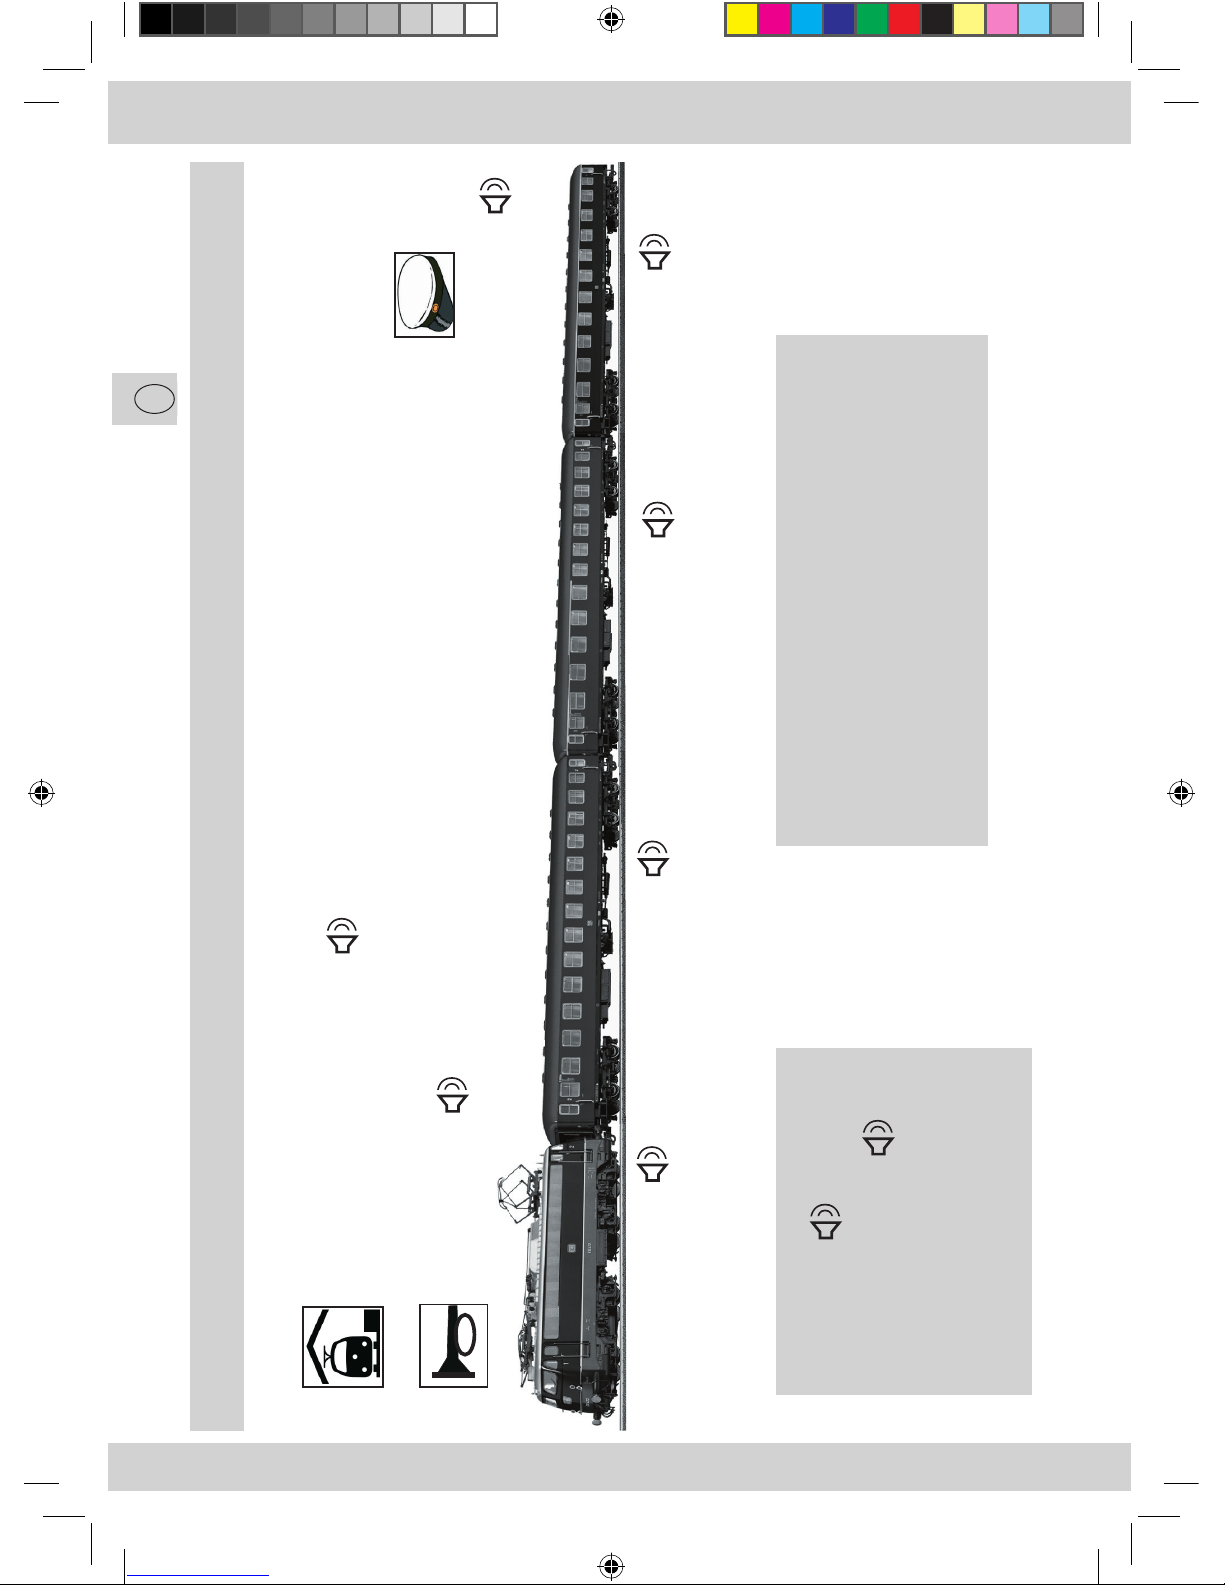
Setup and Overview of Functions:
Station announcement F14
Whistle F6, F9
Conductor’s carriage F16, F17
LOCOMOTIVE
Sound F1
Electrically movable
pantograph F2, F12
Driver’s cabin lighting F5
Headlight (light key F0)
with separately switchable
tail light F8
1
st
class, 1
st
/2
nd
class and 2
nd
class
Interior carriage lighting (flicker-free!) F7
Electrically movable carriage doors on both sides
F3, F4
2
nd
class
Tail light: light key (F0)
LOCOMOTIVE 1
st
Class
1
st
/2
nd
Class
2
nd
Class
with LokSound/function decoder
Digital Waggon.indd 24 23.10.2008 08:32:09
Page 25
25
GB
Digital Operation Functions
The set (locomotive and carriage) can be operated via Address 3 when in the delivery state. The function train
has 19 functions. The function keys have been designed in such a way that users with only a few function keys
can also use the main functions (pantographs, doors, sounds, lights) without difficulty.
The 20 function keys on the
multi
MAUS make it especially comfortable to use.
Please refer to the chapters `Operation with Märklin
1)
6021´ or `Operation with the Märklin1) Mobile
Station´ if you use the Märklin1) 6021 or Mobile Station.
Station operation – a possible scenario:
The locomotive driver climbs into cabin 1 and switches the driver’s cabin light on first. (F5)
He now triggers the lifting of a pantograph, the rear one in normal running operation. (F2)
He activates the main switch, the compressor runs briefly. (F1, F10)
If the train is at the platform, the passengers can get in from the platform side. (F3 o. F4)
The interior lighting is switched on in the three carriages.
(F7)
The station announcement or conductor’s announcement can be heard. (F14 o. F17
)
After all of the passengers have got on the train, the conductor gets on with a short
departure whistle and closes the last door. (F3 o. F4)
Ready for departure: the locomotive driver switches the exterior lighting on and the
cabin lighting which is no longer required, off. (F0 u. F5)
With a short whistle, the locomotive driver carefully gets the train moving. (F6, controller)
The train accelerates on an open stretch and blows a long whistle when
approaching a level crossing. (controller, F9)
Room for customisation
The locomotive and the carriage can obviously be operated at different addresses independent of each other.
The locomotive and each of the carriages is provided with a fully self-supporting multiprotocol decoder for
this purpose.
The locomotive and the carriage are provided with selectable, easily adjustable function key groupings for the
simple operation with its own address.
The function keys can also be occupied with random functions by means of the `function mapping´.
When reading through this instruction manual and trying it for the first time, you will notice that the model
has taken another great step in the direction of the original with this set.
Please remove the carriage from the tracks when programming the locomotive as this will otherwise also be programmed.
Please remove the locomotive from the tracks when programming the carriage as this will otherwise also be programmed.
Digital Waggon.indd 25 23.10.2008 08:32:10
Page 26
26
GB
Motorola
1
st
Address
Function key mapping
The function keys are so occupied that the set (locomotive and 3 carriages) can be operated via one locomotive address (Address 3 in the delivery state).
F-key Function Function Type Direction-
related
Additional
sound
Light Locomotive headlight ON/OFF
F01 LokSound ON/OFF
F02 Pantograph
Driver’s cabin 2 (rear)
RAISING /LOWERING
F05 Driver’s cabin light
Driver’s cabin 1 (front)
ON/OFF
F06 Short whistle ON
F08 Locomotive tail light ON/OFF
F09 Long whistle ON/OFF
F10 Compressor ON/OFF
F12 Pantograph cab. 1 (front) RAISING /LOWERING
F13 Shunting ON/OFF
F14 Station announcement ON
F15 Driver’s cabin light
Driver’s cabin 2 (rear)
ON/OFF
Light Carriage tail light ON/OFF
F03* Carriage doors corridor side OPEN/CLOSE
F04* Carriage doors
compartment side
OPEN/CLOSE
F07 Interior carriage lighting
LED-non-flicker
ON/OFF
F16** Conductor’s whistle
F17** Conductor’s announcement
in german language
F18 Carriage tail light stop
ON: Tail light NEVER on
OFF: control via F0
ON/OFF
CARRIAGE
LOCOMOTIVE
*) For mechanical reasons, the doors of a carriage can only permit the position `open´ on one long side
(`corridor´ or `compartment´)!
**) The 2
nd
class carriage is the conductor’s carriage in the delivery state. Each of the carriages can be
set as being a conductor’s carriage via CV62 if required.
Motorola
1
st
Address
Motorola
2
nd
Address
Mot.
2
nd
add
Digital Waggon.indd 26 23.10.2008 08:32:10
Page 27
27
GB
Locomotive Settings
General information
The LokSound (LokSound) decoder has been optimally adjusted to this locomotive. You can still adapt numerous decoder properties to your wishes however. Certain parameters (referred to as CVs – Configuration
Variable – or register) can be amended.
Please check before each programming if this is really necessary. Incorrect settings can result in the decoder
not reacting correctly.
The decoder is preprogrammed with 28 speed steps at the factory for a high level of comfort. This means
that it can be used together with all of the modern DCC (
multi
MAUS) and Motorola2) control devices.
The LokSound decoder has been especially modified for the additional functions and must not be
replaced with a decoder which is available from a retailer.
This can result in the pantograph drives suffering a defect!
If the locomotive is to be reprogrammed, only the locomotive is to be on the programming track.
It is imperative that the rest of the train is decoupled as the programming will otherwise not be
executed or the carriage will also be programmed.
Informations about the linking of running with sound
This sound decoder of the latest generation enables a stronger linking of running and sound processes. For
example, when the sound is activated (Function key «F1» activated) the locomotive only starts to move
after the «engine» sound sequence has been fully completed and «engine idling» has been reached, just
as with the original. Vice versa, the «engine off» sound sequence only runs after the Function key F1 (now
«sound off») has been activated again, followed by the «engine idling» status, if the locomotive is already
at a standstill when the key «F1» has been activated. This means that a fast switching of the sound on or
off using the key «F1» is only possible if the locomotive is already or still moving.
CV Name Adjustable Values Default
Values
1 Address (= short address) 00 – 99 03
2 Minimum speed
(lowest creeping speed)
00 – 75
03
3 Start-up delay
(from standstill to maximum speed)
00 – 64 14
4 Braking delay
(from maximum speed to stand-still)
00 – 64 07
5 Maximum speed 00 – 64 38
6 Medium speed
(at medium running step)
00 – 64 22
8 Resetting of all values to the default
settings; (With readable amplifiers/controllers,
the manufacturer ID is readable)
---------------------
08=Reset
CV- list for the locomotive
Digital Waggon.indd 27 23.10.2008 08:32:10
Page 28
28
GB
13 Analogue Modes F1-F8 00 – 255 128
17
+
18
Long address
(requirement: corresponding CV29 long
address setting is activated)
---------------------
192
00
29 Settings 1
Bit 0: direction reversal
Bit 1: speed steps (DCC)
Bit 2: analogue operation
Bit 5: long address
See table in the
“CV combinations“
chapter
06
49 Settings 2
Bit 0: load control active
Bit 1: 30 kHz engine cycle frequency
Bit 2: lighting in the Märklin
1)
Delta operation
Bit 3: automatic DCC running steps detection
See table in the
“CV combinations“
chapter
27
50 Analogue mode 00= both off
01= AC mode on
02= DC mode on
03= both on
03
51 Brake mode detection
Bit 0: Märklin1) 72441
Bit 1: Zimo latest
Bit 2: Lenz DC
Value: 1
Value: 2
Value: 8
07
63 Total volume of all sounds
(observe CV 121-123 settings!)
00 – 64
55
65 Functionmapping
Changes the function key accommodation
so that the most important functions can be
addressed with fewer function keys
1: Set (default)
2: operation with
Märklin
1)
6021
3: Operation with
Märklin1)Mobil Station
Set
113 Front light dimming (15=max. brightness) 00 – 64 15
114 Rear light dimming (15=max. brightness) 00 – 64 15
119 Pantograph driver’s cabin 1
Changes the height of pantograph 1
00 – 20
individually
adjusted
120 Pantograph driver’s cabin 2
Changes the height of pantograph 2
00 – 20
individually
adjusted
121 Volume controller for pantographs
(max. volume only if CV63 value also=64)
00 – 64
64
122 Volume controller for switching noise
(max. volume only if CV63 value also=64)
00 – 64
64
123 Volume controller for running sounds
and other additional sounds
(max. volume only if CV63 value also=64)
00 – 64
64
Digital Waggon.indd 28 23.10.2008 08:32:10
Page 29
29
GB
Carriage settings
If you wish to programme other decoders (e.g. in the locomotive, carriage, etc.), you must remove
the carriage with the revolving door from the track as this will otherwise also be programmed.
Address
The carriage is programmed at address 3 in the delivery state.
The carriage can be programmed at diverse addresses between 1-99 via CV1. 9999 addresses are possible
via the long addressing (CV17/18) (this requires the activation of an additional CV29 Bit5, see CV list).
The tail lamp of the carriage is logically coupled to the locomotive (direction of travel,
activation) if the addresses are the same.
Configuration (CV29)
Decoder configurations are possible via CV29. In the CV list, each of the configurations has a value. The
required settings (values) are to be added and CV29 programmed with them.
Bit 0 (value 1 or 0) changes the direction if the carriage is coupled to the locomotive the wrong way round.
The tail lamp is now conform with the direction.
Bit 1 (value 2 or 0) comprises the number of speed steps. This is important for a correct, direction-related
illumination of the tail lamp and must be conform with the running step setting/operation in the
mul-
ti
MAUS/controller. A flashing of the tail lamp when rotating the running controller is an indication of
an incorrect speed step setting.
Bit 2 (value 4 or 0) switches the analogue operation on or off.
Bit 5 (value 32 or 0) switches the „long address“ mode on or off.
For more informations look chapter “CV-Combinations“.
Carriage settings (CV62)
You can make additional carriage settings with regard to the conductor and the door movement via CV62.
In the default setting, the 2nd class carriage is defined as the conductor’s carriage, i.e. the conductor announcement and whistle come from this carriage.
CV62 Carriage Type Default Values
1
st
class no whistle and announcement 0
1st/2nd class no whistle and announcement 0
2nd class with tail lamp with whistle and announcement 3
Carriage configuration via CV62 (conductor’s carriage)
Resetting to the default setting
The CV settings of the carriage are reset to the default setting by value 8 being programmed at CV8.
The door mechanic of the carriage goes to the starting state when you program value 7 at CV7.
If you wish to define the 1
st
class as being the conductor’s carriage (i.e. with whistle and announcement),
program value “3“ at CV62.
Digital Waggon.indd 29 23.10.2008 08:32:11
Page 30
30
GB
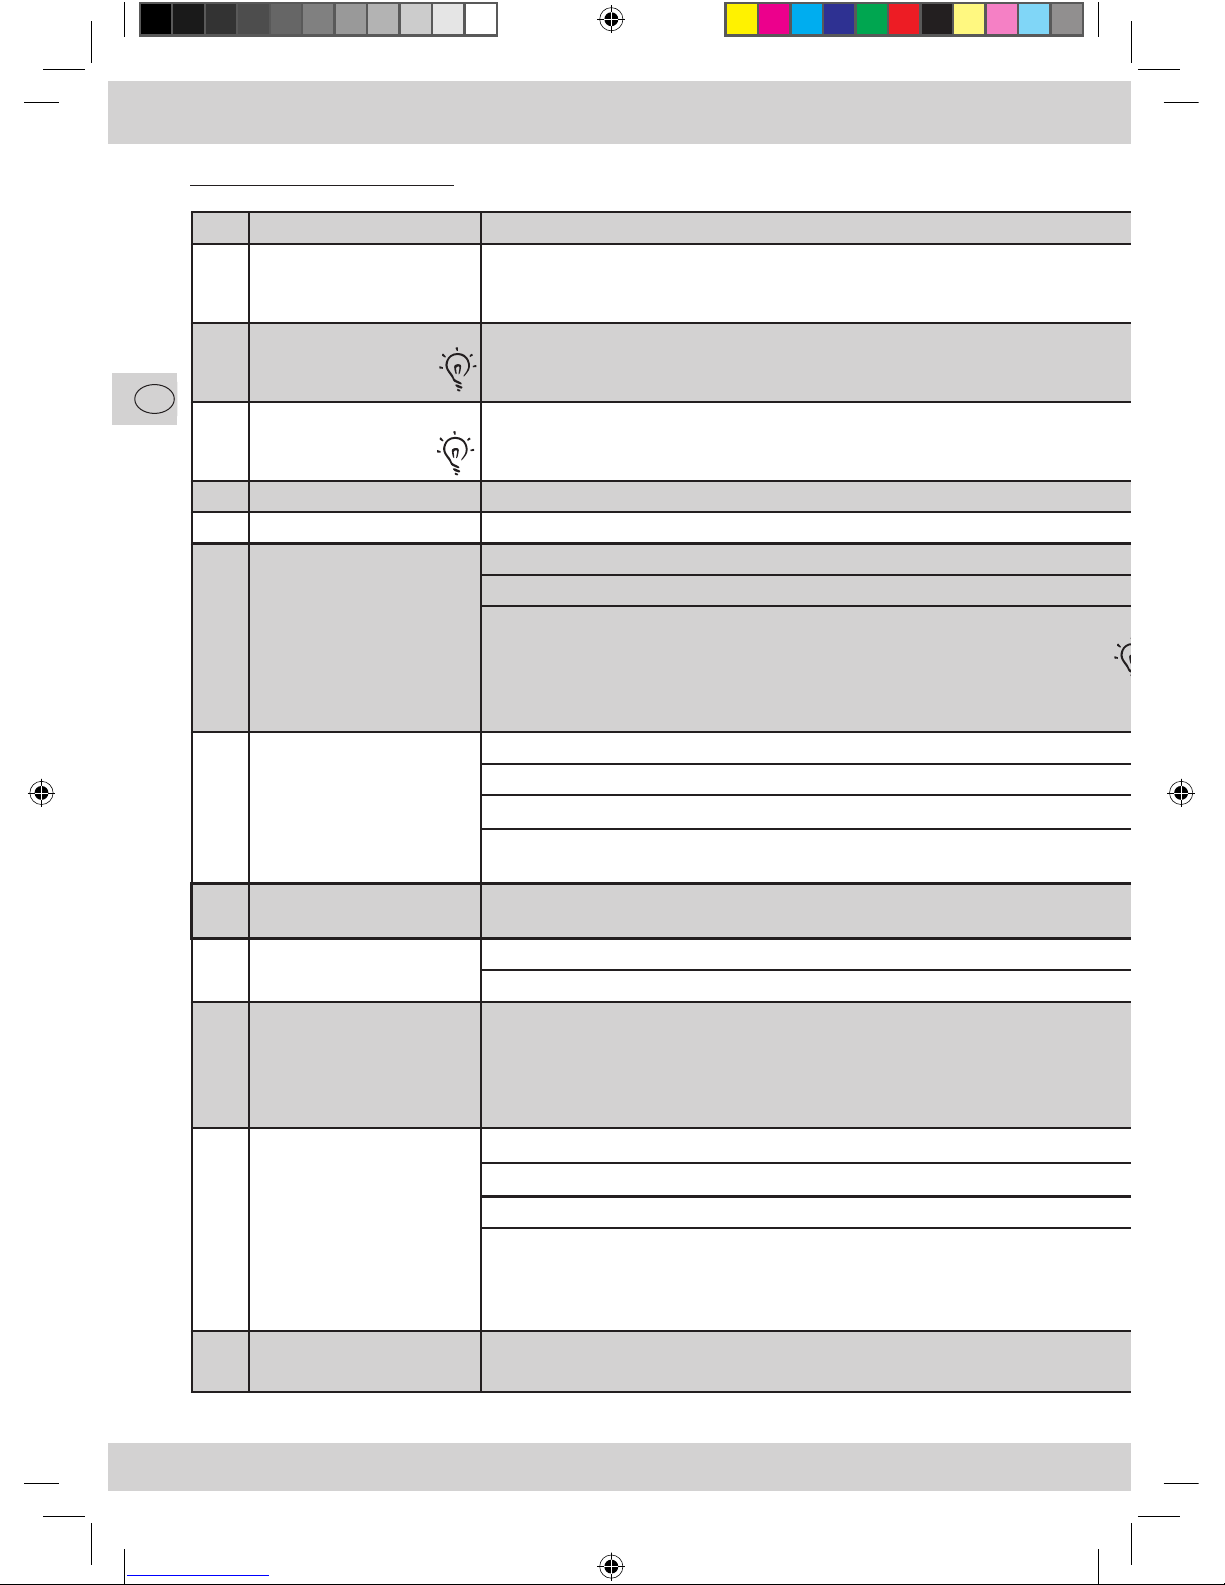
CV Name Description Value/explanation Range Default Values
1 Carriage address
The decoder reacts to the address range 1-127, the
multi
MAUS and
other controllers address 1-99 via the short address, the rest
via the long address (CV17/18)
7 Version number Internal decoder software
Programming with value 7 results in a resetting
of the doors to the delivery state
8 Manufacturer identification Manufacturer ID of Modelleisenbahn GmbH
Programming with value 8 results in a resetting of the CVs
to the delivery state.
13 Analogue F1-F8 Function key in analogue mode F7: interior lighting OFF (0) / ON (64) 0/64 0
14 Analogue Lamp, F9-F14 Function key in analogue mode F0: tail light OFF( 0) / ON (1) 0/1 0
17 Long address 100-9999
18 high-value byte (HByte) 192
low-value byte (NByte)
Calculation: long address=(HByte-192)x256+NByte
e.g.: Adr 170: HByte=192, NByte=170
Adr 270: HByte=193, NByte=14
Adr 370: HByte=193, NByte=114
You do not have to calculate CV17/18 if you use “LONG ADDRESS“ when
programming the
multi
Activation of the long address via CV29
29 Configuration Bit 0: direction reversal 0: normal, 1: wrong way round 0/1 OFF: 0
Bit 1: speed steps (DCC) 0: 14 speed steps 2: 28/128 speed steps 0/2 ON: 2
See table in the Bit 2: analogue operation 0: OFF, 4. functions are switched as set in CV13/14 0/4 OFF: 0
“CV combinations chapter“ Bit 5: long address 0: use carriage address (CV1)
32: use long address (CV17/18)
33
- 54
Function Mapping With CVs, one can allocate functions to each of the function keys
(see annex “function mapping“)
56 Extended configuration Bit 0: store function keys 0: switched off, 1: switched on 0/1 9
Bit 3: 2nd Märklin1) address
0: switched off, 8: switched on
61 Function keys grouping automatically writes CV33-54
Value 0: standard occupancy for set with loc. at same address
Value 1: for DCC operation at own address
Value 2: for Märklin
1)
6021 operation at own address
Value 3: for Märklin
1)
Mobile Station operation at double address (loc. database 37540)
62 Carriage configuration Bit 0: manual conductor 0: OFF, 1: ON --> reacts to F16, F17 0/1
Bit 1: automatic conductor whistle 0: OFF, 2: ON --> automatic conductor whistle when doors closing 0/2
Bit 2: automatic conductor announcement 0: OFF, 4: ON --> automatic conductor whistle when doors move 0/4
Bit 3: fast closing
--> short time for closing of the doors:
The conductor announcement from another carriage is not waited for.
Fast closing is not applicable if the carriage is a conductor carriage.
0: OFF, 8: ON --> shorter time for closing doors
63 Dimming of the interior
lighting
The brightness of the interior lighting can be set via this CV. 0-15 12
CV list for the carriage
Digital Waggon.indd 30 23.10.2008 08:32:11
Page 31
31
GB
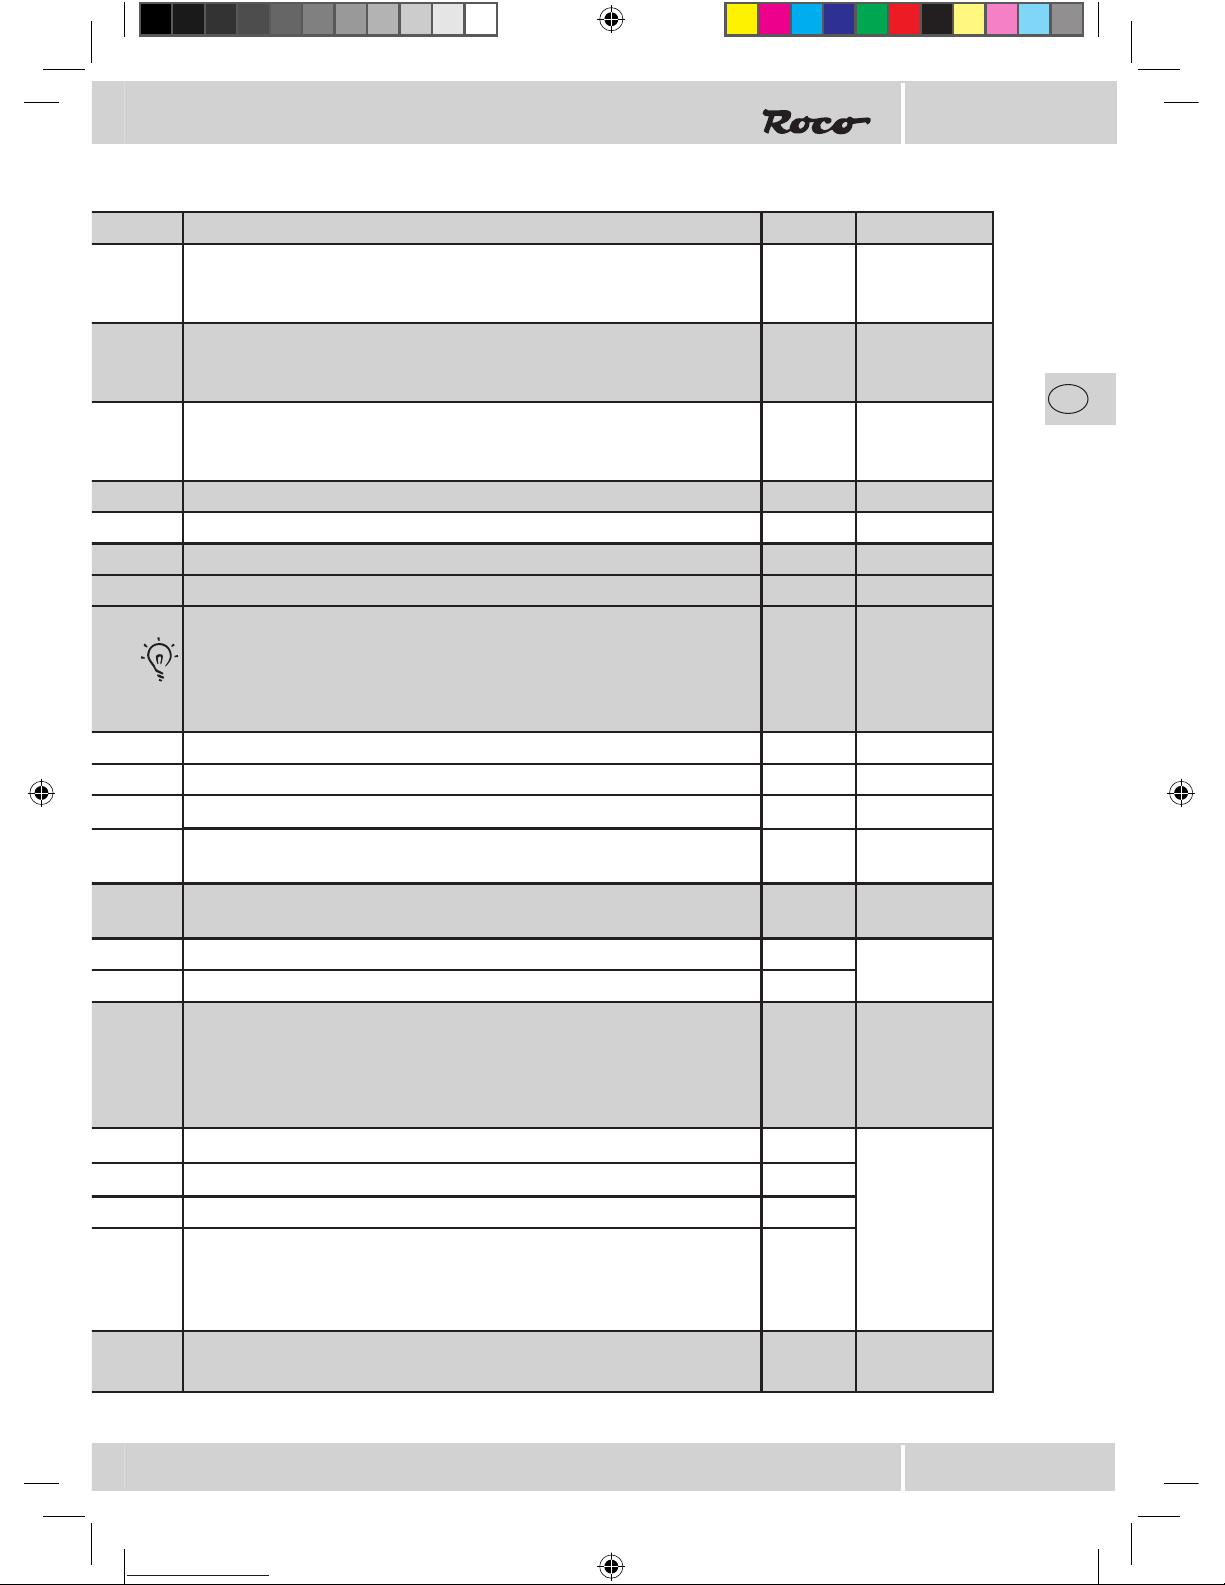
1-99/
1-127
3
161
You do not have to calculate CV17/18 if you use “LONG ADDRESS“ when
programming the
multi
MAUS
Activation of the long address via CV29
0
32: use long address (CV17/18)
0/32 OFF: 0
0: switched off, 8: switched on
0/8
0-3 0
0: OFF, 8: ON --> shorter time for closing doors
0/8
1st class: 0
1st/2
nd
class: 0
2nd class: 3
Digital Waggon.indd 31 23.10.2008 08:32:11
Page 32
32
GB
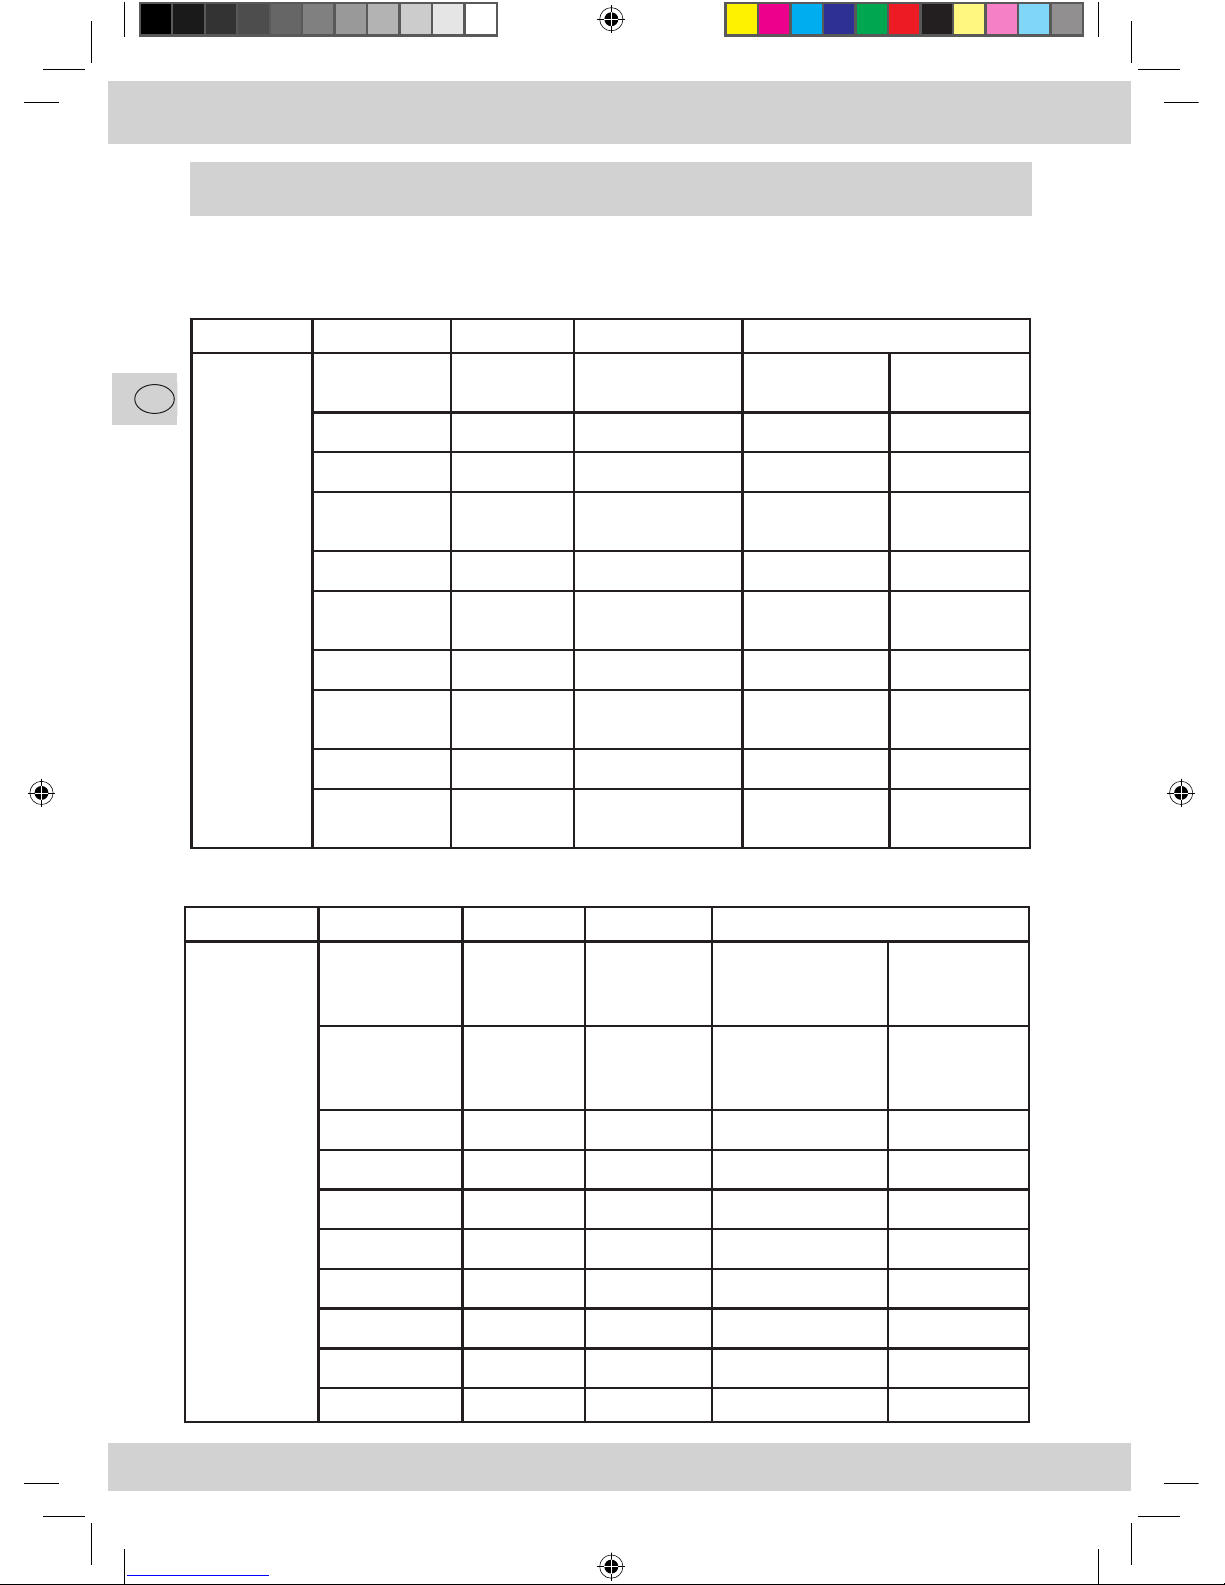
CV-Combinations
Combinations for CV29 and CV49
CV29 Bit 0 Bit 1 Bit 2
Direction of
Travel
Speed
Steps
Operating Mode Value Value
Short address Long address
normal 14 digital 0 32
other way
round
14 digital 1 33
normal 28/128 digital 2 (default) 34
other way
round
28/128 digital 3 35
normal 14 analogue+digital 4 36
other way
round
14 analogue+digital 5 37
normal 28/128 analogue+digital 6 38
other way
round
28/128 analogue+digital 7 39
Bit 5
CV49 Bit 0 Bit 1 Bit 3
Load Control
Engine
Cycle
Frequency
Märklin1) 2
nd
Address
Value Value
No automatic
speed step
detection
Automatic
speed step
detection
inactive 15kHz off 0 16
active 15kHz off 1 17
inactive 30kHz off 2 18
active 30kHz off 3 19
inactive 15kHz on 8 24
active 15kHz on 9 25
inactive 30kHz on 10 26
active 30kHz on 11 27 (default)
Bit 4
Digital Waggon.indd 32 23.10.2008 08:32:11
Page 33
33
GB
F-Key Function Function Type Direction-
related
Additional
sound
F00 Carriage tail light ON/OFF
F01 Carriage doors corridor side OPEN/CLOSE
F02 Carriage doors
compartment side
OPEN/CLOSE
F03 Interior carriage lighting ON/OFF
F04* Conductor’s whistle ON
F05* Conductor’s announcement
in german language
ON/OFF
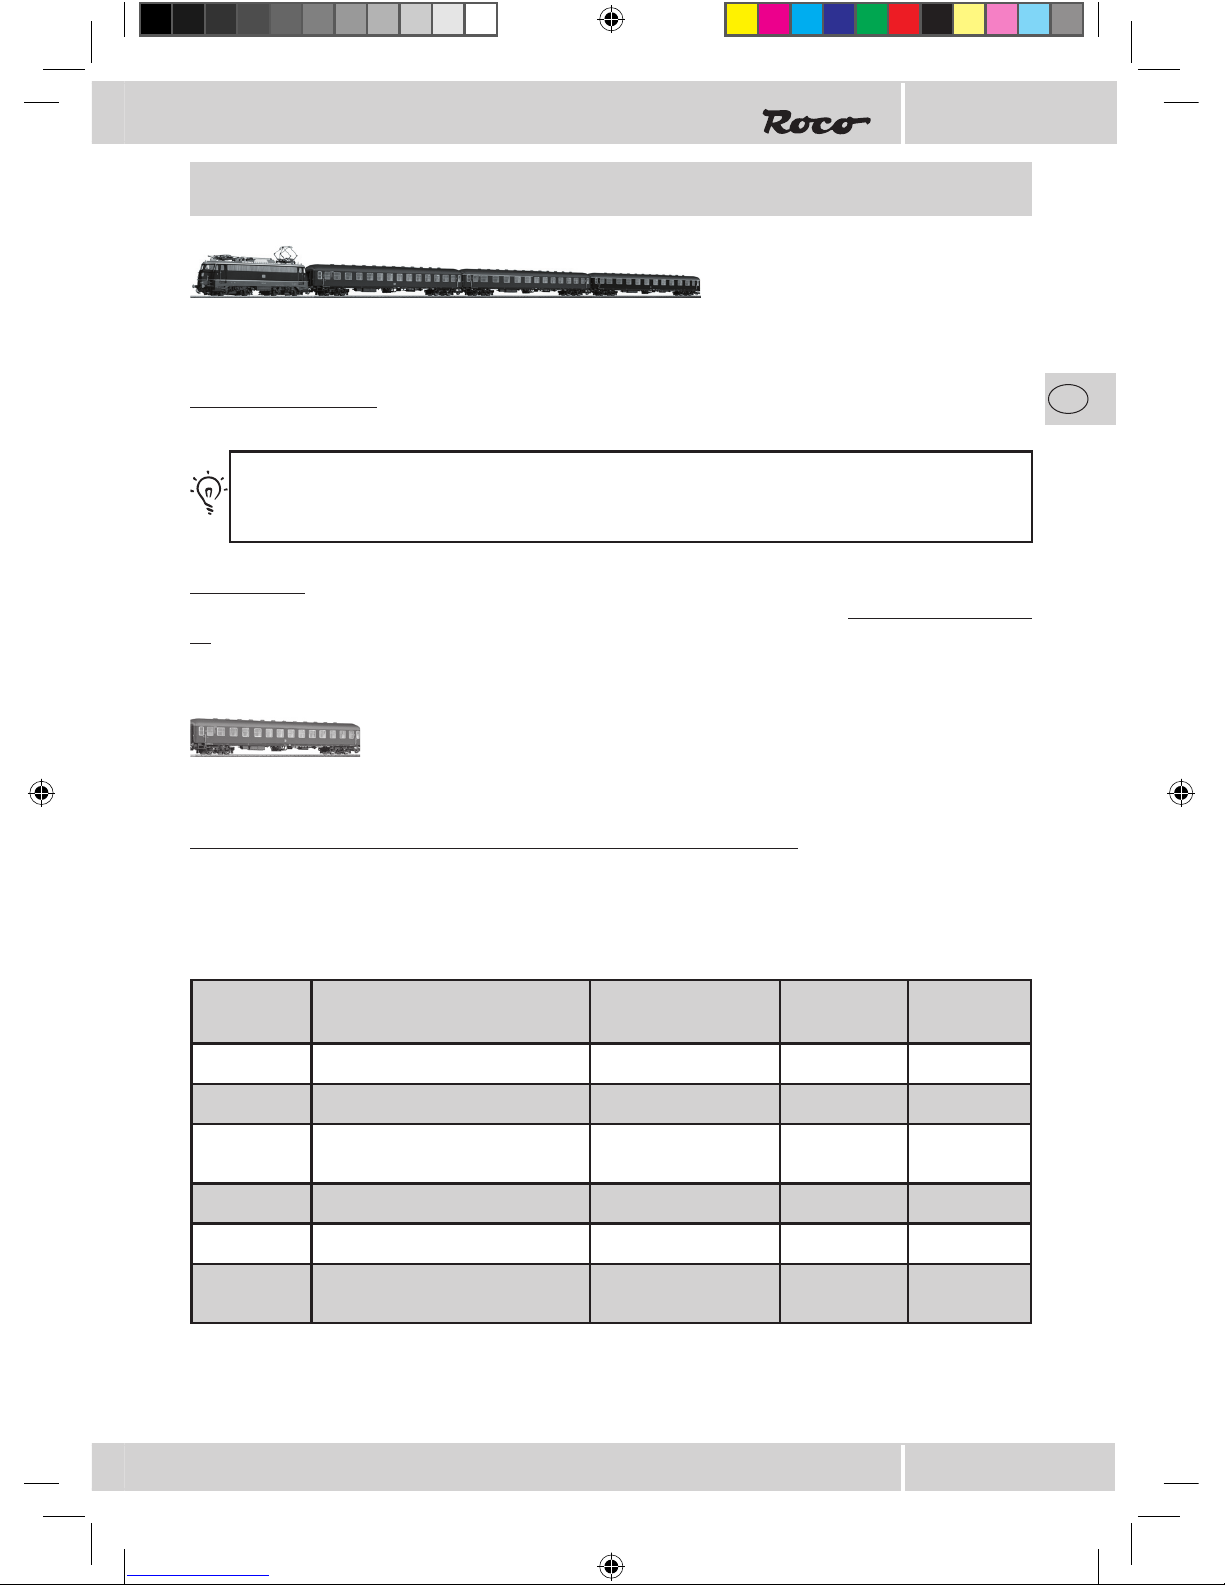
*) The 2nd class carriage is the conductor’s carriage in the delivery state. Each of the carriages can be set
as being a conductor’s carriage via CV62 if required.
Operation with a DCC Command Station (
multi
MAUS)
As the
multi
MAUS has 20 function keys and a light button, the entire set can be especially comfortably
operated.
Programming modes:
The locomotive and carriages react to all DCC programming modes.
We recommend: direct CV programming (byte by byte) or POM mode (programming on main track).
The programming is described in the
multi
MAUS manual.
Reading CVs:
With the appropriate equipment (e.g. Rocomotion 10785), you can read the value byte by byte and bit by
bit.
Function key grouping for operation at own address
If you wish to operate the carriage(s) separately, i.e. at another address than the locomotive, you can
simply group the functions.
To do so, program the value 1 via CV61.
Experts can also “map“ the functions individually (see Annex):
Digital Waggon.indd 33 23.10.2008 08:32:12
Page 34
34
GB
Operation with Märklin
1)
6021
More functions
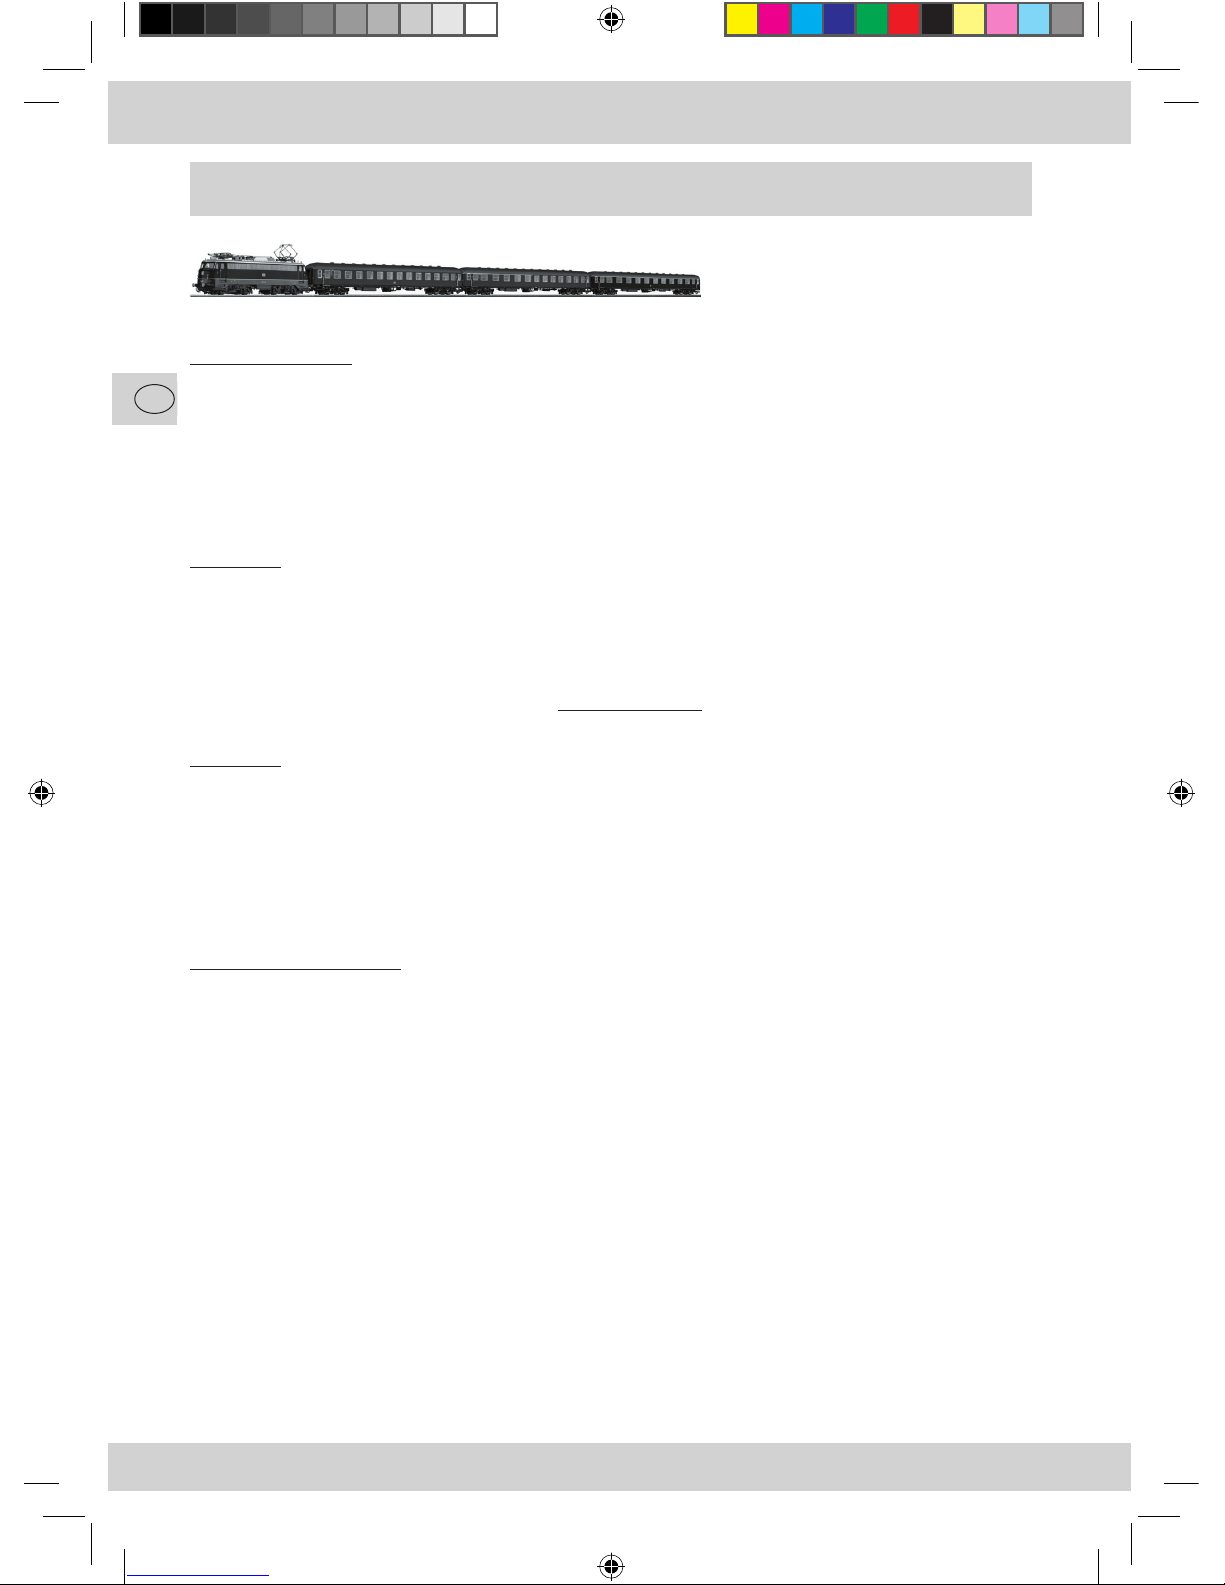
We are certain that you noticed when trying the set out that not all of the functions which are described in
the “function overview“ are available in the delivery state.
So that more functions can be addressed with the Märklin1) 6021, you have
on the one hand: the “2
nd
address“ . This is activated in the delivery state and is one higher than the
normal address.
Example 1
Address (CV1)=3 (default state)
2nd address=4
on the other: there is a dedicated function key mapping (refer to the table on the next page) which
addresses more functions at different addresses (1st address + 2nd address), which can be
activated via CV65 (locomotive) or CV61 (carriage) respectively.
Example 2
Locomotive: addresses 3 (CV1) and 4
Carriage: addresses 5 (CV1) and 6.
Programming mode
Note: programming is only possible if DIP switch #2 on the back of the Märklin
1)
6021 has been activated.
Programming:
1. set the speed controller to ‘0’
2. press stop+go for approx. 1 sec. in order to trigger reset (or disconnect/connect the Station)
3. press stop
4. enter the address or ‘80’
5. press go during the activation of the change in the direction of travel
6. enter the CV at Märklin
1)
6021 in two figures in the form of a locomotive address (CV1-79 possible)
7. activate the change in the direction of travel
8. enter the value in two figures (1-79 possible, enter ‘80’ for value 0)
9. activate the change in the direction of travel
10. the decoder has been programmed and is in travel mode
Digital Waggon.indd 34 23.10.2008 08:32:12
Page 35
35
GB
Function
key
Function Function
Type
Directionrelated
Additional
sound
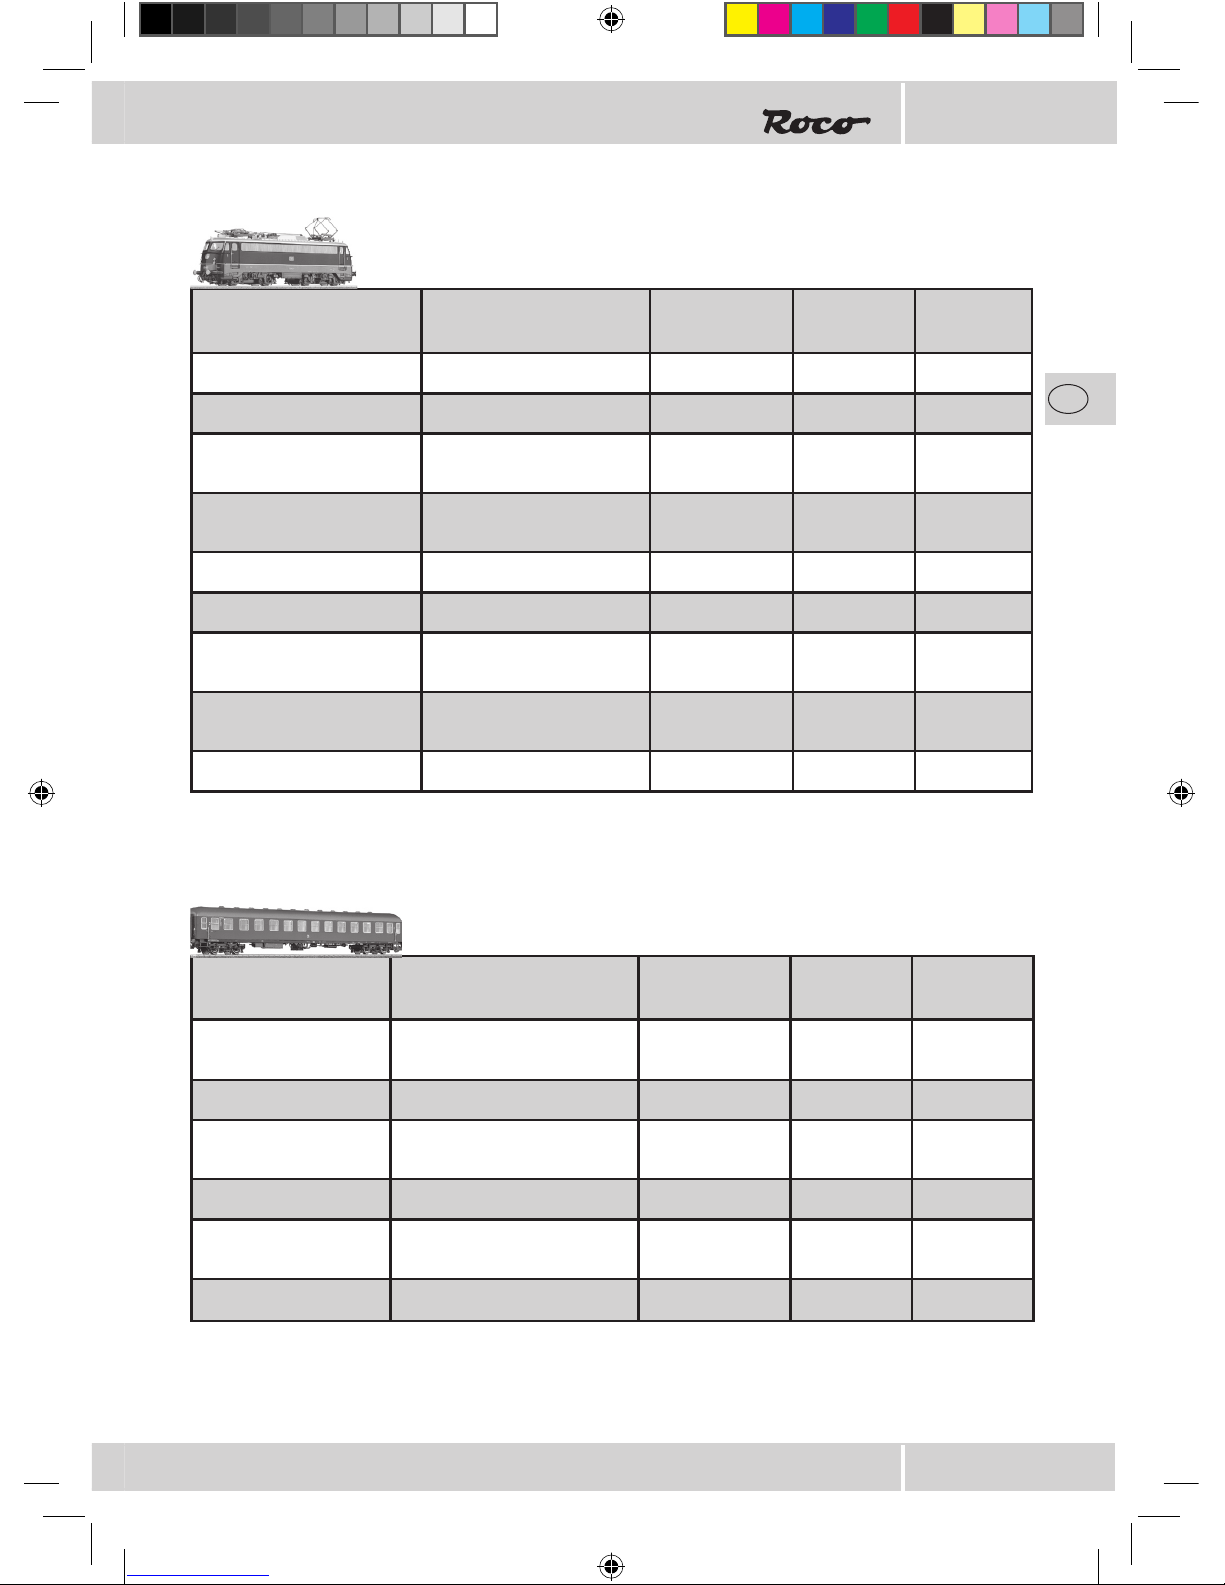
1st address function Locomotive headlight ON/OFF
1st address f1 LokSound ON/OFF
1st address f2 Pantograph
Driver’s cabin 2 (rear)
RAISING/
LOWERING
1st address f3 Driver’s cabin light
Driver’s cabin 1 (front)
ON/OFF
1st address f4 Locomotive tail light ON/OFF
2nd address f1 Short whistle ON
2nd address f2 Pantograph cab. 1 (front) RAISING/
LOWERING
2nd address f3 Driver’s cabin light
Driver’s cabin 2 (rear)
ON/OFF
2nd address f4 Station announcement ON
Only place the carriage on the track!
Programme the value 2 at CV61 (see programming mode)
Change the address (as in example 2)
Function
key
Function Function Type Direction-
related
Additional
sound
1st address function Carriage tail light and
interior lighting
ON/OFF
1st address f1 Carriage doors corridor side OPEN/CLOSE
1st address f2 Carriage doors
compartment side
OPEN/CLOSE
1st address f3* Conductor’s whistle ON/OFF
1st address f4* Conductor’s announcement
in german language
ON/OFF
2nd address no functions
*) The 2
nd
class carriage is the conductor’s carriage in the delivery state. Each of the car-riages can be set
as being a conductor’s carriage via CV62 if required.
Only place the locomotive on the track!
Programme the value 2 at CV65 (see programming mode)
Digital Waggon.indd 35 23.10.2008 08:32:12
Page 36
36
GB
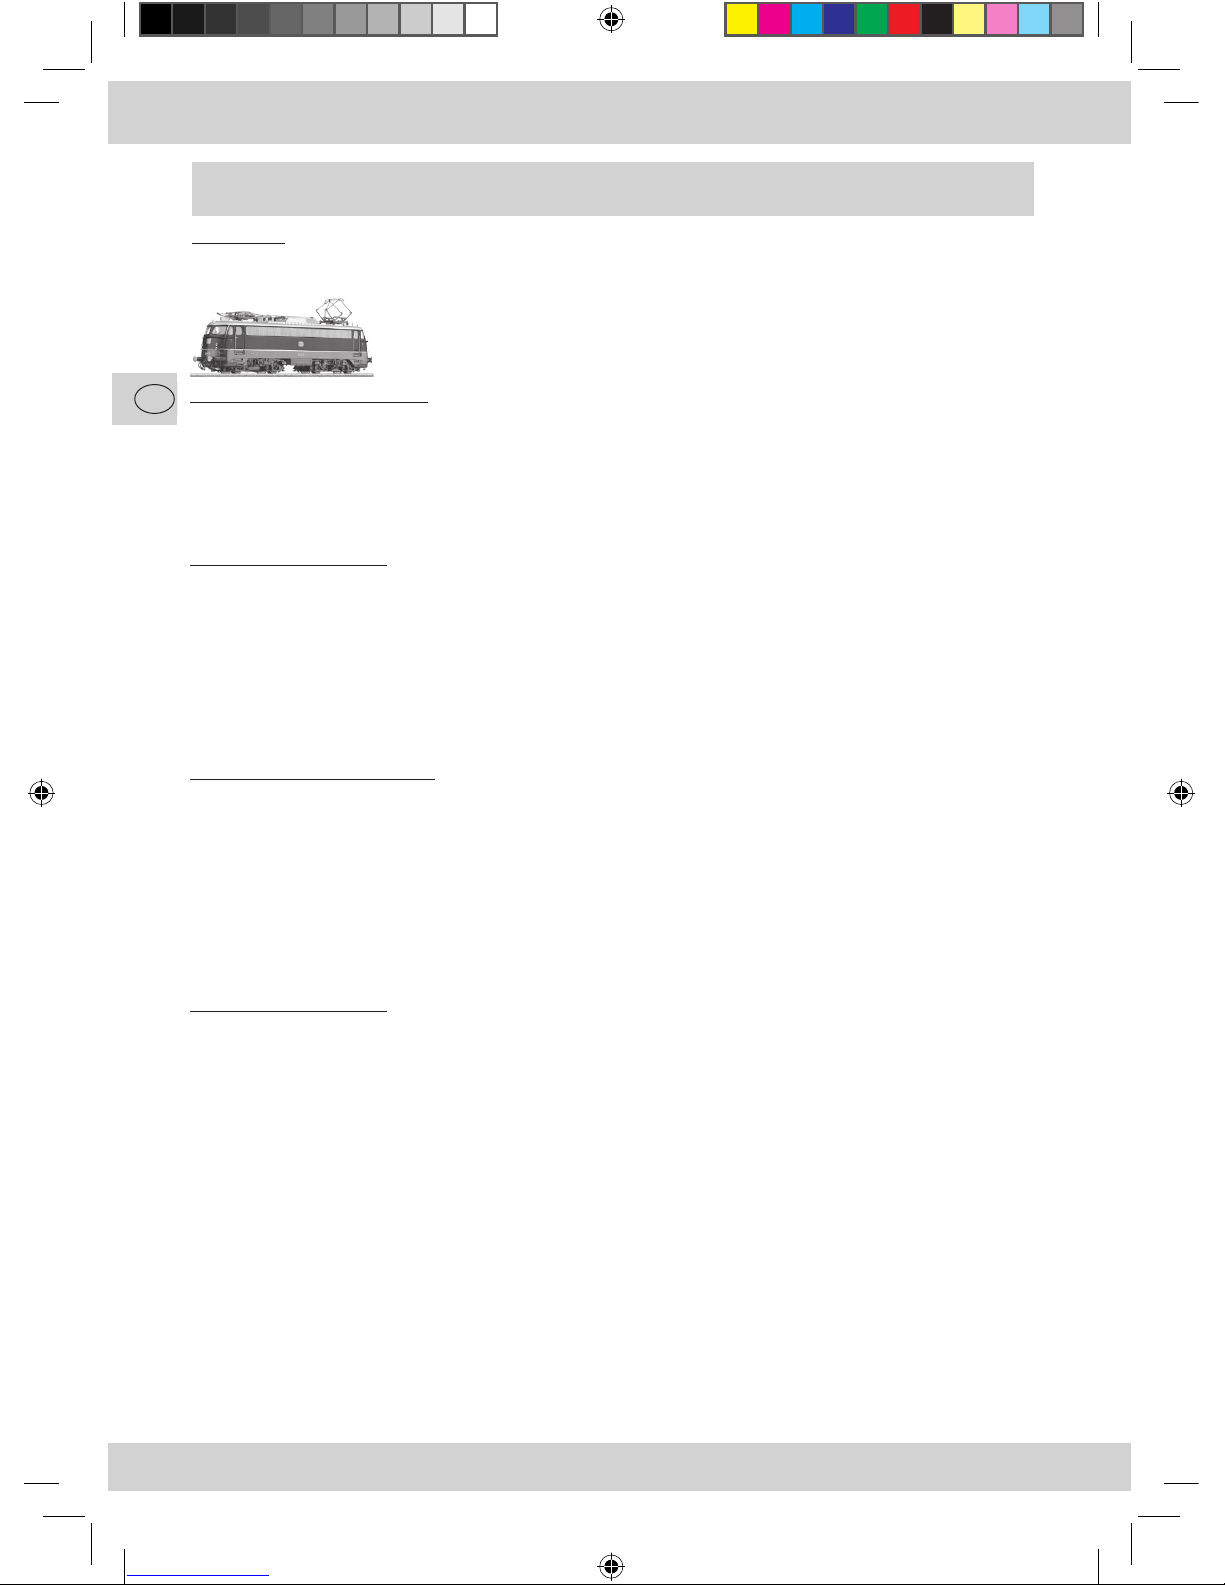
1. Creating the locomotive:
Press “ESC“
„NEW LOC” --> press OK
“Database” --> press OK --> rotate to Loc 37540 --> press OK ‘BR55’
You have now successfully created the locomotive but this is still at another address. Change the address
as follows:
2. Setting the address:
Press “ESC”
Rotate to the right “EDIT LOC” --> press OK
“Address” --> press OK
Rotate. e.g. to address “3/4” --> press OK
“PRG LOC?” --> press OK (lamps flash)
You have now successfully set the address and can use the locomotive.
Do the following in order to address the functions as shown in the table on the next page:
3. Setting the function keys:
press “ESC”
rotate to the right “EDIT LOC” --> press OK
rotate 2x to the left “REG” --> press OK
rotate until REG “65” flashes --> press OK
rotate until REG 65: “3” flashes --> press OK (lamps flash)
The locomotive has now been programmed with the corresponding function key mapping.
You can now switch the functions in accordance with the table.
Change the names as follows:
4. Changing the name:
Press “ESC”
Rotate to the right “EDIT LOC” --> press OK
Rotate to the right “NAME” --> press OK
Change letters with rotary knob
Continue by pressing the rotary knob
Return by pressing “ESC”
Finish with OK
Operation with Märklin1) Mobile Station
Start-up:
Place the locomotive on the track without the carriage!
Digital Waggon.indd 36 23.10.2008 08:32:13
Page 37
37
GB
1. Creating the carriage (same as creating a new locomotive):
Press ESC
“NEW LOC” --> press OK
“Database” --> press OK --> rotate to Loc 37540 --> press OK `BR55´
You have now successfully created the carriage but this is still at another address. Change the address as
follows:
2. Setting the address
(at another address as the locomotive so that all functions can be use):
Press ESC
Rotate to the right “EDIT LOC” --> press OK
“Address” --> press OK
Rotate. e.g. to address “5/6 --> press OK
“PRG LOC?” --> press OK
The carriage has now been successfully programmed at the new address (a beep sounds 3 times)
3. Setting the function keys:
Press ESC
Rotate to the right “EDIT LOC” --> press OK
Rotate 2x to the left to “REG” --> press OK
Rotate until REG “61” flashes” --> press OK
Rotate until REG 61: “3” flashes” --> press OK (lamps flash)
The carriages have now been programmed with the corresponding function key mapping (a beep sounds
3 times).
4. Changing the name:
Press ESC
Rotate to the right “EDIT LOC” --> press OK
Rotate to the right “NAME” --> press OK
Change letters with rotary knob
Continue by pressing the rotary knob
Return by pressing ESC
Finish with OK
Place the 3 carriages on the track without the locomotive!
Digital Waggon.indd 37 23.10.2008 08:32:13
Page 38
38
GB
Function
key
Function Function
Typ
Directionrelated
Additional
sound
Carriage tail light ON/OFF
Carriage doors corridor side OPEN/CLOSE
Carriage doors
compartment side
OPEN/CLOSE
Conductor’s whistle ON/OFF
Conductor’s announcement
“All on board please!“
ON/OFF
Interior lighting ON/OFF
Märklin Mobile Station Function Keys (Carriage)
Programming with the Märklin1) Mobile Station
1. Press the “ESC” button
2. Rotate to the right “EDIT LOC” --> press OK
3. Rotate 2x to the left to “REG” --> press OK
4. Rotate until the required CV flashes --> press OK
5. Rotate until the required value flashes --> press OK
The locomotive confirms the programming by flashing briefly.
The carriage confirms the programming by the interior lighting flashing and with additional sounds.
Märklin1) Mobile Station Function Keys (Locomotive)
Function
key
Function Function
Typ
Directionrelated
Additional
sound
Locomotive headlight ON/OFF
LokSound ON/OFF
Pantograph
Driver’s cabin 2 (rear)
RAISING /
LOWERING
Driver’s cabin light
Driver’s cabin 1 (front)
ON/OFF
Locomotive tail light ON/OFF
Short whistle ON
Pantograph cab. 1 (front)
RAISING/LOWERING
Driver’s cabin light
Driver’s cabin 2 (rear)
ON/OFF
Station announcement ON
Digital Waggon.indd 38 23.10.2008 08:32:16
Page 39
39
GB
Analogue Mode
Analogue mode functions
The tail light and the interior lighting can always be active or deactivated via CV13/14. No functions can be
switched in analogue mode. The analogue mode is activated via CV29.
When in the DC analogue mode, the tail light is direction-related. The tail lamp is on if the carri
age is pulled and extinguishes if it is pushed.
As the track voltage is too low at lower speeds, the analogue operation only works above
~7V).
We recommend that the analogue mode be deactivated (CV29) when using a brake section.
Annex
Function mapping (in accordance with the NMRA standard)
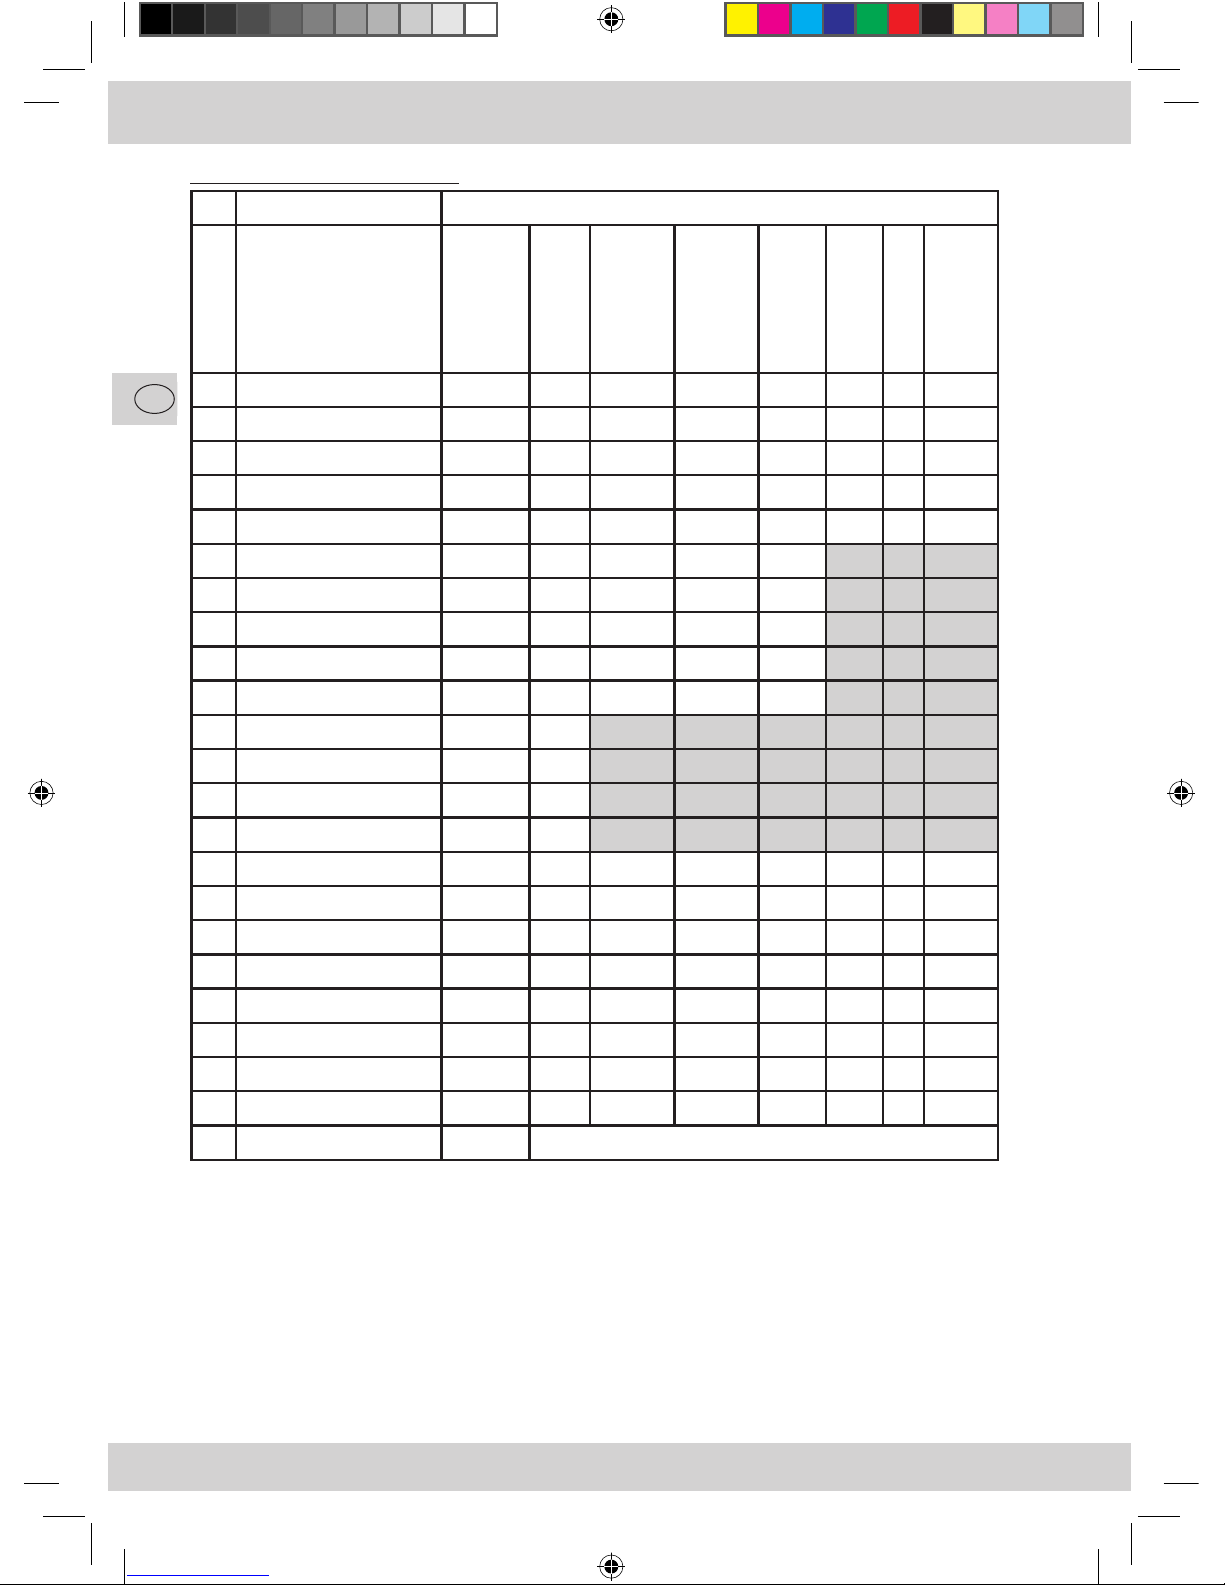
You can allocate one or more functions to a function key with function mapping.
Procedure:
At the CV, programme both the function key and the value which is next to the function in this line (See
table on the next page).
You can combine numerous functions for each function key by adding the values. The grey area is not pos
-
sible, due to the norm.
Ensure that you do not connect a function to both of the doors (corridor/compartment) as only
one side can be opened for mechanical reasons.
Examples:
You want to switch the tail lamp and the interior carriage lighting together with the light button (F0):
In the CV33 line, the tail lamp has the value 1 and the interior carriage lighting has the value 32.
--> Programme the value 33 (1+32) at CV33.
You want to switch the door on the corridor side with F8 and the door on the compartment side with F9:
In the F8 line, the door on the corridor side has the value 8. In the F9 line, the door on the compartment
side has the value 2.
You want to open the door pairs of the 3 carriages separately (class 1: F11 & F12, class 2: F13 & F14, class
3: F15 & F16) but address all 3 carriages via a single address:
The carriages must be programmed separately.
1st class: in the F11 (CV45) line, the door on the corridor side has the value 1. In the F12 (CV46) line,
the door on the compartment side has the value 2.
1st/2nd class: in the F13 (CV47) line, the door on the corridor side has the value 64. In the F14 (CV48) line,
the door on the compartment side has the value 128.
2nd class: in the F15 (CV49) line, the door on the corridor side has the value 64. In the F16 (CV50)
line, the door on the compartment side has the value 128. Connect the conductor’s whistle
which was previously at F16, to F19: CV53 --> 8
Digital Waggon.indd 39 23.10.2008 08:32:16
Page 40
40
GB
CV Function key
Door
compartment
side
Door
corridor side
Interior carriage
lighting
Conductor
announcement
Conductor
whistle
Tail lamp block
Tail lamp
33 F0 light forwards 128 64 32 16 8 n.u. 2 1*
34 F0 light reverse n.u. n.u. n.u. n.u. n.u. n.u. 2 n.u.
35 F1 128 64 32 16 8 n.u. 2 1
36 F2 128 64 32 16 8 n.u. 2 1
37 F3 128 64* 32 16 8 n.u. 2 1
38 F4 16* 8 4 2 1
39 F5 16 8 4 2 1
40 F6 16 8 4 2 1
41 F7 16 8 4* 2 1
42 F8 2 8 4 2 1
43 F9 2 1
44 F10 2 1
45 F11 2 1
46 F12 1
47 F13 128 64 32 16 8 n.u. 2 1
48 F14 128 64 32 16 8 n.u. 2 1
49 F15 128 64 32 16 8 n.u. 2 1
50 F16 128 64 32 16 8* n.u. 2 1
51 F17 128 64 32 16* 8 n.u. 2 1
52 F18 128 64 32 16 8 n.u. 2* 1
53 F19 128 64 32 16 8 n.u. 2 1
54 F20 128 64 32 16 8 n.u. 2 1
*Default
n.u. = not used
Functionmapping-Tabelle
Function
Digital Waggon.indd 40 23.10.2008 08:32:16
Page 41
41
GB
The doors must be actively closed by the operator using the preset command F03 or F04. They
do not close automatically when the train departs!
No liability can be assumed for any damage resulting from the train departing when the doors
are open (hazard spots are when trains encounter each other in curves, tunnel portals, overhead
line masts, etc.!).
A carriage with open doors is 25mm wider when measured from the track centre (permissible
clearance gauge in the width from the centre of the tract pursuant to NEM301: 20mm) , the
projection measuring 32mm in the outer curves with a R2 radius!
Fault Pattern Action
Carriage does not react: neither the
doors nor the interior lighting.
Check the carriage address.
Programme the value 8 at CV8 in order to reset the
settings to the delivery state.
Doors do not open, no door sound. Programme the value 7 at CV7 in order to reset the
hardware to the delivery state.
One door functions, the other does not.
Programme the value 7 at CV7 in order to reset the
hardware to the delivery state.
The doors do not open, door sounds
audible, engine audible.
Defective gear.
Tail lamp flickers.
Compare the running steps of your centre with the
setting in CV29.
Warnings and instructions
Troubleshooting table for the carriages
The operation with overhead lines has been dispensed with for various reasons (car-riages are
not fitted with a pantograph).
Digital Waggon.indd 41 23.10.2008 08:32:16
Page 42
42
F
Légende
Valable uniquement pour
locomotive
Valable uniquement pour
wagons
Avertissement
Information / Astuce
1) Le nom „Märklin“ est une marque déposée de la société Gebr. Märklin &
Cie. GmbH, Göppingen
2) Le nom „Motorola“ est une marque déposée de la société Motorola Inc.,
Tempe-Phoenix (Arizona/USA)
Important pour les utilisateurs
Motorola
2)
Valable pour locomotive et
wagons
Digital Waggon.indd 42 23.10.2008 08:32:17
Page 43
43
F
SOMMAIRE
Installation et aperçu des fonctions....................................................................................................... 44
Fonctions avec système numérique
Fonctionnement en gare – un déroulement possible ............................................................................ 45
Espace pour individualisation................................................................................................................ 45
Touches de commandes (Kit état initial) ............................................................................................... 46
Réglages de la locomotive
Généralités............................................................................................................................................ 47
Indications pour la combinaison conduite – bruitage........................................................................... 47
Liste CV Locomotive ............................................................................................................................. 47 – 48
Réglages wagons
Adresse................................................................................................................................................. 49
Configuration (CV29) ........................................................................................................................... 49
Réglages wagons (CV62) ..................................................................................................................... 49
Configuration wagons à partir de CV62 (wagon contrôleur) ................................................................ 49
Réinitialisation ..................................................................................................................................... 49
Liste CV Wagons .................................................................................................................................. 50 – 51
Combinaisons CV
Combinaisons pour CV29 et CV49 ....................................................................................................... 52
Système avec centrale DCC (
multi
MAUS)
Types de programmation...................................................................................................................... 53
Lecture ................................................................................................................................................. 53
Groupage des touches de fonction pour système avec une propre adresse ......................................... 53
Système avec Märklin1)6021
Plus de fonctions .................................................................................................................................. 54
Mode de programmation...................................................................................................................... 54
Système avec Märklin1) Mobile Station
Mise en marche (locomotive)................................................................................................................. 56
Mise en marche (wagons)........................................................................................................................ 57
Touches de fonction Märklin
1)
Mobile Station (locomotive) ........................................................................ 58
Touches de fonction Märklin
1)
Mobile Station (wagons)............................................................................. 58
Programmation avec Märklin1) Mobile Station .......................................................................................... 58
Système analogique
Fonctions avec système analogique ..................................................................................................... 59
Annexes
Attribution des fonctions (mapping) (selon la norme NMRA)............................................................... 59
Tableau «attribution des fonctions» ..................................................................................................... 60
Avertissements et indications................................................................................................................ 61
Aperçu des problèmes – wagons........................................................................................................... 61
Digital Waggon.indd 43 23.10.2008 08:32:17
Page 44
44
F
Installation et aperçu des fonctions
Annonce de la gare F14
Signal départ F6, F9
Wagon Contrôleur F16 / F17
LOCOMOTIVE
Son F1
Pantographes électriques mobiles
F2,F12
Lumière poste de conduite F5
Lumière frontale (touche lumière
F0) avec un éclairage arrière
séparément activable F8
1
ère
classe, 1
ère
/ 2
ème
classe, 2
ème
classe
Eclairage intérieur des wagons (sans vacillement !) F7
Portes électriques mobiles des deux côtés du wagon F3, F4
2
ème
classe
Eclairage arrière Touche lumière (F0)
LOCOMOTIVE 1
ère
classe 1
ère
/ 2
ème
classe 2
ème
classe
Avec LokSound/ décodeur de fonctions
Digital Waggon.indd 44 23.10.2008 08:32:19
Page 45
45
F
Fonctions avec système numérique
Le kit (locomotive et wagons) est utilisable à l’état initial en passant par l’adresse 3. Le train multifonctions
comprend 19 fonctions. Les touches de fonction ont été définies de telle façon que même les utilisateurs avec
peu de touches de fonction peuvent atteindre facilement les fonctions principales (pantographes, portes, sons,
éclairage).
Grâce aux 20 touches de fonction de
multi
MAUS, l’utilisation de cet appareil de commande est particulière-
ment facile.
Pour les utilisateurs de Märklin
1)
6021 ou Mobile Station, se reporter au chapitre «système avec
Märklin1)» et «système avec Märklin1) Mobile Station».
Fonctionnement en gare – un déroulement possible:
Le conducteur de train monte dans le poste de conduite 1 et active d’abord la lumière
du poste de conduite.
(F5)
Il déclenche maintenant le levage d’un pantographe, en conditions normales l’arrière
(F2)
Il active l’interrupteur général, le compresseur se met brièvement en marche. (F1, F10)
Lorsque le train est en gare, les passagers peuvent alors se rendre sur le quai. (F3 ou. F4)
L’éclairage intérieur est activé dans les trois wagons.
(F7)
L’on entend l’annonce de la gare ou du contrôleur (F14 ou. F17
)
Une fois que les passagers sont montés en train et les portes fermées, le contrôleur
monte, siffle le départ et ferme la dernière porte (F3 ou. F4)
Prêt à partir, le conducteur de train active l’éclairage extérieur et désactive
la lumière du poste de conduite dont il n’a plus besoin. (F0 ou. F5)
Le conducteur indique par un court signal que le train se met doucement en marche. (F6, régulateur)
Le conducteur de train accélère en rase campagne et indique par un long signa l’abord
d’un passage à niveau (régulateur, F9)
Espace pour individualisation
La locomotive et les wagons peuvent être naturellement programmés sur différentes adresses, indépendamment
l’un de l’autre. Pour cela, la locomotive et chaque wagon contiennent un décodeur multi protocole qui
fonctionne de façon complètement autonome.
Pour une utilisation facile dans le cas d’une propre adresse, il existe pour la locomotive et les wagons des
groupages de touches de fonction que l’utilisateur peut choisir et facilement régler.
Avec le «mapping» (attribution des fonctions), vous pouvez également choisir quelle sera la fonction de
chaque touche.
Lorsque vous souhaitez programmer la locomotive, enlevez les wagons des rails, car ceuxci
seront sinon également programmés.
Lorsque vous souhaitez programmer les wagons, enlevez la locomotive des rails, car celleci sera
sinon également programmée.
Digital Waggon.indd 45 23.10.2008 08:32:19
Page 46
46
F
Motorola
2)
1
ère
adresse
Touches de commandes (Kit état initial)
Les touches de fonction sont programmées de telle sorte que le kit (locomotive et 3 wagons) peut être
utilisé à partir d’une adresse locomotive (à l’état initial, adresse 3).
Touche
Fonction
Fonction Type fonction selon le sens
de marche
Sons
suppl.
Lumière Locomotive lumière frontale MARCHE/ARRÊT
F01 LokSound MARCHE/ARRÊT
F02 Pantographe
Poste de conduite 2 (arrière)
LEVER/BAISSER
F05 Lumière poste de conduite
Poste de conduite 1 (avant)
MARCHE/ARRÊT
F06 Signal court MARCHE
F08 Feux arrière locomotive MARCHE/ARRÊT
F09 Signal long MARCHE/ARRÊT
F10 Compresseur MARCHE/ARRÊT
F12 Pantographe Poste de conduite 1 (avant) LEVER/BAISSER
F13 Mode « manœuvre » MARCHE/ARRÊT
F14 Annonce de la gare MARCHE
F15 Lumière poste de conduite
Poste 2 (arrière)
MARCHE/ARRÊT
Licht Lumière frontale wagon MARCHE/ARRÊT
F03* Portes wagon Côté couloir OUVRIR/FERMER
F04* Portes wagon Côté compart OUVRIR/FERMER
F07 Eclairage intérieur wagon
DEL – sans vacillement
MARCHE/ARRÊT
F16** Signal contrôleur
F17** Annonce contrôleur
«En voiture s’il vous plaît»!
F18 Verrouillage lumière arrière
MARCHE : feux arr. ne s’allument
JAMAIS
ARRÊT: commande par F0
MARCHE/ARRÊT
WAGON
LOCOMOTIVE
*) L’ouverture des portes d’un wagon n’est possible que sur un côté un même temps («couloir» ou
«compartiment»), ceci pour des raisons d’ordre mécanique.
**) A l’état initial, le wagon 2
ème
classe est le wagon du contrôleur. Si besoin est, il est possible de
régler chaque wagon comme wagon du contrôleur à partir de CV62.
Motorola
2)
1
ère
adresse
Motorola
2)
2
ème
Adresse
Mot.
2)
2
ème
Adr.
Digital Waggon.indd 46 23.10.2008 08:32:20
Page 47
47
F
Motorola
2)
2)
2)
Mot.
2)
Réglages de la locomotive
Généralités
Le décodeur-son contenu dans cette locomotive a été ajusté de façon optimale sur la locomotive.
Cependant, vous pouvez modifier de nombreuses caractéristiques du décodeur selon vos désirs. Pour cela, il
est possible de modifier certains paramètres (appelés aussi CV – Configuration Variable- ou registres).
Veuillez cependant vérifier avant chaque programmation si celleci est effectivement nécessaire. Si les
réglages sont faux, il se peut que le décodeur ne réagisse plus correctement.
Pour un grand confort de conduite, le décodeur a un préréglage standard de 28 crans de marche. Ainsi, il est
utilisable avec tous les boîtiers de commande modernes DCC (
multi
MAUS) et Motorola2).
Le décodeur-son de la locomotive a été spécialement modifié pour les fonctions supplémentaires
et ne doit pas être échangé contre un décodeur disponible dans le commerce.
Cela peut conduire à un endommagement du mécanisme des pantographes !
Si la locomotive doit être à nouveau programmée, seule la locomotive doit se situer sur le rail de
programmation. Vous ne devez en aucun cas laisser les wagons car la programmation ne peut
sinon s’effectuer ou les wagons sont également programmés.
Indications pour la combinaison conduite – bruitage
Ce décodeur-son de la dernière génération permet une synchronisation plus précise entre les mouvements
du train et le bruitage. Ainsi, lorsque le son est activé (touche «F1» activée), la locomotive se met en mouvement seulement lorsque la séquence son «démarrage moteur» est complètement terminée et lorsque l’état
«moteur au ralenti» est atteint, conformément à l’original. A l’inverse, la séquence-son «moteur éteint» se
terminera uniquement après avoir activé une nouvelle fois la touche «F1» (maintenant «Son ARRÊT») et
atteint ensuite l’état «moteur au ralenti» si la locomotive est déjà à l’arrêt au moment de l’activation de
la touche «F1». Ainsi, il est seulement possible d’activer ou de désactiver rapidement le son à partir de la
touche «F1» si la locomotive est déjà ou encore en mouvement.
CV Nom Valeurs ajustables Valeurs
standard
1 Adresse (=courte adresse) 00 – 99 03
2 Tension de démarrage
(vitesse de fluage la plus petite)
00 – 75
03
3 Temps d’accélération
(de l’arrêt jusqu’à la vitesse maximale)
00 – 64
14
4 Temps de freinage
(de la vitesse maximale jusqu’à l’arrêt)
00 – 64
07
5 Vitesse maximale 00 – 64 38
6 Vitesse moyenne
(bei mittlerer Fahrstufe)
00 – 64
22
Fonction ResetInitialisation de toutes les
valeurs à l’état standard ;
(le code du constructeur est lisible sur les amplificateurs/centrales capables de décoder)
----------------------
08=Reset
Liste CV Locomotive
Digital Waggon.indd 47 23.10.2008 08:32:20
Page 48
48
F
13 Mode «commande analogue»
des fonctions «F1» à F8
00 – 255
128
17
+
18
Adresse longue
(Condition préalable : l’adresse longue est
activée conformément au réglage CV29)
----------------------
192
00
29 Réglages 1
Bit 0 : Inversion
Bit 1 : Mode de marche par crans (DCC)
Bit 2 : Système analogique
Bit 5 : Adresse longue
Cf. tableau chap.
«combinaisons CV»
06
49 Réglages 2
Bit 0 : Régulation de puissance active
Bit 1 : Fréquence de base du moteur 30kHz
Bit 2 : Lumière pour système Märklin1)-Delta
Bit 3 : Reconnaissance automatique cran de
marche DCC
Cf. tableau chap.
«combinaisons CV»
27
50 Mode analogique 00= les deux ARRÊT
01= mode AC MARCHE
02= mode DC MARCHE
03= les deux MARCHE
03
51 Reconnaissance mode freinage
Bit 0 : Märklin1) 72441
Bit 1 : Zimo actuel
Bit 2 : Lenz DC
Valeur: 1
Valeur: 2
Valeur: 8
07
63 Volume de tous les bruits
(CV 121-123- respecter les réglages!)
00 – 64
55
65 Attribution des fonctions (mapping)
Modifie l‘attribution des touches afin de pou
voir accéder aux fonctions les plus importantes avec peu de touches de fonction.
1: Kit (standard)
2: Système avec Märklin
1)
6021
3: Système avec
Märklin1)Mobile Station
Kit
113 Variateur d’éclairage avant
(15= clarté maximale)
00 – 15
15
114 Variateur d’éclairage arrière
(15 = clarté maximale)
00 – 15
15
119 Pantographe Poste de conduite 1
Modifie la hauteur du pantographe 1
00 – 20
Réglage
individuel
120 Pantograph Poste de conduite 2
Modifie la hauteur du pantographe 2
00 – 20
Réglage
individuel
121 Réglage du volume pour Pantograpes
(volume max. uniquement si CV63 = valeur 64)
00 – 64
64
122 Réglage du volume bruit accoupler
(volume max. uniquement si CV63 = valeur 64)
00 – 64
64
123 Réglage du volume pour bruitage
conduite et sons supplémentaires
(volume max. uniquement si CV63 = valeur 64)
00 – 64 64
Digital Waggon.indd 48 23.10.2008 08:32:21
Page 49
49
F
Réglages wagons
Si vous souhaitez programmer d’autres décodeurs (par ex. dans locomotive, wagons etc.), vous
devez enlever le wagon à portes à tambour du train car celui-ci sera sinon également programmé.
Adresse
Le wagon est programmé à l‘état initial sur l‘adresse 3.
Il est possible de programmer le wagon à partir de CV1 sur les différentes adresses de 1-99 9999 adresses
sont possibles à partir du long adressage (CV17/18). (Pour cela, il est nécessaire d’activer, en plus, la CV29
Bit 5, cf. liste CV).
L’éclairage arrière du wagon est, de façon logique, uniquement accouplé à la locomotive (sens
de marche, activation) si les deux adresses sont les mêmes.
Configuration (CV29)
Vous pouvez configurer le décodeur à partir de CV29. Dans la liste CV, chaque configuration a une valeur.
Les réglages souhaités (valeurs) doivent être ajoutés et la CV29 est ainsi programmée.
Bit 0 (valeur 1 ou 0) change le sens de marche si le wagon est accroché à la locomotive de façon inversée.
Ainsi, l’éclairage arrière correspond à nouveau au sens de marche.
Bit 1 (valeur 2 ou 0) contient le nombre de crans de marche. Cela est important pour un éclairage correct
et en fonction du sens de marche des feux arrière et doit correspondre au réglage et l’utilisation des
crans de marche de la centrale / de
multi
MAUS,. Un clignotement des feux arrière lorsque vous tour-
nez le régulateur de conduite indique un mauvais réglage des crans de marche.
Bit 2 (valeur 4 ou 0) active ou désactive le système analogique.
Bit 5 (valeur 32 ou 0) active ou désactive le mode «adresse longue».
Vous trouvez les combinaisons des réglages possibles au chapitre «Combinaisons CV».
Réglages wagons (CV62)
Vous pouvez réaliser des réglages supplémentaires en ce qui concerne le contrôleur et le mouvement des
portes à partir de CV62.
Le wagon 2
ème
classe est défini à l’état initial comme étant le wagon du contrôleur, ce qui veut dire que
l’annonce du contrôleur et le signal proviennent de ce wagon.
CV62 Wagon Type Valeur initiale
1
ère
classe Sans signal et annonce 0
1
ère
/2
ème
classe Sans signal et annonce 0
2
ème
classe avec éclairage arrière Avec signal et annonce 3
Configuration wagons à partir de CV62 (wagon contrôleur)
Réinitialisation
Les réglages CV du wagon sont remis à l’état initial si vous programmez la valeur 8 sur CV8.
Le mécanisme de la porte du wagon est remis à l’état initial si vous programmez la valeur 7 sur CV7.
Si vous souhaitez par exemple que la 1
ère
classe soit le wagon du contrôleur (c.-à-d. avec signal et an-
nonce), programmez la valeur «3» sur CV62.
Digital Waggon.indd 49 23.10.2008 08:32:21
Page 50
50
F
CV Nom Description Valeur / Explication Domaine Default
1 Adresse wagon
Le décodeur réagit au domaine des adresses 1-127. La
multi
MAUS,
tout comme les autres centrales, répond à 1-99 à partir de l’adresse courte,
le reste à partir de l’adresse longue (CV17/18).
7 Numéro de
version
Version interne du logiciel du décodeur
La description avec la valeur 7 remet les portes à l’état initial.
8 Reconnaissance
constructeur
ID-constructeur de Modelleisenbahn GmbH
La description avec la valeur 8 remet les CV à l‘état initial.
13 Mode analogique
F1-F8
Touches de fonction dans le mode analogique
F7: éclairage intérieur ARRÊT (0) / MARCHE (64) 0/64 0
14 Mode analogique
Eclairage, F9-F14
Touches de fonction dans le mode analogique F0: éclairage arrière ARRÊT (0) / MARCHE (1) 0/1 0
17 Adresse longue 100-9999
18 Octet de poids fort (hByte) 192
Octet de poids faible (nByte)
Calcul : adresse longue = (hByte-192)*256 + nByte
Ex. : Adr 170 : hByte = 192, nByte = 170
Adr 270 : hByte = 193, nByte = 14
Adr 370 : hByte = 193, nByte = 114
Vous n’avez pas besoin d’effectuer le calcul de CV17/18 si vous utilisez la
programmation «ADRESSE LONGUE» de
Activation de l’adresse longue à partir de CV29.
29 Configuration Bit 0: Inversion 0: normal, 1 : inverse 0/1 ARRÊT: 0
Bit 1: Mode de marche par crans (DCC) 0: 14 crans de marche, 2 : 28/128 crans de marche 0/2 MARCHE: 2
Cf. tableau Ch.
Bit 2: Système analogique 0: ARRÊT, 4 : les fonctions sont ajustées comme le prévoit CV 13/14 0/4 ARRÊT: 0
«combinaisons CV» Bit 5: Adresse longue 0: utiliser adresse wagon (CV1), 32: utiliser adresse longue (CV17/18) 0/32 ARRÊT: 0
33
- 54
Attribution des
fonctions
Il est possible, avec les CV, d’attribuer des fonctions à chaque touche.
(voir annexe «attribution des fonctions» (mapping)
56 Configuration avancée Bit 0: sauvegarder les touches de fonction 0: désactivé, 1 : activé 0/1 9
Bit 3: 2
ème
adresse Märklin
1)
0: désactivé, 8 : activé 0/8
61 Groupage touches
de fonction
Décrit automatiquement CV33-54
Valeur 0 : attribution standard pour kit avec locomotive sur une propre adresse
Valeur 1 : pour système DCC sur une propre adresse
Valeur 2 : pour système
Märklin
1)
6021 sur une propre adresse
Valeur 3 : pour système
Märklin
1)
Mobile Station sur double adresse
(base de données locomotive 37540)
62 Configuration wagons Bit 0: contrôleur manuel 0: ARRÊT, 1: MARCHE --> réagit à F16, F17 0/1
Bit 1: signal du contrôleur automatique 0: ARRÊT 2: MARCHE --> signal automatique du contrôleur lors de la fermeture des portes 0/2
Bit 2: annonce du contrôleur automatique 0: ARRÊT, 4: MARCHE --> annonce automatique du contrôleur lorsque les portes sont en
mouvement
Bit 3: fermeture rapide
--> écarts de temps très courts lors de la fermeture des portes :
La fermeture des portes d’un autre wagon s’effectue sans attendre
l’annonce du contrôleur.Si le wagon est celui du contrôleur,
la fermeture rapide des portes n’a alors aucune influence.
0: ARRÊT, 8: MARCHE --> courts écarts de temps lors de la fermeture des portes 0/8
63 Variateur
éclairage intérieur
Il est possible d’ajuster la clarté de l’éclairage intérieur à partir de cette CV. 0-15 12
Liste CV Wagons
Digital Waggon.indd 50 23.10.2008 08:32:21
Page 51
51
F
Wert
1-99/
1-127
3
161
F7: éclairage intérieur ARRÊT (0) / MARCHE (64) 0/64 0
Vous n’avez pas besoin d’effectuer le calcul de CV17/18 si vous utilisez la
programmation «ADRESSE LONGUE» de
multi
MAUS.
Activation de l’adresse longue à partir de CV29.
0
0: désactivé, 8 : activé 0/8
0-3 0
mouvement
0/4
0: ARRÊT, 8: MARCHE --> courts écarts de temps lors de la fermeture des portes 0/8
Digital Waggon.indd 51 23.10.2008 08:32:22
Page 52
52
F
Combinaisons CV
Combinaisons pour CV29 et CV49
CV29 Bit 0 Bit 1 Bit 2
Sens de
marche
Crans de
marche
Type de système Valeur Valeur
Adresse
courte
Adresse
longue
normal 14 Numérique 0 32
Inverse 14 Numérique 1 33
normal 28/128 Numérique 2 (default) 34
Inverse 28/128 Numérique 3 35
normal 14 Analogique+Numérique 4 36
Inverse 14 Analogique+Numérique 5 37
normal 28/128 Analogique+Numérique 6 38
Inverse 28/128 Analogique+Numérique 7 39
Bit 5
CV49 Bit 0 Bit 1 Bit 3
Régulation de
puissance
Fréquence
de base du
moteur
Märklin1)
2
ème
adresse
Valeur Valeur
Pas de reconnais
-
sance automatique
des crans de
marche
Reconnaissance
automatique
des crans de
marche
Inactif 15kHz aus 0 16
Actif 15kHz aus 1 17
Inactif 30kHz aus 2 18
Actif 30kHz aus 3 19
Inactif 15kHz ein 8 24
Actif 15kHz ein 9 25
Inactif 30kHz ein 10 26
Actif 30kHz ein 11 27 (valeur par
défaut)
Bit 4
Digital Waggon.indd 52 23.10.2008 08:32:22
Page 53
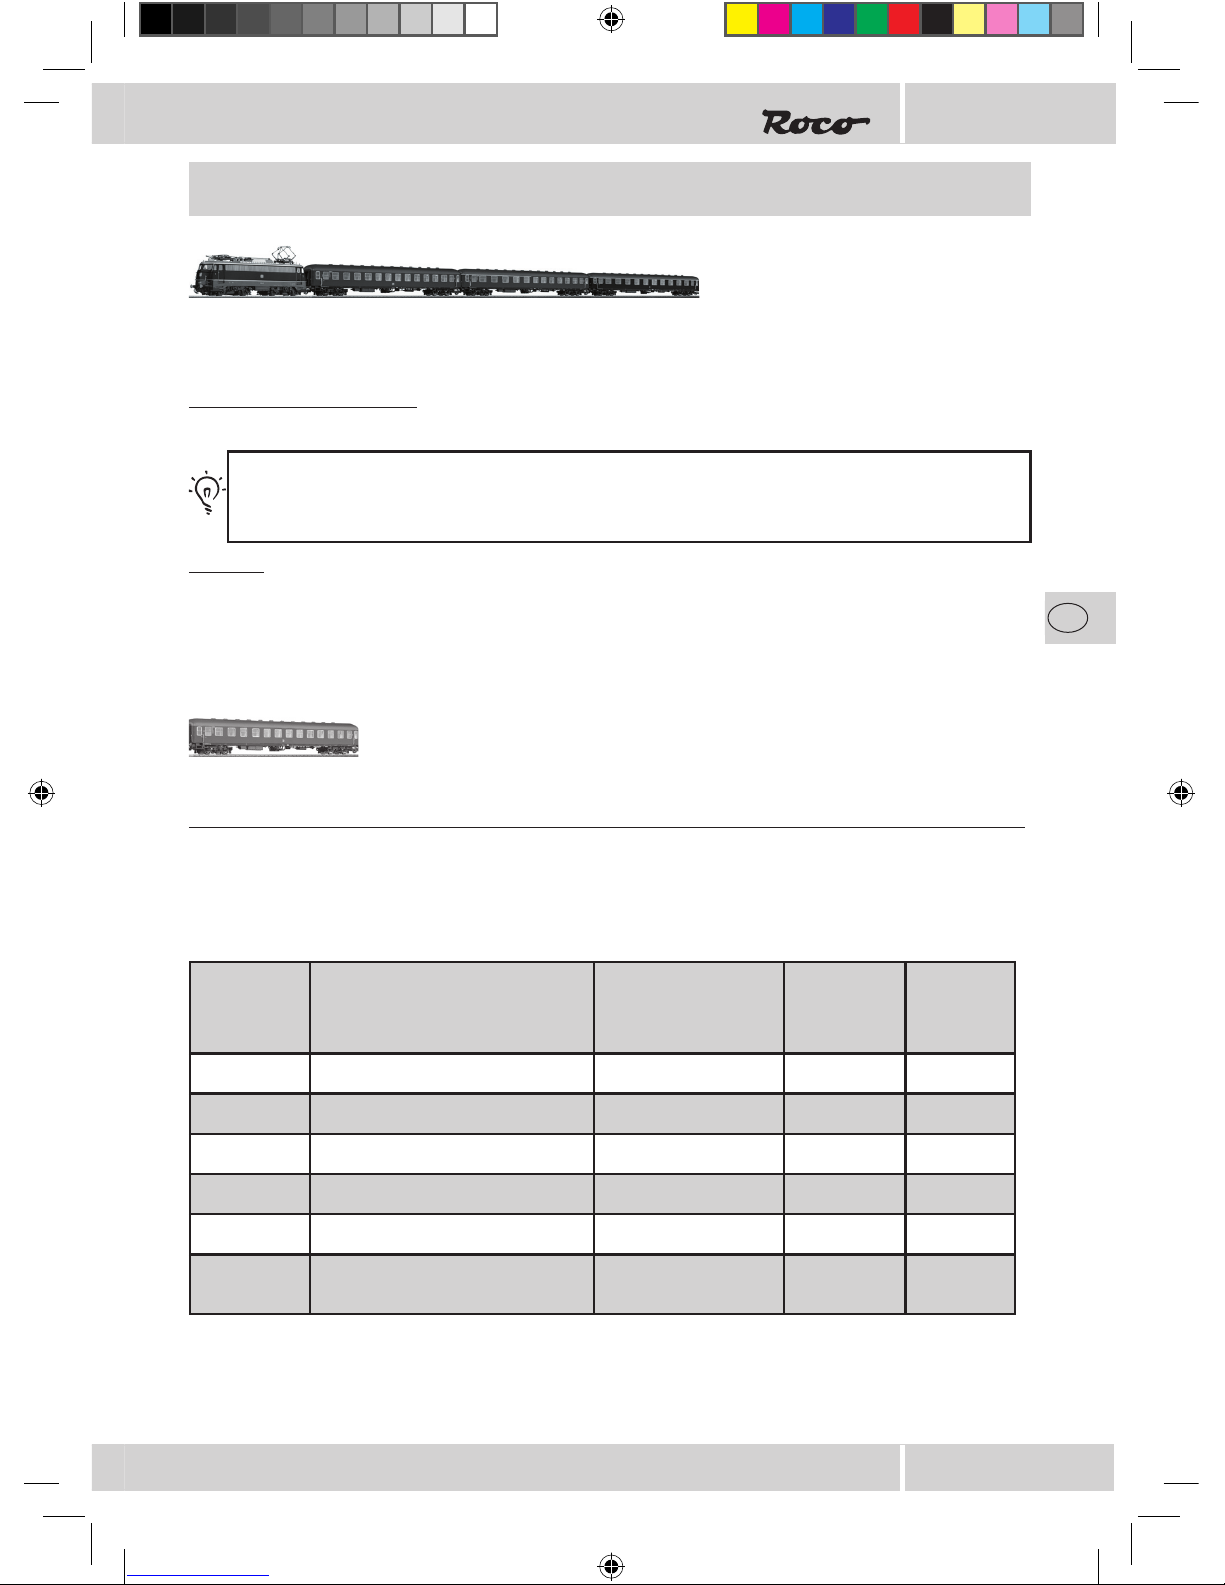
53
F
Touche de
fonction
Fonction Type de fonction Selon le
sens de
marche
Sons
suppl.
F00 Eclairage arr. wagon MARCHE/ARRÊT
F01 Portes wagon côté couloir OUVRIR/FERMER
F02 Portes wagon côté compartiment OUVRIR/FERMER
F03 Eclairage intérieur wagon MARCHE/ARRÊT
F04* Signal contrôleur MARCHE/ARRÊT
F05* Annonce contrôleur
«En voiture s’il vous plaît !»
MARCHE/ARRÊT
*) A l’état initial, le wagon 2
ème
classe est le wagon du contrôleur. Si besoin est, il est possible de régler
chaque wagon comme wagon du contrôleur à partir de CV62.
Système avec centrale DCC (
multi
MAUS)
Etant donné que la
multi
MAUS, dispose de 20 touches de fonction dont une touche pour l’éclairage, l’utili-
sation de l’ensemble du kit est ainsi d’une grande facilité.
Types de programmation :
La locomotive et les wagons réagissent à tous les types DCC.
Notre recommandation : programmation CV directe (type octet) ou mode POM (programmation sur
le rail principal).
La programmation est décrite dans le manuel de la
multi
MAUS,.
Lecture :
Vous pouvez lire les valeurs de type octet ou bit avec un équipement approprié (par exemple Rocomotion
10785).
Groupage des touches de fonction pour système avec une propre adresse
Si vous souhaitez manœuvrer le ou les wagon(s) de façon séparée, c.-à-d. sur une autre adresse comme la
locomotive, vous pouvez tout simplement regrouper en un bloc les fonctions réparties dans le kit.
Programmez à cet effet la valeur 1 sur CV61.
Il existe la possibilité, pour les experts, d‘attribuer les fonctions de façon individuelle (voir annexes).
Digital Waggon.indd 53 23.10.2008 08:32:22
Page 54
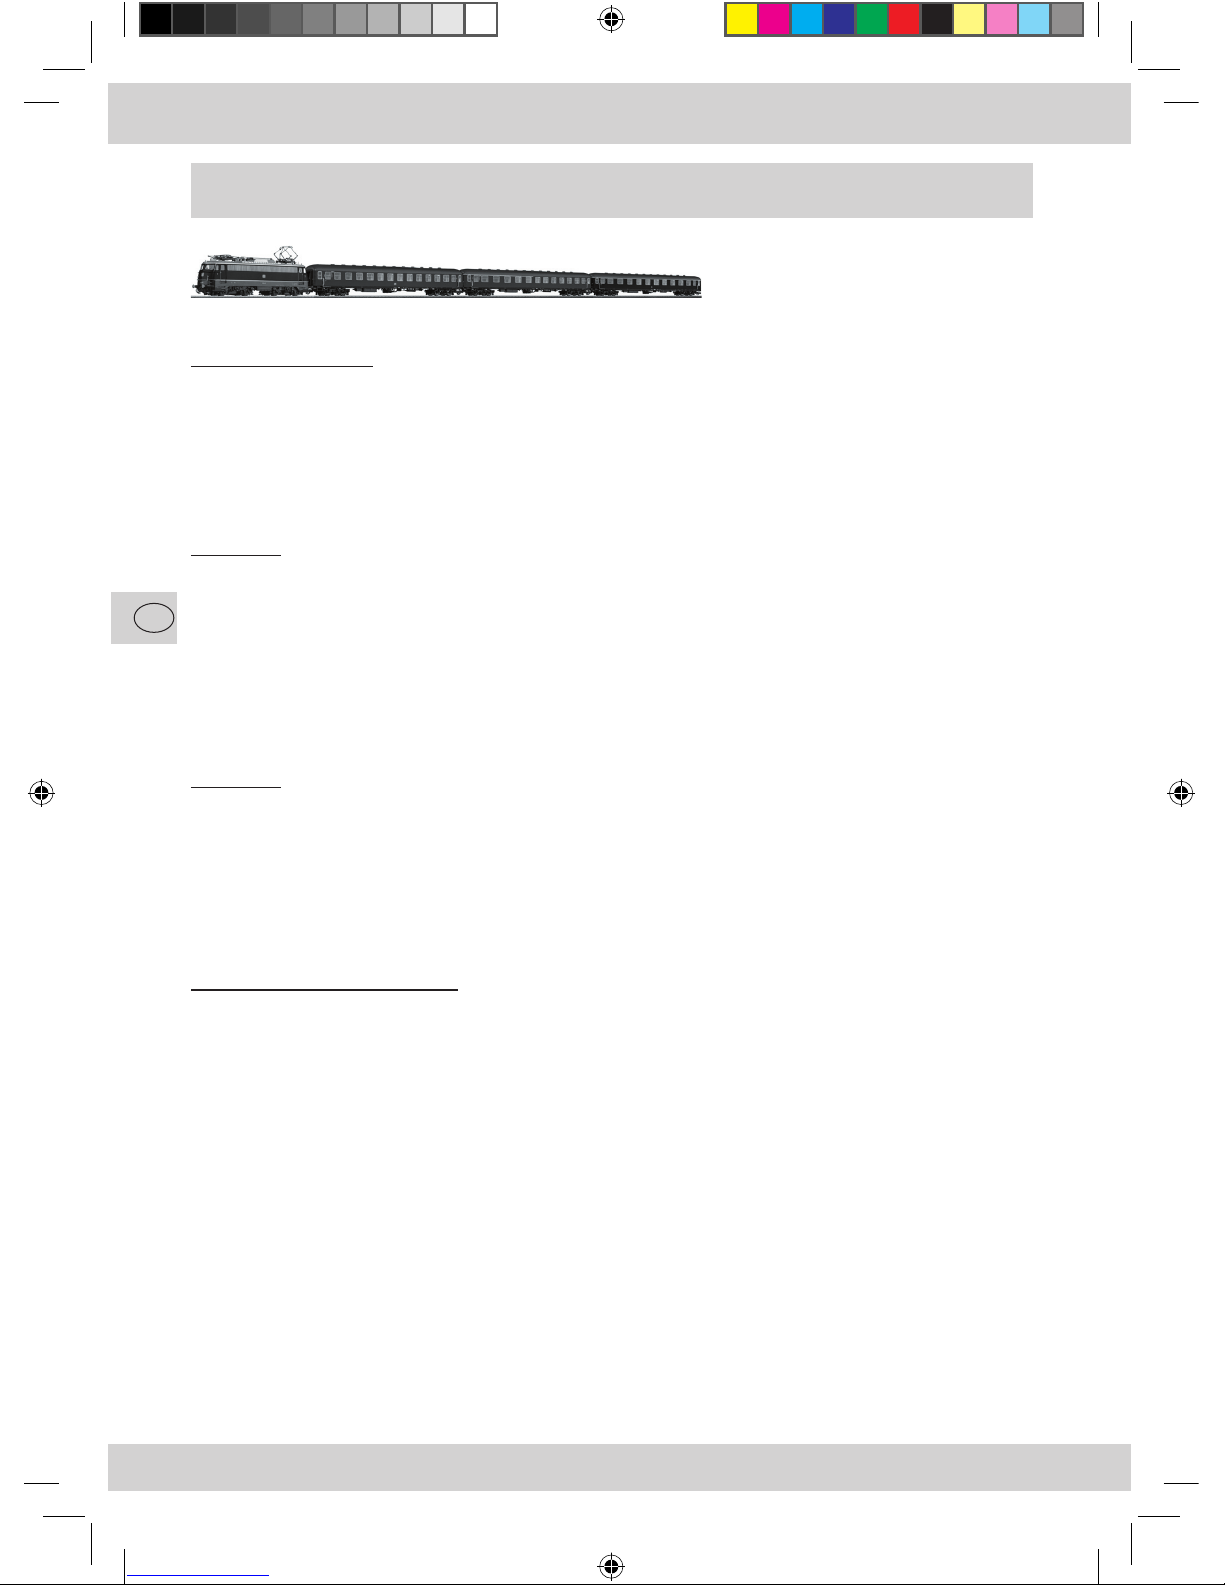
54
F
Système avec Märklin1) 6021
Plus de fonctions
Vous avez certainement remarqué lors d’un premier essai qu’il n’est pas possible, à l’état initial, d‘atteindre
toutes les fonctions comme décrites dans «l’aperçu des fonctions».
Afin de pouvoir accéder à plus de fonctions avec la Märklin
1)
6021, il existe
dans un premier temps: la «2
ème
adresse». Elle est active à l’état initial et est d’une valeur plus haute
vis-à-vis de l’adresse régulière.
Exemple 1
Adresse (CV1) = 3 (état initial)
2
ème
adresse = 4
dans un second temps : Afin de pouvoir accéder à plus de fonctions sur des adresses différentes (1
ère
adresse + 2
ème
adresse), il existe une propre attribution des touches de fonction
(voir tableau sur la prochaine page) qui est activable à partir de CV65 (locomotive) et CV61 (wagons).
Exemple 2
LLocomotive : adresse 3 (CV1) et 4
Wagons : adresse 5 (CV1) et 6
Mode de programmation
Indication : L’interrupteur DIP #2 situé sur la face arrière du boîtier 6021 doit être activé pour la program-
mation.
Programmation :
1. Mettre le régulateur de conduite sur «0»
2. appuyer environ 1 seconde sur stop+go afin d’activer la fonction Reset (ou débrancher et rebrancher la
station)
3. appuyer sur stop
4. indiquer l’adresse ou «80»
5. lors de l’activation de l’inversion du sens de marche, appuyer sur go
6. indiquer la CV à deux chiffres pour 6021 comme une adresse locomotive (CV1-79 possible)
7. activer l’inversion du sens de marche
8. indiquer la valeur à deux chiffres (1-79 possible, pour la valeur 0 : indiquer «80»)
9. activer l’inversion du sens de marche
10. le décodeur a été programmé et se situe dans le mode conduite.
Digital Waggon.indd 54 23.10.2008 08:32:23
Page 55
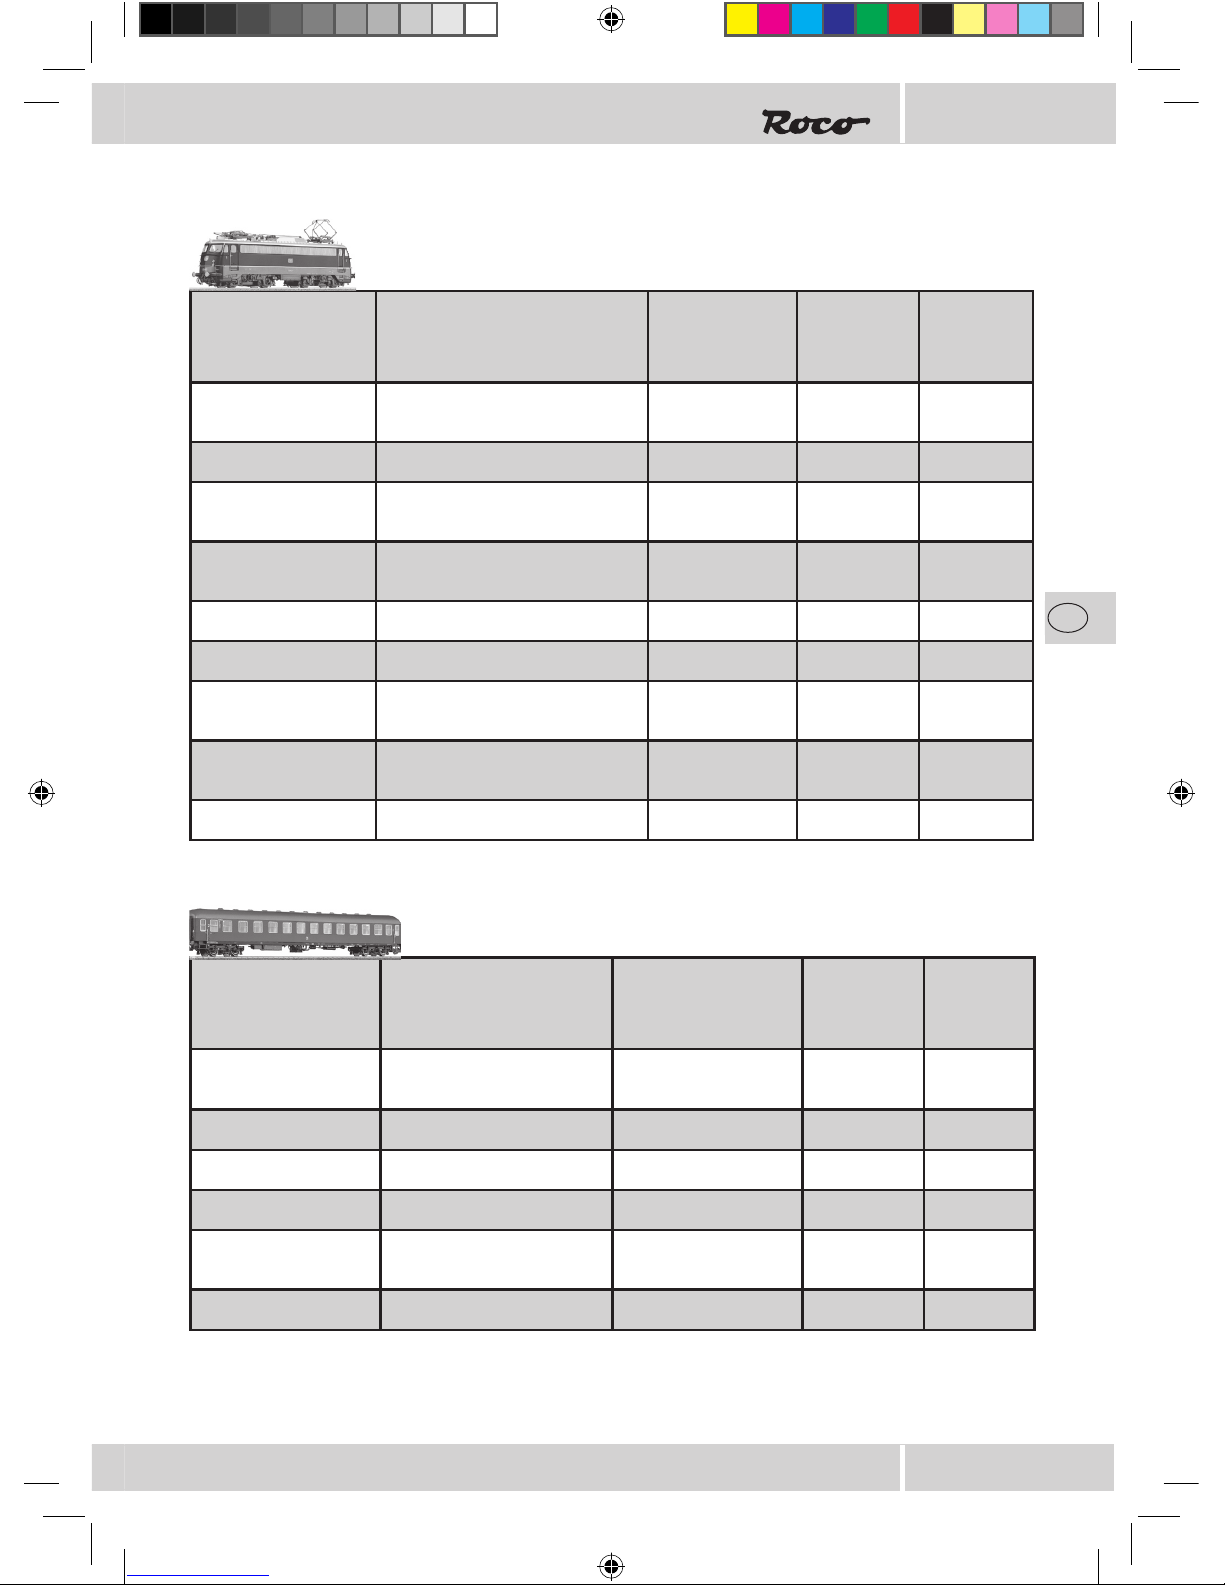
55
F
Touche F Fonction Type
fonction
Selon le
sens de
marche
Sons
suppl.
1
ère
adresse
fonction
Locomotive lumière frontale MARCHE/ARRÊT
1
ère
adr. f1 LokSound MARCHE/ARRÊT
1
ère
adr. f2 Pantographe
Poste de conduite 2 (arrière)
LEVER/BAISSER
1
ère
adr. f3 Eclairage poste de conduite
Poste de conduite 1 (avant)
MARCHE/ARRÊT
1
ère
adr. f4 Feux arrière locomotive MARCHE/ARRÊT
2
ème
adr. f1 Signal court MARCHE
2
ème
adr. f2 Pantographe Poste de conduite
1 (avant)
LEVER/BAISSER
2
ème
adr. f3 Eclairage poste de conduite
Poste 2 (arrière)
MARCHE/ARRÊT
2
ème
adr. f4 Annonce de la gare MARCHE
Placez uniquement les wagons sur le rail !
Programmieren Sie auf CV61 den Wert 2 (siehe Programmiermodus).
Ändern Sie die Adresse (wie in Beispiel 2)
Touche F Fonction Type fonction Selon le
sens de
marche
Sons
suppl.
1
ère
adresse
fonction
Eclairage arrière wagon &
Eclairage intérieur
MARCHE/ARRÊT
1
ère
adr. f1 Portes wagons côté couloir OUVRIR/FERMER
1
ère
adr. f2 Portes wagons côté comp. OUVRIR/FERMER
1
ère
adr. f3* Signal contrôleur MARCHE/ARRÊT
1
ère
adr. f4* Annonce du contrôleur
«En voiture s’il vous plaît !»
MARCHE/ARRÊT
2
ème
adr. Aucune fonction
*) A l’état initial, le wagon 2
ème
classe est le wagon du contrôleur. Si besoin est, il est possible de régler
chaque wagon comme wagon du contrôleur à partir de CV62.
Placez uniquement la locomotive sur le rail !
Programmez la valeur 2 sur CV65 (voir mode de programmation)
Digital Waggon.indd 55 23.10.2008 08:32:23
Page 56
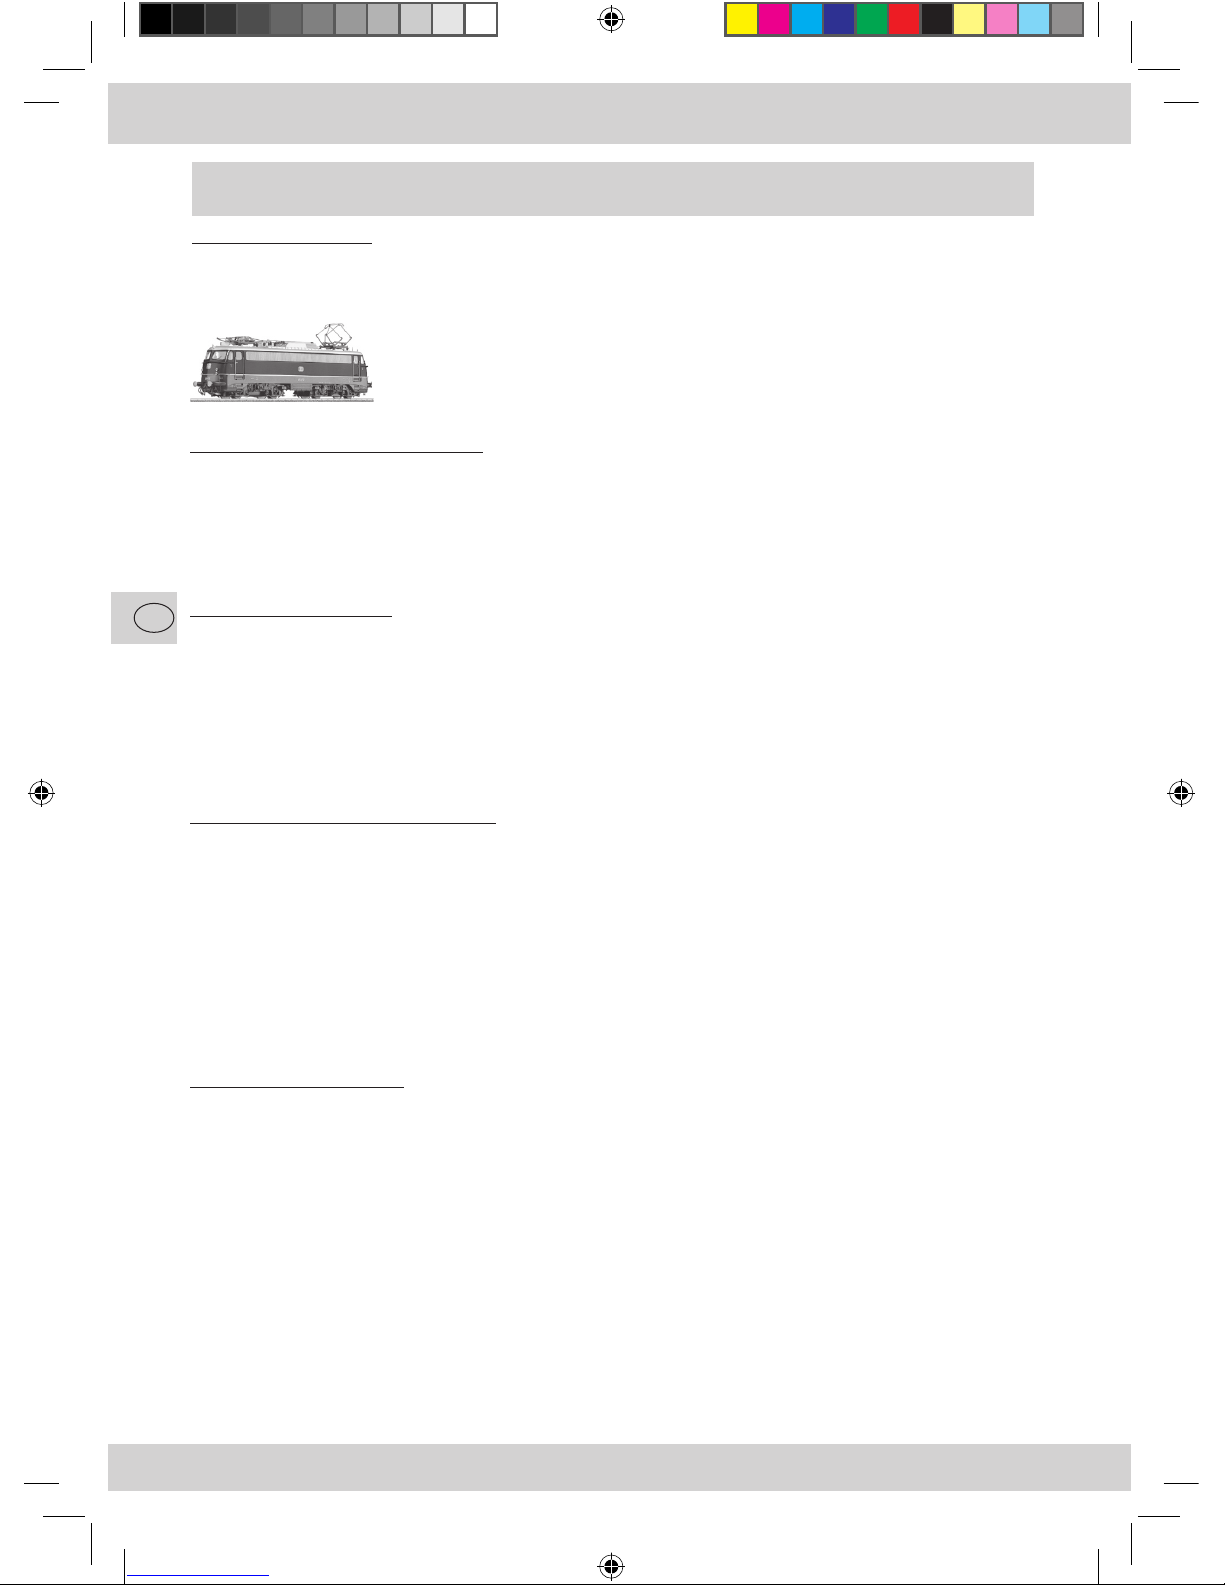
56
F
1. Mise en route de la locomotive
appuyer sur «ESC»
«NOUVELLE LOCOMOTIVE» --> appuyer sur OK
«base de données» --> appuyer sur OK --> tourner jusqu’à locomotive 37540 --> appuyer sur OK‚BR55‘
Vous avez maintenant mis en route la locomotive avec succès. Cependant, elle se situe encore sur une autre
adresse. Afin de modifier l’adresse, procédez comme suit :
2. Réglage de l’adresse
appuyer sur «ESC»
tourner vers la droite «MODIFIER LOCOMOTIVE» --> appuyer sur OK
«Adresse» --> appuyer sur OK
tourner par ex. : jusqu’à l’adresse «3/4» --> appuyer sur OK
«PROGR LOC?» --> appuyer sur OK (les lumières clignotent)
Vous avez réglé avec succès l’adresse et pouvez maintenant faire fonctionner la locomotive.
Afin de pouvoir accéder aux fonctions comme dans le tableau de la page suivante, procédez comme suit :
3. Réglage des touches de fonction
appuyer sur «ESC»
tourner vers la droite «MODIFIER LOCOMOTIVE» --> appuyer sur OK
tourner deux fois vers la gauche «REG» --> appuyer sur OK
tourner jusqu’à ce que REG «65» clignote -->appuyer sur OK
tourner jusqu‘à REG 65: «3» clignote --> appuyer sur OK (les lumières clignotent)
Die Lok wird jetzt mit der passenden Funktionstastenbelegung programmiert.
La locomotive est maintenant programmée avec l’attribution des touches de fonction appropriée.
Vous pouvez maintenant ajuster les fonctions comme le montre le tableau. Pour modifier le nom, procédez comme
suit.
4. Modification du nom :
appuyer sur «ESC»
tourner vers la droite «MODIFIER LOCOMOTIVE» --> appuyer sur OK
tourner vers la droite «NOM» --> appuyer sur OK
changer les lettres avec le bouton de réglage rotatif
appuyer sur le bouton rotatif
revenir en arrière en appuyant sur «ESC»
appuyer sur OK pour terminer
Système avec Märklin1) Mobile Station
Mise en marche :
Placez la locomotive sans les wagons sur le rail !
Digital Waggon.indd 56 23.10.2008 08:32:23
Page 57
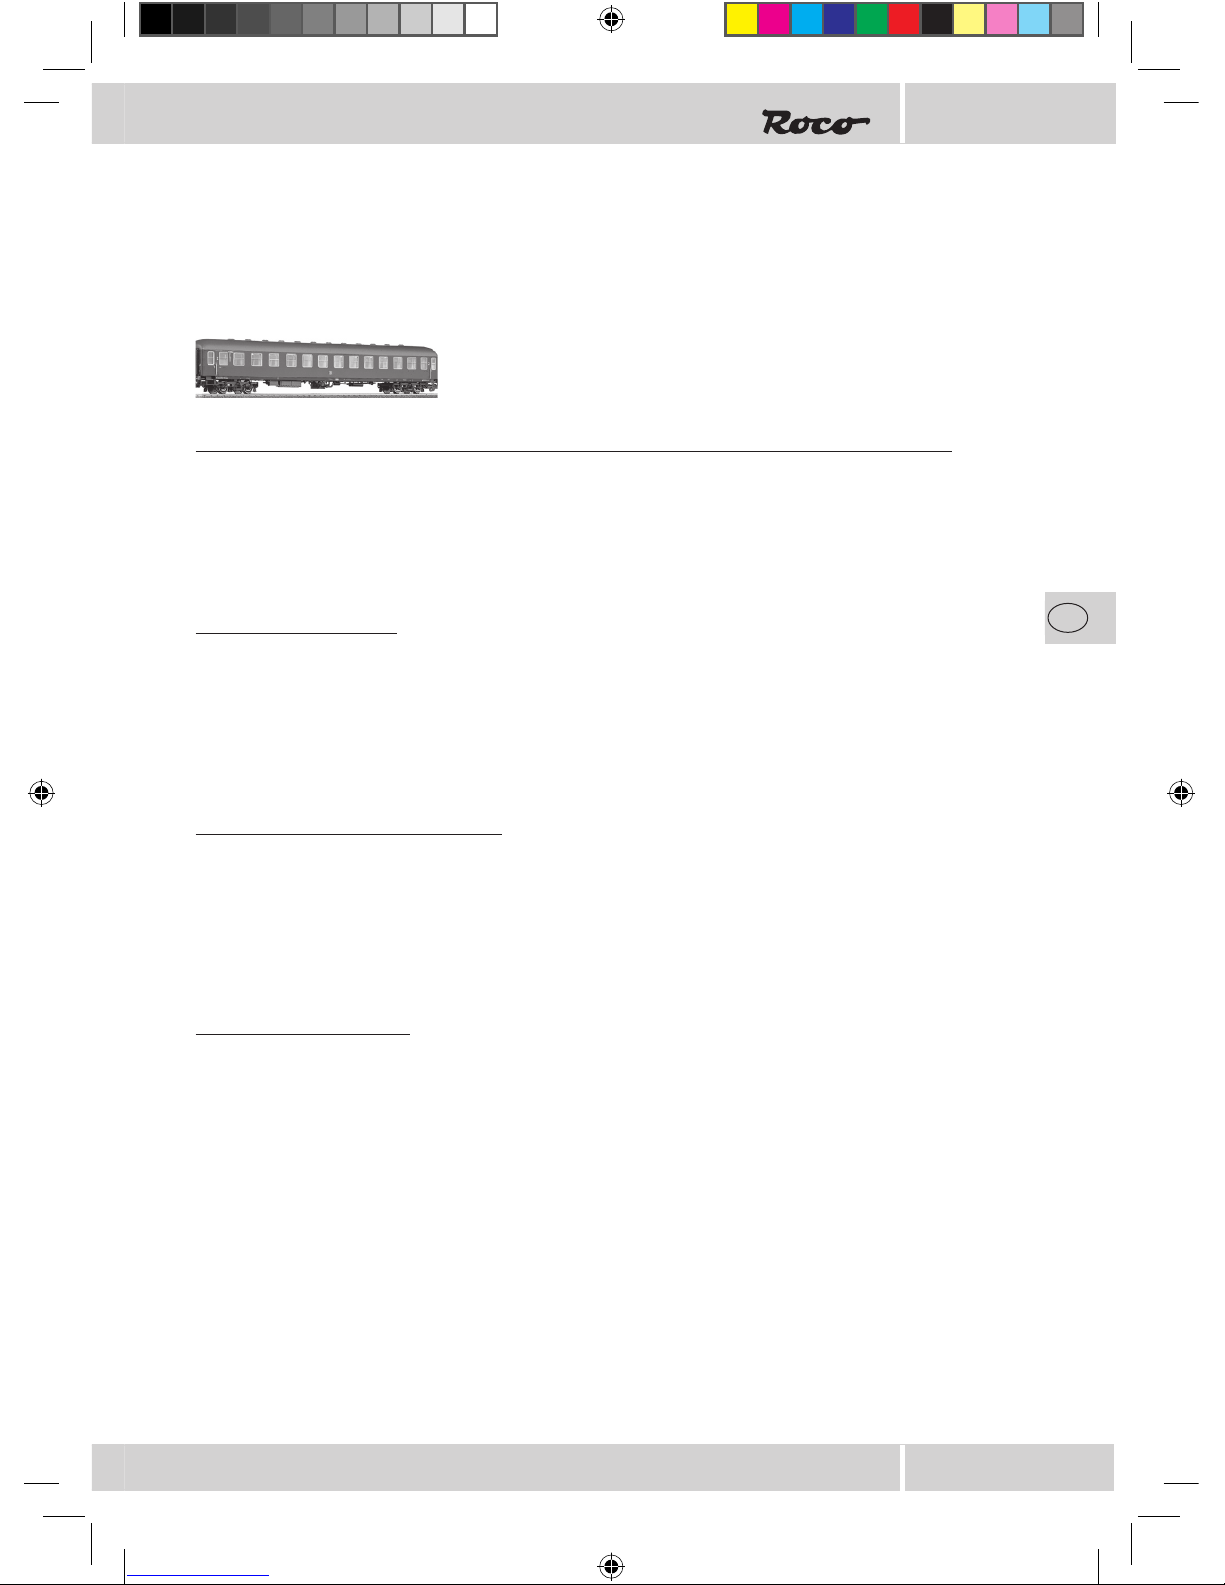
57
F
1. Mise en route des wagons (identique à la mise en route d’une nouvelle locomotive)
appuyer sur «ESC»
«NOUVELLE LOCOMOTIVE» --> appuyer sur OK
«base de données» --> appuyer sur OK --> tourner jusqu’à locomotive 37540 --> appuyer sur
OK‚BR55‘
Vous avez maintenant mis en route les wagons avec succès. Cependant ceux-ci se situent encore sur une
autre adresse. Afin de modifier l’adresse, procédez comme suit :
2. Réglage de l’adresse (sur une autre adresse comme pour la locomotive afin de pouvoir utiliser
toutes les fonctions):
appuyer sur «ESC»
tourner vers la droite «MODIFIER LOCOMOTIVE» --> appuyer sur OK
«Adresse» --> appuyer sur OK
tourner par ex. : jusqu’à l’adresse «5/6» --> appuyer sur OK
«PROGR LOC ?» --> appuyer sur OK
Les wagons sont maintenant programmés sur la nouvelle adresse (un bip résonne trois fois).
3. Réglage des touches de fonction
appuyer sur «ESC»
tourner vers la droite «MODIFIER LOCOMOTIVE» --> appuyer sur OK
tourner deux fois vers la gauche «REG» --> appuyer sur OK
tourner jusqu’à ce que REG «61» clignote -->appuyer sur OK
tourner jusqu‘à REG 61: «3» clignote --> appuyer sur OK
Les wagons sont maintenant programmés avec l’attribution des touches de fonction appropriée (un bip
résonne trois fois).
4. Modification du nom :
appuyer sur «ESC»
tourner vers la droite «MODIFIER LOCOMOTIVE» --> appuyer sur OK
tourner vers la droite «NOM» --> appuyer sur OK
changer les lettres avec le bouton de réglage rotatif
appuyer sur le bouton rotatif
revenir en arrière en appuyant sur «ESC»
appuyer sur OK pour terminer
Placez les 3 wagons sans la locomotive sur le rail !
Digital Waggon.indd 57 23.10.2008 08:32:23
Page 58
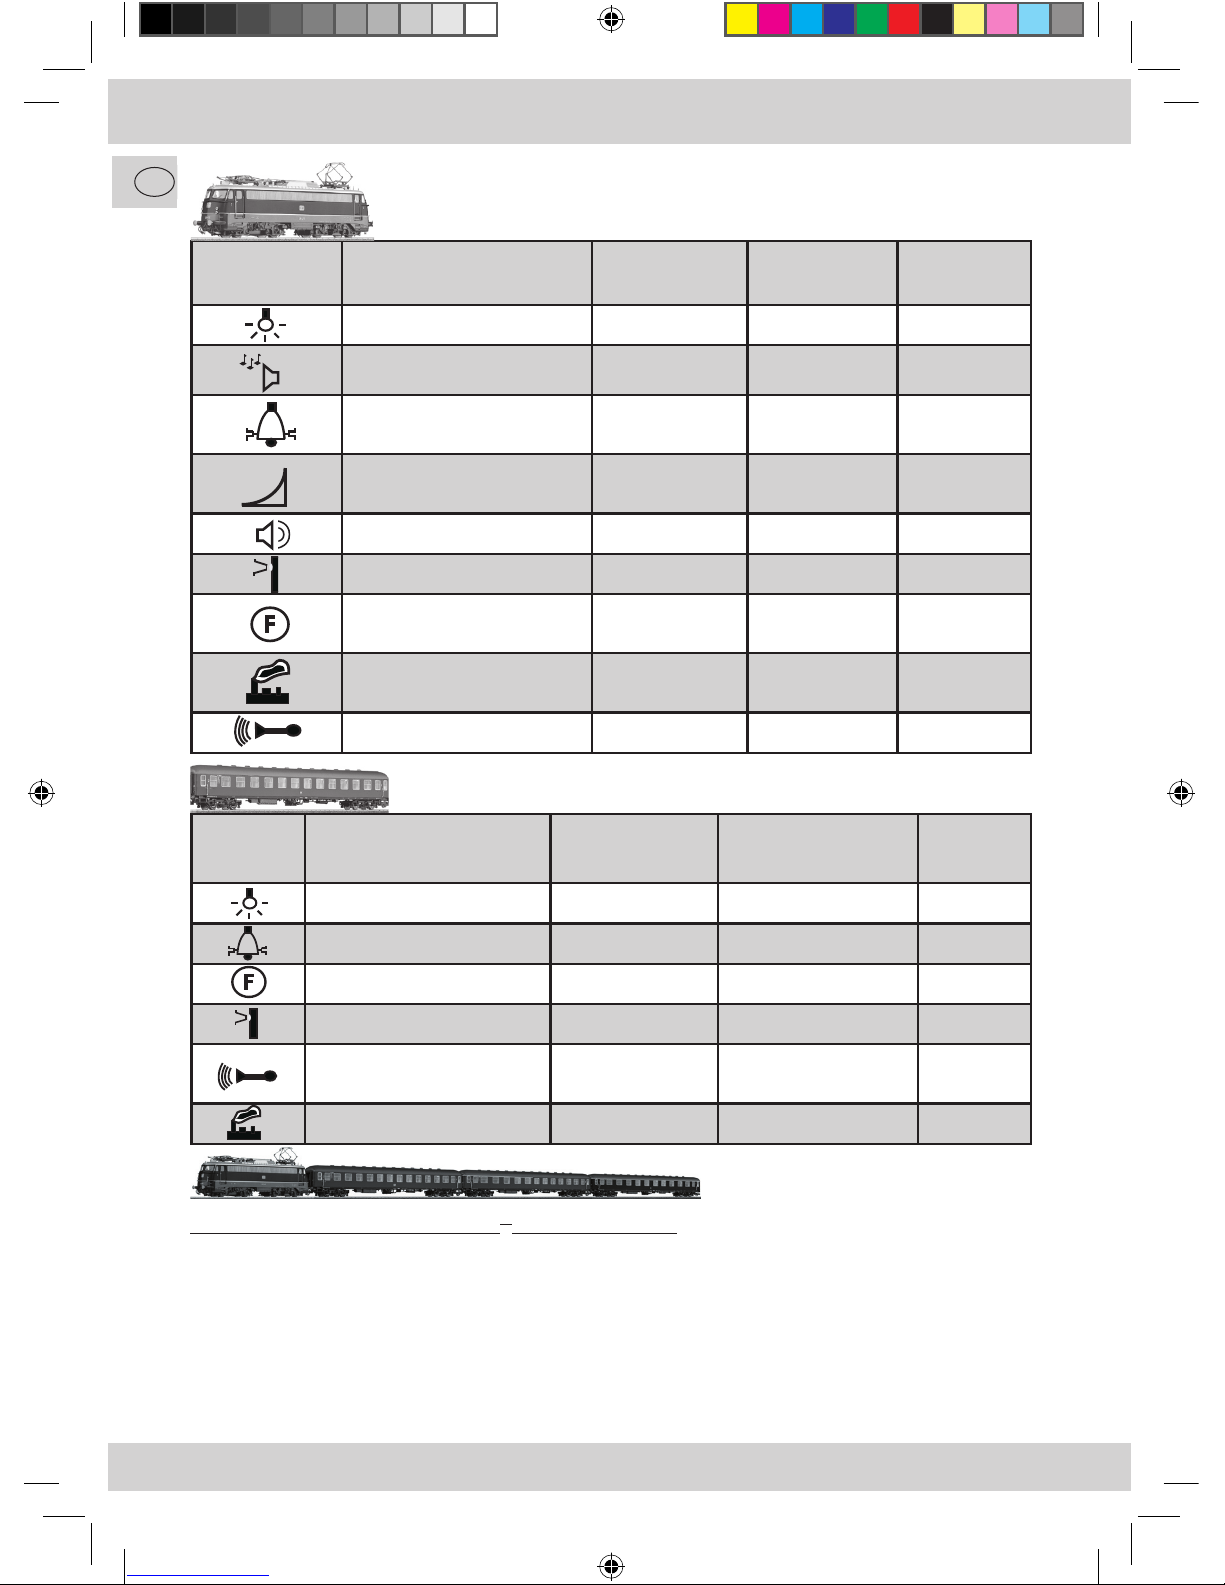
58
58
D
Touche
Fonction
Fonction Type fonction Selon le sens de
marche
B r u i t s
suppl
Eclairage arrière wagon MARCHE/ARRÊT
Portes wagons côté couloir OUVRIR/FERMER
Portes wagons côté comp. OUVRIR/FERMER
Signal contrôleur MARCHE/ARRÊT
Annonce du contrôleur
«En voiture s’il vous plaît !»
MARCHE/ARRÊT
Eclairage intérieur MARCHE/ARRÊT
Touches de fonction Märklin1) Mobile Station (wagons)
Touches de fonction Märklin
1)
Mobile Station (locomotive)
Touche
Fonction
Fonction Type fonction Selon le sens
de marche
Bruits
suppl.
Locomotive lumière frontale MARCHE/ARRÊT
LokSound MARCHE/ARRÊT
Pantographe
Poste de conduite 2 (arrière)
LEVER/BAISSER
Lumière poste de conduite
Poste de conduite 1 (avant)
MARCHE/ARRÊT
Feux arrière locomotive
MARCHE/ARRÊT
Signal court MARCHE
Pantographe Poste de condu
-
ite 1 (avant)
LEVER/BAISSER
Eclairage poste de conduite
Poste 2 (arrière)
MARCHE/ARRÊT
Annonce de la gare MARCHE
Programmation avec Märklin1) Mobile Station
1. appuyer sur la touche «ESC»
2. tourner vers la droite «MODIFIER LOCOMOTIVE» --> appuyer sur OK
3. tourner deux fois vers la gauche «REG» --> appuyer sur OK
4. tourner jusqu’à ce que la CV souhaitée clignote --> appuyer sur OK
5. tourner jusqu’à ce que la valeur souhaitée clignote --> appuyer sur OK
La locomotive confirme la programmation avec un court clignotement.
Le wagon confirme la programmation avec le clignotement de l’éclairage intérieur et les bruitages supplé
-
mentaires.
Digital Waggon.indd 58 23.10.2008 08:32:26
Page 59
59
59
D
Système analogique
Fonctions avec système analogique
Les feux arrière ainsi que l‘éclairage intérieur peuvent toujours être en mode actif ou être désactivés à partir
de CV13/14. Dans le système analogique, les fonctions ne sont pas commutables. Le système analogique est
activé à partir de CV29.
L’éclairage arrière dépend, dans le mode analogique DC, du sens de marche. Si le wagon est tiré,
les feux arrière s‘allument, s‘il est poussé, les feux arrière s‘éteignent.
Comme la tension sur le rail est trop faible lorsque le train roule lentement, le système analogique ne fonctionne que de façon restreinte (à partir d‘environ 7V).
Nous recommandons la désactivation du système analogique lors de l’utilisation de sections de freinage (CV29).
Annexes
Attribution des fonctions (mapping) (selon la norme NMRA)
Avec le «mapping», vous pouvez attribuer une ou plusieurs fonctions à une touche.
Démarche:
Programmez sur la CV à côté de la touche de fonction souhaitée, la valeur qui se situe sur cette ligne dans
la colonne fonction (cf. tableau «attribution des fonctions»).
Vous pouvez combiner plusieurs fonctions pour la même touche en ajoutant leurs valeurs. L’espace en gris
n’est pas possible à cause de la norme.
Veuillez à ne pas placer les deux portes (couloir/compartiment) sous la même fonction car seul
un côté peut être ouvert pour des raisons d‘ordre mécanique.
Exemples :
Vous voulez activer en même temps les feux arrière et l’éclairage intérieur des wagons avec la touche
lumière (F0):
Dans la ligne de CV33, les feux arrière ont la valeur 1, l’éclairage intérieur des wagons la valeur 32.
--> Programmez sur CV33 la valeur 33 (1+32).
Vous voulez activer la porte côté couloir avec F8 et la porte côté compartiment avec F9 :
Dans la ligne concernant F8, la porte côté couloir a la valeur 8. Dans la ligne concernant F9, la porte côté
compartiment a la valeur 2.
Vous souhaitez ouvrir les portes des trois wagons de façon séparée. (classe 1 : F11 & F12, classe 2 : F13 &
F14, classe 3 : F15 & F16), mais vous voulez commander les trois wagons à partir d‘une adresse:
Pour cela, les wagons doivent être programmés séparément :
1
ère
classe : Dans la ligne concernant F11 (CV45), la porte côté couloir a la valeur 1. Dans la ligne
concernant F12 (CV46), la porte côté compartiment a la valeur 2.
1
ère/2ème
classe Dans la ligne concernant F13 (CV47), la porte côté couloir a la valeur 64. Dans la ligne
concernant F14 (CV48), la porte côté compartiment a la valeur 128.
2
ème
classe : Dans la ligne concernant F15 (CV49), la porte côté couloir a la valeur 64. Dans la ligne
concernant F16 (CV50), la porte côté compartiment a la valeur 128. Vous placez le
signal du contrôleur, qui avant était sur F16, sur F19 : CV53 � 8
Digital Waggon.indd 59 23.10.2008 08:32:26
Page 60
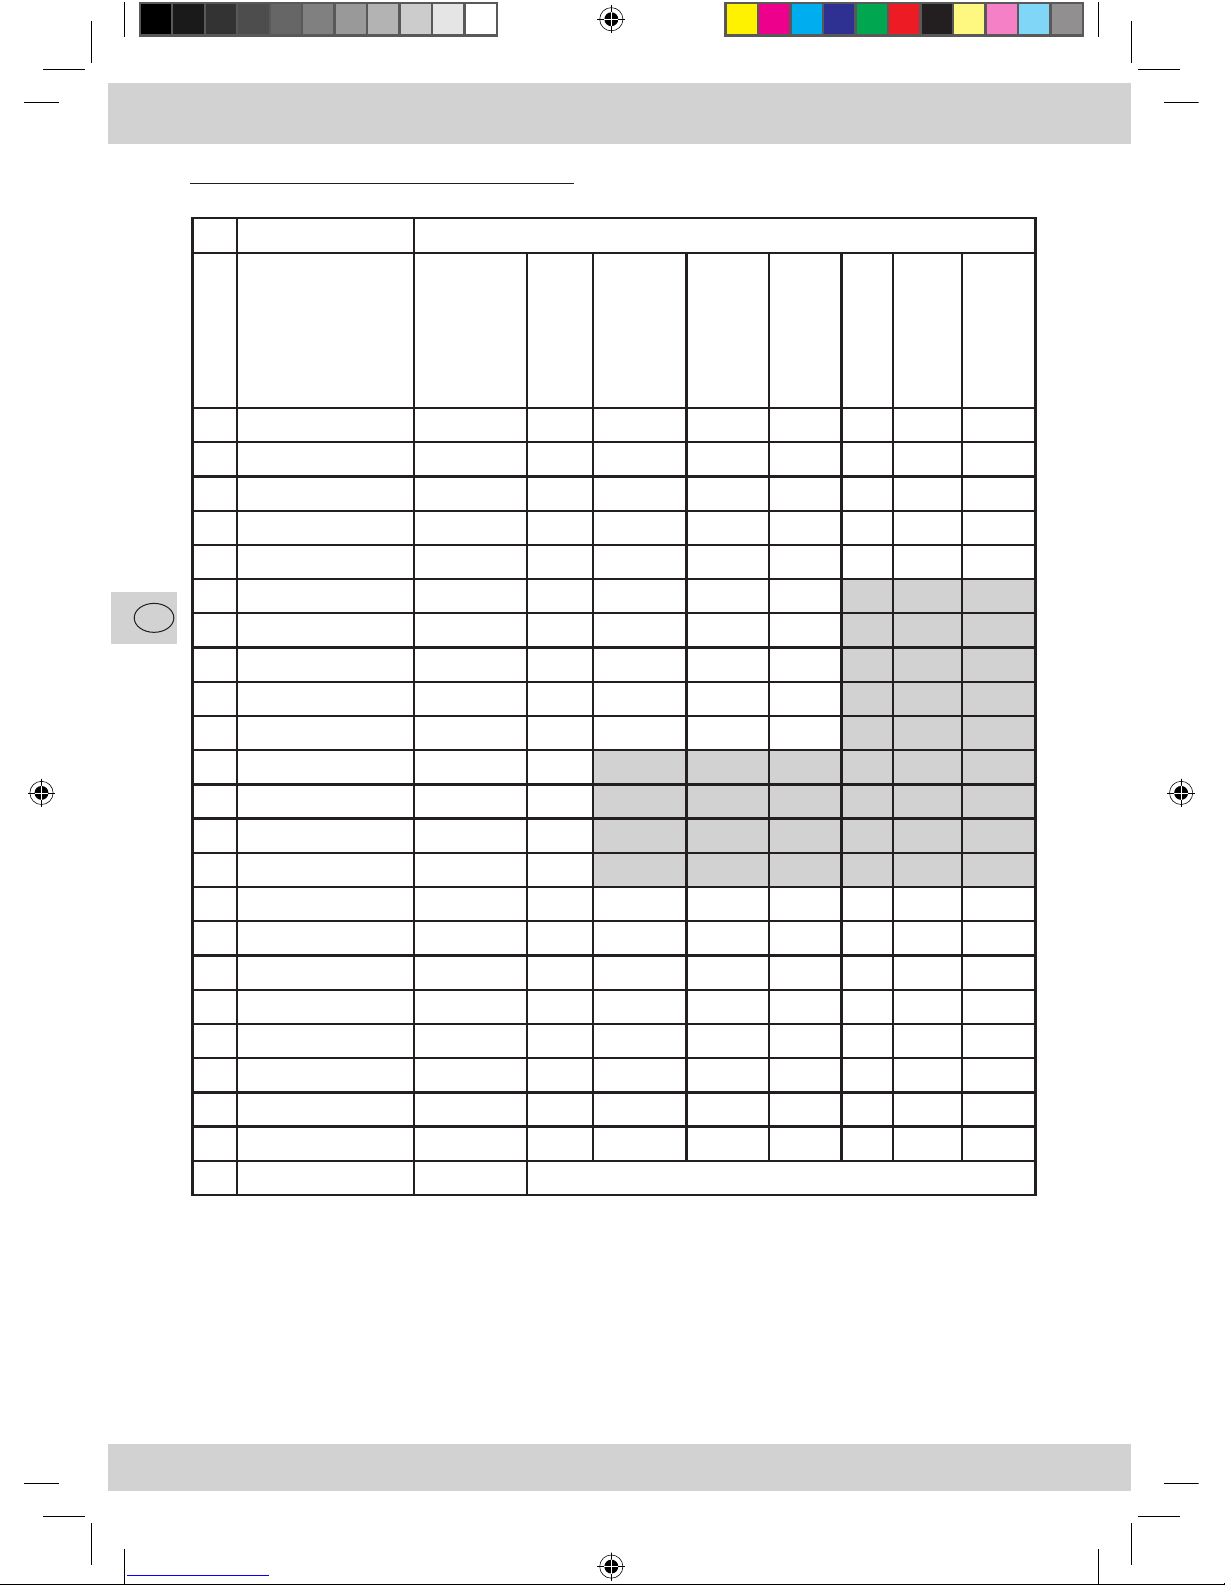
60
F
CV Touche de fonction
Porte Côté
couloir
Porte
Côté comp.
Wagon
Eclairage
Intérieur
Annonce
Contrôleur
Signal
Contrôleur
Verrouillage
Feux arr.
Eclairage
Feux arr.
33 F0 lumière en av. 128 64 32 16 8 n.o. 2 1*
34 F0 lumière en arr. n.o. n.o. n.o. n.o. n.o. n.o. 2 n.o.
35 F1 128 64 32 16 8 n.o. 2 1
36 F2 128 64 32 16 8 n.o. 2 1
37 F3 128 64* 32 16 8 n.o. 2 1
38 F4 16* 8 4 2 1
39 F5 16 8 4 2 1
40 F6 16 8 4 2 1
41 F7 16 8 4* 2 1
42 F8 2 8 4 2 1
43 F9 2 1
44 F10 2 1
45 F11 2 1
46 F12 1
47 F13 128 64 32 16 8 n.o. 2 1
48 F14 128 64 32 16 8 n.o. 2 1
49 F15 128 64 32 16 8 n.o. 2 1
50 F16 128 64 32 16 8* n.o. 2 1
51 F17 128 64 32 16* 8 n.o. 2 1
52 F18 128 64 32 16 8 n.o. 2* 1
53 F19 128 64 32 16 8 n.o. 2 1
54 F20 128 64 32 16 8 n.o. 2 1
*pa défaut
n.o. : non occupé
Tableau «Attribution des fonctions»
Fonction
Digital Waggon.indd 60 23.10.2008 08:32:27
Page 61
61
F
L‘utilisateur doit fermer les portes à partir des touches de commande préréglées F03 ou F04. Les
portes ne se ferment pas automatiquement lorsque le train part!
Nous ne nous portons pas garants des endommagements pouvant apparaître si le train roule
avec des portes encore ouvertes (Il y a présence de dangers lorsque des trains se croisent ou
encore à l‘embouchure des tunnels ou à proximité des poteaux caténaires etc. !).
La portée d’un wagon sur une ligne droite, avec portes ouvertes, est de 25 mm à partir du milieu
du rail (le gabarit autorisé à partir du milieu du rail est selon la norme NEM301 de 20mm sur la
largeur, 32 mm dans les courbes extérieures avec un rayon R2!
Description du problème Mesure
Le wagon ne réagit pas, ni les portes,
ni l’éclairage intérieur
Vérifiez l’adresse du wagon.
Programmez la valeur 8 sur CV8 afin de remettre les
réglages à l’état initial.
Les portes ne s’ouvrent pas, bruitage
des portes inexistant
Programmez la valeur 7 sur CV7 afin de remettre le
hardware
à l‘état initial.
Certaines portes fonctionnent, les
autres non
Programmer la valeur 7 sur CV7 afin de remettre le
hardware à l’état initial.
Les portes ne s’ouvrent pas, bruitage
des portes existant, moteur existant
Engrenage défectueux
Lumière arrière vacille
Comparez les crans de marche de votre centrale
avec le réglage en CV29.
Avertissements et indications
Aperçu des problèmes Wagons
Nous avons renoncé, pour plusieurs raisons (les wagons n’ont pas de pantographes), au système
par caténaires.
Digital Waggon.indd 61 23.10.2008 08:32:27
Page 62

62
Digital Waggon.indd 62 23.10.2008 08:32:27
Page 63
63
Digital Waggon.indd 63 23.10.2008 08:32:27
Page 64
Änderungen von Konstruktion und Ausführung
vorbehalten! • We reserve the right to change the
construction and design! • Nous nous réservons
le droit de modifi er la construction et le dessin! •
Ci riserviamo il diritto di variare la costruzione e il
design! • Verandering van model en construcie
voorbehounden.
Bitte diese Beschreibung zum späteren Gebrauch
aufbewahren! • Please retain these instructions
for further reference! • Pi�re d‘bien vouloir conserver ce mode d’emploi en vue d’une future utilisation! • Conservate queste istruczioni per un futuro utiliozzo! • Deze handleding altijd bewaren.
Modelleisenbahn GmbH
Plainbachstraße 4
A - 5101 Bergheim
Tel.: +43 (0)5 7626
8041273922 XI / 2008
Digital Waggon.indd 64 23.10.2008 08:32:28
 Loading...