

Page 1

ThinManager 12
Thin Client
Management Platform
Catalog Number 9541
User Manual
Original Instructions
Page 2

2 Rockwell Automation Publication TM-UM001D-EN-P - December 2020
Page 3

Table of Contents
Preface
About This Publication . . . . . . . . . . . . . . . . . . . . . . . . . . . . . . . . . . . . . . . . . . 11
Download Firmware, AOP, EDS, and Other Files . . . . . . . . . . . . . . . . . . . 11
Summary of Changes. . . . . . . . . . . . . . . . . . . . . . . . . . . . . . . . . . . . . . . . . . . . 11
Additional Resources . . . . . . . . . . . . . . . . . . . . . . . . . . . . . . . . . . . . . . . . . . . . 11
Chapter 1
Quick Setup Overview Microsoft . . . . . . . . . . . . . . . . . . . . . . . . . . . . . . . . . . . . . . . . . . . . . . . . . . . . . . 13
ThinManager . . . . . . . . . . . . . . . . . . . . . . . . . . . . . . . . . . . . . . . . . . . . . . . . . . . 13
Installation & Activation . . . . . . . . . . . . . . . . . . . . . . . . . . . . . . . . . . . . . 13
ThinManager Database Encryption . . . . . . . . . . . . . . . . . . . . . . . . . . . 14
Configuration . . . . . . . . . . . . . . . . . . . . . . . . . . . . . . . . . . . . . . . . . . . . . . . 15
Network . . . . . . . . . . . . . . . . . . . . . . . . . . . . . . . . . . . . . . . . . . . . . . . . . . . . . . . 16
VLANs and Subnets. . . . . . . . . . . . . . . . . . . . . . . . . . . . . . . . . . . . . . . . . . 16
Network Level Authentication (NLA) . . . . . . . . . . . . . . . . . . . . . . . . . . 16
Hardware . . . . . . . . . . . . . . . . . . . . . . . . . . . . . . . . . . . . . . . . . . . . . . . . . . . . . . 17
Results. . . . . . . . . . . . . . . . . . . . . . . . . . . . . . . . . . . . . . . . . . . . . . . . . . . . . . . . . 17
Chapter 2
Introduction Relevance User Access . . . . . . . . . . . . . . . . . . . . . . . . . . . . . . . . . . . . . . . 21
Relevance Location Services . . . . . . . . . . . . . . . . . . . . . . . . . . . . . . . . . . 21
ThinManager Interface . . . . . . . . . . . . . . . . . . . . . . . . . . . . . . . . . . . . . . . . . . 22
Menus. . . . . . . . . . . . . . . . . . . . . . . . . . . . . . . . . . . . . . . . . . . . . . . . . . . . . . 23
Customizing the Toolbar . . . . . . . . . . . . . . . . . . . . . . . . . . . . . . . . . . . . . 27
Icons . . . . . . . . . . . . . . . . . . . . . . . . . . . . . . . . . . . . . . . . . . . . . . . . . . . . . . . 28
Terminals. . . . . . . . . . . . . . . . . . . . . . . . . . . . . . . . . . . . . . . . . . . . . . . . . . . 29
Display Servers . . . . . . . . . . . . . . . . . . . . . . . . . . . . . . . . . . . . . . . . . . . . . . 30
Chapter 3
Licenses ThinManager Master License . . . . . . . . . . . . . . . . . . . . . . . . . . . . . . . . . . . . 37
ThinManager Redundancy . . . . . . . . . . . . . . . . . . . . . . . . . . . . . . . . . . . 38
Auto-synchronization for Redundancy . . . . . . . . . . . . . . . . . . . . . . . . 38
Manual Synchronization for Redundancy. . . . . . . . . . . . . . . . . . . . . . 41
ThinManager License Process . . . . . . . . . . . . . . . . . . . . . . . . . . . . . . . . 43
FactoryTalk Activations. . . . . . . . . . . . . . . . . . . . . . . . . . . . . . . . . . . . . . . . . . 47
FactoryTalk Activation Files . . . . . . . . . . . . . . . . . . . . . . . . . . . . . . . . . . 47
Chapter 4
ThinManager System Users Windows Users . . . . . . . . . . . . . . . . . . . . . . . . . . . . . . . . . . . . . . . . . . . . . . . . . 51
ThinManager Security Group Users. . . . . . . . . . . . . . . . . . . . . . . . . . . . . . . 51
Relevance Users. . . . . . . . . . . . . . . . . . . . . . . . . . . . . . . . . . . . . . . . . . . . . . . . . 51
Rockwell Automation Publication TM-UM001D-EN-P - December 2020 3
Page 4

Chapter 5
Sources Remote Desktop Servers. . . . . . . . . . . . . . . . . . . . . . . . . . . . . . . . . . . . . . . . . 53
Microsoft Configuration . . . . . . . . . . . . . . . . . . . . . . . . . . . . . . . . . . . . . 53
Defining Remote Desktop Servers in ThinManager . . . . . . . . . . . . . 54
Remote Desktop Server Graph . . . . . . . . . . . . . . . . . . . . . . . . . . . . . . . . 63
Remote Desktop Server Status . . . . . . . . . . . . . . . . . . . . . . . . . . . . . . . . 64
Remote Desktop Server Group . . . . . . . . . . . . . . . . . . . . . . . . . . . . . . . . . . . 69
Containers . . . . . . . . . . . . . . . . . . . . . . . . . . . . . . . . . . . . . . . . . . . . . . . . . . . . . 75
Container Deployment . . . . . . . . . . . . . . . . . . . . . . . . . . . . . . . . . . . . . . . 76
Container Host Server Installation . . . . . . . . . . . . . . . . . . . . . . . . . . . . 76
Install Container Images . . . . . . . . . . . . . . . . . . . . . . . . . . . . . . . . . . . . . 79
Define the Container Host Display Server. . . . . . . . . . . . . . . . . . . . . . 79
Define the Container Host Display Client . . . . . . . . . . . . . . . . . . . . . . 80
Apply the Container Display Client to a Terminal . . . . . . . . . . . . . . . 84
Install the TLS Certificates . . . . . . . . . . . . . . . . . . . . . . . . . . . . . . . . . . . 86
IP Cameras. . . . . . . . . . . . . . . . . . . . . . . . . . . . . . . . . . . . . . . . . . . . . . . . . . . . . 90
Configure the IP Camera . . . . . . . . . . . . . . . . . . . . . . . . . . . . . . . . . . . . . 91
Define the IP Camera as a Display Server . . . . . . . . . . . . . . . . . . . . . . 91
IP Camera . . . . . . . . . . . . . . . . . . . . . . . . . . . . . . . . . . . . . . . . . . . . . . . . . . 93
Define the USB Camera as a Display Server . . . . . . . . . . . . . . . . . . . . 95
VNC Servers. . . . . . . . . . . . . . . . . . . . . . . . . . . . . . . . . . . . . . . . . . . . . . . . . . . . 98
Workstations . . . . . . . . . . . . . . . . . . . . . . . . . . . . . . . . . . . . . . . . . . . . . . . . . . . 99
VCenter Servers . . . . . . . . . . . . . . . . . . . . . . . . . . . . . . . . . . . . . . . . . . . . . . . 101
Snapshots . . . . . . . . . . . . . . . . . . . . . . . . . . . . . . . . . . . . . . . . . . . . . . . . . 103
Adding a Virtual Server . . . . . . . . . . . . . . . . . . . . . . . . . . . . . . . . . . . . . 105
Chapter 6
Content Remote Desktop Services Display Clients. . . . . . . . . . . . . . . . . . . . . . . . . 109
Desktop . . . . . . . . . . . . . . . . . . . . . . . . . . . . . . . . . . . . . . . . . . . . . . . . . . . 110
Single Application Deployment with AppLink . . . . . . . . . . . . . . . . . 117
Connection Options . . . . . . . . . . . . . . . . . . . . . . . . . . . . . . . . . . . . . . . . 127
Failover. . . . . . . . . . . . . . . . . . . . . . . . . . . . . . . . . . . . . . . . . . . . . . . . . . . . 137
Instant Failover . . . . . . . . . . . . . . . . . . . . . . . . . . . . . . . . . . . . . . . . . . . . 141
Camera Display Clients. . . . . . . . . . . . . . . . . . . . . . . . . . . . . . . . . . . . . . . . . 142
Camera Overlay Template . . . . . . . . . . . . . . . . . . . . . . . . . . . . . . . . . . . 144
Terminal Shadow . . . . . . . . . . . . . . . . . . . . . . . . . . . . . . . . . . . . . . . . . . . . . . 158
Shadow Any Terminal. . . . . . . . . . . . . . . . . . . . . . . . . . . . . . . . . . . . . . . 158
Shadow a Specific Terminal . . . . . . . . . . . . . . . . . . . . . . . . . . . . . . . . . 161
Shadow of the Terminal . . . . . . . . . . . . . . . . . . . . . . . . . . . . . . . . . . . . . 164
Workstation Deployment . . . . . . . . . . . . . . . . . . . . . . . . . . . . . . . . . . . . . . . 167
Step 1 – On the PC . . . . . . . . . . . . . . . . . . . . . . . . . . . . . . . . . . . . . . . . . . 167
Step 2 – Workstation Display Client . . . . . . . . . . . . . . . . . . . . . . . . . . 169
Add the Workstation Display Client to the Terminal . . . . . . . . . . . 172
VNC Shadow . . . . . . . . . . . . . . . . . . . . . . . . . . . . . . . . . . . . . . . . . . . . . . . . . . 177
Shadow Any VNC Server . . . . . . . . . . . . . . . . . . . . . . . . . . . . . . . . . . . . 177
Shadow a Specific VNC Server . . . . . . . . . . . . . . . . . . . . . . . . . . . . . . . 179
Virtual Screens . . . . . . . . . . . . . . . . . . . . . . . . . . . . . . . . . . . . . . . . . . . . . . . . 182
Virtual Screen Display Client Wizard . . . . . . . . . . . . . . . . . . . . . . . . . 182
Predefined Templates . . . . . . . . . . . . . . . . . . . . . . . . . . . . . . . . . . . . . . . 185
4 Rockwell Automation Publication TM-UM001D-EN-P - December 2020
Page 5

Add a Virtual Screen to a Terminal . . . . . . . . . . . . . . . . . . . . . . . . . . . 190
Custom Overlays . . . . . . . . . . . . . . . . . . . . . . . . . . . . . . . . . . . . . . . . . . . 193
Display Client Override on Virtual Screens . . . . . . . . . . . . . . . . . . . . 203
Chapter 7
Devices Terminal Configuration . . . . . . . . . . . . . . . . . . . . . . . . . . . . . . . . . . . . . . . . 209
Terminal Configuration Wizard in ThinManager . . . . . . . . . . . . . . 209
User Accounts in the Terminal Configuration Wizard. . . . . . . . . . 230
Copy Settings from another Terminal . . . . . . . . . . . . . . . . . . . . . . . . 242
Use Groups for Organization . . . . . . . . . . . . . . . . . . . . . . . . . . . . . . . . 244
Use Groups for Configuration . . . . . . . . . . . . . . . . . . . . . . . . . . . . . . . 248
IP Configuration. . . . . . . . . . . . . . . . . . . . . . . . . . . . . . . . . . . . . . . . . . . . . . . 258
ThinManager-ready Thin Client IP Configuration . . . . . . . . . . . . . 259
Add and Configure Thin Clients. . . . . . . . . . . . . . . . . . . . . . . . . . . . . . 263
PXE Server and PXE Boot . . . . . . . . . . . . . . . . . . . . . . . . . . . . . . . . . . . 264
Local WinTMC Configuration . . . . . . . . . . . . . . . . . . . . . . . . . . . . . . . 277
WinTMC Configuration in ThinManager . . . . . . . . . . . . . . . . . . . . . 279
Mobile Devices. . . . . . . . . . . . . . . . . . . . . . . . . . . . . . . . . . . . . . . . . . . . . . . . . 283
Configure an iPad in ThinManager. . . . . . . . . . . . . . . . . . . . . . . . . . . 283
Configure an Android Device in ThinManager . . . . . . . . . . . . . . . . 294
Chapter 8
Active Directory User
Login Account
Search for Active Directory User. . . . . . . . . . . . . . . . . . . . . . . . . . . . . . . . . 301
Search for Active Directory Location . . . . . . . . . . . . . . . . . . . . . . . . . . . . . 301
Chapter 9
Packages Firmware, Packages, and Modules . . . . . . . . . . . . . . . . . . . . . . . . . . . . . . . 305
Update Packages and Files. . . . . . . . . . . . . . . . . . . . . . . . . . . . . . . . . . . 306
Customizing Packages . . . . . . . . . . . . . . . . . . . . . . . . . . . . . . . . . . . . . . 308
Configuring Packages for a Model of Thin Client. . . . . . . . . . . . . . . . . . 312
Configure Packages for an Individual Thin Client . . . . . . . . . . . . . . . . . 314
Chapter 10
Modules Module List. . . . . . . . . . . . . . . . . . . . . . . . . . . . . . . . . . . . . . . . . . . . . . . . . . . . 317
Add a Module. . . . . . . . . . . . . . . . . . . . . . . . . . . . . . . . . . . . . . . . . . . . . . . . . . 319
Individual Module Details . . . . . . . . . . . . . . . . . . . . . . . . . . . . . . . . . . . . . . 322
ICA Modules . . . . . . . . . . . . . . . . . . . . . . . . . . . . . . . . . . . . . . . . . . . . . . . 322
Keyboard Modules . . . . . . . . . . . . . . . . . . . . . . . . . . . . . . . . . . . . . . . . . . . . . 323
Key Block Module. . . . . . . . . . . . . . . . . . . . . . . . . . . . . . . . . . . . . . . . . . . 323
Key Block Single Key Module . . . . . . . . . . . . . . . . . . . . . . . . . . . . . . . . 323
Keyboard Configuration Module . . . . . . . . . . . . . . . . . . . . . . . . . . . . . 324
On-Screen Keyboard Module . . . . . . . . . . . . . . . . . . . . . . . . . . . . . . . . 325
RF Ideas pcProx USB Module . . . . . . . . . . . . . . . . . . . . . . . . . . . . . . . . 325
Share Keyboard and Mouse Module . . . . . . . . . . . . . . . . . . . . . . . . . . 325
Language Modules . . . . . . . . . . . . . . . . . . . . . . . . . . . . . . . . . . . . . . . . . . . . . 326
Language Selection Module. . . . . . . . . . . . . . . . . . . . . . . . . . . . . . . . . . 326
Local Storage Modules. . . . . . . . . . . . . . . . . . . . . . . . . . . . . . . . . . . . . . . . . . 327
USB Flash Drive Module. . . . . . . . . . . . . . . . . . . . . . . . . . . . . . . . . . . . . 327
Rockwell Automation Publication TM-UM001D-EN-P - December 2020 5
Page 6

USB Memory Card Reader Module . . . . . . . . . . . . . . . . . . . . . . . . . . . 327
Miscellaneous Modules . . . . . . . . . . . . . . . . . . . . . . . . . . . . . . . . . . . . . . . . . 328
Add Serial Port . . . . . . . . . . . . . . . . . . . . . . . . . . . . . . . . . . . . . . . . . . . . . 328
Barcode Configuration Module . . . . . . . . . . . . . . . . . . . . . . . . . . . . . . 328
Bluetooth Module . . . . . . . . . . . . . . . . . . . . . . . . . . . . . . . . . . . . . . . . . . 328
Firmware Update Module . . . . . . . . . . . . . . . . . . . . . . . . . . . . . . . . . . . 328
Instant Failover Module . . . . . . . . . . . . . . . . . . . . . . . . . . . . . . . . . . . . . 329
Local Print Module. . . . . . . . . . . . . . . . . . . . . . . . . . . . . . . . . . . . . . . . . . 330
MultiStation Configuration Module . . . . . . . . . . . . . . . . . . . . . . . . . . 331
Redundant Ethernet Module . . . . . . . . . . . . . . . . . . . . . . . . . . . . . . . . 331
Terminal Shadow Module . . . . . . . . . . . . . . . . . . . . . . . . . . . . . . . . . . . 331
TermMon ActiveX Configuration Module. . . . . . . . . . . . . . . . . . . . . 331
Time Zone Redirection Module . . . . . . . . . . . . . . . . . . . . . . . . . . . . . . 332
TMTerm DLL Configuration Module . . . . . . . . . . . . . . . . . . . . . . . . . 332
USB to Serial Module . . . . . . . . . . . . . . . . . . . . . . . . . . . . . . . . . . . . . . . 332
User Override Module. . . . . . . . . . . . . . . . . . . . . . . . . . . . . . . . . . . . . . . 332
Mouse Modules . . . . . . . . . . . . . . . . . . . . . . . . . . . . . . . . . . . . . . . . . . . . . . . . 332
Locate Pointer Module . . . . . . . . . . . . . . . . . . . . . . . . . . . . . . . . . . . . . . 333
Mouse Configuration Module. . . . . . . . . . . . . . . . . . . . . . . . . . . . . . . . 333
PS/2 Mouse Module. . . . . . . . . . . . . . . . . . . . . . . . . . . . . . . . . . . . . . . . . 334
Serial Mouse Driver. . . . . . . . . . . . . . . . . . . . . . . . . . . . . . . . . . . . . . . . . 334
Share Keyboard and Mouse Modules . . . . . . . . . . . . . . . . . . . . . . . . . 334
Network Modules . . . . . . . . . . . . . . . . . . . . . . . . . . . . . . . . . . . . . . . . . . . . . . 334
Domain Name System Module. . . . . . . . . . . . . . . . . . . . . . . . . . . . . . . 334
Second Network Module . . . . . . . . . . . . . . . . . . . . . . . . . . . . . . . . . . . . 335
Third Network Module . . . . . . . . . . . . . . . . . . . . . . . . . . . . . . . . . . . . . . 335
RDP Modules . . . . . . . . . . . . . . . . . . . . . . . . . . . . . . . . . . . . . . . . . . . . . . . . . . 336
RDP Experience Module . . . . . . . . . . . . . . . . . . . . . . . . . . . . . . . . . . . . 336
RDP Port Module . . . . . . . . . . . . . . . . . . . . . . . . . . . . . . . . . . . . . . . . . . . 336
RDP Serial Port Redirection Module. . . . . . . . . . . . . . . . . . . . . . . . . . 336
RDP Session IP Module . . . . . . . . . . . . . . . . . . . . . . . . . . . . . . . . . . . . . 337
Smart Card Module . . . . . . . . . . . . . . . . . . . . . . . . . . . . . . . . . . . . . . . . . 337
Relevance Modules. . . . . . . . . . . . . . . . . . . . . . . . . . . . . . . . . . . . . . . . . . . . . 337
Bluetooth Module . . . . . . . . . . . . . . . . . . . . . . . . . . . . . . . . . . . . . . . . . . 337
iPhone Beacon . . . . . . . . . . . . . . . . . . . . . . . . . . . . . . . . . . . . . . . . . . . . . 340
DigitalPersona UareU Fingerprint Reader . . . . . . . . . . . . . . . . . . . . 340
RF Ideas pcProx Modules. . . . . . . . . . . . . . . . . . . . . . . . . . . . . . . . . . . . 341
TermMon ActiveX Configuration . . . . . . . . . . . . . . . . . . . . . . . . . . . . 343
USB Flash Drive Module. . . . . . . . . . . . . . . . . . . . . . . . . . . . . . . . . . . . . 344
Wavetrend Tag Reader (Package 5 Only) . . . . . . . . . . . . . . . . . . . . . . 344
Screen Saver Modules . . . . . . . . . . . . . . . . . . . . . . . . . . . . . . . . . . . . . . . . . . 344
MultiSession Screen Saver Module . . . . . . . . . . . . . . . . . . . . . . . . . . . 344
Screen Saver Module. . . . . . . . . . . . . . . . . . . . . . . . . . . . . . . . . . . . . . . . 345
Sound Modules . . . . . . . . . . . . . . . . . . . . . . . . . . . . . . . . . . . . . . . . . . . . . . . . 346
Universal Sound Driver . . . . . . . . . . . . . . . . . . . . . . . . . . . . . . . . . . . . . 346
TermSecure Modules. . . . . . . . . . . . . . . . . . . . . . . . . . . . . . . . . . . . . . . . . . . 347
Touch Screen . . . . . . . . . . . . . . . . . . . . . . . . . . . . . . . . . . . . . . . . . . . . . . . . . . 348
Serial Drivers . . . . . . . . . . . . . . . . . . . . . . . . . . . . . . . . . . . . . . . . . . . . . . 348
USB Touch Screen Driver. . . . . . . . . . . . . . . . . . . . . . . . . . . . . . . . . . . . 350
Video Driver Modules . . . . . . . . . . . . . . . . . . . . . . . . . . . . . . . . . . . . . . . . . . 351
6 Rockwell Automation Publication TM-UM001D-EN-P - December 2020
Page 7

Custom Video Mode Module. . . . . . . . . . . . . . . . . . . . . . . . . . . . . . . . . 351
Monitor Configuration Module . . . . . . . . . . . . . . . . . . . . . . . . . . . . . . 352
Chapter 11
MultiMonitor MultiMonitor Layout Page . . . . . . . . . . . . . . . . . . . . . . . . . . . . . . . . . . . . . . 355
MultiMonitor Display Client Selection Page . . . . . . . . . . . . . . . . . . . . . . 360
Override Function . . . . . . . . . . . . . . . . . . . . . . . . . . . . . . . . . . . . . . . . . . . . . 361
Share Keyboard and Mouse Module. . . . . . . . . . . . . . . . . . . . . . . . . . . . . . 364
Master Thin Client Configuration . . . . . . . . . . . . . . . . . . . . . . . . . . . . 365
Replica Thin Client Configuration. . . . . . . . . . . . . . . . . . . . . . . . . . . . 366
Share Keyboard and Mouse with MultiMonitor . . . . . . . . . . . . . . . . 367
Chapter 12
ThinManager Server
Configuration Wizard
Introduction Page. . . . . . . . . . . . . . . . . . . . . . . . . . . . . . . . . . . . . . . . . . . . . . 369
Unknown Terminals Page . . . . . . . . . . . . . . . . . . . . . . . . . . . . . . . . . . . . . . 370
Terminal Replacement Page . . . . . . . . . . . . . . . . . . . . . . . . . . . . . . . . . . . . 371
Historical Logging Page . . . . . . . . . . . . . . . . . . . . . . . . . . . . . . . . . . . . . . . . 372
Event Log Tab . . . . . . . . . . . . . . . . . . . . . . . . . . . . . . . . . . . . . . . . . . . . . . . . . 373
System Schedule Page . . . . . . . . . . . . . . . . . . . . . . . . . . . . . . . . . . . . . . . . . . 374
Security Groups Page. . . . . . . . . . . . . . . . . . . . . . . . . . . . . . . . . . . . . . . . . . . 375
Event Selection Page . . . . . . . . . . . . . . . . . . . . . . . . . . . . . . . . . . . . . . . . . . . 378
Email or Windows Messaging Recipients Page. . . . . . . . . . . . . . . . . . . . 379
Multicast Configuration Page . . . . . . . . . . . . . . . . . . . . . . . . . . . . . . . . . . . 383
Shadow Configuration Page . . . . . . . . . . . . . . . . . . . . . . . . . . . . . . . . . . . . 385
Biometric Device Configuration Page . . . . . . . . . . . . . . . . . . . . . . . . . . . . 386
Chapter 13
Reports Selecting Reports . . . . . . . . . . . . . . . . . . . . . . . . . . . . . . . . . . . . . . . . . . . . . . 387
Report Tab . . . . . . . . . . . . . . . . . . . . . . . . . . . . . . . . . . . . . . . . . . . . . . . . . . . . 388
Print Report . . . . . . . . . . . . . . . . . . . . . . . . . . . . . . . . . . . . . . . . . . . . . . . . . . . 388
Report Template Installation. . . . . . . . . . . . . . . . . . . . . . . . . . . . . . . . . . . . 389
Chapter 14
Scheduling System Scheduling of Reports. . . . . . . . . . . . . . . . . . . . . . . . . . . . . . . . . . . 391
Schedule Configuration Backups . . . . . . . . . . . . . . . . . . . . . . . . . . . . . . . . 395
Chapter 15
Relevance Introduction. . . . . . . . . . . . . . . . . . . . . . . . . . . . . . . . . . . . . . . . . . . . . . . . . . . 399
Relevance User Services Introduction . . . . . . . . . . . . . . . . . . . . . . . . . . . . 400
Permission-deployed Applications in Relevance. . . . . . . . . . . . . . . . . . . 401
Permission-deployed Applications Diagrams. . . . . . . . . . . . . . . . . . 401
Relevance Access Group Creation . . . . . . . . . . . . . . . . . . . . . . . . . . . . 404
Add Access Group to a Display Client . . . . . . . . . . . . . . . . . . . . . . . . . 407
Configure Terminals for Relevance. . . . . . . . . . . . . . . . . . . . . . . . . . . 409
Create the Relevance User without a Windows Account . . . . . . . . 413
Rockwell Automation Publication TM-UM001D-EN-P - December 2020 7
Page 8

Relevance Results. . . . . . . . . . . . . . . . . . . . . . . . . . . . . . . . . . . . . . . . . . . 416
Log On to Relevance . . . . . . . . . . . . . . . . . . . . . . . . . . . . . . . . . . . . . . . . 417
Log Out of Relevance. . . . . . . . . . . . . . . . . . . . . . . . . . . . . . . . . . . . . . . . 420
Assign Roaming Display Clients to a Relevance User . . . . . . . . . . . . . . 420
Roaming Display Clients in Relevance Diagrams . . . . . . . . . . . . . . 421
Create the Relevance User via Active Directory . . . . . . . . . . . . . . . . 423
Relevance Configuration Wizard. . . . . . . . . . . . . . . . . . . . . . . . . . . . . 428
Add User-specific Display Clients . . . . . . . . . . . . . . . . . . . . . . . . . . . . 430
Log On with a Relevance User Account. . . . . . . . . . . . . . . . . . . . . . . . 436
Log Out of Relevance. . . . . . . . . . . . . . . . . . . . . . . . . . . . . . . . . . . . . . . . 440
Roaming Applications for Non-domain Users . . . . . . . . . . . . . . . . . 440
Relevance User Groups . . . . . . . . . . . . . . . . . . . . . . . . . . . . . . . . . . . . . . . . . 448
Add a Relevance User to a Relevance User Group . . . . . . . . . . . . . . 454
Batch Create Relevance Users using Active Directory OU . . . . . . . 457
Password and Account Management. . . . . . . . . . . . . . . . . . . . . . . . . . . . . 462
Active Directory . . . . . . . . . . . . . . . . . . . . . . . . . . . . . . . . . . . . . . . . . . . . 462
Shortcut Method to Add Relevance Access Groups . . . . . . . . . . . . . 469
Relevance User Schedule . . . . . . . . . . . . . . . . . . . . . . . . . . . . . . . . . . . . 471
Card Readers and Fingerprint Scanners. . . . . . . . . . . . . . . . . . . . . . . . . . 473
Card and Badge Configuration for a Relevance User . . . . . . . . . . . 473
Fingerprint Reader . . . . . . . . . . . . . . . . . . . . . . . . . . . . . . . . . . . . . . . . . 484
Relevance Location Services. . . . . . . . . . . . . . . . . . . . . . . . . . . . . . . . . . . . . 493
Create a Location with the Location Configuration Wizard . . . . . 494
Add a Location to a Terminal . . . . . . . . . . . . . . . . . . . . . . . . . . . . . . . . 502
Mobile Device Interactions with Relevance . . . . . . . . . . . . . . . . . . . . . . . 507
Manual Interaction
with Locations
Chapter 16
Shadow . . . . . . . . . . . . . . . . . . . . . . . . . . . . . . . . . . . . . . . . . . . . . . . . . . . . . . . 513
Transfer. . . . . . . . . . . . . . . . . . . . . . . . . . . . . . . . . . . . . . . . . . . . . . . . . . . . . . . 515
Transfer at the Location . . . . . . . . . . . . . . . . . . . . . . . . . . . . . . . . . . . . . 518
Clone . . . . . . . . . . . . . . . . . . . . . . . . . . . . . . . . . . . . . . . . . . . . . . . . . . . . . . . . . 520
Using the Mobile Device to Add Resolver Codes . . . . . . . . . . . . . . . . . . . 523
QR Codes . . . . . . . . . . . . . . . . . . . . . . . . . . . . . . . . . . . . . . . . . . . . . . . . . . 524
Register QR Codes with an iPad. . . . . . . . . . . . . . . . . . . . . . . . . . . . . . 524
Register QR Codes with an Android Device. . . . . . . . . . . . . . . . . . . . 528
Bluetooth Beacons . . . . . . . . . . . . . . . . . . . . . . . . . . . . . . . . . . . . . . . . . . . . . 531
Relevance Settings. . . . . . . . . . . . . . . . . . . . . . . . . . . . . . . . . . . . . . . . . . 532
Define Bluetooth Beacons on an iPad. . . . . . . . . . . . . . . . . . . . . . . . . 533
Define Bluetooth Beacons on an Android . . . . . . . . . . . . . . . . . . . . . 537
Wi-Fi Access Points . . . . . . . . . . . . . . . . . . . . . . . . . . . . . . . . . . . . . . . . . . . . 542
Define Wi-Fi Access Points with an iPad . . . . . . . . . . . . . . . . . . . . . . 542
Defining Wi-Fi Access Points with an Android . . . . . . . . . . . . . . . . 546
GPS. . . . . . . . . . . . . . . . . . . . . . . . . . . . . . . . . . . . . . . . . . . . . . . . . . . . . . . . . . . 549
Register GPS with an iPad . . . . . . . . . . . . . . . . . . . . . . . . . . . . . . . . . . . 550
Register GPS with an Android . . . . . . . . . . . . . . . . . . . . . . . . . . . . . . . 553
Add Actions to Resolver Codes . . . . . . . . . . . . . . . . . . . . . . . . . . . . . . . . . . 557
Interact with the Location . . . . . . . . . . . . . . . . . . . . . . . . . . . . . . . . . . . . . . 560
Shadow. . . . . . . . . . . . . . . . . . . . . . . . . . . . . . . . . . . . . . . . . . . . . . . . . . . . 561
8 Rockwell Automation Publication TM-UM001D-EN-P - December 2020
Page 9

Forced Transfer. . . . . . . . . . . . . . . . . . . . . . . . . . . . . . . . . . . . . . . . . . . . . . . . 563
Transfer. . . . . . . . . . . . . . . . . . . . . . . . . . . . . . . . . . . . . . . . . . . . . . . . . . . . . . . 566
Clone . . . . . . . . . . . . . . . . . . . . . . . . . . . . . . . . . . . . . . . . . . . . . . . . . . . . . . . . . 570
Glossary . . . . . . . . . . . . . . . . . . . . . . . . . . . . . . . . . . . . . . . . . . . 573
Rockwell Automation Publication TM-UM001D-EN-P - December 2020 9
Page 10

Notes:
10 Rockwell Automation Publication TM-UM001D-EN-P - December 2020
Page 11

Preface
About This Publication
Download Firmware, AOP, EDS, and Other Files
Summary of Changes
This publication provides comprehensive information for users of
ThinManager® thin client management software.
Download firmware, associated files (such as AOP, EDS, and DTM), and access
product release notes from the Product Compatibility and Download Center at
rok.auto/pcdc
ThinManager resources are also available at thinmanager.com
.
.
This publication contains the following new or updated information. This list
includes substantive updates only and is not intended to reflect all changes.
Topic Page
New Hotkey Options—Force failover to next display server and Set keyboard focus to a screen 227
Portrait Mode Rotation in MultiMonitor 355
New Features in Menu Bar: Clear, Disable Tab Reordering and Tear-Off, Remote View items 25
Screen Selector for MultiMonitor 358
Display Client Options 111
Set Don’t Fragment Flag 383
Reset Scale and Snap settings in Overlay Layout (Camera) 144
iPhone Beacon 340
Additional Resources
These documents contain additional information concerning related products
from Rockwell Automation.
Resource Description
EtherNet/IP Network Devices User Manual, ENET-UM006
Ethernet Reference Manual, ENET-RM002
System Security Design Guidelines Reference Manual, SECURE-RM001
Industrial Components Preventive Maintenance, Enclosures, and Contact Ratings
Specifications, publication IC-TD002
Safety Guidelines for the Application, Installation, and Maintenance of Solid-state
Control, publication SGI-1.1
Industrial Automation Wiring and Grounding Guidelines, publication 1770-4.1
Product Certifications website, rok.auto/certifications
. Provides declarations of conformity, certificates, and other certification details.
Describes how to configure and use EtherNet/IP devices to communicate on the EtherNet/IP
network.
Describes basic Ethernet concepts, infrastructure components, and infrastructure features.
Provides guidance on how to conduct security assessments, implement Rockwell Automation
products in a secure system, harden the control system, manage user access, and dispose of
equipment.
Provides a quick reference tool for Allen-Bradley industrial automation controls and assemblies.
Designed to harmonize with NEMA Standards Publication No. ICS 1.1-1987 and provides general
guidelines for the application, installation, and maintenance of solid-state control in the form of
individual devices or packaged assemblies incorporating solid-state components.
Provides general guidelines for installing a Rockwell Automation industrial system.
You can view or download publications at rok.auto/literature
.
Rockwell Automation Publication TM-UM001D-EN-P - December 2020 11
Page 12

Notes:
12 Rockwell Automation Publication TM-UM001D-EN-P - December 2020
Page 13

Chapter 1
Quick Setup Overview
This chapter guides you through the actions needed to build and activate a
ThinManager system.
Microsoft
ThinManager
Complete the following activities to install and configure Remote
Desktop Services.
• Build a Remote Desktop Server with the Microsoft Windows Server
2008/2008R2, 2012, or 2016 operating system. Enable the Remote
Desktop Services (Terminal Services) role.
• Create a Microsoft Remote Desktop Licensing Server and add Remote
Desktop Services Client Access Licenses (RDSCALs) for each thin client.
These were called Terminal Server Client Access Licenses (TSCALs) in
Server 2003. The servers also require a normal CAL.
• It is common to have each ThinManager-managed terminal
automatically log in to the Remote Desktop Server when it boots up.
Therefore, create a unique Windows user for each
ThinManager-managed terminal. For domain deployments, this will be
done within Active Directory. For work group deployments, this will be
done on each Remote Desktop Server. Make sure that each user has
permission to start Remote Desktop Server sessions on each Remote
Desktop Server.
• Apply appropriate security to each user profile using the standard
Microsoft techniques.
This section describes how to install, activate, and configure ThinManager.
Installation & Activation
Perform the following actions to install and activate ThinManager.
Install ThinManager software onto a computer to create
ThinManager Server.
• If using ThinManager Master Licensing, create a Master ThinManager
License and add enough Product Licenses for each
ThinManager-managed terminal.
• If using FactoryTalk Activation:
- Install the FactoryTalk Activation Manager on each computer where
ThinManager is installed.
- Download the FactoryTalk Activations for ThinManager.
- Change the License Mode in ThinManager to FactoryTalk Activation
and assign the newly downloaded activations.
Rockwell Automation Publication TM-UM001D-EN-P - December 2020 13
Page 14
Chapter 1 Quick Setup Overview
ThinManager Database Encryption
ThinManager 11.2 introduced a major encryption change, with the Advanced
Encryption Standard, AES, used to encrypt the ThinManager database instead
of the previous encryption key. This led to a few important changes.
The database requires a password to be used as part of the encryption key and
prompts for a password as soon as it is installed or updated.
Installation
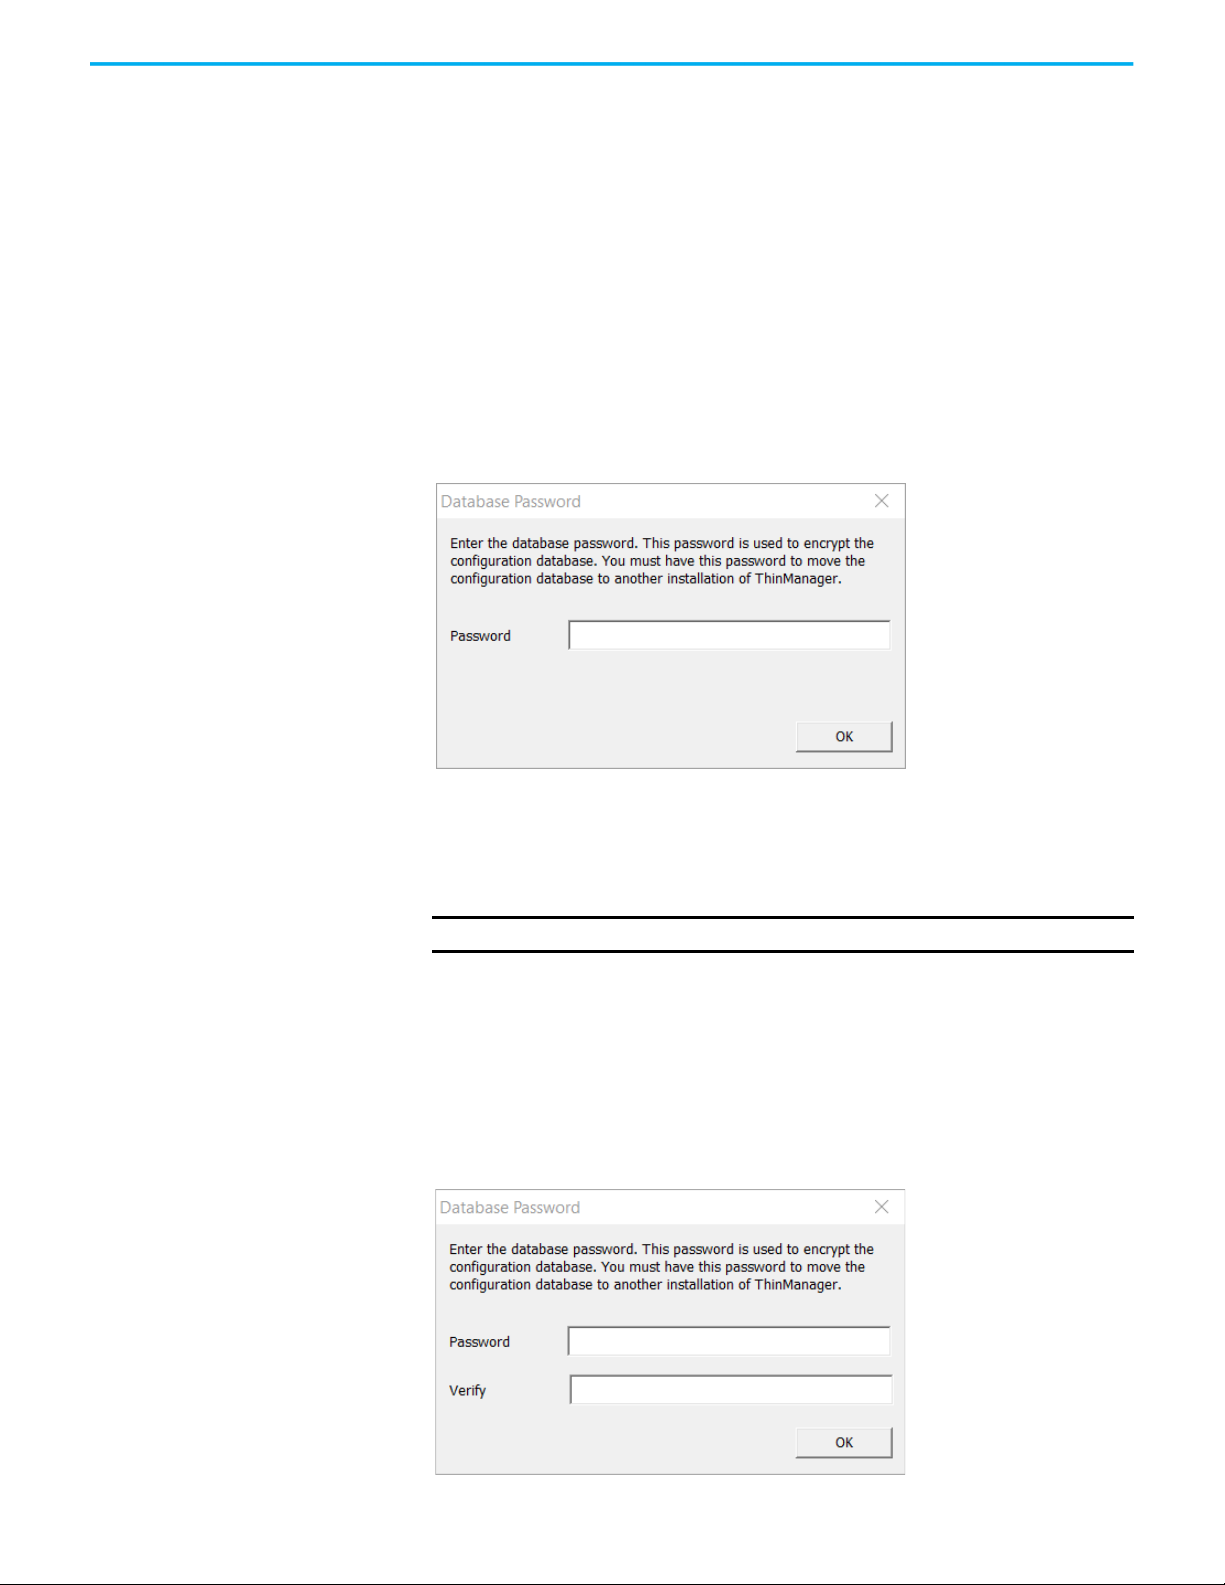
When ThinManager 11.2 and later is first run, a dialog box appears, which
prompts for a new database password.
Figure 1 - Database Password Dialog Box
1. Type a password into the Password field and click OK.
This password is used for the encryption key when the database is
configured. There are no requirements for length or complexity. You can
leave the Password field blank.
IMPORTANT
The Database Password is unrecoverable if lost.
Manual Backup
To manually back up the database, follow these instructions.
1. Choose Manage>Backup.
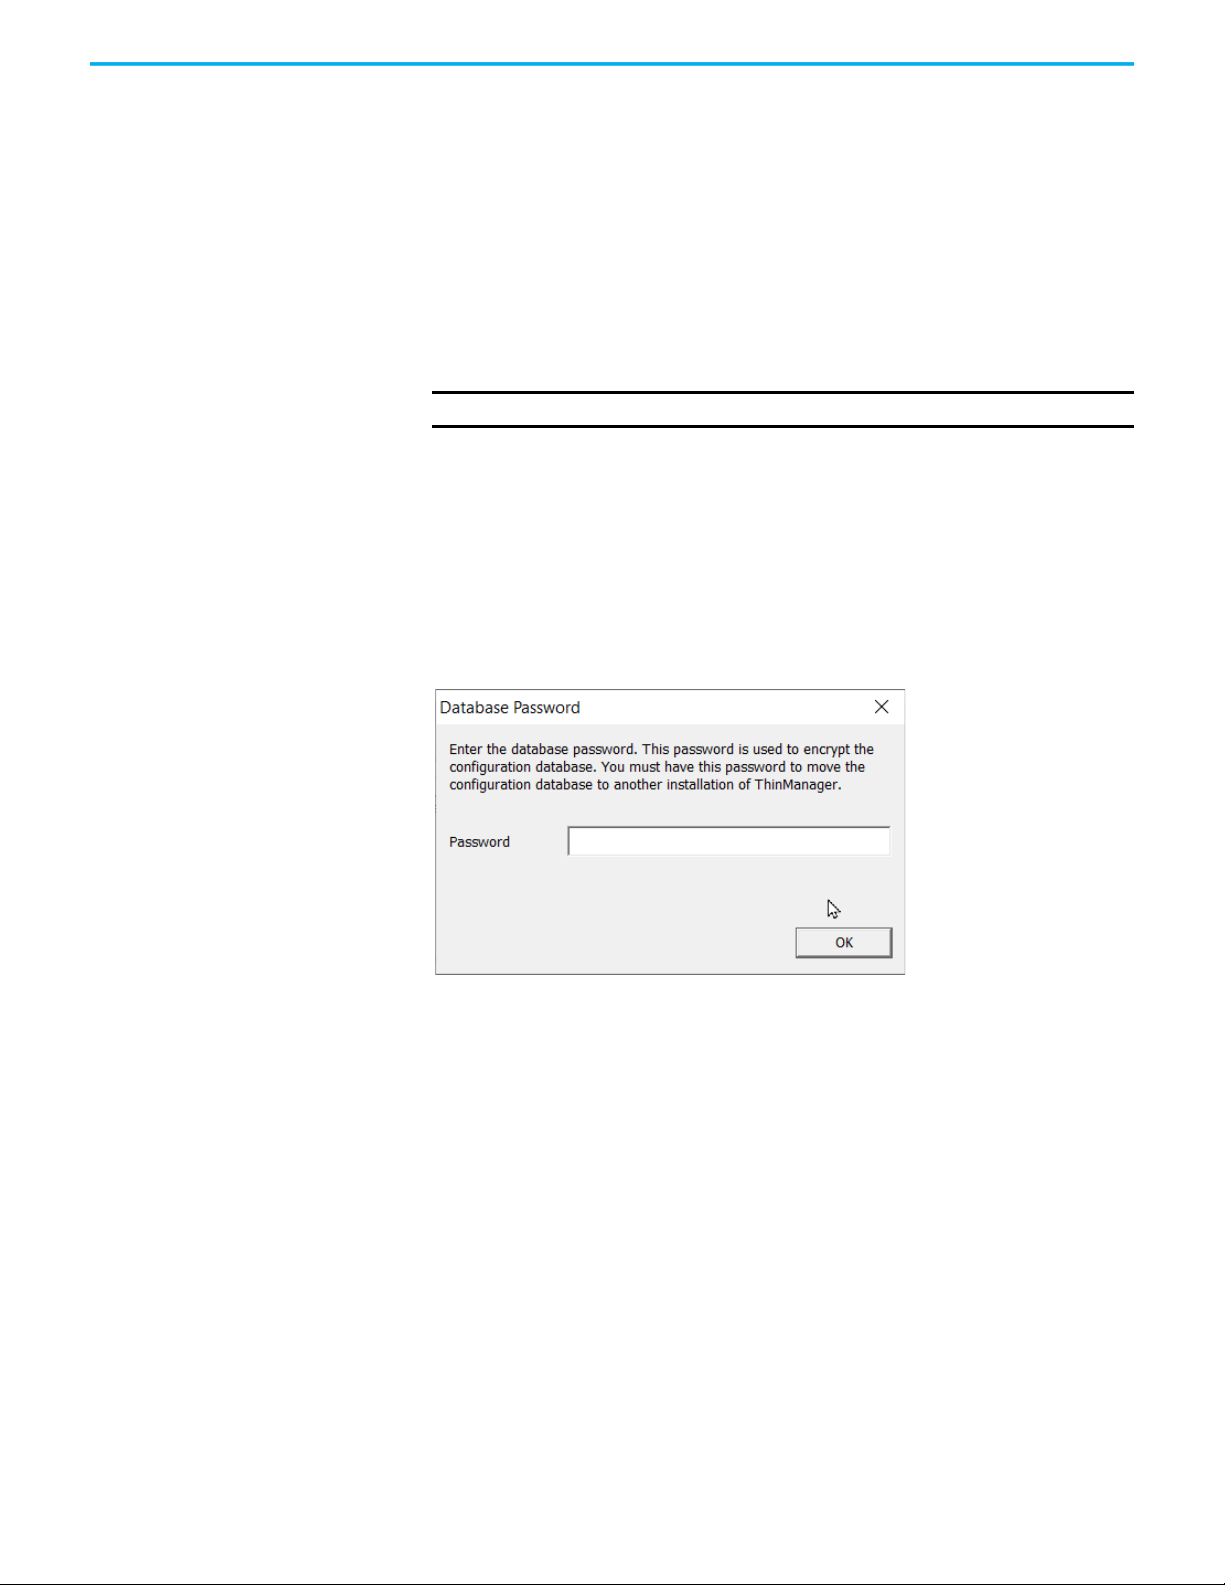
You are prompted to create a password for the backup.
Figure 2 - Database Password Dialog Box
14 Rockwell Automation Publication TM-UM001D-EN-P - December 2020
Page 15
Chapter 1 Quick Setup Overview
2. Type the password into the Password field.
3. Type the password into the Verify field.
4. Click OK.
The manual backup password is for the copy of the database as a backup only,
not the running database. The password allows a user to backup the
configuration with a short password to send to support without the need to
send the main database password.
There are no requirements for length or complexity of the backup password.
The password can be blank.
IMPORTANT
This password is unrecoverable if lost.
Manual Restore
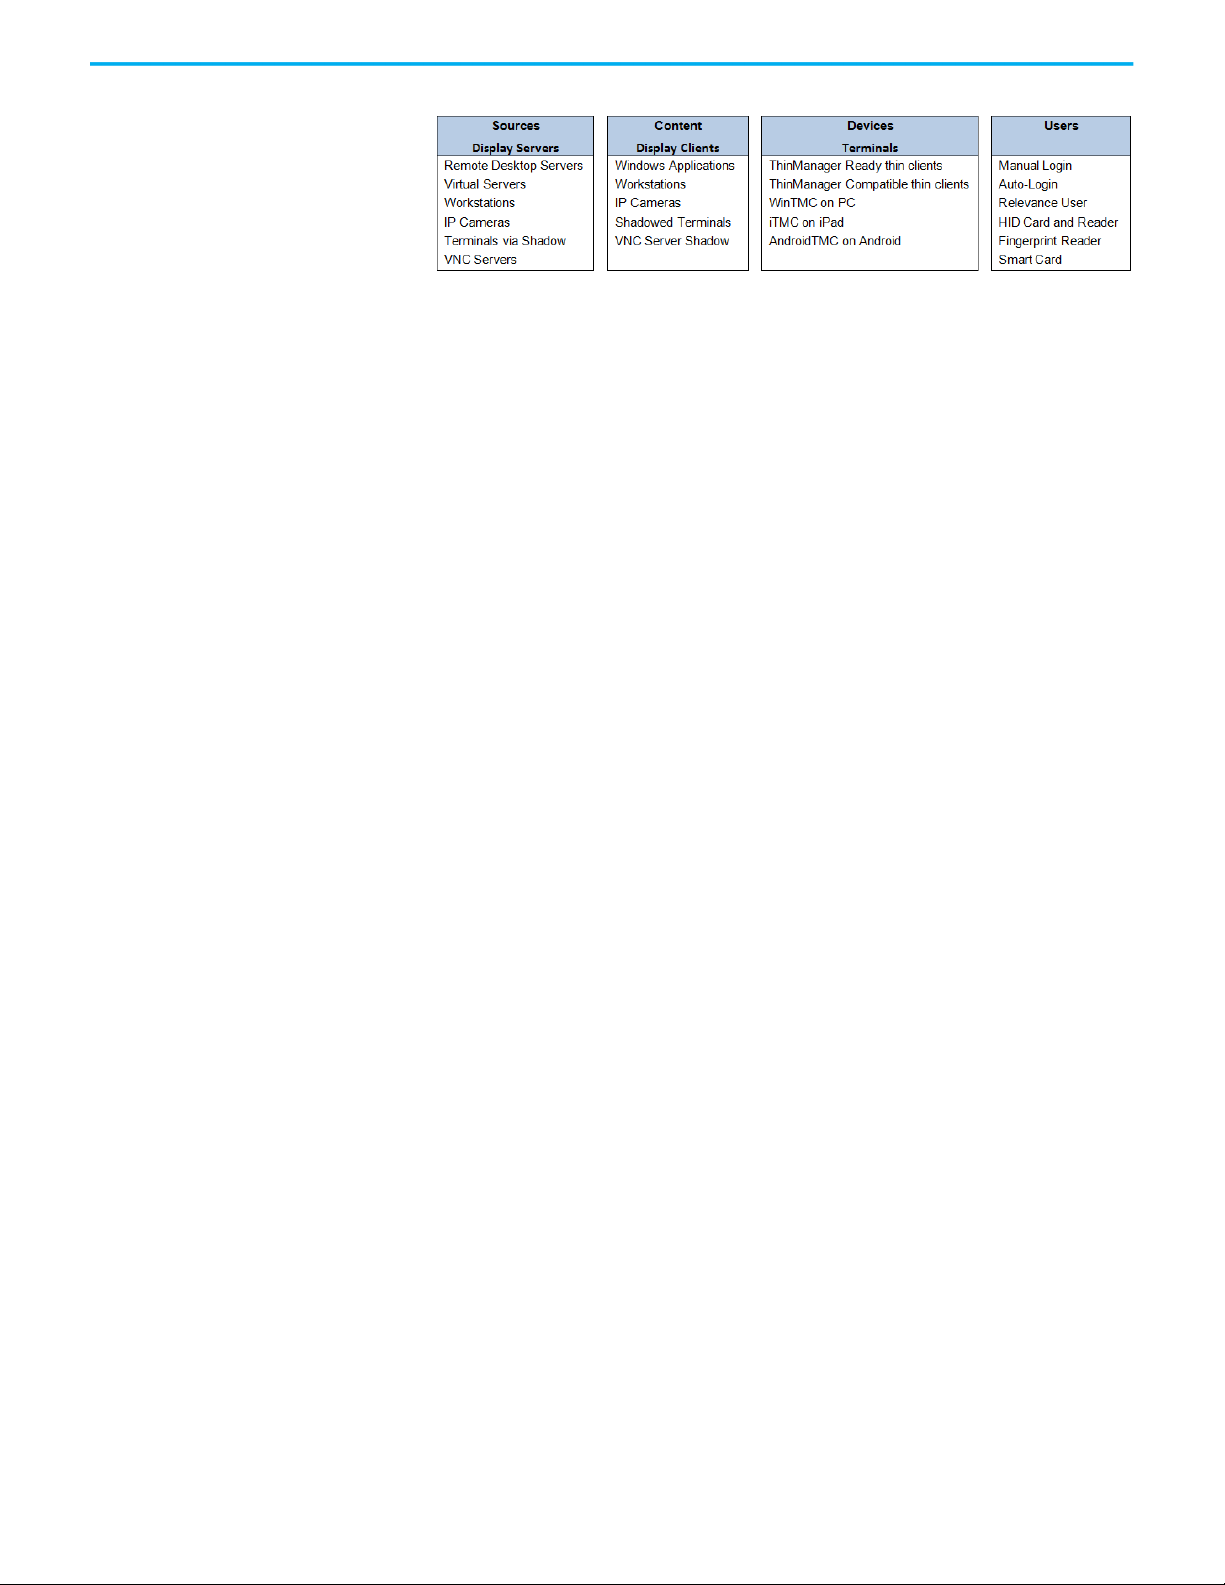
To manually restore an encrypted backup, follow these steps.
1. Choose Manage>Restore.
The Database Password dialog box appears and prompts for the backup
database password, not the original database password.
Figure 3 - Database Password
2. Type the Password and click OK.
Automatic Backup
ThinManager can be configured to backup the configuration automatically.
These automatic backups use the original password that was originally set
when ThinManager was set up.
The backups are now be saved in
C:\ProgramData\Rockwell Software\ThinManager
instead of C:\Program Files (x86)\Rockwell Software\ThinManager.
Configuration
Perform the following actions to configure ThinManager.
• Define the Remote Desktop Servers at Display Servers>
Remote Desktop Servers>Remote Desktop Server Wizard.
Rockwell Automation Publication TM-UM001D-EN-P - December 2020 15
Page 16

Chapter 1 Quick Setup Overview
• Define the Display Clients at Display Clients>
Remote Desktop Services>Display Client Wizard to deploy
the applications.
• Define the Terminals using the Terminal>
Terminal Configuration Wizard.
• Associate the hardware to the Terminal configuration.
Network
Thin clients and Remote Desktop Servers need a reliable network.
Verify that traffic is allowed on the following network ports in all software and
hardware firewalls.
• UDP/67 – IP Address Assignment – Used by the PXE Server (if using
PXE boot).
• UDP/69 – TFTP – Used by the PXE Server (if using PXE boot).
• TCP/1494 - Citrix - Used by the ICA protocol (if using ICA instead
of RDP).
• UDP/1758 – Used if the default Multicast is used. If the network MTU size
is not the default, then the packet size need to be changed on the
Multicast Configuration page of the ThinManager Server
Configuration Wizard.
• TCP/2031 - Configuration - Used to pass the configuration from the
ThinManager server to the ThinManager thin clients.
• TCP/2376: Containers: This port is needed to allow an encrypted channel
for the terminal to connect to a Container Host to display the
Container content.
• TCP/3268 – Used for LDAP queries targeted at the global catalog.
• TCP/3389 - RDP - Used by the RDP protocol (if using RDP in v2.4.1
or later).
• UDP/4011 – UEFI Boot – Used when the DHCP server is on the
ThinManager server or when using the UEFI BIOS to boot.
• UDP/4900 - TFTP - Used for the TFTP download of the firmware.
• TCP/5900 - Shadowing - Used to shadow Terminals. This can be changed
on the Shadow Configuration page of the ThinManager Server
Configuration Wizard.
• ICMP Echo Packets (Ping) – Used by WinTMC and Enforce Primary.
• DHCP - Configure as needed.
VLANs and Subnets
You should have only one PXE server per network. It is a good idea to have a
separate VLAN for each ThinManager Server pair that will be replying to
PXE requests.
Network Level Authentication (NLA)
ThinManager supports Network Level Authentication (NLA) with firmware
package 7.1.113 and later.
• If a terminal has a valid Windows account entered in its configuration
for an automatic login, then the client will pass that info through NLA to
16 Rockwell Automation Publication TM-UM001D-EN-P - December 2020
Page 17

Chapter 1 Quick Setup Overview
authenticate. The client will log in and start a session without the
operator noticing.
• If a terminal does not have a valid Windows account entered in its
configuration, then an NLA login screen will be displayed, requiring a
valid user account and password. This gets passed to the Remote
Desktop Server for the login. A Windows Security/Login window is
never displayed.
Note: NLA must be turned off on the Remote Desktop Servers if you want to use
a Smart Card for authentication.
Hardware
Results
Perform the following actions regarding hardware.
• Establish the IP addressing scheme for the ThinManager-managed
terminals. ThinManager-ready thin clients can use Static IP or DHCP.
ThinManager-compatible thin clients use PXE boot and, therefore,
require DHCP.
• If using Static addressing, open the IP Address menu on the thin client
and enter the IP address of the thin client and the
ThinManager Server.
• If using DHCP, configure Option 066 for the IP address of the
ThinManager Server, and Option 067 as acpboot.bin.
• If using PXE Boot, enable PXE boot by selecting Manage>PXE Server
to launch the PXE Server wizard.
• Attach the terminals to ThinManager by either:
- Turning on the terminal and selecting Create New Terminal when the
offline terminals are listed.
- Pre-creating the terminals in ThinManager and selecting the proper
terminal name when the terminal is turned on and offline terminals
are listed.
Step 1: The clients connect to the ThinManager Server and download the
firmware and configuration.
Step 2: The configuration sends the clients to the Remote Desktop Server
to log in and start a session, and delivers any additional content assigned
to the terminal’s configuration.
Rockwell Automation Publication TM-UM001D-EN-P - December 2020 17
Page 18

Chapter 1 Quick Setup Overview
Notes:
18 Rockwell Automation Publication TM-UM001D-EN-P - December 2020
Page 19

Chapter 2
Sources
Content
Users
Devices
Introduction
ThinManager is a content delivery system that delivers content from a source
to a device, where a user can view and interact with the content.
ThinManager is the management system. Relevance is an extension that
allows you to grant or deny access based on location or user permissions.
This manual covers the variations of content deployment using ThinManager
®
with Relevance
Figure 4 - Thin Manager Content Delivery by Device, User, or Location
.
®
ThinManager is the tool that allows you to define sources, deploy content,
configure devices, and allow user access. Each device connects to it to receive
its configuration and instructions.
Figure 5 - Typical Simple Deployment
ThinManager is a software program that is installed on a computer in your
system. The simplest use of ThinManager is to deploy a Windows application
from a Windows Remote Desktop Server to a ThinManager-ready device.
However, ThinManager provides many more options for deploying
applications.
Rockwell Automation Publication TM-UM001D-EN-P - December 2020 19
Page 20
Chapter 2 Introduction
Servers
Terminals
Users
PLCs
I/O
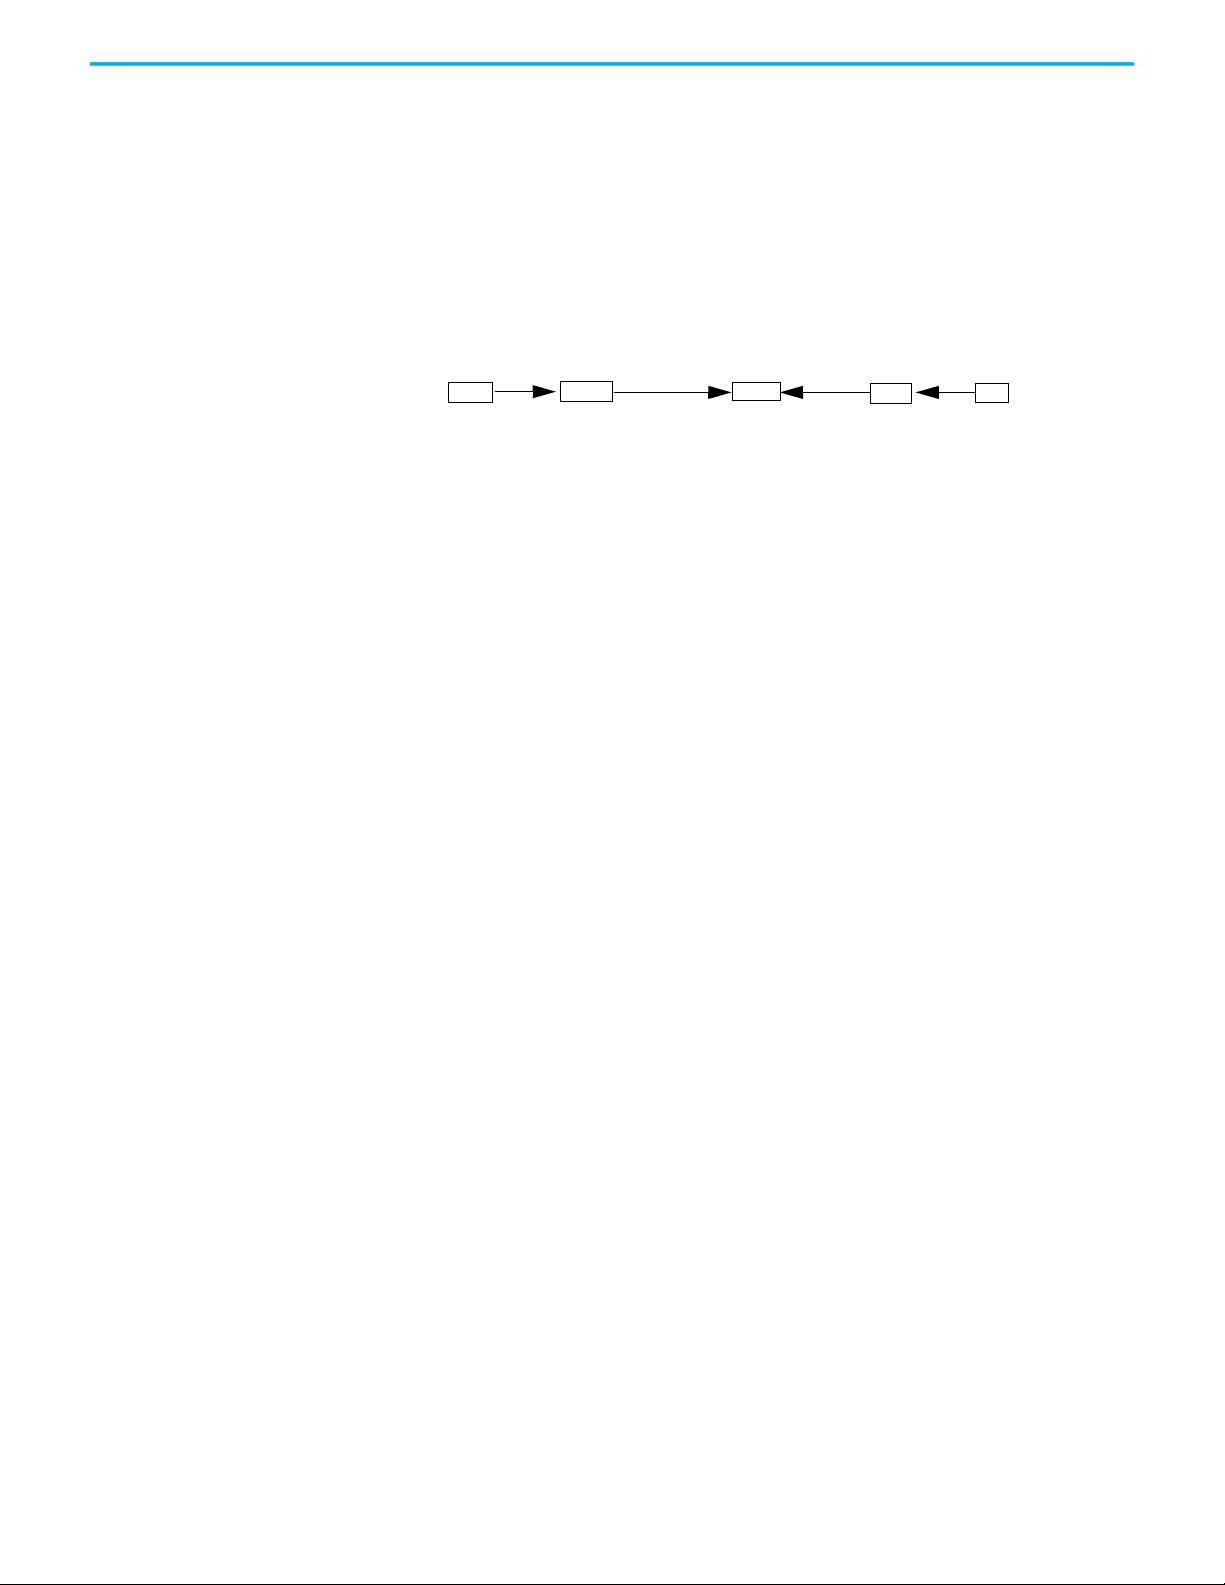
Figure 6 - Sources, Content, Devices, and User Options
These options allow a robust content delivery system.
Figure 7 - ThinManager Content Deployment
ThinManager centralizes content servers in a computer room and deploys the
content to the plant floor, office, or control room as needed.
Figure 8 - Standard Industrial Architecture
An industrial network pulls the I/O to the PLCs. The Remote Desktop Server
hosts the sessions that run the HMI and talk to the PLCs to gather and display
the data.
20 Rockwell Automation Publication TM-UM001D-EN-P - December 2020
Page 21
Chapter 2 Introduction
Source
Content
Device
Access
User
Source
Content
Devices
Locations
Users
Relevance User Access
ThinManager has an additional security system that controls deployment of
applications to users. This was formerly called TermSecure and is now
integrated into ThinManager with Relevance
Figure 9 - Access
as Access.
Relevance Location Services
The Relevance component builds on the ThinManager system by adding
location to the application delivery. This allows content to be sent to the right
person, at the right place, at the right time.
Figure 10 - Stylized Content Deployment
Figure 11 - Content Deployment in ThinManager Tree
ThinManager uses wizards to configure the ThinManager components.
You create Locations in Relevance and send content to the locations. These can
be assigned locations with a tethered terminal, or they can be unassigned
locations that have no terminal at the location and are accessed solely by
mobile devices.
Locations can be resolved manually or by using QR codes, Bluetooth beacons,
Wi-Fi networks, or GPS.
Rockwell Automation Publication TM-UM001D-EN-P - December 2020 21
Page 22

Chapter 2 Introduction
ThinManager Interface
This section leads you through the important features on the ThinManager
interface. Press F1 to find specific information while in the
ThinManager program.
Figure 12 - ThinManager Interface
The ThinManager Interface has several components.
Note Component Description
Application Button Launches the ThinManager Server Configuration wizard to configure global
1
2 Quick Access Toobar Click the pull-down arrow to customize this toolbar. Add icons of commonly
3 Menu Bar Separates the functions into categories.
4 Ribbon Bar Contains icons for the functions. Hide when unused via the Minimize the Ribbon
5 Detail Pane Tabs Allows you to choose details to display. The tabs and detail selections change
6 Tree Displays the components of ThinManager with the Outlook Bar Tab control so the
7 Detail Pane Displays the information for the selected tab for the highlighted tree component.
8 Tree Selector The selector buttons at the bottom of the tree control select which branch is
ThinManager settings.
used tasks from the menu bar, like Restart, Send Message, Modify, Backup, and
Shadow.
command on the Quick Access pull-down arrow menu.
depending on what is selected in the tree. Drag the tabs to change the order.
branches of the ThinManager tree are shown one at a time.
The Detail Pane can be torn away by dragging the tab away from ThinManager.
The Detail Pane can be re-docked by dragging the pane title bar back to the
tabs.
active and visible. These can be pulled upwards to stack the buttons, or pulled
down to minimize the buttons.
22 Rockwell Automation Publication TM-UM001D-EN-P - December 2020
Page 23

Chapter 2 Introduction
Tree Selector Buttons
Minimized Buttons at the Bottom
Buttons Stacked
Figure 13 - Tree Selector Buttons - Minimized Buttons at the Bottom/Buttons Stacked
Stacking the buttons provides quicker switching, but the minimized buttons
allows more room to show components in a larger system.
There is an arrow that allows customization tasks—like hiding branches or
reordering the branches of the tree.
Menus
The menus of ThinManager use the Microsoft Outlook ribbon but contain
similar functions as previous versions.
This is a brief description. Many of these functions will be explained in greater
detail in the sections of the manual that cover setup and configuration.
Figure 14 - Edit
Feature Description
Add ThinManager Server Allows connection to, and managment of, other ThinManager Servers from your local
Disconnect Breaks the connection to the remote ThinManager Server.
Remove Deletes the remote ThinManager Server from the local list. Does not affect the remote
Refresh Refreshes the data.
Modify Opens the configuration wizard for a highlighted tree component.
interface. Appropriate permissions on the remote computer are required for access.
Intended for a remote connection, not the partner in a synchronized pair.
ThinManager Server.
Rockwell Automation Publication TM-UM001D-EN-P - December 2020 23
Page 24

Chapter 2 Introduction
Feature Description
Add Launches a new configuration wizard for a highlighted tree component.
Add Group Launches a group configuration wizard for a highlighted tree component.
Copy Launches a dialog that allows you to create a copy of a highlighted item.
Delete Deletes a highlighted item.
Rename Renames a highlighted item.
Lock Locks a highlighted item.
Unlock Unlocks a locked item.
Find Use to search for names, descriptions, IP addresses, and other data in the tree.
Find Next Repeatedly search for a term.
Figure 15 - Manage
Feature Description
Packages Opens the Package Manager window.
Restore Opens a file browser to let you restore a previously saved ThinManager configuration.
Backup
Restore Biometric
Database
Backup Biometric
Database
Synchronize
PXE Server Launches the PXE Server configuration wizard.
ThinManager Server List Opens the ThinManager Server configuration wizard for automatic synchronization.
DNS Configuration
Configure Default Terminal
Web Management Allows web access management when it is implemented in the future.
Manage Accounts
Synchronize Passwords
Settings (Active Directory)
Manage Resolvers
Access Groups
Settings (Relevance)
Opens a file browser that lets you back up and save a ThinManager configuration for
emergency restoration. This backup can be automated using the Scheduler.
Opens a file browser to let you restore a previously saved Biometric database.
Opens a file browser to let you save your Biometric data.
Use to manually synchronize a pair of ThinManager Servers if you are not using the
recommended automatic synchronization.
Opens the DNS configuration wizard to allow ThinManager to resolve names using
your DNS.
Allows configuration of the default Terminal if you are using auto-creation
of Terminals.
Allows password management of Active Directory accounts. See Manage Accounts
Management on page 462 for details.
Allows synchronization of passwords between ThinManager and the Active Directory for
the chosen accounts. See Synchronize Password on page 467
Allows you to use Active Directory, set Password Settings, and select whether to use
Windows Security Groups or Active Directory Organizational Units for Relevance. See
Settings on page 468
Opens the Resolver Management window that lets you Add, Delete, and Edit resolvers
added through a mobile device. See Mobile Device Interactions with Relevance
page 507 for details.
Opens the Access Groups dialog box where you create access groups for Relevance User
Services. See Relevance Access Group Creation
Opens the Relevance Settings window that lets you define iBeacons and manage Bluetooth
filtering.
for details.
on page 404 for details.
for details.
on
24 Rockwell Automation Publication TM-UM001D-EN-P - December 2020
Page 25

Chapter 2 Introduction
Figure 16 - Install
Feature Description
Firmware Package Updates a firmware package, which consists of a firmware version and the modules for that
Firmware Updates the firmware without an update of modules.
Modules Updates a module without an update of the firmware.
Boot Loader Updates the boot loader used in PXE boot.
Chain Loader Updates the chain loader used in PXE boot.
Licenses Launches the Licensing window to add licenses to ThinManager.
License Mode Selects between the traditional ThinManager licensing or the Rockwell Automation FactoryTalk
TermCap Database The Terminal Capability Database has information on the abilities of every ThinManager-ready
Reports Adds a report and SQL query if you need a newly released one before it is added in a service
version.
activation.
thin client. A new version is released with every newly supported thin client. Service packs
update the TermCap but this allows you to update the TermCap if a new unit you have is not
listed.
pack.
Figure 17 - Tools
Feature Description
Restart Resends the configuration to a highlighted terminal.
Reboot Cycles power to a highlighted terminal and reloads the firmware and configuration.
Reboot Server
Power Off
Power On
Calibrate Touchscreen Initiates the calibrate touchscreen program on a highlighted terminal.
Send Message Sends a message to a highlighted terminal.
Enable Re-enables a disabled terminal, Remote Desktop Server, or location.
Disable
Clear Clears the event log for the highlighted Terminal or Remote Desktop Server.
Cycles power to a highlighted Remote Desktop Server. Although it will give you a warning
prompt, do not use unless you are serious about restarting a Remote Desktop Server. All
sessions end abruptly when the server is rebooted.
Powers off a highlighted virtual machine or thin client with a Wake-On-LAN
function enabled.
This will power on a highlighted virtual machine or a thin client with a Wake-On-LAN function
enabled.
Disables a highlighted terminal, Remote Desktop Server, or location.
A terminal stops showing the session but shows a ThinManager splash screen. The session
continues to run on the Remote Desktop Server.
A disabled Remote Desktop Server kicks off all the ThinManager thin clients from the Remote
Desktop Server, and forces them to a backup server. The Remote Desktop Server is still
functional and allows RDP connections from other sources. This is useful to force failover to a
backup so you can update your Remote Desktop Servers on the fly.
A location will stop showing the session when disabled.
Rockwell Automation Publication TM-UM001D-EN-P - December 2020 25
Page 26

Chapter 2 Introduction
Figure 18 - View
Feature Description
Status Bar Check to display the status bar at the bottom of the ThinManager interface.
Show Connected Only
Options
Application Use to choose the color scheme for ThinManager.
Tabs Use to choose the tab scheme for ThinManager.
Disable Tab Reordering
Disable Tab Tear-Off
Select Reports
Print Use to print a highlighted Report tab.
Hides any unpowered or unconnected thin clients. Although it can be useful, it is best left
checked as it can be confusing when the unpowered terminal is hidden.
Launches the Options window with the settings for license notifications, and allows new
terminals and users to initiate a Terminal Configuration Wizard or Relevance User
Configuration Wizard.
Check to lock the Detail Pane tabs in their current position. Normally, the tabs can
be rearranged.
Check to lock the Detail Pane tabs in their current position. Normally, the tabs can be dragged
free from the ThinManager console.
Opens the Select Reports window that lets you select the reports for the various components.
Select the Report tab for a highlighted component to see the actual report or use the Scheduler
to generate a report automatically.
Figure 19 - Remote View
Feature Description
Interactive Check to click into and control a shadow session. Clear this option for view-only mode.
Scaled to Window
Go Full Screen
Send Keys Sends the selected key sequence to a shadowed terminal.
Zoom In
Zoom Out
Connect Options
Shrinks the shadowed terminal to fit into the details pane. Clear this option to show it in the
correct resolution with scroll bars to give you a closer view.
Makes the shadowed terminal’s image full screen. Use CTL+ALT+Break to undo full screen. To
close ThinManager, use ALT+F4.
Use to click inside a shadow session and zoom in for detail. This option is dimmed until the
Interactive checkbox is cleared.
Use to click inside a shadow session and zoom out for an overview. This option is dimmed until
the Interactive checkbox is cleared.
Use to configure the RDP settings when you connect to a Remote Desktop Server console from
ThinManager.
26 Rockwell Automation Publication TM-UM001D-EN-P - December 2020
Page 27

Chapter 2 Introduction
Figure 20 - Help
Feature Description
About Shows the version and build number of ThinManager.
Help Launches the ThinManager Help.
Customizing the Toolbar
Select More Commands from the Customize Quick Access Toolbar pull-down
menu to launch the Customize window and add icons of frequently
used functions.
Figure 21 - Customize Quick Access Toolbar Menu
Rockwell Automation Publication TM-UM001D-EN-P - December 2020 27
Page 28

Chapter 2 Introduction
Figure 22 - Customize Window
Feature Description
Choose commands from Use to select commands from each group.
Commands
Show Quick Access Toolbar
below the Ribbon
Lists the available command options. Select one and click Add to move it to the
right-hand list to add it to the Quick Access bar. Adjust the order using the up and
down arrows.
Check to move the Quick Access bar.
Figure 23 - Quick Access Toolbar
The icons for the selected functions appear in the Quick Launch menu. Click
one to launch that function or wizard.
Icons
ThinManager tree icons show the status of components.
ThinManager Server
The ThinManager Server branch has two ThinManager icons.
28 Rockwell Automation Publication TM-UM001D-EN-P - December 2020
Page 29

Chapter 2 Introduction
Figure 24 - ThinManager Server Tree Icons
Icon Description
Green ThinManager ThinManager console is talking to the ThinServer.
Red ThinManager
ThinManager console is not talking to the ThinServer. Right-click on the icon and select
Reconnect from the menu.
Note: You should not add the second ThinManager Server of a synchronized pair in
the tree of your Primary ThinManager Server. The data is the same.
Adding a second ThinManager Server is intended to display a remote connection to a
different system.
Terminals
The Terminal branch of the ThinManager tree has several different icons.
Terminal Tree Icons
Icon Represents
Dual Monitor A Terminal Group
Lock A Terminal with an open configuration wizard
Exclamation Mark A Terminal with a configuration change that needs a restart
Globe A Terminal with an assigned Location, which is shown in parentheses
Green Monitor A Terminal that is booted and connected to the ThinManager Server
Yellow Monitor A Terminal that is going through the boot process
User
Red Monitor A Terminal that is either turned off or not able to communicate with the ThinManager Server
Red X A Terminal that was Disabled using the Tools>Disable command
Rockwell Automation Publication TM-UM001D-EN-P - December 2020 29
A Terminal that has a Relevance User logged in to the Terminal. The user name is shown in
parentheses.
Page 30

Chapter 2 Introduction
Display Servers
The Display Server tree has several different icons.
Figure 25 - Display Server Tree Icons
Icon Represents
Blue Server The Remote Desktop Server branch
Server with Folder A Remote Desktop Server Group
Server with Virtual Boxes A Virtual Server defined through the VCenter Server tool
Blue Camera The Camera branch
Camera with Folder A Camera Group
Gray Camera A Camera
Blue Eye The VNC Server branch
Cyan Eye with Folder A VNC Server Group
Cyan Eye A VNC Server
Figure 26 - Remote Desktop Server Icon Colors
30 Rockwell Automation Publication TM-UM001D-EN-P - December 2020
Page 31

Chapter 2 Introduction
The color stripe on a Remote Desktop Server icon indicates its connection
status.
Icon Represents
Server with Gray Stripe A Remote Desktop Server without an administrative account
Server with Green Stripe
Server with Red Stripe
A Remote Desktop Server with a connection to the ThinServer using an administrative
account
A Remote Desktop Server with an account but unable to make a connection to the
ThinServer
Note: A red stripe does not mean that a Terminal cannot connect to the Remote
Desktop Server. It only indicates the status of the ThinManager Server to Remote
Desktop Server communication.
Display Clients
The Display Client branch has several icons.
Figure 27 - Remote Desktop Services Display Client Branch Icons
Icon Represents
Dark Gray Server and
Blue Monitor
Blue Server and Blue
Monitor
Light Gray Server and
Blue Monitor
Gray Server A Remote Desktop Server assigned to a Display Client
The Display Client Tree Branch
The Remote Desktop Services Branch
A Remote Desktop Services Display Client
Rockwell Automation Publication TM-UM001D-EN-P - December 2020 31
Page 32

Chapter 2 Introduction
Figure 28 - Other Display Client Branch Icons
Icon Represents
Dark Gray Server and
Blue Monitor
Blue Server and Blue
Monitor
Blue Camera and Blue Monitor The Camera Branch
Gray Camera and Blue Monitor A Camera Display Client
Gray Camera inside a Blue Box A Camera Overlay assigned to a Display Client
Dark Blue Terminal and Blue Monitor The Terminal Shadow Branch
Light Blue Terminal and Blue Monitor The Terminal Shadow Display Client
Dark Blue Virtual Boxes and Blue Monitor The Terminal Shadow Branch
Medium Blue Virtual Boxes and Blue Monitor The Workstation Display Client
Dark Blue Eye and Blue Monitor The VNC Server Branch
Light Blue Eye and Blue Monitor The VNC Server Display Client
The Display Client Tree Branch
The Remote Desktop Services Branch
32 Rockwell Automation Publication TM-UM001D-EN-P - December 2020
Page 33

Figure 29 - Virtual Screen Display Client Branch Icons
Chapter 2 Introduction
Icon Represents
Dark Blue Monitor and Blue Monitor The Virtual Screen Branch
Blue Monitor and Blue Monitor The Virtual Screen Display Client
Blue Square within a Blue Monitor The Virtual Screen Overlay
A Light Gray Server and Blue Monitor A Display Client. Assigned to the Overlay
A Light Gray Server
A Remote Desktop Services Server assigned to the Display Client on the
Overlay
Lightning Bolts
Icons with lightning bolts indicate the connection status.
Figure 30 - Lightning Bolts
Icon Represents
Green Lightning Bolt Active connection that is visible in the foreground
Yellow Lightning Bolt
Red Lightning Bolt Defined connection that is not active.
Rockwell Automation Publication TM-UM001D-EN-P - December 2020 33
An active connection that is not displayed, usually running in the background.
An Instant Failover display client will show servers with a green and a yellow
to show the main and secondary session.
Page 34

Chapter 2 Introduction
Relevance Users
Figure 31 - Relevance Users Tree
Icon Represents
Light Blue Person The Relevance User Tree Branch
Two People A Relevance User Group
Red Person A Relevance User
Red Person with Blue Monitor
A Relevance User that is logged in to a Terminal or Location. The Terminal is displayed
in parentheses.
Locations
The Globe icon represents the Locations Tree Branch, Locations, Parent
Locations, and Sub-Locations.
Figure 32 - Locations Tree
34 Rockwell Automation Publication TM-UM001D-EN-P - December 2020
Page 35

VCenter Servers
Figure 33 - VCenter Servers
Icon Represents
Green and Yellow Squares Either the VCenter Tree Branch or a VCenter Server
Gray Building A VCenter Server Datacenter
Blue Virtual Squares A Virtual Machine, both server and workstation
Chapter 2 Introduction
Rockwell Automation Publication TM-UM001D-EN-P - December 2020 35
Page 36

Chapter 2 Introduction
Notes:
36 Rockwell Automation Publication TM-UM001D-EN-P - December 2020
Page 37

Chapter 3
Licenses
ThinManager has two license modes, ThinManager Master License and
FactoryTalk Activations.
To choose the licensing mode, follow these steps.
3. Choose Install>License Mode from the ThinManager menu.
The License Mode dialog box appears.
Figure 34 - License Mode
ThinManager Master License
a.To choose ThinManager Master License Mode, click ThinManager
Master License.
b.To choose FactoryTalk Activations License Mode, click
FactoryTalk Activations.
4. Click OK.
ThinManager Master License is the traditional ThinManager license, which is
comprised of three components.
Component Description
Product License
Master License
Activated License File
Provides permission for terminals to connect, and controls which features and functions
the terminals have. Purchase from a ThinManager distributor.
A container for the Product Licenses, which is created by the user on the ThinManager
License site and has the Product Licenses added to it. Activated with the Installation ID
from the Licensing dialog box of the ThinManager application.
A file generated from the Master License and Installation ID on the ThinManager License
site. Download and apply to ThinManager.
Product Licenses are connection licenses purchased from ThinManager
distributors. Standard license packs are available as 5-, 10-, or 25-pack
Rockwell Automation Publication TM-UM001D-EN-P - December 2020 37
Page 38

Chapter 3 Licenses
quantities. Also, there is an Enterprise Server license with
unlimited connections.
Greater detail on ThinManager licensing is found in the ThinManager Knowledge
Base at https://kb.thinmanager.com/index.php/License_Activation
.
ThinManager Redundancy
Standard product licenses are available with redundancy. Enterprise server
licenses include full redundancy.
Redundancy Type Description
Full Redundancy
Mirrored Redundancy
Stand-Alone ThinManager
Licenses a synchronized pair of ThinManager servers so that one ThinManager server is
available if the other is offline. Both synchronized ThinManager servers have the
administrative console available.
Licenses a synchronized pair of ThinManager servers so that one is available if the other
is offline, but this option only activates the administrative console on one ThinManager
server—the one designated as the primary ThinManager server. The other ThinManager
server is designated as the secondary ThinManager server. From the secondary server,
terminals can boot, but the ThinManager console
is view-only.
Licenses one stand-alone ThinManager. If the stand-alone ThinManager goes offline, the
terminals continue to run. However, if a terminal reboots, it waits until the ThinManager
server is online before it can rejoin the system.
Auto-synchronization for Redundancy
To have a Redundant ThinManager system, configure Auto-synchronization
as described in the following steps.
1. From the menu bar on your Primary ThinManager Server, choose
Manage>ThinManager Server List.
The ThinManager Server List Wizard Introduction page appears.
2. Click Next.
The Auto-synchronization Selection page appears.
38 Rockwell Automation Publication TM-UM001D-EN-P - December 2020
Page 39

Figure 35 - Auto-synchronization Select Page
Chapter 3 Licenses
3. Check Automatic Synchronization and click Next.
The Auto-synchronization Configuration page appears.
Figure 36 - Auto-synchronization Configuration Page
4. Click Edit in the Primary ThinManager Server section.
The Enter the Primary ThinManager Server Information dialog
box appears.
Rockwell Automation Publication TM-UM001D-EN-P - December 2020 39
Page 40

Chapter 3 Licenses
Figure 37 - Enter the ThinManager Server Information
a.Enter the name of your Primary ThinManager Server in the
ThinManager Server field.
b.Click Discover to automatically populate the IP address in the
ThinManager Server IP field. However, this field can be
completed manually.
Do not click Discover to complete the ThinManager Server IP field manually.
c. Click OK.
5. Repeat step 4 for the Secondary ThinManager Server.
Figure 38 - Auto-synchronization Configuration Page
6. On the Auto-synchronization Configuration page, click Finish to
begin auto-synchronization.
IMPORTANT
With a Mirrored Redundancy License, it is important to select the Primary
and Secondary ThinManager Servers carefully because only the Primary
ThinManager Server has an administrative console. The Secondary
ThinManager Server administrative console is view-only.
7. Highlight the ThinManager Server.
40 Rockwell Automation Publication TM-UM001D-EN-P - December 2020
Page 41

Chapter 3 Licenses
Figure 39 - Synchronization Tab
a.On the Synchronization tab, verify that the server’s Synchronization
State indicates ‘Synchronized’.
Manual Synchronization for Redundancy
Follow these steps to use manual synchronization with a redundant
ThinManager system.
1. On your Primary ThinManager Server, in the ThinManager Server tree,
highlight the green ThinManager icon.
2. From the menu bar, choose Manage>ThinManager Server List.
The ThinManager Server List Wizard Introduction page appears.
3. Click Next.
The Auto-synchronization Selection page appears.
Rockwell Automation Publication TM-UM001D-EN-P - December 2020 41
Page 42

Chapter 3 Licenses
Figure 40 - Clear Automatic Synchronization Checkbox
4. For manual synchronization, clear the Automatic
Synchronization checkbox.
With mirrored licenses, you must use Automatic Synchronization.
5. Click Next.
The ThinManager Server List page appears with your network
ThinManager Servers displayed.
Figure 41 - ThinManager Server List Page
6. (Optional) Highlight a server and use the up and down arrows to change
the order of the servers in the list.
42 Rockwell Automation Publication TM-UM001D-EN-P - December 2020
Page 43
Chapter 3 Licenses
7. (Optional) Highlight a server and click Remove Server to eliminate it
from the ThinManager server list.
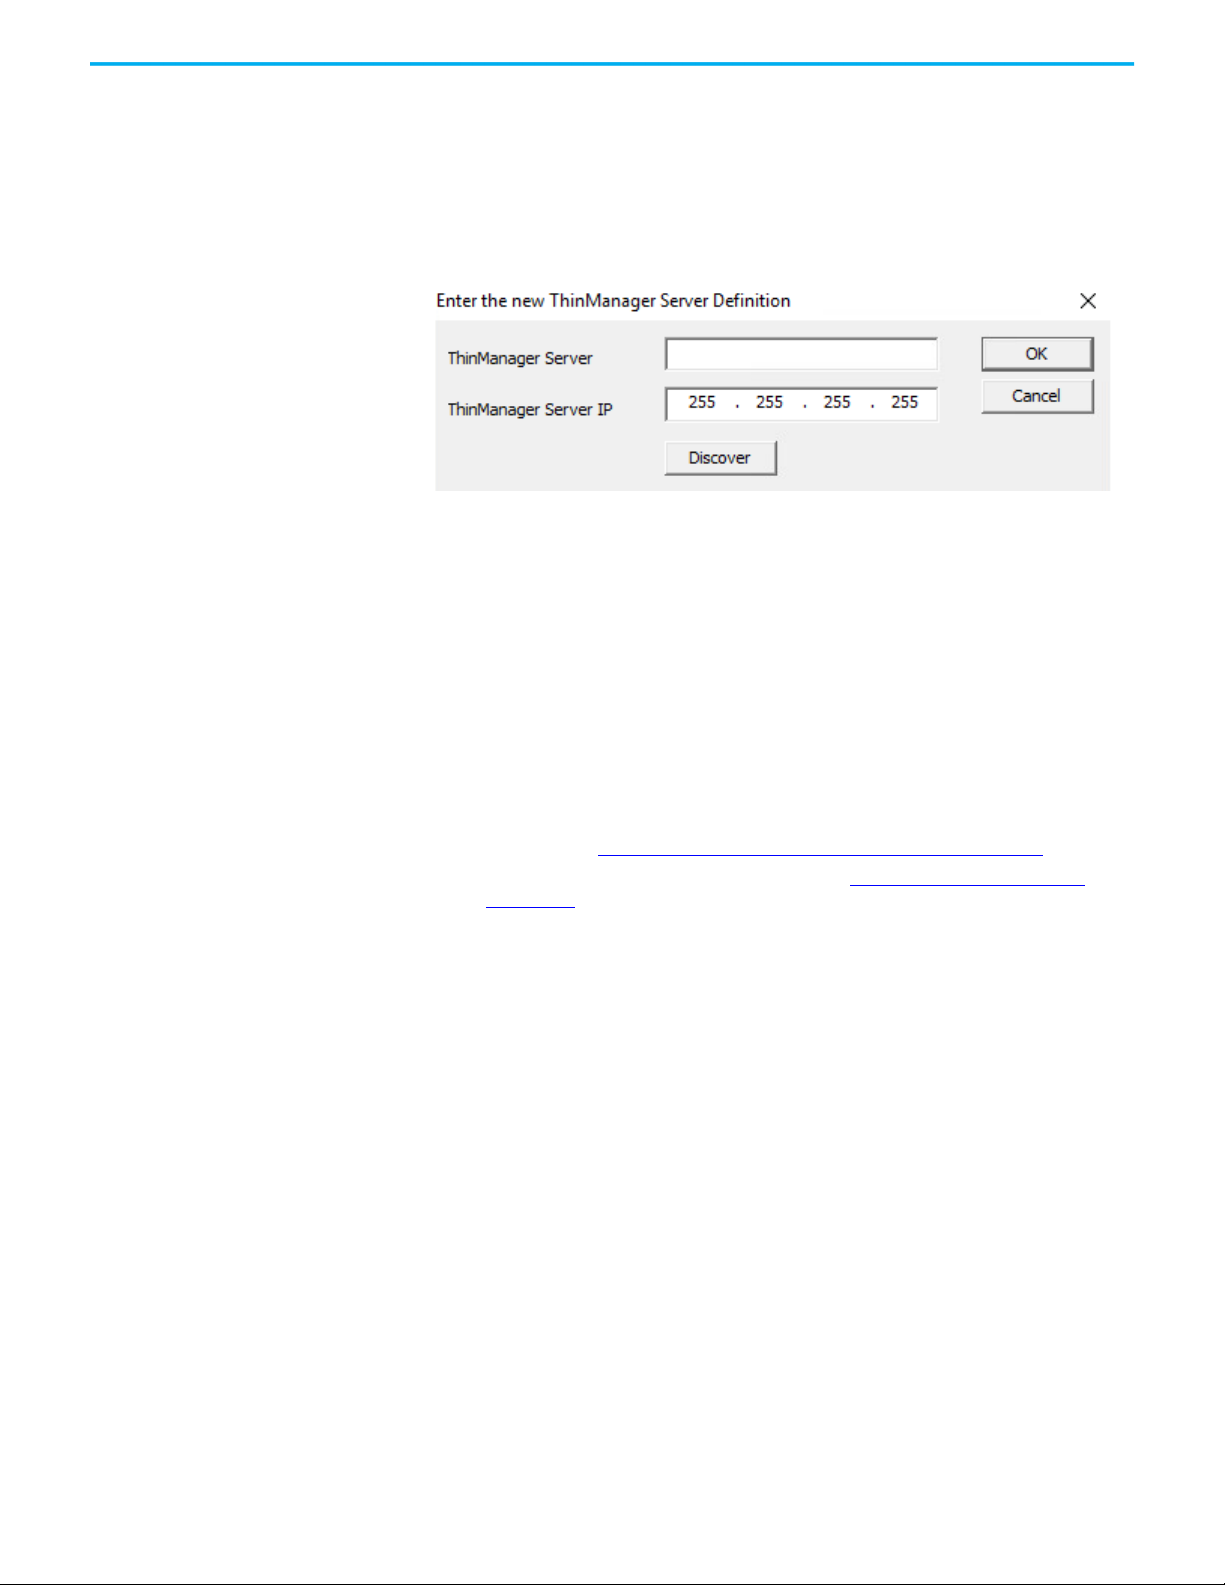
8. (Optional) Click Add Server to add a server to the list.
A dialog box appears, in which you can define a new
ThinManager server.
Figure 42 - ThinManager Server Definition Dialog
a.Enter a ThinManager Server name.
b.Click Discover to automatically populate the ThinManager Server
IP field. Also, this field can be completed manually.
c. Click OK.
9. Click Finish to complete your changes.
ThinManager License Process
Follow these steps to license ThinManager.
1. Purchase a Product License from a ThinManager distributor.
2. If you have a redundant product license, synchronize two ThinManager
Servers. See Auto-synchronization for Redundancy on page 38
3. Go to the ThinManager Licensing site at https://thinmanager.com/
licensing/.
4. Log in to the site or register as a new user, and log in with the new user
account.
5. Click the Create Master License link on the License Site menu bar.
6. Enter a description and complete the other fields.
7. Click Create.
The License site displays the Master License.
.
Rockwell Automation Publication TM-UM001D-EN-P - December 2020 43
Page 44

Chapter 3 Licenses
Figure 43 - Master License
8. Click Add Product License and enter the Product License.
9. Once the Product License is added, click Activation.
The Licensing dialog box appears.
Figure 44 - Stand-alone ThinManager Installation ID
10.Enter the Installation IDs, which are found in the Licensing dialog box
when y0u choose Install>Licenses.
A stand-alone ThinManager has a single Installation ID at the bottom of
the Licensing dialog box.
A synchronized ThinManager system displays both the Primary and
Secondary Installation IDs at the bottom of Licensing dialog box.
44 Rockwell Automation Publication TM-UM001D-EN-P - December 2020
Page 45

Chapter 3 Licenses
Figure 45 - Primary and Secondary Installation IDs
11. Once the Installation IDs are added, scroll down and click Create at the
bottom of the Master License form.
12.Click the Download License link and save the license file.
13. Move the license file to the ThinManager Server but not into the
ThinManager folder.
14.Choose Install>Licenses in the ThinManager menu to open the
Licensing dialog box.
Figure 46 - Install License
15.Click Install License.
Rockwell Automation Publication TM-UM001D-EN-P - December 2020 45
Page 46

Chapter 3 Licenses
Figure 47 - File Browser
16.Browse to the License file and click Open.
Figure 48 - Install Master License
A properly installed license is indicated.
17.Click OK.
Figure 49 - Installed License
A successfully installed license is shown in the Master License Number
field, the Product Licenses are listed in the center section, and the
Installation ID shows in the bottom field.
18.Click Done.
46 Rockwell Automation Publication TM-UM001D-EN-P - December 2020
Page 47

Chapter 3 Licenses
FactoryTalk Activations
The other license mode—besides ThinManager Master License—is
FactoryTalk Activations.
Follow these steps to enter FactoryTalk Activations mode.
1. From the ThinManager menu, choose Install>License Mode to open the
License Mode dialog box.
Figure 50 - License Mode
2. Click FactoryTalk Activations and OK.
FactoryTalk Activation Files
FactoryTalk Activation binds Rockwell Automation software product licenses
to specific devices. Without activation, some Rockwell Automation products
do not run, run with less than full functionality, or they run for a limited time
and shut down. Therefore, before you can proceed with FactoryTalk
Activations in ThinManager, you must create activation files via the
FactoryTalk Activation Manager.
Figure 51 - FactoryTalk Activation Manager Home
Rockwell Automation Publication TM-UM001D-EN-P - December 2020 47
Page 48

Chapter 3 Licenses
When FactoryTalk Activation Manager is started, it detects whether an
Internet connection exists. Available options for obtaining new
activations differ depending on your Internet connectivity status. In
FactoryTalk Activation Manager, click Help to find instructions on
activation options.
3. Return to ThinManager and choose Install>Licenses to open the
FactoryTalk Activations dialog box.
Figure 52 - FactoryTalk Activations
4. Click Add Activations.
The Add Activations to ThinManager dialog box appears, searches for
and displays FactoryTalk activations.
Figure 53 - Add Activations to ThinManager
5. Highlight the license to use with ThinManager, and, when enabled, in
the Enter the number of activations to add to ThinManager field, specify
how many licenses to add.
6. Click OK.
The FactoryTalk Activations dialog box appears and shows the
FactoryTalk licenses transferred.
48 Rockwell Automation Publication TM-UM001D-EN-P - December 2020
Page 49

Figure 54 - FactoryTalk Activations
7. Click OK.
Chapter 3 Licenses
Rockwell Automation Publication TM-UM001D-EN-P - December 2020 49
Page 50

Chapter 3 Licenses
Notes:
50 Rockwell Automation Publication TM-UM001D-EN-P - December 2020
Page 51

Chapter 4
ThinManager System Users
There are three types of ThinManager system users: Windows™ Users,
ThinManager Security Group Users, and Relevance Users. The Windows Users
may be local or domain accounts.
Windows Users
ThinManager Security Group Users
Windows Users are the Microsoft™ accounts created in Windows that allow
access to the Windows Remote Desktop Servers. These are configured within,
and authenticated by, Windows. They can be given varying levels of access and
power using Windows User Groups and Group Policies.
All users and terminals need a Windows account to log in to a Remote Desktop
Server. These accounts need to be members of the Remote Desktop
User Group.
As a Microsoft best practice, each Terminal or Location needs a unique Windows
account .
ThinManager 8 introduced Active Directory integration to the ThinManager
system, which is covered in Active Directory User Login Account on page 301
ThinManager Security Group Users are Windows User Group members who
were configured, in the ThinManager Server Configuration Wizard, to have
varying levels of access and control within the ThinManager program. This
pertains to access to the administrative console of ThinManager, not access to
a Windows application.
ThinManager Security Groups are configured on the ThinManager Security
Groups page of the ThinManager Server Configuration wizard. See
ThinManager Server Configuration Wizard on page 369
.
.
Relevance Users
Relevance Users can go to a ThinManager-ready thin client and receive access
to specific display clients based on their membership in an Access Group.
ThinManager performs authentication a level above the Windows login.
Formerly called TermSecure, this feature is currently integrated into the
Relevance suite of functions.
Relevance User Services give additional powers to grant or deny access to
Windows applications but still rely on a Windows user account to log in to a
Remote Desktop Server.
Rockwell Automation Publication TM-UM001D-EN-P - December 2020 51
Page 52

Chapter 4 ThinManager System Users
The following are various strategies for Relevance Users.
• For a Terminal-specific Application, a user does not need a Windows
account; but permission from an Access Group is required to open a
hidden application.
• If a user is accessing their own User-specific Applications, they need a
Windows account associated with them so they can log in and start these
sessions. The Relevance User can be created:
• From an Active Directory account
• To match the name of a Windows account, and use that Windows
account without using Active Directory
• With one name and be associated to a Windows account of a different,
aliased name
See Active Directory User Login Account on page 301
for details.
52 Rockwell Automation Publication TM-UM001D-EN-P - December 2020
Page 53

Chapter 5
Sources
There are three possible ThinManager sources: Remote Desktop Servers, IP
Cameras, and VNC Server.
Remote Desktop Servers
Microsoft servers with Remote Desktop Services, formerly known as Terminal
Services, provide the foundation of thin client computing, which consolidates
management of the Windows environment to mainframe architecture. In this
document, Remote Desktop Server refers to the computer and operating
system, while Remote Desktop Services refers to the connection using the
Remote Desktop Protocol.
To configure Remote Desktop Servers as sources:
• First, you need to build and configure the server using standard
Microsoft practices.
• Second, you need to define the server as a Display Server
in ThinManager.
Microsoft Configuration
Refer to Microsoft for instructions on the use and configuration of
a Microsoft server.
Here are a few common tips.
• Build a Remote Desktop Server with Microsoft 2008, 2008R2, 20012, 2016 or 2019 Server operating system.
Enable Terminal Services in 2008 Server or Remote Desktop Services in 2008R2, 2012, and 2016 Server.
The 2012 and 2016 Servers usually require a domain.
• Create a Microsoft Licensing Server and add a Remote Desktop Services Client Access License
(RDS CAL) for each thin client. These are called Terminal Services Client Access Licenses (TS CALs) in Server
2008 and earlier. This does not need to be a separate physical server but can be a role added to an existing
server. The servers also require a normal CAL.
• Create a unique Microsoft user profile for each Terminal on the Remote Desktop Server. Make sure that the
user is a member of the Remote Desktop Users Windows group.
• Apply appropriate security to each user profile using the standard Microsoft techniques.
• Install all applications in the Install Mode. This can be done by typing change user /install in
a command window or by using the Install Application on Remote Desktop Server in the Control Panel.
Rockwell Automation Publication TM-UM001D-EN-P - December 2020 53
Page 54

Chapter 5 Sources
Make sure that the following network ports are unblocked, including in the
Windows firewall.
Port Protocol Description
UDP/67 DHCP – IP Address Assignment
UDP/69 TFTP
TCP/1494 Citrix ICA Used by the ICA protocol (if using ICA instead of RDP)
TCP/2031 Propriety – Configuration
TCP/3268 LDAP
TCP/3389 RDP Used by the Microsoft RDP protocol
UDP/4900 TFTP Used for the TFTP download of the firmware
TCP/5900 Propriety – Shadow
ICMP Echo Packets
(Ping)
ICMP Used by WinTMC and Enforce Primary
Used by the PXE Server (if using PXE boot)
Used to pass the configuration from the ThinManager Server to
the thin client
Used for LDAP queries targeted at the global catalog with Active
Directory
Used to shadow Terminals. This can be changed on the Shadow
Configuration page of the ThinManager Server Configuration
Wizard.
Defining Remote Desktop Servers in ThinManager
Once the Remote Desktop Servers are built, you must define them as Display
Servers in ThinManager.
Display Servers Branch of the ThinManager Tree
Perform the following to define Remote Desktop Servers as Display Servers.
1. Right-click RDS Servers in the Display Servers branch of the
ThinManager tree.
54 Rockwell Automation Publication TM-UM001D-EN-P - December 2020
Page 55

Chapter 5 Sources
2. Choose Add Remote Desktop Server to launch the Remote Desktop
Server Wizard Introduction page, which provides instruction about
DNS servers.
IMPORTANT
If you are using a DNS server, click Cancel to close the Remote Desktop
Server Wizard. Click Manage>DNS Configuration. The Domain Name
Server Wizard appears where you define a DNS server.
3. Click Next.
Figure 55 - Introduction - Remote Desktop Server Wizard
Non-Domain Remote Desktop Server
The Remote Desktop Server Name page allows you to define the Remote
Desktop Server.
Rockwell Automation Publication TM-UM001D-EN-P - December 2020 55
Page 56

Chapter 5 Sources
Figure 56 - Remote Desktop Server Name Page – Non-Domain
To define the Remote Desktop Server, perform the following steps.
1. Enter the Remote Desktop Server Name.
2. Click Discover to validate the server name and auto-populate the
IP address.
3. Complete the Log In Information fields to add an administrative
account on the Remote Desktop Server.
This step is required for SmartSession load balancing and server
management from ThinManager as the Microsoft server only provides
information to an administrator. The ThinServer connects to the
Remote Desktop Server to retrieve CPU, Memory, and Session status for
load balancing.
4. Click Change Group to add the Remote Desktop Server into a Remote
Desktop Server Group.
5. Run the Remote Desktop Server Wizard for each Remote Desktop Server
you want to add to the system.
Domain Member Remote Desktop Server
On the Remote Desktop Server Name page, the Search function allows you to
search for a domain user account for the administrative login.
56 Rockwell Automation Publication TM-UM001D-EN-P - December 2020
Page 57

Figure 57 - Remote Desktop Server Name Page - Domain
Chapter 5 Sources
Perform the following to search for a administrative account.
1. Click Search.
The Search for AD User dialog box appears, which allows you to select an
Active Directory user.
This adds an administrative account to the Log In Information fields of
the Remote Desktop Server Name page.
Figure 58 - Search for AD User
Rockwell Automation Publication TM-UM001D-EN-P - December 2020 57
Page 58

Chapter 5 Sources
Feature Description
Locations Click and the Select AD Location to Search dialog box appears, where you choose which Organizational
Unit (OU) to search
Recurse Check this option to set the Search function to look in nested Windows Security Groups. To enable this
function, set Choose AD Synchronization Mode to Security Group on the Active Directory System Settings
dialog box to work. To open the Active Directory System Setting dialog box, click
Manage>Active Directory>Settings.
Search Searches the selected OU and populates the Name field with the OU members
Filter Filters the results with either the Contains or Starts with function and the entry of the text box
2. Click Locations.
The Select AD Location to Search dialog box appears.
Figure 59 - Select AD Location to Search
3. Choose the branch of the Active Directory tree that contains the
administrative user account.
4. Click OK.
The location appears in the Search for AD User dialog box with the list of
domain users from that branch.
Figure 60 - Search for AD User
5. Choose the desired user and click OK.
58 Rockwell Automation Publication TM-UM001D-EN-P - December 2020
Page 59

The domain user is populated to the User Name field of the Remote
Desktop Server Name page.
Figure 61 - Remote Desktop Server Wizard - Log In Information
Chapter 5 Sources
6. Complete the Password field.
7. Click Verify to check whether the password is valid.
If correct, the Account Verify dialog box indicates that the password
is valid.
Figure 62 - Account Verify Dialog
8. Click OK to return to the Remote Desktop Server Name page.
9. Click Next to continue in the wizard.
The Terminal Server Capabilities page appears.
Rockwell Automation Publication TM-UM001D-EN-P - December 2020 59
Page 60

Chapter 5 Sources
Figure 63 - Terminal Server Capabilities - Terminal Server Options
10.To use the Remote Desktop Server with SmartSession, check Available
for Display Clients using SmartSession and click Next.
The Data Gathering page appears.
Figure 64 - Data Gathering
11. On the Data Gathering page, set the speed and frequency with which
ThinManager polls Remote Desktop Servers. This covers both
SmartSession and the data on the Users, Sessions, and Processes tabs of
60 Rockwell Automation Publication TM-UM001D-EN-P - December 2020
Page 61

Chapter 5 Sources
the server. Fast is the default Data Gathering Interval, but the interval
can be changed for less frequent polling or to a custom value.
Figure 65 - SmartSession Configuration
If Available for Display Clients using SmartSession was checked to load
balance on the Remote Desktop Server Capabilities page, then the
wizard shows the SmartSession Configuration page.
Values are not prevented from exceeding the maximum or minimum. The values
represent the levels that ‘No Utilization’ or ‘Full Utilization’ is reached.
See SmartSession on page 132
.
12.Click Finish to accept the changes and close the wizard.
13. Repeat this process for each Remote Desktop Server in use.
Citrix Servers
Support for Citrix ICA was deprecated starting with ThinManager Server 9.0.
By default, the ability to configure a Remote Desktop Services Display Client to
use Citrix ICA was removed. This was deprecated because ICA is a proprietary
protocol that prevents it from being fully supported by all of the latest features
of ThinManager such as mobile clients, Tiling, Virtual Screens, and so on. With
that said, it is still possible to enable ICA in ThinManager.
Rockwell Automation Publication TM-UM001D-EN-P - December 2020 61
Page 62

Chapter 5 Sources
To allow ICA configuration for ThinManager 9.0 and newer, follow these steps.
1. Open the registry editor and navigate to the option for your deployment.
32-bit Windows, or 64-bit ThinManager on 64-bit Windows:
• HKEY_LOCAL_MACHINE\SOFTWARE\Automation Control
Products\ThinManager
32-bit ThinManager on 64-bit Windows:
• HKEY_LOCAL_MACHINE\SOFTWARE\Wow6432Node\Automation
Control Products\ThinManager
2. Add a new DWORD value named SupportICA with a value of 1
3. Restart the ThinServer service.
4. For redundant systems, make this change on both servers.
This is a one-time change that does not need to be made again; for example,
after an upgrade.
ThinManager only supports the Citrix PNAgent, not StoreBrowse. Therefore, Citrix 7.x
and newer installations must enable PNAgent since it is no longer enabled
by default.
Automatically Find Remote Desktop Servers
ThinManager has a search function that finds Remote Desktop Servers on the
network to speed your configuration.
Figure 66 - Remote Desktop Server Branch - Display Servers Tree
To find Remote Desktop Servers on the network, follow these steps.
1. Go to the Remote Desktop Server branch of the Display Server tree.
2. In the Display Server tree, right-click RDS Servers and choose Edit
Remote Desktop Server List.
The Remote Desktop Server List Wizard appears.
62 Rockwell Automation Publication TM-UM001D-EN-P - December 2020
Page 63

Figure 67 - Remote Desktop Server List Wizard
3. Click Find Servers.
The Available Remote Desktop Servers dialog appears.
Figure 68 - Available Remote Desktop Servers
Chapter 5 Sources
The Available Remote Desktop Servers list shows all Remote Desktop Servers
that ThinManager can communicate with in a workgroup.
4. Choose the Remote Desktop Server to add and click OK.
The Remote Desktop Server Wizard appears, displaying the name and IP
address.
5. Use the WorkGroup to search field to expand the search. Enter the
workgroup and click Find to search again.
Remote Desktop Server Graph
The Remote Desktop Server Graph allows you to see the performance levels of
the server.
Rockwell Automation Publication TM-UM001D-EN-P - December 2020 63
Page 64

Chapter 5 Sources
Figure 69 - Remote Desktop Server Performance Graph
To view the performance levels of a Remote Desktop Server, highlight a
Remote Desktop Server in the RDS Servers branch of the Display Servers tree
and click the Graph tab.
CPU Usage, Memory Usage, and Total Sessions are the values that
ThinManager uses to calculate the SmartSession resource load.
This graph is only displayed for Remote Desktop Servers that have a valid
administrative account on the Remote Desktop Server Name page, have
Available for Display Clients using SmartSession checked, and have an active
connection (green-light status) to the ThinManager Server.
Remote Desktop Server Status
Remote Desktop Server Status shows the connection status between
ThinManager and the servers.
64 Rockwell Automation Publication TM-UM001D-EN-P - December 2020
Page 65

Figure 70 - Remote Desktop Server Status
Chapter 5 Sources
To show the connection status between ThinManager and the servers,
highlight the RDS Servers branch of the Display Servers tree and click the
Status tab.
Ideally, the Remote Desktop Servers are configured properly so that
ThinManager communicates with them and is able to pull load status into
ThinManager for use in management and SmartSession load balancing.
Figure 71 - Remote Desktop Server Status Lights
Status Color Meaning
Green
ThinServer can talk to the Remote Desktop Server and pull data
using the administrative account you are using. “OK” is displayed
as the Value on the Status tab.
Red
The server is offline or the administrative account failed to connect
to the server.
Gray
The administrative account was left blank, and the ThinManager
Server is not trying to communicate with the server. “No login
information supplied” is the Value displayed on the Status tab.
A Red or Gray status does not mean that the Terminals cannot log in and run on
the servers. These colors only indicate the ability of ThinManager to access the
resources on the server.
Rockwell Automation Publication TM-UM001D-EN-P - December 2020 65
Page 66

Chapter 5 Sources
Solutions to Failed or No Connection
• For a gray status, reopen the Remote Desktop Server Wizard and enter
an administrative account in the Log In Information fields on the
Remote Desktop Server Name page.
• For a red status with a Value of “User specified does not have permission
to connect,” re-open the Remote Desktop Server Wizard and correct the
administrative account in the Log In Information fields on the Remote
Desktop Server Name page.
• For a red status with a Value of “The RPC Server is unavailable” or
“WTSAPI32.dll failed,” then the Remote Desktop Server is offline or
missing the Terminal Services/Remote Desktop Protocol role.
Local Administrative Login for ThinServer
Sometimes, large domains have issues where the connection times out before
the domain controller validates the user name. To correct this issue, create a
local administrative user account on each server, then have the ThinServer log
in with this account. This speeds up data retrieval.
Figure 72 - Services in Windows 2016
To change the ThinServer service login in Microsoft Services on your
ThinManager Server, follow these steps.
1. To access the Windows Services dialog box, choose Control
Panel>System and Security>Administrative Tools>Services, or choose
Server Manager>Tools>Services.
2. Double-click on the ThinServer service. The ThinServer Properties dialog
box appears.
66 Rockwell Automation Publication TM-UM001D-EN-P - December 2020
Page 67

Figure 73 - ThinServer Properties
Chapter 5 Sources
3. Click the Log On tab.
4. To change the log in account from the Local System account, click This
account and specify the local administrative account. Make sure it is a
member of the Administrative Group.
5. Click OK and restart the ThinServer service to apply the changes to
the login.
Disable Remote Desktop Servers
ThinManager allows you to disable a Remote Desktop Server, which is useful
for failover tests and updates. This feature allows you to move servers offline,
one at a time, for updating. This action forces ThinManager-controlled thin
clients to drop their connections and switch to an alternate server. This is
useful for testing Failover and Instant Failover because the Terminals should
switch to a back-up server. The network card on the server is not disabled—you
can make RDP connections from a PC; but ThinManager thin clients stop
using the server.
Rockwell Automation Publication TM-UM001D-EN-P - December 2020 67
Page 68

Chapter 5 Sources
Figure 74 - Disabled Remote Desktop Servers in Display Clients
To disable a Remote Desktop Server, follow these steps.
1. Highlight the Remote Desktop Server icon in the Display Servers tree
and choose Tools>Disable.
2. Once the Remote Desktop Server is disabled, reset the sessions on the
Sessions tab. Right-click a session and choose Reset Session. Once the
server is clear of sessions, patch and update the server and applications,
and even reboot it if necessary. This does not impact production as all
the Terminals are using a backup server.
3. Once the task is complete, choose Tools>Enable to allow the Terminals to
use the server again.
68 Rockwell Automation Publication TM-UM001D-EN-P - December 2020
Page 69

Chapter 5 Sources
Remote Desktop Server Group
A Remote Desktop Server Group can be created to speed configuration by
selecting a pool of servers instead of an individual server.
Figure 75 - Add a Remote Desktop Server Group
To add a Remote Desktop Server Group, follow these steps.
1. In the Display Servers branch, right-click RDS Servers and choose Add
Remote Desktop Server Group.
The Remote Desktop Server Wizard appears.
Figure 76 - Remote Desktop Server Name Page
Rockwell Automation Publication TM-UM001D-EN-P - December 2020 69
Page 70

Chapter 5 Sources
2. Enter a name for the Remote Desktop Server Group.
3. Click Gateway.
The RDP Gateway dialog box appears.
The RDP Gateway allows Remote Desktop Servers to use the Microsoft
RDP Gateway to connect to resources on other subnets.
Figure 77 - RDP Gateway
4. Enter the Gateway Name, Username, and Password.
5. Click OK.
The Remote Desktop Server Group is created as an empty group as shown on
the Remote Desktop Server Order page.
Remote Desktop Server Order Page
The Remote Desktop Servers are added individually in the Remote Desktop
Server Wizard.
6. Double-click on the server under RDS Servers in the Display Server
branch.
70 Rockwell Automation Publication TM-UM001D-EN-P - December 2020
Page 71

Chapter 5 Sources
The Remote Desktop Server Name page of the Remote Desktop Server
Wizard appears.
Figure 78 - Remote Desktop Server Name Page
7. Click Change Group.
The Select Parent Remote Desktop Server Group dialog box appears.
Figure 79 - Select Parent Remote Desktop Server Group
8. Choose the desired Remote Desktop Server and click OK to accept the
changes.
The chosen Remote Desktop Server is populated to the Change
Group field.
Rockwell Automation Publication TM-UM001D-EN-P - December 2020 71
Page 72

Chapter 5 Sources
Figure 80 - Remote Desktop Server Name Page with RDS Group Membership
The Remote Desktop Server is now a member of the Remote Desktop
Server Group.
9. Repeat as needed.
Figure 81 - Remote Desktop Server Group with Member Remote Desktop Servers
The tree shows the member Remote Desktop Servers in the RDS
Servers group.
72 Rockwell Automation Publication TM-UM001D-EN-P - December 2020
Page 73

Figure 82 - Remote Desktop Server Order Page
Chapter 5 Sources
Button Description
Up Moves a highlighted Remote Desktop Server up in the priority list.
Down Moves a highlighted Remote Desktop Server down in the priority list.
10.Open the Remote Desktop Server Group wizard and navigate to the
Remote Desktop Server Order page to view the members of the Remote
Desktop Server Group.
The Remote Desktop Servers are used in the order listed.
11. Highlight a member server to move, then use the Up and Down buttons
to change the order.
12.Click Finish.
Remote Desktop Server Groups and Display Clients
The Display Client Wizard appears differently when Remote Desktop Server
Groups are configured versus not configured. The following steps depict when
no Remote Desktop Server Groups are configured.
1. In the Display Clients branch, double-click a Display Client.
The Display Client Wizard appears.
2. Click Next until the Display Client Members page appears.
Rockwell Automation Publication TM-UM001D-EN-P - December 2020 73
Page 74

Chapter 5 Sources
Figure 83 - Display Client Members Page
3. Click Add.
The Select Remote Desktop Server or Group dialog appears, from which
you may select a Remote Desktop Server Group, an individual Remote
Desktop Server, or a Remote Desktop Server that is a member of a
Remote Desktop Server Group.
Figure 84 - Select Remote Desktop Server or Group
4. Highlight the desired Remote Desktop Server or group and click OK.
5. Repeat as needed.
74 Rockwell Automation Publication TM-UM001D-EN-P - December 2020
Page 75

Once a Remote Desktop Server or group is selected, it appears in the
Selected Remote Desktop Servers list.
Figure 85 - Display Client Wizard – Display Client Member Page
Chapter 5 Sources
Containers
Feature Description
Use RD Gateway Prompts the Display Client to use the Microsoft RD Gateway.
Bypass RD Gateway
server for
local address
Allows the Display Client to use a Remote Desktop Server without going through the RD Gateway if
the Terminal and Remote Desktop Server are on the same subnet.
Navigation through the remaining Display Client Wizard pages follows those
displayed when no Remote Desktop Server Groups are configured.
ThinManager 12 introduced Containers as a method of delivering content.
This technology is based on the Container technology developed by Docker.
Instead of connecting to a Microsoft Remote Desktop Server and running a
session, the thin client, or terminal, connects to a Container Host. Then, the
thin client, or terminal, creates a Container that runs an application. The
display is sent to the terminal, or thin client, where the user can interact with
and control it.
With the ThinManager 12 release, the Container provides a Firefox browser
that can be run without a Remote Desktop Server.
Rockwell Automation Publication TM-UM001D-EN-P - December 2020 75
Page 76

Chapter 5 Sources
Container Deployment
Container Deployment is similar to the deployment of Remote Desktop
Services Servers.
1. Create a Windows 2019 Server and install Docker.
2. Install the Container image in ThinManager.
3. Define the Container Host as a Display Server.
4. Define the Container as a Display Client and add the Container Image to
the Container Display Client.
5. Apply the Container Display Client to the Terminal.
The Container Host needs two TLS Certificates and a TLS key installed,
which provides secure authentication between the Container Host and
the ThinServer service. The certificates can be generated with the TLS
Certificate tool in ThinManager.
6. Generate the two certificates and the key, and move them to the Docker
Container Host.
On boot, the thin client requests a connection to the container from
ThinManager, which starts a container instance, if not already running, and
returns the connection details to the thin client. Then, the thin client
establishes a connection directly to the container.
This section shows the steps to configure the Container system in
ThinManager, then covers the Certificate process once ThinManager is
configured. It is possible to create the certificates during the ThinManager
configuration process, but it is easier to understand if it is done as
one procedure.
Container Host Server Installation
To make the selected server a Docker Container server, the script
Install-Docker.ps1 installs Hyper-V and Containers Roles.
Windows Server 2019 with Internet connection is required for the Docker
Container Server solution in ThinManager. Offline installation is not available
as the Internet is necessary to download files from Microsoft Servers and
Rockwell Automation Servers.
If a virtual machine is not used, skip to Running the Script. To prepare your
virtual machine, follow these steps to enable nested virtualization.
If a Hyper-V virtual machine is used, this setting can be set using PowerShell.
1. Power off the Docker Container Server virtual machine.
2. On the Hyper-V host, open PowerShell as an Administrator.
76 Rockwell Automation Publication TM-UM001D-EN-P - December 2020
Page 77

Chapter 5 Sources
Figure 86 - Windows PowerShell
3. Type the following command:
Set-VMProcessor -VMName [VM Name]
-ExposeVirtualizationExtensions $True
where [VM Name] is replaced by the Docker Container virtual machine
name. See Figure 87
Figure 87 - Type Command into PowerShell
.
4. Press Enter to run the command.
If you use a VMware virtual machine, this setting can be configured under
Virtual Machine Settings.
1. Power off the Docker Container Server virtual machine.
2. Navigate to Virtual Machine Settings.
Figure 88 - Virtual Machine Settings
3. Click the Hardware Tab, and select Processors.
Rockwell Automation Publication TM-UM001D-EN-P - December 2020 77
Page 78

Chapter 5 Sources
4. Under the Virtualization engine properties section, check
Virtualize Intel VT-x/EPT or AMD-V/RVI.
5. Click OK.
Run the Script
Once the designated Server 2019 has Internet connectivity, run the script
Install-Docker.ps1 located in the installer files at:
\Common\12.0.0-ThinManager\Install-Docker.ps1
or at downloads.thinmanager.com.
The Install-Docker.ps1 script has two components: the Installation of Hyper-V
and the installation of Container roles. The virtual machine restarts during the
installation processes of the Hyper-V and Containers roles, as required.
You must manually initiate the script a second time during this installation process
as detailed below.
1. Open PowerShell as an Administrator.
Figure 89 - Windows PowerShell
2. Change the file directory as necessary to match the location of
Install-Docker.ps1.
Figure 90 - Install Script
3. Type:
".\Install-Docker.ps1 -AllowFirewall -Restart"
and press Enter to run the script. See Figure 90
Switch Description
-AllowFirewall
-Restart
-Verbose Enables more in-depth information about command processing.
Creates a Windows firewall rule, Docker SSL Inbound, to allow TCP2376 , the default port for Docker. If
this is not specified in this PowerShell command, it must be added manually to the Windows
firewall rules.
Automatically restarts the server after the installation of Hyper-V and Docker Containers. If it is omitted,
the script prompts if a restart is required.
.
4. Once the server restarts, repeat steps 1 through 3 to initiate the
Install-Docker.ps1.
5. To complete the installation, restart the Docker service in Windows
Services or restart the server.
.
For more information on the script, type the command:
Get-Help .\Install-Docker.ps1
78 Rockwell Automation Publication TM-UM001D-EN-P - December 2020
Page 79

Chapter 5 Sources
Install Container Images
The Container images are included as part on the ThinManager installation.
Additional containers can be installed into ThinManager similarly to
firmware packages.
Figure 91 - Install Container Images
To install container images, follow these steps.
1. Choose Install>Container Images.
The Install Container Image dialog box appears.
2. Click Install.
The File Browser appears.
3. Selecting the Container Image *tar.gz file
4. Click Open.
The Container Image is installed.
Define the Container Host Display Server
The Container Host is a new branch of the Display Server branch of the
ThinManager tree.
Rockwell Automation Publication TM-UM001D-EN-P - December 2020 79
Page 80

Chapter 5 Sources
Figure 92 - Container Hosts in Display Server Branch
5. Right-click on the Container Hosts icon and choose Add Container Host.
The Container Host Wizard appears.
Figure 93 - Container Host Wizard
1. Type the name of the Container Host in the Name field.
2. Type the IP address in the IP Address field.
3. Type the port number that is used for the container connection. Port
2376 is the default port number, but it can be changed in the wizard if it
was changed on the Container Host.
4. Click Finish to exit the Container Host Wizard.
You must click TLS Certificate to open the TLS Certificate dialog box, which allows
you to save the Server Certificate and Server Key. See Install the TLS Certificates on
page 86.
Define the Container Host Display Client
The Container Host is a new branch of the Display Clients branch of the
ThinManager tree.
80 Rockwell Automation Publication TM-UM001D-EN-P - December 2020
Page 81

Figure 94 - Container Host in Display Clients Branch
Chapter 5 Sources
1. Right-click on the Container Host icon and choose Add Display Client.
The Display Client Wizard appears.
Rockwell Automation Publication TM-UM001D-EN-P - December 2020 81
Page 82

Chapter 5 Sources
Figure 95 - Display Client Wizard
2. Type the name of the display client in the Client Name field.
3. Choose an installed Container Image from the Container Application
pull-down menu. The Firefox browser is the default Container Image.
See Install Container Images on page 79
for more information on
installed Container Images.
4. Click Next.
The Display Client Wizard continues with the typical pages and settings.
The Select Container Hosts page of the Display Client Wizard allows the
selection of a Container Host much like Remote Desktop Servers are selected
in Remote Desktop Server Display Clients.
82 Rockwell Automation Publication TM-UM001D-EN-P - December 2020
Page 83

Figure 96 - Select Container Hosts Page
Chapter 5 Sources
5. Select the Container Host of your choice for the Display Client.
6. Click Next to continue with the wizard.
The Container Properties page shows the maximum size the Docker
Container uses. By default, the maximum size is 1 GB, but it can
be changed.
Figure 97 - Container Properties
7. Click Next to continue.
Rockwell Automation Publication TM-UM001D-EN-P - December 2020 83
Page 84

Chapter 5 Sources
8. The final page of the Container Display Client Wizard, which uses the
Firefox web browser Container Image, allows you to specify the web
content to be displayed through the Start URL field.
Figure 98 - AppLink Path Page
9. Type the URL of the desired web content to display.
10.In the Other Command Line Options field, type -kiosk.
The Firefox browser is put into Kiosk Mode, which prevents user access
to the address bar. The content is displayed without the toolbar, menu,
and URL field.
11. Click Finish to close the Wizard.
Apply the Container Display Client to a Terminal
Container Host Display Clients are added to thin clients, or terminals, like any
other Display Client.
The Container Display Client is added on the Display Client Selection page
with the other Display Clients.
84 Rockwell Automation Publication TM-UM001D-EN-P - December 2020
Page 85

Figure 99 - Display Client Selection Page
Chapter 5 Sources
1. Expand the Container Host branch, highlight the Container Display
Client, and click the right arrow.
The selected Container Display Client launches when the terminal boots.
Figure 100
shows the ThinManager Knowledge Base launches in the
container on a thin client.
Figure 100 - ThinManager Knowledge Base in Container
Rockwell Automation Publication TM-UM001D-EN-P - December 2020 85
Page 86

Chapter 5 Sources
Install the TLS Certificates
A TLS Certificate is needed to provide secure authentication between the
Container Host and the ThinServer service. There are two certificates and one
key that must be generated in ThinManager and copied to the Container Host.
When Docker is installed, a configuration folder that contains the file
daemon.json is created, which contains the names and locations of the keys
and certificates. This file is found at: C:\ProgramData\docker\config.
Three files are needed to add the two certificates and one key to the
Container Host.
By default, the certificates and keys are saved at
C:\ProgramData\docker\certs.d. You must manually create the certs.d folder.
Figure 101 - JSON File
Certificate Authority Certificate
The first certificate needed is the Certificate Authority (CA) Certificate, which
is generated in the Certificate Authority Window.
1. Choose Manage>TLS Certificate.
The Certificate Authority dialog box appears.
86 Rockwell Automation Publication TM-UM001D-EN-P - December 2020
Page 87

Figure 102 - Certificate Authority
Chapter 5 Sources
Setting Description
Generate New Certificate
Import
Certificate Length (days)
Save Click to save the certificate so you can export it to the Container Host.
Click if you want to invalidate existing certificates, which ThinServer generates automatically
during installation.
Click if your site’s IT department already uses Docker and generated a CA certificate that
they want to use.
The number of days the CA certificate is valid. Change as needed from the default 7,300
days, or 20 years.
Figure 103 uses docker-ca-cert.pem as the CA certificate name. You must use
the file name that was specified in the Docker configuration folder.
There is only one CA certificate needed per ThinManager system. However,
this also means that a Docker Host cannot be shared by two independent
ThinManager systems.
Rockwell Automation Publication TM-UM001D-EN-P - December 2020 87
Page 88

Chapter 5 Sources
Figure 103 - CA Cerfiticate Name
2. Click OK to exit the wizard.
Server Certificate
The second certificate is the Server Certificate, which is generated in the
Container Host Wizard.
Figure 104 - TLS Certificate Button
1. Click TLS Certificate.
The TLS Certificate dialog box appears.
88 Rockwell Automation Publication TM-UM001D-EN-P - December 2020
Page 89

Figure 105 - TLS Certificate
Chapter 5 Sources
The TLS Certificate dialog box does not show the Certificate and the
Certificate Key until the Generate New Certificate button is clicked. The
Certificate and the Certificate Key must be saved and moved to the
Container Host.
2. Click Save for the Certificate.
By default, the Server Certificate is saved with a file name of
docker-server-cert.pem, which must match the name specified in the
Docker configuration folder.
Figure 106 - Save Server Certificate
3. Click Save for the Certificate Key.
Rockwell Automation Publication TM-UM001D-EN-P - December 2020 89
Page 90

Chapter 5 Sources
Figure 107 - Save Certificate Key
Install the Certificates
1. Open the Docker Container Host server.
2. Copy the three files to the default location,
C:\ProgramData\docker\certs.d, or the location you specified in the
Docker config file. You must create the certs.d folder manually.
3. Restart the Docker service to register the new certificates.
Figure 108
installed on the Container Host.
Figure 108 - Certificate Files on Container Host
shows the three certificate files, generated through ThinManager,
IP Cameras
90 Rockwell Automation Publication TM-UM001D-EN-P - December 2020
ThinManager supports cameras in the ThinManager system. Cameras, either
IP or USB, can be configured to provide the camera feed to display clients on
Terminals. This section covers how to define the camera as a Display Server.
Delivery of the video to a Camera Display Client is covered in Camera Display
Clients on page 142.
Page 91

Chapter 5 Sources
There are three steps in integrating an IP camera into the
ThinManager system.
1. Configure the camera and add it to your network using the guidelines
from the camera manufacturer.
2. Add the configured camera to ThinManager as a Display Server source.
3. Deploy the content of the cameras by creating a camera display client
and applying it to the Terminals.
USB cameras are added to a Terminal and configured. See Define the IP
Camera as a Display Server on page 91.
Configure the IP Camera
Each camera manufacturer distributes their cameras with a default IP address
and a default administrative account. These need to be configured to add the
camera to your network. Methods vary between vendors, but a web interface
is common.
IMPORTANT
Figure 109 - Browser-based Camera Configuration
Please follow the instructions from the camera manufacturer to
configure your camera for use.
Define the IP Camera as a Display Server
The Camera Configuration Wizard is launched from the Camera branch of the
Display Server tree.
1. To open the Display Server tree, click the Display Servers icon at the
bottom of the ThinManager tree.
Rockwell Automation Publication TM-UM001D-EN-P - December 2020 91
Page 92

Chapter 5 Sources
Figure 110 - Camera Branch of the Display Servers Tree
2. Right-click on the Cameras branch and choose Add Camera to launch the
Camera Configuration Wizard.
Figure 111 - Camera Name Page
3. Complete the Camera Name field.
4. In the Camera Network Setup section, chose either USB Camera or IP
Camera from the Type pull-down menu.
92 Rockwell Automation Publication TM-UM001D-EN-P - December 2020
Page 93

Chapter 5 Sources
IP Camera
ThinManager supports IP cameras added to the network. A thin client that has
a camera added makes a connection to the camera and streams the video feed
directly. The video does not go through the ThinManager Server. ThinManager
only tells the thin client to stream the video feed.
Choose a protocol that the camera uses from the following choices.
Legacy Motion JPEG
Legacy Motion JPEG is the original protocol configuration for IP cameras in
ThinManager.
For this option, choose the make and model from a list contained in the
TermCap database. ThinManager populates the
necessary URL.
Motion JPEG
This protocol provides flexibility of camera choices because it does not require
the use of a camera from the TermCap database.
Each camera uses a specific Motion JPEG URL, usually specified in the camera
manufacturer’s documentation.
Enter the Motion JPEG URL in the Custom URL field on the Camera
Authentication page.
Real Time Streaming Protocol (RTSP)
RTSP is preferred as it is most widely supported by camera companies.
RTSP has several transport layers—HTTP, TCP, UDP, and UDP multicast.
Specify the URL that specific camera uses for the video stream.
For this option, follow these steps.
1. Choose IP Camera from the Type pull-down menu.
2. Enter the IP address of the camera in the IP Address field.
3. Choose the desired transport method from the Streaming Protocol
pull-down menu.
4. Click Next.
The Camera Authentication page appears.
Rockwell Automation Publication TM-UM001D-EN-P - December 2020 93
Page 94

Chapter 5 Sources
Figure 112 - Camera Authentication Page
5. Enter the Username and Password of the account for the camera that
allows streaming. The thin client is unable to access the video feed
without an account unless the camera allows anonymous access.
6. Enter the RTSP URL specified by the camera manufacturer in the
Customer URL field.
7. Click Finish.
The wizard closes and camera configuration is complete.
Figure 113 - Camera Management Dialog
To access the camera’s browser control panel, highlight the camera in the
ThinManager tree and click the Connect tab. Make changes as needed.
94 Rockwell Automation Publication TM-UM001D-EN-P - December 2020
Page 95

Chapter 5 Sources
• If a camera uses a 32-bit ActiveX, then it can be connected and viewed within a 32-bit
ThinManager, but not a 64-bit ThinManager.
• If a camera uses a 64-bit ActiveX, then it can be connected and viewed within a 64-bit
ThinManager, but not a 32-bit ThinManager.
The network settings and configuration are available, but not the live video feed.
Define the USB Camera as a Display Server
USB cameras can be attached to ThinManager thin clients, and the video feed
sent to display clients, on any ThinManager thin client.
To define the USB camera as a display server, follow these steps.
1. To open the Display Servers tree, click the Display Servers icon at the
bottom of the ThinManager tree.
Figure 114 - Camera Branch of the Display Servers Tree
2. Right-click the Cameras branch and choose Add Camera.
The Camera Configuration Wizard appears.
Rockwell Automation Publication TM-UM001D-EN-P - December 2020 95
Page 96

Chapter 5 Sources
Figure 115 - USB Camera on Camera Name Page
3. Complete the Camera Name field.
4. Select USB Camera from the Type pull-down menu.
The Terminal field appears dynamically.
5. Click Select.
The Choose Terminal dialog appears.
Figure 116 - Choose Terminal Dialog
6. Choose the correct Terminal and click OK.
The Terminal appears in the Terminal field of the Choose
Terminal dialog.
96 Rockwell Automation Publication TM-UM001D-EN-P - December 2020
Page 97

Figure 117 - Terminal Name in the Camera Name Page
Chapter 5 Sources
7. Click Next.
The Camera Authentication page appears.
Figure 118 - Camera Authentication Page
8. Enter the administrative account Username and Password information
if your USB cameras use authentication.
9. Click Finish.
The camera appears in the Display Servers tree.
Rockwell Automation Publication TM-UM001D-EN-P - December 2020 97
Page 98

Chapter 5 Sources
Figure 119 - Cameras in Display Servers Tree
VNC Servers
A USB camera cannot be connected to and managed from the Connect detail pane in
the ThinManager console.
ThinManager uses Virtual Network Computing (VNC) to shadow thin clients
in various ways.
• From within the ThinManager Server console
• From another Terminal using a Terminal Shadow Display Client
• Through a connection to any VNC Server to shadow from the
administrative console or through a display client
All of these options are useful in shadowing PanelView Plus panels.
Figure 120 - VNC Servers Branch of the Display Servers Tree
98 Rockwell Automation Publication TM-UM001D-EN-P - December 2020
Page 99

Chapter 5 Sources
To define the VNC server, follow these steps.
1. Click the Display Servers icon at the bottom of the ThinManager tree.
The Display Servers tree is displayed.
2. Right-click the VNC Servers branch and choose Add VNC Server.
The VNC Server Configuration Wizard dialog appears.
Figure 121 - VNC Server Name Page of the VNC Server Configuration Wizard
Workstations
Required Settings Description
VNC Server Name Name of the device that is acting as the VNC server.
VNC Server IP Address IP address of the device that is acting as the VNC server.
Port The port that the VNC server is using. The default is 5900.
Password Password for the VNC server, if needed.
3. Complete the fields on the VNC Server Name page.
4. Click Finish.
You must create a VNC Display Client to deploy the VNC shadow. See
VNC Shadow on page 177
for details.
ThinManager takes advantage of Microsoft Remote Desktop Protocol (RDP) to
allow you to port a workstation to a thin client. Use RDP connectivity to
connect to physical or virtual workstations and transfer the desktop to
another computer.
To activate the remote desktop function on the workstation, follow these steps.
1. Right-click the My Computer icon and choose Properties, or double-click
the System icon in Control Panel.
Rockwell Automation Publication TM-UM001D-EN-P - December 2020 99
Page 100

Chapter 5 Sources
The System Properties dialog appears.
Figure 122 - Workstation System Properties
2. Under the Remote Desktop section, click Allow remote connections to
this computer.
3. Click Select Users to specify which users can access the workstation.
The Remote Desktop Users dialog appears.
Figure 123 - Remote Desktop Users
4. To grant permission to users, click Add.
This makes the workstations sources. You deliver the workstation to the
thin client by defining Workstation Display Clients as shown in the
Content section.
See Workstation Deployment
100 Rockwell Automation Publication TM-UM001D-EN-P - December 2020
on page 167 for details.
 Loading...